2A34H-EL00470Easi Scope Wireless Microscope
RM Educational Resources Ltd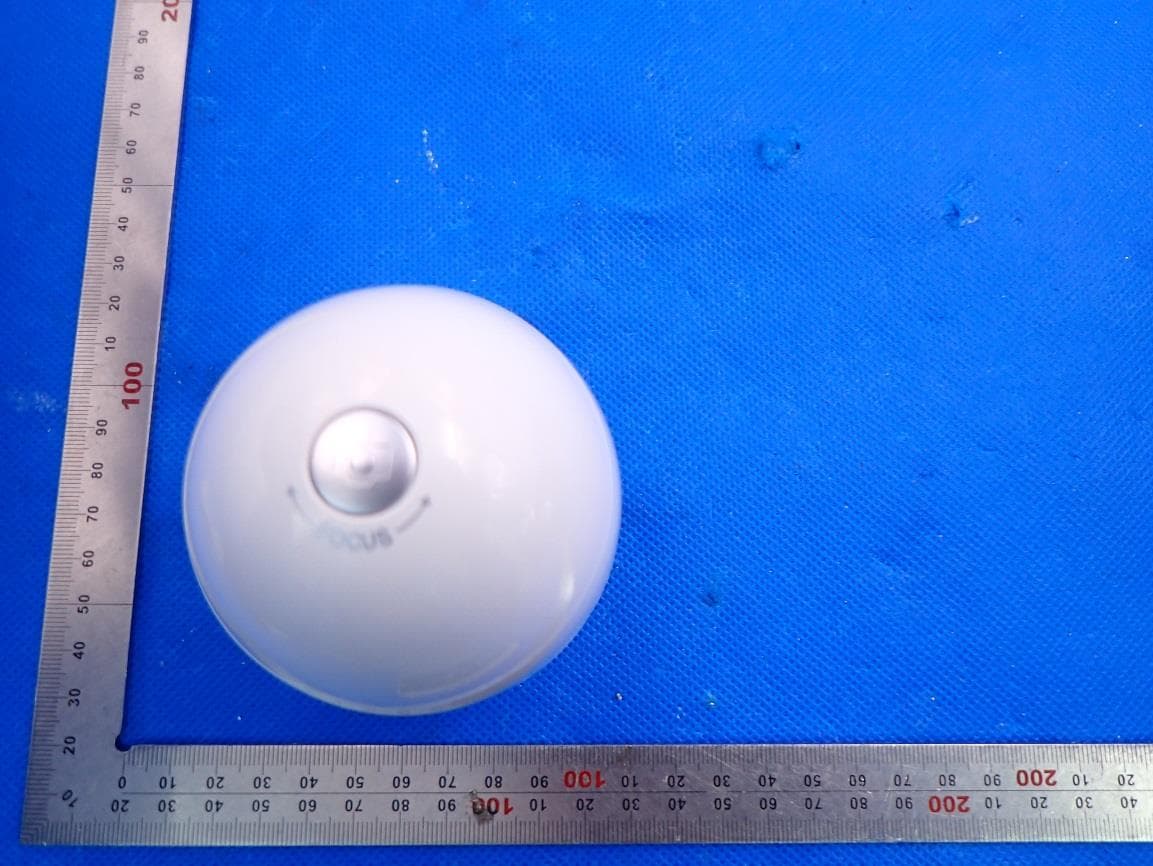
Click to zoom
Application Details
- Equipment Class
- DTS - Digital Transmission System
- Date of Grant
- Feb 19, 2022
- Application Purpose
- Original Equipment
- Date of Application
- Feb 19, 2022
- Equipment Note
- Easi Scope Wireless Microscope
- Frequency Range
- 2412.00000000 - 2462.00000000
- Company
- RM Educational Resources Ltd
- Country
- United Kingdom
Documents & Files
Document Text
Text extracted from the exhibit documents filed with the FCC. Open a document above to read the original.
Users Manual
Wireless Microscope Instruction Manual CONTENTS BEFORE USE Important information Care and maintenance Warning Product description Computer requirements PRODUCT AT A GLANCE Package contents Product overview Product specification GETTING STARTED Charging Assembling the product Turning on the device Focusing Capturing Turning off the device INSTALLING SMARTPHONE APP USING WIRELESS MICROSCOPE WITH A SMARTPHONE Connecting the device Open the xploview app Button menu System settings menu Deleting an item INSTALLING COMPUTER SOFTWARE Software installation USING “XPLOVIEW” Button menu Full screen viewing Image rotation / flip System settings menu Device setup Timed shot setup Movie setup Save setting Language setting Advanced settings Saved files Uninstalling the xploview software 4 4 4 4 5 5 7 7 7 8 9 9 9 10 10 11 11 12 12 12 13 14 15 16 18 18 19 19 20 21 22 23 23 23 24 24 24 26 26 3 BEFORE USE Important information Please read this instruction manual carefully before using this product, and retain this instruction for future reference. Improvements and changes to this text necessitated by typographical errors, or improvements to the software and/or equipments may be made at any time without notice. Care and maintenance Avoid vibration, shock and pressure e.g. dropping the microscope. Keep the device dry and protect it from water or vapour. Do not leave your device in a place with extreme high or low temperature. Do not touch the device with a wet hand as it may damage the device, or cause an electric shock to the user. Do not use or store the device in dusty, dirty areas as its moving parts may be damaged. Do not use harsh chemicals, cleaning solvents or strong detergents to clean the device. Wipe it with a soft cloth slightly dampened in a mild soap-and- water solution. Warning Do not place lighted Wireless Microscope upon the eye, doing so may cause permanent eye damage. Do not attempt to open or dismantle the Wireless Microscope. Product description This wireless microscope features a 640 x 480 CMOS sensor and can be paired with up to 2 Wi-Fi enabled devices within a 10m range. It is compatible with Android, IOS, Windows and Mac OS devices. Simply connect the device to the wireless microscope's WLAN access point to start viewing, capturing and recording live images. Computer requirements Smartphone (Android and IOS) CPU Speed 1.2GHz or above RAM 1GB or above ROM / SD 500 MB or above WLAN Wi-Fi 802.11 b/g/n 45 Windows Compatible operating Windows 8 (32 bit or 64 bit) systems Windows 7 (32 bit or 64 bit) Windows Vista (32 bit or 64 bit) Windows XP SP2, SP3 CPU Speed P4-1.8GHz or above RAM 512 MB or above Hard disk 800 MB or above WLAN Wi-Fi 802.11 b/g/n Mac OS Compatible operating Mac OS X 10.4.8 - Mac OS X 10.10.x systems CPU Speed Power PC G3/G4/G5 or Intel based RAM 128 MB or above Hard disk 800 MB or above WLAN Wi-Fi 802.11 b/g/n PRODUCT AT A GLANCE Package contents Wireless microscope Installation CD Adaptor User manual USB cable Product overview 1. Capture button 2. Focusing ring 3. Power button 4. USB port 5. LED lights 6. Adaptor slot 7. Indication light 67 Product specification Connection type 802.11 b/g/n Effective magnifications (on a 17” monitor) 41x Effective viewing area 8 x 6 mm Illumination Four LEDs Sensor CMOS Size 70 x 85 mm Weight 170 grams GETTING STARTED Charging Charge the wireless microscope before using it. Connect the wireless microscope to a computer with the USB cable provided. StatusIndication light colour ChargingRed ChargedGreen Assembling the product Insert the adaptor into the adaptor slot. 89 Fasten the adaptor by turning it gently in the clockwise direction. Turning on the device Press and hold the power button for 2 seconds. Focusing Adjust the focus of the image manually by rotating the focusing ring. Capturing Press the image capture button to capture an image. Turning off the device Press and hold the power button for 2 seconds to turn off the device. 1011 手持设备的使用 开机 打开显微镜 ( 详情请参考第 10 页 ) 打开 WIFI 点击手持设备的 "Settings" 图标 . 将 "WIFI" 打开 . 连接 xploview 1213 点击 "Connect" 确认连接 . 连接成功 . 打开 APP 点击 "xploview" 图标 . INSTALLING THE SMARTPHONE APP Search for “xploview” on Play Store or App Store on your mobile device and install the app. USING THE WIRELESS MICROSCOPE WITH A SMARTPHONE Connecting the device Turn on the wireless microscope (see P.10). Go to “Settings”. Turn on Wi-Fi connection. Search for and connect to “xploview_xxxxxx” under the list of available devices. (”xxxxxx” is a 6 digit code unique to your device.) The default password of the device is 12345678. Open the xploview app The performance of the device may be affected in an environment crowded by Wi-Fi signal. 14 15 Button Menu The icons on the button menu: Enter Image / Video playback mode Picture playback Video playback Capture on screen image Enter Video mode Start video recording Pause video recording End video recording Open System Settings Menu (see system settings menu on page 15) System Settings Menu Set image directory Set size limit for video files (in MB) Toggle to turn off wireless microscope upon app exit Restore the wireless microscope to factory status Display settings Information about the app 16 17 Deleting an item Android: Press and hold an item for 2 seconds. Tab “OK” to confirm. IOS: Swipe the item to the left. Tab “Delete” to confirm. 18 19 INSTALLING THE COMPUTER SOFTWARE Software installation Windows Insert the supplied application CD to the CD-ROM of the computer. Double click the "xploview.exe" icon < > located on the driver CD. Follow the xploview setup wizard to install the application software for the wireless microscope. Mac OS Insert the supplied application CD to the CD-ROM of the computer. Double click the “xploview.dmg" icon < > located on the driver CD. Drag the xploview icon < > into the Applications folder. USING “XPLOVIEW” Button menu The icons on the button menu : Open System Settings Menu (see system settings menu on page22). Capture on screen image. To start and…
Text truncated - open the document above for the full version.
Users Manual
Wireless Microscope Instruction Manual CONTENTS BEFORE USE Important information Care and maintenance Warning Product description Computer requirements PRODUCT AT A GLANCE Package contents Product overview Product specification GETTING STARTED Charging Assembling the product Turning on the device Focusing Capturing Turning off the device INSTALLING SMARTPHONE APP USING WIRELESS MICROSCOPE WITH A SMARTPHONE Connecting the device Open the xploview app Button menu System settings menu Deleting an item INSTALLING COMPUTER SOFTWARE Software installation USING “XPLOVIEW” Button menu Full screen viewing Image rotation / flip System settings menu Device setup Timed shot setup Movie setup Save setting Language setting Advanced settings Saved files Uninstalling the xploview software 4 4 4 4 5 5 7 7 7 8 9 9 9 10 10 11 11 12 12 12 13 14 15 16 18 18 19 19 20 21 22 23 23 23 24 24 24 26 26 3 BEFORE USE Important information Please read this instruction manual carefully before using this product, and retain this instruction for future reference. Improvements and changes to this text necessitated by typographical errors, or improvements to the software and/or equipments may be made at any time without notice. Care and maintenance Avoid vibration, shock and pressure e.g. dropping the microscope. Keep the device dry and protect it from water or vapour. Do not leave your device in a place with extreme high or low temperature. Do not touch the device with a wet hand as it may damage the device, or cause an electric shock to the user. Do not use or store the device in dusty, dirty areas as its moving parts may be damaged. Do not use harsh chemicals, cleaning solvents or strong detergents to clean the device. Wipe it with a soft cloth slightly dampened in a mild soap-and- water solution. Warning Do not place lighted Wireless Microscope upon the eye, doing so may cause permanent eye damage. Do not attempt to open or dismantle the Wireless Microscope. Product description This wireless microscope features a 640 x 480 CMOS sensor and can be paired with up to 2 Wi-Fi enabled devices within a 10m range. It is compatible with Android, IOS, Windows and Mac OS devices. Simply connect the device to the wireless microscope's WLAN access point to start viewing, capturing and recording live images. Computer requirements Smartphone (Android and IOS) CPU Speed 1.2GHz or above RAM 1GB or above ROM / SD 500 MB or above WLAN Wi-Fi 802.11 b/g/n 45 Windows Compatible operating Windows 8 (32 bit or 64 bit) systems Windows 7 (32 bit or 64 bit) Windows Vista (32 bit or 64 bit) Windows XP SP2, SP3 CPU Speed P4-1.8GHz or above RAM 512 MB or above Hard disk 800 MB or above WLAN Wi-Fi 802.11 b/g/n Mac OS Compatible operating Mac OS X 10.4.8 - Mac OS X 10.10.x systems CPU Speed Power PC G3/G4/G5 or Intel based RAM 128 MB or above Hard disk 800 MB or above WLAN Wi-Fi 802.11 b/g/n PRODUCT AT A GLANCE Package contents Wireless microscope Installation CD Adaptor User manual USB cable Product overview 1. Capture button 2. Focusing ring 3. Power button 4. USB port 5. LED lights 6. Adaptor slot 7. Indication light 67 Product specification Connection type 802.11 b/g/n Effective magnifications (on a 17” monitor) 41x Effective viewing area 8 x 6 mm Illumination Four LEDs Sensor CMOS Size 70 x 85 mm Weight 170 grams GETTING STARTED Charging Charge the wireless microscope before using it. Connect the wireless microscope to a computer with the USB cable provided. StatusIndication light colour ChargingRed ChargedGreen Assembling the product Insert the adaptor into the adaptor slot. 89 Fasten the adaptor by turning it gently in the clockwise direction. Turning on the device Press and hold the power button for 2 seconds. Focusing Adjust the focus of the image manually by rotating the focusing ring. Capturing Press the image capture button to capture an image. Turning off the device Press and hold the power button for 2 seconds to turn off the device. 1011 手持设备的使用 开机 打开显微镜 ( 详情请参考第 10 页 ) 打开 WIFI 点击手持设备的 "Settings" 图标 . 将 "WIFI" 打开 . 连接 xploview 1213 点击 "Connect" 确认连接 . 连接成功 . 打开 APP 点击 "xploview" 图标 . INSTALLING THE SMARTPHONE APP Search for “xploview” on Play Store or App Store on your mobile device and install the app. USING THE WIRELESS MICROSCOPE WITH A SMARTPHONE Connecting the device Turn on the wireless microscope (see P.10). Go to “Settings”. Turn on Wi-Fi connection. Search for and connect to “xploview_xxxxxx” under the list of available devices. (”xxxxxx” is a 6 digit code unique to your device.) The default password of the device is 12345678. Open the xploview app The performance of the device may be affected in an environment crowded by Wi-Fi signal. 14 15 Button Menu The icons on the button menu: Enter Image / Video playback mode Picture playback Video playback Capture on screen image Enter Video mode Start video recording Pause video recording End video recording Open System Settings Menu (see system settings menu on page 15) System Settings Menu Set image directory Set size limit for video files (in MB) Toggle to turn off wireless microscope upon app exit Restore the wireless microscope to factory status Display settings Information about the app 16 17 Deleting an item Android: Press and hold an item for 2 seconds. Tab “OK” to confirm. IOS: Swipe the item to the left. Tab “Delete” to confirm. 18 19 INSTALLING THE COMPUTER SOFTWARE Software installation Windows Insert the supplied application CD to the CD-ROM of the computer. Double click the "xploview.exe" icon < > located on the driver CD. Follow the xploview setup wizard to install the application software for the wireless microscope. Mac OS Insert the supplied application CD to the CD-ROM of the computer. Double click the “xploview.dmg" icon < > located on the driver CD. Drag the xploview icon < > into the Applications folder. USING “XPLOVIEW” Button menu The icons on the button menu : Open System Settings Menu (see system settings menu on page22). Capture on screen image. To start and…
Text truncated - open the document above for the full version.
Cover Letter(s)
RM Educational Resources Ltd Agent Authorization Company: RM Educational Resources Ltd Address: Building 1, Harrier Business Park, Heyworth Road, Hucknall, NG15 6XJ Product Name: Easi Scope Wireless Microscope Model Number(s): EL00470 Product Description: Easi Scope Wireless Microscope We authorize MiCOM Labs Inc., 575 Boulder Court, Pleasanton, California 94566, USA, to act on our behalf on all matters concerning the certification of above named equipment. We declare that MiCOM Labs Inc. is allowed to forward all information related to the approval and certification of equipment to the regulatory agencies as required and to discuss any issues concerning the approval application. Any and all acts carried out by MiCOM Labs on our behalf shall have the same effect as acts of our own. Signature: Date: 2022-01-06 Name: Grace Carpenter Company: RM Educational Resources Ltd
Cover Letter(s)
RM Educational Resources Ltd Office of Engineering Technology Federal Communications Commission 7435 Oakland Mills Road Columbia, MD 21046 USA Date: 2022-01-06 Subject; Request for Confidentiality FCC ID: 2A34H-EL00470 To Whom It May Concern, Pursuant to the provisions of the Commission’s rules Title 47 Sections §0.457 and §0.459, we are requesting the Commission to withhold the following attachment(s) as confidential documents from public disclosure indefinitely. These documents contain detailed system and equipment descriptions and are considered as proprietary information in operation of the equipment. The public disclosure of these documents might be harmful to our company and would give competitors an unfair advantage in the market. Schematic Diagram Block Diagram Parts List Operational Description Tune-up Procedure In additional to above mentioned documents, in order to comply with the marketing regulations in Title 47 CFR §2.803 and the importation rules in Title 47 CFR §2.1204, while ensuring that business sensitive information remains confidential until the actual marketing of newly authorized devices, we request Short Term Confidentiality of the following attachment(s); External Photos Test Setup Photos Internal Photos User Manual For 45 days, pursuant to Public Notice DA 04-1705. OR For 180 days pursuant to KDB 726920 D01. It is our understanding that all measurement test reports, FCC ID label format and correspondence during the certification review process cannot be granted as confidential documents and this information will be available for public review once the grant of equipment authorization is issued. Sincerely RM Educational Resources Ltd Contact person: Grace Carpenter
External Photos
External Photos ALL VIEW OF EUT TOP VIEW OF EUT BOTTOM VIEW OF EUT FRONT VIEW OF EUT BACK VIEW OF EUT LEFT VIEW OF EUT RIGHT VIEW OF EUT VIEW OF EUT (PORT)
ID Label/Location Info
FCC ID Label Location 30mm&20mm FCC ID: 2A34H-EL00470
Internal Photos
Internal Photos OPEN VIEW OF EUT VIEW OF BATTERY INTERNAL VIEW-1 OF EUT INTERNAL VIEW-2 OF EUT INTERNAL VIEW-3 OF EUT INTERNAL VIEW-4 OF EUT INTERNAL VIEW-5 OF EUT INTERNAL VIEW-6 OF EUT INTERNAL VIEW-7 OF EUT INTERNAL VIEW-8 OF EUT INTERNAL VIEW-9 OF EUT Antenna
RF Exposure Info
RF EXPOSURE EVALUATION 1. PRODUCT INFORMATION Product Description Easi Scope Wireless Microscope Model Name EL00470 FCC ID 2A34H-EL00470 2. EVALUATION METHOD AND LIMIT Human exposure to RF emissions from mobile devices (47 CFR §2.1091) may be evaluated based on the MPE limits adopted by the FCC for electric and magnetic field strength and/or power density, as appropriate, since exposures are assumed to occur at distances of 20 cm or more from persons. LIMITS FOR GENERAL POPULATION / UNCONTROLLED EXPOSURE Frequency Range (MHz) E-field Strength (E) (V/m) Magnetic Field Strength (H) (A/m) Power Density (S) (mW/cm 2 ) Averaging Time |E| 2 , |H| 2 or S (Minutes) 0.3 -- 1.34 614 1.63 (100)* 30 1.34 -- 30 824/f 2.19/f (180/f 2 )* 30 30 -- 300 27.5 0.073 0.2 30 300 -- 1500 -- -- f/1500 30 1500 -- 100,000 -- -- 1.0 30 *Note: 1. f= Frequency in MHz * Plane-wave Equivalent Power Density 2. The averaging time for General Population/Uncontrolled exposure to fixed transmitters is not applicable for mobile and portable transmitters. See 47 CFR §§2.1091 and 2.1093 on source-based time-averaging requirement for mobile and portable transmitters. S=PG/4πR² Where: S=power density P=power input to antenna G=power gain of the antenna in the direction of interest relative to an isotropic radiator R=distance to the center of radiation of the antenna CALCULATION A minimum test separation distance ≥ 20 cm is required between the antenna and radiating structures of the device and nearby persons to apply mobile device exposure limits. The distance must be at least 20 cm and fully supported by the operating and installation configurations of the transmitter and its antenna(s), according to the source-based time-averaged maximum power requirements of § 2.1091(d)(2). In cases where cable losses or other attenuations are applied to determine compliance, the most conservative operating configurations and exposure conditions must be evaluated. Antenna Gain=1dBi (Numeric 1.26), π=3.14 Note: 1. Only the worst case recorded. Frequency Output Power Output Power Power Density Power Density Limit MHz dBm mW mW/cm 2 mW/cm 2 2437 15.72 37.33 0.0094 1
Test Report
Page 1 of 90 Report No.: AGC12647211017FE05 FCC ID : 2A34H-EL00470 APPLICATION PURPOSE : Original Equipment PRODUCT DESIGNATION : Easi Scope Wireless Microscope BRAND NAME : TTS MODEL NAME : EL00470 APPLICANT : RM Educational Resources Ltd DATE OF ISSUE : Nov. 11, 2021 STANDARD(S) TEST PROCEDURE(S) : FCC Part 15.247 REPORT VERSION : V1.0 Attestation of Global Compliance (Shenzhen) Co., Ltd FCC Test Report Report No.: AGC12647211017FE05 Page 2 of 90 REPORT REVISE RECORD Report Version Revise Time Issued Date Valid Version Notes V1.0 / Nov. 11, 2021 Valid Initial Release Report No.: AGC12647211017FE05 Page 3 of 90 TABLE OF CONTENTS 1. VERIFICATION OF CONFORMITY .................................................................................................................. 5 2. GENERAL INFORMATION .............................................................................................................................. 6 2.1. PRODUCT DESCRIPTION ........................................................................................................................ 6 2.2. TABLE OF CARRIER FREQUENCYS ....................................................................................................... 6 2.3. IEEE 802.11N MODULATION SCHEME .................................................................................................... 7 2.4. RELATED SUBMITTAL(S) / GRANT (S) .................................................................................................... 7 2.5. TEST METHODOLOGY ............................................................................................................................. 7 2.6. SPECIAL ACCESSORIES ......................................................................................................................... 7 2.7. EQUIPMENT MODIFICATIONS ................................................................................................................. 7 2.8. ANTENNA REQUIREMENT....................................................................................................................... 8 3. MEASUREMENT UNCERTAINTY ................................................................................................................... 9 4. DESCRIPTION OF TEST MODES ................................................................................................................. 10 5. SYSTEM TEST CONFIGURATION ................................................................................................................ 11 5.1. CONFIGURATION OF EUT SYSTEM ...................................................................................................... 11 5.2. EQUIPMENT USED IN EUT SYSTEM ..................................................................................................... 11 5.3. SUMMARY OF TEST RESULTS .............................................................................................................. 11 6. TEST FACILITY .............................................................................................................................................. 12 7. OUTPUT POWER ........................................................................................................................................... 13 7.1. MEASUREMENT PROCEDURE ............................................................................................................. 13 7.2. TEST SET-UP (BLOCK DIAGRAM OF CONFIGURATION) .................................................................... 13 7.3. LIMITS AND MEASUREMENT RESULT .................................................................................................. 14 8. BANDWIDTH .................................................................................................................................................. 15 8.1. MEASUREMENT PROCEDURE ............................................................................................................. 15 8.2. TEST SET-UP (BLOCK DIAGRAM OF CONFIGURATION) .................................................................... 15 8.3. LIMITS AND MEASUREMENT RESULTS ............................................................................................... 16 9. CONDUCTED SPURIOUS EMISSION........................................................................................................... 29 9.1. MEASUREMENT PROCEDURE ............................................................................................................. 29 9.2. TEST SET-UP (BLOCK DIAGRAM OF CONFIGURATION) .................................................................... 29 9.3. MEASUREMENT EQUIPMENT USEDJN ................................................................................................ 29 9.4. LIMITS AND MEASUREMENT RESULT .................................................................................................. 29 Report No.: AGC12647211017FE05 Page 4 of 90 10. MAXIMUM CONDUCTED OUTPUT POWER SPECTRAL DENSITY ........................................................ 44 10.1 MEASUREMENT PROCEDURE ............................................................................................................ 44 10.2 TEST SET-UP (BLOCK DIAGRAM OF CONFIGURATION) ................................................................... 44 10.3 MEASUREMENT EQUIPMENT USED ................................................................................................... 44 10.4 LIMITS AND MEASUREMENT RESULT ................................................................................................. 44 11. RADIATED EMISSION ................................................................................................................................. 51 11.1. MEASUREMENT PROCEDURE............................................................................................................ 51 11.2. TEST SETUP ................................................................................................…
Text truncated - open the document above for the full version.
Test Report
Report No.: AGC12647211017FE05 Page 43 of 90 Test_Graph_802.11n20_ANT1_2412_MCS0_Lower Band Edge Emissions Test_Graph_802.11n40_ANT1_2422_MCS0_Lower Band Edge Emissions Note: Emissions from 2483.5-2500MHz which fall in the restricted bands had been considered with the radiated emission limits specified. Report No.: AGC12647211017FE05 Page 44 of 90 10. MAXIMUM CONDUCTED OUTPUT POWER SPECTRAL DENSITY 10.1 MEASUREMENT PROCEDURE (1). Connect EUT RF output port to the Spectrum Analyzer through an RF attenuator (2). Set the EUT Work on the top, the middle and the bottom operation frequency individually. (3). Set SPA Trace 1 Max hold, then View. Note: The method of PKPSD in the ANSI C63.10 (2013) item 11.10 was used in this testing. 10.2 TEST SET-UP (BLOCK DIAGRAM OF CONFIGURATION) Refer to Section 8.2. 10.3 MEASUREMENT EQUIPMENT USED Refer to Section 6. 10.4 LIMITS AND MEASUREMENT RESULT Test Data of Conducted Output Power Spectral Density Test Mode Test Channel (MHz) Power density (dBm/20kHz) Power density (dBm/3kHz) Limit (dBm/3kHz) Pass or Fail 802.11b 2412 2.952 -5.287 ≤8 Pass 2437 2.088 -6.151 ≤8 Pass 2462 2.674 -5.565 ≤8 Pass 802.11g 2412 -1.747 -9.986 ≤8 Pass 2437 -2.760 -10.999 ≤8 Pass 2462 -2.257 -10.496 ≤8 Pass 802.11n20 2412 -1.702 -9.941 ≤8 Pass 2437 -2.774 -11.013 ≤8 Pass 2462 -3.364 -11.603 ≤8 Pass 802.11n40 2422 -6.039 -14.278 ≤8 Pass 2437 -5.109 -13.348 ≤8 Pass 2452 -4.871 -13.11 ≤8 Pass Note: Power density(dBm/3kHz) = Power density(dBm/20kHz) – 10*log(20/3). Report No.: AGC12647211017FE05 Page 45 of 90 Test Graphs of Conducted Output Power Spectral Density Test_Graph_802.11b_ANT1_2412_1Mbps_PSD Test_Graph_802.11b_ANT1_2437_1Mbps_PSD Report No.: AGC12647211017FE05 Page 46 of 90 Test_Graph_802.11b_ANT1_2462_1Mbps_PSD Test_Graph_802.11g_ANT1_2412_6Mbps_PSD Report No.: AGC12647211017FE05 Page 47 of 90 Test_Graph_802.11g_ANT1_2437_6Mbps_PSD Test_Graph_802.11g_ANT1_2462_6Mbps_PSD Report No.: AGC12647211017FE05 Page 48 of 90 Test_Graph_802.11n20_ANT1_2412_MCS0_PSD Test_Graph_802.11n20_ANT1_2437_MCS0_PSD Report No.: AGC12647211017FE05 Page 49 of 90 Test_Graph_802.11n20_ANT1_2462_MCS0_PSD Test_Graph_802.11n40_ANT1_2422_MCS0_PSD Report No.: AGC12647211017FE05 Page 50 of 90 Test_Graph_802.11n40_ANT1_2437_MCS0_PSD Test_Graph_802.11n40_ANT1_2452_MCS0_PSD Report No.: AGC12647211017FE05 Page 51 of 90 11. RADIATED EMISSION 11.1. MEASUREMENT PROCEDURE 1. The EUT was placed on the top of the turntable 0.8 or 1.5 meter above ground. The phase center of the receiving antenna mounted on the top of a height-variable antenna tower was placed 3 meters far away from the turntable. 2. Power on the EUT and all the supporting units. The turntable was rotated by 360 degrees to determine the position of the highest radiation. 3. The height of the broadband receiving antenna was varied between one meter and four meters above ground to find the maximum emissions field strength of both horizontal and vertical polarization. 4. For each suspected emission, the antenna tower was scan (from 1 M to 4 M) and then the turntable was rotated (from 0 degree to 360 degrees) to find the maximum reading. 5. Set the test-receiver system to Peak or CISPR quasi-peak Detect Function with specified bandwidth under Maximum Hold Mode. 6. For emissions above 1GHz, use 1MHz RBW and 3MHz VBW for peak reading. Place the measurement antenna away from each area of the EUT determined to be a source of emissions at the specified measurement distance, while keeping the measurement antenna aimed at the source of emissions at each frequency of significant emissions, with polarization oriented for maximum response. The measurement antenna may have to be higher or lower than the EUT, depending on the radiation pattern of the emission and staying aimed at the emission source for receiving the maximum signal. The final measurement antenna elevation shall be that which maximizes the emissions. The measurement antenna elevation for maximum emissions shall be restricted to a range of heights of from 1 m to 4 m above the ground or reference ground plane. 7. When the radiated emissions limits are expressed in terms of the average value of the emissions, and pulsed operation is employed, the measurement field strength shall be determined by averaging over one complete pulse train, including blanking intervals, as long as the pulse train does not exceed 0.1 seconds. As an alternative (provided the transmitter operates for longer than 0.1 seconds) or in cases where the pulse train exceeds 0.1 seconds, the measured field strength shall be determined from the average absolute voltage during a 0.1 second interval during which the field strength is at its maximum values. 8.If the emissions level of the EUT in peak mode was 3 dB lower than the average limit specified, then testing will be stopped and peak values of EUT will be reported, otherwise, the emissions which do not have 3 dB margin will be repeated one by one using the quasi-peak method for below 1GHz. 9. For testing above 1GHz, the emissions level of the EUT in peak mode was lower than average limit (that means the emissions level in peak mode also complies with the limit in average mode), then testing will be stopped and peak values of EUT will be reported, otherwise, the emissions will be measured in average mode again and reported. 10. In case the emission is lower than 30MHz, loop antenna has to be used for measurement and the recorded data should be QP measured by receiver. High - Low scan is not required in this case. Report No.: AGC12647211017FE05 Page 52 of 90 11.2. TEST SETUP Radiated Emission Test-Setup Frequency Below 30MHz RADIATED EMISSION TEST SETUP 30MHz-1000MHz RADIATED EMISSION TEST SETUP ABOVE 1000MHz Report No.: AGC12647211017FE05 Page 53 of 90 11.3. LIMITS AND MEASUREMENT RESULT 15.209(a) Limit in the below table has to be followed Frequencies (MHz) Field Strength (microvolts/meter) Measurement Distance (meters) 0.009~0.490 2400/F(kHz) 300 0.490~1.705 24000/F(kHz) 30 1.705~30.…
Text truncated - open the document above for the full version.
Test Report
Report No.: AGC12647211017FE05 Page 79 of 90 APPENDIX A: PHOTOGRAPHS OF TEST SETUP FCC RADIATED EMISSION TEST SETUP BELOW 1GHZ FCC RADIATED EMISSION TEST SETUP ABOVE 1GHZ Report No.: AGC12647211017FE05 Page 80 of 90 CONDUCTED EMISSION TEST SETUP CONDUCTED TEST SETUP Report No.: AGC12647211017FE05 Page 81 of 90 APPENDIX B: PHOTOGRAPHS OF EUT ALL VIEW OF EUT TOP VIEW OF EUT Report No.: AGC12647211017FE05 Page 82 of 90 BOTTOM VIEW OF EUT FRONT VIEW OF EUT Report No.: AGC12647211017FE05 Page 83 of 90 BACK VIEW OF EUT LEFT VIEW OF EUT Report No.: AGC12647211017FE05 Page 84 of 90 RIGHT VIEW OF EUT VIEW OF EUT (PORT) Report No.: AGC12647211017FE05 Page 85 of 90 OPEN VIEW OF EUT VIEW OF BATTERY Report No.: AGC12647211017FE05 Page 86 of 90 INTERNAL VIEW-1 OF EUT INTERNAL VIEW-2 OF EU…
Text truncated - open the document above for the full version.
Contact Information
Applicant
Grace Carpenter
Technical Contact
Test Firm
Attestation of Global Compliance (Shenzhen) Co., LDoris Li
[email protected]+86-755-25234088
Technical Specifications
| # | Rule Parts | Frequency Range | Power Output |
|---|---|---|---|
| 1 | 15C | 2.41 GHz - 2.46 GHz | 145.50 mW |