2A9C3-E2303D Printers
Shanghai Union Technology Corporation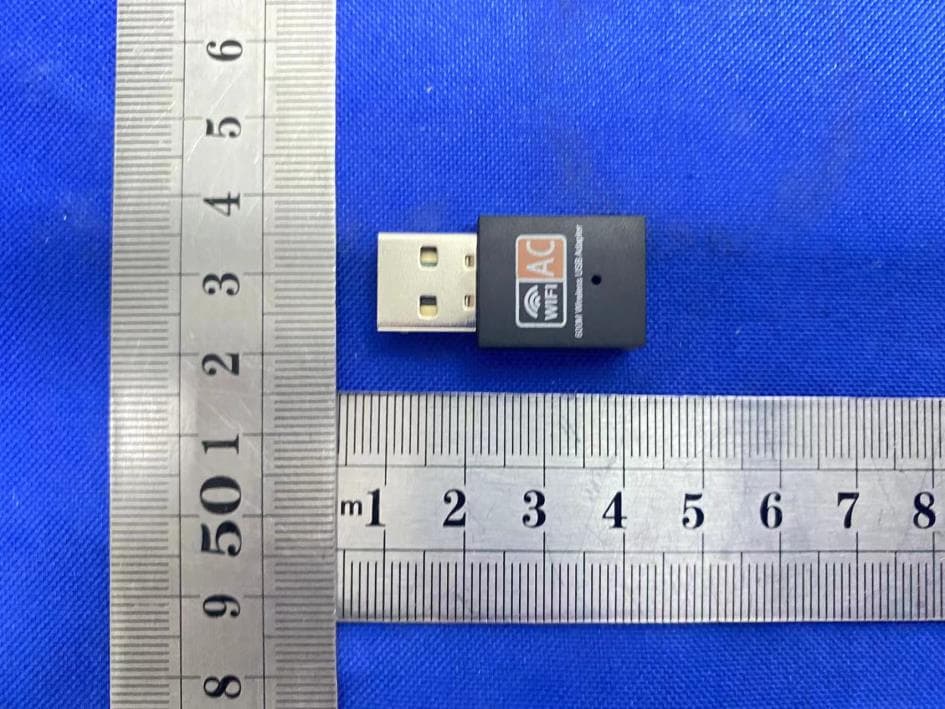
Click to zoom
Application Details
- Equipment Class
- DTS - Digital Transmission System
- Date of Grant
- Oct 16, 2023
- Application Purpose
- Original Equipment
- Date of Application
- Oct 16, 2023
- Equipment Note
- 3D Printers
- Frequency Range
- 2412.00000000 - 2462.00000000
- Country
- China
Documents & Files
Document Text
Text extracted from the exhibit documents filed with the FCC. Open a document above to read the original.
Users Manual
Produc E230 t User Manual 1:PackingList PrintingParameters: Serial Number ProductNameUnitQuantity onePhotocuring3DPrintingEquipmentpieceone twoResinTankpieceone threeFunnelpiecetwo fourBuildPlatformpieceone fiveUSBDrivepieceone sixBent-tipTweezerspieceone sevenpiec Power line eone eightPowerCordstripone nineSpatula(Plastic,Metal)hold1each tenWireCutterholdone elevenGlovesdoubleone twelveAllenWrenchsetone thirteenindividua WiFi connectivity lone 2 2.1 E230 Printing Area 217.4×136×190mm XY Resolution 0.01mm 9840×5760 、SizeIntroduction 3、UserInstructions 3.1 Assembly and Power Connection 1.After opening the packaging, take out the accessories inside, take out the power cord and wireless antenna from the accessories, connect the power cord and the power socket at the back of the printer, and plug in the wireless network card. As shown in Figure 3-1 Figure3-1 2、lightlypressthepowerswitchtoturnontheprinter.Oncetheprinter isturnedon,itwillautomaticallyenterthemainmenuasshowninFigure3-2. Language。 Figure3-2 3.2Language 1、ThedefaultfactorylanguageconfigurationofthisdeviceisEnglish.Asshownin Figures3-3and3-4. Figure3-3 Figure3-4 3.3Remoteconnection Clickontheiconmarkedwith"①"asshowninFigure3-5toenter theWiFiselectionpageandconnecttoWiFi,orconnecttothenetworkthrough theEthernetportatthebackofthedevice. Figure3-5 Afterconfirmingtheconnection,clickon"②"inFigure3-5to enterthepageshowninFigure3-6andobtainthedevice'sIPaddress.Inthe browser Figure3-6 Enterthedisplayedaddresstojumptothecontrolpanel,asshown inFigure3-7: Figure3-7 ① ② 3 1.Click on 【Platform Leveling】in the main menu as shown in figures 3-11 and 3-12 to enter the platform leveling mode. Figure 3-11 Figure 3-12 2. After entering the platform leveling mode, confirm that all four fixed screws of the platform are loosened and there are no foreign objects on the exposure screen. Place an A4 paper on the exposure screen and click【next】 to lower the platform. 3. When the platform presses down onto the exposure screen and stops, hold the platform in the middle with your hand and diagonally pre-tighten the four screws of the platform. Pull the A4 paper with your hand. If there is a noticeable pulling sensation and the four corners are even, press the platform with your hand to tighten the four screws. Otherwise, loosen the screws and repeat the pre-tightening operation until the pulling sensation at the four to perform the operation: .4LevelingOperation Alldevicesarefactorycalibratedandcanbeusedforprintinguponreceipt. Underfactorssuchasprolongedusageandexternalforces,theprinting platformmaybecomemisaligned,requiringre-leveling.Followthestepsbelow cornersiseven. 4.Aftercompletingtheoperation,click【Complete】asshowninfigure3-13 tofinishthelevelingprocess. Figure3-13 3.5PreparingforPrinting 1、Afterlevelingiscompleted,itisnecessarytoperforman exposuretestonthecuringscreentocheckifitisfunctioningproperly. Theexposuretestingprocessisasfollows:Clickon【ScreenCalibration】 inthemainmenuasshowninfigure3-14,thenenterthesubmenuandclick onanyexposurepatternagainasshowninfigure3-15.Thiswillputthe exposurescreenintoworkingmode. Figure3-14 Figure3-15 2.Afterclickingonthecorrespondingexposurepattern,theexposure processwillbegin,andagraphicidenticaltothedisplayscreenwillbe displayedontheexposurescreenasshowninFigure3-16.Note:Iftheexposure screendoesnotdisplaythegraphicproperly,itindicatesthatthecuring screenmaybedamaged.Inthiscase,printingwillnotbepossible.Please contacttheafter-saleshotlineforassistancepromptly. Figure3-16 3、Aftertheexposuretestiscompleted,itisnecessarytocleanthe curingscreenandthebottomoftheresintraywithalcoholtoensurethat therearenoimpuritiesthatmayhinderprinting.Then,theresintraycan beplacedbackinitsoriginalposition,andthetwolockingboltsshownin Figure3-17shouldbetightened.Oncetightened,resinrequiredforprinting canbeaddedtotheresintray.(Note:Beforeaddingresin,itisrecommended togentlyshakeitafewtimes.Avoidshakingitvigorouslyasitmaycreate excessiveairbubbles.)Note:Theresinisaslightlytoxicsubstanceand directcontactwithhandsisnotrecommended.Protectiveglovesshouldbeworn. Figure3-17 3.6PrintingSettings 1.Toenableordisabletheuniformlightingmode,clickon 【Setting】inthemainmenuasshowninFigure3-18toentertheprinting settingspageasshowninFigure3-19.Clickontheiconindicatedbythe redboxinFigure3-19toselecttheopen/closestateoftheuniform lightingmode.Statusindication: (On)(Off) Figure3-18 Figure3-19 2.Synchronizationmodeexplanation:Whenenabled,theprinterwillexecute theprintjobwiththeprintparametersembeddedintheprintfileitself, suchasexposuretime,numberoflayers,speed,etc.Whendisabled,the printerwillexecutetheprintjobwiththeprintparameterssetonthe device.Statusindication: onoff 3.Heatingfunctionon/off:Clickon"Dashboard"inthemainmenuasshownin 3-20toaccessthedashboardpage,asshowninFigure3-21.Clickonthe iconselectedbytheredboxinFigure3-21tocontroltheon/offstate oftheheatingfunction.(Note:Iftheheatingfunctionisenabledand thesystemdetectsthatthechambertemperaturehasnotreachedtheset temperature,itwillnotbeabletoentertheprintingstate,thusunable toprint.)Statusindication: onoff Figure3-20 Figure3-21 4.Modelprinting:Clickon"Models"inthemainmenuasshownin Figure3-22toenterthemodelselectionpage,asshowninFigure3-23. Figure3-22 Figure3-23 Findtherequiredfileforprintinginsideandclickonitasshownin Figure2-24toentertheprintingmode.。 Figure3-24 Afterenteringtheprintingmode,clickonthetrianglesymbolonthepanelto startprintingasshowninFigure3-25.Clickingonitwillredirecttothedashboardpage asshowninFigure3-26.Clickonthetrianglesymbolonthedashboardagain,asindicated bytheredboxin3-26,tostarttheprintingprocess. 图 Figure3-25 Figure3-26 3.7ReservoirCleaning Clickon"Tools"inthemainmenu,asshowninFigure3-27,toenterthe secondarymenupage.Then,clickon"ClearResidue"asshowninFigure3-28 toaccessthereservoircleaningpage,depictedinFigure3-29. Figure3-27 Figure3-28 Figure3-29 Clickonthe"Next"optiontoenterfull-screenexposuremode,as illustratedinFigure3-30.Followtheon-screeninstructionstoremovethe solidifiedfilm…
Text truncated - open the document above for the full version.
Attestation Statements
(Shanghai Union Technology Corporation) (October 10, 2023) Eurofins Electrical and Electronic Testing NA, Inc. 914 West Patapsco Avenue Baltimore, MD 21230 RE: Attestation Statements Part 2.911(d)(5)(i) request for (FCC ID: 2A9C3-E230) [Shanghai Union Technology Corporation] (“the applicant”) certifies that the equipment for which authorization is sought is not “covered” equipment prohibited from receiving an equipment authorization pursuant to section 2.903 of the FCC rules. Sincerely, (Applicant signature) (Applicant printed name) Wang Jincheng (Shanghai Union Technology Corporation) (October 10, 2023) Eurofins Electrical and Electronic Testing NA, Inc. 914 West Patapsco Avenue Baltimore, MD 21230 RE: Attestation Statements Part 2.911(d)(5)(ii) request for (FCC ID: 2A9C3-E230) [Shanghai Union Technology Corporation] (“the applicant”) certifies that, as of the date of the filing of the application, the applicant is not identified on the Covered List as an entity producing “covered” equipment. Sincerely, (Applicant signature) (Applicant printed name) Wang Jincheng
Cover Letter(s)
Shanghai Union Technology Corporation Model Difference Data:October 10, 2023 Product description: 3D Printers Model name: E230, Evodent E230 Trade Name: FCC ID: 2A9C3-E230 All the model are the same circuit and RF module, except model names . Regards Sincerely Client’s signature : Client’s name / title : Wang Jincheng(Manager) Contact information / address:Room 102, 40 Building, Xinzhuan Rd. 258, Songjiang District, Shanghai 201612, China
Cover Letter(s)
Shanghai Union Technology Corporation (October 10, 2023) Eurofins Electrical and Electronic Testing NA, Inc. 914 West Patapsco Avenue Baltimore, MD 21230 RE: CONFIDENTIALITY REQUEST FOR (3D Printers / E230, Evodent E230 / FCC ID: 2A9C3-E230 ) To Whom It May Concern: This letter serves as an official request for confidentiality under sections 0.457 and 0.459 of CFR 47. We have requested that the Exhibits Long-Term Confidentiality Short-Term Confidentiality NOTE 2 ID Label/Location No No Attestation Statement No No External Photos No ☐ Block Diagram ☒ ☐ Schematics ☒ ☐ Test Report No No Test Setup Photos No ☐ User’s Manual ☐ NOTE 1 ☒ Internal Photos ☐ NOTE 1 ☒ Parts List / Tune Up ☐ ☐ RF Exposure Info No No Operational Description ☒ ☐ Cover Letter(s) No No SDR Software / Security Info ☐ No required to be submitted with this application be permanently withheld from public review. Above mentioned document contains detailed system and equipment description are considered as proprietary information in operation of the equipment. The public disclosure of above documents might be harmful to our company and would give competitor an unfair advantage in the market. Please contact me if there is any information you may need. Sincerely, Signature: Name: Wang Jincheng Title: Manager
Cover Letter(s)
Shanghai Union Technology Corporation (October 10, 2023) Eurofins Electrical and Electronic Testing NA, Inc. 914 West Patapsco Avenue Baltimore, MD 21230 RE: LETTER OF AGENT AUTHORIZATION To Whom It May Concern: We, the undersigned, hereby authorize (Shenzhen CTB Testing Technology Co., Ltd.) to act on our behalf in all matters relating to application for equipment authorization, including the signing of all documents relating to these matters. We also hereby certify that no party to the application authorized hereunder is subject to the denial of benefits, including FCC benefits, pursuant to Section 5301 of the Anti-Drug Abuse Act of 1988, 21 U.S.C.853(a). This agreement expires one year from the current date. Sincerely, Signature: Name: Wang Jincheng Title: Manager
External Photos
Shenzhen CTB Testing Technology Co., Ltd. Report Tel: 4008-707-283 Web: http://www.ctb-lab.net Page 1 of 5 Model: E230 External Photos Shenzhen CTB Testing Technology Co., Ltd. Report Tel: 4008-707-283 Web: http://www.ctb-lab.net Page 2 of 5 Shenzhen CTB Testing Technology Co., Ltd. Report Tel: 4008-707-283 Web: http://www.ctb-lab.net Page 3 of 5 Shenzhen CTB Testing Technology Co., Ltd. Report Tel: 4008-707-283 Web: http://www.ctb-lab.net Page 4 of 5 Shenzhen CTB Testing Technology Co., Ltd. Report Tel: 4008-707-283 Web: http://www.ctb-lab.net Page 5 of 5
ID Label/Location Info
FCC ID LABEL: Label Location: FCC ID: 2A9C3-E230 Model No.: E230
Internal Photos
Shenzhen CTB Testing Technology Co., Ltd. Report Tel: 4008-707-283 Web: http://www.ctb-lab.net Page 1 of 3 Model: E230 Internal Photos ANT Shenzhen CTB Testing Technology Co., Ltd. Report Tel: 4008-707-283 Web: http://www.ctb-lab.net Page 2 of 3 Shenzhen CTB Testing Technology Co., Ltd. Report Tel: 4008-707-283 Web: http://www.ctb-lab.net Page 3 of 3
RF Exposure Info
FCC §15.247 (i), §2.1091 – RF Exposure FCC ID: 2A9C3-E230 Applied procedures / limit According to FCC §15.247(i) and §1.1307(b)(1), systems operating under the provisions of this section shall be operated in a manner that ensures that the public is not exposed to radio frequency energy level in excess of the Commission’s guidelines. Limits for Occupational / Controlled Exposure Frequency Range (MHz) Electric Field Strength (E) (V/m) Magnetic Field Strength (H) (A/m) Power Density (S) (mW/ cm 2 ) Averaging Time |E| 2 ,|H| 2 or S (minutes) 0.3-3.0 614 1.63 (100)* 6 3.0-30 1842 / f 4.89 / f (900 / f)* 6 30-300 61.4 0.163 1.0 6 300-1500 F/300 6 1500-100,000 5 6 Note: ƒ is frequency in MHz * = Power density limit is applicable at frequencies greater than 100 MHz Limits for General Population / Uncontrolled Exposure Frequency Range (MHz) Electric Field Strength (E) (V/m) Magnetic Field Strength (H) (A/m) Power Density (S) (mW/ cm 2 ) Averaging Time |E| 2 ,|H| 2 or S (minutes) 0.3-1.34 614 1.63 (100)* 30 1.34-30 824/f 2.19/f (180/f)* 30 30-300 27.5 0.073 0.2 30 300-1500 F/1500 30 1500-100,000 1.0 30 Note: f = frequency in MHz * = Plane-wave equivalent power density MPE PREDICTION Predication of MPE limit at a given distance, Equation from OET Bulletin 65, Edition 97-01 Where: S = power density P = power input to antenna G = power gain of the antenna in the direction of interest relative to an isotropic radiator R = distance to the center of radiation of the antenna,R=20cm Test Result of RF Exposure Evaluation Modes& Channel Freq. (MHz) Tune up Produce power Maximu m peak output power (dBm) Output power to antenna (mW) Antenna Gain (numeric) Power Density (S) (mW/ cm2) Limit (mW / cm2 ) Result 2.4G WIFI 802.11b&2 462 14±1 15 31.6228 1.3152 (1.19dBi) 0.008 1 Pass
Test Report
SPECIFICATIONS FOR APPROVAL Customer Name: Product Name:2.4GHz Antenna Product Model: Part Number: Write By : Issued Date:2021-04-08 CUSTOMER ENGINEER R&D DEPTBUSSINESS DEPTAPPROVAL LEJIN R&D DEPTENGINEER DEPTAPPROVAL REVMODIFIED DESCRIPTIONDATEREMARK V1.0Initial Draft Release2021/04/08 Manufacturer: Shanghai Union Technology Corporation Manufacturer's address: Room 102, 40 Building, Xinzhuan Rd. 258, Songjiang District, Shanghai 201612, China 1.Product Specification A. Electrical Characteristics Frequency2400MHz ~2500 MHz VSWR<2.0 Efficiency>40% Impedance50Ohm PolarizationLinear Gain ≥ 1.0dB B. Material & Mechanical Characteristics Material of Radiator Cable Type Connector Type Dimension N/A N/A C. Environmental Operation Temperature- 20 ̊C ~ + 70 ̊C Storage Temperature- 30 ̊C ~ + 85 ̊C Humidity40%~95% 2.Test Equipment & Conditions 1.Network AnalyzersAgilent 8753D/5071C 2.HSPA and LTE protocol test setR&S CMW500 -PT 3.Communications Test SetAgilent 8960 4.3D Chamber Test System 3.Test Report 3.1 Voltage Standing Wave Ratio(VSWR). Chart 2 VSWR 3.2 Efficient and gain. Passive Test For WIFI 2.4G Freq(MHz) 24002410242024302440245024602470248024902500 Effi(%) 42.6246.8451.4755.0753.5448.0651.8049.3844.2142.7740.64 Gain(dBi) 0.971.041.061.050.940.991.021.191.020.770.36 3.3 Radiation pattern. 4.Antenna pattern
Test Report
Shenzhen CTB Testing Technology Co., Ltd. Report No.: CTB230828039RFX Report Tel: 4008-707-283 Web: http://www.ctb-lab.net Page 1 of 54 TEST REPORT Compiled by: Reviewed by: Approved by: Zhou Kui Arron Liu Bin Mei / Director Note: If there is any objection to the inspection results in this report, please submit a written report to the company within 15 days from the date of receiving the report. The test report is effective only with both signature and specialized stamp. This result(s) shown in this report refer only to the sample(s) tested. Without written approval of Shenzhen CTB Testing Technology Co., Ltd. this report can’t be reproduced except in full. The tested sample(s) and the sample information are provided by the client. “*” indicates the testing items were fulfilled by subcontracted lab. “#” indicates the items are not in CNAS accreditation scope. Product Name: 3D Printers FCC ID: 2A9C3-E230 Trademark: Model Number: E230, Evodent E230 Prepared For: Shanghai Union Technology Corporation Address: Room 102, 40 Building, Xinzhuan Rd. 258, Songjiang District, Shanghai 201612, China Manufacturer: Shanghai Union Technology Corporation Address: Room 102, 40 Building, Xinzhuan Rd. 258, Songjiang District, Shanghai 201612, China Prepared By: Shenzhen CTB Testing Technology Co., Ltd. Address: 1&2/F., Building A, No.26, Xinhe Road, Xinqiao, Xinqiao Street, Bao'an District, Shenzhen, Guangdong, China Sample Received Date: Aug. 23, 2023 Sample tested Date: Aug. 23, 2023 to Aug. 28, 2023 Issue Date: Aug. 28, 2023 Report No.: CTB230828039RFX Test Standards FCC Part15.247 ANSI C63.10:2013 Test Results PASS Remark: This is WIFI-2.4GHz band radio test report. Shenzhen CTB Testing Technology Co., Ltd. Report No.: CTB230828039RFX Report Tel: 4008-707-283 Web: http://www.ctb-lab.net Page 2 of 54 TABLE OF CONTENT Test Report Declaration Page 1. VERSION .......................................................................... 3 2. TEST SUMMARY ................................................................... 4 3. MEASUREMENT UNCERTAINTY ..................................................... 5 4. PRODUCT INFORMATION AND TEST SETUP .......................................... 6 4.1 Product Information .................................................................... 6 4.2 Test Setup Configuration ............................................................... 6 4.3 Support Equipment .................................................................... 6 4.4 Channel List .......................................................................... 7 4.5 Test Mode ............................................................................ 7 4.6 Test Environment ...................................................................... 7 5. TEST FACILITY AND TEST INSTRUMENT USED ....................................... 8 5.1 Test Facility ........................................................................... 8 5.2 Test Instrument Used .................................................................. 8 6. AC POWER LINE CONDUCTED EMISSION ............................................ 10 6.1 Block Diagram Of Test Setup .......................................................... 10 6.2 Limit ................................................................................ 10 6.3 Test procedure ....................................................................... 10 6.4 Test Result .......................................................................... 12 7. RADIATED SPURIOUS EMISSION ................................................... 14 7.1 Block Diagram Of Test Setup .......................................................... 14 7.2 Limit ................................................................................ 14 7.3 Test procedure ....................................................................... 15 7.4 Test Result .......................................................................... 16 8. BAND EDGE AND RF COUNDUCTED SPURIOUS EMISSIONS .......................... 33 8.1 Block Diagram Of Test Setup .......................................................... 33 8.2 Limit ................................................................................ 33 8.3 Test procedure ....................................................................... 33 8.4 Test Result .......................................................................... 34 9. COUDUCTED OUTPUT POWER ..................................................... 40 9.1 Block Diagram Of Test Setup .......................................................... 40 9.2 Limit ................................................................................ 40 9.3 Test procedure ....................................................................... 40 9.4 Test Result .......................................................................... 41 10. 6DB OCCUPIED BANDWIDTH ....................................................... 42 10.1 Block Diagram Of Test Setup ......................................................... 42 10.2 Limit ............................................................................... 42 10.3 Test procedure ...................................................................... 42 10.4 Test Result ......................................................................... 43 11. POWER SPECTRAL DENSITY ...................................................... 47 11.1 Block Diagram Of Test Setup ......................................................... 47 11.2 Limit ............................................................................... 47 11.3 Test procedure ...................................................................... 47 11.4 Test Result ......................................................................... 48 12. ANTENNA REQUIREMENT ......................................................... 52 13. EUT TEST SETUP PHOTOGRAPHS .................................................. 53 (Note: N/A means not applicabl…
Text truncated - open the document above for the full version.
Test Setup Photos
Shenzhen CTB Testing Technology Co., Ltd. Report Tel: 4008-707-283 Web: http://www.ctb-lab.net Page 1 of 2 Model: E230 Radiated Emission Below 1G Above 1G Shenzhen CTB Testing Technology Co., Ltd. Report Tel: 4008-707-283 Web: http://www.ctb-lab.net Page 2 of 2 Conducted emissions
Contact Information
Applicant
Wang Jincheng(Manager)
Test Firm
Shenzhen CTB Testing Technology Co., Ltd.Rita Xiao
[email protected]86-13538218145
Technical Specifications
| # | Rule Parts | Frequency Range | Power Output |
|---|---|---|---|
| 1 | 15C | 2.41 GHz - 2.46 GHz | 28.79 mW |
Other Applications from Shanghai Union Technology Corporation
2A9C3-E128
Oct 15, 20233D Printers
Equipment Class
DTS - Digital Transmission System