2AE3N-SR3001Rain collector
Guangzhou Bresser Optical Instruments Co., LTD.
Click to zoom
Application Details
- Equipment Class
- DSC - Part 15 Security/Remote Control Transmitter
- Date of Grant
- Jan 26, 2021
- Application Purpose
- Original Equipment
- Date of Application
- Jan 26, 2021
- Equipment Note
- Rain collector
- Frequency Range
- 433.92000000 - 433.92000000
- Country
- China
Documents & Files
Document Text
Text extracted from the exhibit documents filed with the FCC. Open a document above to read the original.
Users Manual
EN INSTRUCTION MANUAL .............2 IT ISTRUZIONI PER L’USO ............12 DE BEDIENUNGSANLEITUNG .........22 FR MODE D‘EMPLOI .....................32 ES MANUAL DE INSTRUCCIONES ..42 Art.No.: RGT1001 (EU / AUS Version, US Version) WIRELESS RAIN GAUGE WITH OUTDOOR TEMPERATURE PLUVIOMETRO WIRELESS CON TEMPERATURA ESTERNA KABELLOSES REGENMESSGERÄT MIT AUSSENTEMPERATUR PLUVIOMÈTRE SANS FIL AVEC TEMPÉRATURE EXTÉRIEUR MEDIDOR DE LLUVIA INALÁMBRICO CON TEMPERATURA EXTERIOR EU / AUS Version US Version 2 ABOUT THIS INSTRUCTION MANUAL These operating instructions are to be considered a component of the device. Please read the safety instructions and the operating instructions carefully before use. Keep these instructions for renewed use at a later date. When the device is sold or given to someone else, the instruction manual must be provided to the new owner/user of the product. The device is intended only for indoor use. GENERAL WARNINGS • Risk of electric shock — This device contains electronic components. Only use the device as described in the manual; otherwise, you run the risk of an electric shock. • Choking hazard — Children should only use the device under adult supervision. Keep packaging material, like plastic bags and rubber bands, out of the reach of children, as these materials pose a choking hazard. • Risk of chemical burn — Keep batteries out of the reach of children! Make sure you insert the batteries correctly. Leaking battery acid can lead to chemical burns. Avoid contact of battery acid with skin, eyes and mucous membranes. In the event of contact, rinse the affected region immediately with a plenty of water and seek medical attention. • Risk of fire/explosion — Do not expose the device to high temperatures. Use only the recommended batteries. Do not short-circuit the device or batteries, or throw them into a fire. Excessive heat or improper handling could trigger a short-circuit, a fire, or an explosion. • Do not disassemble the device. In the event of a defect, please contact your dealer. The dealer will contact the Service Centre and can send the device in to be repaired, if necessary. • Use only the recommended batteries. Always replace weak or empty batteries with a new, complete set of batteries at full capacity. Do not use batteries from different brands or with different capacities. The batteries should be removed from the unit if it has not been used for a long time. 3 EN IT DE FR ES SCOPE OF DELIVERY Main station, rain sensor, operating instructions, 3 x screws BEFORE YOU BEGIN • We recommend using alkaline batteries. If temperatures regularly fall below 0°C (32°F), we recommend using lithium batteries. • Avoid using rechargeable batteries. (Rechargeable batteries cannot maintain correct power requirements.) • Insert batteries before first use, matching the polarity in the battery compartment. 3x AA Batteries are required for the station and 2x AA Batteries are required for the sen- sor. 4 PRODUCT OVERVIEW MAIN UNIT 1. In standard mode, press [ RAIN ALERT ] to turn on/ off the rainfall alarm.Press and hold [ RAIN ALERT ] to enter the rainfall alarm setting mode. 2. Press and hold [ SINCE ] to clear the past 9 days rainfall value. 3. Press [ MODE ] to check the time, week and calendar. Press and hold [ MODE ] to enter time and date setting mode. 4. Press [ UP ] to check the past 9 days rainfall. In set- ting mode, press [ UP ] to increase one unit, press and hold to increase rapidly. 5. Press and hold [ DOWN ] to initiate RF signal. In setting mode, press to decrease one unit. Press and hold to decrease rapidly. 6. Press [ IN/MM ] to select the rainfall unit. 7. Battery compartment. Slide down to open. h 5 EN IT DE FR ES RAIN SENSOR 1. LED indicator 2. Rain collector 3. Mounting ring 4. Insert card (IMPORTANT: Remove the card from below the tipping bucket. The card secured the tip- ping bucket for shipment.) 5. Tipping bucket 6. Battery compartment 7. Watertight battery compartment door (IMPORTANT: Unscrew to open the door) d h c g e c f 6 LCD DISPLAY 1. Outdoor temperature display 2. Current and Total daily rainfall display or Past 9 days rainfall display (Press [ UP ] to switch) 3. Time, week or calendar display (Press [ MODE ] to switch) [] Outdoor signal received [ ] Rainfall alarm [ ] Low battery indicator [] Rain measurement received GETTING STARTED REMOVE INSERT CARD 1. Remove the rain collector from the rain sensor, then, remove the insert card securing the tipping bucket for shipment. 2. Reattach the rain collector. EU / AUS Version US Version 7 EN IT DE FR ES INSERT BATTERIES 1. Remove the mounting ring at the bottom of the rain sensor and unscrew the watertight battery door. 2.Remove the battery compartment cover of the main unit. 3. Insert 3x AA and 2xAA (LR03)/1.5V batteries into main unit and rain sensor respectively. Please ensure the polarities (+/-) of the batteries match upon installation. 4. Reattach the battery covers and mounting ring. NOTE: - Ensure the watertight O-ring is properly aligned in place to ensure water-resistant. - Replace batteries when [ ] displays, or when the display is dim. RAIN SENSOR INSTALLATION The base station and rain gauge should be positioned within an effective range: about 100 meters (328 feet) in an open area. The rain gauge should be mounted horizontally in an open area away from trees or other obstructions to allow rain to fall naturally for an accurate reading. You may insert the three mounting screws (included) through the holes in the base of the rain sensor. CLOCK In standard mode, press [ MODE ] button to check the time, week and calendar. SET THE CLOCK MANUALLY 1. Press and hold [ MODE ] button to enter time and date setting. 2. The setting parameter will flash. 3. Press [ UP ] button once, the figure will increase 1 unit. Press and hold the [ UP ] button, the figures will increase rapidly. 4. Press [ DOWN ] button once, the figure will decrease 1 unit. Press and hold the [ DOWN ] butto…
Text truncated - open the document above for the full version.
Users Manual
35 EN IT DE FR ES PLUVIOMÈTRE 1. Témoin LED 2. Collecteur de pluie 3. Anneau de montage 4. Insérez la carte (IMPORTANT: retirez la carte du sous le godet basculant. La carte a fixé le seau basculant pour l'expédition.) 5. Godet basculant 6. Compartiment à piles 7. Porte du compartiment à piles étanche (IMPORTANT: Dévissez pour ouvrir la porte) h d h c g e c f 36 INSERTION DES PILES ÉCRAN LCD 1. Affichage de la température extérieure 2. Affichage des précipitations quotidiennes actuelles et totales ou Affichage des précipitations des 9 derniers jours (appuyez sur [ UP ] pour changer) 3. Affichage de l’heure, de la semaine ou du calendrier (appuyez sur [ MODE ] pour changer) [] Signal extérieur reçu [ ] Alarme de précipitations [ ] Indicateur de batterie faible [] Mesure des précipitations reçue POUR COMMENCER RETIRER LA CARTE INSÉRÉE 1. Retirez le collecteur de pluie du capteur de pluie, puis, retirez la carte d'insertion fixant le godet basculant pour l'expédition. 2. Remettez le collecteur de pluie en place. 37 EN IT DE FR ES 1. Retirez la bague de montage au bas du capteur de pluie et dévissez le couvercle du compartiment à piles étanche. 2. Retirez le couvercle du compartiment des piles de l'unité principale. 3. Insérez 3 piles AA et 2 piles AAA (LR03) de 1,5 V dans l’unité principale et le pluviomètre, respectivement. Veillez à respecter la polarité (+/-) des piles lors de leur insertion. 4. Remettez les couvercles de batterie et la bague de montage en place. REMARQUE : - Assurez-vous que le joint torique étanche est correctement aligné en place pour garantir l'étanchéité. - Remplacez les piles lorsque [ ] s’affiche ou lorsque l’écran est sombre. INSTALLATION DU PLUVIOMÈTRE La station de base et le pluviomètre doivent se situer à une distance de : environ 100 mètres (328 pieds) en plein air. Le pluviomètre doit être monté horizontalement à environ 1 mètre (3 pieds) du sol dans une zone découverte loin d’arbres ou autres obstacles pour permettre à la pluie de tomber naturellement et obtenir des données précises. Vous pouvez insérer les trois vis de montage (fournies) dans les trous de la base du pluviomètre. HORLOGE En mode standard, appuyez sur le bouton [ MODE ] pour vérifier l’heure, la semaine et le calendrier. RÉGLAGE MANUEL DE L’HORLOGE 1. Maintenez le bouton [ MODE ] appuyé pour entrer en mode de réglage de l'heure et de la date. 2. Le paramètre de réglage clignote. 3. Appuyez une fois sur le bouton [ UP ] : le chiffre augmente d’1 unité. Maintenez le bouton [ UP ] appuyé : les chiffres augmentent rapidement. 4.Appuyez une fois sur le bouton [ DOWN ] : le chiffre diminue d’1 unité. Maintenez le bouton [ DOWN ] appuyé : les chiffres diminuent rapidement. 5. Appuyez sur le bouton [ MODE ] pour confirmer le réglage et passer au paramètre suivant. 6. Séquence de réglage : Heure 12/24 h Minute Année Format de la date (mois/date ou date/mois) Mois Date Langue Quitter LANGUE 38 Séquence de réglage de la langue : Anglais (E) Allemand (D) Français (F) Italien (I) Espagnol (S). RÉGLAGE DE LA MESURE DES PRÉCIPITATIONS 1. L’appareil captera le signal radio-piloté automatiquement pendant 4 minutes lors de sa mise en marche. 2. En mode standard, maintenez le bouton [ DOWN ] appuyé pendant 2 secondes pour recevoir la valeur de façon manuelle. Valeur de précipitations actuelles : 0 - 2 539 mm (0 - 99,96 pouces) Valeur de précipitations totales : 0 - 25 399 mm (0 - 999,96 pouces) Unité des précipitations : mm ou pouces (in) 3. Appuyez sur le bouton [ IN/MM ] pour choisir l’unité des précipitations, mm ou pouces. 4. Par défaut, le pluviomètre affiche la quantité de précipitations quotidiennes. Vous pouvez appuyer sur le bouton [ UP ] pour consulter les précipitations des 9 derniers jours. Maintenez le bouton [ SINCE ] appuyé pour supprimer la valeur. ALERTE DE PRÉCIPITATIONS CONFIGURATION/RÉGLAGE DE L’ALARME DE PRÉCIPITATIONS 1. Maintenez le bouton [ RAIN ALERT ] appuyé pour entrer le paramètre d’alarme de précipitations. 2. Appuyez une fois sur le bouton [ UP ] pour augmenter de 1 ou appuyez une fois sur le bouton [ DOWN ] pour diminuer de 1. Vous pouvez aussi maintenir le bouton appuyé pour faire défiler les chiffres rapidement. 3. Appuyez sur le bouton [ MODE ] pour confirmer le réglage. REMARQUE : Lorsque la valeur des précipitations du jour dépasse celle de l’alarme, cette dernière émet un bip sonore pendant 60 secondes. Appuyez sur n’importe quel bouton pour arrêter l’alarme. MISE EN MARCHE/ARRÊT DE L’ALARME DE PRÉCIPITATIONS 1. En mode standard, appuyez une fois sur le bouton [ RAIN ALERT ] pour activer/désactiver l’alarme de précipitations. 2. Lorsque la valeur d’alarme de précipitations est affichée, 39 EN IT DE FR ES n’appuyez sur aucun bouton. L’alarme s’activera au bout de 6 secondes. 3. Lorsque « ---- » s’affiche, n’appuyez sur aucun bouton. L’alarme se désactivera au bout de 6 secondes. SPÉCIFICATIONS UNITÉ PRINCIPALE : Dimensions 94x50x172mm (L x l x h) Poids 200 g (sans les piles) Alimentation : 3 piles AAA (LR03) 1,5 V Plage des précipitations actuelles : 0 - 2 539 mm (0 - 99,96 pouces) Plage des précipitations totales : 0 - 25 399 mm (0 - 999,96 pouces) CAPTEUR EXTÉRIEUR : Dimensions 117x117x164 mm (L x l x h) Poids 280 g (sans les piles) Plage de mesure de la température -40 °C à +70 °C (-40 °F à 158 °F) Portée de transmission : 30 m (98 ft) Fr équence du signal : 433 MHz Alimentation : 2 piles AA (LR03) 1,5 V DÉCLARATION DE CONFORMITÉ CE Par la présente, Folux GmbH déclare que le type d’appareil de numéro de pièce : RGT1001 satisfait 40 à la Directive : 2014/53/UE. L’intégralité de la déclaration de conformité UE est disponible à l’adresse internet suivante : www.bresser.de/download/RGT1001/CE/RGT1001_CE.pdf REMARQUES SUR LE NETTOYAGE • Retirez les piles avant le nettoyage. • Utilisez uniquement un chiffon sec pour nettoyer l’extérieur de l’appareil. Pour éviter d’endommager les composants électroniques, n’utilisez pas de liquide de nettoyage. • …
Text truncated - open the document above for the full version.
Cover Letter(s)
Guangzhou Bresser Optical Instruments Co., Ltd. Federal Communications Commission 7435 Oakland Mills Road Columbia MD 21046 Subject: Request for Confidentiality FCC ID: 2AE3N-S R3001 To Whom It May Concern: Pursuant to the provisions of Sections 0.457 and 0.459 of the Commission's rules (47 CFR §§ 0.457, 0.459), we are requesting the Commission to withhold the following attachments as confidential document from public disclosure indefinitely. Schematic Diagram Block Diagram Theory of Operation Above mentioned document contains detailed system and equipment description are considered as proprietary information in operation of the equipment. The public disclosure of above documents might be harmful to our company and would give competitor an unfair advantage in the market. It is our understanding that all measurement test reports, FCC ID label format and correspondent during certification review process cannot be granted as confidential documents and those information will be available for public review once the grant of equipment authorization is issued. Best Regards f1W?Hj Company Name: Guangzhou Bresser Optical Instruments C o ., Ltd. Contact Name: Agnes Huang Title of Person : Sales Manager Address: Kangda Rd. 12, Yunpu Ind. Area, Huangpu, Guangzhou, PRC Date: Nov. 9, 2020
External Photos
Appendix I External Photographs Page 2 of 2 UL Verification Services (Guangzhou) Co., Ltd, Song Shan Lake Branch This report shall not be reproduced except in full, without the written approval of UL Verification Services (Guangzhou) Co., Ltd, Song Shan Lake Branch. View of EUT-1 View of EUT-2
ID Label/Location Info
Model number: SR3001 LOT No. This device complies with Part 15 of the FCC Rules. Operation is subject to the following two conditions: (1) this device may not cause harmful interference, and (2) this device must accept any interference received, including interference that may cause undesired operation. Model number: SR3001 LOT No. This device complies with Part 15 of the FCC Rules. Operation is subject to the following two conditions: (1) this device may not cause harmful interference, and (2) this device must a ccept any interference received, including interference that may cause undesired operation.
Internal Photos
Appendix II Internal Photographs Page 2 of 4 UL Verification Services (Guangzhou) Co., Ltd, Song Shan Lake Branch This report shall not be reproduced except in full, without the written approval of UL Verification Services (Guangzhou) Co., Ltd, Song Shan Lake Branch. Internal View of EUT-1 Internal View of EUT-2 Antenna Page 3 of 4 UL Verification Services (Guangzhou) Co., Ltd, Song Shan Lake Branch This report shall not be reproduced except in full, without the written approval of UL Verification Services (Guangzhou) Co., Ltd, Song Shan Lake Branch. Internal View of EUT-3 Internal View of EUT-4 Page 4 of 4 UL Verification Services (Guangzhou) Co., Ltd, Song Shan Lake Branch This report shall not be reproduced except in full, without the written approval of UL Verification Services (Guangzhou) Co., Ltd, Song Shan Lake Branch. Internal View of EUT-5 Internal View of EUT-6
Test Report
The results reported herein have been performed in accordance with the laboratory’s terms of accreditation. This report shall not be reproduced except in full without the written approval of the Laboratory. The results in this report apply to the test sample(s) mentioned above at the time of the testing period only and are not to be used to indicate applicability to other similar products. CFR 47 FCC PART 15 SUBPART C CERTIFICATION TEST REPORT For Rain collector MODEL NUMBER: SR3001 FCC ID: 2AE3N-SR3001 REPORT NUMBER: 4789711969.1-1 ISSUE DATE: December 23, 2020 Prepared for Guangzhou Bresser Optical Instruments Co., Ltd. Kangda Rd. 12, Yunpu Ind. Area, Huangpu District, Guangzhou, PRC Prepared by UL Verification Services (Guangzhou) Co., Ltd, Song Shan Lake Branch Building 10, Innovation Technology Park, No. 1, Li Bin Road, Song Shan Lake Hi- Tech Development Zone Dongguan, 523808, People’s Republic of China Tel: +86 769 22038881 Fax: +86 769 33244054 Website: www.ul.com REPORT NO.: 4789711969.1-1 Page 2 of 33 UL Verification Services (Guangzhou) Co., Ltd, Song Shan Lake Branch FORM NO.: 10-SL-F0057 This report shall not be reproduced except in full, without the written approval of UL Verification Services (Guangzhou) Co., Ltd, Song Shan Lake Branch. Revision History Rev. Issue Date Revisions Revised By V0 12/23/2020 Initial Issue REPORT NO.: 4789711969.1-1 Page 3 of 33 UL Verification Services (Guangzhou) Co., Ltd, Song Shan Lake Branch FORM NO.: 10-SL-F0057 This report shall not be reproduced except in full, without the written approval of UL Verification Services (Guangzhou) Co., Ltd, Song Shan Lake Branch. Summary of Test Results Clau se Test Items FCC Rules Test Results 1 Transmitter Timeout CFR 47 FCC §15.231 (a) (1) Pass 2 20 dB Bandwidth and 99 % Occupied Bandwidth CFR 47 FCC §15.231 (c) Pass 3 Radiated Emission CFR 47 FCC §15.231 (b)(e) CFR 47 FCC §15.205 and §15.209 Pass 4 Antenna Requirement CFR 47 FCC §15.203 Pass Note 1: This test report is only published to and used by the applicant, and it is not for evidence purpose in China. Note 2: The measurement result for the sample received is <Pass> according to < CFR 47 FCC PART 15 SUBPART C > when <Accuracy Method> decision rule is applied. REPORT NO.: 4789711969.1-1 Page 4 of 33 UL Verification Services (Guangzhou) Co., Ltd, Song Shan Lake Branch FORM NO.: 10-SL-F0057 This report shall not be reproduced except in full, without the written approval of UL Verification Services (Guangzhou) Co., Ltd, Song Shan Lake Branch. TABLE OF CONTENTS 1. ATTESTATION OF TEST RESULTS .................................................................................... 5 2. TEST METHODOLOGY ........................................................................................................ 6 3. FACILITIES AND ACCREDITATION .................................................................................... 6 4. CALIBRATION AND UNCERTAINTY .................................................................................. 7 4.1. MEASURING INSTRUMENT CALIBRATION ................................................................ 7 4.2. MEASUREMENT UNCERTAINTY ................................................................................. 7 5. EQUIPMENT UNDER TEST ................................................................................................. 8 5.1. DESCRIPTION OF EUT ................................................................................................. 8 5.2. MAXIMUM FIELD STRENGTH ...................................................................................... 8 5.3. TEST CHANNEL CONFIGURATION ............................................................................. 8 5.4. DESCRIPTION OF AVAILABLE ANTENNAS ................................................................ 8 5.5. TEST ENVIRONMENT ................................................................................................... 8 5.6. DESCRIPTION OF TEST SETUP .................................................................................. 9 5.7. MEASURING INSTRUMENT AND SOFTWARE USED .............................................. 10 6. ANTENNA PORT TEST RESULTS .................................................................................... 11 6.1. ON TIME AND DUTY CYCLE ...................................................................................... 11 6.2. TRANSMITTER TIMEOUT ........................................................................................... 13 6.3. 20 dB BANDWIDTH AND 99 % OCCUPIED BANDWIDTH ......................................... 16 6.4. RADIATED TEST RESULTS ........................................................................................ 19 6.4.1. FIELD STRENGTH AND SPURIOUS EMISSIONS BELOW 1 GHz AND ABOVE 30 MHz 26 6.4.2. SPURIOUS EMISSIONS ABOVE 1 GHz .............................................................. 28 6.4.3. SPURIOUS EMISSIONS BELOW 30 MHz ........................................................... 30 7. ANTENNA REQUIREMENTS ............................................................................................. 33 REPORT NO.: 4789711969.1-1 Page 5 of 33 UL Verification Services (Guangzhou) Co., Ltd, Song Shan Lake Branch FORM NO.: 10-SL-F0057 This report shall not be reproduced except in full, without the written approval of UL Verification Services (Guangzhou) Co., Ltd, Song Shan Lake Branch. 1. ATTESTATION OF TEST RESULTS Applicant Information Company Name: Guangzhou Bresser Optical Instruments Co., Ltd. Address: Kangda Rd. 12, Yunpu Ind. Area, Huangpu, Guangzhou, PRC Manufacturer Information Company Name: Guangzhou Bresser Optical Instruments Co., Ltd. Address: Kangda Rd. 12, Yunpu Ind. Area, Huangpu, Guangzhou, PRC EUT Information EUT Name: Rain collector Model: SR3001 Serial Model: / Brand: Sample Received Date: November 23, 2020 Sample Status: Normal Sample ID: 3480579 Date of Tested: November 23, 2020 ~ December 22, 2020 APPLICABLE STANDARDS STANDARD TEST RESULT…
Text truncated - open the document above for the full version.
Test Setup Photos
Appendix III Setup Photographs Radiated Disturbance Below 1 GHz and Above 30 MHz Radiated Disturbance Below 30 MHz Radiated Disturbance Above 1 GHz
Contact Information
Applicant
Agnes Huang(Manager)
Technical Contact
UL Verification Services (Guangzhou) Co., Ltd., SoVicky Gao
[email protected]86 076933817138
Building 10, Innovation Technology Park, Song Shan · Dongguan · China
Test Firm
UL Verification Services (Guangzhou) Co., Ltd.Stephen Guo
[email protected]+86 0769 33817120
Technical Specifications
| # | Rule Parts | Frequency Range | Power Output |
|---|---|---|---|
| 1 | 15.231(e) | 433.92 MHz - 433.92 MHz | - |
Other Applications from Guangzhou Bresser Optical Instruments Co., LTD.
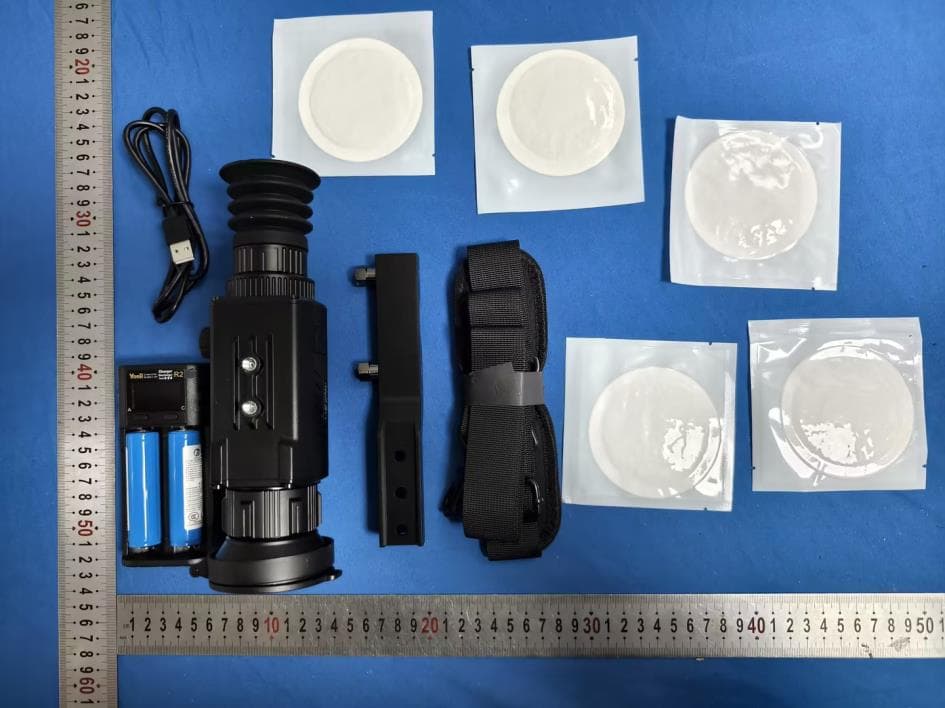
2AE3N-ATH650-ATH635
Jan 26, 2026Alpen Apex LRF
Equipment Class
DTS - Digital Transmission System
2AE3N-ATRS650
Jan 26, 2026Alpen Apex thermal rifle scope 640 50MM
Equipment Class
DTS - Digital Transmission System2AE3N-PUSHTO
Dec 29, 2025Push-to telescope
Equipment Class
DSS - Part 15 Spread Spectrum Transmitter2AE3N-BR90D
Apr 11, 202435mm Thermal Monocular, 54mm Thermal Monocular, 25mm Thermal Monocular
Equipment Class
DTS - Digital Transmission System
2AE3N-7000023
Oct 11, 2020Thermo-/Hygrometer with 3 outdoor sensors
Equipment Class
DSC - Part 15 Security/Remote Control Transmitter