2AHL80025368507Reverse parking sensors
Metra Electronics
Click to zoom
Application Details
- Equipment Class
- VRD - Part 95 Vehicular Radar Systems
- Date of Grant
- Jul 29, 2020
- Application Purpose
- Original Equipment
- Date of Application
- Jul 28, 2020
- Equipment Note
- Reverse parking sensors
- Frequency Range
- 77000.00000000 - 81000.00000000
- Company
- Metra Electronics
- Country
- United States
Documents & Files
Document Text
Text extracted from the exhibit documents filed with the FCC. Open a document above to read the original.
Users Manual
©COPYRIGHT 2020 METRA ELECTRONICS CORPORATION iBEAMUSA.comiBEAM Vehicle Safety Sytems ® REV. 05/22/2020 INSTTE-2PSK Attention! When testing the aftermarket equipment, ensure that all factory equip- ment is connected before cycling the key to ignition. TE-2PSK INSTALLATION INSTRUCTIONS #IBEAMSAFETY Technical Tip............................................................2 Installation .........................................................3-5 Calibration ..............................................................6 Wiring digrams and specs ................................4-5 TABLE OF CONTENTS TOOLS REQUIRED • Wire stripper • Tape • Digital Multi-meter • Cutter • Alcohol wipes/cleaning pads Universal 2 Sensor No Drill Parking Sensor Kit Visit iBEAMUSA.com for more detailed informatuon about the product and up-to-date vehicle specific applications. Product Features • 2 sensor parking solution • No need to drill into the bumper • Audible 3-zone alerts • No additional control box needed • Use for plastic bumpers only • Easy to install Part Components A) 2 Sensors B) Wiring harness C) Accessories ABC 386-257-1187 | iBEAMUSA.com 2 Installation NOTE: This installation may require the removing of the bumper to get the proper sensor alignment. 1. Before removing of the bumper (if it is needed) iBEAM suggests measuring the placement of the sensors on the outside of the bumper with the provided ruler and painters tape. 2. T ape off the vertical mounting location 15-24 inches from the ground. Find the flatest surface possible. (Figure A.1) 3. Find the c enter of the bumper. Tape off two positions between 10 and 20 inches from the center on the left and right hand side. Again, find the flatest surface possible. (Figure A.2) 4. These tape marks will be used to indicate where on the opposite side the sensors will be mounted once the bumper is removed. 5. R emove the bumper. Each vehicle is different. Take care with removal, lay a cloth on the ground to protect the exterior paint from damage. Figure A 15-24 in15-24 in15-24 in 10-20 in10-20 in 1 2 2 TECHNICAL TIP REV. 05/22/2020 INSTTE-2PSK 3 I N S TA LL ATI O N Camera Installation 1. Mount the camera with either the surface mount or the license plate mount. If wanting the surface mount, the two small screws will need to be removed to remove the license plate mount and replace with surface mount. 2. Remove the tail light from the vehicle to allow access to the light bulbs wiring. (If help is needed, review the vehicles owners manual section on replacing the tail light bulbs.) (Figure A) 3. Find the wiring that connects to the reverse bulb. There is normally 2 wires. (Figure B) Strip the insulation to expose the copper wire. 4. Using a Digital Multi-meter on the DC Voltage setting, to verify the reverse wire. (Figure C) 5. C onnect the wires from the camera • C onnect the RED wire to reverse, ei- ther found at the taillight or another source for reverse. • C onnect the BLACK wire to chassis ground. Figure C Figure B Figure A 12 V - 12V Select this symbol on the meter 386-257-1187 | iBEAMUSA.com 4 Figure A GROUND 10-20 in10-20 in 15-24 in15-24 in 1 2 2 Mounting of Sensors (Figure A) NOTE: This installation may require the removing of the bumper to get the proper sensor alignment. 1. Using the painters tape on the outside of the bumper as a guide, re-measure the desired sensor location on the inside of the bumper. • 10-20 inches from the bumper center • 15- 24 inches from the ground NOTE: Measurements do depend on the vehicles itself. There is a 4 inch tolerance on the mea- surements listed, but measurements can vary by vehicle. For example, a SUV may have a higher measurement from the ground. 2. Clean the surf ace thoroughly where the sensors will be mounted on the inside of the bumper. Some dirt may cause the sensors to give false alerts. 3. R emove the backing from the 3M double sided tape and use the provided adhesion promotor to assist in improving the adhesion to the bumper. Mount the sensors with the connector side mounting down towards the ground. Make sure the sensors are as straight as possible to each other and on the flatest surface possible on the bumper. I N S TA LL ATI O N REV. 05/22/2020 INSTTE-2PSK 5 Figure A Running the wiring 1. Carefully find a safe location to run the wires along the bumper or underside of the bumper on the vehile. Use zip ties to secure the wiring to the vehicle. Please keep away from moving parts and anything that would cause too much heat near the wiring. (Figure A) 2. Find a suitable location to gain access to the inside of the vehicle. 3. Mount the Audible buzzer inside the vehicle in a good loction that the driver will hear the alerts clearly. The wires may need to be extended is the location is desired near the front of the vehicle. 4. Remove the double sided tape and mount to a flat surface. If needed the adhesion promotor can be used here also. (Figure B) 5. \Plug the buzzer in. Please keep the connector next to the buzzer avaialble. This is for the calibration button which is used in the next step. This button does NOT need to remain plugged in after calibration is finished. Figure B I N S TA LL ATI O N 386-257-1187 | iBEAMUSA.com 6 Figure AFigure A CA LI B R ATI O N Calibration 1. Complete the installation, put the bumper back in place, make sure power and groung are connected and the buzzer is plugged in. Connect the provided push button to the harness near the buzzer connection. 2. Check power up and make sure there are no moving object within 3 feet of the rear of the vehicle. (Figure A) 3. Press and hold the calibration button for more than 3 seconds to activate the parking sensor system. You should hear two continu- ous beeps. If not please repeat step 3. 4. Check function of the parking sensors. 5. There should be 3 zones of alerts • Level 1: 3.2 FT to 2 FT - slow beeping • Level 2: 2 FT to 1 FT - faster beeping • Level 3: less than 1 FT - constant beeping 3 FT > 1 FT 1 - 2 FT 2 - 3.2 FT REV. 05/22/2…
Text truncated - open the document above for the full version.
External Photos
PHOTOGRAPHS OF EUT Report No. : EP021730-02 SPORTON INTERNATIONAL INC. EMC & Wireless Communications Laboratory Page Number : 1 of 3 TEL : 886-3-656-9065 Issued Date : Jul. 28, 2020 FAX : 886-3-656-9085 EP Report Version : 01 Report Template No.: CB Ver1.0_EP Brand Name: iBEAM Model Name: TE-2PSK PHOTOGRAPHS OF EUT Report No. : EP021730-02 SPORTON INTERNATIONAL INC. EMC & Wireless Communications Laboratory Page Number : 2 of 3 TEL : 886-3-656-9065 Issued Date : Jul. 28, 2020 FAX : 886-3-656-9085 EP Report Version : 01 Report Template No.: CB Ver1.0_EP PHOTOGRAPHS OF EUT Report No. : EP021730-02 SPORTON INTERNATIONAL INC. EMC & Wireless Communications Laboratory Page Number : 3 of 3 TEL : 886-3-656-9065 Issued Date : Jul. 28, 2020 FAX : 886-3-656-9085 EP Report Version : 01 Report Template No.: CB Ver1.0_EP
ID Label/Location Info
Label Location
Internal Photos
PHOTOGRAPHS OF EUT Report No. : EP021730-02 SPORTON INTERNATIONAL INC. EMC & Wireless Communications Laboratory Page Number : 1 of 8 TEL : 886-3-656-9065 Issued Date : Jul. 28, 2020 FAX : 886-3-656-9085 EP Report Version : 01 Report Template No.: CB Ver1.0_EP Brand Name: iBEAM Model Name: TE-2PSK PHOTOGRAPHS OF EUT Report No. : EP021730-02 SPORTON INTERNATIONAL INC. EMC & Wireless Communications Laboratory Page Number : 2 of 8 TEL : 886-3-656-9065 Issued Date : Jul. 28, 2020 FAX : 886-3-656-9085 EP Report Version : 01 Report Template No.: CB Ver1.0_EP PHOTOGRAPHS OF EUT Report No. : EP021730-02 SPORTON INTERNATIONAL INC. EMC & Wireless Communications Laboratory Page Number : 3 of 8 TEL : 886-3-656-9065 Issued Date : Jul. 28, 2020 FAX : 886-3-656-9085 EP Report Version : 01 Report Template No.: CB Ver1.0_EP Main cable for car front radar PHOTOGRAPHS OF EUT Report No. : EP021730-02 SPORTON INTERNATIONAL INC. EMC & Wireless Communications Laboratory Page Number : 4 of 8 TEL : 886-3-656-9065 Issued Date : Jul. 28, 2020 FAX : 886-3-656-9085 EP Report Version : 01 Report Template No.: CB Ver1.0_EP BGC button (Calibration) cable Main cable for car rear radar PHOTOGRAPHS OF EUT Report No. : EP021730-02 SPORTON INTERNATIONAL INC. EMC & Wireless Communications Laboratory Page Number : 5 of 8 TEL : 886-3-656-9065 Issued Date : Jul. 28, 2020 FAX : 886-3-656-9085 EP Report Version : 01 Report Template No.: CB Ver1.0_EP Function on/off button cable PHOTOGRAPHS OF EUT Report No. : EP021730-02 SPORTON INTERNATIONAL INC. EMC & Wireless Communications Laboratory Page Number : 6 of 8 TEL : 886-3-656-9065 Issued Date : Jul. 28, 2020 FAX : 886-3-656-9085 EP Report Version : 01 Report Template No.: CB Ver1.0_EP PHOTOGRAPHS OF EUT Report No. : EP021730-02 SPORTON INTERNATIONAL INC. EMC & Wireless Communications Laboratory Page Number : 7 of 8 TEL : 886-3-656-9065 Issued Date : Jul. 28, 2020 FAX : 886-3-656-9085 EP Report Version : 01 Report Template No.: CB Ver1.0_EP Buzzer PHOTOGRAPHS OF EUT Report No. : EP021730-02 SPORTON INTERNATIONAL INC. EMC & Wireless Communications Laboratory Page Number : 8 of 8 TEL : 886-3-656-9065 Issued Date : Jul. 28, 2020 FAX : 886-3-656-9085 EP Report Version : 01 Report Template No.: CB Ver1.0_EP
RF Exposure Info
FCC RADIO EXPOSURE TEST REPORT Report No. : FA021730-02 TEL : 886-3-656-9065 Page Number : 2 of 7 FAX : 886-3-656-9085 Issued Date : Jul. 28, 2020 Report Template No.: CB-A1_1 Ver1.0 Report Version : 01 Table of Contents History of this test report ................................................................................................................................. 3 Summary of Test Result ................................................................................................................................... 4 1 General Description ............................................................................................................................. 5 1.1 EUT General Information ....................................................................................................................... 5 1.2 Testing Location ..................................................................................................................................... 5 2 Maximum Permissible Exposure ........................................................................................................ 6 2.1 Limit of Maximum Permissible Exposure ............................................................................................... 6 2.2 MPE Calculation Method ........................................................................................................................ 6 2.3 Calculated Result and Limit .................................................................................................................... 7 Photographs of EUT v01 FCC RADIO EXPOSURE TEST REPORT Report No. : FA021730-02 TEL : 886-3-656-9065 Page Number : 3 of 7 FAX : 886-3-656-9085 Issued Date : Jul. 28, 2020 Report Template No.: CB-A1_1 Ver1.0 Report Version : 01 History of this test report Report No. Version Description Issued Date FA021730-02 01 Initial issue of report Jul. 28, 2020 FCC RADIO EXPOSURE TEST REPORT Report No. : FA021730-02 TEL : 886-3-656-9065 Page Number : 4 of 7 FAX : 886-3-656-9085 Issued Date : Jul. 28, 2020 Report Template No.: CB-A1_1 Ver1.0 Report Version : 01 Summary of Test Result Report Clause Ref Std. Clause Test Items Result (PASS/FAIL) Remark 2 - Exposure evaluation PASS - Note: Reference to Sporton Project No.: 021730-01. Declaration of Conformity: The test results with all measurement uncertainty excluded are presented in accordance with the regulation limits or requirements declared by manufacturers. Comments and Explanations: The declared of product specification for EUT presented in the report are provided by the manufacturer, and the manufacturer takes all the responsibilities for the accuracy of product specification. Reviewed by: Sam Chen Report Producer: Wendy Pan FCC RADIO EXPOSURE TEST REPORT Report No. : FA021730-02 TEL : 886-3-656-9065 Page Number : 5 of 7 FAX : 886-3-656-9085 Issued Date : Jul. 28, 2020 Report Template No.: CB-A1_1 Ver1.0 Report Version : 01 1 General Description 1.1 EUT General Information RF General Information Frequency Range (MHz) Operating Frequency (MHz) Modulation Type 76-81 77 ~ 81 FMCW 1.2 Testing Location Testing Location HWA YA ADD : No. 52, Hwa Ya 1st Rd., Kwei-Shan Hsiang, Tao Yuan Hsien, Taiwan, R.O.C. TEL : 886-3-327-3456 FAX : 886-3-327-0973 JHUBEI ADD : No.8, Lane 724, Bo-ai St., Jhubei City, HsinChu County 302, Taiwan, R.O.C. TEL : 886-3-656-9065 FAX : 886-3-656-9085 Test site Designation No. TW0006 with FCC. Test site registered number IC 4086D with Industry Canada. FCC RADIO EXPOSURE TEST REPORT Report No. : FA021730-02 TEL : 886-3-656-9065 Page Number : 6 of 7 FAX : 886-3-656-9085 Issued Date : Jul. 28, 2020 Report Template No.: CB-A1_1 Ver1.0 Report Version : 01 2 Maximum Permissible Exposure 2.1 Limit of Maximum Permissible Exposure (A) Limits for Occupational / Controlled Exposure Frequency Range (MHz) Electric Field Strength (E) (V/m) Magnetic Field Strength (H) (A/m) Power Density (S) (mW/ cm²) Averaging Time |E|²,|H|² or S (minutes) 0.3-3.0 614 1.63 (100)* 6 3.0-30 1842 / f 4.89 / f (900 / f)* 6 30-300 61.4 0.163 1.0 6 300-1500 F/300 6 1500-100,000 5 6 (B) Limits for General Population / Uncontrolled Exposure Frequency Range (MHz) Electric Field Strength (E) (V/m) Magnetic Field Strength (H) (A/m) Power Density (S) (mW/ cm²) Averaging Time |E|²,|H|² or S (minutes) 0.3-1.34 614 1.63 (100)* 30 1.34-30 824/f 2.19/f (180/f)* 30 30-300 27.5 0.073 0.2 30 300-1500 F/1500 30 1500-100,000 1.0 30 Note: f = frequency in MHz ; *Plane-wave equivalent power density 2.2 MPE Calculation Method The MPE was calculated at 20 cm to show compliance with the power density limit. The following formula was used to calculate the Power Density: E (V/m) = d GP30 Power Density: Pd (W/m²) = 377 2 E E = Electric field (V/m) P = RF output power (W) G = EUT Antenna numeric gain (numeric) d = Separation distance between radiator and human body (m) The formula can be changed to Pd = 2 377 30 d GP FCC RADIO EXPOSURE TEST REPORT Report No. : FA021730-02 TEL : 886-3-656-9065 Page Number : 7 of 7 FAX : 886-3-656-9085 Issued Date : Jul. 28, 2020 Report Template No.: CB-A1_1 Ver1.0 Report Version : 01 2.3 Calculated Result and Limit Exposure Environment: General Population / Uncontrolled Exposure Distance (cm) Test Freq. (GHz) EIRP-Average (dBm) EIRP-Average (mW) Power Density(S) (mW/cm²) Limit of Power Density (S) (mW/cm²) Result 20 79.00 25.15 327.43 0.065 1.00 PASS ─────THE END────
Test Report
FCC RADIO TEST REPORT Report No. : FR021730-02 TEL : 886-3-656-9065 Page Number : 2 of 36 FAX : 886-3-656-9085 Issued Date : Jul. 31, 2020 Report Template No.: CB-A17_2 Ver1.2 Report Version : 02 Table of Contents History of this test report.................................................................................................................................3 Summary of Test Result...................................................................................................................................4 1 General Description .............................................................................................................................5 1.1 Information..............................................................................................................................................5 1.2 Applicable Standards .............................................................................................................................6 1.3 Testing Location Information ..................................................................................................................6 1.4 Measurement Uncertainty ......................................................................................................................6 2 Test Configuration of EUT...................................................................................................................7 2.1 Test Channel Frequencies Configuration...............................................................................................7 2.2 Conformance Tests and Related Test Frequencies...............................................................................7 2.3 The Worst Case Measurement Configuration........................................................................................8 2.4 EUT Operation during Test ....................................................................................................................8 2.5 Accessories ............................................................................................................................................9 2.6 Table for Assembly.................................................................................................................................9 2.7 Support Equipment.................................................................................................................................9 2.8 Far Field Boundary Calculations ..........................................................................................................10 2.9 Test Setup Diagram .............................................................................................................................11 3 Transmitter Test Result .....................................................................................................................14 3.1 AC Power-line Conducted Emissions ..................................................................................................14 3.2 Occupied Bandwidth ............................................................................................................................17 3.3 Radiated E.I.R.P Power / E.I.R.P Power Density.................................................................................19 3.4 Transmitter Radiated Unwanted Emissions .........................................................................................21 3.5 Frequency Stability ...............................................................................................................................33 4 Test Equipment and Calibration Data ..............................................................................................35 Appendix A. Test Photos Photographs of EUT v01 FCC RADIO TEST REPORT Report No. : FR021730-02 TEL : 886-3-656-9065 Page Number : 3 of 36 FAX : 886-3-656-9085 Issued Date : Jul. 31, 2020 Report Template No.: CB-A17_2 Ver1.2 Report Version : 02 History of this test report Report No. Version Description Issued Date FR021730-02 01 Initial issue of report Jul. 28, 2020 FR021730-02 02 Revise the unit of measured Frequency on Frequency stability section. Jul. 31, 2020 FCC RADIO TEST REPORT Report No. : FR021730-02 TEL : 886-3-656-9065 Page Number : 4 of 36 FAX : 886-3-656-9085 Issued Date : Jul. 31, 2020 Report Template No.: CB-A17_2 Ver1.2 Report Version : 02 Summary of Test Result Report Clause Ref Std. Clause Test Items Result (PASS/FAIL) Remark 3.1 15.107 AC Power-line Conducted Emissions PASS - 3.2 95.303 Occupied Bandwidth PASS - 3.3 95.3367 Radiated E.I.R.P Power / E.I.R.P Power Density PASS - 3.4 95.3379 Transmitter Radiated Unwanted Emissions PASS - 3.5 95.3379 Frequency Stability PASS - Note: Reference to Sporton Project No.: 021730-01. Declaration of Conformity: The test results with all measurement uncertainty excluded are presented in accordance with the regulation limits or requirements declared by manufacturers. Comments and Explanations: The declared of product specification for EUT presented in the report are provided by the manufacturer, and the manufacturer takes all the responsibilities for the accuracy of product specification. Reviewed by: Sam Chen Report Producer: Wendy Pan FCC RADIO TEST REPORT Report No. : FR021730-02 TEL : 886-3-656-9065 Page Number : 5 of 36 FAX : 886-3-656-9085 Issued Date : Jul. 31, 2020 Report Template No.: CB-A17_2 Ver1.2 Report Version : 02 1 General Description 1.1 Information 1.1.1 RF General Information RF General Information Frequency Range (GHz) Operating Frequency Range (GHz) Test Frequency (GHz) Modulation 76-81 77 ~ 81 79 FMCW 1.1.2 Antenna Information Ant. Brand Model Name Antenna Type Connector Gain (dBi) 1 MEDIATEK MT2706 Array Antenna N/A 11.6247 Note: The above information was declared by manufacturer. 1.1.3 EUT Operational Condition EUT Power Type From DC power supply Supply Voltage AC State AC voltage - Supply Voltage DC State DC voltage 12 V 1.1.4 Test Signal Duty Cycle …
Text truncated - open the document above for the full version.
Test Setup Photos
Report No.: FR021730-02 SPORTON INTERNATIONAL INC. EMC & Wireless Communications Laboratory Page No. : A1 of A5 TEL : 886-3-656-9065 FAX : 886-3-656-9085 Appendix A. Test Photos Report No.: FR021730-02 SPORTON INTERNATIONAL INC. EMC & Wireless Communications Laboratory Page No. : A2 of A5 TEL : 886-3-656-9065 FAX : 886-3-656-9085 1. Photographs of Conducted Emissions Test Configuration FRONT VIEW REAR VIEW Report No.: FR021730-02 SPORTON INTERNATIONAL INC. EMC & Wireless Communications Laboratory Page No. : A3 of A5 TEL : 886-3-656-9065 FAX : 886-3-656-9085 2. Photographs of Radiated Emissions Test Configuration Test Configuration: 30MHz~1GHz / Test Mode: Mode 1 FRONT VIEW REAR VIEW Report No.: FR021730-02 SPORTON INTERNATIONAL INC. EMC & Wireless Communications Laboratory Page No. : A4 of A5 TEL : 886-3-656-9065 FAX : 886-3-656-9085 Test Configuration: 1GHz~40GHz FRONT VIEW REAR VIEW Report No.: FR021730-02 SPORTON INTERNATIONAL INC. EMC & Wireless Communications Laboratory Page No. : A5 of A5 TEL : 886-3-656-9065 FAX : 886-3-656-9085 Test Configuration: Above 40GHz FRONT VIEW ─────THE END─────
Contact Information
Applicant
Juan Lugo(NPD)
Test Firm
Sporton International Inc.Alex CHEN
Technical Specifications
| # | Rule Parts | Frequency Range | Power Output | Emission | Tolerance |
|---|---|---|---|---|---|
| 1 | 95M | 77.00 GHz - 81.00 GHz | 1.858 W | 3G74F3N | 1.3300000000 ppm |
Other Applications from Metra Electronics
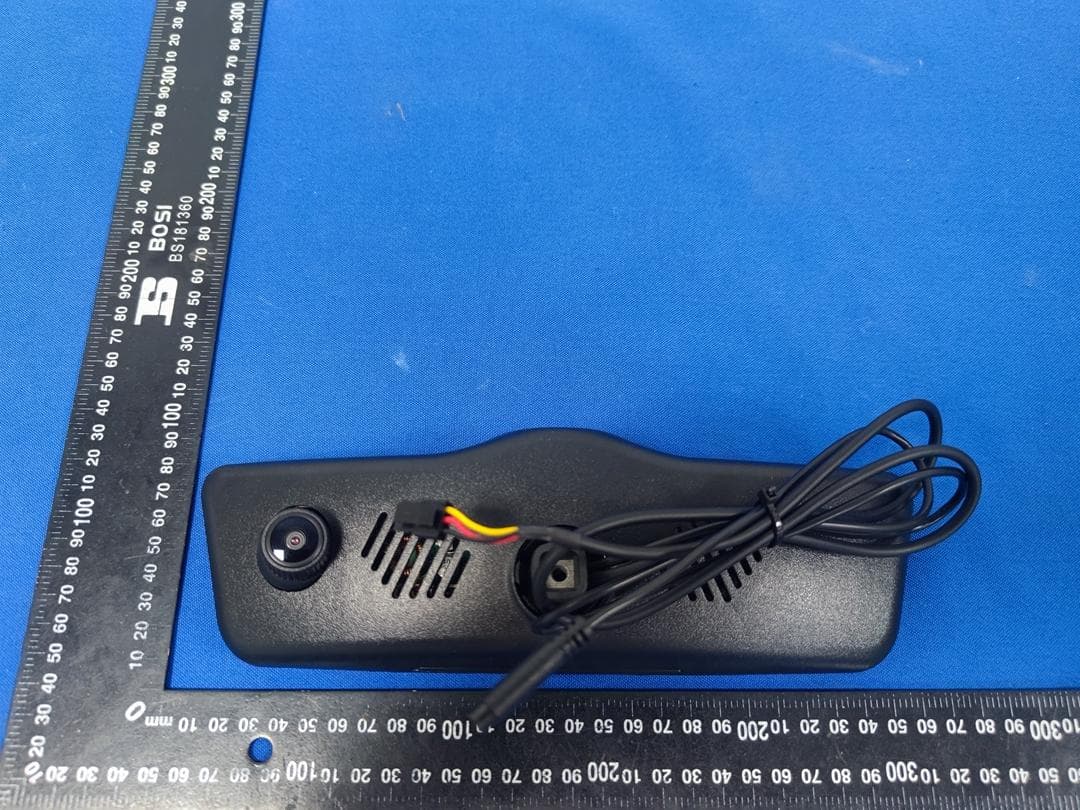
2AHL8TE-LVM9
Jul 03, 20229.66 Inch 1080P Streaming Media Mirror Monitor With Built-in Dash Cam
Equipment Class
DTS - Digital Transmission System