2AHYA-3402Glucose Smart Transmitter
Senseonics Incorporated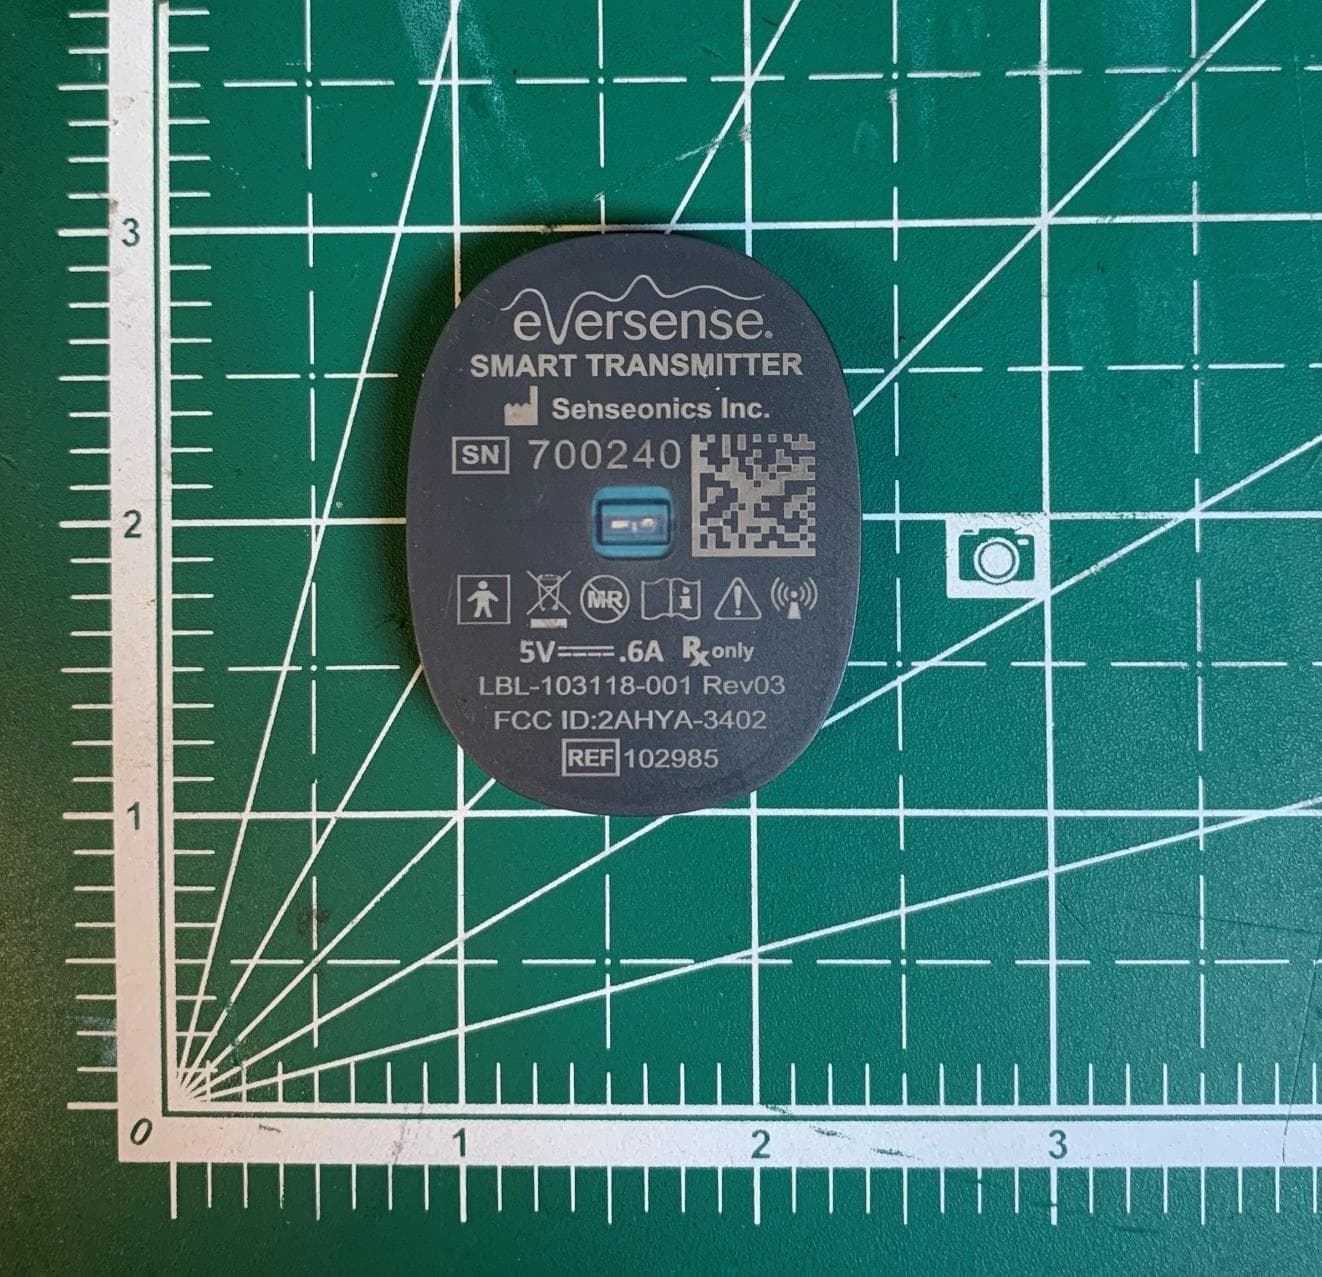
Click to zoom
Application Details
- Equipment Class
- DXX - Part 15 Low Power Communication Device Transmitter
- Date of Grant
- Jun 29, 2023
- Application Purpose
- Original Equipment
- Date of Application
- Jun 27, 2023
- Equipment Note
- Glucose Smart Transmitter
- Frequency Range
- 13.56000000 - 13.56000000
- Company
- Senseonics Incorporated
- Country
- United States
Documents & Files
Document Text
Text extracted from the exhibit documents filed with the FCC. Open a document above to read the original.
Users Manual
User Guide A guide for using the Eversense E3 Continuous Glucose Monitoring System Mobile AppSensorSmart Transmitter LBL-5402-01-001 Rev 2_Eversense E3 User Guide_mgdL_R2.indd 1LBL-5402-01-001 Rev 2_Eversense E3 User Guide_mgdL_R2.indd 11/24/23 1:14 PM1/24/23 1:14 PM LBL-5402-01-001 Rev 2_Eversense E3 User Guide_mgdL_R2.indd 2LBL-5402-01-001 Rev 2_Eversense E3 User Guide_mgdL_R2.indd 21/24/23 1:14 PM1/24/23 1:14 PM Eversense E3 Trademark Eversense E3, Eversense E3 Continuous Glucose Monitoring, Eversense E3 CGM, Eversense E3 Sensor, Eversense E3 Smart Transmitter, Eversense App and the Eversense E3 logo are trademarks of Senseonics, Incorporated. Other brands and their products are trademarks or registered trademarks of their respective holders. LBL-5402-01-001 Rev 2_Eversense E3 User Guide_mgdL_R2.indd 1LBL-5402-01-001 Rev 2_Eversense E3 User Guide_mgdL_R2.indd 11/24/23 1:14 PM1/24/23 1:14 PM Contents Glossary 5 1. Introduction 7 Help and Support 7 Eversense E3 CGM System Components 8 System Requirements 12 End User License Agreement and Privacy Policy 12 Jailbroken Devices 12 Broken Screen or Button 12 Device Modifications 12 Indications for Use 13 MRI Safety Information 13 Contraindications 14 What is Included in this Kit 14 2. Benefits and Risks 15 Risks and Side Effects 16 Warnings 17 Precautions 19 3. Getting Started 21 Charge your Smart Transmitter 22 Battery Indicator 23 Step 1. Download and Install the App 24 Step 2. Set up the App – Account Creation, Pairing and Settings 25 Smart Transmitter Connection Icons 31 4. Linking the Sensor 32 5. Daily Transmitter Wear 38 Daily Use 39 Using the Smart Transmitter 40 Smart Transmitter Care and Maintenance 42 Secure the Smart Transmitter over Inserted Sensor 43 6. Calibrating the System 46 Calibration Phases 48 How To Calibrate 51 7. Using the App 55 Eversense Account Management 56 Check Your Mobile Device Settings 57 Get To Know the “My Glucose” Screen 58 Trend Arrows 61 Understanding Treatment Decisions with CGM 62 LBL-5402-01-001 Rev 2_Eversense E3 User Guide_mgdL_R2.indd 2LBL-5402-01-001 Rev 2_Eversense E3 User Guide_mgdL_R2.indd 21/24/23 1:14 PM1/24/23 1:14 PM Discuss with Your Health Care Provider 64 Making Treatment Decisions with Eversense E3 66 Eversense E3 Trend Arrows and Treatment Decisions 68 What Would You Do 70 Trend Graph 74 Menu Options 75 8. Customizing your Settings 76 Setting Glucose Alert Levels 78 Setting Glucose Target Levels 80 Setting Predictive Alerts 82 Setting Rate of Change Alerts 84 Setting Daily Calibration Reminders 86 Setting System Information 87 Re-linking a Sensor 88 Setting Sounds 90 Low Glucose Override Setting 91 Transmitter Disconnect Setting 97 Setting Temporary Profile 100 9. Alert Descriptions 103 Alert History 105 Alert Descriptions and Actions 107 10. Event Log 133 Glucose 135 Meals 136 Insulin 137 Health 138 Exercise 139 11. Reports 140 Weekly Modal Summary 141 Glucose Pie Chart 142 Glucose Statistics 143 12. Sharing Data 144 Eversense Data Management Software (DMS) Program 144 Share My Data 144 Sync 145 My Circle 146 Application Sharing 147 13. Product and General Information on the App 148 Profile Picture 149 Logging out 151 14. Viewing Eversense E3 Data on the Apple Watch 152 Alerts and Notifications Displayed on the Apple Watch 155 LBL-5402-01-001 Rev 2_Eversense E3 User Guide_mgdL_R2.indd 3LBL-5402-01-001 Rev 2_Eversense E3 User Guide_mgdL_R2.indd 31/24/23 1:14 PM1/24/23 1:14 PM 15. My Circle 175 Remote Monitoring with Eversense E3 CGM System and Eversense NOW App 175 16. About the Sensor 181 Insertion Steps 182 Removal Steps 183 17. Travel 184 18. Troubleshooting 185 Smart Transmitter 185 Smart Transmitter Battery and Charging 187 Connection with Smart Transmitter 188 Calibration 191 Alerts and Notifications 193 Glucose Readings 195 Making Treatment Decisions 196 Trend Arrows 197 App 197 Sensor 199 Events 201 Sync 201 Shortcuts 202 19. Device Performance 204 Clinical Study Performance 204 Accuracy to YSI in PROMISE Study 206 Alert Performance 212 Sensor Life 218 Safety 219 20. Technical Specifications 220 Sensor 220 Smart Transmitter 221 Power Supply and Charger 222 USB Cable* for Charging and Downloading 222 Electrical and Safety Standards 223 Symbols on the Eversense CGM Mobile App 226 Symbols on Packaging and Devices 229 Eversense E3 Smart Transmitter Limited Warranty 231 Legal Notices 234 Apple Legal Notice 234 Google Legal Notice 234 About Bluetooth® 234 Bluetooth® Trademark 234 FCC Information 235 Index 236 LBL-5402-01-001 Rev 2_Eversense E3 User Guide_mgdL_R2.indd 4LBL-5402-01-001 Rev 2_Eversense E3 User Guide_mgdL_R2.indd 41/24/23 1:14 PM1/24/23 1:14 PM 5 Eversense E3 CGM User Guide Glossary Alert An alert warns you that a situation needs your attention and that you should respond/take appropriate action. Blood Glucose Meter A commercially available device used to measure glucose using a blood sample from a fingerstick. Bluetooth® A brand name for a wireless networking technology that uses short wave radio frequencies (RF) to connect mobile devices and other wireless electronic devices. Calibration Blood glucose reading from a fingerstick sample entered in the Eversense App to check the accuracy of the system. With the Eversense E3 System, there are two phases: Initialization Phase during which 4 fingerstick tests are required, and the Daily Calibration Phase, during which a fingerstick test is required once or twice daily. CGM Continuous Glucose Monitoring. Continuously monitoring your glucose levels from interstitial fluid every few minutes. Contraindication A condition or circumstance in which a person should not use the device. CT Computed Tomography Do Not Disturb Mode (DND in the Eversense App) When enabled, the mobile app will stop displaying non-critical alerts, and the smart transmitter will stop providing vibratory notifications for non-critical alerts. Critical alerts will still be provided. Many mobile devices have a separate Do Not Disturb Mode. Consult the manufactu…
Text truncated - open the document above for the full version.
Users Manual
7 60 Eversense E3 CGM User Guide Multiple events iconIndicates multiple events have occurred at the same time. Event icon Indicates manually entered events (e.g., exercise). See Logging Events for more information. Calibration iconsIndicates calibration entry status. Glucose trend graph Glucose levels over time. You can scroll back and forth to see trends or zoom in to display as few as 3 hours of data, or zoom out to see up to 3 days. MenuProvides easy navigation to various sections of the Eversense App: My GlucoseReportsSettings CalibrateShare My DataAbout Alert HistoryPlacement Guide Event LogConnect LBL-5402-01-001 Rev 2_Eversense E3 User Guide_mgdL_R2.indd 60LBL-5402-01-001 Rev 2_Eversense E3 User Guide_mgdL_R2.indd 601/24/23 1:14 PM1/24/23 1:14 PM 7 61 Eversense E3 CGM User Guide Gradually rising or falling glucose levels, falling or rising at a rate between 0.0 mg/dL and 1.0 mg/dL per minute. Moderately rising glucose level, rising at a rate between 1.0 mg/dL and 2.0 mg/dL per minute. Moderately falling glucose levels, falling at a rate between 1.0 mg/dL and 2.0 mg/dL per minute. Very rapidly rising glucose levels, rising at a rate more than 2.0 mg/dL per minute. Very rapidly falling glucose levels, falling at a rate more than 2.0 mg/dL per minute. Trend Arrows There are 5 different trend arrows that show the current direction of your glucose levels, and how fast they are changing. The app uses the last 20 minutes of continuous glucose data for calculating glucose trends. When there are not enough sensor values available to calculate a trend arrow, it is not displayed and the glucose value is grey instead of black. Before making a treatment decision, you should take into account the sensor glucose value, the trend graph, the trend arrow and any alerts from the Eversense E3 CGM System. If no trend arrow is displayed, the system does not have enough data to display direction and rate of change. You should not make a treatment decision based solely on the sensor glucose value. LBL-5402-01-001 Rev 2_Eversense E3 User Guide_mgdL_R2.indd 61LBL-5402-01-001 Rev 2_Eversense E3 User Guide_mgdL_R2.indd 611/24/23 1:14 PM1/24/23 1:14 PM 7 62 Eversense E3 CGM User Guide Understanding Treatment Decisions with CGM Read the entire Eversense E3 CGM System User Guide and be sure you are familiar with when you should and should not make treatment decisions based on your CGM information. Before you begin using Eversense E3 to make treatment decisions, talk with your health care provider about understanding how food, insulin, medications, stress, and exercise impact your glucose. IMPORTANT: • If your symptoms do not match the sensor glucose information displayed, or the app is not displaying both a number and a trend arrow, then use your BG meter to make treatment decisions. • Use your blood glucose meter to make treatment decisions until you understand how Eversense E3 works for you. It may take days, weeks, or even months for you to be comfortable using your CGM data to make treatment decisions. Take your time and follow your health care provider’s recommendation for when to use Eversense E3 instead of your BG meter. Sensor Glucose and Blood Glucose Sensor glucose is measured in the interstitial fluid, not in blood. Because of this, sensor glucose values may lag behind blood glucose values. For example, when your CGM trend arrow shows rapidly falling glucose, your blood glucose may be lower than the number shown; or when your CGM trend arrow shows a rapid rise, your blood glucose may be higher than the number shown. These examples are more likely when your glucose is changing rapidly, such as after a meal, after dosing insulin, or during and after exercise. Stress, illness, and even some medications you take can also impact your glucose. Sometimes the right treatment decision is to wait and check your CGM data frequently before taking action. LBL-5402-01-001 Rev 2_Eversense E3 User Guide_mgdL_R2.indd 62LBL-5402-01-001 Rev 2_Eversense E3 User Guide_mgdL_R2.indd 621/24/23 1:14 PM1/24/23 1:14 PM 7 63 Eversense E3 CGM User Guide Early Wear Time During the 24-hour Warm up Phase, glucose values are not displayed. Also, during early wear time as your insertion site heals, your sensor glucose values may not match your blood glucose values as closely as they will when healing is complete. Use your BG meter to make treatment decisions during the Warm up Phase and until you are confident with your CGM values. Always remember, if the way you feel does not match the glucose value and trend arrow, use your BG meter. Bluetooth Communication The smart transmitter communicates wirelessly with your mobile device via Bluetooth to display your glucose reading. If the connection between your smart transmitter and your mobile device is interrupted, you will not see a glucose value or a trend arrow. Use your BG meter to make treatment decisions if your smart transmitter is not communicating with your mobile device. On-body Vibe Alert Your smart transmitter provides vibratory alerts when you have passed the glucose alert levels you set. However, do not use on-body vibe alerts to make treatment decisions. When you receive an on-body vibe alert, check your glucose reading and trend arrow on your Eversense App. Remote Monitoring with Eversense NOW Treatment decisions must not be made based on CGM information displayed on the Eversense NOW Remote Monitoring Mobile App. Remote monitoring relies on data being sent from your mobile device through the Eversense cloud and then to the Eversense NOW app. Interruptions in any of these connections will delay data being displayed in Eversense NOW. Only the CGM information sent directly from the smart transmitter to your mobile device can be used to make treatment decisions. LBL-5402-01-001 Rev 2_Eversense E3 User Guide_mgdL_R2.indd 63LBL-5402-01-001 Rev 2_Eversense E3 User Guide_mgdL_R2.indd 631/24/23 1:14 PM1/24/23 1:14 PM 7 64 Eversense E3 CGM User Guide Discuss with Your Health Care P…
Text truncated - open the document above for the full version.
Users Manual
9 121 Eversense E3 CGM User Guide Alert Descriptions and Actions (continued) Alerts App Display Description Data Unavailable Appears when the system’s internal checks detect a system error. No glucose readings can be displayed until the error is corrected. Incompatible Transmitter Detected* Appears during linking when the system detects the transmitter is incompatible with the sensor. Actions Plug the charging cable into a wall outlet or USB port. Plug the cable into the smart transmitter and remove it. If the condition persists, follow the steps shown in the Troubleshooting section to reset your smart transmitter. If you are unable to complete the reset, contact Customer Support. Try linking again. If the error is displayed on the second attempt, contact Customer Support. LBL-5402-01-001 Rev 2_Eversense E3 User Guide_mgdL_R2.indd 121LBL-5402-01-001 Rev 2_Eversense E3 User Guide_mgdL_R2.indd 1211/24/23 1:15 PM1/24/23 1:15 PM 9 122 Eversense E3 CGM User Guide Alert Descriptions and Actions (continued) Alerts App Display Description System Time Error Appears when your system detects a discrepancy in time between your mobile device clock and the system clock. Sensor File Error* Appears when the system detects a problem during linking. Actions Set your mobile device clock to your current local time. If the error persists, contact Customer Support. Try linking again. If the error is displayed on the second attempt, contact Customer Support. LBL-5402-01-001 Rev 2_Eversense E3 User Guide_mgdL_R2.indd 122LBL-5402-01-001 Rev 2_Eversense E3 User Guide_mgdL_R2.indd 1221/24/23 1:15 PM1/24/23 1:15 PM 9 123 Eversense E3 CGM User Guide Alert Descriptions and Actions (continued) Alerts App Display Description New Password Detected Appears once when the system detects the password was changed via your Eversense DMS account. Calibration In Progress Appears when your calibration value is significantly different from your sensor glucose value. Actions Log out of the mobile app and log back in with the new password. Do not remove your transmitter for 15 minutes. Re-calibrate when prompted. LBL-5402-01-001 Rev 2_Eversense E3 User Guide_mgdL_R2.indd 123LBL-5402-01-001 Rev 2_Eversense E3 User Guide_mgdL_R2.indd 1231/24/23 1:15 PM1/24/23 1:15 PM 9 124 Eversense E3 CGM User Guide Alert Descriptions and Actions (continued) Alerts App Display Description Incompatible Transmitter Software Appears when the software in your smart transmitter is incompatible with the Eversense CGM Mobile App version on your mobile device. Log Out Warning Appears when you attempt to log out of the mobile app. If you log out, you will not be able to view glucose data in the Eversense mobile app. Actions Contact Customer Support.Remain logged in to the mobile app to continue viewing your glucose data. If you log out, you must log back in with your username and password to continue using the app. LBL-5402-01-001 Rev 2_Eversense E3 User Guide_mgdL_R2.indd 124LBL-5402-01-001 Rev 2_Eversense E3 User Guide_mgdL_R2.indd 1241/24/23 1:15 PM1/24/23 1:15 PM 9 125 Eversense E3 CGM User Guide Alert Descriptions and Actions (continued) Alerts App Display Description Incompatible Device/Operating System Appears when an incompatible device/operating system is being used with the app. Enable Bluetooth and Location Services For Android only. Explains the use of location services is required to enable Bluetooth connection and to receive alerts. Actions For a list of compatible devices/operating systems visit www.eversensediabetes.com. Tap OK to acknowledge. LBL-5402-01-001 Rev 2_Eversense E3 User Guide_mgdL_R2.indd 125LBL-5402-01-001 Rev 2_Eversense E3 User Guide_mgdL_R2.indd 1251/24/23 1:15 PM1/24/23 1:15 PM 9 126 Eversense E3 CGM User Guide Alert Descriptions and Actions (continued) Alerts App Display Description New Password Detected Appears once when the system detects the password was changed via your Eversense DMS account. Incorrect Password Appears when the system detects one or two incorrect passwords have been entered consecutively via your mobile app. Actions Log out of the mobile app and log back in with the new password. Use the correct password to log in to the mobile app. LBL-5402-01-001 Rev 2_Eversense E3 User Guide_mgdL_R2.indd 126LBL-5402-01-001 Rev 2_Eversense E3 User Guide_mgdL_R2.indd 1261/24/23 1:15 PM1/24/23 1:15 PM 9 127 Eversense E3 CGM User Guide Alert Descriptions and Actions (continued) Alerts App Display Description Account Locked Appears after three incorrect passwords have been entered consecutively via your mobile app. Delete Account Appears when Delete Account is tapped on the log in page. Actions Wait 30 minutes. Log in with correct password or reset your password. Contact Customer Support if you wish to proceed. LBL-5402-01-001 Rev 2_Eversense E3 User Guide_mgdL_R2.indd 127LBL-5402-01-001 Rev 2_Eversense E3 User Guide_mgdL_R2.indd 1271/24/23 1:15 PM1/24/23 1:15 PM 9 128 Eversense E3 CGM User Guide Alert Descriptions and Actions (continued) Notifications App Display Description New Sensor Detected Appears when the smart transmitter detects a new sensor. The inserted sensor and the smart transmitter must be linked to begin communication. Calibrate Now Appears when it is time for you to calibrate when the system is in Initialization Phase or after a calibration has been entered that is very different from the sensor glucose. Actions Tap Link Sensor to complete the linking process and begin the 24-hour Warm-Up Phase. You do not need to wear your smart transmitter over the sensor until the Warm-Up Phase is complete. Do a fingerstick blood glucose test and enter the reading as your calibration value. DO NOT use an alternative site (such as forearm) to obtain your blood glucose reading. LBL-5402-01-001 Rev 2_Eversense E3 User Guide_mgdL_R2.indd 128LBL-5402-01-001 Rev 2_Eversense E3 User Guide_mgdL_R2.indd 1281/24/23 1:15 PM1/24/23 1:15 PM 9 129 Eversense E3 CGM User Guide Alert Descriptions and Actions (continued) Notifications A…
Text truncated - open the document above for the full version.
Users Manual
16 182 Eversense E3 CGM User Guide Insertion Steps Your health care provider will explain and perform the simple and quick steps to insert the sensor. You will be fully awake during the approximately 5-minute insertion procedure. Insertion site: It is important to choose a site on the upper arm that is comfortable for you to wear the sensor and smart transmitter for up to 180 days. It is recommended to have the sensor inserted toward the back of the upper arm. Placement in this area minimizes the chance of the sensor and smart transmitter being bumped by doorways, walls or other narrow passages. If possible, avoid areas with loose skin, scars, tattoos, nevus, or blood vessels that could be incised during the procedure. It is recommended to alternate arms for subsequent insertion sites. Step 1: Site preparation – the insertion site will be cleaned, disinfected, then anesthetized using lidocaine. Step 2: Incision – a small (less than 1 centimeter) incision will be made at the insertion site. Step 3: Sensor insertion – a subcutaneous pocket will be created under the skin and the sensor will be inserted in this pocket. Step 4: Site closure – the incision will be closed with an adhesive bandage. Steri Strips™ are typically used to close the incision. Step 5: Sensor and smart transmitter linking – link the sensor and smart transmitter to begin the 24-hour Warm-Up Phase. Note: After insertion, link the smart transmitter and the sensor and then allow the incision site to heal 24 hours before wearing the transmitter. The sensor requires 24 hours to stabilize within the insertion site, this period is known as the Warm-up Phase. After the first 24 hours of sensor insertion, position and secure the smart transmitter over the sensor and ensure you have a connection (see Daily Transmitter Wear). Then you can perform your Initialization Phase calibration of 4 fingerstick blood glucose tests to start getting glucose readings. LBL-5402-01-001 Rev 2_Eversense E3 User Guide_mgdL_R2.indd 182LBL-5402-01-001 Rev 2_Eversense E3 User Guide_mgdL_R2.indd 1821/24/23 1:15 PM1/24/23 1:15 PM 16 183 Eversense E3 CGM User Guide Removal Steps Similarly to the insertion steps, your health care provider will explain the simple and quick steps for the sensor removal and you will be fully awake during the 5-minute (approximate) removal process. Step 1: Site preparation – the sensor site will be cleaned, disinfected, then anesthetized using lidocaine. Step 2: Incision – a small (less than 1 centimeter) incision will be made at the sensor site. Step 3: Sensor removal – the sensor will be removed and discarded. Step 4: Site closure – once removed, the incision will be closed with a Steri Strips™ (sutures may be used depending on provider’s preference). LBL-5402-01-001 Rev 2_Eversense E3 User Guide_mgdL_R2.indd 183LBL-5402-01-001 Rev 2_Eversense E3 User Guide_mgdL_R2.indd 1831/24/23 1:15 PM1/24/23 1:15 PM 184 Eversense E3 CGM User Guide 17. Travel When traveling, your smart transmitter and sensor are safe to go through airport security without removing them. You may inform security that you have an implanted medical device. Your smart transmitter will automatically sync to your smartphone’s current time and date when time zones are changed. The Eversense E3 CGM System is safe for use on U.S. commercial airlines. The Eversense E3 Smart Transmitter is a Medical Portable Electronic Device (M-PED) with emission levels that meet FAA mandates for use in all modes while in flight. (Reference FAA Advisory, Circular #21-16G, dated 6.22.2011.) To use, turn your mobile device’s Bluetooth feature on after you have put your mobile device in airplane mode. For flights outside the US, follow local security regulations for use of medical devices in flight. This section describes the safety issues when traveling with your Eversense E3 smart transmitter and sensor. 17 LBL-5402-01-001 Rev 2_Eversense E3 User Guide_mgdL_R2.indd 184LBL-5402-01-001 Rev 2_Eversense E3 User Guide_mgdL_R2.indd 1841/24/23 1:15 PM1/24/23 1:15 PM 18 185 Eversense E3 CGM User Guide 18. Troubleshooting This section lists information about troubleshooting your Eversense E3 CGM System and includes a list of frequently asked questions (FAQs). Smart Transmitter Q: How do I turn my smart transmitter OFF? A: Touch and hold the soft-touch button in the center of the transmitter for 5 seconds. Release the button when you feel a quick vibe and the LED turns off. Q: How do I turn my smart transmitter ON? A: Touch and hold the soft-touch button in the center of the transmitter for 3 seconds. Release the button when you feel a quick vibe and the LED turns on. Q: How do I properly position the smart transmitter over the sensor? A: There are two ways to ensure proper positioning: 1. When using the adhesive patch to secure the smart transmitter, make sure the power button symbol and the LED are lined up in parallel with your arm. 2. Use the PLACEMENT GUIDE screen on the app to confirm connection between the sensor and the transmitter. • Tap Placement Guide. • Position the smart transmitter over the sensor so that a connection is confirmed. Note: To see more information about signal strength and transmitter positioning, see Placement Guide – Show More Detail Screen in the Linking the Sensor section. Q: My smart transmitter will not vibrate. Why? A: If the smart transmitter does not vibrate, try the following steps: • Check that the smart transmitter is paired to your mobile device. • Check that the Do Not Disturb is disabled by tapping Menu > Settings > Sound Settings. • Check that your smart transmitter has enough battery power and charge if necessary. • Go to About > My Transmitter and tap Demonstration. If the smart transmitter still will not vibrate, contact Customer Support or your local distributor for further troubleshooting. LBL-5402-01-001 Rev 2_Eversense E3 User Guide_mgdL_R2.indd 185LBL-5402-01-001 Rev 2_Eversense E3 User Guide_mgdL_R2.indd 1851/24/23 1:15 PM1/24/23 1:15 PM 18 1…
Text truncated - open the document above for the full version.
Cover Letter(s)
THIS MUST BE SIGNED BY THE APPLICANT/AGENT AND SHOULD BE PLACED ON APPROPRIATE LETTERHEAD 030122-15 Authority to Act as Agent Date: June 20, 2023 American Certification Body, Inc. 313 Park Avenue Suite 300 Falls Church, VA 22046 To Whom It May Concern: ______Kimberly Colbert______ is authorized to act on our behalf, until otherwise notified, for applications to American Certification Body, Inc. (ACB). We certify that we are not subject to denial of federal benefits, that includes FCC benefits, pursuant to Section 5301 of the Anti-Drug Abuse Act of 1988, 21 U.S.C. 862. Further, no party, as defined in 47 CFR 1.2002 (b), to the application is subject to denial of federal benefits, that includes FCC benefits. We also declare that the information provided to the FCC is true and correct to the best of our knowledge (47 CFR 2.911(d)) and we have been informed of the grantee responsibilities (47 CFR 2.909) with regard to certified equipment. Thank you, Agency Agreement Expiration Date: ___August 15, 2023_____ By: ___________ _______Dawit Belete___________ (Signature 1 ) (Print name) Title: Director, Quality Sciences____________ On behalf of: ___Senseonics Inc.________ (Company Name) Telephone: ______301-556-1608__________________ 1 - Must be signed by applicant contact given for applicant on the FCC site, or by the authorized agent if an appropriate authorized agent letter has been provided. Letters should be placed on appropriate letterhead.
Cover Letter(s)
THIS MUST BE SIGNED BY THE APPLICANT/AGENT AND SHOULD BE PLACED ON APPROPRIATE LETTERHEAD 030122-15 Request for Confidentiality Date: May 18, 2023 Subject: Confidentiality Request for: ______2AHYA-3402______ Pursuant to FCC 47 CFR 0.457(d) and 0.459 and IC RSP-100, Section 12.4, the applicant requests that a part of the subject FCC application be held confidential. Type of Confidentiality Requested Exhibit ☐ Short Term ☒ Permanent Block Diagrams ☐ Short Term External Photos ☐ Short Term ☐ Permanent * 1 Internal Photos ☐ Short Term ☒ Permanent Operation Description/Theory of Operation ☐ Short Term ☐ Permanent Parts List & Placement/BOM ☐ Short Term ☐ Permanent Tune-Up Procedure ☐ Short Term ☒ Permanent Schematics ☐ Short Term Test Setup Photos ☐ Short Term ☐ Permanent * 3 User’s Manual ____Senseonics Incorporated has spent substantial effort in developing this product and it is one of the first of its kind in industry. Having the subject information easily available to "competition" would negate the advantage they have achieved by developing this product. Not protecting the details of the design will result in financial hardship. Permanent Confidentiality: The applicant requests the exhibits listed above as permanently confidential be permanently withheld from public review due to materials that contain trade secrets and proprietary information not customarily released to the public. Short-Term Confidentiality: The applicant requests the exhibits selected above as short term confidential be withheld from public view for a period of ___(specify number of days not to exceed 180) 2 ___ days from the date of the Grant of Equipment Authorization and prior to marketing. This is to avoid premature release of sensitive information prior to marketing or release of the product to the public. Applicant is also aware that they are responsible to notify ACB in the event information regarding the product or the product is made available to the public before the requested period has expired. ACB will then release the documents listed above for public disclosure pursuant to FCC Public Notice DA 04-1705. NOTE for Industry Canada Applications: IC currently only distinguishes Permanent Confidentiality exhibits as shown above. Short Term confidentiality is not considered applicable to IC applications. Sincerely, By: / Director, Quality Sciences Dawit Belete (Signature/Title 3 ) (Print name) 1 - The asterisked items (*) require further information to be provided to ACB before permanent confidentiality will be extended to these exhibits. Please refer to FCC KDB 726920 and the specific Document link for D01 found at: https://apps.fcc.gov/oetcf/kdb/forms/FTSSearchResultPage.cfm?switch=P&id=41731 and review section II, 3) regarding specific information that must accompany these requests. 2 - Please refer to https://acbcert.com/documents/misc-docs/Memo-Short-Term-Vs-Standard-Confidentiality.pdf for complete details. 3 - Must be signed by applicant contact given for applicant on the FCC site, or by the authorized agent if an appropriate authorized agent letter has been provided. Letters should be placed on appropriate letterhead.
External Photos
EUT Photographs EUT Name: Phoenix2 Transmitter FCC ID: 2AHYA-3402 WL# 17891, 17892, 17893 IC ID: N/A Production/Shipping Contents Wall-wart AC/DC Power Adapter EUT Top View EUT Bottom View & Label USB Charing Port Bottom and Charge Port View
ID Label/Location Info
EUT Bottom View & Label
Internal Photos
Bottom with Cover Removed LEDs Bottom with Cover Removed, View 2 Top with Cover Removed BLE Radio Chip NFC Initiator Top with Cover Removed 2.4GHz BLE Antenna NFC Traces to 13.56MHz Antenna Vibration Actuator Bottom with Cover Removed Ferrite Backing Over 13.56MHz Coil-Antenna Assembly Both Sides, Bottom View 13.56MHz Coil-Antenna Assembly Both Sides, Bottom View
RF Exposure Info
Page 1 of 2 Laboratory Location: 4840 Winchester Boulevard Suite 5 Frederick, Maryland 21703 Business Office Address: 9055 Comprint Court Suite 310 Gaithersburg, Maryland 20877 (301) 216-1500 [email protected] March 20, 2023 Test Letter #: 17893-01 REV 0 (Created with Reference to WL Report # 17891 & 17892) Applicant Name: Senseonics, Inc. Exempt RF Device (Co-Located Transmitters) Digital Transmission System (BLE) & Near Field Communications (NFC) EUT Name: Phoenix2 Transmitter FCC ID: 2AHYA-3402 IC ID: N/A EUT Summary: The Phoenix2 Transmitter is categorically excluded from SAR testing. Exclusion Threshold: Reference: KDB 447498 DO1 General RF Exposure Guidance v06 Section 4.3. SAR determinations are not required for transmitters operating betwee…
Text truncated - open the document above for the full version.
Contact Information
Applicant
Dawit Belete
Technical Contact
Senseonics Inc.Pavel Beresnev
[email protected]301 407 2945
20451 Seneca Meadows Parkway · Germantown · United States
Test Firm
Washington Laboratories, Ltd.Steve Koster
Technical Specifications
| # | Rule Parts | Frequency Range | Power Output |
|---|---|---|---|
| 1 | 15C | 13.56 MHz - 13.56 MHz | - |