2AP98-YKQ02ZMRemote Control
Beijing Smartmi Electronic Technology Co., Ltd.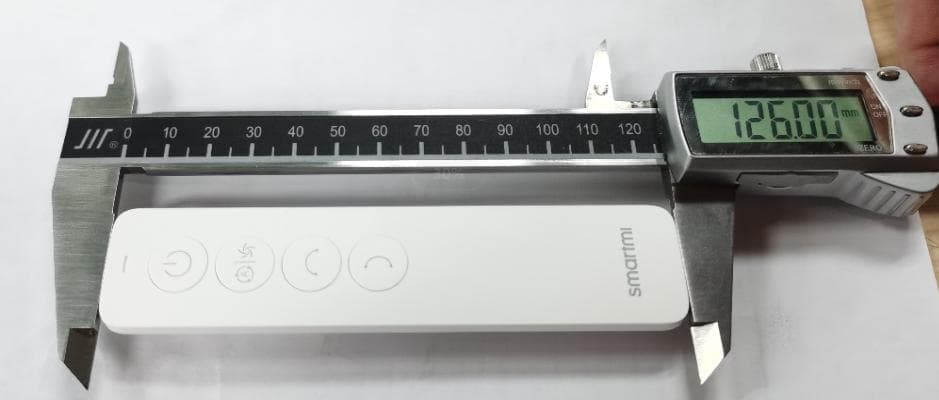
Click to zoom
Application Details
- Equipment Class
- DXX - Part 15 Low Power Communication Device Transmitter
- Date of Grant
- May 09, 2021
- Application Purpose
- Original Equipment
- Date of Application
- Apr 28, 2021
- Equipment Note
- Remote Control
- Frequency Range
- 2402.00000000 - 2480.00000000
- Country
- China
Documents & Files
Document Text
Text extracted from the exhibit documents filed with the FCC. Open a document above to read the original.
Users Manual
Smartmi Air Circulator Fan Instruction Manual Manuel d'Utilisation Smartmi Ventilateur de circulation d'air 01 12 1 Improper product use may lead to electrical shocks, accidental fire, personal injuries, and other damages. Please do not operate the product on an uneven or unsteady surface where it may topple over. Please do not operate the product near other objects which may topple over. Please do not operate the product in a hot and humid environment, such as a bathroom. Please discontinue your use of the product if the adapter cord is damaged or the adapter plug is loose. Please do not operate the product if the fan grille is not properly installed or the rear fan grille is loose/missing. This appliance can be used by children aged from 8 years and above and persons with reduced physical, sensory or mental capabilities or lack of experience and knowledge if they have been given supervision or instruction concerning use of the appliance in a safe way and understand the hazards involved. Only use the supply unit provided with this appliance. When the power adapter is damaged, it must be replaced with a genuine power adapter purchased from the manufacturer or after-sales service department. Children shall not play with the appliance. Cleaning and user maintenance shall not be made by children without supervision. Please do not take the product apart on your own. Please do not fold, bend, or twist the adapter cord with excessive force to prevent exposed or broken wires. Please do not insert your finger or foreign objects into the front fan grille, rear fan grille, or the fan blades while the fan is in operation. WARNING READ AND SAVE THESE INSTRUCTIONS 2 Please keep your hair or fabrics away from the fan to prevent objects from becoming entangled in the fan blades. Please do not use the supplied adapter with any other product. This appliance contains batteries that are only replaceable by skilled persons. The remote controller is powered by 1 LRAAA battery, insert 1 LRAAA battery with the correct polarity in the battery compartment. The supply terminals are not to be short-circuited. Non-rechargeable battery used for remote contoller is not to be recharged. Exhausted batteries are to be removed from the appliance and safely disposed of. If the remote controller is to be stored unused for a long period, the battery in the remote controller should be removed. To reduce the risk of fire or electric shock, do not use this appliance with any solid-state speed control device. Do not incinerate this fan, even if it is severely damaged. The batteries can explode in a fire. Dispose of the fan in accordance with the following instructions: 1. Turn off and unplug the fan before disassemble. 2. Remove the base bolts with an Allen wrench to separate the column. 3. Remove the foot pad with a sharp tool, and then use a Phillips-head screwdriver to remove the the base screws. 4. Detach the upper cover of the base. 5. Use a Phillips-head screwdriver to remove the screws on the battery compartment cover. Remove the cover and take out the lithium battery. 3 Precautions Safety instructions Installation Handling Always turn the fan off and unplug it before moving it. Hold the fan column firmly to prevent falling and personal injuries. To avoid fire, electric shocks, or other damage,use the power adapter and electrical outlet as instructed below: Do not excessively pull, twist or bend the power adapter, as this may expose or break the cord's core. The power adapter must be plugged into a suitable electrical outlet. Use the power adapter that is provided with the fan, do not use any third party power adapters. Always unplug the fan before carrying out maintenance to or moving the fan. In use If you encounter any of the following: abnormal sound, strange odor, high temperature, inconsistent fan rotation, etc., stop the fan immediately. Do not lean on the fan or tilt the fan while it is running. Do not dismantle the device by yourself. In case repair or consultation is needed, please contact Smartmi customer service. Adapter Be sure to properly install the product according to the instructions to avoid electric shocks, fire hazards, personal injuries, and any other accidents. When installing and dismantling the device, be sure to first disconnect the power.This fan contains a battery. When assembling the unit, mount the fan cover and fan blades first, and then assemble the base to prevent the fan from starting accidentally and causing mechanical hazards. 4 3 4 5 8 10 9 Package list 1 Column 2 Base Fan blade knob Screw for fan coverPower Adapter Remote control Fan assembly Fan cover knob 6 Allen wrench 7 Base bolt 5 Magnetic charging port On/Off button Temperature-sensing mode / Set Level button Horizontal Oscillation button Vertical button Magnetic charging port Product overview Home position Home position for fan oscillation. If the fan is turned off while oscillation is on, the wind speed will be reduced and the fan cover will slowly rotate back to home position. If the fan's power supply is cut off, the fan cover will not return to home position and will remain in it's current position at the time. Column Display Base 6 Installation Take out the fan assembly. Rotate the fan grille counterclockwise until it is loose, as shown in Fig. below. Remove the fan grille as per the directions in Fig. and remove fan blades. Dismantling the fan assembly 2 Fan assembly 11 13 12 Fan grilleFan bladesRear fan cover 1 2 Installing the rear fan cover Align the center hole of fan blades with the motor shaft and push into position. Tighten the blade knob counterclockwise to attach fan blades to motor that has the rear fan cover installed. Installing the fan blades Place the rear fan cover on the motor aligned at the top position. Tighten fan cover knob clockwise to attach the rear fan cover to motor. 5 1 2 4
Users Manual
7 Insert the screw for fan cover into the hole at the bottom of the fan cover, then fasten it clockwise with a Phillips head screwdriver. Place the fan grille into the frame of the rear fan cover, then rotate the fan grille clockwise to align with the engraved markings on the rear cover. Installing the fan grille Fastening the fan grille UnfastenFasten Tighten the base bolt clockwise with the Allen wrench to secure column to base. Insert the base bolt into the hole at the bottom of the base. Align column to base socket as illustrated, and insert lower end of column into base socket. Installing the base 1 2 3 8 7 6 7 13 8 Magnetic charging port Operating on the battery Note: If pairing is not successful within 10 seconds, the fan will resume normal operation and clear existing pairing information. Pairing Procedure for Fan Remote Control Child Lock Setting Turning Wi-Fi on/off Resetting Wi-Fi Press and hold both the “vertical oscillation” button and the "timer” button located on the air circulator fan for 2 seconds. When you hear a long beep, the fan has entered pairing mode. Within 30 seconds, press and hold both the "vertical oscillation” button and the "horizontal oscillation” button" for 2 seconds. When you hear a long beep, the remote control has been paired. Setting child lock: The child lock must be enabled on the app. Disable child lock: Press and hold both the "horizontal oscillation” button and the "timer” button for 2 seconds. When you hear a long beep, the child lock has been disabled. Turning Wi-Fi off: Press and hold both the "mode” button and the "timer” button for 2 seconds. When you hear a long beep, Wi-Fi has been turned off and the Wi-Fi indicator on the unit will turn off. Turning Wi-Fi on: When Wi-Fi is off, press and hold both the "mode” button and "timer” button for 2 seconds. When you hear a long beep, Wi-Fi has been turned on and the Wi-Fi indicator on the unit will blink. Press both the "power” button and the "level/ mode” button for 5 seconds. When you hear a long beep, Wi-Fi has been reset. Installation Connecting to power supply/charging the battery Charging Insert the adapter plug into a power supply. Place the magnetic charging base connected to the adapter on a flat surface. Align charging port on fan base to charging base. Bring charging port close to the charging base, and they will connect automatically (see the left figure below). There is a battery contained inside the fan base. When it is sufficiently charged, gently step on the adapter cord to separate the adapter from the device. The device can then be used independently (see the right figure below). If the fan is connected to a power supply, no battery power will be consumed while it is running, and the battery will be charged to full capacity. When the battery level is between 0%–90%, the indicator light is orange and slowly fades off in 12 seconds. When the battery level is between 91%–100%, the indicator light remains solid green for 12 seconds. Indicator status Battery level Green light solid for 20 seconds 21%-100% Orange light solid 11%-20% Orange light blinking 0%-10% Body buttons Body buttons Remote control buttons 9 Intelligent Control with Apple HomeKitLinking the Device to Smartmi Link Open the Home app on your iPhone/iPad Tap "Add Accessory" and then scan the HomeKit setup code on the product sticker (two stickers on the device unit, see illustration), or enter the eight-digit setup code above the HomeKit Setup Code. The device will then be linked to the Apple Home app This product has been linked to the Smartmi Link and can be controlled using the app. Scan the QR code or search for "Smartmi Link" on the app store to download and install the app. Go to the app's homepage, click "+" in the middle of the page, then add the device as prompted. Note: Please ensure that your Wi-Fi network is both available and has Internet access. Place your phone as close to this product as possible. (This product does not support 5G This product will be listed as "Smartmi Air Circulator Fan" in the app's device listingnetworks) Tap "Add Accessory" and then scan the HomeKit setup code on the product sticker (two stickers on the device unit, see illustration), or enter the eight-digit setup code above the HomeKit Setup Code. The device will then be linked to the Apple Home app Devices linked to Smartmi Link can also be added to HomeKit. Go to the Device Control page on Smartmi Link. Tap "Add to HomeKit" in "Settings" and then link the device to HomeKit as prompted Note: Please ensure that your Wi-Fi network is both available and has Internet access. Place your phone as close to this product as possible. (This product does not support 5G networks) To control this accessory which is compatible with HomeKit, it is recommended to use iOS 13.0 or a later version. Please keep the HomeKit setup code, as you will need to scan the code to link the device to HomeKit after a factory reset. iPad and iPhone are trademarks of Apple Inc., registered in the U.S. and other countries. Controlling this HomeKit-enabled accessory automatically and away from home requires a HomePod, Apple TV, or iPad set up as a home hub. It is recommended that you update to the latest software and operating system. 1 2 HomeKit Setup Code 10 Use Features Scheduled off Level indicator Vertical button Horizontal Oscillation button Wi-Fi status indicator On/Off button Temperature-sensing mode indicator Temperature-sensing mode / Set Level button Temperature-sensing Mode Press and hold the button to switch to temperature-sensing mode. In temperature-sensing mode, the temperature-sensing mode indicator remains on. The next time the fan is switched on, it will return to its previous mode by default. Press and hold this button again to return to normal mode. Both temperature-sensing and standard modes feature four fan speed options. In temperature-sensing mode, the starting wind speed varies dependent on fan speed selection, which corresponds to four t…
Text truncated - open the document above for the full version.
Users Manual
13 Specifications NameSmartmi Air Circulator FanRated voltage 15V Power cord 1.5m Model ZLBPKQXHS02ZM ZLBPKQXHS02ZM/DG Power Adapter Rated Input 100-240V , 50/60Hz, 1.0A Battery typeLithium-ion battery pack TypeDC fanRated power 36W Rated capacity of battery 5200mAh Net weightApprox.3.8kgItem dimensions 325mm×340mm×990mm Noise ≤60dB(A) Wireless connection Wi-Fi IEEE 802.11 b/g/n 2.4GHz ; 2.4G SRDRF output power≤20dBm NameRemote ControlRated voltage 1.5V ModelKQXHSYKQ02ZMItem dimensions 126mm×28mm×14mm Wireless connection 2.4G SRDRF output power ≤20dBm Regulatory Compliance Information This device complies with part 15 of the FCC Rules. Operation is subject to the following two conditions: (1) This device may not cause harmful interference, and (2) this device must accept any interference received, including interference that may cause undesired operation. Caution: Changes or modifications to this unit not expressly approved by the party responsible for compliance could void the user's authority to operate the equipment. NOTE: This equipment has been tested and found to comply with the limits for a Class B digital device, pursuant to part 15 of the FCC Rules. These limits are designed to provide reasonable protection against harmful interference in a residential installation. This equipment generates, uses and can radiate radio frequency energy and, if not installed and used in accordance with the instructions, may cause harmful interference to radio communications. However, there is no guarantee that interference will not occur in a particular installation. If this equipment does cause harmful interference to radio or television reception, which can be determined by turning the equipment off and on, the user is encouraged to try to correct the interference by one or more of the following measures: Reorient or relocate the receiving antenna. Increase the separation between the equipment and receiver. Connect the equipment into an outlet on a circuit different from that to which the receiver is connected. Consult the dealer or an experienced radio/TV technician for help. Limited by local law regulations, version for North America does not have region selection option. To satisfy FCC RF exposure requirements, a separation distance of 20 cm or more should be maintained between the antenna of this device and persons during device operation.To ensure compliance, operations at closer than this distance is not recommended. ISED Compliance This device contains licence-exempt transmitter(s)/receiver(s) that comply with Innovation, Science and Economic Development Canada’s licence-exempt RSS(s). Operation is subject to the following two conditions: This device may not cause interference. This device must accept any interference, including interference that may cause undesired operation of the device. Fan: FCC ID: 2AP98-XHS02ZM IC: 26864-XHS02ZM Contains FCC ID: 2ANDL-TYWE3SE Contains IC: 23243-TYWE3SE Remote controller: FCC ID: 2AP98-YKQ02ZM IC: 26864-YKQ02ZM 14 15 Une utilisation inappropriée du produit peut entraîner des chocs électriques, des incendies accidentels, des blessures personnelles et d'autres dommages. Toute mauvaise utilisation l’appareil peut entraîner des chocs électriques, un incendie accidentel, des blessures corporelles ou d'autres dommages. Veuillez ne pas utiliser l’appareil sur une surface inégale ou instable où il pourrait se renverser. Veuillez ne pas utiliser l’appareil à proximité d'autres objets qui pourraient se renverser. Veuillez ne pas utiliser l’appareil dans un environnement chaud et humide, comme par exemple une salle de bain. Veuillez cesser d'utiliser l’appareil si le cordon de l'adaptateur est endommagé ou si sa fiche est lâche.. Veuillez ne pas faire fonctionner l’appareil si la grille du ventilateur n'est pas correctement installée ou si la grille arrière est lâche / manquante. Cet appareil peut être utilisé par des enfants âgés de 8 ans et plus et des personnes ayant des capacités physiques, sensorielles ou mentales réduites ou un manque d'expérience et de connaissances, à condition qu’ils bénéficient d’une supervision ou d’instructions concernant son utilisation sûre et comprennent les dangers inhérents. Veuillez n'utiliser que le bloc d'alimentation fourni avec cet appareil. Lorsque l'adaptateur d'alimentation est endommagé, il doit être remplacé par un adaptateur d'origine acheté chez le fabricant ou provenant du service après-vente. Veuillez ne pas laisser les enfants jouer avec l'appareil. Le nettoyage et l'entretien par l'utilisateur ne doivent pas être effectués par des enfants sans surveillance. Avertissement LISEZ ET CONSERVEZ CES INSTRUCTIONS 16 Veuillez ne pas démonter l’appareil vous-même. Veuillez ne pas plier, incurver ou tordre le cordon de l'adaptateur avec une force excessive, afin d’éviter que les fils ne soient dénudés ou cassés. Veuillez ne pas insérer votre doigt ou un quelconque objet dans la grille avant, la grille arrière ou les pales du ventilateur pendant que l’appareil fonctionne. Veuillez garder vos cheveux et vêtements éloignés du ventilateur pour éviter qu’ils ne s'emmêlent dans les pales. Veuillez ne pas utiliser un adaptateur fourni avec un autre produit. Cet appareil contient des piles qui ne peuvent être remplacées que par des personnes qualifiées. La télécommande est alimentée par 1 pile LRAAA. Veuillez insérer 1 pile LRAAA avec la polarité correcte dans le compartiment à piles. Les terminaux d’alimentation ne doivent pas être court- circuitées. La batterie non rechargeable utilisée pour la télécommande ne doit pas être rechargée. Les piles usées doivent être retirées de l'appareil et jetées en toute sécurité. Si la télécommande est stockée et inutilisée pendant une longue période, la pile de la télécommande doit être retirée. N'incinérez pas ce ventilateur, même s'il est gravement endommagé. Les batteries peuvent exploser dans le feu. Veuillez jeter le ventilateur conformément aux instructions suivantes : 1. Éteignez et dé…
Text truncated - open the document above for the full version.
Users Manual
21 Insérez la vis de la grille frontale dans l'orifice situé au bas de la grille frontale, et serrez-la dans le sens horaire à l'aide d'un tournevis Phillips. Incrustez la grille frontale dans le cadre du couvercle arrière, et faites tourner la grille frontale dans le sens horaire pour l'aligner sur les marques gravées sur le couvercle arrière. Montage la grille frontale Fixation de la grille frontale DéverrouillerVerrouiller Serrez le boulon de la base dans le sens horaire à l'aide de la clé Allen pour fixer la colonne de support sur la base. Insérez le boulon de la base dans le trou situé au bas de la base. Alignez la colonne de support avec la baïonnette de la base dans la direction indiquée, et insérez l'extrémité inférieure de la colonne de support dans la baïonnette de la base. Montage de la base 1 2 3 8 7 1 3 6 7 22 Port de charge magnétique Lors de l'utilisation de la batterie Brancher la source d'alimentation / charge de la batterie Recharge Veuillez insérer la fiche de l'adaptateur dans le bloc d'alimentation, posez à plat la base de charge magnétique connectée à l'adaptateur et alignez le port de charge de la base du ventilateur avec la base de charge. Lorsque la base de charge s'approche du port de charge, elle s'y attache automatiquement (comme indiqué dans l'image en bas à gauche). La base du ventilateur contient une batterie. Si la batterie est complètement chargée, vous pouvez marcher sur l'adaptateur pour la séparer du corps et utiliser le ventilateur indépendamment (comme indiqué dans l'image en bas à droite). Lorsque le ventilateur est connecté à une source d'alimentation, le ventilateur ne consommera pas d'énergie de la batterie lors de son fonctionnement et chargera la batterie jusqu'à ce qu'elle soit complètement chargée. Lorsque la charge de la batterie est comprise entre 0 % et 90 %, le voyant orange s'éteint après avoir clignoté pendant 12 secondes. Lorsque la puissance de la batterie est comprise entre 91 % et 100 %, le voyant vert s'allumera pendant 12 secondes avec de s'éteindre. État du voyantÉnergie restante Le voyant vert s'éteindra après avoir été allumé pendant 20 secondes. 21%-100% Le voyant orange est allumé en continu. 11%-20% Le voyant orange clignote 0%-10% Installation 23 boutons de l'appareil Boutons de la télécommande Remarque : si le ventilateur active l'état de jumelage pendant 10 secondes sans que le jumelage ait réussi, il revient au fonctionnement normal et efface les informations de jumelage précédentes. Processus d’appairage de la télécommande du ventilateur Réglages du verrouillage parental Activer / désactiver la connexion Wi-Fi Réinitialisation du Wi-Fi Appuyez simultanément sur la « touche haut / bas » et sur la « touche de contrôle de la minuterie » du ventilateur pendant 2 s ; celui-ci entrera en mode d'appairage avec la télécommande lorsqu’un long bip retentira. Appuyez simultanément sur la « touche haut / bas » et sur la « touche droite / gauche » de la télécommande pendant 30 s. La télécommande sera appairée lorsqu’un long bip retentira. Activer le verrouillage parental : le verrouillage parental doit être activé sur l'application mobile Désactiver le verrouillage parental : appuyez simultanément sur la « touche droite / gauche » et sur la « touche de contrôle de la minuterie » pendant 2 s ; le verrouillage parental sera désactivé lorsqu’un long bip retentira. Désactiver la connexion Wi-Fi : appuyez simultanément sur la « touche de mode » et la « touche de contrôle de la minuterie » pendant 2 s. Le Wi-Fi sera désactivé lorsqu’un long bip retentira et que le voyant Wi-Fi de l’appareil s'éteindra. Activer la connexion Wi-Fi : appuyez simultanément sur la « touche de mode » et la « touche de contrôle de la minuterie » pendant 2 s lorsque le Wi- Fi est désactivé. Le Wi-Fi sera activé lorsqu’un long bip retentira et que le voyant Wi-Fi de l’appareil clignotera. Appuyez simultanément sur la « touche d'alimentation » et la « touche de changement de vitesse / mode » pendant 5 s ; le Wi-Fi sera réinitialisé lorsqu’un long bip retentira. boutons de l'appareil 24 Contrôle intelligent avec Apple HomeKitLier l'appareil à l'application Smartmi Link Veuillez ouvrir l'application Home sur votre iPhone/iPad. Veuillez appuyer sur « Ajouter un accessoire », puis scannez le code de configuration HomeKit sur l'autocollant du produit (deux autocollants collés sur l'unité d'appareil, voir l'illustration) ou entrez le code de configuration à huit chiffres au-dessus du code de configuration HomeKit. L'appareil sera lié à l'application Apple Home. Ce produit a bien été lié à Smartmi Link et peut être contrôlé à l'aide de l'application. Veuillez scanner le code QR ou rechercher « Smartmi Link » sur l'app store pour télécharger et installer l'application. Accédez à la page d'accueil de l'application, cliquez sur « + » au milieu de la page pour ajouter l'appareil comme suggéré. Attention:Assurez-vous que votre réseau Wi-Fi est disponible et dispose d'un accès Internet. Veuillez placer votre téléphone aussi proche que possible de ce produit. (Ce produit ne prend pas en charge les réseaux 5G) Ce produit sera répertorié en tant que « Ventilateur de circulation d'air Smartmi » dans la liste des appareils de l'application. L'appareil peut être lié à Smartmi Link après l'avoir lié à HomeKit. Veuillez aller à la page d'informations personnelles de l'application Smartmi Link, appuyez sur « HomeKit Info », puis liez l'appareil à HomeKit comme indiqué. Les appareils liés à Smartmi Link peuvent également être ajoutés à HomeKit. Veuillez aller à la page de contrôle de l'appareil de l'application Smartmi Link, appuyez sur « Ajouter à HomeKit » dans « Réglages », puis liez l'appareil à HomeKit comme suggéré. Attention: Assurez-vous que votre réseau Wi-Fi est disponible et dispose d'un accès Internet. Veuillez placer votre téléphone aussi proche que possible de ce produit. (Ce produit ne prend pas en charge les réseaux 5G) Pour contrôler cet accessoire compatible avec HomeKi…
Text truncated - open the document above for the full version.
External Photos
PHOTOOFTHEDEVICEUNDERTEST DIMENSIONS:Length151xwide38xhigh=126.0mm(L)X28.0mm(W)X14.0mm(H) FRONTPHOTO BACKPHOTO -----------------------------------THELASTPAGEOFTHEREPORT-----------------------------------
ID Label/Location Info
循环扇2遥控器美版铭牌 20210415 V1.4 PANTONE CoolGray 7C 白色PET T=0.1mm 单色单面印刷、模切、覆哑膜 16mm R=1mm 18mm 标签实物效果 9mm 14mm LRAAA 1.5V Manufact ur er: Beijing Smartmi Electronic Technology Co., Ltd. Production Date: 04/2021 Made in China Remote Control KQXHSYKQ02ZM HVIN: V06 FCC ID: 2AP98- YKQ02ZM IC: 26864- YKQ02ZM
Internal Photos
PCBA-TOPPCBA-BOTTOM PCBANT
Test Report
Prüfbericht - Produkte Test Report - Products Prüfbericht-Nr.: Test report no.: CN21Q4Y0 001 Auftrags-Nr.: Order no.: 168310213 Seite 1 von 19 Page 1 of 19 Kunden-Referenz-Nr.: Client reference no.: N/A Auftragsdatum: Order date: 2021-03-10 Auftraggeber: Client: Beijing Smartmi Electronic Technology Co., Ltd. Room 201-203, Unit 6, Building A, No. 66, Zhufang Road, Qinghe, Haidian District, 100085 Beijing, China Prüfgegenstand: Test item: Remote Control Bezeichnung / Typ-Nr.: Identification / Type no.: KQXHSYKQ02ZM (Trade Mark: Smartmi) Auftrags-Inhalt: Order content: FCC & IC approval Prüfgrundlage: Test specification: CFR47 FCC Part 15: Subpart C Section 15.249 CFR47 FCC Part 2: Section 2.1093 CFR47 FCC Part 15: Subpart B Section 15.109 ICES-003 Issue 7 October 2020 RSS-210 Issue 10 December 2019 RSS-Gen Issue 5 March 2019 RSS-102 Issue 5 March 2015 Wareneingangsdatum: Date of sample receipt: 2021-03-28 Please refer to photo documents Prüfmuster-Nr.: Test sample no.: A003010337-004 Prüfzeitraum: Testing period: 2021-03-15 – 2020-04-20 Ort der Prüfung: Place of testing: TÜV Rheinland (Shenzhen) Co., Ltd. Prüflaboratorium: Testing laboratory: TÜV Rheinland (Shenzhen) Co., Ltd. Prüfergebnis*: Test result*: Pass geprüft von: tested by: X Signed by: Bell Hu genehmigt von: authorized by: X Signed by: Winnie Hou Datum: Date: 2021-04-26 Ausstellungsdatum: Issue date: 2021-04-26 Stellung / Position Project Manager Stellung / Position Department Manager Sonstiges / Other: FCC ID: 2AP98-YKQ02ZM IC: 26864-YKQ02ZM; HVIN: V06; PMN: Remote Control. Zustand des Prüfgegenstandes bei Anlieferung: Condition of the test item at delivery: Prüfmuster vollständig und unbeschädigt Test item complete and undamaged: * Legende: 1 = sehr gut 2 = gut 3 = befriedigend 4 = ausreichend 5 = mangelhalt P(ass) = entspricht o.g. Prüfgrundlage(n) F(ail) = entspricht nicht o.g. Prüfgrundlage(n) N/A = nicht anwendbar N/T = nicht getestet Legend: 1 = very good 2 = good 3 = satisfactory 4 = sufficient 5 = poor P(ass) = passed a.m. test specifications(s) F(ail) = failed a.m. test specifications(s) N/A = not applicable N/T = not tested Dieser Prüfbericht bezieht sich nur auf das o.g. Prüfmuster und darf ohne Genehmigung der Prüfstelle nicht auszugsweise vervielfältigt werden. Dieser Bericht berechtigt nicht zur Verwendung eines Prüfzeichens. This test report only relates to the a. m. test sample. Without permission of the test center this test report is not permitted to be V05 duplicated in extracts. This test report does not entitle to carry any test mark. TÜV Rheinland (Shenzhen) Co., Ltd. 1601 R&D Room, 1602-1604, 17-18F, Building 7 Site C, Vanke Cloud City Phase I, Xingke First Street, Xili Street, Xili Community, Nanshan District, Shenzhen 518052, P.R. China Mail: [email protected] · Web: www.tuv.com Produkte Products Prüfbericht - Nr.: Test Report No. CN21Q4Y0 001 Seite 2 von 19 Page 2 of 19 Test Summary 5.1.1 ANTENNA REQUIREMENT RESULT: Pass 5.1.2 FUNDAMENTAL & HARMONICS RADIATED EMISSION RESULT: Pass 5.1.3 BANDWIDTH RESULT: Pass 5.1.4 RADIATED SPURIOUS EMISSION & BAND EDGE RESULT: Pass 5.1.5 CONDUCTED EMISSION ON AC MAINS RESULT: N/A 5.1.6 RADIATED EMISSION RESULT: Pass 6.1.1 ELECTROMAGNETIC FIELDS RESULT: Pass Produkte Products Prüfbericht - Nr.: Test Report No. CN21Q4Y0 001 Seite 3 von 19 Page 3 of 19 Contents 1 GENERAL REMARKS ........................................................................................................................... 4 1.1 COMPLEMENTARY MATERIALS ............................................................................................................ 4 2 TEST SITES ........................................................................................................................................ 4 2.1 TEST FACILITIES ................................................................................................................................. 4 2.2 LIST OF TEST AND MEASUREMENT INSTRUMENTS................................................................................. 5 2.3 TRACEABILITY .................................................................................................................................... 6 2.4 CALIBRATION ..................................................................................................................................... 6 2.5 MEASUREMENT UNCERTAINTY............................................................................................................. 6 2.6 LOCATION OF ORIGINAL DATA ............................................................................................................. 6 2.7 STATUS OF FACILITY USED FOR TESTING ............................................................................................. 6 3 GENERAL PRODUCT INFORMATION ...................................................................................................... 7 3.1 PRODUCT FUNCTION AND INTENDED USE ............................................................................................. 7 3.2 RATINGS AND SYSTEM DETAILS .......................................................................................................... 7 3.3 INDEPENDENT OPERATION MODES ...................................................................................................... 8 3.4 NOISE GENERATING AND NOISE SUPPRESSING PARTS ......................................................................... 8 3.5 SUBMITTED DOCUMENTS..................................................................................................................... 8 4 TES…
Text truncated - open the document above for the full version.
Contact Information
Applicant
Feipeng LIN
Technical Contact
Test Firm
TUV Rheinland (Shenzhen) Co., Ltd.Gina Yang
[email protected]86 755 8268 1497
Technical Specifications
| # | Rule Parts | Frequency Range | Power Output |
|---|---|---|---|
| 1 | 15C | 2.40 GHz - 2.48 GHz | - |
Other Applications from Beijing Smartmi Electronic Technology Co., Ltd.
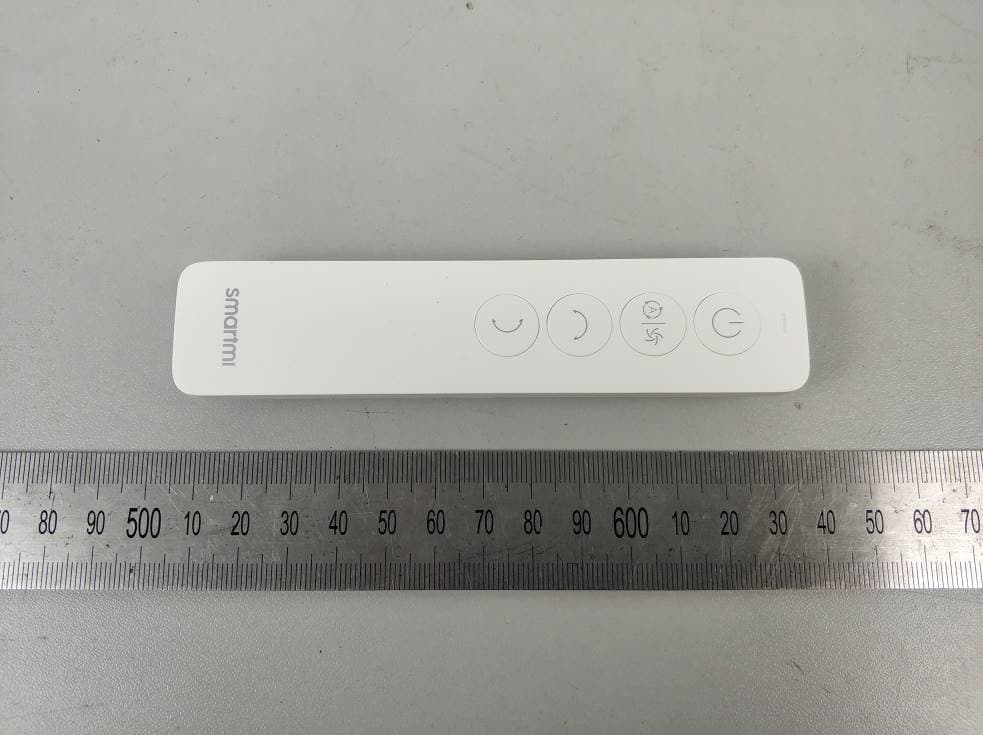
2AP98-XHS02ZM
May 09, 2021Smartmi Air Circulator Fan
Equipment Class
DXX - Part 15 Low Power Communication Device Transmitter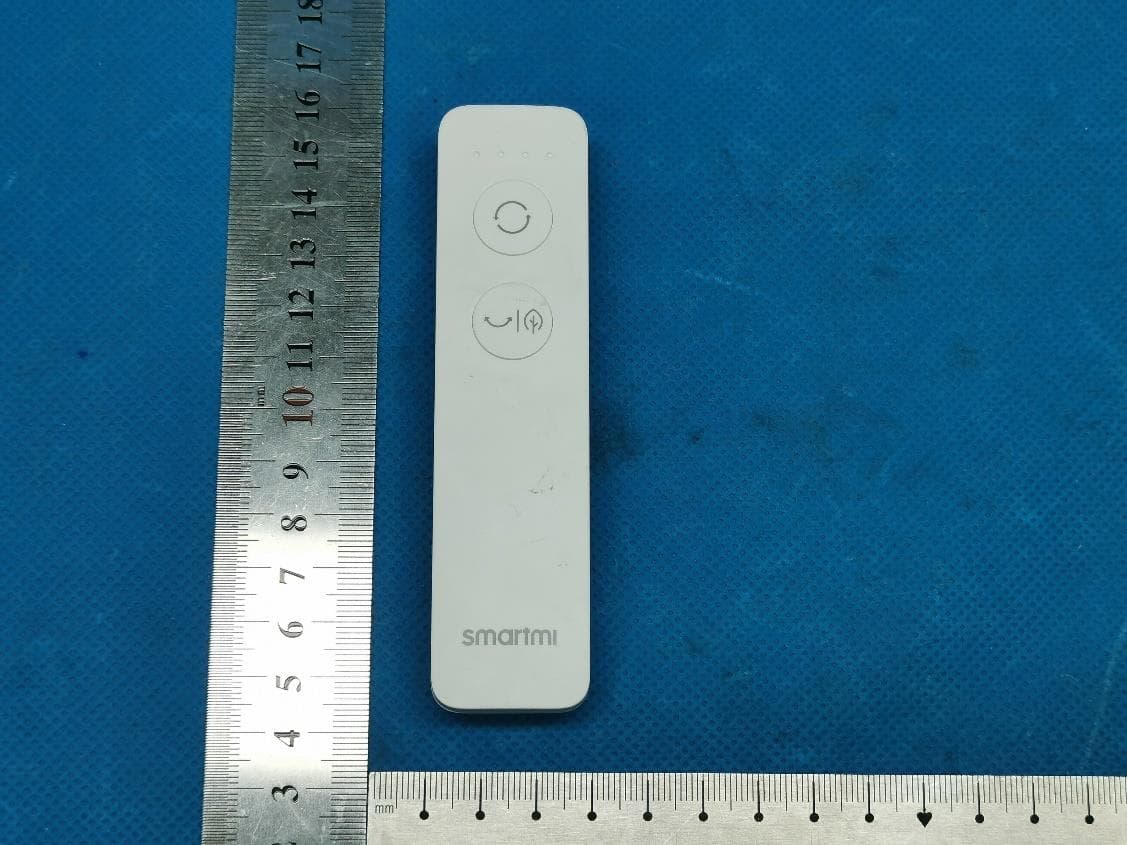
2AP98-FSYKQ04ZM
Jan 24, 2021Bluetooth Remote Control
Equipment Class
DTS - Digital Transmission System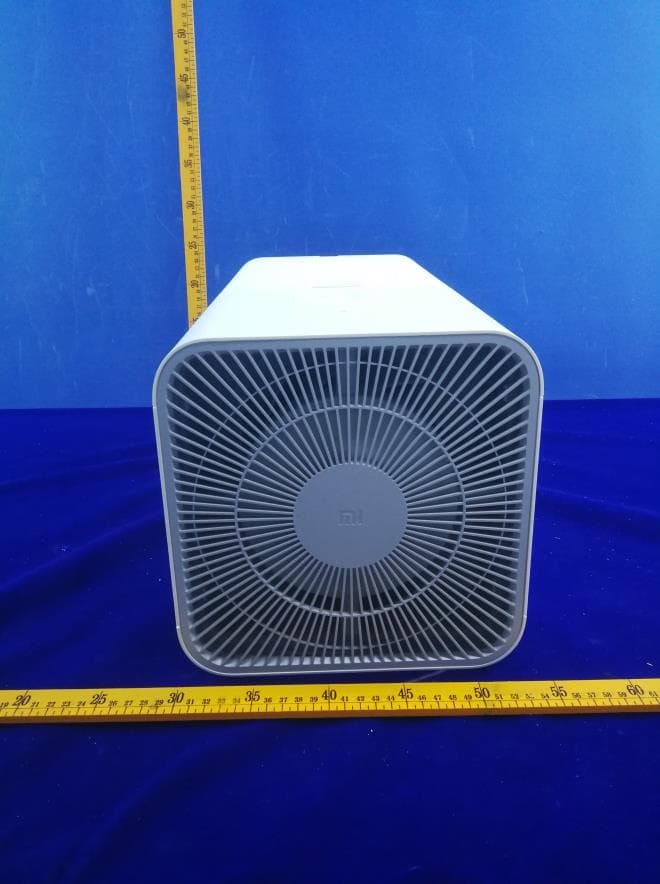
2AP98-ACM6SC
Sep 22, 2020Air purifier
Equipment Class
DXX - Part 15 Low Power Communication Device Transmitter