2AQZU-18010CEILING FAN REMOTE CONTROLLER
Satellite Electronic(Zhong Shan)Ltd.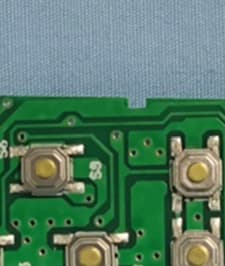
Click to zoom
Application Details
- Equipment Class
- DSC - Part 15 Security/Remote Control Transmitter
- Date of Grant
- May 20, 2020
- Application Purpose
- Original Equipment
- Date of Application
- May 20, 2020
- Equipment Note
- CEILING FAN REMOTE CONTROLLER
- Frequency Range
- 304.25000000 - 304.25000000
- Country
- China
Documents & Files
Document Text
Text extracted from the exhibit documents filed with the FCC. Open a document above to read the original.
Users Manual
.CEILING FAN REMOTE CONTROLLER OPERATION AND INSTALLATION INSTRUCTIONS (Please keep this instruction pamphlet.) IMPORTANT POINTS TO REMEMBER: 1. Read and save these instructions. 2. Please note that all fixed wiring appliances should be installed by a qualified electrician. 3. The supply to the remote control receiver should be connected through a mains switch, i.e. existing wall switch. 4. Disconnect from power supply at wall switch before working on remote control receiver or ceiling fan. 5. Install receiver into the ceiling fan canopy of the fan to ensure proper protection. 6. This unit is to be used for the control of ceiling fan and in an AC120V 60Hz power supply only. 7. Do not install in wet locations or immerse in water. 8. Do not pull on or cut leads shorter. 9. Do not drop or bump the unit. 10. PLEASE NOTE: The battery will weaken with age and should be replaced before leaking takes place as this will damage the transmitter. Dispose of used battery properly, keep the battery out of reach of children. 11. CAUTION: To reduce the risk of fire or injury, do not use this product in conjunction with any variable (rheostat) wall control. INSTALLATION INSTRUCTIONS 1. Ceiling fan must be set at HIGH speed and light kit (If any) at ON position by pressing the “Light Switch” after installation. 2. Press and hold the emitter’s “SET” key for about 3S in 30 seconds of turning the Receivers AC power ON, The receiver learn the emitter’s CODE and the emitter can remote the receiver.(FIG.1 / 2 / 3) 3. Your transmitter is ready for use after 2pc DC1.5V/ AAA, battery installation(FIG. 1) IMPORTANT YOU MUST SET CEILING FAN MANUAL SWITCH TO HIGH SPEED AND LIGHT KIT (IF ANY) TO ON POSITION BEFORE OPERATING REMOTE CONTROL. CAUTION: INCORRECT WIRE CONNECTION WOULD DAMAGE THIS RECEIVER . FIG. 2 FIG. 1 FIG. 3 FUNCTIONS OF TRANSMITTER 1、 ON/OFF - Press and release immediately to turn on or off light. DIMMER - Press and hold to dim or brighten light to the desired level and release. (Only when the dip switch was set on “D” dimmer setting) 2. FAN SPEED:Pressing key s 1、2、3、, it will control receiver FAN at speed 1~3 and OFF. 3. Pressing key : Press and release immediately to set fan direction: 4.. Natural wind Function: Pressing key , Fan will run in natural wind. 5.. Learning keys: Learning distance is no limition. Please press learning keys(black), Then receiver will remind that learning is finished. Only transmitter was learned can control receiver. 6. It has corresponding keys LED indicator, Pressing KEY, The LED indicator will flash. 7. key of color tempreture can be chosen to use. 8. Transmitter has learning key and toggle switch with 4 position (reserved). It has O/D switch. 9. Transmitter can be controlled by hand or you can place it in wall socket to control. To assure continued FCC compliance: FEDERAL COMMUNICATIONS COMMISSION INTERFERENCE STATEMENT This equipment has been tested and found to comply with the limits for a Class B digital device, pursuant to Part 15 of the FCC Rules. These limits are designed to provide reasonable protection against harmful interference in a residential installation. This equipment generates, uses and can radiate radio frequency energy and, if not installed and used in accordance with the instructions, may cause harmful interference to radio communications. However, there is no guarantee that interference will not occur in a particular installation. If this equipment does cause harmful interference to radio or television reception, which can be determined by turning the equipment off and on, the user is encouraged to try to correct the interference by one or more of the following measures: --Reorient or relocate the receiving antenna. --Increase the separation between the equipment and receiver. --Connect the equipment into an outlet on a circuit different from that to which the receiver is connected. --Consult the dealer or an experienced radio/TV technician for help. CAUTION: Any changes or modifications not expressly approved by the grantee of this device could void the user's authority to operate the equipment. FCC ID:2AQZU-18010 This device complies with Part 15 of the FCC Rules. Operation is subject to the following two conditions: (1) This device may not cause harmful interference, and (2) this device must accept any interference received, including interference that may cause undesired operation. IC WARNING This device contains licence-exempt transmitter(s) that comply with Innovation, Science and Economic Development Canada’s licence-exempt RSS(s). Operation is subject to the fol lowing two conditions: (1) This device may not cause interference. (2) This device must accept any interference, including interference that may cause undesir ed operation of the device. L’émetteur/récepteur exempt de licence contenu dans le présent appareil est conforme aux CNR d’Innovation, Sciences et Développement économique Canada applicables aux appareils radio exempts de licence. L’exploitation est autorisée aux deux conditions suivantes: 1. L’appareil ne doit pas produire de brouillage; 2. L’appareil doit accepter tout brouillage radioélectrique subi, même si le brouillage est susceptible d’en compromettre le fonctionnement.
Users Manual
.CEILING FAN REMOTE CONTROLLER OPERATION AND INSTALLATION INSTRUCTIONS (Please keep this instruction pamphlet.) IMPORTANT POINTS TO REMEMBER: 1. Read and save these instructions. 2. Please note that all fixed wiring appliances should be installed by a qualified electrician. 3. The supply to the remote control receiver should be connected through a mains switch, i.e. existing wall switch. 4. Disconnect from power supply at wall switch before working on remote control receiver or ceiling fan. 5. Install receiver into the ceiling fan canopy of the fan to ensure proper protection. 6. This unit is to be used for the control of ceiling fan and in an AC120V 60Hz power supply only. 7. Do not install in wet locations or immerse in water. 8. Do not pull on or cut leads shorter. 9. Do not drop or bump the unit. 10. PLEASE NOTE: The battery will weaken with age and should be replaced before leaking takes place as this will damage the transmitter. Dispose of used battery properly, keep the battery out of reach of children. 11. CAUTION: To reduce the risk of fire or injury, do not use this product in conjunction with any variable (rheostat) wall control. INSTALLATION INSTRUCTIONS 1. Ceiling fan must be set at HIGH speed and light kit (If any) at ON position by pressing the “Light Switch” after installation. 2. Press and hold the emitter’s “SET” key for about 3S in 30 seconds of turning the Receivers AC power ON, The receiver learn the emitter’s CODE and the emitter can remote the receiver.(FIG.1 / 2 / 3) 3. Your transmitter is ready for use after 2pc DC1.5V/ AAA, battery installation(FIG. 1) IMPORTANT YOU MUST SET CEILING FAN MANUAL SWITCH TO HIGH SPEED AND LIGHT KIT (IF ANY) TO ON POSITION BEFORE OPERATING REMOTE CONTROL. CAUTION: INCORRECT WIRE CONNECTION WOULD DAMAGE THIS RECEIVER . FIG. 2 FIG. 1 FIG. 3 FUNCTIONS OF TRANSMITTER 1、 ON/OFF - Press and release immediately to turn on or off light. DIMMER - Press and hold to dim or brighten light to the desired level and release. (Only when the dip switch was set on “D” dimmer setting) 2. FAN SPEED:Pressing key s 1、2、3、4、, it will control receiver FAN at speed 1~4 and OFF. 3. Pressing key : Press and release immediately to set fan direction: 4.. Natural wind Function: Pressing key , Fan will run in natural wind. 5.. Learning keys: Learning distance is no limition. Please press learning keys(black), Then receiver will remind that learning is finished. Only transmitter was learned can control receiver. 6. It has corresponding keys LED indicator, Pressing KEY, The LED indicator will flash. 7. key of color tempreture can be chosen to use. 8. Transmitter has learning key and toggle switch with 4 position (reserved). It has O/D switch. 9. Transmitter can be controlled by hand or you can place it in wall socket to control. To assure continued FCC compliance: FEDERAL COMMUNICATIONS COMMISSION INTERFERENCE STATEMENT This equipment has been tested and found to comply with the limits for a Class B digital device, pursuant to Part 15 of the FCC Rules. These limits are designed to provide reasonable protection against harmful interference in a residential installation. This equipment generates, uses and can radiate radio frequency energy and, if not installed and used in accordance with the instructions, may cause harmful interference to radio communications. However, there is no guarantee that interference will not occur in a particular installation. If this equipment does cause harmful interference to radio or television reception, which can be determined by turning the equipment off and on, the user is encouraged to try to correct the interference by one or more of the following measures: --Reorient or relocate the receiving antenna. --Increase the separation between the equipment and receiver. --Connect the equipment into an outlet on a circuit different from that to which the receiver is connected. --Consult the dealer or an experienced radio/TV technician for help. CAUTION: Any changes or modifications not expressly approved by the grantee of this device could void the user's authority to operate the equipment. FCC ID:2AQZU-18010 This device complies with Part 15 of the FCC Rules. Operation is subject to the following two conditions: (1) This device may not cause harmful interference, and (2) this device must accept any interference received, including interference that may cause undesired operation. IC WARNING This device contains licence-exempt transmitter(s) that comply with Innovation, Science and Economic Development Canada’s licence-exempt RSS(s). Operation is subject to the fol lowing two conditions: (1) This device may not cause interference. (2) This device must accept any interference, including interference that may cause undesir ed operation of the device. L’émetteur/récepteur exempt de licence contenu dans le présent appareil est conforme aux CNR d’Innovation, Sciences et Développement économique Canada applicables aux appareils radio exempts de licence. L’exploitation est autorisée aux deux conditions suivantes: 1. L’appareil ne doit pas produire de brouillage; 2. L’appareil doit accepter tout brouillage radioélectrique subi, même si le brouillage est susceptible d’en compromettre le fonctionnement.
Users Manual
.CEILING FAN REMOTE CONTROLLER OPERATION AND INSTALLATION INSTRUCTIONS (Please keep this instruction pamphlet.) IMPORTANT POINTS TO REMEMBER: 1. Read and save these instructions. 2. Please note that all fixed wiring appliances should be installed by a qualified electrician. 3. The supply to the remote control receiver should be connected through a mains switch, i.e. existing wall switch. 4. Disconnect from power supply at wall switch before working on remote control receiver or ceiling fan. 5. Install receiver into the ceiling fan canopy of the fan to ensure proper protection. 6. This unit is to be used for the control of ceiling fan and in an AC120V 60Hz power supply only. 7. Do not install in wet locations or immerse in water. 8. Do not pull on or cut leads shorter. 9. Do not drop or bump the unit. 10. PLEASE NOTE: The battery will weaken with age and should be replaced before leaking takes place as this will damage the transmitter. Dispose of used battery properly, keep the battery out of reach of children. 11. CAUTION: To reduce the risk of fire or injury, do not use this product in conjunction with any variable (rheostat) wall control. INSTALLATION INSTRUCTIONS 1. Ceiling fan must be set at HIGH speed and light kit (If any) at ON position by pressing the “Light Switch” after installation. 2. Press and hold the emitter’s “SET” key for about 3S in 30 seconds of turning the Receivers AC power ON, The receiver learn the emitter’s CODE and the emitter can remote the receiver.(FIG.1 / 2 / 3) 3. Your transmitter is ready for use after 2pc DC1.5V/ AAA, battery installation(FIG. 1) IMPORTANT YOU MUST SET CEILING FAN MANUAL SWITCH TO HIGH SPEED AND LIGHT KIT (IF ANY) TO ON POSITION BEFORE OPERATING REMOTE CONTROL. CAUTION: INCORRECT WIRE CONNECTION WOULD DAMAGE THIS RECEIVER . FIG. 2 FIG. 1 FIG. 3 FUNCTIONS OF TRANSMITTER 1、 ON/OFF - Press and release immediately to turn on or off light. DIMMER - Press and hold to dim or brighten light to the desired level and release. (Only when the dip switch was set on “D” dimmer setting) 2. FAN SPEED:Pressing key s 1、2、3、4、5、6、, it will control receiver FAN at speed 1~6 and OFF. 3. Pressing key : Press and release immediately to set fan direction: 4.. Natural wind Function: Pressing key , Fan will run in natural wind. 5.. Learning keys: Learning distance is no limition. Please press learning keys(black), Then receiver will remind that learning is finished. Only transmitter was learned can control receiver. 6. It has corresponding keys LED indicator, Pressing KEY, The LED indicator will flash. 7. key of color tempreture can be chosen to use. 8. Transmitter has learning key and toggle switch with 4 position (reserved). It has O/D switch. 9. Transmitter can be controlled by hand or you can place it in wall socket to control. To assure continued FCC compliance: FEDERAL COMMUNICATIONS COMMISSION INTERFERENCE STATEMENT This equipment has been tested and found to comply with the limits for a Class B digital device, pursuant to Part 15 of the FCC Rules. These limits are designed to provide reasonable protection against harmful interference in a residential installation. This equipment generates, uses and can radiate radio frequency energy and, if not installed and used in accordance with the instructions, may cause harmful interference to radio communications. However, there is no guarantee that interference will not occur in a particular installation. If this equipment does cause harmful interference to radio or television reception, which can be determined by turning the equipment off and on, the user is encouraged to try to correct the interference by one or more of the following measures: --Reorient or relocate the receiving antenna. --Increase the separation between the equipment and receiver. --Connect the equipment into an outlet on a circuit different from that to which the receiver is connected. --Consult the dealer or an experienced radio/TV technician for help. CAUTION: Any changes or modifications not expressly approved by the grantee of this device could void the user's authority to operate the equipment. FCC ID:2AQZU-18010 This device complies with Part 15 of the FCC Rules. Operation is subject to the following two conditions: (1) This device may not cause harmful interference, and (2) this device must accept any interference received, including interference that may cause undesired operation. IC WARNING This device contains licence-exempt transmitter(s) that comply with Innovation, Science and Economic Development Canada’s licence-exempt RSS(s). Operation is subject to the fol lowing two conditions: (1) This device may not cause interference. (2) This device must accept any interference, including interference that may cause undesir ed operation of the device. L’émetteur/récepteur exempt de licence contenu dans le présent appareil est conforme aux CNR d’Innovation, Sciences et Développement économique Canada applicables aux appareils radio exempts de licence. L’exploitation est autorisée aux deux conditions suivantes: 1. L’appareil ne doit pas produire de brouillage; 2. L’appareil doit accepter tout brouillage radioélectrique subi, même si le brouillage est susceptible d’en compromettre le fonctionnement.
External Photos
Report No.: W EXHIBI EUT View 1 EUT View 2 WTH20X040 T 2 - EUT 1 2 19312W T EXTER RNAL PH HOTOGR APHS Mode RF el: TR330A-3 Part 15.231a Report No.: W EUT View 3 EUT View 4 WTH20X040 3 4 19312W Mode RF el: TR330A-3 Part 15.231a Report No.: W EUT View 5 EUT View 6 WTH20X040 5 6 19312W Mode RF el: TR330A-3 Part 15.231a Report No.: W EUT View 7 EUT View 8 WTH20X040 7 8 19312W Mode RF el: TR330A-3 Part 15.231a Report No.: W EUT View 9 EUT View 1 WTH20X040 9 10 19312W Mode RF el: TR330A-3 Part 15.231a Report No.: W EUT View 1 WTH20X040 11 19312W Mode RF el: TR330A-3 Part 15.231a
ID Label/Location Info
Report No.: W EXHIBI Proposed Specificatio n silk-screened Proposed WTH20X040 T 1 - PRO FCC ID La ns: Text is b d onto the EU Label Loca 19312W ODUCT L abel Forma black in colo UT or shall be ation on EU LABELIN at FCC ID: 2 r and justifie e affixed at a UT FCC NG 2AQZU-18 ed. Labels ar conspicuous ID Label Lo 010 re printed in location on t cation indelible ink the EUT. Mode RF k on perman el: TR330A-3 Part 15.231a nent adhesivee
Internal Photos
Report No.: W EXHIBI EUT Housi n EUT Housi n WTH20X040 T 3 - EUT ng and Boar ng and Boar 19312W T INTER rd View 1 rd View 2 NAL PHO OTOGRA APHS Mode RF el: TR330A-3 Part 15.231a Report No.: W Solder Boar Solder Boar WTH20X040 rd-Compone rd-Compone 19312W ent View 1 ent View 2 Mode RF el: TR330A-3 Part 15.231a Report No.: W Antenna V i 304.25M WTH20X040 iew MHz Antenna 19312W Mode RF el: TR330A-3 Part 15.231a
Test Report
Model: TR330A-3 Report No.: WTH20X04019312W Page 1 of 19 RF Part 15.231a FCC Part 15C Measurement and Test Report For Satellite Electronic(Zhong shan)Ltd. No.8, Chuang Ye Road, Torch Development Zone, Zhongshan, Guangdong, China. FCC ID: 2AQZU-18010 FCC Rule(s): FCC Part 15.231 Product Description: CEILING FAN REMOTE CONTROLLER Tested Model: TR330A-3 Report No.: WTH20X04019312W Sample Receipt Date: Apr.15, 2020 Tested Date: Apr.15, 2020 to Apr.21, 2020 Issued Date: Apr.21, 2020 Tested By: Jack Huang / Engineer Reviewed By: Lion Cai / RF Manager Approved & Authorized By: Silin Chen / Manager Prepared By: Waltek Testing Group (Shenzhen) Co., Ltd. 1/F., Room 101, Building 1, Hongwei Industrial Park, Liuxian 2nd Road, Block 70 Bao'an District, Shenzhen, Guangdong, China Tel.: +86-755-33663308 Fax.: +86-755-33663309 Website: www.semtest.com.cn Note: This test report is limited to the above client company and the product model only. It may not be duplicated without prior permitted by Waltek Testing Group (Shenzhen) Co., Ltd. Model: TR330A-3 Report No.: WTH20X04019312W Page 2 of 19 RF Part 15.231a TABLE OF CONTENTS 1. GENERAL INFORMATION ................................................................................................................................... 4 1.1 PRODUCT DESCRIPTION FOR EQUIPMENT UNDER TEST (EUT) ............................................................................... 4 1.2 TEST STANDARDS ................................................................................................................................................... 5 1.3 TEST METHODOLOGY ............................................................................................................................................. 5 1.4 TEST FACILITY ....................................................................................................................................................... 5 1.5 EUT SETUP AND TEST MODE ................................................................................................................................. 6 1.6 MEASUREMENT UNCERTAINTY .............................................................................................................................. 6 1.7 TEST EQUIPMENT LIST AND DETAILS ..................................................................................................................... 7 2. SUMMARY OF TEST RESULTS ........................................................................................................................... 8 3. ANTENNA REQUIREMENT .................................................................................................................................. 9 3.1 STANDARD APPLICABLE ......................................................................................................................................... 9 3.2 TEST RESULT.......................................................................................................................................................... 9 4. RADIATED EMISSIONS ....................................................................................................................................... 10 4.1 STANDARD APPLICABLE ....................................................................................................................................... 10 4.2 TEST PROCEDURE ................................................................................................................................................. 11 4.3 CORRECTED AMPLITUDE & MARGIN CALCULATION ............................................................................................ 12 4.4 SUMMARY OF TEST RESULTS/PLOTS .................................................................................................................... 12 5. 20DB BANDWIDTH ............................................................................................................................................... 15 5.1 STANDARD APPLICABLE ....................................................................................................................................... 15 5.1 TEST PROCEDURE ................................................................................................................................................. 15 5.2 SUMMARY OF TEST RESULTS/PLOTS .................................................................................................................... 15 6. TRANSMISSION TIME ......................................................................................................................................... 16 6.1 STANDARD APPLICABLE ....................................................................................................................................... 16 6.2 TEST PROCEDURE ................................................................................................................................................. 16 6.3 SUMMARY OF TEST RESULTS/PLOTS .................................................................................................................... 16 7. DUTY CYCLE ......................................................................................................................................................... 17 7.1 STANDARD APPLICABLE ....................................................................................................................................... 17 7.2 TEST PROCEDURE ................................................................................................................................................. 17 7.3 SUMMARY OF TEST RESULTS/PLOTS .................................................................................................................... 17 8. CONDUCTED EMISSIONS .................................................................................................................................. 19 8.1 TEST PROCEDURE ........................................…
Text truncated - open the document above for the full version.
Test Setup Photos
Report No.: W EXHIBI Radiation E Radiation E WTH20X040 T 4 - TES Emission Tes Emission Tes 19312W ST SETUP st Setup (Belo st Setup (30M P PHOTO ow 30MHz) MHz to 1GHz OGRAPH z) HS Mode RF el: TR330A-3 Part 15.231a Report No.: W Radiation E Radiation E WTH20X040 Emission Tes Emission Tes 19312W st Setup (1GH st Setup (Abo Hz to 18GHz ove 18GHz) z) Mode RF el: TR330A-3 Part 15.231a Report No.: W WTH20X040 19312W Mode RF el: TR330A-3 Part 15.231a
Contact Information
Applicant
sean zheng(Manager)
Test Firm
Waltek Testing Group (Shenzhen) Co., Ltd.Jandy So
Technical Specifications
| # | Rule Parts | Frequency Range | Power Output |
|---|---|---|---|
| 1 | 15.231 | 304.25 MHz - 304.25 MHz | - |
Other Applications from Satellite Electronic(Zhong Shan)Ltd.

2AQZU-18085
Sep 10, 2026CEILING FAN REMOTE CONTROL
Equipment Class
DSC - Part 15 Security/Remote Control Transmitter
2AQZU-18083
Aug 24, 2026Ceiling Fan Wall Control
Equipment Class
DXX - Part 15 Low Power Communication Device Transmitter
2AQZU-18073
Dec 04, 2025CEILING FAN REMOTE CONTROL
Equipment Class
DSC - Part 15 Security/Remote Control Transmitter
2AQZU-18071
Nov 27, 2025CEILING FAN REMOTE CONTROL
Equipment Class
DSC - Part 15 Security/Remote Control Transmitter
2AQZU-18075
Nov 27, 2025CEILING FAN REMOTE CONTROL
Equipment Class
DSC - Part 15 Security/Remote Control Transmitter