2BAKT-STEALTHCAR DSP AMPLIFIER
ETON CAR-AUDIO GMBH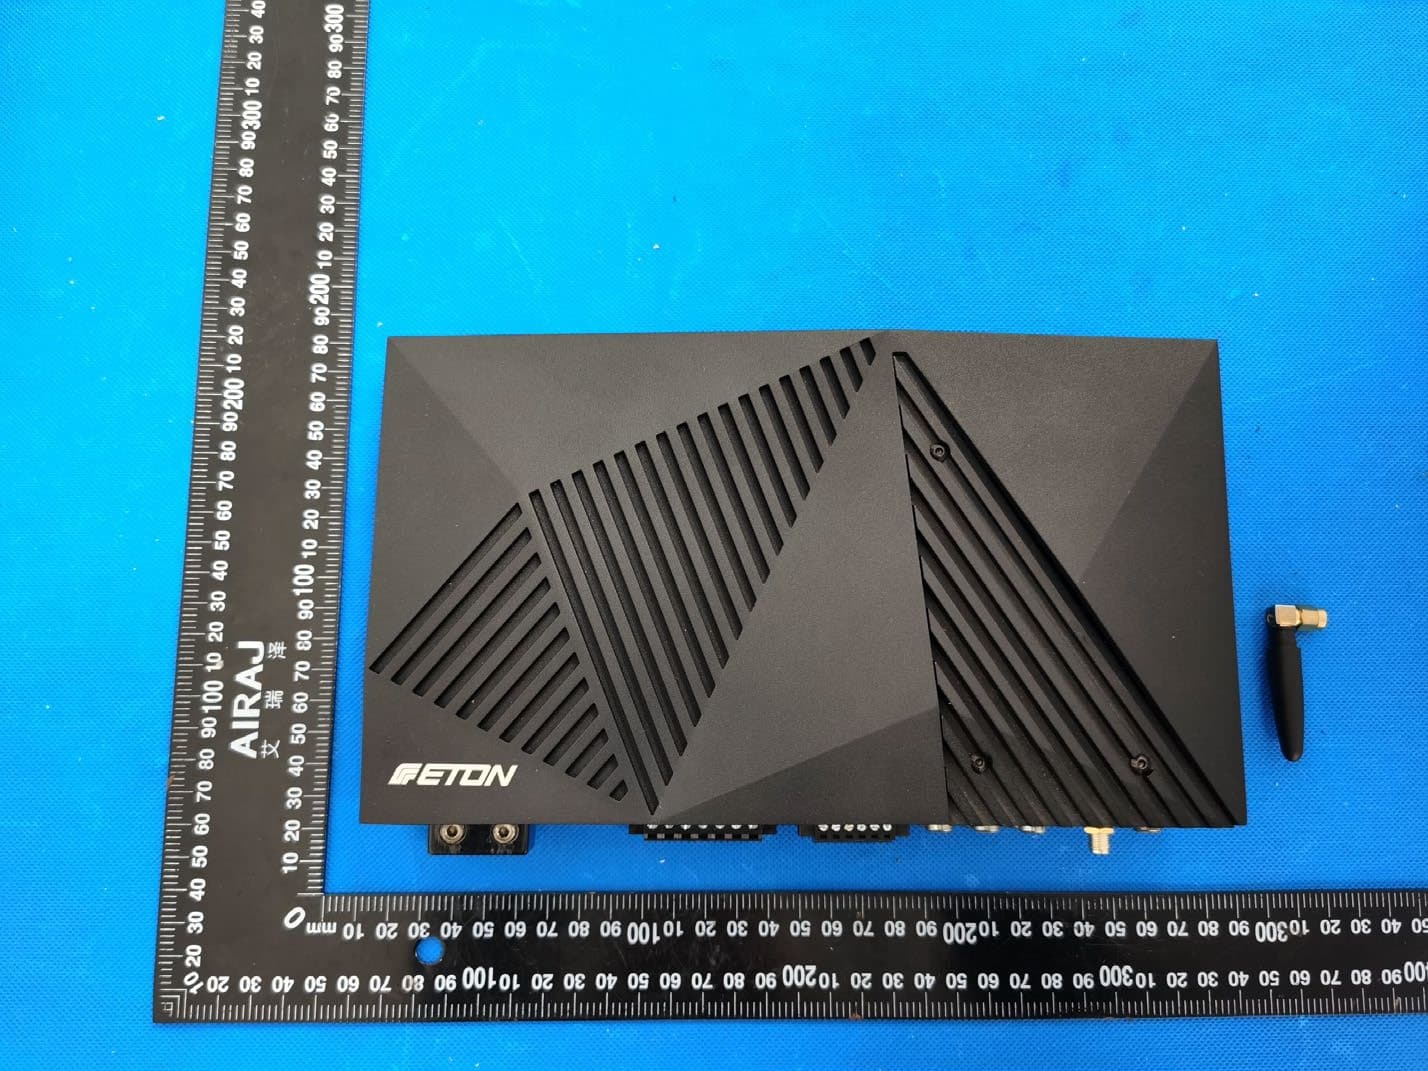
Click to zoom
Application Details
- Equipment Class
- DTS - Digital Transmission System
- Date of Grant
- Mar 26, 2023
- Application Purpose
- Original Equipment
- Date of Application
- Mar 26, 2023
- Equipment Note
- CAR DSP AMPLIFIER
- Frequency Range
- 2412.00000000 - 2462.00000000
- Company
- ETON CAR-AUDIO GMBH
- Country
- Germany
Documents & Files
Document Text
Text extracted from the exhibit documents filed with the FCC. Open a document above to read the original.
Users Manual
7-Kanal Class-D DSP Verstärker 7-channel Class-D DSP amplifi er DSP SOFTWARE INSTRUCTION DSP SOFTWARE ANLEITUNG STEALTH 7.1 DSP STEALTH 7.1 DSP DSP 2 INHALT / CONTENT EinführungIntroduction DeutschEnglish Introduction 2 Safety Instructions 3 Table of Contents 4 Tools 4 Precautions - Read first 5 Before Installation 7 Installation and wiring 8 Adjustments 19 ETONDSPcontrol app 21 Trouble shooting 70 Specifications 74 Einführung 2 Sicherheitshinweise 3 Verpackung und Inhalt 4 Werkzeuge 4 Vorsichtsmaßregeln - Zuerst lesen 5 Vor dem Einbau 7 Einbau und Verkabelung 8 Einstellungen 19 ETONDSPcontrol App 21 Fehlerbehebung 70 Technische Daten 74 ETON bedankt sich ausdrücklich für den Kauf des Verstärkers und beglückwünscht Sie zu der Wahl dieses ausgezeichneten Produktes. Die ETON Verstärker garantieren hervorra- gende Leistungen. Die elektrischen, mechani- schen und klanglichen Eigenschaften bleiben über die gesamte Lebensdauer des Produk- tes erhalten. Wir wünschen Ihnen viel Freude beim Hören. Bedienungsanleitung Die vorliegende Bedienungsanleitung wurde so konzipiert, dass Sie Ihnen eine korrekte Installation ermöglicht. Sie enthält Informationen und grundsätzliche Vorgehens- weisen für die korrekte Funktionsweise des Produktes und deren daran angeschlossenen externen Geräte. Bitte lesen Sie die Bedie- nungsanleitung sorgfältig, bevor Sie mit der Installation oder dem Anschluss des Verstär- kers beginnen. ETON expressly thanks you for deciding to purchase this amplifier and congratulates you on the selection of this excellent product. The ETON amplifiers are a guarantee for out- standing performance. The electrical, mecha- nical and tonal characteristics will be main- tained at the original high standard throughout the entire operational life of this product. We wish you many pleasant listening hours. Operating Instructions The current operational instructions are de- signed to ensure correct installation of the amplifier. They contain information and es- sential procedures for the correct operation of the product and its attached external devices. Please carefully study the operating instruc- tions before beginning with the installation or the connection of the amplifier. 3 SicherheitshinweiseSafety Instructions Achtung ! Bitte lesen Sie alle Warnungen in dieser An- leitung. Diese Informationen sind hervorgeho- ben und eingefügt, um Sie über mögliche per- sönliche Schäden oder Beschädigungen von Sachwerten zu informieren. Hörschäden DAUERHAFTES AUSGESETZTSEIN VON LAUTSTÄRKEN ÜBER 85dB KANN ZUR SCHÄDIGUNG DES GEHÖRS FÜHREN. VERSTÄRKER BETRIEBENE AUTOHIFI- ANLAGEN KÖNNEN LEICHT SCHALLDRÜ- CKE ÜBER 130dB ERZEUGEN UND IHR GEHÖR NACHHALTIG SCHÄDIGEN. BITTE BENUTZEN SIE DEN GESUNDEN MEN- SCHENVERSTAND UND VERMEIDEN SIE SOLCHE RISIKEN. Lautstärke und Fahrerbewusstsein Der Gebrauch von Musikanlagen kann das Hören von wichtigen Verkehrsgeräuschen behindern und dadurch während der Fahrt Gefahren auslösen. ETON übernimmt keine Verantwortung für Gehörschäden, körperliche Schäden oder Sachschäden, die aus dem Gebrauch oder Missbrauch seiner Produkte entstehen. Attention ! Please read all warnings found in this manual. This information is highlighted and included to inform you of the potential danger of personal injury or damage to property. Hearing Damage CONTINOUS EXPOSURE TO SOUND PRESSURE LEVELS OVER 85dB MAY CAU- SE PERMANENT HEARING LOSS. HIGH POWERED AUTO-SOUND SYSTEMS MAY PRODUCE SOUND PRESSURE LEVELS WELL OVER 130dB. THIS MAY CAUSE DA- MAGE OF HEARING. USE COMMON SEN- SE AND AVOID SUCH RISKS! Volume and Driver Awareness Use of sound components can impair your ability to hear necessary traffic sounds and may constitute a hazard while driving your automobile. ETON accepts no liability for hearing loss, bodily injury or property damage as a result of use or misuse of this product. ACHTUNG! Sollen Karosseriebleche ausge- schnitten oder entfernt werden, nehmen Sie Kontakt mit Ihrer Fahr- zeug-Vertragswerkstatt auf. Bei Beschädigungen tragender Karosserieteile kann die Betriebser- laubnis erlöschen. ATTENTION! If sheet metal must be cut or removed contact your authorized car dealer for professional advice. By damage to supporting body structures the safety certificate may be withdrawn. 4 Verpackung und Inhalt WerkzeugeTools Table of contents Der Verstärker ist in einem dafür konstruierten schützenden Karton verpackt. Beschädigen Sie die Verpackung nicht und bewahren Sie diese für die spätere Verwendung im Schadensfalle auf. Kontrollieren Sie bei Erhalt des Verstärkers, dass: Die Verpackung intakt ist, der Inhalt den Spezifikationen entspricht und das Produkt keine Beschädigung aufweist. Bei Fehlen oder Beschädigung von Teilen setzen Sie sich bitte sofort mit Ihrem Händler in Verbindung. Geben Sie hierbei sowohl das Modell als auch die Se- riennummer an, die an der Unterseite des Ver- stärkers abgelesen werden kann. Inhalt: Endstufe, Bedienungsanleitung (Die Software- anleitung finden Sie auf unserer ETON Websi- te), Befestigungszubehör mit Haltefüße, Fern- bedienung mit Kabel, Innensechskantschlüssel, High Level Steckverbinder, LS-Steckverbindun- gen, WiFi-Antenne. The amplifier is packed into an especially con- structed protecting carton. Do not damage the packing and store it for future use in the case of possible damage. Upon receipt of the amplifier verify that: The packing is not damaged, the contents are ac- cording to specifications, the product shows no obvious damage. In the case of missing or damaged parts plea- se contact immediately your dealer providing the model name as well as the serial number that is shown on the bottom of the amplifier. Content: Amplifier, operating instructions (software ins- tructions can be found on our ETON website), mounting accessories with mounting feet, re- mote control with cable, Hexagonal wrench, High Level Adapter plug connectors, loudspe- aker plug connections, WiFi Antenna. Die nachfolgenden Werkzeuge werden für den Einbau benötigt: Sicherungshalter und…
Text truncated - open the document above for the full version.
Users Manual
33 Sobald Sie Ihr Systemlayout angelegt ha- ben, können Sie nun im nächsten Schritt die Eingangs-Einstellungen festlegen, d.h. Sie können die Eingangssignale für die einzel- nen Lautsprecher defi nieren. Dazu tippen Sie im oberen Bereich auf den Pfeil, neben dem ETON Logo und bestätigen Sie mit OK das Pop-Up Menü. Once you have created your system layout, you can now defi ne the input settings in the next step, i.e. you can defi ne the input signals for the individual loudspeakers. To do this, tap on the arrow next to the ETON logo in the up- per area and confi rm the pop-up menu with OK. Eingangs-EinstellungenInput settings 34 EingangseinstellungenInput settings Tippen Sie nun die einzelnen Lautsprecher im Systemlayout an, danach können Sie die Ein- gangsquellenwerte defi nieren. Sie können das Analog- und Digital-Eingangssignal für jeden einzelnen Lautsprecher defi nieren. Achten Sie dabei auf den Ausgangs-Kanal. Bestätigen Sie die Eingabe mit "OK".Speichern Sie danach Ihre Einstellungen mit Tippen auf das Speichern Icon. ACHTUNG: Durch das Speichern werden alle Einstellungen der gesamten App übernom- men und bei jedem Speichervorgang werden alle weiteren Einstellungen überspreichert! Touch the individual speakers in the system layout and you can then defi ne the input sour- ce values. You can defi ne the analog and digi- tal input signal for each speaker. Pay attention to the output channel Confi rm the entry with "OK". Then save your settings by tapping on the Save icon. ATTENTION: By saving, all settings of the entire app will be accepted and all further settings will be skipped each time you save! 35 Erweiterte EinstellungenAdvanced Tuning Nachdem nun alle Lautsprecher im System- layout defi niert wurden, alle Signalquellen defi niert, gehen Sie im nächsten Schritt in die "Advanced Settings". Dazu tippen Sie auf Home und wählen Sie den Button "Tuning" und das Untermenü "Advanced Tuning". Now that all loudspeakers have been defi ned in the system layout and all signal sources have been defi ned, go to "Advanced Settings" in the next step. To do this, tap Home and select the "Tuning" button and the "Advanced Tuning" submenu. 36 Erweiterte EinstellungenAdvanced Tuning In den nächsten Schritten werden die Einstel- lungen im Menüpunkt Advanced Tuning erläu- tert. Seien Sie hier besonders vorsichtig, wir empfehlen Ihnen, die Einstellungen sich zu merken oder sich zu notieren. Sie können im Menüpunkt "Advanced Tuning" Filtereinstellungen, Laufzeit sowie das EQ einstellen. Ebenso können Sie eine Messung der Fahrzeugakustik vornehmen, dank der Stealth integrierten RTA-Funktion. Darüber- hinaus können Sie Lautstärkebereiche für die Einzelnen Kanäle vornehmen. Bevor Sie mit den EQ, Filter- und Laufzeit- einstellungen fortfahren empfehlen wir Ihnen nochmals alle Ausgangseinstellungen zu überprüfen sowie die Eingangseinstellungen und diese zu speichern. ACHTUNG! Geben Sie kein ungefiltertes Signal auf Ihre Hochtöner im vollalktiven Betrieb! Stellen Sie zuvor die nötigen Filter ein und definieren Sie einen Hz-Bereich, Ihren Hochtönern entsprechend, bevor Sie ein Eingangssignal auf diese geben. Fal- sche Frequenzen können den Hochtöner zerstören! Verschaffen Sie sich nun im nächsten Schritt einen Überblick über die Einstellmöglichkei- ten Ihres DSPs. Dazu ist es hilfreich einmal alle möglichen Filter und EQ durchzuspielen. Der STEALTH DSP verfügt über vorgefertigte Filter wie Bandpass, Highpass-, Lowpass- und Shelffilter, er kann in 0.1 Hz Schritten ein- gestellt werden. Wählen Sie hierzu am besten die Tieftöner aus und spielen Sie alle Filter- funktionen einmal durch. Speichern Sie die- se jedoch nicht! Achten Sie darauf, dass kein Signal übermittelt wird. Nachdem Sie sich ei- nen Überblick verschafft haben, können Sie den nächsten Schritten folgen. Bitte lesen Sie hierzu genaustens die Bedienungsanleitung! In the next steps, the settings in the Advanced Tuning menu item are explained. Be especial- ly careful here, we recommend that you me- morize the settings or make a note of them. In the menu item "Advanced Tuning" you can set filter settings, run time and EQ. You can also measure the vehicle acoustics thanks to the Stealth integrated RTA function. In additi- on, you can adjust the volume ranges for the individual channels. Before you continue with the EQ, filter and delay settings, we recommend that you check all output settings again and save the input settings. ATTENTION: Do not apply an unfiltered si- gnal to your tweeters in fully active mode! Set the necessary filters and define a Hz range according to your tweeters before applying an input signal to them. Wrong frequencies can destroy the tweeter! The next step is to get an overview of the setting options of your DSP. It is helpful to play through all possible filters and EQs. The STEALTH DSP has prefabricated filters like Bandpass, Highpass, Lowpass and Shelffilter, it can be adjusted in 0.1 Hz steps. The best way to do this is to select the woofers and play through all the filter functions once. But don't save them! Make sure that no signal is trans- mitted. After you have gained an overview, you can follow the next steps. Please read the operating instructions carefully! 37 Erweiterte EinstellungenAdvanced Tuning Streichen Sie zwischen den einzelnen Ka- nälen im "CH Level" Menü, alle aktiven Ka- näle werden hier automatisch angezeigt, sie können hier über die Drehregler Lautstärke anpassungen vornehmen. Die Lautsprecher sind so benannt, wie sie zuvor im System Layout erstellt wurden. Über das "Verknüp- fen" Icon lassen sich Kanalpaare verbinden. Zum Speichern, wählen Sie hier ebenso das "Speichern" Icon oben rechts. Swipe between the individual channels in the "CH Level" menu, all active channels are au- tomatically displayed here, you can adjust the volume using the knobs. The loudspeakers are named as they were previously created in the system layout. Channel pairs can be connected via the "Link" icon. To save, also select the "Sa…
Text truncated - open the document above for the full version.
Users Manual
47 Erweiterte EinstellungenAdvanced Tuning Ausgabe Lautsprecher Aus-/Eingangs EQ Parameter / Filter Aktueller Kanal Output speaker Output / Input EQ Parameters / Filters Actual channel 48 Erweiterte EinstellungenAdvanced Tuning Jeder Kanal Ihres DSP Verstärkers verfügt über 31 EQ Bänder, diese sind wie folgt aufgeschlüs- selt: 21 EQ Eingangs-Bänder sowie 10 EQ Aus- gangs-Bänder. Ihr ETON DSP verfügt über vordefi nierte EQ Typen: EQ, PEQ, HSLF und LSLF. PEQ: Q-Gütebereich: 0.1 – 10 (0.1 Abstufung möglich, Default: 3.0) LSLF/HSLF: Q-Gütebereich: 0.3 – 2 (0.1 Abstufung möglich, Default: 0.7) Gain Range: -12 dB bis + 12 dB (0.1 dB Abstufung möglich) Zum Einstellen des Ausgangs-EQ vergewissern Sie sich, dass Sie sich im "CH EQ" befi nden. Sie können zwischen Ein- und Ausgangs-EQ umschalten, indem Sie auf auf "CH EQ" bzw. "IN EQ" tippen. Nachdem Sie auf "CH EQ" ge- schaltet haben, können Sie die einzustellenden Lautsprecher mittels des "Zahnrad" Symbols auswählen. Tippen Sie nun einen Lautsprecher an, diese sind gruppiert, sollten Sie die Grup- pierung aufheben wollen, tippen Sie auf das "Koppeln" Symbol, danach können sie einzelne Lautsprecher im Ausgangs-EQ einstellen. Soll- ten Sie Ihre Lautsprecher wieder miteinander verbinden wollen, können Sie dies in umgekehr- ter Reihenfolge, mit einem Tap auf das "Kop- peln" Symbol bewirken. Ihr DSP kopiert nun die Einstellungen eines Einzellautsprechers auf ein Kanalpaar, hierzu können Sie festlegen, welche Einstellungen kopiert werden sollen. Each channel of your DSP amplifi er has 31 EQ bands, broken down as follows: 21 EQ in- put bands and 10 EQ output bands. Your ETON DSP has pre-defi ned EQ bands. Guys: EQ, PEQ, HSLF and LSLF. PEQ: Q quality range: 0.1 - 10 (0.1 gradation possible, default: 3.0) LSLF/HSLF: Q quality range: 0.3 - 2 (0.1 gradation possible, default: 0.7) Gain Range: -12 dB to + 12 dB (0.1 dB gradation possible) To adjust the output EQ, make sure that you are in "CH EQ". You can switch between in- put and output EQ by tapping "CH EQ" or "IN EQ". After switching to "CH EQ", you can select the speakers to be adjusted using the "Gear" icon. If you want to ungroup them, tap on the "Pair" symbol, then you can set indi- vidual loudspeakers in the output EQ. If you want to reconnect your speakers, you can do this in reverse order by tapping the "Pair" icon. Your DSP now copies the settings of a single loudspeaker to a channel pair, for this you can specify which settings are to be copied. Ausgangs-EQOutput EQ 49 Erweiterte EinstellungenAdvanced Tuning Speichern Sie Ihre Einstellungen im Aus- gangs-EQ nachdem Sie den Einzellautsprecher bzw. das Kanalpaar erfolgreich eingestellt ha- ben mit Tippen auf das "Speichern" Icon. Save your settings in the output EQ after you have successfully set the individual loudspeaker or channel pair by tapping on the "Save" icon. 50 Erweiterte EinstellungenAdvanced Tuning Sie können ebenso die 21 Eingangsbänder pro Kanal in Ihrem Eingangs-EQ einstellen. Dazu wechseln Sie den EQ, indem Sie auf "CH EQ" tippen. Danach wird "IN EQ" angezeigt, nun be- fi nden Sie sich im Eingangs-EQ. Hier können Sie alle Eingangskanäle mit einem EQ verse- hen. Zum Auswählen eines Eingangs tippen Sie auf das "Zahnrad" Icon, es öffnet sich eine Übersicht. Alle Kanäle die belegt sind, werden nun angezeigt. Es sind stets Kanalpaare mit- einander gekoppelt, zum einzelnen Einstellen müssen Sie wie bereits in den Ausgangs-EQ Einstellungen bekannt, die Kopplung aufheben. Dazu tippen Sie auf das "Koppeln" Icon. Beachten Sie: das Kanalpaar bzw. der Einzel- kanal der aktiv ist, wird farblich grün hinterlegt. Sollten Kanäle ausgegraut sein, sind diese nicht belegt bzw. nicht aktiv. Beachten Sie den "Mode" in dem Sie sich befi nden (Analog, SPDIF, Streaming). Zum Einstellen eines EQ wählen Sie nun einen Kanal / ein Kanalpaar (digital oder analog) aus und stellen Sie die gewünschten Eigenschaften des EQ ein. Der Kanal in dem Sie sich befi nden, wird oben links angezeigt. You can also set the 21 input bands per chan- nel in your input EQ. To do this, change the EQ by tapping "CH EQ". IN EQ" is then dis- played and you are now in the input EQ. Here you can assign an EQ to all input channels. To select an input, tap on the "Gear" icon to open an overview. All channels that are oc- cupied are now displayed. There are always channel pairs coupled to each other, for indi- vidual setting you have to cancel the coupling as already known in the output EQ settings. To do this, tap on the "Pair" icon. Note: the channel pair or single channel that is active is highlighted in green. If channels are grayed out, they are not occupied or not active. Note the "Mode" you are in (Analog, SPDIF, Streaming). To set an EQ, select a channel / channel pair (digital or analog) and set the desired proper- ties of the EQ. The channel you are in is dis- played in the upper left corner. Eingangs-EQInput EQ 51 Erweiterte EinstellungenAdvanced Tuning Speichern Sie Ihre Einstellungen im Ein- gangs-EQ nachdem Sie den Einzellautsprecher bzw. das Kanalpaar erfolgreich eingestellt ha- ben mit Tippen auf das "Speichern" Icon. Save your settings in the input EQ after you have successfully set the individual loudspeaker or channel pair by tapping on the "Save" icon. 52 Erweiterte EinstellungenAdvanced Tuning Ihr ETON Stealth 7.1 DSP verfügt über ein eingebaute Messeinrichtung, zur Vermessung der Fahrzeugakustik. Dies ist besonders hilf- reich um Laufzeiten und EQs optimal zu set- zen bzw. einzustellen. Bitte beachten Sie, für diese Funktion wird ein nicht im Zubehör enthaltenes Mess-Mikrofon benötigt. Dieses können Sie über Ihren ETON Fachhändler beziehen, dieser berät Sie auch gerne. Um die Funktion "RTA" zu nutzen entfernen Sie zunächst die Abdeckung auf der Ober- seite an Ihrem Stealth DSP-Verstärker. Dazu drehen Sie die 3 Schrauben auf der Ober- seite des Gerätes heraus (in Bild auf Seite 19 beschrieben). Danach können Sie das Mess-Mikrofon in die 3,5 mm Klinke Buchse einstecke…
Text truncated - open the document above for the full version.
Users Manual
66 Setup EinstellungenSetup adjustment Von Zeit zu Zeit ist es nötig die App sowie die aufgespielte MCU Version von Ihrem Verstärker zu aktualisieren. Für ein App Update deinstal- lieren Sie bitte zunächst Ihre bisherige ETON DSP control app und laden Sie sich die neueste App im Google PlayStore oder im Apple Apps- tore herunter und installieren Sie diese. Nähere Informationen fi nden Sie unter www.etongmbh. com Um Ihre MCU aktuell zu halten, gehen Sie bit- te in den Einstellungen unter dem Punkt "MCU Version" und tippen Sie auf "Update". Für ein erfolgreiches Update müssen Sie mit einem Smartphone mit Internetverbindung verbunden sein. Schließen Sie bitte während des komplet- ten Update Vorgangs nicht die Endstufe vom Strom ab. Nachdem das Update geladen wur- de, fährt die Endstufe runter und startet danach neu. Bitte warten Sie den Updatevorgang ab, dies kann einige Minuten dauern. Schließen Sie nach einiger Zeit die App auf Ihrem Smartphone und starten Sie die App neu. Sie sollten danach wieder eine Verbindung zur Ihrer Endstufe fi n- den. Sobald Sie wieder mit der Endstufe ver- bunden sind, überprüfen Sie die MCU Version. From time to time it is necessary to update the app and the MCU version of your amplifi er. To update your app, please uninstall your previous ETON DSP control app and download and in- stall the latest app from Google PlayStore or Ap- ple appstore. Further information can be found at www.etongmbh.com To keep your MCU up to date, please go to the settings under "MCU Version" and tap on "Update". For a successful update, you must be connected to a smartphone with an Internet connection. Please do not disconnect the pow- er amplifi er from the power supply during the complete update process. After the update has been loaded, the power amplifi er shuts down and restarts afterwards. Please wait for the up- date process, this may take a few minutes. After some time, close the app on your smartphone and restart the app. After that you should fi nd a connection to your power amplifi er again. As soon as you are connected to the power ampli- fi er again, check the MCU version. MCU UpdateMCU update 67 Diese Funktion ist nur für die ETON Mini 150.4 DSP, nicht funktionstüchtig bei der Stealth 7.1 DSP. Vier unterschiedliche digitale Filter, die die Ab- spielcharakteristik, Klangfarbe beeinfl ussen. Sie können hier nach Gehör einen Filter auswählen, der Ihren Klangeigenschaften entspricht. Tippen Sie zum Wechseln der Filter den gewünschten Filter an. Um das analoge Eingangssignal zu verstärken, verfügt Ihre ETON Stealth 7.1 DSP Endstufe über eine Anpassung des Eingangspegels um 0 dB, +6dB, +9dB. Dies ist bei diversen leisen Audioquellen (OEM Radio/Headunit) nötig um das Eingangssignal zu verstärken. Sie können das Ausgangssignal um 0 dB, +6dB, +9dB anheben um einen maximalen Pegel und Wirkungsgrad im Fahrzeug zu erreichen. Bitte beachten Sie dabei, dass eine Übersteuerung der Lautsprecher zu einem Defekt dieser führen kann. Um das Ausgangssignal zu verstärken, wählen Sie zwischen +6dB und +9dB aus. Ge- hen Sie nun in Ihr Homemenü und verändern Sie die Hauptlautstärke, diese ist nun um den ausgewählten Wert erhöht. Four different digital fi lters that infl uence the playback characteristics and timbre. Here you can select a fi lter by ear that corresponds to your sound characteristics. Touch the desired fi lter to change the fi lters. To amplify the analog input signal, your ETON Stealth 7.1 DSP amplifi er has an adjustment of the input level by 0 dB, +6dB, +9dB. This is necessary for various quiet audio sources (OEM Radio/Headunit) to amplify the input signal. You can increase the output signal by 0 dB, +6dB, +9dB to achieve maximum level and effi - ciency in the vehicle. Please note that an over- load of the loudspeakers can lead to a defect. To amplify the output signal, select between +6dB and +9dB. Now go to your home menu and ch- ange the main volume, which is now increased by the selected value. This function is only available for the ETON Mini 150.4 DSP, not for the Stealth 7.1 DSP. SPDIF Ausgang DAC Filter MAX Input level MAX Output level DAC fi lter MAX Input level MAX Output level SPDIF out Setup EinstellungenSetup adjustment 68 Musik StreamingMusic streaming Ihre ETON Stealth 7.1 DSP verfügt über die Möglichkeit digital Musik in HiRes Qualität zu streamen. D.h. Sie können Musik direkt von Ihrem Smartphone in Ihre Endstufe streamen ohne dabei Qualitätseinbußen zu erleiden. Die- se Funktion wird mittels der integrierten WiFi Verbindung gelöst. Bitte beachten Sie: Um die Funktion des digitalen Musikstreaming zu nutzen, ist DLNA nötig. Dieses Protokoll ist als Übertragungsstandard bei Apple Produk- ten integriert. Android Nutzer müssen um die- se Funktion zu nutzen, Drittanbieter Software wie beispielsweise "BubbleUPnP" installieren. Dies ermöglicht das digitale Streaming von local Content. Die Möglichkeit Content von Streamingdiensten bsp. Spotify, Deezer uvm. abzuspielen, ist mit Android Smartphones leider derzeit nicht möglich, da eine Verbindung zur Endstufe hergestellt werden muss sowie paral- lel eine Verbindung mittels mobiler Daten. Nutzer von Apple Smartphone und Tablets hin- gegen, können voll umfänglich Musik streamen. Für das digitale Musikstreaming stellen Sie Ih- ren DSP Verstärker im Home Menü unter dem Reiter "Mode" auf das Eingangssignal "Stre- aming". Stellen Sie sicher, dass Sie mit Ihrem Smartphone mit dem Verstärker über WiFi ver- bunden sind. Öffnen Sie danach Ihre Musikapp auf Ihrem Smartphone. Wählen Sie einen Titel aus und drücken Sie auf "Play". Sie sollten in Ihrem Musikplayer nun über das Icon "AirPlay" die Endstufe sehen, wählen Sie diese als Laut- sprecher aus. Android User müssen zunächst sich die Drittanbieter Software "BubbleUPnP" aus dem Google Playstore laden. Mittels dieser App können ebenso gespeicherte Musikstücke vom Smartphone abgespielt werden. Your ETON Stealth 7.1 DSP has the ability to stream digital music in HiRes quality. This …
Text truncated - open the document above for the full version.
Attestation Statements
ETON CAR-AUDIO GMBH 2023.03.20 Eurofins Electrical and Electronic Testing NA, Inc. 914 West Patapsco Avenue Baltimore, MD 21230 RE: Attestation Statements Part 2.911(d)(5)(i) request for 2BAKT-STEALTH [ETON CAR-AUDIO GMBH] (“the applicant”) certifies that the equipment for which authorization is sought is not “covered” equipment prohibited from receiving an equipment authorization pursuant to section 2.903 of the FCC rules. Sincerely, (Applicant signature) (Applicant printed name): Schuller Konstantin ETON CAR-AUDIO GMBH 2023.03.20 Eurofins Electrical and Electronic Testing NA, Inc. 914 West Patapsco Avenue Baltimore, MD 21230 RE: Attestation Statements Part 2.911(d)(5)(ii) request for 2BAKT-STEALTH [ETON CAR-AUDIO GMBH (“the applicant”) certifies that, as of the date of the filing of the application, the applicant is not identified on the Covered List as an entity producing “covered” equipment. Sincerely, (Applicant signature) (Applicant printed name): Schuller Konstantin
Attestation Statements
ETON CAR-AUDIO GMBH U.S. Agent Designation for Service of process (Applicant and U.S. Agent are Separate parties) TO: FederalCommunicationsCommission Authorization and Evaluation Division 7435 Oakland Milts Road Columbia, MD 21046, USA ATTENTION: FCC certification - Section 2.91r (d)(7) Information Desisnated U.S. Aeent Company Name: Aegis Distribution Inc. FRN:0033512070 Contact Name : John Borges Address: 801 Davis St Suite B vacaviile, cA 956g7 United States Teleplrone No: (707) 446-6149 Email : John(rlaegisdis. conr This Ietter is to confinn that we ("the Designated U.S. Agent) have accepted the responsibility to act as the Designated U'S. Agent for Service of Process as required by section 47 cFR 2.w(d)(1)on behalf of the Applicant rroted below. Signed by (Printed Name/Title): John Borges/ Secretary This Agreement is valid until: March 21.2024 Tlic Applicant acknon4edges that they must maintain an agent for no less than one year after terminating all nd irnportation oR the conclu commission-related proceeding involvrng the The applicant further acknow responsibility to inform the FCC whenever the U.S. Agerrt irrflonrration above Applicant Company name: ETON CAR-AUDIO GMBH Grantee'Code: 2BAKT Contact Nanre; Schuller I(onstantin Address: Dinkelweg 6, 89283 Neu-Ulm, Germany Telephone No: +49(0)7 3 I -tj 5999 -t2 Enrail ; Konstantin. schuller@eton-caraudio. corn Signed by (Printed Nanre/Title): Schuller Konstantin / Engineer
Cover Letter(s)
ETON CAR-AUDIO GMBH 2023.03.20 Eurofins Electrical and Electronic Testing NA, Inc. 914 W. Patapsco Avenue Baltimore, MD 21230 USA RE: CONFIDENTIALITY REQUEST FOR EUT NAME: CAR DSP AMPLIFIER Trademark: ETON MODEL: Stealth 7.1 FCC ID:2BAKT-STEALTH To Whom It May Concern: This letter serves as an official request for confidentiality under sections 0.457 and 0.459 of CFR 47. We have requested that the - Block Diagram - Schematics - Operational Description required to be submitted with this application be permanently withheld from public review. The above materials contain trade secrets and proprietary information not customarily released to the public. The public disclosure of these materials may be harmful to the applicant and provide unjustified benefits to its competitors. Please contact me if there is any information you may need. Sincerely, Client’s signature: Client’s name / title : Schuller Konstantin / Engineer Contact information / address: Dinkelweg 6, 89233 Neu-Ulm, Germany
Cover Letter(s)
ETON CAR-AUDIO GMBH 2023.03.20 Eurofins Electrical and Electronic Testing NA, Inc. 914 W. Patapsco Avenue Baltimore, MD 21230 USA RE: LETTER OF AGENT AUTHORIZATION To Whom It May Concern: We, the undersigned, hereby authorize Shenzhen BCTC Testing Co., Ltd to act on our behalf in all matters relating to application for equipment authorization, including the signing of all documents relating to these matters. We also hereby certify that no party to the application authorized hereunder is subject to the denial of benefits, including FCC benefits, pursuant to Section 5301 of the Anti-Drug Abuse Act of 1988, 21 U.S.C.853(a). This agreement expires one year from the current date. Sincerely, Client’s signature: Client’s name / title : Schuller Konstantin / Engineer Contact information / address: Dinkelweg 6, 89233 Neu-Ulm, Germany
External Photos
External Photos Antenna
ID Label/Location Info
Label & label location 20mm*10mm This device complies with part 15 of the FCC Rules. Operation is subject to the following two conditions: (1) this device may not cause harmful interference, (2) this device must accept any interference received, including interference that may cause undesired operation FCC ID:2BAKT-STEALTH Label location
Internal Photos
Internal Photos
RF Exposure Info
FCC §15.247 (i), §2.1091 – RF Exposure FCC ID:2BAKT-STEALTH Applied procedures / limit According to FCC §15.247(i) and §1.1307(b)(1), systems operating under the provisions of this section shall be operated in a manner that ensures that the public is not exposed to radio frequency energy level in excess of the Commission’s guidelines. Limits for Occupational / Controlled Exposure Frequency Range (MHz) Electric Field Strength (E) (V/m) Magnetic Field Strength (H) (A/m) Power Density (S) (mW/ cm 2 ) Averaging Time |E| 2 ,|H| 2 or S (minutes) 0.3-3.0 614 1.63 (100)* 6 3.0-30 1842 / f 4.89 / f (900 / f)* 6 30-300 61.4 0.163 1.0 6 300-1500 F/300 6 1500-100,000 5 6 Note: ƒ is frequency in MHz * = Power density limit is applicable at frequencies greater than 100 MHz Limits for General Population / Uncontrolled Exposure Frequency Range (MHz) Electric Field Strength (E) (V/m) Magnetic Field Strength (H) (A/m) Power Density (S) (mW/ cm 2 ) Averaging Time |E| 2 ,|H| 2 or S (minutes) 0.3-1.34 614 1.63 (100)* 30 1.34-30 824/f 2.19/f (180/f)* 30 30-300 27.5 0.073 0.2 30 300-1500 F/1500 30 1500-100,000 1.0 30 Note: f = frequency in MHz * = Plane-wave equivalent power density MPE PREDICTION Predication of MPE limit at a given distance, Equation from OET Bulletin 65, Edition 97-01 Where: S = power density P = power input to antenna G = power gain of t…
Text truncated - open the document above for the full version.
Contact Information
Applicant
Schuller Konstantin(Engineer)
Technical Contact
Shenzhen BCTC Testing Co., Ltd.Alan Mei
[email protected]+86-755-36882589
1-2/F., Building B, Pengzhou Industrial Park, · Bao'an District, Shenzhen, Guangdong · China
Test Firm
Shenzhen BCTC Testing Co., Ltd.Sally He
[email protected]15999690624
Technical Specifications
| # | Rule Parts | Frequency Range | Power Output |
|---|---|---|---|
| 1 | 15C | 2.41 GHz - 2.46 GHz | 8.26 mW |