A3L1160LMulit-Function Printer
Samsung Electronics Co Ltd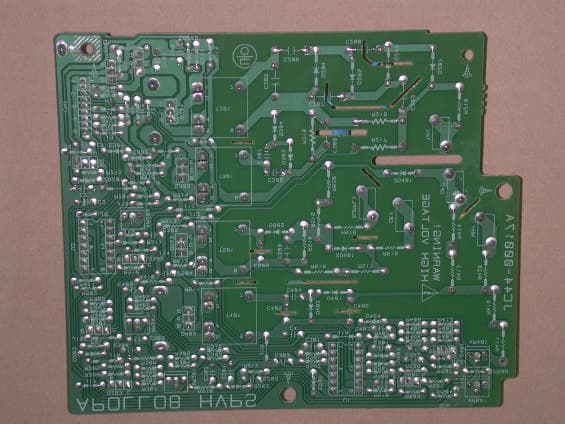
Click to zoom
Application Details
- Equipment Class
- JBP - Part 15 Class B Computing Device Peripheral
- Date of Grant
- Jun 27, 2002
- Application Purpose
- Original Equipment
- Date of Application
- Jun 27, 2002
- Equipment Note
- Mulit-Function Printer
- Company
- Samsung Electronics Co Ltd
- Country
- United States
Documents & Files
Document Text
Text extracted from the exhibit documents filed with the FCC. Open a document above to read the original.
Users Manual
Trademarks • Windows, Windows 95, Windows 98, Windows Me, Windows NT, Windows 2000 and Windows XP are trademarks of Microsoft corporation. • Other names and trademarks mentioned in this manual are trademarks of their respective holders. I Introduction Welcome!–––––––––––––––––––––––––––––––––––––––––1.1 Contents––––––––––––––––––––––––––––––––––––––––––1.3 Identifying Parts–––––––––––––––––––––––––––––––––––1.4 Setting Up Your Machine Choosing a Location––––––––––––––––––––––––––––––––1.9 Preparing Your Machine for Use–––––––––––––––––––––1.9 Attaching the Supports––––––––––––––––––––––––––––1.10 Connecting to the Phone Line––––––––––––––––––––––1.11 Connecting to the Computer (MFP model only)––––––1.12 Plugging In the Power–––––––––––––––––––––––––––––1.13 Loading Paper––––––––––––––––––––––––––––––––––––1.13 Installing the Toner Cartridge––––––––––––––––––––––1.16 Setting the Date and Time–––––––––––––––––––––––––1.18 Setting Your Fax Number and Name––––––––––––––––1.19 Contents Getting Started Setting Up Stand-alone Fax System Setting Volume –––––––––––––––––––––––––––––––––– 2.1 Setting Alert Tones ––––––––––––––––––––––––––––––– 2.2 Setting User-Selectable System Options –––––––––––––– 2.2 Sending a Fax Preparing Documents for Faxing or Copying ––––––––––– 2.7 Setting Document Resolution and Contrast –––––––––––– 2.8 Loading Documents ––––––––––––––––––––––––––––––– 2.9 Sending a Fax Automatically ––––––––––––––––––––––– 2.10 Sending a Fax After Talking ––––––––––––––––––––––– 2.11 1 2 Stand-alone Fax II Receiving a Fax About Reception Modes –––––––––––––––––––––––––– 2.12 Loading Paper for Receiving Faxes–––––––––––––––– 2.13 Receiving Automatically in FAX Mode –––––––––––––––– 2.13 Receiving in AUTO Mode –––––––––––––––––––––––––– 2.14 Receiving Automatically in ANS/FAX Mode –––––––––––– 2.14 Receiving Manually in TEL Mode –––––––––––––––––––– 2.15 Receiving Manually Using Remote Receive Start Code ––– 2.15 Making a Copy Copying Overview ––––––––––––––––––––––––––––––– 2.16 Making a Single Copy –––––––––––––––––––––––––––– 2.16 Using Advanced Copy Features ––––––––––––––––––––– 2.17 Automatic Dialling How To Enter a Name Using the Number Keys ––––––––– 2.18 One-Touch Dialling –––––––––––––––––––––––––––––– 2.20 Speed Dialling –––––––––––––––––––––––––––––––––– 2.22 Searching for a Number in the Memory –––––––––––––– 2.24 Transmission Options Broadcasting ––––––––––––––––––––––––––––––––––– 2.25 Delayed Fax –––––––––––––––––––––––––––––––––––– 2.26 Priority Fax –––––––––––––––––––––––––––––––––––– 2.28 Polling –––––––––––––––––––––––––––––––––––––––– 2.29 Adding Documents To a Scheduled Operation ––––––––– 2.31 Cancelling a Scheduled Operation ––––––––––––––––––– 2.31 Additional Functions Monitoring a Dual Job Status –––––––––––––––––––––––2.32 Forwarding Received Faxes ––––––––––––––––––––––––2.32 Printing Reports ––––––––––––––––––––––––––––––––– 2.33 Group Dialling (for Multi-Address Transmission)–––––––––––2.35 Stand-alone Fax (continued) 2 III Contents (continued) Installing Software System Requirements––––––––––––––––––––––––––––––3.1 Installing the Software–––––––––––––––––––––––––––––3.1 Uninstalling the Software ––––––––––––––––––––––– 3.3 Print Media Selecting Print Media–––––––––––––––––––––––––––––––3.5 Using the Automatic Paper Input Tray––––––––––––––––3.7 Using the Manual Paper Input Tray––––––––––––––––––3.9 Specialty Paper Guidelines–––––––––––––––––––––––––3.12 Printing Printing a Document––––––––––––––––––––––––––––––3.13 Cancelling a Print Job–––––––––––––––––––––––––––––3.16 Printing Help–––––––––––––––––––––––––––––––––––––3.17 Printing Several Pages Per Sheet–––––––––––––––––––3.18 Scaling Your Document––––––––––––––––––––––––––––3.19 Fitting Your Document to a Selected Paper Size––––––3.20 Printing Posters–––––––––––––––––––––––––––––––––––3.21 Printing Watermarks––––––––––––––––––––––––––––––3.22 Using Page Overlays––––––––––––––––––––––––––––––3.24 Printing in a Network Environment–––––––––––––––––3.28 Scanning Scanning from a Windows Application––––––––––––––3.30 Type1100 TWAIN for Scan Window –––––––––––––––––3.31 Printing and Scanning (MFP model only) 3 IV Guidelines for Maintenance–––––––––––––––––––––––––4.1 Clearing Memory–––––––––––––––––––––––––––––––––––4.1 Cleaning the OPC Drum––––––––––––––––––––––––––––4.2 Adjusting Shading –––––––––––––––––––––––––––––––––4.2 Setting the Machine to be Checked by Phone–––––––––4.3 Sending Toner Low Information to the Service Company–––––––––––––––––––––––––––––4.3 Cleaning the Machine––––––––––––––––––––––––––––––4.4 Managing the Toner Cartridge–––––––––––––––––––––––4.7 Automatic Document Feeder Rubber Pad Replacement 4.10 4 Maintenance Clearing Paper Jams––––––––––––––––––––––––––––––––––5.1 LCD Error Messages ––––––––––––––––––––––––––––––––––5.5 Fax Problems ––––––––––––––––––––––––––––––––––––––––5.7 General Printing Problems (MFP model only) ––––––––––5.9 Print Quality Problems ––––––––––––––––––––––––––––––5.11 Troubleshooting 5 Connecting Other Devices to the Phone line–––––––––––A.1 Specifications ––––––––––––––––––––––––––––––––––––––––A.4 Safety Information –––––––––––––––––––––––––––––––––––A.6 Index ––––––––––––––––––––––––––––––––––––––––––––––A.13 Appendix CAUTION - INVISIBLELASER RADIATION WHEN THIS COVER OPEN. DO NOT OPEN THIS COVER. VORSICHT - UNSICHTBARE LASERSTRAHLUNG, WENN ABDECKUNG GEÖFFNET. NICHT DEM STRAHL AUSSETZEN. ATTENTION - RAYONNEMENT LASER INVISIBLE EN CAS D’OUVERTURE.EXPOSITION DAN GEREUSE AU FAISCEAU. ATTENZIONE -RADIAZIONE LASER INVISIBILE IN CASO DI APERTURA. EVITARE L’ESPOSIZIONE AL FASCIO. PRECAUCION -RADIACION LASER IVISIBLE CUANDO SE ABRE. EVITAR EXPONERSE AL RAYO. ADVARSEL - USYNLIG LASERSTRÅLNING VED ÅBNING NÅR SIKKERHEDSBRYDERE ER UDE AF FUNKTION. UNDGÅ UDSAETTELSE FOR STRÅLNING. ADVARSER - USYNLIG LASERSTRÅLNING NÅR DEKSEL ÅPNES. STIRR IKKE INN I STRÅLEN. UNNGÅ EKSPONERING FOR STRÅLEN. VARNING - OSYNLIG LASERSTRÅLNING NÄR DENNA DEL ÄR ÖPPAND OCH SPÄRRENÄRURKOPPLAD. BET…
Text truncated - open the document above for the full version.
Users Manual
2.10 Stand-alone Fax Sending a Fax Automatically 1. After loading a document, enter the number of the remote fax using the keypad. One-touch or speed dialling is also available if you have already stored the number into a one-touch or speed dial number. For information on storing and using numbers in the memory, see page 2.18. If you make a mistake while entering a number, press Search/Deleteto delete the number. 2. Press Start/Enterwhen the number appears correctly on the display. The machine dials the number and begins to transmit. Cancelling a Transmission Press Stopany time during transmission. The machine continues to send the fax and the display shows a message warning that the machine is in use. Press Stopagain. Confirming a Transmission When the last document has been sent successfully, the machine beeps and returns to the Standby mode. If something went wrong during your fax transmission, an error message appears on the display. For a listing of error messages and their meanings, see page 5.5. When you receive an error message, press Stopto clear the message and resend the document. You can print out a confirmation report automatically each time sending is completed. For more information, see `Setting User-Selectable System Options’ on page 2.2. Automatic Redialling If the number you have dialled is busy or there is no answer, the machine will automatically redial the number every three minutes up to a maximum of two times. The display shows ‘RETRY REDIAL?.’ To redial the number without waiting, press Start/Enter. To cancel the automatic redialling, press Stop. 2.11 Stand-alone Fax Sending a Fax After Talking You can send a fax after talking with the remote location. 1. After loading a document, pick up the handset of the extension telephone and call the remote machine. 2. If the remote party answers, talk with her/him. 3. Press Start/Enterafter you finish talking. The machine begins to transmit. 4. Replace the handset. Last Number Redialling Press Pause/Redialwith a document loaded in the feeder, the machine begins to send. The redial memory in your machine retains the last 10 numbers called. To search through the redial memory, do as follows: 1. Press and hold Pause/Redialfor about 2 seconds. 2. Press ➛or ❿to search through the memory until you find the desired number. 3. When the desired number appears on the display, press Start/Enter to dial. Answering a Voice Request When the phone rings after receiving a fax, pick up the external handset and press Stop. If the person at remote end is waiting with the handset lift up, you can talk to the person. If you do not answer the Voice Request, the machine prints out the number that made the Voice Request, as well as the time and date that the request was made. 2.12 Stand-alone Fax About Reception Modes Your machine has four reception modes: • In FAX mode, the machine answers an incoming call and immediately goes into receive mode. • In AUTO mode, the machine answers an incoming call expecting to receive a fax. If the machine does not sense a fax signal, it will continue to sound the ringing tone to tell you it is a phone call. If you do not lift the handset of the extension telephone during the ringing, the machine will switch to automatic fax reception mode. • In ANS/FAXmode, the answering machine answers an incoming call, and the caller can leave a message on the answering machine. If the fax machine senses a fax tone on the line, the call automatically switches to the fax machine. Note: To use the ANS/FAX mode, attach an answering machine to the EXT. jack on the back of your machine (see page A.1). • In TELmode, the automatic fax reception is turned off. If you pick up the extension telephone and hear fax tones, you can receive a fax by pressing Start/Enteron the front panel of your machine. • In DRPDmode, you can receive a call using the Distinctive Ring Pattern Detection (DRPD) feature. “Distinctive Ring” is a telephone company service which enables a user to use a single telephone line to answer several different telephone numbers. This mode is displayed when you have set up the distinctive ring pattern. For details on this feature, see page 2.6. Receiving a Fax 2.13 Stand-alone Fax The current reception mode is displayed when the machine is in Standby mode. If you seldom use the fax line for voice conversations, set your machine to receive a fax automatically by selecting FAX mode. 08-DEC 15:30 FAX Current reception mode Loading Paper for Receiving Faxes The instructions for loading paper in the paper input tray are the same whether you are printing, faxing, or copying, except that faxes can only be printed on letter-, A4-, or legal-sized paper. See “Loading Paper” on page 1.13 for instructions. After loading paper for receiving faxes, set the paper size to the size of paper you normally load in the paper input tray. This product uses this setting when printing reports and determining autoreduction for incoming faxes. See page 2.3 to set the paper size. Note: As for MFP model, the printing function does not use this setting. If you are loading special-sized media only for your current print job, do not change this setting. After you have finished printing, reload the original paper. Receiving Automatically in FAX Mode This machine is preset to FAX mode at the factory. If you have changed the fax mode, take the following steps to receive faxes automatically: 1. Press and hold down Rcv. Mode/Contraston the front panel repeatedly until the display shows ‘FAX’. 2. When you receive a call, the machine answers the call on a specified number of rings and receives a fax automatically. To change the number of rings. See ‘Setting User-Selectable System Options’ on page 2.2. To adjust the ringer volume, see ‘Setting Volume’ on page 2.1. 2.14 Stand-alone Fax Receiving Automatically in ANS/FAX Mode For this mode, youMUSTattach an answering machine to the EXT.jack on the back of your machine (see page A.1). 1. Press and hold down Rcv. Mod…
Text truncated - open the document above for the full version.
ID Label/Location Info
Page 14 of 15 JOB NO. : LBE020048 5. FCC Label Configuration and Location 5.1 Label Configulation 5.2 Location of Label This test reports does not constitute an endorsement by NIST/NVLAP or U.S Government.
Internal Photos
HVPS LIU MAIN SMPS OPE
Test Report
Page 1 of 15 JOB NO. : LBE020048 Product :Multi Function Product Model No. :3710/F102/LF115m AG/1160L JOB NO. : LBE020048 1. This test reports shall not be reproduced except in full, without the written approval of SEC EMC Testing laboratory. 2. This test reports does not constitute an endorsement by NIST/NVLAP or U.S Government. 3. This test report is to certify that the tested device properly complies with the requirements of FCC Rules and Regulations Part 15 Subpart B Unintentional Radiators. All tests necessary to show compliance to the requirements were and these results met the specifications requirement. Date of test :May 14 , 2002 Issued Date :May 15, 2002 Prepared by: Jong Ho,Lee / Test Engineer Reviewed by: Chun Kil,Kim / Technical Manager Authorised by: Yang Su,Kim / Quality Manager This laboratory is registered by the NIST/NVLAP, U.S.A. The test reported herein have been performed in accordance with its terms of registration. EMI TEST REPORT FCC Part 15 Subpart B, Class B LAB CODE : 200447 Page 2 of 15 JOB NO. : LBE020048 Table of Contents 1. General Information 1.1 Product Description 1.2 Configuration of EUT and peripherals 1.3 Used Cable Description 1.4 System Block Diagram of Test Configuration 1.5 Test Facility 2. System Test Configuration 2.1 Configuration of Radiated and Conducted Interference Measurement 2.2 Operation Enviroment 2.3 Test Procedure 3. Conducted Emission Test Data 4. Radiated Emission Test Data 5. Label Configuration and Location 6. Test Equipment Used Distribution This test report has been made available as follows: CS Management Center, EMC Laboratory1 original Printer Division1 copy This test reports does not constitute an endorsement by NIST/NVLAP or U.S Government. Page 3 of 15 JOB NO. : LBE020048 1. General Information Applicant :Samsung Electronics Co., Ltd. CS Management Center EMC Test Laboratory Tel.: +81-(0)31-200-2135 Fax.: +81-(0)31-200-2189 Full Address :416 Maetan 3 Dong, Paldal-Ku, Suwon City, Kyungki Do, Korea, 442-742 Kind of Product :Multi Function Product FCC ID:A3L1160L Project Name :- Model & Variant Names :3710/F102/LF115m AG/1160L(Brand Name: Ricoh) Test Report Produced by :Jong Ho,Lee/ Test Eng. 1.1 Product Description 1) Justification The system was configured for testing in typical fashion use. Cable were attached to each of the available I/O Ports. Where applicable, peripherals were attached to the I/O cables. The mode of operation utilized for testing was selected to best simulate typical EUT use. The Test mode is standby,USB printing,and Parallel Printing. the test results of standby mode was the worst case emissions. Further details of cabling and configuration are shown in the test system configuration. This test reports does not constitute an endorsement by NIST/NVLAP or U.S Government. Page 4 of 15 JOB NO. : LBE020048 2) Operating Frequency : CPU(Main) Clock 9.5MHz Video Clock28.74448MHz Modem Clock28.224MHz 3) Description of Testing operating mode LPT1 LPT1 Tx,Rx - - 4) Tested Resolution : This test reports does not constitute an endorsement by NIST/NVLAP or U.S Government. Refresh ratesColorsTested Video modeResolutions STAND BY PRINTING Operating Mode Operating section of EUT Fax Scan Copy Page 5 of 15 JOB NO. : LBE020048 5) Assemble Parts ItemSpecificationRemark Size313x356x195mm Weight7.7kg Power ConsumptionEnergy save mode:9.5W Standby mode:50W Priting mode:170W Scanning mode:25W Max power consumption:700W Interface(MFP only)Parallel: IEEE1284 Printer TechnologyLaser Beam Printer Speed8ppm mono Print Resolution600 x 600 dpi Copy Resolution1120L/F101/LF110: 200 x 200 dpi 1160L/3710/F102/LF115m: 300 x 300 dpi Scan MethodContact Image Sensor(CIS) Scan Speed1120L/F101/LF110: 9 sec/page 1160L/3710/F102/LF115m: 6 sec/page Fax Modem speed33.6 kbps CompatibilityITU-T Group 3 This test reports does not constitute an endorsement by NIST/NVLAP or U.S Government. Page 6 of 15 JOB NO. : LBE020048 2.5.2 Configuration of EUT and peripherals MarkItemModel No.Serial No.ManufacturerRemark AMFP1160L-SAMSUNGA3L1160L BComputerC400 TW04D1027016123KJ0V7 DellDOC CMouseUSB-PS/2602SAMSUNGDOC DTelephoneSP-F106B23D727355SAMSUNGDOC EAdaptorPA-8 TH08H0511797123B1Q1K DellDOC 2.5.3 Used Cable Description No.ItemLength[m]Shielded(Y/N) 1IEEE1284 cable1.7Y 2Tel. Cable1.5N 3Tel. Cable1.5N 4AC Power cable1.7N 5AC Power cable1.7N This test reports does not constitute an endorsement by NIST/NVLAP or U.S Government. Remark Page 7 of 15 JOB NO. : LBE020048 1.4 System Block Diagram of Test Configuration 1.5 Test Facility All test described in this report were performed by : SAMSUNG ELECTRONICS CO., LTD. EMC TESTING LABORATORY 416 Maetan 3 Dong, Paldal-Ku, Suwon City, Kyungki Do, Korea, 442-742 This test facility has been filed in FCC under the criteria in ANSI C63.4-1992. This report shall not be reproduced except in full, without the written approval of SEC EMC Testing laboratory. B 3 2 5 D A E 4 1 C Page 8 of 15 JOB NO. : LBE020048 2. System Test Configuration 2.1 Configuration of Radiated and Conducted Interference Measurement * Cabling was taken into consideration and test data was taken under worse case conditions. 1)Conduction(Front View) 2)Conduction(Rear View) This test reports does not constitute an endorsement by NIST/NVLAP or U.S Government. Page 9 of 15 JOB NO. : LBE020048 3) Radiation(Front View) 4) Radiation(Rear View) This test reports does not constitute an endorsement by NIST/NVLAP or U.S Government. Page 10 of 15 JOB NO. : LBE020048 2.2 Operation Enviroment ConductionRadiation Temperature [ C ] :2323 Humidity [ % ] :4141 Power supply :AC110V/60HzAC110V/60Hz 2.3 Test Procedure 2.3.1 Conducted Emissions Eut was placed on a platform of nominal size, 1m by 1.5m, raised 80cm above the conducting ground plane. The rear of tabletop was located 40cm to the vertical conducting ground plane. The rear of EUT,including peripherals was aligned and flush with rear of tabletop. All other surfaces of tabletop was at least 80cm from any other grounded co…
Text truncated - open the document above for the full version.
Test Setup Photos
Page 8 of 15 JOB NO. : LBE020048 2. System Test Configuration 2.1 Configuration of Radiated and Conducted Interference Measurement * Cabling was taken into consideration and test data was taken under worse case conditions. 1)Conduction(Front View) 2)Conduction(Rear View) This test reports does not constitute an endorsement by NIST/NVLAP or U.S Government. Page 9 of 15 JOB NO. : LBE020048 3) Radiation(Front View) 4) Radiation(Rear View) This test reports does not constitute an endorsement by NIST/NVLAP or U.S Government.
Contact Information
Applicant
Jenni Chun(General Manager)
Technical Contact
PCTEST Engineering Lab., Inc.Randy Ortanez
[email protected]410-290-6652
6660-B Dobbin Road · Columbia, Maryland · United States
Test Firm
Samsung Electronics Co., Ltd.T. Shin
Technical Specifications
| # | Rule Parts | Frequency Range | Power Output |
|---|---|---|---|
| 1 | 15B | - | - |
Other Applications from Samsung Electronics Co Ltd
A3LSMS741B
Aug 05, 2026Portable Handset
Equipment Class
6VL - 15E 6 GHZ Very Low Power DeviceA3LSMX940
Jul 31, 2026BT,BLE Tablet DTS,UNII a,b,g,n,ac,ax,be and digitizer
Equipment Class
DTS - Digital Transmission SystemA3LSMS741U
Jul 30, 2026Portable Handset
Equipment Class
6CD - 15E 6 GHz Low Power Dual ClientA3LSMX840
Jul 27, 2026BT,BLE Tablet DTS,UNII a,b,g,n,ac,ax and Digitizer
Equipment Class
DSS - Part 15 Spread Spectrum TransmitterA3LSMX848U
Jul 27, 2026WCDMA, LTE, 5G NR Tablet BT,BLE, DTS,UNII a b g n ac ax and Digitizer
Equipment Class
JBP - Part 15 Class B Computing Device Peripheral