A3LCLX3185Color Laser Printer
Samsung Electronics Co Ltd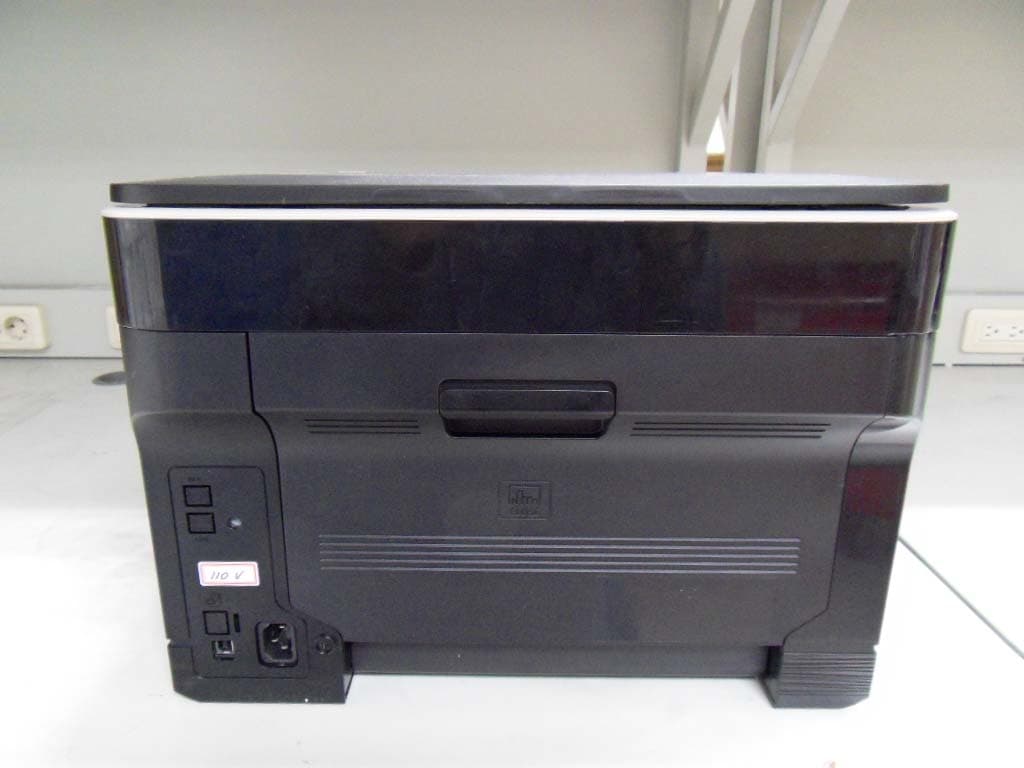
Click to zoom
Application Details
- Equipment Class
- JBP - Part 15 Class B Computing Device Peripheral
- Date of Grant
- Jan 18, 2010
- Application Purpose
- Original Equipment
- Date of Application
- Jan 18, 2010
- Equipment Note
- Color Laser Printer
- Company
- Samsung Electronics Co Ltd
- Country
- United States
Documents & Files
Document Text
Text extracted from the exhibit documents filed with the FCC. Open a document above to read the original.
Users Manual
CLX-318x Series Multi-Functional Printer User’s Guide imagine the possibilities Thank you for purchasing a Samsung product. Contents_ 2 contents CONTENTS 2 COPYRIGHT 9 10 Safety information 14 Regulatory information 25 About this user’s guide 27 Features of your new product INTRODUCTION 29 29 Machine overview (CLX-3185/CLX-3185N/CLX-3185WK) 29Front view 30Rear view 31 Control panel overview (CLX-3185/CLX-3185N/CLX-3185WK) 32 Machine overview (CLX-3185FN/CLX-3185FW) 32Front view 33Rear view 34 Control panel overview (CLX-3185FN/CLX-3185FW) 36 Understanding the Status LED 36 Introducing the useful buttons 36Menu button 36Power button 36Print screen button (CLX-3185 only) 36Eco Copy button (CLX-3185/CLX-3185N/CLX-318FN only) 37WPS button (CLX-3185WK/CLX-3185FW only) 37 Acknowledging the status of the toner cartridge GETTING STARTED 38 38 Setting up the hardware 38 Supplied software 39 System requirements 39Microsoft® Windows® 39Macintosh 40Linux 40 Installing USB connected machine’s driver 40Windows 41Macintosh 41Linux 42 Sharing your machine locally 42Windows 43Macintosh NETWORK SETUP (CLX-3185N/CLX-3185WK/CLX-3185FN/ CLX-3185FW ONLY) 44 44 Network environment 44 Introducing useful network programs 44SyncThru™ Web Service 44SyncThru™ Web Admin Service 44SetIP 44 Using a wired network 45Printing a network configuration report 45Setting IP address 46Network parameter setting 46Restoring factory default settings 46 Installing wired network-connected machine’s driver 46Windows 48Macintosh contents Contents_ 3 48Linux 49 IPv6 Configuration 49Activating IPv6 49Setting IPv6 addresses 49Using SyncThru™ Web Service WIRELESS NETWORK SETUP (CLX-3185FW/CLX-3185WK ONLY) 50 50 Using a wireless network 50Choosing your network connection 50Printing a network configuration report 50IP addresses 50Wireless network name and Network Key 50Installing a wireless network with the WPS button 51Installing a wireless network with cables 51 Setting a wireless network with WPS button on the control panel 51Items to prepare 51Choosing your network connection 51Changing WPS mode 51Setting a wireless network in PBC mode 52Setting a wireless network in PIN mode 52 Setting a wireless network with USB cable 52Installing the machine on a wireless network with an Access Point (Windows) 54Installing the machine on an Ad-Hoc wireless network (Windows) 55Installing the machine on a wireless network with an Access Point (Macintosh) 56Installing the machine on an Ad-Hoc wireless network (Macintosh) 57 Setting a wireless network with network cable 57Preparing items 57Setting IP address 58Configuring the machine’s wireless network 59 Resetting factory default values 59Resetting the machine to factory default settings (Windows) 59Resetting the machine to factory default settings (Macintosh) 59Network parameter setting 59 Completing the Installation 59 Troubleshooting 59Wireless network problems 60Solving other problems BASIC SETUP 61 61 Altitude adjustment 61 Changing the display language 61 Setting the date and time (CLX-3185FN/CLX-3185FW only) 61 Changing the clock mode (CLX-3185FN/CLX-3185FW only) 62 Changing the default mode (CLX-3185FN/CLX-3185FW only) 62 Setting sounds 62Key sound and alarm sound (CLX-3185/CLX-3185N only) 62Speaker, ringer, key sound, and alarm sound (CLX-3185FN/CLX- 3185FW only) 62Speaker volume (CLX-3185FN/CLX-3185FW only) 62 Entering characters using the number keypad (CLX-3185FN/CLX- 3185FW only) 62Entering alphanumeric characters 62Keypad letters and numbers 63Correcting numbers or names 63Inserting a pause 63 Using the save modes contents Contents_ 4 63Using the power saving feature 63 Setting the default paper 63From your machine’s control panel 63From your computer 64 Setting job timeout MEDIA AND TRAY 65 65 Loading originals 65On the scanner glass 65In the document feeder (CLX-3185FN/CLX-3185FW only) 66 Selecting print media 66Guidelines for selecting the print media 66Media sizes supported in each mode 66 Changing the tray size for print media 68 Loading paper in the tray 68 Printing on special media 68Envelopes 69Transparencies 69Labels 69CardStock/Custom-sized paper 70Letterhead/Preprinted paper 70Glossy photo 70Matte photo 70 Setting the paper size and type 70Setting the paper size 70Setting the paper type 70 Using the output support PRINTING 71 71 Introducing useful software program 71Samsung AnyWeb Print 71Samsung Easy Color Manager 71 Printer driver features 71Printer driver 71 Basic printing 72Canceling a print job 72 Opening printing preferences 72Using a favorite setting 73 Using help 73 Using special print features 73Printing multiple pages on one sheet of paper 73Printing posters 73Printing booklets (Manual) 73Printing on both sides of the paper (Manual) 74Change percentage of your document 74Fitting your document to a selected paper size 74Using watermarks 75Using overlay 75Advanced Options 76 Changing the default print settings 76 Setting your machine as a default machine 76 Printing to a file (PRN) 76 Macintosh printing 76Printing a document 76Changing printer settings 77Printing multiple pages on one sheet of paper 77 Linux printing contents Contents_ 5 77Printing from applications 78Printing files 78Configuring Printer Properties COPYING 79 79 Basic copying 79 Changing the settings for each copy 79Darkness 79Original Type 79Reduced or enlarged copy 80 Changing the default copy settings 80 ID card copying 80 Using special copy features 802-up or 4-up copying (N-up) 81Poster copying 81Clone copying 81Erasing background images 81Gray enhance copying 81 Deciding the form of copy output SCANNING 83 83 Basic scanning method 83 Scanning originals and sending to your computer (Scan to PC) 83For USB connected machine 84For network connected machine (CLX-3185N/CLX-3185FN/CLX- 3185FW only) 84 Scanning by a network connection (Scan to Email) (CLX-3185FN/CLX- 3185FW only) 84Setting up an e-mail account 84Scanning to Email 85 Changing the settings for each scan job 85 Changing the default scan sett…
Text truncated - open the document above for the full version.
Users Manual
Using USB memory device (CLX-3185N/CLX-3185FN/CLX-3185WK/CLX-3185FW only)_ 101 customized (See “"Customizing Scan to USB" on page 101). Your machine begins scanning the original, and then asks if you want to scan another page. 5.Press OK when Yesappears to scan more pages. Load another original to be scanned and press Color Start or Black Start. Regardless of the button you press, the color mode is decided as customized (See “"Customizing Scan to USB" on page 101). Otherwise, press the left/right arrow to select Noand press OK. After scanning is complete, you can remove the USB memory device from the machine. Customizing Scan to USB You can specify image size, file format, or color mode for each scanning to USB job. 1.Press (Scan) on the control panel. 2.Press Menu on the control panel. 3.Press the left/right arrow until Scan Feature appears and press OK. 4.Press OK when USB Feature appears. 5.Press the left/right arrow until the setting option you want appears and pressOK. You can set the following options. •Scan Size:Sets the image size. •Original Type:Sets the original document’s type. •Resolution:Sets the image resolution. •Scan Color:Sets the color mode. If you select Mono in this option, you cannot select JPEG in Scan Format. •Scan Format:Sets the file format in which the image is to be saved. When you select TIFF or PDF, you can select to scan multiple pages. If you select JPEG in this option, you cannot select Mono in Scan Color. 6.Press the left/right arrow until the desired status appears and press OK. 7.Repeat steps 4 and 5 to set other setting options. 8.When you have finished, press Stop/Clear to return to ready mode. You can change the default scan settings. For details, see "Changing the default scan settings" on page 85. PRINTING FROM A USB MEMORY DEVICE You can directly print files stored on a USB memory device. You can print TIFF, BMP, JPEG and PRN files. Files types supported by Direct Print option •PRN: Only files created by provided driver with your machine are compatible. •PRN files can be created by selecting the Print to file check box when you print a document. The document will be saved as a PRN file, rather than printed on paper. Only PRN files created in this fashion can be printed directly from USB memory. See "Printing to a file (PRN)" on page 76 to learn how to create a PRN file. •BMP: BMP Uncompressed •TIFF: TIFF 6.0 Baseline •JPEG: JPEG Baseline To print a document from a USB memory device 1.Insert a USB memory device into the USB memory port on your machine, and then press Direct USB. If one has already been inserted, pressDirect USB. 2.Press OK when USB print appears. Your machine automatically detects the device and reads data stored on it. 3.Press the left/right arrow until the folder or file you want appears and pressOK. If you see [D] in the front of a folder name, there are one or more files or folders in the selected folder. 4.If you selected a file, skip to the next step. If you selected a folder, press the left/right arrow until the file you want appears. 5.Press the left/right arrow to select the number of copies to be printed or enter the number. 6.Press OK,Color Start orBlack Start to start printing the selected file. There are two types of mode as following. •OKorColor Start: Color print •Black Start: Black and White print After printing the file, the display asks if you want to print another job. 7.Press OK when Yesappears to print another job, and repeat from step 2. Otherwise, press the left/right arrow to select Noand press OK. 8.Press Stop/Clear to return to ready mode. BACKING UP DATA Data in the machine’s memory can be accidentally erased due to power failure or storage failure. Backup helps you protect the system settings by storing them as backup files on a USB memory device. Backing up data 1.Insert the USB memory device into the USB memory port on your machine. 2.Press Menu on the control panel. 3.Press the left/right arrow until System Setup appears and press OK. 4.Press OK when Machine Setup appears. 5.Press the left/right arrow until Export Setting appears and press OK. 6.Press the left/right arrow until the option you want appears. For CLX-3185N, Setup Data option is only available. For CLX-3185FN/3185FW, Setup Data and Address Book options are available. 7.Press OK to begin backing up the data. The data is backed up to the USB memory. Press Stop/Clear to return to ready mode. Restoring data 1.Insert the USB memory device on which the backup data is stored in to the USB memory port. 2.Press Menu on the control panel. 3.Press the left/right arrow until System Setup appears and press OK. 4.Press OK when Machine Setup appears. 5.Press the left/right arrow until Import Setting appears and press OK. 6.Press the left/right arrow until the data type you want appears and press OK. Using USB memory device (CLX-3185N/CLX-3185FN/CLX-3185WK/CLX-3185FW only)_ 102 For CLX-3185N, Setup Data option is only available. For CLX-3185FN/3185FW, Setup Data and Address Book options are available. 7.Press the left/right arrow until the file containing the data you want to restore appears and press OK. 8.Press OKwhen Yesappears to restore the backup file to the machine. 9.Press Stop/Clearto return to ready mode. MANAGING USB MEMORY You can delete image files stored on a USB memory device one by one or all at once by reformatting the device. After deleting files or reformatting a USB memory device, files cannot be restored. Therefore, confirm that you no longer need the data before deleting it. Deleting an image file 1.Insert the USB memory device into the USB memory port on your machine. 2.Press Direct USB. 3.Press the left/right arrow until File Manage appears and press OK. 4.Press OKwhen Delete appears. 5.Press the left/right arrow until the folder or file you want to delete appears and press OK. If you see [D] in the front of a folder name, there are one or more files or folders in the selected folder. If you selected a file, the display shows the …
Text truncated - open the document above for the full version.
Block Diagram
Block Diagram of Zinnia CLX - 3185 Main B’d Sensor (Deve Home)Sensor (Deve Home) CLX 3185 3p3p CISCIS 12 FFC12 FFC 33 LSU LSU Zinnia16 Single beamZinnia16 Single beam HVPSHVPS Sensor (Empty)Sensor (Empty) Ground Wire(225mm)Ground Wire(225mm) 16p FFC16p FFC 3p3p RAM Controller ARM9 – 360MHz Chorus3 DDR2128MB X 1EA SA[12:0], BA0,1 DQ[15:0] 3p3p Sensor (Bin Full & Narrow)Sensor (Bin Full & Narrow) CISCIS 12 p FFC 12 p FFC 3 p 3 p SMPSSMPSZinnia16 Type2 1WZinnia16 Type2 1W HVPSHVPST1T1T2T2ChargerChargerSupplySupplyDeve BiasDeve BiasEitSEitS Waste Toner TXWaste Toner TX Waste Toner RXWaste Toner RX 5p5p 26p FFC26p FFC 2p2p 2p2p 2p2p Sensor (Regi)Sensor (Regi) GPIOMACUART ADC 8chPWM 8ch N/W Φ AC201A1KMLG MAC_TXD[3:0] MAC_RXD[3:0] CKE, nCS0 , nRAS, nCAS, WE DM0~1, nDQS0~1, DQS1, ODT0, nDDR_CLK0, BA0~1 25MHz Fan Fan 3p3p 4p4p E x it S ensor E x it S ensor Fuser LampFuser Lamp ThemistorThemistor FuserFuser BLDC MotorBLDC Motor(Main)(Main) 2p2p 10p10p 2p2p I2CStep LSUControllerHPVC EEPROM8Kbit SCL SDA 25MHz Fuser ClutchFuser Clutch Pickup ClutchPickup Clutch T2 ClutchT2 Clutch ITB CutchITB Cutch D ClthD Clth OPE Panel DisplayOPE Panel Display(LED & Keys)(LED & Keys) Inner Temp.Inner Temp.ITB Home SensorITB Home Sensor 2p2p 3p3p 3p3p 3p3p2p2p 9p9p 5p5p Local ControllerImage ProcessorStepMotor HPVC P. Flash4M ADDR[24:1 ] DATA[15:0 ] nRD, nWR, nCS ] JitJit CRUM YCRUM YCRUM MCRUM M D eve Cl u t c h D eve Cl u t c h 5p5p +24V Cover Open S/W+24V Cover Open S/W 2p2p ERASER LAMPERASER LAMP 2p2p 4p4p 4p4p4p4p PLL Vclk Mclk USB2.0 SSCG 12MHz USBISP1582 DATA[15:0 ] ADDR[8:1 ] Regi ClutchRegi Clutch 3p3p USBClock J o i n t J o i n t CRUM CCRUM C CRUM YCRUM Y OPC KEYOPC KEY 2p2p ERASER LAMPERASER LAMP 4p4p 4p4p 12MHz
External Photos
External Pictures 1) Front view 2) Rear view External Pictures 3) Side View1 4) Side View2
ID Label/Location Info
Project No. : LBE093745 Mono Laser PRINTER : CLX-3185 -32/32- This report must not be reproduced, except in full, without written permission from SEC EMC Laboratory. Label Location Label
Internal Photos
Internal Pictures 1) Front view 2) Rear view PBA Pictures 1) Top View of MainController (CLX-3185) 2) Bottom View of MainController (CLX-3185) 3) Top View of OPE (CLX-3185) 4) Bottom View of OPE (CLX-3185) 5) Top View of SMPS (110V) 6) Bottom View of SMPS (110V) 7) Top View of HVPS 8) Bottom View of HVPS
Operational Description
Project No. : LBE093745 Mono Laser PRINTER : CLX-3185 -7/32- This report must not be reproduced, except in full, without written permission from SEC EMC Laboratory. 3.5 EUT Description The following features describe EUT represented by this report: Item Specification and Description Processor Chorus3 (360Mhz) Standard System memory 256MB DDR2 SDRAM Resolution Up to 2400X600dpi Class (Default 1200x600 dpi) Optical: 600x600 Dpi Copy Quality mode Text : 600x600dpi(Optical: 300x300dpi) Mixed : 600x600dpi(Optical: 300x300dpi) Photo : 600x600dpi(Optical: 300x300dpi)(ADF) , 1200x1200dpi(Optical: 600x600dpi) (Platen) Paper Handling Paper Tray(standard) 150 Sheets Power Rating 110~127 VAC, 5.5A, 50/60 Hz Power Consumption Average : 350W Sleep/Power off : Less than 6W/0.45W Printer Language SPL-C, PCL-6 (CLX-3185N/FN/FW only) PC Interfaces USB2.0 OS compatibility Microsoft Windows: 2000/XP(Include 64bit) Vista Linux OS: Red Hat 8~9, Fedora Core 1~4 Mandrake 9.2~10.1 SuSE 8.2~9.2 Modes of Operation USB Printing, Copy , Intended Class for Emissions Class B
Test Report
-1/32- E E E M M M C C C T T T E E E S S S T T T R R R E E E P P P O O O R R R T T T Project No. LBE093745 Issue No. 1 Name of organization Samsung Electronics Co., Ltd. Address 416 Maetan 3-Dong, Yeongtong-Gu, Suwon-Si, Gyeonggi-Do 443-742 Korea Applicant Date of application December 04, 2009 Type of device Class B digital devices, peripherals Equipment authorization Declaration of Conformity Certification Verification FCC ID A3LCLX3185 Kind of product Color Laser MFP CLX-3185 Model No. Variant Model No. CLX-3180 EUT Manufacturer Samsung Electronics Co., Ltd. 259, Gongdan-Dong, Gumi-City, Gyeongsangbuk-Do, Korea 730-030 Samsung Electronics (Shandong) Digital Printing Co., Ltd. 264209, Samsung Road, Weihai Hi-Tech. IDZ, Shandong Province, P.R. CHINA Weihai Shin Heung Digital Electronics Co., Ltd. 98, Samsung Road, Weihai Hi-Tech. IDZ, Shandong Province, P.R.CHINA Intops : Intops (Weihai) Electronics Co., Ltd., Keji Road-268-1 , Weihai Hi-Tech,Industries Development Zone , Shandong Province , CHINA Applied Standards FCC Part 15, Subpart B / ANSI C63.4-2003 Test Period December 08, 2009 ~ December 17, 2009 Issue date December 18, 2009 Test result : Complied The equipment under test has found to be compliant with the applied standards. (Refer to the attached test result for more detail.) Tested by : Sung Jin Sim Reviewed by : No Cheon Park This report is the test result about the sphere accredited by KOLAS which signed the Mutual Recognition Arrangement of International Laboratory Accreditation Cooperation. The test results in this report only apply to the tested sample. This report must not be reproduced, except in full, without written permission from SEC EMC Laboratory. 416 Maetan 3-Dong, Yeongtong-Gu, Suwon-Si, Gyeonggi-Do, 443-742 Korea Tel: 82 31 277 7752, Fax: 82 31 277 7753 Project No. : LBE093745 Mono Laser PRINTER : CLX-3185 -2/32- This report must not be reproduced, except in full, without written permission from SEC EMC Laboratory. Table of contents 1. Summary of test results 1.1 Emission 2. General Information 2.1 Test facility 2.2 Accreditation and listing 3. Test configuration 3.1 Test Peripherals 3.2 EUT operating mode 3.3 Details of Sampling 3.4 Used cable description 3.5 EUT Description 3.6 Clock Frequencies 3.7 Test configuration and condition 3.8 Measurement uncertainty 4. Result of individual tests 4.1 Conducted disturbance 4.2 Radiated disturbance Appendix – EUT photography Project No. : LBE093745 Mono Laser PRINTER : CLX-3185 -3/32- This report must not be reproduced, except in full, without written permission from SEC EMC Laboratory. 1. Summary of test results 1.1 Emission The EUT has been tested according to the following specifications: Applied Test type Applied standard Result Remarks Conducted Disturbance (Mains Port) Complied Meets Class B Limit Radiated Disturbance FCC Part 15 Subpart B Complied Meets Class B Limit 2. General Information 2.1 Test facility The SEC EMC Laboratory is located on Samsung Electronics Co., Ltd. at 416 Maetan 3-Dong, Yeongtong-Gu, Suwon-Si, Gyeonggi-Do, South Korea. All testing are performed in Semi-anechoic chambers conforming to the site attenuation Characteristics defined by ANSI C63.4, CISPR 22, 16-1 and 16-2. and Shielded rooms. The SEC EMC Laboratory is operated as testing laboratory in accordance with the requirements of ISO/IEC 17025:2005. Project No. : LBE093745 Mono Laser PRINTER : CLX-3185 -4/32- This report must not be reproduced, except in full, without written permission from SEC EMC Laboratory. 2.2 Accreditation and listing Laboratory Qualifications Remarks KOLAS(Korea Laboratory Accreditation Scheme) Accredited : 124 UKAS(United Kingdom Accreditation Service) Accredited : 4290 Korea Communications Commission Radio Research Agency Accredited : KR0004 FCC(Federal Communications Commission) Accredited : KR0004 National Voluntary Laboratory Accreditation Program Lab Code: 200623-0 Norges Elektriske Materiellkontroll Accredited : ELA 195 VCCI (Voluntary Control Council for Interference by Information Technology Equipment) C-2421,R-2224 China Quality Certification Center 5-053, 5-054 TUV Rhineland H9354285 GOST(GOSTSTANDART) ROSTEST Elektrotechnicky Zkusebni Ustav Reg. No.: 001 IC(Industry Canada) Assigned Code: 5871 Project No. : LBE093745 Mono Laser PRINTER : CLX-3185 -5/32- This report must not be reproduced, except in full, without written permission from SEC EMC Laboratory. 3. Test Setup configuration 3.1 Test Peripherals The cables used for these peripherals are either permanently attached by the peripheral manufacturer or coupled with an assigned cable as defined below. The following is a listing of the EUT and peripherals utilized during the performance of EMC test: 3.2 EUT operating mode To achieve compliance applied standard specification, the following mode(s) were made during compliance testing: Operating Mode 1 Stand-by Operating Mode 2 USB Printing Operating Mode 3 Scan to PC 3.3 Details of Sampling Customer selected, single unit. Description Model No. Serial No. Manufacturer FCC ID and/or DoC Printer CLX-3185 - SAMSUNG A3LCLX3185 PC PP18L 27182225373 Dell DoC AC Adapter LA65NS1-00 CN-0YD637-71615-83C-0A0A Dongguang Lite Power DoC USB mouse MOARUO 0827010010 PRIMAX ELECTRONICS DoC Headset COV140 - COSY DoC Project No. : LBE093745 Mono Laser PRINTER : CLX-3185 -6/32- This report must not be reproduced, except in full, without written permission from SEC EMC Laboratory. 3.4 Used cable description The EUT is configured, installed, arranged and operated in a manner consistent with typical applications. Interface cables/loads/devices are connected to at least one of each type of interface port of the EUT, and where practical, each cable shall be terminated in a device typical of actual usage. The type(s) of interconnecting cables to be used and the interface port (of the EUT) to which these were connected; Connected cable Length [m] Shielded [Y/N] Note Power 1.8 No - USB 1.8 Yes From EUT to PC Project No. : LBE093745…
Text truncated - open the document above for the full version.
Test Setup Photos
Project No. : LBE093745 Mono Laser PRINTER : CLX-3185 -11/32- This report must not be reproduced, except in full, without written permission from SEC EMC Laboratory. 4.1.3 Photograph of Test Setup Front Rear Project No. : LBE093745 Mono Laser PRINTER : CLX-3185 -21/32- This report must not be reproduced, except in full, without written permission from SEC EMC Laboratory. 4.2.3 Photograph of Test Setup Front Rear Project No. : LBE093745 Mono Laser PRINTER : CLX-3185 -22/32- This report must not be reproduced, except in full, without written permission from SEC EMC Laboratory. Front (Above 1GHz) Rear (Above 1GHz)
Contact Information
Applicant
Jenni Chun(General Manager)
Technical Contact
PCTEST Egineering Lab., Inc.Randy Ortanez
[email protected]410-290-6652
6660-B Dobbin Road · Columbia, Maryland · United States
Test Firm
Samsung Electronics Co., Ltd. Global CS CenterPark No cheon
Technical Specifications
| # | Rule Parts | Frequency Range | Power Output |
|---|---|---|---|
| 1 | 15B | - | - |
Other Applications from Samsung Electronics Co Ltd
A3LSMS741B
Aug 05, 2026Portable Handset
Equipment Class
6VL - 15E 6 GHZ Very Low Power DeviceA3LSMX940
Jul 31, 2026BT,BLE Tablet DTS,UNII a,b,g,n,ac,ax,be and digitizer
Equipment Class
DTS - Digital Transmission SystemA3LSMS741U
Jul 30, 2026Portable Handset
Equipment Class
6CD - 15E 6 GHz Low Power Dual ClientA3LSMX840
Jul 27, 2026BT,BLE Tablet DTS,UNII a,b,g,n,ac,ax and Digitizer
Equipment Class
DSS - Part 15 Spread Spectrum TransmitterA3LSMX848U
Jul 27, 2026WCDMA, LTE, 5G NR Tablet BT,BLE, DTS,UNII a b g n ac ax and Digitizer
Equipment Class
JBP - Part 15 Class B Computing Device Peripheral