A3LHLM617WDLP Projection TV
Samsung Electronics Co Ltd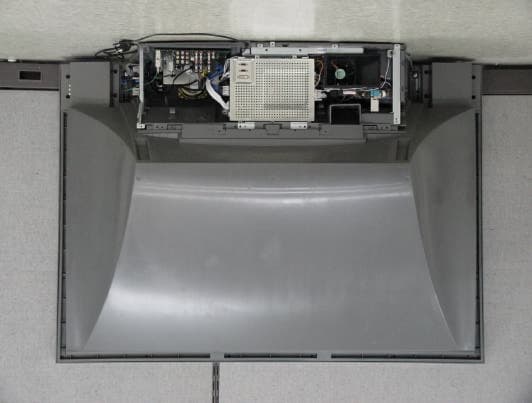
Click to zoom
Application Details
- Equipment Class
- JBP - Part 15 Class B Computing Device Peripheral
- Date of Grant
- Nov 12, 2003
- Application Purpose
- Original Equipment
- Date of Application
- Nov 12, 2003
- Equipment Note
- DLP Projection TV
- Company
- Samsung Electronics Co Ltd
- Country
- United States
Documents & Files
Document Text
Text extracted from the exhibit documents filed with the FCC. Open a document above to read the original.
Users Manual
Samsung Electronics of America, Inc.Service Division400 Valley Road, Suite 201Mount Arlington, NJ 07856TEL: 1-800-SAMSUNG (1-800-726-7864)www.samsungusa.com BP68-00142A-00 DLPTV INSTRUCTION MANUALHLN467W//HLN567W/HLN4365W/HLN5065W/HLN437WHLN507W/HLN617W DLPTV BP68-00142A-cover 3/31/03 7:27 AM Page 2 2 3 Safety Instructions Wa rning! Important Safety Instructions CAUTION: TO REDUCE THE RISK OF ELECTRIC SHOCK, DO NOT REMOVE COVER(OR BACK). THERE ARE NO USER SERVICEABLE PARTS INSIDE. REFER ALL SERVICINGTO QUALIFIED SERVICE PERSONNEL. This symbol indicates high voltage is present. It is dangerous to make any kind of contactwith any part inside this product.This symbol alerts you that important literature concerning operation and maintenance hasbeen included with this product. CAUTION: FCC/CSA regulations state that any unauthorized changes or modificationsto this equipment may void the user’s authority to operate it.CAUTION: To prevent electric shock, match the wide blade of plug to the wide slot, andfully insert the plug.A TTENTION: Pour eviter les chocs electriques, introduire la lame le plus large de la fiche dans la borne correspondante de la prise et pousser jusqu’au fond.Note to CATV system installer: This reminder is provided to call CATV system installer’sattention to Article 820-40 of the National Electrical Code (Section 54 of Canadian Electrical Code, Part I), that provides guidelines for proper grounding and, in particular,specifies that the cable ground shall be connected to the grounding system of the build-ing as close to the point of cable entry as possible.Important: One Federal Court has held that unauthorized recording of copyrighted TVprograms is an infringement of U.S. copyright laws. Certain Canadian programs mayalso be copyrighted and any unauthorized recording in whole or in part may be in violation of these laws. To prevent damage which may result in fire or electric shock, do not expose this appliance to rain or moisture. CAUTION RISK OF ELECTRIC SHOCK DO NOT OPEN Thank You for Choosing SamsungThank you for choosing Samsung! Your new Samsung projection TV represents the latest in television tech-nology. We designed it with easy-to-use on-screen menus and closed captioning capabilities, making itone of the best products in its class. We are proud to offer you a product that will provide convenient, dependable service and enjoyment for years to come.Important Safety Information Always be careful when using your TV. To reduce the risk of fire, electrical shock, and other injuries,keep these safety precautions in mind when installing, using, and maintaining your unit. • Read all safety and operating instructions before operating your TV. • Keep the safety and operating instructions for future reference. • Heed all warnings on the TV and in the operating instructions. • Unplug the TV from the wall outlet before cleaning. Use a damp cloth; do not use liquid or aerosol cleaners. • Never add any attachments and/or equipment without approval of the manufacturer. Such additions can increase the risk of fire, electric shock, or other personal injury. • Do not use the TV where contact with water is possible, such as near bath tubs, sinks, washing machines, swimming pools, etc. • Do not place the TV on an unstable cart, stand, tripod, bracket, or table whereit can fall. A falling TV can cause serious injury to a child or adult, and seriousdamage to the appliance. Use only with a cart, stand, tripod, bracket, or tablerecommended by the manufacturer or sold with the TV. Follow themanufacturer’s instructions when mounting the unit, and use a mounting accessory recommended by the manufacturer. Move the TV and cart with care.Quick stops, excessive force, and uneven surfaces can make the unit and cartunsteady and more likely to overturn. • The TV is designed with slots in the cabinet for ventilation to protect it from overheating. Do not blockthese openings with any object, and do not put the TV on a bed, sofa, rug, or other similar surface. Donot put the TV near a radiator or heat register. If you do put the TV on a rack or bookcase, make sure that there is adequate ventilation and that you’ve followed the manufacturer’sinstructions for mounting. • Operate your TV only from the type of power source indicated on the marking label. If you are not sureof the type of power supplied to your home, consult your appliance dealer or local power company. • Use only a grounded or polarized outlet. For your safety, this TV is equipped with a polarized alternat-ing current line plug having one blade wider than the other. This plug will fit into the power outlet onlyone way. If you are unable to insert the plug fully into the outlet, try reversing the plug. If the plug stilldoes not fit, contact an electrician to replace your outlet. BP68_ A-1 3/27/03 9:36 AM Page 2 SAMSUNG FCC InformationUser InstructionsThe Federal Communications Commission RadioFrequency Interference Statement includes the fol-lowing warning:NOTE: This equipment has been tested and foundto comply with the limits for a Class B digitaldevice, pursuant to Part 15 of the FCC Rules.These limits are designed to provide reasonableprotection against harmful interference in a resi-dential installation. This equipment generates,uses, and can radiate radio frequency energyand, if not installed and used in accordance withthe instructions, may cause harmful interference toradio communications. However, there is no guar-antee that interference will not occur in a particu-lar installation.If this equipment does cause harmful interferenceto radio or television receptions, which can bedetermined by turning the equipment off and on,the user is encouraged to try to correct the interfer-ence by one or more of the following measures:• Reorient or relocate the receiving antenna. • Increase the separation between the equipmentand receiver. • Connect the equipment into an outlet on a cir-cuit different from that to which the receiver isconnected. • Co…
Text truncated - open the document above for the full version.
Users Manual
33 Operation 32 Channel MemoryY our TV can memorize and store all of the channels available. Once the channels are memorized, you can use the CH and CH buttons to scan through the available channels. Selecting the Broadcast SourceBefore memorizing available channels, you must select what broadcast source your TV is connect-ed to, either an antenna or a cable system. 1 Press the Menu button. Move the joystick down toselect SETUP, then press the joystick to enter. 2 Press the joystick to enter. The channel setup menu willappear. Move the joystickdown to select “Air or CATV”. 3 If you are connected to an antenna, leave “AIR” dis-played. If you connectedcable, press the joystick to theright to display the type ofcable system: “STD,” “HRC,”or “IRC.” (If you are not sure which typeof cable system you have,contact your cable company.) Storing Channels in Memory Automatically 1 First, select the broadcast source as described on the previous page. Withthe Channel Setup menu on screen,move the joystick down to select “AutoChannel Memory.” 2 Press the joystick to enter. The TV will begin memorizing all of the available stations. Press the VOL+ button at anytime to interrupt the memorizationprocess. NOTE• When the ANT B mode is selected, the auto programming runs on the main screen. Adding and Erasing Channels 1 Use the number buttons to select the channel you want to add or erase. 2 To add a channel, select it and press the Add/Erase button on the remote control.The channel will be added to the TV’smemory and the word “Channel added”will appear in the corner of the screen. 3 To erase a channel, select it and then press the Add/Erase button on theremote control. The word “Channelerased” will appear in the corner of thescreen. You can still view a channel thathas been erased from memory by usingthe number buttons on the remote controlto select the channel directly. BP68-00120A-3 3/27/03 8:25 AM Page 32 Selecting Your Favorite ChannelsY ou can store up to ten of your favorite channels for each available input source (such as TV and CATV). Then, when you press the Fav.CH button on the remote control, the TV displays only thefavorite channels you previously stored, allowing you to quickly and easily find frequentlywatched channels. To Store Your Favorite Channels: 1 Press the Menu button. Move the joystick down to select SETUP, then press the joystick to enter. 2 Press the joystick to enter. The channel setup menu will appear. Move the joystick down to select Air or CATV, then move the joystick to the right to display the type ofcable system or Air. 3 Move the joystick down to select “Favorite Channel”,then press the joystick toenter. 4 Move the joystick to the left or right to select channel.Note: Only memorized chan-nels can be set as Favoritechannels. To View Your Favorite Channels: Press the Fav.CH button repeatedly tojump from one favorite channel to another.The favorite channels are selected inascending sequence. 35 Changing ChannelsYo u can change channels on your TV by using the CH and CH buttons, or by direct selec- tion using the number buttons. You can use the number buttons to tune to any channel (even onethat has been erased or has not been memorized). Using the Channel ButtonsPress the CH or CH buttons to change channels. The TV changes each channel in order, up or down,depending on which button you press. You will see allthe channels that the TV has memorized. (The TV musthave memorized at least three channels.) You will notsee channels that were not memorized or have beenerased.Using the Number Buttons To change to single-digit channels (0–9) faster, press “0” before the single digit. Example: For channel 4, press “0,” then “4.” To select a channel over 100, press the +100 button first. Example: For channel 122, press “+100,” then “2,” then “2.” Using the Previous Channel Press the Pre-ch button on the remote control. The TV changes to the last channel you were watching. Scanning channels Yo u can automatically scan all of the channels in memo- ry at the touch of just one button. Press the Scan button on the remote control. The TV will change the channelsautomatically, one by one. Scanning channels will bedisplayed in the PIP window. To stop channel scan,press the Scan button again. NOTE•W hen the ANT B mode is selected, the channel scan function doesn’t work. Operation 34 BP68-00120A-3 3/27/03 8:25 AM Page 34 Setting The On/Off MelodyY ou can hear clear melody sound when the TV is powered On or Off. 1 Press the Menu button. Move the joystick down to select SETUP, then press the joystick to enter. 2 Move the joystick down to select Melody. 3 Move the joystick to the right or left to select “On”. 4 Press the Menu button to exit. 37 Labeling the ChannelsUse this feature to assign an easy-to-remember label to any channel (i.e., “CBS”, “ESPN”,“PBS2”, CNN1”, etc.) A label consists of four fields, where each field is a letter, a number, or ablank. When the DISPLAY button is pressed, the channel label will appear next to the channelnumber. 1 Press the CH or CH but- ton to tune to the channel that will be labeled. 2 Press the Menu button. Move the joystick down to select SETUP, then press the joystick to enter. 3 Press the joystick to enter. Move the joystick down to select Labeling. 4 Move the joystick to the right to begin labeling. (Each labelhas four fields. See top para-graph.)Move the joystick up or downto select a letter, a number, ora blank. (Pressing the CH but-ton results in this sequence:A,B,...Z, blank,0,1,...9). 5 Move the joystick to the right to switch to the next field,which will be selected. Selecta second letter or digit usingjoystick(up or down), asabove. Repeat the process toselect the last two digits.Press the Menu button to exit. Operation 36 Move Select Menu BP68-00120A-3 3/27/03 8:25 AM Page 36 Picture ControlUsing the remote, you can change the contrast, brightness, tint, color, and sharpness settings ofthe TV. Customizing the Picture 1 Press the Menu button. Press the j…
Text truncated - open the document above for the full version.
Users Manual
59 NOTES•Y ou can select only Wide, Normal(4:3) screen size in the Component Mode. • Screen size can’t be changed in the DVI and PC (1080i) mode. •Y ou can select Wide(TV), Wide(PC) screen size in the DVI and PC (720p) Mode. •Y ou can select Wide(TV), Wide(PC), Normal(4:3) screen size in the DVI and PC (480p) Mode. • If you set PIP ON in any mode (Normal, Panorama, Zoom1, Zoom2) except Wide, the modewill automatically change to Wide. Special Features 58 Special Audio OptionsMTS Settings: Choosing a SoundtrackDepending on the particular program being broadcast, you can listen to stereo, mono, or aSeparate Audio Program. (SAP audio is usually a foreign-language translation. Sometimes SAPhas unrelated information like news or weather.) 1 Press the Menu button. Move the joystick down to select SOUND, then press the joystick to enter. 2 Move the joystick down to select MTS. 3 Move the joystick to the right repeatedly to select “Mono”, “SAP” or“Stereo”. 4 Press the Menu button to exit. Guide to MTS Settings• Choose Stereo for channels that are broadcasting in stereo.• Choose Mono for channels that are broadcasting in mono, or if you are having difficulty receiv- ing a stereo signal. • Choose SAP to listen to the Separate Audio Program, which is usually a foreign-language trans- lation. BP68-00120A-4 3/27/03 8:28 AM Page 58 61 Special Features 60 BBEBBE is a built-in effect that adds clarity, punch and dynamics to the sound. 1 Press the Menu button. Move the joystick down to select SOUND, then press the joystick to enter. 2 Move the joystick down to select BBE. 3 Move the joystick to the right or left to select “On”or “Off”. 4 Press the Menu button to exit. NOTE• Dolby Virtual and BBE can't be set ON at the same time. Dolby VirtualThis feature allows the TV’s L/R speakers to provide a home Theater-like Dolby effect.The center and surround sounds are mixed into the L/R speakers. 1 Press the Menu button. Move the joystick down to select SOUND, then press the joystick to enter. 2 Move the joystick down to select Dolby Virtual. 3 Move the joystick to the right or left to select “Virtual”or “Off”. 4 Press the Menu button to exit. NOTE• Dolby Virtual and BBE can't be set ON at the same time. BP68-00120A-4 3/27/03 8:28 AM Page 60 63 Special Features 62 Viewing Closed Caption InformationY our TV decodes and displays the closed captions information that is broadcast along with some television shows. These captions are usually subtitles for the hearing impaired or translations intoother languages. All VCRs record the closed caption signal from television programs, so pre-recorded video tapes can also deliver closed-caption information. Check for the closed captionsymbol ( ) on the tape’s package or your TV program-schedule. Closed Captions 1 Press the Menu button. Move the joystick down to selectSETUP, then press the joystickto enter. 2 Move the joystick down to select Closed Caption, thenpress the joystick to enter. 3 Move the joystick right or left to turn closed captioningon/off. Misspelling and unusu-al characters sometimes occurin closed caption transmis-sions, especially those of liveevents. There may be a smalldelay before captions appearwhen you change channels. (These do not indicate theTV is malfunctioning.) Move the joystick down toselect the “Mode”. Move the joystick right or left tochoose “Caption” or “Text.” ln caption mode, cap-tions appear at the bottom of the screen, and theyusually cover only a small portion of the picture. Intext mode, information unrelated to the program, suchas news or weather, is displayed. Text often covers alarge portion of the screen. 4 If you wish, use the joystick button to change the captioning channel or field. Then, press Menu to return to normal viewing. Different channels and fieldsdisplay different information. For example, Channel 1may have subtitles in English, while Channel 2 has subtitles in Spanish. NOTE• The Caption function doesn’t operate in Zoom1, Zoom2. Auto VolumeEach broadcasting station has its own signal conditions, and it is inconvenient to adjustthe volume every time the channel is changed. “Auto volume” automatically adjusts thevolume of the desired channel by lowering the sound output when the modulation signalis high or by raising the sound output when the modulation signal is low. 1 Press the Menu button. Move the joystick down to select SOUND, then press the joystick to enter. 2 Move the joystick down to select Auto Volume. 3 Move the joystick to the right or left to select “On”or “Off”. 4 Press the Menu button to exit. BP68-00120A-4 3/27/03 8:28 AM Page 62 65 Special Features 64 Selecting an External SignalY ou can use PIP to view a signal from an external source, such as a VCR. 1 Press the Menu button. Move the joystick down to selectPIP, then press the joystick toenter. Quick way to access PIPsource: Just press “Source” onthe remote control. 2 Move the joystick down to select “Source”. 3 Move the joystick right or left to select an external signal.Y ou can choose between “TV”, “Video 1~3”, or “S-Video 1~3”. The signal from these inputs will not appear if you havenot connected any equipment to the TV’s input jacks.For more information about external signals, see“Viewing an External Signal Source” (See page 41). If you select “TV.” the PIP image is the same as the main image. 4 Press Menu to exit. NOTE• The PIP subscreen doesn’t support ANT-B, Component1, Component2, Component3, PC, andDVI. Viewing Picture-in-PictureOne of the most best features of your TV is the Picture-in-Picture (PIP) feature. The advanced PIPsystem allows you to watch two different pictures at once, even if you don’t have a VCR connect-ed to your TV. Selecting a PIP Screen 1 Press the Menu button. Move the joystick down to select PIP,then press the joystick toenter.Quick way to access PIP: Just press “PIP” on the remotecontrol. 2 Move the joystick right to select PIP “On”. The PIPimage will appear in the corner of the screen. 3 Press Menu to exit. NOTES• Picture-…
Text truncated - open the document above for the full version.
External Photos
EUT Photographs EUT Photographs
ID Label/Location Info
EUT Photographs [Label and Label position]
Internal Photos
EUT Photographs
Test Report
Project No. : LBE020896 Page 1 of 16 Project No. :LBE020896 Product :DLP Projection TV Model No. :BK61** Date of test :October 08 ~ 09, 2002 Issued Date :October 10, 2002 Tested by: Cheon Kyu, PARK / Test Engineer Reviewed by: No Cheon, PARK / Manager of EMC Lab. Authorized by: Kyu Baek, CHUNG / Chief of EMC Lab. SAMSUNG ELECTRONICS Co., Ltd. EMC Test Laboratory 416 Maetan-3 Dong, Paldal-Ku, Suwon City, Kyungki-Do, Korea,442-742 Tel. : 81-31-200-2185 Fax. : 81-31-200-2189 This reports shall not be reproduced except in full, without the written approval of SEC EMC Testing laboratory. EMC TEST REPORT Project No. : LBE020896 Page 2 of 16 Table of Contents 1. Introduction & Summary 1.1 Description of the EUT 1.2 Test facility 1.3 Test equipment 2. Test Set-up 2.1 Test mode 2.2 Justification 2.3 Test equipment setup 2.4 Tested System Details 2.5 System Block Diagram of Test Configuration 2.6 Test rule and Procedure 2.7 Test Summary 3. Test Results 3.1 AC POWERLINE CONDUCTED EMISSION MEASUREMENT 3.2 RADIATED EMISSION MEASUREMENT This reports shall not be reproduced except in full, without the written approval of SEC EMC Testing laboratory. Project No. : LBE020896 Page 3 of 16 1. Introduction & Summary 1.1 Description of the EUT Applicant Project Number Equipment Under Test Trade Name Model Number Operating Frequency FCC ID Number Mains input 1.2 Test facility The EMI/EMS measurement facilities used to collect the tested data are located at 416 Maetan 3 Dong, Paldal-Ku, Suwon City, Kyungki Do, Korea. The sites are constructed in conformance with the requirements of ANSI C63.4 and CISPR 16-1 & 16-2. SAMSUNG Electronics Co.,Ltd is accredited by Korea Laboratory Accreditation Scheme(KOLAS) which signed the International Laboratory Accreditation Cooperation (ILAC) Mutual Recognition Arrangement (MRA) for the above test item(s) and test method(s). Measured in Semi-anechoic chamber #1 that is FCC Registration Number 98856. This reports shall not be reproduced except in full, without the written approval of SEC EMC Testing laboratory. SAMSUNG ELECTRONICS Co., Ltd. SAMSUNG ELECTRONICS Co., Ltd. LBE020896 DLP Projection TV Main clock : 66.8MHz, Memory clock : 54MHz, 200MHz A3LHLM617W 120V 60Hz 200W BK61** Project No. : LBE020896 Page 4 of 16 1.3 Test equipment EquipmentModel No.Serial No.Makers Last calibration and Interval 8566B3340A21744H.P02/04/18, 12Months Firmware versions : Rev.29.9.86 Quasi-peak adapter85650A2521A00687H.P01/10/09, 12Months RF Preselector85685A2602A00224H.P01/10/09, 12Months ESCS30839809/002R & S02/06/27, 12Months Firmware versions : Main 1.08, OTP 02.01, GRA 02.03 ESI 26832692/002R & S01/12/22, 12Months Firmware versions : BIOS 3.3, Analyzer 2.09.2 Field strength meterESVP860688/015R & S02/02/28, 12Months L.I.S.NESH3-Z5847265/028R & S01/10/09, 12Months Pattern GeneratorPM5418-TDSILO627116PHILIPS01/12/07, 12Months Pattern Generator408NPS1110117LEADER02/02/18, 12Months Matching PADRAM-R & S- Double Ridged Guide Antenna 31159505-4441EMCO02/11/13, 12Months Bi-Log AntennaCBL6112B2767SCHAFFNER02/ 04/26, 12Months This reports shall not be reproduced except in full, without the written approval of SEC EMC Testing laboratory. Spectrum analyzer Field strength meter Field strength meter Project No. : LBE020896 Page 5 of 16 2. Test Set-up 2.1 Test mode The EUT was tested in the following operating modes for the tests mention in this report: Description of Testing operating mode & Tested Resolution Horizontal F.:63kHz Vertical F. : 70Hz Measured each about 2 input(PC VIDEO INPUT mode & Digital Video Interface)of EUT. Further details of cabling and configuration are shown in the test system configuration. The EUT exercise program used during radiated and conducted testing was designed to exercise the various system components in a manner similar to typical use. 2.2 Justification The system was configured for testing in typical fashion use. Cable were attached to each of the available I/O Ports. The mode of operation utilized for testing was selected to best simulate typical EUT use. 2.3 Test equipment setup The explanation of measuring equipment setup when respective function is used in any frequency band is as following: DetectorResolutionVideo functionBandwidthBandwidth Quasi-Peak9kHz- Peak100kHz1MHz Quasi-Peak120kHz- Peak1MHz1MHz This reports shall not be reproduced except in full, without the written approval of SEC EMC Testing laboratory. Operating ModeResolutionsRefresh ratesColors "H" Pattern display1280 * 72024bits Frequency Band [MHz] Equipment EMI Test receiverAbove 1000 0.45 to 30EMI Test receiver Spectrum analyzer EMI Test receiver 30 to 1000 Project No. : LBE020896 Page 6 of 16 2.4 Tested System Details 1) Configuration of EUT and peripherals MarkItemModel No.Serial No.ManufacturerFCC ID A DLP Projection TVBK61** -Samsung BPersonal ComputerM6050950592ET0300510Samsung CPS/2 MouseP8012350894Samsung DKeyboardSEM-DT352205SPXADSamsung EInkjet PrinterK10158CLG001000275CANON FAC AdapterK30088CLG001000275CANON * DOC : FCC Declaration of Conformity 2) Used Cable Description No.ItemLength[m]Shielded(Y/N) 1AC Power cable1.9N 2AC Power cable1.9N 3AC Power cable1.5N 4Keyboard Cable1.45N 5Monitor cable2Y 6Mouse Cable1.8N 7DC Power Cable1.92N 8Printer Cable1.5Y 9S-Video1,2 Cable2Y 10Audio/Video Cable2Y This reports shall not be reproduced except in full, without the written approval of SEC EMC Testing laboratory. Remark From Printer to AC adapter Analog & Digital RCA Cable From Printer to PC LPT1 Project No. : LBE020896 Page 7 of 16 2.5 System Block Diagram of Test Configuration 2.6 Test rule and Procedure FCC Rule Part 15, Subpart B : Unintentional Radiators Test Procedure : ANSI C63.4-1992 2.7 Test Summary Result Pass Pass * N/A : Test not applicable This reports shall not be reproduced except in full, without the written approval of SEC EMC Testing laboratory. RADIATED EMISSIONANSI C63.4-1992 Test itemTest Procedure AC POWERLINE CONDUCTED EMISSION ANSI C63.4-1992 A B F D E 5 6 4 7 3 21 C 8 9 …
Text truncated - open the document above for the full version.
Test Setup Photos
Test Set up Photographs [AC POWERLINE CONDUCTED EMISSION MEASUREMENT] [RADIATED EMISSION MEASUREMENT]
Contact Information
Applicant
Jenni Chun(General Manager)
Technical Contact
PCTEST Engineering Lab., Inc.Randy Ortanez
[email protected]410-290-6652
6660-B Dobbin Road · Columbia, Maryland · United States
Test Firm
SAMSUNG ELECTRONICS CO., LTD.No Cheon Park
Technical Specifications
| # | Rule Parts | Frequency Range | Power Output |
|---|---|---|---|
| 1 | 15B | - | - |
Other Applications from Samsung Electronics Co Ltd
A3LSMS741B
Aug 05, 2026Portable Handset
Equipment Class
6VL - 15E 6 GHZ Very Low Power DeviceA3LSMX940
Jul 31, 2026BT,BLE Tablet DTS,UNII a,b,g,n,ac,ax,be and digitizer
Equipment Class
DTS - Digital Transmission SystemA3LSMS741U
Jul 30, 2026Portable Handset
Equipment Class
6CD - 15E 6 GHz Low Power Dual ClientA3LSMX840
Jul 27, 2026BT,BLE Tablet DTS,UNII a,b,g,n,ac,ax and Digitizer
Equipment Class
DSS - Part 15 Spread Spectrum TransmitterA3LSMX848U
Jul 27, 2026WCDMA, LTE, 5G NR Tablet BT,BLE, DTS,UNII a b g n ac ax and Digitizer
Equipment Class
JBP - Part 15 Class B Computing Device Peripheral