A3LML7300NLASER PRINTER
Samsung Electronics Co Ltd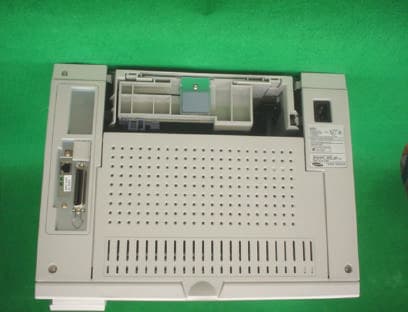
Click to zoom
Application Details
- Equipment Class
- JBP - Part 15 Class B Computing Device Peripheral
- Date of Grant
- Oct 15, 2000
- Application Purpose
- Original Equipment
- Date of Application
- Oct 15, 2000
- Equipment Note
- LASER PRINTER
- Company
- Samsung Electronics Co Ltd
- Country
- United States
Documents & Files
Document Text
Text extracted from the exhibit documents filed with the FCC. Open a document above to read the original.
Users Manual
Copyright The software described in this document is supplied under a license agreement. The software may be used or copied only in accordance with the terms of this agreement. It is against the law to copy the software on any medium except as specifically allowed in the license agreement. The purchaser may make only one copy of the software for backup purposes. No part of this manual may be photocopied or transmitted in any form or by any means, electronic or mechanical including photocopying, recording or information storage and retrieval systems, for any purpose other than the purchaser’s personal use, without the expressly written consent of Samsung Electronics Co., Ltd. Information in this document is subject to change without notice and does not rep- resent a commitment on the part of Samsung Electronics Co., Ltd. Samsung Electronics Co., Ltd. or its distributors can in no circumstances be held responsible for any prejudice, whether direct or indirect, resulting from the use of the software or the documentation. August 2000 Trademark Notices Copyright 2000 SAMSUNG Electronics Co., Ltd. All rights reserved. All other brand or product names are trademarks or registered trademarks of their respective companies or organizations. ML-7300 Series and Samsung logo are trademarks of Samsung Electronics Co., Ltd. Centronics is a registered trademark of Centronics Data Computer Corporation. HP, PCL 6, PCL 5e are registered trademarks of Hewlett-Packard Company. IBM, IBM PC, XT, AT, PS/2 are registered trademarks of International Business Machines Corporation. Apple, AppleTalk, LocalTalk, LaserWriter, TrueType, Macintosh are registered trademarks of Apple Computer Inc. Microsoft, MS-windows, MS-DOS are registered trademarks of Microsoft Corporation. CompuServe is a registered trademark of CompuServe Inc. TrueDoc R is a registered trademark of Bitstream Inc. Font Navigator TM is a registered trademark of Bitstream Inc. PostScript is a registered trademark of Adobe Systems Inc. Using Operator Panel 3 STEP1:Unpacking your printer - - - - - - - - - - - -2.1 STEP2:Installing Toner Cartridge - - - - - - - - - - -2.3 STEP3:Load Paper - - - - - - - - - - - - - - - - - - - -2.5 SETP4:Connecting the Parallel Cable - - - - - - - - -2.8 STEP5:Connecting the AC Power Cord - - - - - - -2.10 STEP6:Testing the Printer! - - - - - - - - - - - - - -2.11 STEP7:Setting Up the Printer Driver - - - - - - - -2.12 Operator Panel Buttons - - - - - - - - - - - - - - - - - -3.1 Changing Printer Setting - - - - - - - - - - - - - - - - -3.3 Overview of Printer Setting - - - - - - - - - - - - - - - -3.4 PRINTING MENU - - - - - - - - - - - - - - - - - - - - - -3.5 CONFIG MENU - - - - - - - - - - - - - - - - - - - - - - -3.9 JOB MENU - - - - - - - - - - - - - - - - - - - - - - - - -3.12 TEST MENU - - - - - - - - - - - - - - - - - - - - - - - -3.15 PCL MENU - - - - - - - - - - - - - - - - - - - - - - - - -3.15 I/O MENU - - - - - - - - - - - - - - - - - - - - - - - - - -3.17 PS3 MENU - - - - - - - - - - - - - - - - - - - - - - - - -3.17 NETWORK MENU - - - - - - - - - - - - - - - - - - - - -3.18 Contents Introduction 1 2 Setting Up your Printer Safety Precautions - - - - - - - - - - - - - - - - - - - - -1.1 Features and Model Descriptions - - - - - - - - - - - -1.2 Printer Components - - - - - - - - - - - - - - - - - - - -1.3 1 Print Media 4 Printing Tasks 5 Maintaining your Printer 6 Problem Solving 7 Loading Paper - - - - - - - - - - - - - - - - - - - - - - - -4.1 Printing on Envelopes - - - - - - - - - - - - - - - - - - -4.5 Printing on Label - - - - - - - - - - - - - - - - - - - - - -4.7 Printing on Transparencies - - - - - - - - - - - - - - - -4.8 2 Using Features in the Printer Driver - - - - - - - - - - -5.1 Using the Printer Driver - - - - - - - - - - - - - - - - - -5.3 - Paper Tab - - - - - - - - - - - - - - - - - - - - - - - -5.3 - Graphic Tab - - - - - - - - - - - - - - - - - - - - - - -5.5 - Output Tab - - - - - - - - - - - - - - - - - - - - - - -5.7 - Printer Tab - - - - - - - - - - - - - - - - - - - - - - -5.9 - Overlay Tab - - - - - - - - - - - - - - - - - - - - - -5.10 - Watermark Tab - - - - - - - - - - - - - - - - - - - -5.12 Printing Both Sides of Paper - - - - - - - - - - - - - -5.14 Toner Cartridge - - - - - - - - - - - - - - - - - - - - - - -6.1 Cleaning the Printer - - - - - - - - - - - - - - - - - - - -6.4 Cleaning LSU - - - - - - - - - - - - - - - - - - - - - - - -6.6 Clearing Paper Jams - - - - - - - - - - - - - - - - - - - -7.1 Error Messages - - - - - - - - - - - - - - - - - - - - - - -7.5 General Printing Problems - - - - - - - - - - - - - - - - -7.8 Poor Print Quality - - - - - - - - - - - - - - - - - - - - - -7.9 PS(PostScript) Problems - - - - - - - - - - - - - - - - -7.10 Network Problems - - - - - - - - - - - - - - - - - - - - -7.10 Macintosh Problems - - - - - - - - - - - - - - - - - - - -7.11 3 A Specifications B Macintosh User’s Guide C Using the Printer on a Network Printer Specifications - - - - - - - - - - - - - - - - - - -A.1 Paper Specifications - - - - - - - - - - - - - - - - - - - -A.4 Setting Up Your Printer - - - - - - - - - - - - - - - - - -B.1 Installing Software - - - - - - - - - - - - - - - - - - - -B.1 Printing with a Macintosh - - - - - - - - - - - - - - - - -B.5 About Sharing the Printer on a Network - - - - - - - -C.1 Setting Up a Locally Shared Printer - - - - - - - - - - -C.2 Setting Up a Network-Connected Printer - - - - - - - -C.3 D Using Windows PostScript Driver Installing PS Driver - - - - - - - - - - - - - - - - - - - -D.1 4 F Printer Options G Using Your Printer in Linux INDEX Precautions - - - - - - - - - - - - - - - - - - - - - - - - -F.1 Preparations - - - - - - - - - - - - - - - - - - - - - - - - -F.2 Closing The Printer Cover - - - - - - - - - - - - - - - - -F.3 Understanding the Printer Control Board - - - - - - - -F.4 Printer Memory - - - - - - - - - - - - - - - - - - - - - - -F.5 Network Option Card - - - - - - - - - - - - - - - - - - -F.8 Installing Serial/L…
Text truncated - open the document above for the full version.
Users Manual
PR I N T I N GTA S K S 5.8 Output Mode This setting allows you to print multiple pages, booklet and Fit to page and Po s t e r. It also allows you to fit ove r s i zed images onto a single page. Pages per Sheet(Multiple Images) Use the Pages per Sheet setting to print multiple pages on a single sheet of paper. • You can fit 1, 2, 4, 6, 9 or 16 pages on a single sheet of paper. For example, 2 means two page images are printed on one page. • The print page borders setting determines whether a border is printed around each page image. Duplex Use the Duplex box when you want to print on both sides of the paper. See page 5.14. ImportantIf you want to know more about each menu, click on the Help button. The help screen gives detailed information about each menu. Using the Printer Driver PR I N T I N GTA S K S 5.9 Printer Tab Printer Memory Select the value of the printer memory installed in the printer. After adding more memory, set the value of the printer memory. ImportantIf you want to know more about each menu, click on the Help button. The help screen gives detailed information about each menu. Using the Printer Driver PR I N T I N GTA S K S 5.10 Overlay Tab Using the Printer Driver An o v e r l a yis text and/or images stored in the computer HDD as a special file format that can be printed on any document you choose. O ve r l ays are often used to take the place of preprinted forms and letterhead paper PR I N T I N GTA S K S 5.11 Overlay List The file is now shown in the O v e r l a y List b ox and is available for printing. Select the ove r l ay from the O v e r l a y L i s tb ox . Create Overlay To use a page ove r l ay, you must create a new page ove r l ay containing your logo or image. Load Overlay If you have stored the ove r l ay file yo u want to use into an external source, yo u can also load the file when you access this Load Ove r l ay window. Important If you want to know more about each menu, click on the Help button. The help screen gives detailed information about each menu. Using the Printer Driver PR I N T I N GTA S K S 5.12 A Watermark is text that is superimposed on your final output. Usually in a lighter gray you can create a watermark with your own text. Watermark Tab Using the Printer Driver PR I N T I N GTA S K S 5.13 M e s s a g e You can select a watermark from list. E d i t Use this dialog box to enter the text and layout of your watermark. You can set the wa t e r m a r k ’s font, size and darkness, as well as the angle and position on the page. The preview area shows the effect of your settings. ImportantIf you want to know more about each menu, click on the Help button. The help screen gives detailed information about each menu. Using the Printer Driver PR I N T I N GTA S K S 5.14 The printer can automatically print on both sides of paper by setting the Printing Menu or Output tab of Samsung ML-7300 PCL 6 Drive r. 1 Open the document to be printed in appropriate application. 2 Click on the P r i n tb u t t o n . 3 Click on P r o p e r t i e s. 4 Click on the O u t p u tt a b. 5 Set the Duplex item to Short Edgeor Long Edge, and select the source item. Place the paper against the left side of the Tray (See page 5.16). Long Edge Short Edge Printing Both Sides of Paper Notes Do not print on both sides of labels, transparencies, envelopes, or paper heavier than 24lb. Damage to printer and paper jamming might result. Result The PCL printer driver is displayed with the G e n e r a ltab selected. Result The Output tab is displayed. PR I N T I N GTA S K S 5.15 1 M a ke sure the R E A D Ymessage appears on the display. 2 Press On Line. 3 Press Menu until you see PRINTING MENU. 4 Press Item until you see D U P L E X. 5 Press Value until the setting you needappears on the display ( For more information, see page 3.8). 6 Press Enter to save the selection. If you use the driver which has not the properties, you can select ‘DUPLEX’ by setting the control panel menu. Notes Settings in the printer driver and software application override operator panel setting. Menu Setting Result An asterisk(j) appears beside the current user default setting for that menu item. Result The ‘OFFLINE’ message appears on the display and the printer is off-line. Printing Both Sides of Paper PR I N T I N GTA S K S 5.16 The printer prints the second sides of paper first, so paper such as letterhead and preprinted paper needs to be oriented as illustrated in the figure below. Paper Orientation for Printing both sides of Paper For Multi-Purpose tray Load the first side facing down and the top toward you. • Set the source item in the properties dialogue box to Manual or MP. - To print continuously from Multi- Purpose tray, set the source item to MP. - To print a sheet of paper from Multi-Purpose tray, set the source item to Manual. For all other Tray Load the first side facing up and the top toward the printer. Multi-Purpose Tray Tray Printing Both Sides of paper Maintaining Your Printer This chapter provides suggestions for high-quality and economical printing and information for maintaining the toner cartridge and the printer. Topics included in this chapter are: uToner Cartridge uCleaning the Printer uCleaning the LSU 6 6 MA I N TA I N I N GYO U RPR I N T E R 6.1 Toner Cartridge Do not remove the toner cartridge from its package until you are ready to use it. Toner cartridge storage The life of the toner cartridge depends on the amount of toner that print jobs require. When printing text at 5% cove rage, a Samsung toner cartridge lasts an ave rage of 10,000 pages in simplex mode, depending on which toner cartridge is installed. This assumes that print D E N S I T Yand E C O N Om e n u items are set to default. Toner cartridge life NotesTo prevent damage to toner cartridge, do not expose it to light. When toner is low, faded or light area might appear on a printed page. You might be able to temporarily improve print quality by distributing the toner. Distributing the Toner MA I N TA I N I N GYO U R…
Text truncated - open the document above for the full version.
External Photos
Front view of EUT Rear view of EUT
ID Label/Location Info
Page 13 of 14 JOB NO. : 00ISM194 7. Label and Label Location 7.1 Label 7.2 Label location This test reports does not constitute an endorsement by NIST/NVLAP or U.S Government.
Internal Photos
Internal view of EUT Side view of EUT PCBs view of Engine Solder view of Engine PCBs view of Controller Solder view of Controller PCBs view of SMPS Solder view of SMPS PCBs view of Panel Solder view of Panel PCBs view of Joint Solder view of Joint PCBs view of SCF Solder view of SCF PCBs view of Local Talk Solder view of Local Talk PCBs view of Network Solder view of Network
Test Report
Page 1 of 14 JOB NO. : 00ISM194 Product :LASER PRINTER Model No. :ML-7300N, ML-7300 JOB NO. : 00ISM194 1. This test reports shall not be reproduced except in full, without the written approval of SEC EMC Testing laboratory. 2. This test reports does not constitute an endorsement by NIST/NVLAP or U.S Government. 3. This test report is to certify that the tested device properly complies with the requirements of FCC Rules and Regulations Part 15 Subpart B Unintentional Radiators. All tests necessary to show compliance to the requirements were and these results met the specifications requirement. Date of test :Feb 6 and 7, 2001 Issued Date :Feb 7, 2001 Prepared by: Kyung Dong. KIM / Test Engineer Reviewed by: Yang Su. KIM / Quality Manager Authorised by: Taek Jeong. SHIN / Chief of EMC Lab This laboratory is registered by the NIST/NVLAP, U.S.A. The test reported herein have been performed in accordance with its terms of registration. EMI TEST REPORT FCC Part 15 Subpart B, Class B LAB CODE : 3. This test report is to certify that the tested device properly complies with the requirements of Page 2 of 14 JOB NO. : 00ISM194 Table of Contents 1. General Information 1.1 Product Description 1.2 Tested System Details 1.3 Test Methodology 1.4 Test Facility 2. System Test Configuration 2.1 Operation Environment 2.2 Justification 2.3 EUT Exercise Software 2.4 Test Procedure 2.5 Test System configuration 3. Conducted and Radiated Measurement Photos 3.1 Conducted Measurement Photos 3.2 Radiated Measurement Photos 4. Measurement Uncertainty 4.1 Conducted Emission Test 4.2 Radiated Emission Test 5. Conducted Emission Test Data 6. Radiated Emission Test Data 7. Label and Label Location 8. Test Equipment Used This test reports does not constitute an endorsement by NIST/NVLAP or U.S Government. Page 3 of 14 JOB NO. : 00ISM194 1. General Information APPLICANT :SAMSUNG ELECTRONICS CO., LTD. ADDRESS :259, Gongdan-Dong Gumi-City, Kyungsangbuk-Do, Korea, 730-030 CONTACT PERSON :Kyung Dong. Kim TEL. +82-31-280-9955 CONTACT ADDRESS :San 14, Nongseo-Ri, Kihung-Eup, Yongin-City, Kyungki-Do, Korea, 449-900 REGULATION(S) :FCC Part 15 Subpart B, Class B MODEL NUMBER :ML-7300N, ML-7300 SERIAL NUMBER :- KIND OF PRODUCT :LASER PRINTER TESTED DATE :Feb 6 and 7, 2001 TEST SITE :3meter semi-anechoic chamber TEST SITE ADDRESS :San 14, Nongseo-Ri, Kihung-Eup, Yongin-City, Kyungki-Do, Korea, 449-900 This test reports does not constitute an endorsement by NIST/NVLAP or U.S Government. Page 4 of 14 JOB NO. : 00ISM194 1.1 Product Description The Samsung laser printer, ML-7300N or ML-7300(for Marketing Purpose) is supporting powerful speed(21ppm) and high resolution(600dpi) and has clock speeds of 2.983307, 6.94407, 7.3728, 12, 25, 30, 50 and 78.45496MHz. It can be operated in AC100~120V. See attached ML-7300N User's Guide for more information. 1.2 Tested System Details The FCC IDs for all equipment, plus descriptions of all cables used in the tested system are: Device TypeManufacturerModel NumberSerial No.FCC ID / DoC (1)Samsung ElectronicsSamsungLaser PrinterN/AA3LML7300N (EUT) (2)PCHPPavilion 7850MX04704167FCC DoC (3)MonitorSamsung6547-OBN55-00006FCC DoC (4)KeyboardHP5183-9980J94003612FCC DoC (5)MouseSejinSMB-4004FEF027845GJJS965CO (6)PCApplePowerBook 5300SG6050FB5KJBCGM2785 (7)Smart Card ReaderDATAFABMDSM-B-USB0223420865FCC DoC (8) External ModemUSRoboticsSPORTSTER33083962CJE-0149-217 1.3 Test Methodology Both conducted and radiated testing were performed according to the procedures in FCC/ANSI C63.4(1992). Radiated testing was performed at a distance of 3 meters from the antenna to EUT. 1.4 Test Facility All test described in this report were performed by : Open area test site : 781-14, Chung-Ri, Dongtan-Myun, Hwasung-Kun, Kyungki-Do, Korea Conducted measurement facility and 3meter Semi-anechoic chamber : San 14, Nongseo-Ri, Kihung-Eup,Yongin-City, Kyungki-Do, Korea, 449-900 This test reports does not constitute an endorsement by NIST/NVLAP or U.S Government. Page 5 of 15 JOB NO. : 00ISM194 2. System Test Configuration 2.1 Operation Environment ConductionRadiation Temperature [] :2525 Humidity [%] :5254 Power supply :AC115V/60HzAC115V/60Hz 2.2 Justification The system was configured in typical fashion(as a customer would normally use it) for testing. 2.3 EUT Exercise Soft ware The EUT exercise program used during radiated and conducted testing was printer setup and commonly used NOTEPAD software. 2.4 Test Procedure 2.4.1 Conducted Emissions EUT was placed on a platform of nominal size, 1m by 1.5m, raised 80cm above the conducting ground plane. The rear of tabletop was located 40cm to the vertical conducting ground plane. The rear of EUT, including peripherals was aligned and flush with rear of tabletop. All other surfaces of tabletop was at least 80cm from any other grounded conducting surface. I/O cables and AC cables that were connected to the peripherals were bundled in center. They were folded back and forth forming a bundle 30cm to 40cm long and were hanged at a 40cm height to the ground plane. Each EUT current-carrying power lead, except the ground(safety) lead, were individually connected through a LISN to the input power source. This test reports does not constitute an endorsement by NIST/NVLAP or U.S Government. Page 6 of 14 JOB NO. : 00ISM194 All unused 50 ohm connectors of the LISN were resistively terminated in 50 ohm when not connected to the measuring equipment. 2.4.2 Radiated Emissions EUT was placed on a platform of nominal size, 1m by 1.5m, raised 80cm above the conducting ground plane. The rear of EUT, including peripherals was aligned and flush with rear of tabletop. I/O cables that were connected to the peripherals were bundle in center. They were folded back and forth forming a bundle 30cm to 40cm long and were hanged 40cm height to the ground plane. Test was made with the antenna positioned in both the horizontal and vertical planes of polarization. The measurement antenna was varied in height above the…
Text truncated - open the document above for the full version.
Test Setup Photos
Page 8 of 14 JOB NO. : 00ISM194 3. Conducted and Radiated Measurement Photos * Cabling was taken into consideration and test data was taken under worst case conditions. 3.1 Conducted Measurement Photos Conduction(Front View) Conduction(Rear View) This test reports does not constitute an endorsement by NIST/NVLAP or U.S Government. Page 9 of 14 JOB NO. : 00ISM194 * Cabling was taken into consideration and test data was taken under worst case conditions. 3.2 Radiated Measurement Photos Radiation(Front View) Radiation(Rear View) This test reports does not constitute an endorsement by NIST/NVLAP or U.S Government.
Contact Information
Applicant
Jenni Chun(General Manager)
Test Firm
Samsung Electronics Co., Ltd.K. Lyoum
Technical Specifications
| # | Rule Parts | Frequency Range | Power Output |
|---|---|---|---|
| 1 | 15B | - | - |
Other Applications from Samsung Electronics Co Ltd
A3LSMS741B
Aug 05, 2026Portable Handset
Equipment Class
6VL - 15E 6 GHZ Very Low Power DeviceA3LSMX940
Jul 31, 2026BT,BLE Tablet DTS,UNII a,b,g,n,ac,ax,be and digitizer
Equipment Class
DTS - Digital Transmission SystemA3LSMS741U
Jul 30, 2026Portable Handset
Equipment Class
6CD - 15E 6 GHz Low Power Dual ClientA3LSMX840
Jul 27, 2026BT,BLE Tablet DTS,UNII a,b,g,n,ac,ax and Digitizer
Equipment Class
DSS - Part 15 Spread Spectrum TransmitterA3LSMX848U
Jul 27, 2026WCDMA, LTE, 5G NR Tablet BT,BLE, DTS,UNII a b g n ac ax and Digitizer
Equipment Class
JBP - Part 15 Class B Computing Device Peripheral