A3LSMG781BGSM/WCDMA/LTE Phone + BT/BLE, DTS/UNII a/b/g/n/ac/ax, NFC and WPT
Samsung Electronics Co Ltd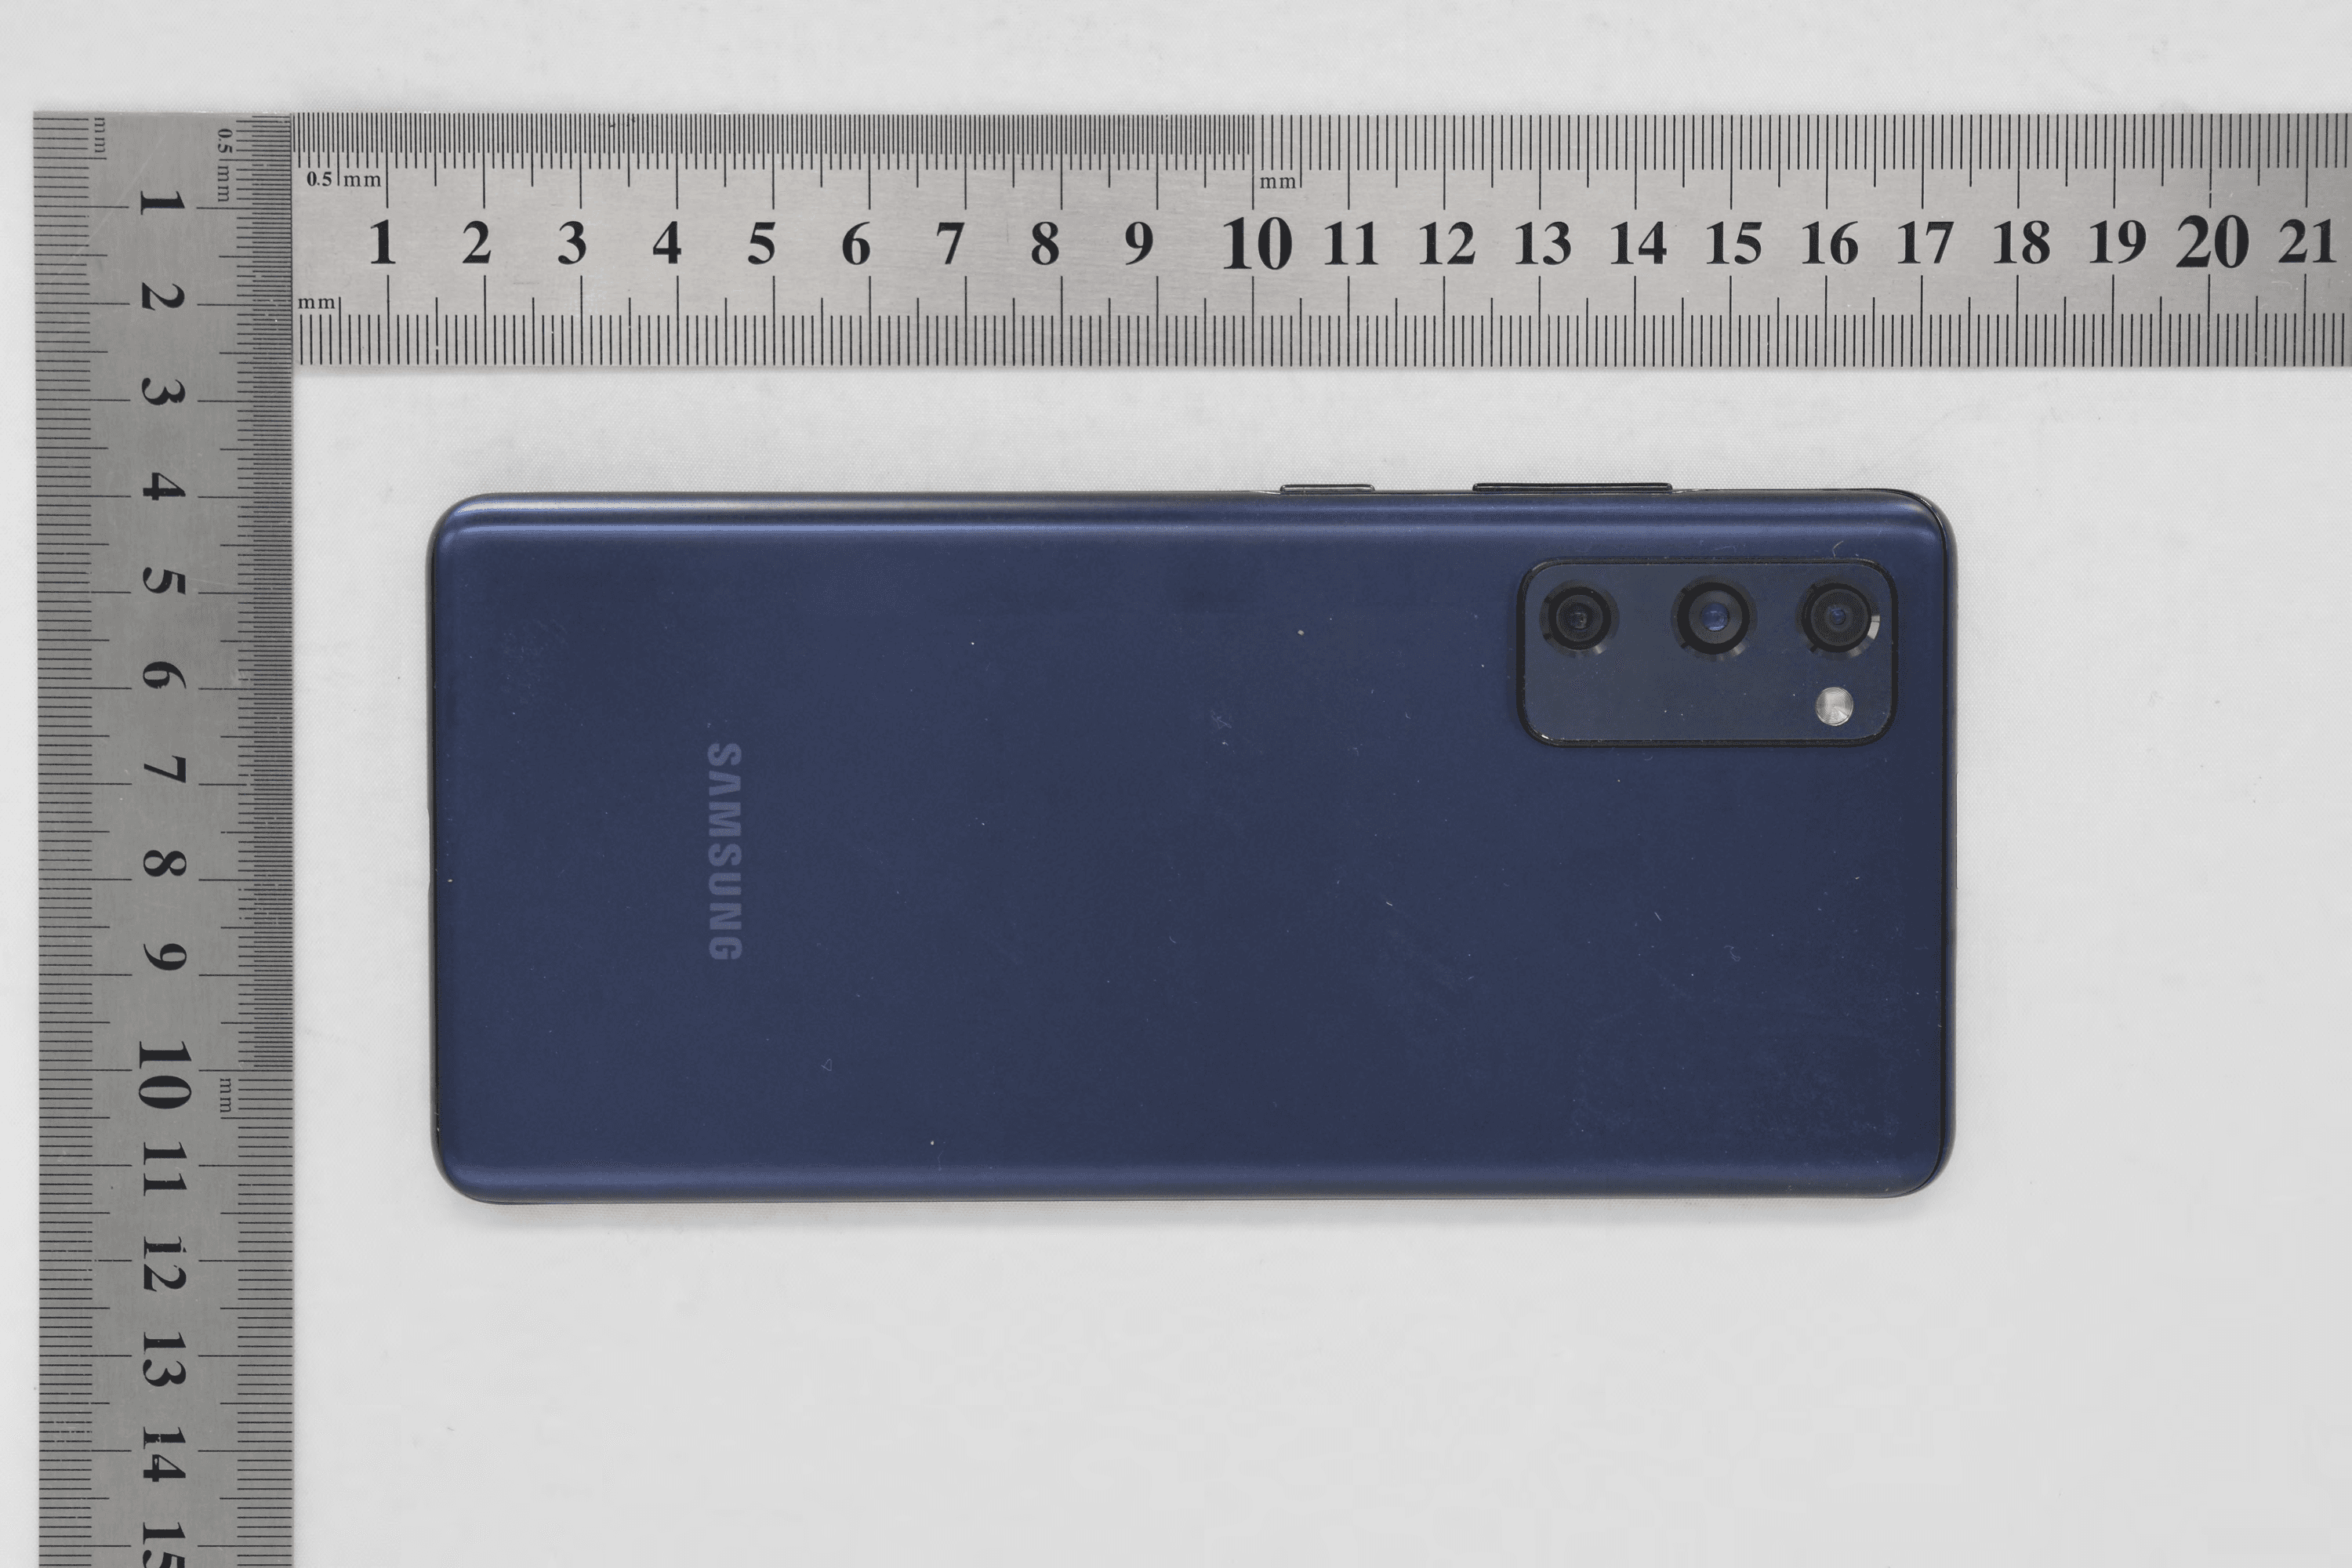
Click to zoom
Application Details
- Equipment Class
- DCD - Part 15 Low Power Transmitter Below 1705 kHz
- Date of Grant
- Sep 13, 2020
- Application Purpose
- Original Equipment
- Date of Application
- Sep 02, 2020
- Equipment Note
- GSM/WCDMA/LTE Phone + BT/BLE, DTS/UNII a/b/g/n/ac/ax, NFC and WPT
- Frequency Range
- 0.11000000 - 0.14800000
- Company
- Samsung Electronics Co Ltd
- Country
- United States
Documents & Files
Document Text
Text extracted from the exhibit documents filed with the FCC. Open a document above to read the original.
Users Manual
www.samsung.com USER MANUAL SM-G781B SM-G781B/DS English (EU). 07/2020. Rev.1.0 2 Table of Contents Basics 4 Read me first 6 Device over heating situations and solutions 9 Device layout and functions 13 Battery 15 SIM or USIM card (nano-SIM card) 18 Memory card (microSD car d) 20 Turning the device on and off 22 Initial setup 23 Samsung account 25 Transferr ing data from your previous device (Smart Switch) 27 Understanding the screen 39 Notification panel 41 Screen capture and screen record 42 Entering text Apps and features 45 Installing or uninstalling apps 47 Finder 47 Bixby 51 Bixby Vision 54 Bixby Home 57 Bixby Routines 60 Reminder 64 Phone 69 Contacts 73 Messages 76 Internet 78 Camera 95 Gallery 100 AR EMOJI 107 AR Doodle 108 Always On Displa y 110 Edge screen 114 Multi window 117 Samsung Pay 120 Samsung Health 123 Galaxy Wearable 123 Samsung Members 124 Samsung Notes 125 Calendar 127 Radio 128 Voice Recorder 129 My Files 129 Clock 131 Calculator 132 Game Launcher 134 Game Booster 135 Kids Home 137 SmartThings 141 Sharing content 142 Samsung Global Goals 142 Google apps Table of Contents 3 178 Privacy 178 Location 179 Accounts and backup 179 Samsung Cloud 181 Google 181 Advanced featur es 182 Link to Windows 183 Motions and gestures 184 Dual Messenger 185 Digital Wellbeing and parental controls 185 Digital Wellbeing 187 Device care 187 Optimising your device 188 Battery 189 Storage 189 Memory 189 Security 190 Apps 190 General management 191 Accessibility 192 Software update 192 About phone Appendix 193 Troubleshooting 198 Removing the battery 199 Health and safety information Settings 144 Introduction 144 Connections 145 Wi-Fi 147 Bluetooth 149 NFC and payment 151 Data saver 151 Mobile data only apps 152 SIM card manager (dual SIM models) 152 Mobile Hotspot and Tethering 154 More connection settings 156 Sounds and vibration 156 Dolby Atmos (surround sound) 157 Separate app sound 157 Notifications 158 Display 159 Blue light filter 159 Dark mode 160 Changing the screen mode or adjusting the display colour 161 Screensaver 161 Wallpaper 161 Themes 162 Lock screen 163 Smart Lock 163 Biometrics and security 164 Face recognition 167 Fingerprint rec ognition 170 Samsung Pass 173 Secure Folder 4 Basics Read me first Please read this manual before using the device to ensure safe and proper use. • Descriptions are based on the device’s default settings. • Some content may differ from your device depending on the region, service provider, model specifications, or device’s software. • Content (high quality content) that requires high CPU and RAM usage will affect the overall performance of the device. Apps related to the content may not work properly depending on the device’s specifications and the environment that it is used in. • Samsung is not liable for performance issues caused by apps supplied by providers other than Samsung. • Samsung is not liable for performance issues or incompatibilities caused by edited registry settings or modified operating system software. Attempting to customise the operating system may cause the device or apps to work improperly. • Software, sound sources, wallpapers, images, and other media provided with this device are licensed for limited use. Extracting and using these materials for commercial or other purposes is an infringement of copyright laws. Users are entirely responsible for illegal use of media. • You may incur additional charges for data services, such as messaging, uploading and downloading, auto-syncing, or using location services depending on your data plan. For large data transfers, it is recommended to use the Wi-Fi feature. • Default apps that come with the device are subject to updates and may no longer be supported without prior notice. If you have questions about an app provided with the device, contact a Samsung Service Centre. For user-installed apps, contact service providers. Basics 5 • Modifying the device’s operating system or installing softwares from unofficial sources may result in device malfunctions and data corruption or loss. These actions are violations of your Samsung licence agreement and will void your warranty. • Depending on the region or service provider, a screen protector is attached for protection during production and distribution. Damage to the attached screen protector is not covered by the warranty. • You can see the touchscreen clearly even in strong outdoor sunlight by automatically adjusting the contrast range based on the surrounding environment. Due to the nature of the product, displaying fixed graphics for extended periods may result in afterimages (screen burn-in) or ghosting. – It is recommended not to use fixed graphics on part or all of the touchscreen for extended periods and turn off the touchscreen when not using the device. – You can set the touchscreen to turn off automatically when you are not using it. Launch the Settings app, tap Display → Screen timeout, and then select the length of time you want the device to wait before turning off the touchscreen. – To set the touchscreen to automatically adjust its brightness based on the surrounding environment, launch the Settings app, tap Display, and then tap the Adaptive brightness switch to activate it. • Depending on the region or model, some devices are required to receive approval from the Federal Communications Commission (FCC). If your device is approved by the FCC, you can view the FCC ID of the device. To view the FCC ID, launch the Settings app and tap About phone → Status. If your device does not have an FCC ID, it means that the device has not been authorised for sale in the U.S. or its territories and may only be brought to the U.S. for the owner’s personal use. • Depending on the region, you can view the regulatory information on the device. To view the information, launch the Settings app and tap About phone → Regulatory information . Instructional icons Warning: situations that could cause injury to yourself or others Caution: situati…
Text truncated - open the document above for the full version.
Users Manual
Apps and features 60 Reminder Create reminders to schedule to-do items or to view content later. You will receive notifications at the preset time or location for each reminder. • To receive more accurate notifications, connect to a Wi-Fi or mobile network. • To fully use this feature, you must sign in to your Samsung account. • To use location reminders, the GPS feature must be activated. Starting Reminder Starting Reminder from Bixby Home 1 On the Home screen, swipe to the right. The Bixby Home screen will appear. 2 Tap Get started on the Reminder card. The Reminder screen will appear and the Reminder app icon () will be added to the Apps screen. Apps and features 61 Starting Reminder from Calendar Launch the Calendar app and tap → Reminder. The Reminder screen will appear and the Reminder app icon () will be added to the Apps screen. Creating reminders Create reminders with various methods. Reminder will alert you if you create a reminder with a specified time or location setting. You can also save various content, such as a single memo or webpage address, and view it later. For example, create a reminder to alert you to ‘Water the flowers when I get home’. 1 Launch the Reminder app. 2 Tap Write a reminder or and enter ‘Water the flowers’. 3 Tap Place → Pick a place and set the location to home. 4 Tap When I arrive at → Done. 5 Tap Save to save the reminder. When you arrive at home, the ‘Water the flowers’ notification will appear. Apps and features 62 Checking reminder notifications At the preset time or location, a notification pop-up window will appear. Tap Complete or Snooze. Viewing the reminders list Launch the Reminder app to view your reminders list. To view reminder details, select a reminder. Editing reminder details Add or edit reminder details, such as frequency, date and time, or location. 1 On the reminders list, select a reminder to edit and tap Edit. 2 Edit the conditions and tap Save. Reminder conditions Change the reminder's colour. Reminder information Add a checklist. Add an image. Apps and features 63 Completing reminders Mark reminders that you do not need to be reminded of as complete. On the reminders list, select a reminder and tap Complete. Restoring reminders Restore reminders that have been completed. 1 On the reminders list, tap → Completed → Edit. 2 Tick items to restore and tap Restore. Reminders will be added to the reminders list and you will be reminded at the preset times. Deleting reminders To delete a reminder, select a reminder and tap Delete. To delete multiple reminders, tap and hold a reminder, tick reminders to delete, and then tap Delete. Apps and features 64 Phone Introduction Make or answer voice and video calls. Making calls 1 Launch the Phone app and tap Keypad. 2 Enter a phone number. 3 Tap to make a voice call, or tap to make a video call. Preview the phone number. Delete a preceding character. Access additional options. Search for a contact. Add the number to the contacts list. Apps and features 65 Making calls from call logs or contacts list Launch the Phone app, tap Recents or Contacts, and then swipe to the right on a contact or a phone number to make a call. If this feature is deactivated, launch the Settings app, tap Advanced features → Motions and gestures , and then tap the Swipe to call or send messages switch to activate it. Using speed dial Set speed dial numbers to quickly make calls. To set a number to speed dial, launch the Phone app, tap Keypad or Contacts → → Speed dial numbers , select a speed dial number, and then add a phone number. To make a call, tap and hold a speed dial number on the keypad. For speed dial numbers 10 and up, tap the first digit(s) of the number, and then tap and hold the last digit. For example, if you set the number 123 as a speed dial number, tap 1, tap 2, and then tap and hold 3. Making calls from the locked screen On the locked screen, drag outside the circle. Making calls by searching for nearby places You can easily make calls to places near your current location by searching for their information. You can search for nearby places by category, such as restaurants or stores, or by selecting recommended hot places. Launch the Phone app, tap Places, and then select a category or tap and enter a business name in the search field. Or, select one from the recommended hot places. The business’s information, such as its phone number or address, will appear. This feature may not be available depending on the region or service provider. Making an international call 1 Launch the Phone app and tap Keypad. 2 Tap and hold 0 until the + sign appears. 3 Enter the country code, area code, and phone number, and then tap . Apps and features 66 Receiving calls Answering a call When a call comes in, drag outside the large circle. Rejecting a call When a call comes in, drag outside the large circle. To send a message when rejecting an incoming call, drag the Send message bar upwards and select a message to send. If the Add reminder switch is activated, a reminder will be saved to alert you of the rejected call one hour later. To create various rejection messages, launch the Phone app, tap → Settings → Quick decline messages , enter a message, and then tap . Missed calls If a call is missed, the icon appears on the status bar. Open the notification panel to view the list of missed calls. Alternatively, launch the Phone app and tap Recents to view missed calls. Blocking phone numbers Block calls from specific numbers added to your block list. 1 Launch the Phone app and tap → Settings → Block numbers. 2 Tap Recents or Contacts, select contacts or phone numbers, and then tap Done. To manually enter a number, tap Add phone number, enter a phone number, and then tap . When blocked numbers try to contact you, you will not receive notifications. The calls will be logged in the call log. You can also block incoming calls from people that do not show their caller ID. Tap the Block unknown callers switch to activate the fea…
Text truncated - open the document above for the full version.
Users Manual
Apps and features 100 AR EMOJI Introduction Create a My Emoji that looks just like you, and take photos and record videos using My Emojis, character Emojis, or stickers. You can customise My Emoji’s features, such as the face shape or hairstyle, and decorate My Emoji with various accessories. You can also express yourself in fun ways using My Emoji stickers during a conversation. My EmojisCharacter EmojisStickers Apps and features 101 Creating My Emoji Make a My Emoji that looks like you. My Emoji stickers with various expressions will be automatically generated. 1 Launch the Camera app, tap MORE on the shooting modes list, and then tap AR EMOJI → Create My Emoji. 2 Align your face on the screen and tap to take a photo. 3 Select My Emoji’s gender and age range and tap Next. 4 Decorate a My Emoji and tap Next. The My Emoji and My Emoji stickers are now created. You can view My Emoji stickers in the My Emoji Studio. Refer to My Emoji stickers for more information. Create My Emoji. You can use the AR EMOJI feature in both the front and rear cameras. If you are using the rear camera, it will automatically switch to the front camera. To switch between cameras, swipe upwards or downwards on the preview screen. Deleting My Emoji Launch the Camera app, tap MORE on the shooting modes list, and then tap AR EMOJI. Tap and hold the My Emoji that you want to delete and tap . The My Emoji and My Emoji stickers will be deleted. Apps and features 102 Customising My Emoji Edit or decorate a My Emoji in the My Emoji Studio. You can also create your own My Emoji stickers. Available options may vary depending on the region or service provider. My Emoji Studio Launch the Camera app, tap MORE on the shooting modes list, and then tap AR EMOJI → Studio. My Emoji Studio will appear. Select a My Emoji to edit. Edit the My Emoji. Change the My Emoji home screen's background. Create stickers. Capture the current screen. Apps and features 103 My Emoji stickers Create your own stickers with My Emoji expressions and actions. You can use My Emoji stickers when sending messages or on a social network. Viewing My Emoji stickers In the My Emoji Studio, tap Stickers. Then, you can view My Emoji stickers. Create your own stickers. Add stickers. Creating your own stickers 1 In the My Emoji Studio, tap Stickers → Make custom stickers. 2 Edit stickers how you want. • : Add stickers. • : Select the sticker’s background. • : Select an expression. • : Select an action. • : Enter text. • : Write or draw on stickers. 3 Tap Save. Apps and features 104 Using My Emoji stickers in chats You can use My Emoji stickers during a conversation via messages or on a social network. The following actions are an example of using My Emoji stickers in the Messages app. 1 While composing a message in the Messages app, tap on the Samsung keyboard. 2 Tap the My Emoji icon. 3 Select one of the My Emoji stickers. The My Emoji sticker will be inserted. My Emoji icon Deleting My Emoji stickers On the Samsung keyboard, tap and tap at the bottom of the keyboard. Select the My Emoji stickers you want to delete and tap Delete. Apps and features 105 Capturing photos or videos with My Emoji Create fun photos or videos with My Emoji using various shooting modes. Basic Mask 1 Launch the Camera app, tap MORE on the shooting modes list, and then tap AR EMOJI. 2 Select a My Emoji you want to use. My Emoji Apps and features 106 3 Select the mode you want to use. • (Mask): My Emoji’s face appears over your face so it looks like you are wearing a mask. • (Basic): My Emoji mimics your expressions. 4 Tap to take a photo, or swipe to the left on the preview screen and tap to record a video. You can view and share the photos and videos that you have captured in Gallery. Capturing photos or videos with character Emojis or stickers Character Emojis mimic your expressions. You can also apply sticker effects that follow your face. 1 Launch the Camera app, tap MORE on the shooting modes list, and then tap AR EMOJI. 2 Select a character Emoji, or tap Stickers and select a sticker you want to use. Stickers Character Emoji 3 Tap to take a photo, or swipe to the left on the preview screen and tap to record a video. You can view and share the photos and videos that you have captured in Gallery. Apps and features 107 AR Doodle Record fun videos with virtual handwriting or drawings on faces or anywhere else. When the camera recognises a face or space, the doodles on the face will follow the face as it moves, and the doodles in the space will be fixed in the same place even if the camera moves. 1 Launch the Camera app and tap VIDEO on the shooting modes list. 2 Tap and select a mode you want. When the camera recognises the subject, the recognition area will appear on the screen. • Face: Doodle on a face. • Everywhere: Doodle anywhere else. 3 Write or draw in the recognition area. If you tap and begin to doodle, you can record yourself doodling. Recognition area Change the pen type and colour. Redo Undo 4 Tap to record a video. 5 Tap to stop recording the video. You can view and share the video in Gallery. Apps and features 108 Always On Display You can view information, such as the clock or calendar, or control music playback on the screen when it is turned off. You can also check notifications for new messages or missed calls. The brightness of the Always On Display may change automatically depending on the lighting conditions. Setting how to display the Always On Display You can select how to display the Always On Display. The Always On Display can be set to appear continuously or only appear when tapping the screen while it is turned off. Also, you can set the time to display the Always On Display. Launch the Settings app, tap Lock screen → Always On Display, and then select the mode you want. • Tap to show: The Always On Display appears for 10 seconds when you tap the screen. • Show always: The Always On Display continuously appears. • Show as scheduled: The Always On Display appe…
Text truncated - open the document above for the full version.
Users Manual
Settings 184 Dual Messenger Install the second app and use two separate accounts for the same messenger app. 1 On the Settings screen, tap Advanced features → Dual Messenger. Supported apps will appear. 2 Tap the switch of an app to install the second app. The second app will be installed. The second app’s icon will be displayed with . When you receive notifications from the second app, the notifications will be displayed with to distinguish them from the first app’s notifications. Second app • The Dual Messenger feature may not be available depending on the app. • Some features of the app may be limited for the second app. Uninstalling a second app 1 On the Settings screen, tap Advanced features → Dual Messenger. 2 Tap the switch of the app you want to uninstall and tap Disable or Uninstall. All data related to the second app will be deleted. If you uninstall the first app, the second app will also be deleted. Settings 185 Digital Wellbeing and parental controls Options View the history of your device usage and use features to prevent your device from interfering with your life. You can also set up parental controls for your children and manage their digital use. On the Settings screen, tap Digital Wellbeing and parental controls. • Digital Wellbeing: View the daily usage history of your device. Refer to Digital Wellbeing for more information. • Parental controls: Manage your children’s digital use. Digital Wellbeing View the daily usage history of your device. You can also limit usage time or change the notification settings for each app. On the Settings screen, tap Digital Wellbeing and parental controls → Digital Wellbeing. Number of unlocks Set timers for apps. Number of notifications Focus mode The time the screen was on Settings 186 Setting timers for apps You can limit the daily usage time for each app by setting a timer. When you reach the limit, the app will be deactivated and you cannot use it. 1 On the Settings screen, tap Digital Wellbeing and parental controls → App timers. 2 Tap No timer next to the app you want and set the time. Activating wind down mode You can activate wind down mode to reduce eye strain before sleeping and prevent your sleep from being disturbed. 1 On the Settings screen, tap Digital Wellbeing and parental controls → Wind Down → Start now. 2 To set the schedule to activate wind down mode, tap Set a schedule, tap the switch to activate it, and then set the days and time. Settings 187 Device care Introduction The device care feature provides an overview of the status of your device’s battery, storage, memory, and system security. You can also automatically optimise the device with a tap of your finger. Battery Storage Security Memory Optimising your device On the Settings screen, tap Device care → Optimise now. The quick optimisation feature improves device performance through the following actions. • Clearing some memory. • Deleting unnecessary files and closing apps running in the background. • Managing abnormal battery usage. • Scanning for crashed apps and malware. Settings 188 Using the auto optimisation feature You can set the device to perform auto optimisation when your device is not in use. Tap → Advanced → Auto optimisation and tap the switch to activate it. If you want to set the time to perform auto optimisation, tap Time. Battery Check the remaining battery power and time to use the device. For devices with low battery levels, conserve battery power by activating power saving features. On the Settings screen, tap Device care → Battery. • The usage time left shows the time remaining before the battery power runs out. Usage time left may vary depending on your device settings and operating conditions. • You may not receive notifications from some apps that use power saving mode. Power mode Select a power mode that suits your device usage purposes. Tap Power mode and select an option. • Optimised: Optimised for a balance between the device’s performance and battery usage. • Medium power saving: Activate power saving mode to extend the battery’s usage time. • Maximum power saving: In maximum power saving mode, the device decreases battery consumption by activating dark mode and limiting the apps and features available. Network connections, except for the mobile network, will be deactivated. You can set the device to charge the battery more quickly. Tap the Fast cable charging switch to activate it. Adaptive power saving You can set the device to activate power saving mode automatically based on your usage patterns and the remaining battery power. Tap Power mode and tap the Adaptive power saving switch to activate it. Your device will activate power saving mode based on the situation to extend the battery’s usage time. Settings 189 Managing battery usage for each app You can save battery power by preventing apps that are running in the background from using battery power when they are not being used. Tap Battery usage, select apps from the apps list, and then tap the Put app to sleep switch to activate the feature. Storage Check the status of the used and available memory. On the Settings screen, tap Device care → Storage. • The actual available capacity of the internal memory is less than the specified capacity because the operating system and default apps occupy part of the memory. The available capacity may change when you update the device. • You can view the available capacity of the internal memory in the Specification section for your device on the Samsung website. Managing the memory To delete residual files, such as cache, tap Clean now. To delete files or uninstall apps that you do not use any more, select a category. Then, tick items to select and tap Delete. Memory On the Settings screen, tap Device care → Memory. To speed up your device by stopping apps running in the background, tick apps from the apps list, and tap Clean now. Security Check the device’s security status. This feature scans your device for malware. On the Settings sc…
Text truncated - open the document above for the full version.
Cover Letter(s)
Date: November 27, 2019 UL Korea, Ltd. Suwon Laboratory 218 Maeyeong-ro, Yeongtong-gu, Suwon-si, Gyeonggi-do, 16675, Korea To whom it may concern: I, the undersigned, hereby authorize UL Korea, Ltd. Suwon Laboratory, to act on our behalf in all manners relating to application for equipment authorization, including signing of all documents relating to these matters. Any and all acts carried out by UL Korea, Ltd. Suwon Laboratory on our behalf shall have the same effect as acts of our own. In authorizing UL Korea as our agent, we still recognize that we are responsible to: a) comply with the relevant provisions of the certification program; b) make all necessary arrangements for the conduct of the evaluation, including provision for examining documentation and access to all areas, records (including internal audit reports) and personnel for the purposes of evaluation (e.g. testing, inspection, assessment, surveillance, reassessment) and resolution of complaints; c) make claims regarding certification only in respect of the scope for which certification has been granted; d) do not use our product certification in such a manner as to bring the Certification Division into disrepute and not make any statement regarding our product certification which the Certification Division may consider misleading or unauthorized; e) upon suspension or cancellation of certification, discontinue use of all advertising matter that contains any reference thereto and return any certification documents as required by the Certification Division; f) use certification only to indicate the products are certified as being in conformity with specified standards; g) endeavor to ensure that no certificate or report nor any part thereof is used in a misleading manner; h) ensure that any reference to our product certification in communication media such as documents, brochures or advertising, complies with the requirements of the Certification Division; i) keep a record of all complaints made known to the us relating to the product’s compliance with requirements of the relevant standard and to make these records available to the when requested; j) take appropriate action with respect to such complaints and any deficiencies found in products or services that affect compliance with the requirements for certification; k) document the actions taken. l) the undersigned, hereby certify that we are not subject to a denial of federal benefits, that includes FCC benefits, pursuant to Section 5301 of the Anti-Drug Abuse Act of 1988, 21 U.S.C. 853(a). This authorization is valid until further written notice from the applicant. Sincerely Yours, Ms. Jenni Chun General Manager Samsung Electronics America, Inc. TEL: +1-973-808-6375 E-mail: [email protected]
Cover Letter(s)
August 10, 2020 Federal Comm unications Commission 7435 Oakland Mills Road Columbia MD 21046 Subject: FCC ID: Request for Confidentiality A3LSMG781B To Whom It May Concern: Pursuant to the provisions of Sections 0.457 and 0.459 of the Commission’s rules (47 CFR §§ 0. 457, 0.459), we are requesting the Commission to withhold the following attachments as confidential document from public disclosure indefinitely. Schematics Block Diagram Operational Description Antenna Specification Parts List Tune-Up Procedure Above mentioned document contains detailed system and equipment description are considered as proprietary information in operation of the equipment. The public disclosure of above docum ents might be harmful to our company and would give competitor an unfair advantage in the market. In additional to above mentioned documents, pursuant to Public Notice DA 04-1705 of the Commission’s policy, in order to comply with the marketing regulations in 47 CFR §2.803 and the importation rules in 47 CFR §2.1204, while ensuring that business sensitive information remains confidential until the actual marketing of newly authorized devices. We are requesting the commission to grant short-term confidentiality request on the following attachments until 180 days External Photos Internal Photos Test Setup Photos User Manual It is our understanding that all measurement test reports, FCC ID label format and correspondence during certification review process cannot be granted as confidential documents and such information will be available for public review once the grant of equipment authorization is issued. Best Regards Ms. Jenni Chun General Manager Samsung Electronics America, Inc. TEL: +1-973-808-6375 E-mail: [email protected]
ID Label/Location Info
A. Information to be displayed 1. The information that will be displayed on the e-label and information that will remain in the user manual is shown below: Information On E-label In Manual FCC ID number Yes Yes DoC logo Not Applicable Not Applicable 15.19 statement (“This device complies with part 15 of the FCC Rules. Operation is subject to the following two conditions: (1) This device may not cause harmful interference, and (2) this device must accept any interference received, including interference that may cause undesired operation.”) - Yes Class A / B Digital Device user manual statements1 - Yes DoC declaration1 Not Applicable Not Applicable Caution to the user that changes or modifications not expressly approved by the party responsible for compliance could void the user's authority to operate the equipment1 - Yes Describe any other FCC regulatory - Yes Describe any other FCC regulatory information included in e-label 1 None Not Applicable If the e-label includes information typically included in the manual then the e-label shall clearly differentiate between information required to be on the device’s surface and information required to be in the manual – refer to 784748 D02 e labelling v01 section II D 3(b) Images of the e-label screen are provided below: B. Access to the required information on the e-label 1. Users are able to access the information in no more than three steps in a device’s menu. The actual steps are: From the home screen: a) Click on Settings App…
Text truncated - open the document above for the full version.
Contact Information
Applicant
Jenni Chun(General Manager)
Technical Contact
Test Firm
UL Korea, Ltd.Junwhan Lee
Technical Specifications
| # | Rule Parts | Frequency Range | Power Output |
|---|---|---|---|
| 1 | 15C | 0.11 MHz - 0.148 MHz | - |
Other Applications from Samsung Electronics Co Ltd
A3LSMU600
Sep 15, 2026Bluetooth Headset
Equipment Class
DTS - Digital Transmission SystemA3LSMA185G
Sep 08, 2026Portable Handset
Equipment Class
CXX - Communications Rcvr for use w/ licensed Tx and CBsA3LSMS741B
Aug 05, 2026Portable Handset
Equipment Class
6VL - 15E 6 GHZ Very Low Power DeviceA3LSMX940
Jul 31, 2026BT,BLE Tablet DTS,UNII a,b,g,n,ac,ax,be and digitizer
Equipment Class
DTS - Digital Transmission SystemA3LSMS741U
Jul 30, 2026Portable Handset
Equipment Class
6CD - 15E 6 GHz Low Power Dual Client