A3LSMP615GSM/WCDMA/LTE Tablet + BT/BLE, DTS/UNII a/b/g/n/ac and ANT+
Samsung Electronics Co Ltd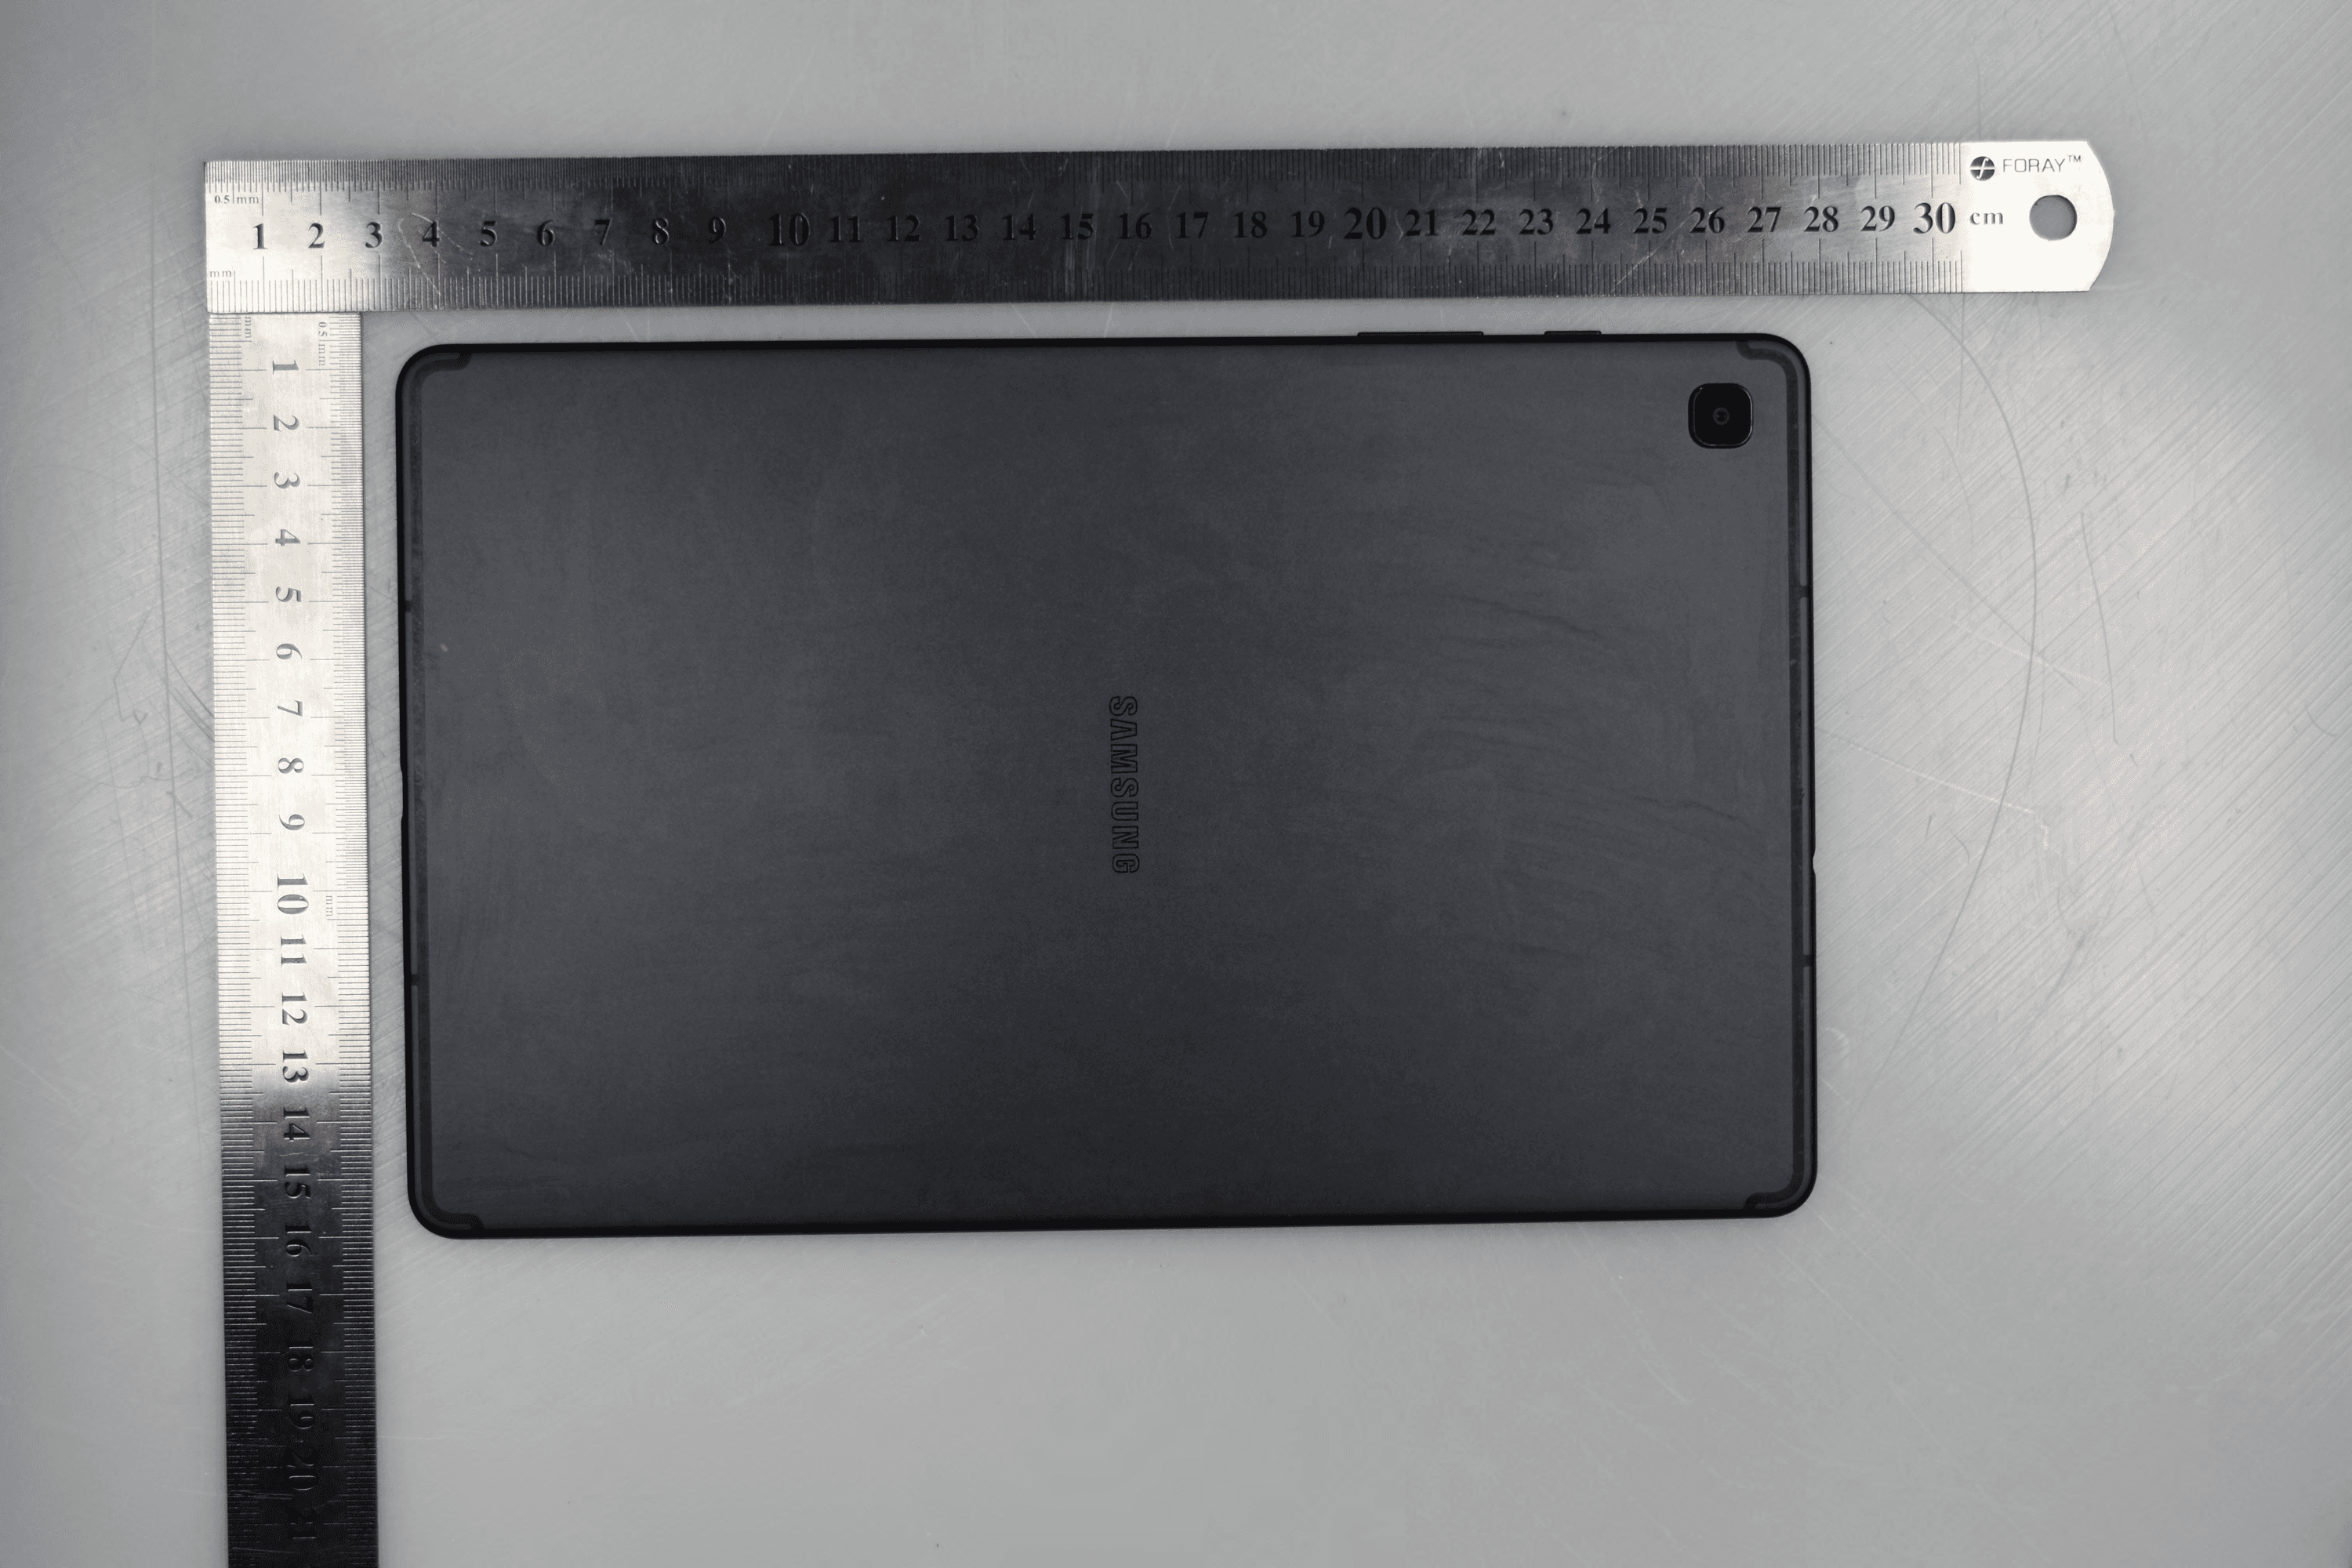
Click to zoom
Application Details
- Equipment Class
- NII - Unlicensed National Information Infrastructure TX
- Date of Grant
- Mar 12, 2020
- Application Purpose
- Original Equipment
- Date of Application
- Mar 10, 2020
- Equipment Note
- GSM/WCDMA/LTE Tablet + BT/BLE, DTS/UNII a/b/g/n/ac and ANT+
- Frequency Range
- 5745.00000000 - 5825.00000000
- Company
- Samsung Electronics Co Ltd
- Country
- United States
Documents & Files
Document Text
Text extracted from the exhibit documents filed with the FCC. Open a document above to read the original.
Users Manual
www.samsung.com USER MANUAL English (EU). 02/2020. Rev.1.0 SM-P615 2 Table of Contents Basics 4 Read me first 6 Devic e overheating situations and solutions 9 Device layout and functions 15 Battery 18 SIM or USIM card (nano-SIM card) 19 Memor y card (microSD card) 21 Turning the device on and off 23 Initial setup 24 Samsung ac count 25 Tr ansferring data from your previous device (Smart Switch) 27 Understanding the screen 40 Notification panel 42 Entering text Apps and features 45 Installing or uninstalling apps 47 Finder 48 S Pen f eatures 60 Bixby 64 Bixby Vision 67 Samsung Daily 68 Bixby R outines 70 Reminder 73 Phone 79 Contacts 83 Messages 86 Internet 88 Camera 101 Gallery 107 AR Doodle 108 Multi window 111 Samsung Members 111 Samsung Notes 119 PENUP 123 Galaxy Wearable 124 Calendar 125 Samsung Flow 127 Voice Recorder 128 My Files 128 Clock 130 Calculator 131 Game Launcher 132 Game B ooster 134 Kids Home 135 Smar tThings 139 Sharing c ontent 140 Daily Board 143 Samsung Global G oals 143 Google apps Table of Contents 3 177 Google 177 Advanced features 178 Motions and gestur es 179 Digital Wellbeing and parental controls 179 Digital W ellbeing 181 Device care 181 Optimising your devic e 182 Ba ttery 183 Storage 183 M emory 183 S ecurity 184 Apps 184 Gener al management 185 A ccessibility 186 Sof tware update 187 About tablet Appendix 188 Troubleshooting 194 Removing the battery Settings 145 Introduction 145 Connections 146 W i-Fi 148 Bluetooth 150 Data saver 150 Mobile da ta only apps 151 Mobile Hotspot and Tethering 152 Mor e connection settings 155 S ound 155 Dolby Atmos (surround sound) 156 Separate app sound 156 Notifica tions 157 Displa y 158 Nigh t mode 158 S creensaver 159 W allpaper 159 Lock screen 160 Smart Lock 160 Biometrics and secur ity 161 Fac e recognition 164 Samsung Pass 167 Secur e Folder 172 P rivacy 172 L ocation 173 Ac counts and backup 174 U sers 175 Samsung Cloud 4 Basics Read me first Please read this manual before using the device to ensure safe and proper use. • Descriptions are based on the device’s default settings. • Some content may differ from your device depending on the region, service provider, model specifications, or device’s software. • Content (high quality content) that requires high CPU and RAM usage will affect the overall performance of the device. Apps related to the content may not work properly depending on the device’s specifications and the environment that it is used in. • Samsung is not liable for performance issues caused by apps supplied by providers other than Samsung. • Samsung is not liable for performance issues or incompatibilities caused by edited registry settings or modified operating system software. Attempting to customise the operating system may cause the device or apps to work improperly. • Software, sound sources, wallpapers, images, and other media provided with this device are licensed for limited use. Extracting and using these materials for commercial or other purposes is an infringement of copyright laws. Users are entirely responsible for illegal use of media. • You may incur additional charges for data services, such as messaging, uploading and downloading, auto-syncing, or using location services depending on your data plan. For large data transfers, it is recommended to use the Wi-Fi feature. • Default apps that come with the device are subject to updates and may no longer be supported without prior notice. If you have questions about an app provided with the device, contact a Samsung Service Centre. For user-installed apps, contact service providers. • Modifying the device’s operating system or installing softwares from unofficial sources may result in device malfunctions and data corruption or loss. These actions are violations of your Samsung licence agreement and will void your warranty. Basics 5 • Depending on the region or service provider, a screen protector is attached for protection during production and distribution. Damage to the attached screen protector is not covered by the warranty. • You can see the touchscreen clearly even in strong outdoor sunlight by automatically adjusting the contrast range based on the surrounding environment. Due to the nature of the product, displaying fixed graphics for extended periods may result in afterimages (screen burn-in) or ghosting. – It is recommended not to use fixed graphics on part or all of the touchscreen for extended periods and turn off the touchscreen when not using the device. – You can set the touchscreen to turn off automatically when you are not using it. Launch the Settings app, tap Display → Screen timeout, and then select the length of time you want the device to wait before turning off the touchscreen. – To set the touchscreen to automatically adjust its brightness based on the surrounding environment, launch the Settings app, tap Display, and then tap the Adaptive brightness switch to activate it. • Depending on the region or model, some devices are required to receive approval from the Federal Communications Commission (FCC). If your device is approved by the FCC, you can view the FCC ID of the device. To view the FCC ID, launch the Settings app and tap About tablet → Status. If your device does not have an FCC ID, it means that the device has not been authorised for sale in the U.S. or its territories and may only be brought to the U.S. for the owner’s personal use. • Depending on the region, you can view the regulatory information on the device. To view the information, launch the Settings app and tap About tablet → Regulatory information . Instructional icons Warning: situations that could cause injury to yourself or others Caution: situations that could cause damage to your device or other equipment Notice: notes, usage tips, or additional information Basics 6 Device overheating situations and solutions When the device heats up while charging the battery While charging, the device and the charger may become hot. During wireless charging or…
Text truncated - open the document above for the full version.
Users Manual
Apps and features 89 2 Tap to take a photo. Camera settings Take a photo. Preview thumbnail Shooting modes Select a lens Switch between the front and rear cameras. Options for current shooting mode Scene optimiser button Current mode • The preview screen may vary depending on the shooting mode and which camera is being used. • The camera automatically shuts off when unused. • Make sure that the lens is not damaged or contaminated. Otherwise, the device may not work properly in some modes that require high resolutions. • Your device’s camera features a wide-angle lens. Minor distortion may occur in wide-angle photos or videos and does not indicate device performance problems. Locking the focus (AF) and exposure (AE) You can lock the focus or exposure on a selected area to prevent the camera from automatically adjusting based on changes to the subjects or light sources. Tap and hold the area to focus, the AF/AE frame will appear on the area and the focus and exposure setting will be locked. The setting remains locked even after you take a photo. This feature is available only in Photo or Pro modes. Apps and features 90 Selecting a lens for shooting On the preview screen, select the lens you want and take a photo or record a video. This feature is only available in some shooting modes. • : The wide-angle lens lets you take basic photos or record normal videos. • : The telephoto lens (2x optical zoom) lets you take photos or record videos by enlarging the subject. 2x optical zoom shooting Basic shooting Apps and features 91 Using shooting modes To change the shooting mode, drag the shooting modes list to the left or right, or swipe to the left or right on the preview screen. Select a shooting mode you want. Shooting modes list Photo mode (Intelligent camera) The camera adjusts the shooting options automatically depending on the surroundings to capture photos easily. The intelligent camera feature automatically recognises the subject and optimises the colour and any effects. On the shooting modes list, tap PHOTO and tap to take a photo. Scene optimiser The camera adjusts the colour settings and applies the optimised effect automatically by recognising the subject. On the shooting modes list, tap PHOTO. When the camera recognises the subject, the scene optimiser button will change and the optimised colour and effect will be applied. Apps and features 92 • If this feature is not activated, tap on the preview screen and tap the Scene optimiser switch to activate it. • To use additional features, tap on the preview screen, tap Scene optimiser, and then tap the switches next to the features you want. • If you do not want to use this feature, tap the Scene optimiser button on the preview screen. Shot suggestions The camera suggests the ideal composition for the photo by recognising the position and angle of your subject. On the preview screen, tap and tap the Shot suggestions switch to activate it. 1 On the shooting modes list, tap PHOTO. A guide will appear on the preview screen. 2 Point the guide at the subject. The camera recognises the composition, and the recommended composition appears on the preview screen. Apps and features 93 3 Adjust the position and angle of the camera to fit the composition. When the ideal composition is achieved, the guide will change to yellow. 4 Tap to take a photo. Guide Ideal composition Taking selfies You can take self-portraits with the front camera. 1 On the shooting modes list, tap PHOTO. 2 On the preview screen, swipe upwards or downwards, or tap to switch to the front camera for self-portraits. 3 Face the front camera lens. To take self-portraits with a wide-angle shot of the landscape or people, tap . 4 Tap to take a photo. Applying filter and beauty effects You can select a filter effect and modify facial features, such as your skin tone or face shape, before taking a photo. 1 On the preview screen, tap . 2 Select a filter effect or beauty effects and take a photo. Apps and features 94 Video mode The camera adjusts the shooting options automatically depending on the surroundings to record videos easily. 1 On the shooting modes list, tap VIDEO. 2 Tap to record a video. • To capture an image from the video while recording, tap . • To change the focus while recording a video, tap where you want to focus. To use auto focus mode, tap AF to cancel the manually set focus. 3 Tap to stop recording the video. The 2x optical zoom may not work in low-light environments. Live focus mode Take photos that focus on the face by blurring the background. You can also apply a background effect and edit it after taking a photo. BlurSpinZoomColour point • Use this feature in a place that has sufficient light. • The background blur may not be applied properly in the following conditions: – The device or the subject is moving. – The subject has a similar colour to the background. Apps and features 95 Taking portraits that stand out using the Live focus feature 1 On the shooting modes list, tap LIVE FOCUS. Drag the background blur adjustment bar to the left or right to adjust the blur level. 2 When Ready appears on the preview screen, tap to take a photo. Background blur adjustment bar Editing the background of the Live focus photos You can also edit the background effect and the intensity of the background effect for a photo taken with the Live focus feature. 1 Select a photo taken with the Live focus feature and tap Change background effect. 2 Select a background effect you want. To adjust the intensity of the background effect, drag the adjustment bar to the left or right. Adjust the intensity of the background effect. Change the background effect. 3 Tap Apply to save the photo. Apps and features 96 Pro mode Capture photos while manually adjusting various shooting options, such as exposure value and ISO value. On the shooting modes list, tap MORE → PRO. Select options and customise the settings, and then tap to take a photo. Available options • : Select an ISO value. This contro…
Text truncated - open the document above for the full version.
Users Manual
Apps and features 112 Composing notes with handwriting On the note composer screen, tap to write or draw with the S Pen. You can enter your handwriting more easily if you magnify the screen by spreading two fingers on it. Pen Favourite pens Eraser Undo Redo Convert handwriting to text. Select and edit. Change the background colour. Change styles. Change drawings into shape. Apps and features 113 Editing your favourite pens Add various styles of pens to your favourites and then you can select and use them more quickly. On the note composer screen, tap . Add a favourite pen. Delete pens. Your favourite pens Changing the pen settings When writing or drawing on the screen, tap to change the pen type, line thickness, or pen colour. Select colour sets to show. Change the pen colour. Change the pen type. Change the line thickness. Select a new colour using the colour picker. Apps and features 114 Using the eraser When you want to erase handwriting from a note, tap and select an area to erase. Alternatively, select an area while pressing and holding the S Pen button. To change the eraser type, tap once more. • Erase by line: Erase the line you select. • Erase by area: Erase only the area you select. You can adjust the size of the eraser by dragging the size adjustment bar. • Erase all: Clear the note. Even with a smaller eraser, you may still not be able to precisely erase the intended part. Using the easy writing pad Use the easy writing pad to enter your handwriting more easily. When you write or draw on the easy writing pad, your handwriting will be automatically adjusted and entered between the lines of the input field. 1 On the Samsung Notes main screen, tap → → Add-ons and tap the Easy writing pad switch to activate it. 2 On the note composer screen, tap . The input field will be magnified and appear as the easy writing pad. Easy writing pad Apps and features 115 Editing handwritten notes Edit handwritten notes using various editing options, such as cutting, moving, resizing, or transforming. 1 When there is handwriting on the note, tap . To change the shape of the selection, tap once more. 2 Tap or draw a line around the input to select. To move the input to another location, select the input, and then drag it to a new location. To change the size of the selection, tap the input and drag a corner of the frame that appears. 3 Edit the input using the available options. • Cut: Cut out the input. To paste it to another location, tap and hold the location, and then tap Paste. • Copy: Copy the input. To paste it to another location, tap and hold the location, and then tap Paste. • Delete: Delete the input. • Change style: Change styles. Select a colour or line thickness and tap Done. • Extract text: Extract text from the selected area. To paste or copy the text to a note, tap Paste or Copy. • To front: Send the input to the front. • To back: Send the input to the back. Apps and features 116 Changing styles You can change the style of your handwriting and drawings. 1 After writing or drawing on the screen, tap twice. 2 Select a colour or line thickness you want. 3 Point the S Pen toward where you want to apply the style. The icon will appear. 4 Tap where you want to change the style. Changing drawings into shape You can change your drawings into shapes. Tap and draw. Your drawings will now automatically change into the corresponding shape. Apps and features 117 Converting handwriting to text After writing on the screen, tap it with your finger. To select all of your handwriting on the current page, tap . Options will appear in the preview window. To replace the handwriting with the text, tap Convert. Painting with brushes On the note composer screen, tap to paint with various brushes. When you are finished, tap Done to insert your painting into the note. You can post your painting to PENUP to share it with others. Select colour sets to show. Select a new colour using the colour picker. Change the brush colour. Redo Post the painting to PENUP. Undo Change the brush type. Eraser Insert the painting into the note. Apps and features 118 Pinning a note to the Home screen Pin a note to the Home screen to quickly view it or open and edit it. 1 Launch the Samsung Notes app. 2 Select a note and tap → Pin to home screen. The note will be added to the Home screen. Saving a note as a reminder You can save a note as a reminder to view the note later. 1 Launch the Samsung Notes app. 2 Select a note and tap → Send to Reminder. The note will be saved as a reminder. Deleting notes 1 Launch the Samsung Notes app. 2 Tap and hold a note to delete. To delete multiple notes, tick more notes to delete. 3 Tap Delete. Apps and features 119 PENUP Introduction PENUP is a social network service for sharing artwork drawn with the S Pen. Post your artwork, view others’ artwork, and get useful drawing tips. Post your artwork. Your profile View artwork by category. Your activities You can sign in to PENUP with your Samsung account or other SNS accounts. Posting your artwork 1 Launch the PENUP app and tap . 2 Select an option. • Tap Drafts, finish artwork, and then tap Done. • Tap From Gallery, select your artwork to post, and then tap Done. • Tap Photo drawing, select an option to take a photo or select a photo, draw on it, and then tap Done. • Tap Drawing, draw artwork, and then tap Done. Apps and features 120 3 Tap Save and post. If you want to apply a filter to your artwork, tap Choose a filter, select a filter you want, and then tap Next. This option will not appear when you select From Gallery. 4 Enter a title, description, and hashtag. 5 Tap Post. Posting artwork from other apps To post your artwork from Gallery or other drawing apps, select the artwork from an app and tap → PENUP. Colouring images Using the various colours, create your own artwork. 1 Launch the PENUP app, and then tap Colouring. 2 Select an image. 3 Tap Start colouring. 4 When you are finished, tap Done. Apps and features 121 Live drawing Draw along as…
Text truncated - open the document above for the full version.
Cover Letter(s)
Date: November 28, 2019 UL Korea, Ltd. Suwon Laboratory 218 Maeyeong-ro, Yeongtong-gu, Suwon-si, Gyeonggi-do, 16675, Korea To whom it may concern: I, the undersigned, hereby authorize UL Korea, Ltd. Suwon Laboratory, to act on our behalf in all manners relating to application for equipment authorization, including signing of all documents relating to these matters. Any and all acts carried out by UL Korea, Ltd. Suwon Laboratory on our behalf shall have the same effect as acts of our own. In authorizing UL Korea as our agent, we still recognize that we are responsible to: a) comply with the relevant provisions of the certification program; b) make all necessary arrangements for the conduct of the evaluation, including provision for examining documentation and access to all areas, records (including internal audit reports) and personnel for the purposes of evaluation (e.g. testing, inspection, assessment, surveillance, reassessment) and resolution of complaints; c) make claims regarding certification only in respect of the scope for which certification has been granted; d) do not use our product certification in such a manner as to bring the Certification Division into disrepute and not make any statement regarding our product certification which the Certification Division may consider misleading or unauthorized; e) upon suspension or cancellation of certification, discontinue use of all advertising matter that contains any reference thereto and return any certification documents as required by the Certification Division; f) use certification only to indicate the products are certified as being in conformity with specified standards; g) endeavor to ensure that no certificate or report nor any part thereof is used in a misleading manner; h) ensure that any reference to our product certification in communication media such as documents, brochures or advertising, complies with the requirements of the Certification Division; i) keep a record of all complaints made known to the us relating to the product’s compliance with requirements of the relevant standard and to make these records available to the when requested; j) take appropriate action with respect to such complaints and any deficiencies found in products or services that affect compliance with the requirements for certification; k) document the actions taken. l) the undersigned, hereby certify that we are not subject to a denial of federal benefits, that includes FCC benefits, pursuant to Section 5301 of the Anti-Drug Abuse Act of 1988, 21 U.S.C. 853(a). This authorization is valid until further written notice from the applicant. Sincerely Yours, Ms. Jenni Chun General Manager Regu latory & Environmental Affairs Samsung Electronics CO. LTD TEL: +1-973-808-6375 E-mail: [email protected]
Cover Letter(s)
February 26, 2020 Federal Comm unications Commission 7435 Oakland Mills Road Columbia MD 21046 Subject: FCC ID: Request for Confidentiality A3LSMP615 To Whom It May Concern: Pursuant to the provisions of Sections 0.457 and 0.459 of the Commission’s rules (47 CFR §§ 0. 457, 0.459), we are requesting the Commission to withhold the following attachments as confidential document from public disclosure indefinitely. Schematics Block Diagram Operational Description Antenna Specification Parts List Tune-Up Procedure Above mentioned document contains detailed system and equipment description are considered as proprietary information in operation of the equipment. The public disclosure of above documents might be harmful to our company and would give competitor an unfair adv antage in the market. In additional to above mentioned documents, pursuant to Public Notice DA 04-1705 of the Commission’s policy, in order to comply with the marketing regulations in 47 CFR §2.803 and the importation rules in 47 CFR §2.1204, while ensuring that business sensitive information remains confidential until the actual marketing of newly authorized devices. We are requesting the commission to grant short-term confidentiality request on the following attachments until 180 days External Photos Internal Photos Test Setup Photos User Manual It is our understanding that all measurement test reports, FCC ID label format and correspondence during certification review process cannot be granted as confidential documents and such information will be available for public review once the grant of equipment authorization is issued. Best Regards Ms . J enni Chun General Manager Regulatory & Environmental Affairs Samsung Electronics CO. LTD TEL: +1-973-808-6375 E-mail: [email protected]
ID Label/Location Info
Description of E-label and Location - FCC ID : A3LSMP615 - Model : SM-P615 This model is app lied E-label, please find description of E-label below. 1. FCC ID(E-label): Sett ing -> About tablet -> Status FCC certification FCC ID:A3LSMP615 <Device Display Screen> 2. Instruction of E -label on the User manual (online manual) Basics • Depending on the region or service provider, a screen protector is attached for protection during production and distribution. Damage to the attached screen protector is not covered by the warranty. • You can see the touchscreen clearly even in strong outdoor sunlight by automatically adjusting the contrast range based on the surrounding environment. Due to the nature of the product, displaying fixed graphics for extended periods may result in afterimages (screen burn-in) or ghosting. – It is recommended not to use fixed graphics on part or all of the touchscreen for extended periods and turn off the touchscreen when not using the device. – You can set the touchscreen to turn off automatically when you are not using it. Launch the Settings app, tap Display → Screen timeout, and then select the length of time you want the device to wait before turning off the touchscreen. – To set the touchscreen to automatically adjust its brightness based on the surrounding environment, launch the Settings app, tap Display, and then tap the Adaptive brightness switch to activate it. • Depending on the region or model, some devices are required to receive approval from the Federal Communications Commission (FCC). If your device is approved by the FCC, you can view the FCC ID of the device. To view the FCC ID, launch the Settings app and tap About tablet → Status. • Depending on the region, you can view the regulatory information on the device. To view the information, launch the Settings app and tap About tablet → Regulatory information .
ID Label/Location Info
Samsung Electronics Co., Ltd. 129, Samsung-ro, Yeongtong-gu Suwon-si, Gyeonggi-do, 16677, Korea Federal Comm unications Commission 7435 Oakland Mills Road Columbia, MD 21046 E-label Attestation Letter - FCC ID : A3LSMP615 - Model : SM-P615 To Whom It May Concern We hereby prov ide the following attestations according to CFR 2.935 and FCC KDB 784748 D02: At the time of purchase, the FCC ID is readily and physically visible to the purchaser on the exterior package per CFR 2.935(f). The FCC ID will be readily legible without the aid of magnification according to CFR 2.935(d). The literature in the package describes how to access the electronic display to find FCC ID per CFR 2.935(b) and FCC KDB 784748. Per CFR 2.935(c), the user will be able to access this information within a maximum of 3 steps. The user will be able to access this information without a SIM card, special accessories or supplemental plug-ins. Per CFR 2.935(e), We, Samsung Electronics Co., Ltd., have programmed the e-label and it is not able to be modified by any third party. Per CFR 2. 935(f), the FCC ID will be able to survive normal shipping and handling so it is visible for inspection at the time of import. Should yo u have any questions or comments concerning the above, please contact the undersigned. Sincerely, Jenni Chun General Manager Samsung Electronics CO. LTD TEL: +1-973 -808-6 375 FAX: 1-973-8 08-6 361 E-mail: [email protected]
RF Exposure Info
Plot No. 1 Test Laboratory: UL Korea, Ltd. Suwon Laboratory Date: 2020-02-04 GSM 850 Frequency: 824.2 MHz; Duty Cycle: 1:1.99986; Room Ambient Temperature: 23.0C; Liquid Temperature: 22.0C Medium parameters used: f = 825 MHz; σ = 0.893 S/m; ε r = 43.177; ρ = 1000 kg/m 3 DASY5 Configuration: - Area Scan Setting: Find Secondary Maximum Within: 2.0 dB and with a peak SAR value greater than 0.0012W/kg - Electronics: DAE4 Sn1494; Calibrated: 2019-07-18 - Probe: EX3DV4 - SN7376; ConvF(10.3, 10.3, 10.3) @ 824.2 MHz; Calibrated: 2019-09-27 - Sensor-Surface: 2.5mm (Mechanical Surface Detection) - Phantom: ELI V6.0 (20deg probe tilt); Type: QD OVA 003 AA; Serial: 2013 Edge 1/GPRS 4 slots ch.128/Area Scan (13x5x1): Measurement grid: dx=15mm, dy=15mm Maximum value of SAR (measured) = 0.903 W/kg Edge 1/GPRS 4 slots ch.128/Zoom Scan (5x5x7)/Cube 0: Measurement grid: dx=8mm, dy=8mm, dz=5mm Reference Value = 32.03 V/m; Power Drift = -0.04 dB Peak SAR (extrapolated) = 1.08 W/kg SAR(1 g) = 0.780 W/kg; SAR(10 g) = 0.535 W/kg Maximum value of SAR (measured) = 0.919 W/kg 0 dB = 0.919 W/kg = -0.37 dBW/kg Plot No. 2 Test Laboratory: UL Korea, Ltd. Suwon Laboratory Date: 2020-02-20 GSM 1900 Frequency: 1909.8 MHz; Duty Cycle: 1:1.99986; Room Ambient Temperature: 23.0C; Liquid Temperature: 22.0C Medium parameters used: f = 1910 MHz; σ = 1.456 S/m; ε r = 39.21; ρ = 1000 kg/m 3 DASY5 Configuration: - Area Scan Setting: Find Secondary Maximum Within: 2.0 dB and with a peak SAR value greater than 0.0012W/kg - Electronics: DAE4 Sn1591; Calibrated: 2019-09-11 - Probe: EX3DV4 - SN7545; ConvF(7.91, 7.91, 7.91) @ 1909.8 MHz; Calibrated: 2019-09-23 - Sensor-Surface: 2.5mm (Mechanical Surface Detection) - Phantom: ELI V6.0 (20deg probe tilt) (Left); Type: QD OVA 003 AA; Serial: 2111 Rear/EGPRS 4 slots ch.810/Area Scan (8x7x1): Measurement grid: dx=15mm, dy=15mm Maximum value of SAR (measured) = 0.574 W/kg Rear/EGPRS 4 slots ch.810/Zoom Scan (5x5x7)/Cube 0: Measurement grid: dx=8mm, dy=8mm, dz=5mm Reference Value = 31.57 V/m; Power Drift = 0.01 dB Peak SAR (extrapolated) = 2.00 W/kg SAR(1 g) = 0.846 W/kg; SAR(10 g) = 0.337 W/kg Maximum value of SAR (measured) = 1.43 W/kg 0 dB = 1.43 W/kg = 1.55 dBW/kg Plot No. 3 Test Laboratory: UL Korea, Ltd. Suwon Laboratory Date: 2020-01-29 WCDMA Band II Frequency: 1880 MHz; Duty Cycle: 1:1; Room Ambient Temperature: 23.0C; Liquid Temperature: 22.0C Medium parameters used: f = 1880 MHz; σ = 1.405 S/m; ε r = 41.39; ρ = 1000 kg/m 3 DASY5 Configuration: - Area Scan Setting: Find Secondary Maximum Within: 2.0 dB and with a peak SAR value greater than 0.0012W/kg - Electronics: DAE4 Sn1494; Calibrated: 2019-07-18 - Probe: EX3DV4 - SN7376; ConvF(8.63, 8.63, 8.63) @ 1880 MHz; Calibrated: 2019-09-27 - Sensor-Surface: 2.5mm (Mechanical Surface Detection) - Phantom: ELI V6.0 (20deg probe tilt); Type: QD OVA 003 AA; Serial: 2013 Edge 1/Rel.99 ch.9400/Area Scan (9x5x1): Measurement grid: dx=15mm, dy=15mm Maximum value of SAR (measured) = 0.782 W/kg Edge 1/Rel.99 ch.9400/Zoom Scan (5x5x7)/Cube 0: Measurement grid: dx=8mm, dy=8mm, dz=5mm Reference Value = 24.00 V/m; Power Drift = -0.03 dB Peak SAR (extrapolated) = 1.02 W/kg SAR(1 g) = 0.628 W/kg; SAR(10 g) = 0.368 W/kg Maximum value of SAR (measured) = 0.797 W/kg 0 dB = 0.797 W/kg = -0.99 dBW/kg Plot No. 4 Test Laboratory: UL Korea, Ltd. Suwon Laboratory Date: 2020-01-29 WCDMA Band IV Frequency: 1752.6 MHz; Duty Cycle: 1:1; Room Ambient Temperature: 23.0C; Liquid Temperature: 22.0C Medium parameters used (interpolated): f = 1752.6 MHz; σ = 1.324 S/m; ε r = 41.458; ρ = 1000 kg/m 3 DASY5 Configuration: - Area Scan Setting: Find Secondary Maximum Within: 2.0 dB and with a peak SAR value greater than 0.0012W/kg - Electronics: DAE4 Sn1494; Calibrated: 2019-07-18 - Probe: EX3DV4 - SN7376; ConvF(8.72, 8.72, 8.72) @ 1752.6 MHz; Calibrated: 2019-09-27 - Sensor-Surface: 2.5mm (Mechanical Surface Detection) - Phantom: ELI V6.0 (20deg probe tilt); Type: QD OVA 003 AA; Serial: 2013 Edge 1/Rel.99 ch.1513/Area Scan (9x5x1): Measurement grid: dx=15mm, dy=15mm Maximum value of SAR (measured) = 0.884 W/kg Edge 1/Rel.99 ch.151…
Text truncated - open the document above for the full version.
Contact Information
Applicant
Jenni Chun(General Manager)
Test Firm
UL Korea, Ltd.Junwhan Lee
Technical Specifications
| # | Rule Parts | Frequency Range | Power Output |
|---|---|---|---|
| 4 | 15E | 5.75 GHz - 5.83 GHz | 28.00 mW |
Other Applications from Samsung Electronics Co Ltd
A3LSMU600
Sep 15, 2026Bluetooth Headset
Equipment Class
DTS - Digital Transmission SystemA3LSMA185G
Sep 08, 2026Portable Handset
Equipment Class
CXX - Communications Rcvr for use w/ licensed Tx and CBsA3LSMS741B
Aug 05, 2026Portable Handset
Equipment Class
6VL - 15E 6 GHZ Very Low Power DeviceA3LSMX940
Jul 31, 2026BT,BLE Tablet DTS,UNII a,b,g,n,ac,ax,be and digitizer
Equipment Class
DTS - Digital Transmission SystemA3LSMS741U
Jul 30, 2026Portable Handset
Equipment Class
6CD - 15E 6 GHz Low Power Dual Client