AK8DCRTRV50Sony Handycam DCR-TRV50
Sony Group Corporation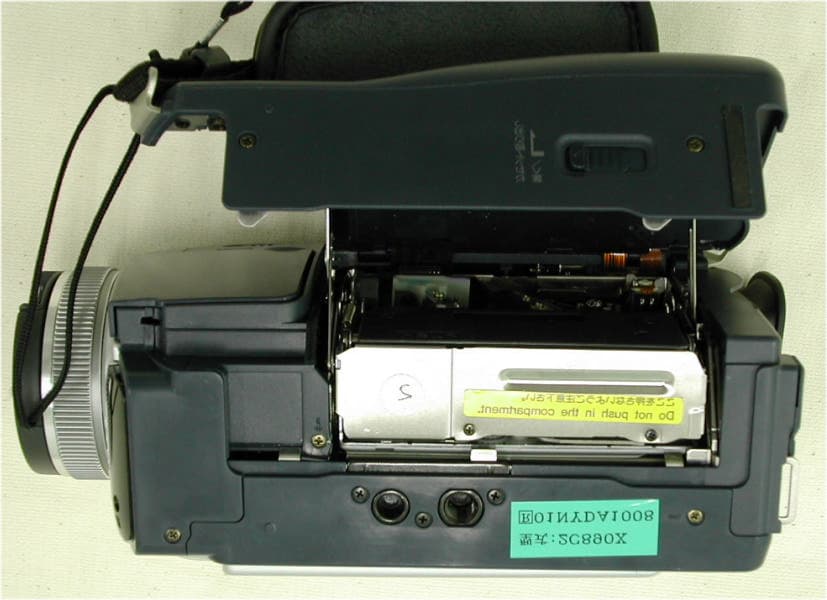
Click to zoom
Application Details
- Equipment Class
- DSS - Part 15 Spread Spectrum Transmitter
- Date of Grant
- Mar 06, 2002
- Application Purpose
- Original Equipment
- Date of Application
- Mar 06, 2002
- Equipment Note
- Sony Handycam DCR-TRV50
- Frequency Range
- 2402.00000000 - 2480.00000000
- Company
- Sony Group Corporation
- Country
- Japan
Documents & Files
Document Text
Text extracted from the exhibit documents filed with the FCC. Open a document above to read the original.
Users Manual
3-074-375-11 (1) ©2002 Sony Corporation Operating Instructions Before operating the unit, please read this manual thoroughly, and retain it for future reference. Owner’s Record The model and serial numbers are located on the bottom. Record the serial number in the space provided below. Refer to these numbers whenever you call upon your Sony dealer regarding this product. DCR-TRV40/TRV50 Digital Video Camera Recorder Model No. DCR-TRVModel No. AC- Serial No.Serial No. SERIES TM DCR-TRV50 2 Welcome! Congratulations on your purchase of this Sony Handycam. With your Handycam, you can capture life’s precious moments with superior picture and sound quality. Your Handycam is loaded with advanced features, but at the same time it is very easy to use. You will soon be producing home video that you can enjoy for years to come. WARNING To prevent fire or shock hazard, do not expose the unit to rain or moisture. CAUTION The use of optical instruments with this product will increase eye hazard. As the laser beam used in this Handycam is harmful to eyes, do not attempt to disassemble the cabinet. Refer to servicing to qualified personnel only. Notice If static electricity or electromagnetism causes data transfer to discontinue midway (fail), restart the application or disconnect and connect the USB cable again. This symbol is intended to alert the user to the presence of uninsulated “dangerous voltage” within the product’s enclosure that may be of sufficient magnitude to constitute a risk of electric shock to persons. This symbol is intended to alert the user to the presence of important operating and maintenance (servicing) instructions in the literature accompanying the appliance. For customers in the U.S.A. and CANADA CAUTION TO PREVENT ELECTRIC SHOCK, MATCH WIDE BLADE OF PLUG TO WIDE SLOT, FULLY INSERT. RECYCLING LITHIUM-ION BATTERIES Lithium-Ion batteries are recyclable. You can help preserve our environment by returning your used rechargeable batteries to the collection and recycling location nearest you. For more information regarding recycling of rechargeable batteries, call toll free 1-800-822- 8837, or visit http://www.rbrc.org/ Caution: Do not handle damaged or leaking Lithium-Ion batteries. DCR-TRV50 only Countries and areas where you can use network functions are restricted. For details, refer to the separate Network Operating Instructions. For customers in the U.S.A. If you have any questions about this product, you may call: Sony Customer Information Center 1-800-222- SONY (7669) The number below is for the FCC related matters only. Regulatory Information Declaration of Conformity Trade Name:SONY Model No.:DCR-TRV50 Responsible Party:Sony Electronics Inc. Address:680 Kinderkamack Road, Oradell, NJ07649 U.S.A. Telephone No.:201-930-6972 This device complies with Part 15 of the FCC Rules. Operation is subject to the following two conditions: (1) This device may not cause harmful interference, and (2)this device must accept any interference received, including interference that may cause undesired operation. 3 “Memory Stick” This device complies with Part 15 of the FCC Rules. Operation is subject to the following two conditions: (1) This device may not cause harmful interference, and (2) this device must accept any interference received, including interference that may cause undesired operation. CAUTION You are cautioned that any changes or modifications not expressly approved in this manual could void your authority to operate this equipment. Note: This equipment has been tested and found to comply with the limits for a Class B digital device, pursuant to Part 15 of the FCC Rules. These limits are designed to provide reasonable protection against harmful interference in a residential installation. This equipment generates, uses, and can radiate radio frequency energy and, if not installed and used in accordance with the instructions, may cause harmful interference to radio communications. However, there is no guarantee that interference will not occur in a particular installation. If this equipment does cause harmful interference to radio or television reception, which can be determined by turning the equipment off and on, the user is encouraged to try to correct the interference by one or more of the following measures: — Reorient or relocate the receiving antenna. — Increase the separation between the equipment and receiver. — Connect the equipment into an outlet on a circuit different from that to which the receiver is connected. — Consult the dealer or an experienced radio/TV technician for help. The supplied interface cable must be used with the equipment in order to comply with the limits for a digital device pursuant to Subpart B of Part 15 of FCC Rules. For customers in CANADA “Memory Stick” This Class B digital apparatus complies with Canadian ICES-003. The term “IC” before the equipment certification number only signifies that the Industry Canada technical specifications were met. 4 Main features Recording moving pictures or still images, and playing them back •Recording moving pictures on a tape (p. 26) •Recording still images on a tape (p. 52) •Playing back a tape (p. 40) •Recording still images on “Memory Stick”s (p. 47, 126) •Recording moving pictures on “Memory Stick”s (p. 144) •Viewing still images recorded on “Memory Stick”s (p. 156) •Viewing moving pictures on “Memory Stick”s (p. 159) Capturing images on your computer •Viewing images recorded on “Memory Stick”s using the USB cable (p. 190, 195) •Viewing moving pictures recorded on tapes using the USB cable (p. 185) •Capturing images on your computer from your camcorder using the USB cable (p. 187) •Converting an analog signal into digital to capture images onto your computer (p. 196) 4 Main Features Getting Started 5 Main features Accessing the Internet via a Bluetooth equipped device (DCR-TRV50 only) Accessing the Internet, sending/ receiving your e-mail. For details, refer to the Network Function Operating Instructions…
Text truncated - open the document above for the full version.
Users Manual
51 Advanced Recording Operations Self-timer recording You can record still images on “Memory Stick”s with the self-timer. You can also use the Remote Commander for this operation. Before operation •Insert a “Memory Stick” into your camcorder (p. 119). •Set PHOTO REC in to MEMORY in the menu settings.(The default setting is MEMORY.) (1)In the standby, press FN and select PAGE2. (2)Press SELFTIMER. The (self-timer) indicator appears on the screen. (3)Press PHOTO deeper. The self-timer starts counting down from 10 with a beep. In the last two seconds of the countdown, the beep gets faster, then the recording starts automatically. To cancel the self-timer Press SELFTIMER so that the (self-timer) indicator disappears from the screen while your camcorder is in the standby. You cannot cancel self-timer using the Remote Commander. Note The self-timer recording is automatically canceled when: –The self-timer recording is finished. –The POWER switch is set to OFF (CHG) or VCR. Self-timer recording You can operate the self-timer recording only during the recording standby. Recording still images on a “Memory Stick” during tape recording 3 PHOTO 1 FN PHOTO 52 You can record still images such as photographs on tapes. You can record about 510 images in the SP mode and about 765 images in the LP mode on a 60-minute tape. (1)In the standby, set PHOTO REC in to TAPE in the menu settings (p. 201). (2)Keep pressing PHOTO lightly until a still image appears. The CAPTURE indicator appears. Recording does not start yet. To change the still image, release PHOTO, select a still image again, and then press and hold PHOTO lightly. (3)Press PHOTO deeper. The still image on the screen is recorded for about seven seconds. The sound during those seven seconds is also recorded. The still image is displayed on the screen until recording is completed. Recording images with the flash For the details, see page 49. Recording images with self-timer (1)Set PHOTO REC in to TAPE in the menu settings (p. 201). (2)Follow steps 1 and 3 on page 51. Recording still images on a tape – Tape Photo recording 2 ••••••• 3 CAPTURE PHOTO PHOTO 53 Advanced Recording Operations Recording still images on a tape – Tape Photo recording Notes •During tape photo recording, you cannot change the mode or setting. •When recording a still image, do not shake your camcorder. The image may fluctuate. •You cannot use PHOTO during the following operations ( indicator flashes on the screen): –Fader –Digital effect If you record a moving subject with the tape photo recording When you play back the still image on other equipment, the image may fluctuate. This is not a malfunction. To use the tape photo recording with the Remote Commander Press PHOTO on the Remote Commander. Your camcorder records an image on the screen immediately. To use the tape photo recording during the normal camera recording You cannot check an image on the screen by pressing PHOTO lightly. Press PHOTO deeper. The still image is then recorded for about seven seconds, and your camcorder returns to the standby. To record clear still images with little unsteadiness We recommend that you record on “Memory Stick”s using the Memory Photo recording. When playing back images recorded with the flash on other equipment These images may flicker. 54 You can manually adjust and set the white balance. This adjustment makes white subjects look white and allows more natural color balance. Normally white balance is automatically adjusted. (1)Set the POWER switch to CAMERA or MEMORY/NETWORK (DCR-TRV50 only). Press MENU, then select WHT BAL in with the SEL/PUSH EXEC dial (p. 200). (2)Turn the SEL/PUSH EXEC dial to select the desired white balance, then press dial. HOLD : Recording a single-colored subject or background OUTDOOR : •When recording a sunset/sunrise, just after sunset, just before sunrise, neon signs, or fireworks •Under a color-matching fluorescent lamp n INDOOR : •Where lighting condition changes quickly •Excessively bright places such as studios •Under sodium lamps or mercury lamps To return to the automatic white balance Set WHT BAL to AUTO in the menu settings. If the picture is being taken in a studio lit by TV lighting We recommend that you record in the INDOOR. When you record under fluorescent lighting Use the automatic white balance or HOLD. Your camcorder may not adjust the white balance correctly in the INDOOR. In the automatic white balance Point your camcorder at a white subject for about 10 seconds after setting the POWER switch to CAMERA to get a better adjustment when: –You detach the battery for replacement. –You take your camcorder outdoors from inside a house holding the exposure, or vice versa. In the HOLD white balance Set the white balance to AUTO and reset to HOLD after a few seconds when: –You change the PROGRAM AE. –You take your camcorder outdoors from inside a house, or vice versa. 1 [ MENU ] : END MANUAL SET P EFFECT FLASH LVL WHT BAL N.S. LIGHT AUTO SHTR RETURN AUTO HOLD OUTDOOR INDOOR STBY MENU Adjusting the white balance manually 55 Advanced Recording Operations You can record a 16:9 wide picture to watch on a 16:9 wide-screen TV (16:9WIDE). If you connect a TV compatible with the ID-1/ID-2 system, the screen size is automatically selected. Black bands appear on the screen during recording in 16:9WIDE mode [a]. The picture during playback on a normal TV [b] or on a wide-screen TV [c] is compressed in the longwise direction. If you set the screen mode of the wide-screen TV to the full mode, you can watch pictures of normal images [d]. (1)In the standby, press MENU, then turn the SEL/PUSH EXEC dial to select 16:9WIDE in , then press the dial (p. 201). (2)Turn the SEL/PUSH EXEC dial to select ON, then press the dial. To cancel the wide mode Set 16:9WIDE to OFF in the menu settings. Using the wide mode [a] [c] [b] [d] 16:9WIDE 2 ON CAMERA SET D ZOOM PHOTO REC 16:9WIDE STEADYSHOT FRAME REC INT. REC RETURN [ MENU ] : END MENU 56 In the wide mode You cannot select th…
Text truncated - open the document above for the full version.
Users Manual
101 Editing If your TV or VCR is a monaural type Connect the yellow plug of the A/V connecting cable to the video output jack and the white or the red plug to the audio output jack on the VCR or the TV. When the white plug is connected, the left channel audio is recorded, and when the red plug is connected, the right channel audio is recorded. If your TV or VCR has an S video jack Pictures can be reproduced more faithfully by using an S video cable (optional). With this connection, you do not need to connect the yellow (video) plug of the A/V connecting cable. Connect an S video cable (optional) to the S video jacks of both your camcorder and the TV or VCR. This connection produces higher quality DV format pictures. Note on the Remote Commander Your camcorder works in the commander mode VTR 2. Commander modes 1, 2 and 3 are used to distinguish your camcorder from other Sony VCRs to avoid erroneous remote control operation. If you use another Sony VCR in the commander mode VTR 2, we recommend changing the commander mode or covering the sensor of the VCR with black paper. Recording video or TV programs 102 Recording video or TV programs Using the i.LINK cable (DV connecting cable) Simply connect the i.LINK cable (DV connecting cable) (optional) to DV IN/OUT jack on your camcorder and to DV OUT on the DV products. With a digital-to-digital connection, video and audio signals are transmitted in digital form for high-quality editing. (1)Insert a blank tape (or a tape you want to record over) into your camcorder, and insert the recorded tape into the VCR. (2)Set the POWER switch to VCR on your camcorder. (3)Press z REC and the button on its right simultaneously on your camcorder, then immediately press X on your camcorder. (4)Press N on the VCR to start playback. The picture to be recorded appears on the screen. (5)Press X on your camcorder at the scene where you want to start recording from. When you have finished dubbing a tape Press x on both your camcorder and the VCR. Using the Remote Commander In step 3, press z REC and MARK simultaneously, then immediately press X. In step 5, press X at the scene where you want to start recording from. DV 3 DV OUT DV IN/OUT REC PAUSE i.LINK cable (DV connecting cable) (optional) : Signal flow 103 Editing You can connect one VCR only using the i.LINK cable (DV connecting cable). During digital editing The color of the display may be uneven. However, this does not affect the dubbed picture. If you record playback pause picture with the DV IN/OUT jack The recorded picture becomes rough. When you play back the picture using your camcorder, the picture may jitter. Before recording Make sure that the DV IN indicator appears on the screen or in the viewfinder. The DV IN indicator may appear on both equipment. Note on the Remote Commander Your camcorder works in the commander mode VTR 2. Commander modes 1, 2 and 3 are used to distinguish your camcorder from other Sony VCRs to avoid erroneous remote control operation. If you use another Sony VCR in the commander mode VTR 2, we recommend changing the commander mode or covering the sensor of the VCR with black paper. Recording video or TV programs 104 Inserting a scene from a VCR – Insert Editing You can insert a new scene from a VCR onto your originally recorded tape by specifying the insert start and end points. Use the Remote Commander for this operation. Connections are the same as on page 100 or 102. Insert a cassette containing the desired scene to insert into the VCR. [A]: A tape that contains the scene to be superimposed [B]: A tape before editing [C]: A tape after editing (1)Set the POWER switch to VCR on your camcorder. (2)On the connected VCR, locate just before the insert start point [a], then press X to set the VCR to the playback pause. (3)On your camcorder, locate the insert end point [c]. Then press X to set your camcorder to the playback pause. (4)Press ZERO SET MEMORY on the Remote Commander. The ZERO SET MEMORY indicator flashes and the end point of the insert is stored in memory. The tape counter shows “0:00:00.” (5)On your camcorder, locate the insert start point [b] by pressing m, then press z REC and the button on its right simultaneously. (6)First press X on the VCR, and after a few seconds press X on your camcorder to start inserting the new scene. Inserting automatically stops near the zero point on the tape counter. Your camcorder automatically returns to the recording pause. [a] [b] [c] [A] [B] [C] 105 Editing To change the insert end point Press ZERO SET MEMORY again after step 5 to erase the ZERO SET MEMORY indicator and begin from step 3. Using the Remote Commander In step 5, press z REC and MARK simultaneously, then immediately press X. In step 6, press X at the scene where you want to start recording from. Note Pictures and sound recorded on the portion between the insert start and end points will be erased when you insert the new scene. If you insert scenes on the tape recorded on another camcorder (including other DCR-TRV40/TRV50) The pictures and sound may be distorted. We recommend that you insert scenes on a tape recorded on your camcorder. When the inserted picture is played back Pictures and sound may be distorted at the end of the inserted portion. This is not a malfunction. Pictures and sound at the start point and the end point may be distorted in the LP mode. To insert a scene without setting the insert end point Skip steps 3 and 4. Press x when you want to stop inserting. If you press FN The ZERO SET MEMORY indicator is not displayed. Note on the Remote Commander Your camcorder works in the commander mode VTR 2. Commander modes 1, 2 and 3 are used to distinguish your camcorder from other Sony VCRs to avoid erroneous remote control operation. If you use another Sony VCR in the commander mode VTR 2, we recommend changing the commander mode or covering the sensor of the VCR with black paper. Inserting a scene from a VCR – Insert Editing 4 0:00:00 ZERO SET MEMORY ZERO SET M…
Text truncated - open the document above for the full version.
Users Manual
151 “ Memory Stick ” Operations You can duplicate selected scenes (programs) for editing onto “Memory Stick”s. Making the program (1)Set the POWER switch to VCR. (2)Insert the tape for playback, and a “Memory Stick” for recording into your camcorder. (3)Press MENU and turn the SEL/PUSH EXEC dial to select VIDEO EDIT in , then press the dial (p. 209). (4)Turn the SEL/PUSH EXEC dial to select MEMORY, then press the dial. (5)Turn the SEL/PUSH EXEC dial to select IMAGESIZE and select the desired image size, then press the dial. (6)Search for the beginning of the first scene you want to insert using the video operation buttons, then pause playback. You can fine-adjust one frame at a time with EDITSEARCH. (7)Press MARK on the Remote Commander, or turn the SEL/PUSH EXEC dial to select MARK, the press the dial. The IN point of the first program is set, and the top part of the program mark changes to light blue. (8)Search for the end of the first scene you want to insert using the video operation buttons, then pause playback. (9)Press MARK on the Remote Commander, or the SEL/PUSH EXEC dial. The OUT point of the first program is set, then the bottom part of the program mark changes to light blue. (10)Repeat steps 6 to 9, then set the program. When one program is set, the program mark changes to light blue. You can set 20 programs in maximum. 7 9 10 6,8 REWPLAYFF STOPPAUSE 320 320 320 VIDEO EDIT MARK UNDO ERASE ALL START IMAGESIZE 1 OUT 0 : 08 : 55 : 06 TOTAL 0 : 00 : 00 SCENE 0 2min TOTAL 0 : 00 : 12 SCENE 1 2min TOTAL 0 : 00 : 31 SCENE 3 2min [ MENU ] : END VIDEO EDIT MARK UNDO ERASE ALL START IMAGESIZE 2 IN 0 : 08 : 58 : 06 [ MENU ] : END VIDEO EDIT MARK UNDO ERASE ALL START IMAGESIZE 4 IN 0 : 10 : 01 : 23 [ MENU ] : END N X N XN X MENU Recording edited pictures from a tape as a moving picture – Digital program editing (on “Memory Stick”s) 152 Recording edited pictures from a tape as a moving picture – Digital program editing (on “Memory Stick”s) Erasing the program you have set Erase OUT first and then IN from of the last program. (1)Turn the SEL/PUSH EXEC dial to select UNDO, then press the dial. (2)Turn the SEL/PUSH EXEC dial to select EXECUTE, then press the dial. The last set program mark flashes, then the setting is canceled. To cancel erasing Select RETURN with the SEL/PUSH EXEC dial in step 2. Erasing all programs (1)Turn the SEL/PUSH EXEC dial to select VIDEO EDIT in the menu settings, then select MEMORY, then press the dial. (2)Turn the SEL/PUSH EXEC dial to select ERASE ALL, then select EXECUTE, then press the dial. All the program marks flash, then the settings are canceled. To cancel erasing all programs Select RETURN with the SEL/PUSH EXEC dial in step 2. To cancel a program you have set Press MENU. The program is stored in memory until the tape is ejected. Notes •You cannot dub the titles, display indicators, or the contents of cassette memory. •You cannot operate recording during the Digital program editing on “Memory Stick”s. On a blank portion of the tape You cannot set IN or OUT on a blank portions of the tape. If there is a blank portion between IN and OUT on the tape The total time code may not be displayed correctly. During making a program If you eject the cassette, NOT READY appears on the screen. The program will be erased. 153 “ Memory Stick ” Operations Recording edited pictures from a tape as a moving picture – Digital program editing (on “Memory Stick”s) Performing the program (Dubbing on a “Memory Stick”) (1)Turn the SEL/PUSH EXEC dial to select VIDEO EDIT in the menu settings, then select MEMORY, then press the dial. (2)Turn the SEL/PUSH EXEC dial to select START, then select EXECUTE, then press the dial. Search for the beginning of the first program, then start dubbing. The program mark flashes. The SEARCH indicator appears during search, and the EDITING indicator appears during writing of data on your camcorder, and REC appears during dubbing on the screen. The program mark changes to light blue after dubbing is complete. When the dubbing ends, your camcorder automatically stops. To stop dubbing during editing Press x using the video operation buttons. The program you made is recorded on a “Memory Stick” up to the place where you pressed x. To end the Digital program editing Your camcorder stops when the dubbing ends. Then the display returns to VIDEO EDIT in the menu settings. Press MENU to end the Digital program editing. NOT READY appears on the LCD screen when: –The program to operate the Digital program editing has not been made. –The “Memory Stick” is not inserted. –The write-protect tab on the “Memory Stick” is set to LOCK. When “Memory Stick” does not have enough space to record LOW MEMORY appears on the screen. However, you can record pictures up to the time indicated. 154 Using the search function, you can automatically capture only still images from tapes and record them on a “Memory Stick” in sequence. Before operation •Insert a recorded tape into your camcorder and rewind the tape. •Insert a “Memory Stick” into your camcorder. (1)Set the POWER switch to VCR. (2)Press MENU and turn the SEL/PUSH EXEC dial to select PHOTO SAVE in , then press the dial (p. 204). PHOTO BUTTON appears on the screen. (3)Press PHOTO deeper. The still images from the tape are recorded on the “Memory Stick.” The number of still images copied is displayed. END is displayed when copying ends. To stop copying Press MENU or x. When the “Memory Stick” becomes full MEMORY FULL appears on the screen, and copying stops. Insert another “Memory Stick” and repeat the procedure from step 2. Copying still images from a tape – PHOTO SAVE 3 2 PHOTO SAV I NG 0 END 4 PHOTO BUTTON 640 STD 640 STD 640 STD PHOTO SAVE0 : 00 : 00 : 00 4/15 PHOTO SAVE0 : 30 : 00 : 00 8/15 MEMORY SET STILL SET MOVIE SET PHOTO SAVE FILE NO. RETURN READY [ MENU ] : END PHOTO SAVE0 : 00 : 00 : 00 4/15 [ PHOTO ] : START [ MENU ] : END [ MENU ] : END [ MENU ] : END MENU 155 “ Memory Stick ” Operations Copying still images…
Text truncated - open the document above for the full version.
Users Manual
201 Customizing Your Camcorder Changing the default settings with the menu Icon/item CAMERA SET D ZOOM PHOTO REC 16:9WIDE STEADYSHOT FRAME REC INT. REC HOLOGRAM F Mode zOFF 20× 120× zMEMORY TAPE zOFF ON zON OFF zOFF ON ON zOFF SET zAUTO OFF Meaning To deactivate the digital zoom. Up to 10× zoom is performed. To activate the digital zoom. More than 10× to 20× zoom is performed digitally (p. 31) To activate the digital zoom. More than 10× to 120× zoom is performed digitally To record still images on “Memory Stick”s when you press PHOTO in the tape recording or tape recording standby (p. 47) To record still images on tape when you press PHOTO in the tape recording or tape recording standby (p. 52) —— To record a 16:9 wide picture (p. 55) To compensate for camera-shake To cancel the SteadyShot. Natural pictures are produced when shooting a stationary object with a tripod. To deactivate Frame recording To activate Frame recording (p. 74) To activate interval recording (p. 72) To deactivate interval recording To set the INTERVAL and REC TIME for interval recording The HOLOGRAM AF emits when focusing on subjects is difficult in dark places (p. 132) The HOLOGRAM AF does not emit. POWER switch CAMERA CAMERA CAMERA CAMERA CAMERA CAMERA MEMORY/ NETWORK Notes on the SteadyShot •The SteadyShot will not correct excessive camera-shake. •Attachment of a conversion lens (optional) may influence the SteadyShot. If you cancel the SteadyShot The SteadyShot off indicator appears. Your camcorder prevents excessive compensation for camera-shake. (continued on the following page) 202 Icon/item VCR SET HiFi SOUND AUDIO MIX A/VtDV OUT LCD/VF SET LCD B.L. LCD COLOR VF B.L. Meaning To play back a stereo tape or dual sound track tape with main and sub sound (p. 221) To play back a stereo tape with the left sound or a dual sound tape with main sound To play back a stereo tape with the right sound or a dual sound track tape with sub sound To adjust the balance between the stereo 1 and stereo 2 (p. 109) To output digital images and sound in analog format using your camcorder To output analog images and sound in digital format using your camcorder (p. 196) To set the brightness on the LCD screen to normal To brighten the LCD screen To adjust the color on the LCD screen, turn the SEL/PUSH EXE dial. To set the brightness on the viewfinder screen to normal To brighten the viewfinder screen Mode zSTEREO 1 2 —— zOFF ON zBRT NORMAL BRIGHT —— zBRT NORMAL BRIGHT Changing the default settings with the menu POWER switch VCR VCR VCR VCR CAMERA MEMORY/ NETWORK VCR CAMERA MEMORY/ NETWORK VCR CAMERA MEMORY/ NETWORK Notes on LCD B.L. and VF B.L. •When you select BRIGHT, battery life is reduced by about 10 percent during recording. •When you use power supplies other than the battery pack, BRIGHT is automatically selected. Even if you adjust LCD B.L., LCD COLOR and/or VF B.L. The recorded picture will not be affected. To get low- intensity To get high- intensity ST1ST2 203 Customizing Your Camcorder Changing the default settings with the menu Icon/item MEMORY SET STILL SET BURST QUALITY IMAGESIZE MOVIE SET IMAGESIZE REMAIN (continued on the following page) Mode zOFF NORMAL HIGH SPEED EXP BRKTG MULTI SCRN zSUPER FINE FINE STANDARD z1360 × 1020 640 × 480 z320 × 240 160 × 112 zAUTO ON Meaning To not record continuously. To record from three to nine images continuously (p. 128) To record up to 16 images continuously fast To record three images continuously with different exposure To record nine images continuously, display the images on a single page divided into nine boxes To record still images in the finest image quality mode (p. 122) To record still images in the fine image quality mode To record still images in the standard image quality mode To record still images at 1360 × 1020 size (p. 124) To record still images at 640 × 480 size To record moving pictures at 320 × 240 size (p. 124). To record moving pictures at 160 × 112 size. To display the remaining capacity of the “Memory Stick” in the following cases: •For five seconds after setting the POWER switch to MEMORY/NETWORK (DCR- TRV50 only) or VCR •For five seconds after setting the POWER switch to MEMORY/NETWORK (DCR- TRV50 only) or VCR and inserting a “Memory Stick” •When the remaining capacity of the “Memory Stick” is less than two minutes after setting the POWER switch to MEMORY/NETWORK (DCR-TRV50 only) •For five seconds from the start of moving picture recording •For five seconds after completing a moving picture recording To always display the remaining capacity of the “Memory Stick” POWER switch MEMORY/ NETWORK VCR MEMORY/ NETWORK MEMORY/ NETWORK VCR MEMORY/ NETWORK VCR MEMORY/ NETWORK 204 Changing the default settings with the menu Icon/item MEMORY SET PHOTO SAVE FILE NO. DELETE ALL FORMAT Mode —— zSERIES RESET —— zRETURN OK POWER switch VCR VCR MEMORY/ NETWORK MEMORY/ NETWORK MEMORY/ NETWORK Notes on formatting •Do not do any of the following while FORMATTING is displayed: – Switch the POWER switch – Operate buttons – Eject the “Memory Stick” •The supplied or optional “Memory Stick” has been formatted at factory. Formatting “Memory Stick”s on your camcorder is not required. •You cannot format the “Memory Stick” if the write-protect tab on the “Memory Stick” is set to LOCK. •Format the “Memory Stick” when FORMAT ERROR is displayed. •Formatting erases protected image data on the “Memory Stick.” Meaning To copy still images on tape onto “Memory Stick” (p. 154). To assign numbers to file in sequence even if the “Memory Stick” is changed To reset the file numbering each time the “Memory Stick” is changed To delete all unprotected images (p. 170) To cancel formatting To format an inserted “Memory Stick” Formatting erases all information on the “Memory Stick” Check the contents of the “Memory Stick” before formatting. 1. Select FORMAT. 2. Select OK with the SEL/PUSH EXEC dial, then press the dial. 3. After EXECUTE appears, press SEL/PUSH EXEC dial. FORMATTING flashes during formatt…
Text truncated - open the document above for the full version.
Contact Information
Applicant
Kazuyuki Hori(Chief EMC/RF Compliance Specialist)
Test Firm
Kansai Electronic Industry Dev. Ct.Eizo Hariya
Technical Specifications
| # | Rule Parts | Frequency Range | Power Output |
|---|---|---|---|
| 1 | 15C | 2.40 GHz - 2.48 GHz | 26.00 µW |
Other Applications from Sony Group Corporation
AK8WW81782
Aug 21, 2026Radio Equipment
Equipment Class
DSS - Part 15 Spread Spectrum TransmitterAK8CFIZCP2
Aug 03, 2026Wireless Controller
Equipment Class
DSS - Part 15 Spread Spectrum TransmitterAK8OEV321MUH
Apr 14, 2026LCD Monitor
Equipment Class
JAD - Part 15 Class A Digital DeviceAK8OEV431MUH
Apr 14, 2026LCD Monitor
Equipment Class
JAD - Part 15 Class A Digital DeviceAK8OEV271MUH
Apr 14, 2026LCD Monitor
Equipment Class
JAD - Part 15 Class A Digital Device