AK8DCRTRV950Digital Video Camera Recorder TRV950
Sony Group Corporation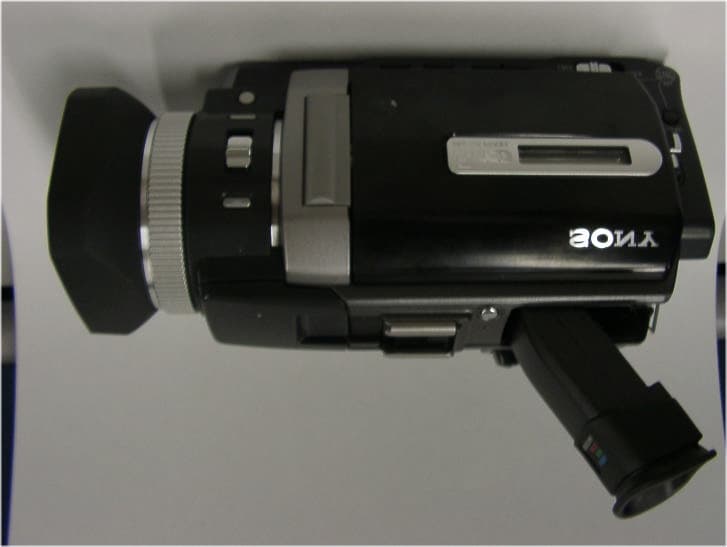
Click to zoom
Application Details
- Equipment Class
- DSS - Part 15 Spread Spectrum Transmitter
- Date of Grant
- May 01, 2002
- Application Purpose
- Original Equipment
- Date of Application
- May 01, 2002
- Equipment Note
- Digital Video Camera Recorder TRV950
- Frequency Range
- 2402.00000000 - 2480.00000000
- Company
- Sony Group Corporation
- Country
- Japan
Documents & Files
Document Text
Text extracted from the exhibit documents filed with the FCC. Open a document above to read the original.
Users Manual
DCR-TRV50 Network 3-074-603-11(1).US 3-074-603-11 (1) Network Function Operating Instructions © 2002 Sony Corporation Registration code (for a detailed explanation of this cord, see page 28.) 2 DCR-TRV50 Network 3-074-603-11(1).US On trademarks • ImageStation is the registered trademark of Sony Corporation. • “Memory Stick” and are registered trademarks of Sony Corporation. • The BLUETOOTH trademarks are owned by their proprietor and used by Sony Corporation under license. • NetFront by Access Co., Ltd. is adopted for the Internet function of this product. NetFront is a registered trademark of Access Co., Ltd in Japan. Copyright © 1996 – 2001 ACCESS CO., LTD. • Portions of the supplied software are based partially on the work of the Independent JPEG Group. All other product names mentioned herein may be the trademarks or registered trademarks of their respective companies. Furthermore, “™” and “®” are not mentioned in each case in this manual. No compensation for your recordings Any recording contents or downloaded files cannot be compensated for being lost due to redording/playback malfunction or storage media problems. Precautions • Before using the network function, make sure to set the clock on the camcorder. For details, refer to the operating instructions of the camcorder. If you use the network function without setting the clock, you may not be able to send/receive email, or view a web page. • Do not remove the battery pack or disconnect the AC power adaptor while operating in NETWORK mode. The setup for the NETWORK mode may be lost. Also, exit the NETWORK mode when setting the POWER switch to OFF (CHG) or switching the mode. These are to prevent the NETWORK mode setup from being lost. • It is recommended that you make backup copies of your email messages and your network preferences. These may be lost from time to time due to memory corruption. To save the network preferences, write them down on paper, or use “Setup memo,” described (p. 108). Also, this data may be lost when the camcorder is repaired by services. • The network function with this product is available only in the U.S. • The reset button cannot reset the network preferences. Note on network operation when using the battery pack When the remaining battery time is insufficient in NETWORK mode, use the AC power adaptor or replace the battery pack with a fully charged battery pack. Before connecting the AC power adaptor or replacing the battery pack, be sure to exit the NETWORK mode. 3 Introduction DCR-TRV50 Network 3-074-603-11(1).US Table of contents Introduction The network function on the camcorder ... 4 Basic operations in the NETWORK mode .................................................................. 6 How to use the Network Menu .......... 6 How to hold your camcorder when operating in the NETWORK mode ................................................ 7 How to use the stylus .......................... 8 How to input characters ...................... 9 Character input display ..................... 11 The available characters list .............. 12 Character input setting ...................... 17 Preparation Using the NETWORK functions .............. 18 Overview of the Bluetooth wireless technology ............................................ 19 Registering a Bluetooth device ......... 20 Using your Modem Adaptor with Bluetooth Function ...................... 20 When the registration has failed ...... 24 Displaying information on your camcorder ..................................... 24 Radio wave indication ....................... 26 Selecting other Bluetooth devices from the list .................................. 26 Deleting a registered Bluetooth device from the list ...................... 26 Customer registration ................................ 28 DI customer registration .................... 28 Online registration using your PC ... 28 Online registration with your camcorder ..................................... 28 Registering your album on the Web ........ 31 Internet service provider ........................... 32 Registering with “So-net” ......................... 33 Setting network preferences ..................... 34 Entering your DI customer ID and password ...................................... 34 Setting your provider preferences ... 36 Network Operation Making your album on the Web .............. 45 Uploading images to your album on the Web .................................... 45 Viewing or editing your album on the Web .................................... 52 Deleting images from your album ... 57 Finishing viewing or editing the album ............................................ 57 Using email .................................................. 58 Sending email ...................................... 58 Using the address book ..................... 69 Receiving email ................................... 75 Deleting unnecessary email .............. 80 Viewing web pages .................................... 82 Viewing web pages ............................ 82 How to use the menu bar on the browser ......................................... 84 Storing the web page into a “Memory Stick” – Page Memo ................................ 90 Shutting down the browser .............. 95 Additional Information File storage destinations and file names ................................................................ 96 Troubleshooting .......................................... 97 Trouble accessing the Internet .......... 97 Trouble with email ............................. 98 Trouble viewing web pages .............. 99 Troubles about the album on the Web .............................................. 100 Adjusting the LCD screen (CALIBRATION) ....................... 100 Specifications ............................................. 101 Messages .................................................... 102 General ............................................... 102 Album on the Web ........................... 103 Email .........…
Text truncated - open the document above for the full version.
Users Manual
58 DCR-TRV50 Network 3-074-603-11(1).US This section describes the basic usage of email. Email is sent and received via the Internet. Email is very convenient; you can send email anytime, and you can also send images stored in a “Memory Stick” by attaching them to email. Sending email By entering the email address of the destination, you can send an email message in a moment. 1Specifying the destination address Be careful to enter the address correctly. Tip You can select the email address from the address book. For details, see “Selecting the destination address from the address book” (p. 74). (1)Open the Network Menu. For details on how to open the Network Menu, refer to “Accessing the network” in the operating instructions supplied with your camcorder. (2)Tap [ Mail]. The Send screen appears. , Using email 59 Network Operation DCR-TRV50 Network 3-074-603-11(1).US (3)Tap [To]. The address list appears. The list shows the latest used six addresses that are registered in the address book. For details on the address book, see “Using the address book” (p. 69). When you have selected an address listed in the address book, go to step 7. , Tips •The last-used address is listed next to [ Return] and [ New]. •Addresses are listed in historical order. (4)Tap [ New]. The character input screen appears. , (5)Enter the email address of an addressee. For details on how to input characters, see “How to input characters” (p. 9). (6)Tap [Enter]. The Send screen appears again. The new email address is listed and its check box is indicated by the checkmark ( ). , Tip You can correct or edit the email address in the address book. For details on the address book, see “Editing or deleting the address book” (p. 72). Using email 60 DCR-TRV50 Network 3-074-603-11(1).US Using email (7)If you want to send the email message to other addressees, tap other email addresses. The check box of the tapped email address is indicated by the checkmark ( ). (8)Tap [ Return]. The Send screen appears again. Note If you try to send an email message with 50 addresses registered in the address book, the last-used address will be deleted. The message “Address Book Full Overwrite the Data with Current Address?” appears for verification. When you overwrite it, tap [OK]. When you tap [Cancel], delete the unnecessary address from the address book, then enter a new address. 61 Network Operation DCR-TRV50 Network 3-074-603-11(1).US 2Entering the subject of a message (1)Tap [Subject]. The subject list appears. The list shows the latest used six subjects. , When you want to use a subject shown on the list, tap the subject. After selecting the subject, go to “3 Entering the text of a message” (p. 62). Tip The last-used subject is listed next to [ Return] and [ New]. You cannot edit or delete the subject. (2)Tap [ New]. The character input screen appears. , (3)Enter the subject. For details on how to input characters, see “How to input characters” (p. 9). Note The maximum number of characters you can enter is 24. (4)Tap [Enter]. The Send screen appears again. , Using email 62 DCR-TRV50 Network 3-074-603-11(1).US 3Entering the text of a message Enter the text of the message. You can select the text from the message list, or edit it to suit your purposes. The list shows up to six messages. (1)Tap [Message]. The message list appears. , When you select the message you wrote previously, tap the message from the list. When you do not edit message, tap [OK]. After you select the message, go to “4 Sending email” (p. 63). If you edit the selected text, tap [Edit]. The character input screen appears. Go to step 3. (2)Tap [ New]. The character input screen appears. , (3)Enter your message. For details on how to input characters, see “How to input characters” (p. 9). Note The maximum number of characters you can enter is 512. (4)Tap [Enter]. The Send screen appears again. , Using email 63 Network Operation DCR-TRV50 Network 3-074-603-11(1).US 4Sending email Tip You can send an email message with your signature. For details, see “Attaching your signature to a message” (p. 67). (1)Select the image that you want to attach. When attaching images, see “Attaching images to email” (p. 66). (2)Check the message. When you check or edit a message, see “Checking or editing a message” (p. 64). (3)Tap [Send]. The screen for verifying the connection appears. Set your Bluetooth device to connection standby with your camcorder beforehand. For details, refer to the operating instructions supplied with your Bluetooth device. (4)Check the telephone number. When dialing other telephone numbers Tap [TEL No.]. The registered telephone number list appears. Tap the desired telephone number. The selected telephone number is specified. (5)Tap [Connect]. Your camcorder starts dialing the selected telephone number. After the sending is completed, the message “Sending Mail Complete” appears. The phone line is automatically disconnected. , Using email 64 DCR-TRV50 Network 3-074-603-11(1).US (6)Tap [OK]. The Send screen appears again. To cancel sending email During sending, tap [Cancel]. Tip You can automatically check the email inbox after sending email. For details, see “4 Setting other preferences” (p. 42). Checking or editing a message (1)Display the Send screen. (2)Tap [Message]. The message list appears. , (3)Tap the message you want to check or edit. The following screen appears. , Using email 65 Network Operation DCR-TRV50 Network 3-074-603-11(1).US (4)Check or edit the message. When the message is long, tap the message area, then tap the scroll button V to scroll the message. When you only check the message: After checking the message, tap [OK]. The Send screen appears again. When you edit the message: Go to step 5. (5)Tap [Edit]. The character input screen appears. , (6)Edit the message. For details on how to input characters, see “How to input characters” (p. 9). (7)Tap [Enter]. The Send screen appears again. , Using email 66 DCR-TRV50 Network 3-074-603-11(1).US Attachin…
Text truncated - open the document above for the full version.
Users Manual
3-075-494-11 (1) ©2002 Sony Corporation Operating Instructions Before operating the unit, please read this manual thoroughly, and retain it for future reference. Owner’s Record The model and serial numbers are located on the bottom. Record the serial number in the space provided below. Refer to these numbers whenever you call upon your Sony dealer regarding this product. DCR-TRV940/TRV950 Digital Video Camera Recorder Model No. DCR-TRVModel No. AC- Serial No.Serial No. SERIES TM DCR-TRV950 2 Welcome! Congratulations on your purchase of this Sony Handycam. With your Handycam, you can capture life’s precious moments with superior picture and sound quality. Your Handycam is loaded with advanced features, but at the same time it is very easy to use. You will soon be producing home video that you can enjoy for years to come. WARNING To prevent fire or shock hazard, do not expose the unit to rain or moisture. CAUTION The use of optical instruments with this product will increase eye hazard. As the laser beam used in this Handycam is harmful to eyes, do not attempt to disassemble the cabinet. Refer to servicing to qualified personnel only. NOTICE If static electricity or electromagnetism causes data transfer to discontinue midway (fail), restart the application or disconnect and connect the USB cable again. This symbol is intended to alert the user to the presence of uninsulated “dangerous voltage” within the product’s enclosure that may be of sufficient magnitude to constitute a risk of electric shock to persons. This symbol is intended to alert the user to the presence of important operating and maintenance (servicing) instructions in the literature accompanying the appliance. For customers in the U.S.A. and CANADA CAUTION TO PREVENT ELECTRIC SHOCK, MATCH WIDE BLADE OF PLUG TO WIDE SLOT, FULLY INSERT. RECYCLING LITHIUM-ION BATTERIES Lithium-Ion batteries are recyclable. You can help preserve our environment by returning your used rechargeable batteries to the collection and recycling location nearest you. For more information regarding recycling of rechargeable batteries, call toll free 1-800-822- 8837, or visit http://www.rbrc.org/. Caution: Do not handle damaged or leaking Lithium-Ion batteries. DCR-TRV950 only Countries and areas where you can use network functions are restricted. For details, refer to the separate Network Operating Instructions. For customers in the U.S.A. If you have any questions about this product, you may call: Sony Customer Information Center 1-800-222- SONY (7669) The number below is for the FCC related matters only. Regulatory Information Declaration of Conformity Trade Name:SONY Model No.:DCR-TRV950 Responsible Party:Sony Electronics Inc. Address:680 Kinderkamack Road, Oradell, NJ07649 U.S.A. Telephone No.:201-930-6972 This device complies with Part 15 of the FCC Rules. Operation is subject to the following two conditions: (1) This device may not cause harmful interference, and (2)this device must accept any interference received, including interference that may cause undesired operation. 3 “Memory Stick” This device complies with Part 15 of the FCC Rules. Operation is subject to the following two conditions: (1) This device may not cause harmful interference, and (2) this device must accept any interference received, including interference that may cause undesired operation. CAUTION You are cautioned that any changes or modifications not expressly approved in this manual could void your authority to operate this equipment. DCR-TRV950 only IMPORTANT NOTE To comply with FCC RF exposure compliance requirements, the following antenna installation and device operating configurations must be satisfied: the antenna has been installed by the manufacturer and no changes can be made. Note: This equipment has been tested and found to comply with the limits for a Class B digital device, pursuant to Part 15 of the FCC Rules. These limits are designed to provide reasonable protection against harmful interference in a residential installation. This equipment generates, uses, and can radiate radio frequency energy and, if not installed and used in accordance with the instructions, may cause harmful interference to radio communications. However, there is no guarantee that interference will not occur in a particular installation. If this equipment does cause harmful interference to radio or television reception, which can be determined by turning the equipment off and on, the user is encouraged to try to correct the interference by one or more of the following measures: —Reorient or relocate the receiving antenna. —Increase the separation between the equipment and receiver. —Connect the equipment into an outlet on a circuit different from that to which the receiver is connected. —Consult the dealer or an experienced radio/TV technician for help. For customers in CANADA “Memory Stick” This Class B digital apparatus complies with Canadian ICES-003. DCR-TRV950 only The term “IC:” before the radio certification number only signifies that Industry Canada technical specifications were met. 4 Recording moving pictures or still images, and playing them back •Recording moving pictures on a tape (p. 26) •Recording still images on a tape (p. 51) •Playing back a tape (p. 39) •Recording still images on a “Memory Stick” (p. 46, 135) •Recording moving pictures on a “Memory Stick” (p. 153) •Viewing still images recorded on a “Memory Stick” (p. 165) •Viewing moving pictures on a “Memory Stick” (p. 168) Capturing images on your computer •Viewing images recorded on a “Memory Stick” using the USB cable (p. 199, 203) •Viewing moving pictures recorded on tapes using the USB cable (p. 194) •Capturing images on your computer from your camcorder using the USB cable (p. 196) •Converting an analog signal to digital to capture images onto your computer (p. 204) 4 Main Features Main Features Getting Started 5 Main Features Accessing the Internet, sending/ receiving your e-mail. For details, refer to the Netwo…
Text truncated - open the document above for the full version.
Users Manual
65 Advanced Recording Operations You can set the camcorder to display a zebra pattern (diagonal stripes) in the portion of the picture on the screen with a subject whose brightness exceeds a certain level. You can check the picture level of a subject by displaying the zebra pattern. Use the zebra pattern as a guide for adjusting the exposure so that you can get the desired picture. The zebra pattern is not recorded in the tape or the “Memory Stick.” Set the ZEBRA selector to 70 or 100 while the POWER switch is set to CAMERA or MEMORY/NETWORK (DCR-TRV950 only). Setting 70 100 OFF To erase the zebra pattern Set the ZEBRA selector to OFF. When the ZEBRA selector is set to 100 The portion of the picture where zebra pattern appears is an area of high brightness and overexposure. Shooting with the zebra pattern Meaning The zebra pattern appears in the portion of the picture on the screen with a subject whose brightness is about 70 IRE. The zebra pattern appears in the portion of the picture on the screen with a subject whose brightness exceeds more than 100 IRE. The zebra pattern does not appear on the screen. ZEBRA OFF 70100 66 Using the color bar If you press COLOR BAR, the color bar is displayed on the screen. Use the color bar in the following cases: –At the beginning of the recording, the recorded images may be unstable. To avoid this, record the color bar first and start recording the desired images when the captured images become clear. –To adjust screen color. Press COLOR BAR while the POWER switch is set to CAMERA. If you press COLOR BAR again the color bar disappears. When you adjust color on the screen Connect your camcorder to the TV (p. 45) and adjust image color on the TV screen. While the color bar is displayed The following functions do not work. However, the settings before the color bar is displayed are retained. –BACK LIGHT –SPOT LIGHT –Picture effect –Digital effect –PROGRAM AE –Shutter speed adjustment –White balance adjustment –Exposure –MEMORY MIX While the color bar is displayed during Picture effect, Digital effect or MEMORY MIX These effects cannot be added on the color bar. While using the fader The color bar cannot be displayed. COLOR BAR 67 Advanced Recording Operations AUTO LOCK selector Set the selector as shown below to maintain or release the settings of the functions. Manually adjusted functions are retained even if you set the AUTO LOCK selector to AUTO LOCK. However, all functions will automatically return to the default settings five minutes after removing the power supply. AUTO LOCK [a] Select this position to lock the PROGRAM AE, Shutter speed, White balance, Exposure and Flexible spot meter functions in order to make these function automatically adjusted. We recommend that you set the AUTO LOCK selector to AUTO LOCK if you use the video flash light (optional). AUTO LOCK release [b] Select this position for setting the functions manually. HOLD [c] Select AUTO LOCK release [b], and set the functions manually. Select this position [c] to maintain the settings. Using the PROGRAM AE You can select the PROGRAM AE (Auto Exposure) to suit your specific shooting requirements. Soft portrait This mode brings out the subject while creating a soft background for subjects such as people or flowers. Sports lesson This mode minimizes camera-shake on fast-moving subjects such as in tennis or golf. Beach & ski This mode prevents people’s faces from appearing dark in strong light or reflected light, such as at a beach in midsummer or on a ski slope. Sunset & moon This mode allows you to maintain atmosphere when you are recording sunsets, general night views, fireworks displays and neon signs. Landscape This mode is for when you are recording distant subjects such as mountains, and prevents your camcorder from focusing on glass or metal mesh in windows when you are recording a subject behind glass or a screen. AUTO LOCK HOLD [a][c] [b] Shooting with manual adjustment 68 (1)Set the AUTO LOCK selector to the center (auto lock release) position while the POWER switch is set to CAMERA or MEMORY/NETWORK(DCR-TRV950 only). (p. 67) (2)Press PROGRAM AE. (3)Turn the SEL/PUSH EXEC dial to select the desired mode, then press the dial. The indicator changes as follows: y y y y To cancel the PROGRAM AE Set the AUTO LOCK selector to the AUTO LOCK or press PROGRAM AE. The PROGRAM AE indicator disappears. Shooting with manual adjustment 3 2 PROGRAM AE 1 AUTO LOCK HOLD 69 Advanced Recording Operations Shooting with manual adjustment Notes •Because your camcorder is set to focus only on subjects in the middle to far distance, you cannot take close-ups in the following modes: –Sports lesson –Beach & ski •Your camcorder is set to focus only on distant subjects in the following modes: –Sunset & moon –Landscape •The following functions do not work in the PROGRAM AE: –BOUNCE –OLD MOVIE –Shutter speed adjustment –Spot focus •When you set the POWER switch to MEMORY/NETWORK (DCR-TRV950 only), Sports lesson does not work. (The indicator flashes.) The PROGRAM AE does not work When you are recording images on a “Memory Stick” using the MEMORY MIX. (The indicator flashes.) While WHT BAL is set to automatic adjustment The white balance is adjusted even if the PROGRAM AE is selected. You can adjust the following functions while using the PROGRAM AE –Backlight –Spot light –Exposure –Flexible Spot Meter When recording under a discharge tube such as a fluorescent lamp, sodium lamp or mercury lamp Flickering phenomenon whilch lights up or dims the screen, or the color change may occur in the following modes. If this happens, turn the PROGRAM AE off. –Soft portrait –Sports lesson 70 Adjusting the shutter speed You can adjust the shutter speed manually to suit your preference and with its shutter speed fixed. (1) Set the AUTO LOCK selector to the center (auto lock release) position while the POWER switch is set to CAMERA or MEMORY/NETWORK(DCR-TRV950 only). (p. 67) (2)Press SHUTTER SPEED. The shutter speed indica…
Text truncated - open the document above for the full version.
Users Manual
129 “Memory Stick” Operations Using a “Memory Stick” – Introduction Using a touch panel Most operation buttons for use of a “Memory Stick” are displayed on the LCD screen. Touch the LCD screen directly with your finger or the supplied stylus (DCR-TRV950 only) to operate each function. (1)Set the POWER switch to MEMORY/NETWORK (DCR-TRV950 only). Make sure that the LOCK switch is set to the further side (unlock position). (2)Press OPEN to open the LCD panel. Operation buttons appear on the LCD screen. You can switch the memory playback/memory camera by pressing PLAY/CAM. (3)Press FN. Operation buttons appear on the LCD screen. (4)Press PAGE2 to go to PAGE2. Operation buttons appear on the LCD screen. (5)Press PAGE3 to go to PAGE3. Operation buttons appear on the LCD screen. (6)Press a desired operation item. Refer to relevant pages for each function. FN 1 3~6 2 FNINDEXPLAYFNINDEXCAM SPOT FOCUS PLAY INDEXSPOT METER SELF TIMER MEM MIX 9PIC PRINT LCD BRT PLAY INDEX PLAY INDEX +– PAGE1 PAGE2 PAGE3 PAGE1 PAGE2 PAGE3 SLIDE SHOW PAGE1 PAGE2 PAGE3EXIT EXIT EXIT LOCK POWER OFF(CHG) CAMERA MEMORY/ NETWORK VCR In the memory camera In the memory camera In the memory playback (still image) 130 Using a “Memory Stick” – Introduction To return to FN Press EXIT. To execute settings Press OK. To cancel settings Press OFF to return to PAGE1/PAGE2/PAGE3. Notes •When using the touch panel, press operation buttons with your thumb supporting the LCD screen from the back side of it or press those buttons lightly with your index finger. •Do not press the LCD screen with sharp-pointed objects other than the supplied stylus. (DCR-TRV950 only) •Do not press the LCD screen too hard. •Do not touch the LCD screen with wet hands. •If FN is not on the LCD screen, touch the LCD screen lightly to make it appear. You can control the display with DISPLAY/TOUCH PANEL on your camcorder. •When operation buttons do not work even if you press them, an adjustment is required (CALIBRATION) (p. 238). •When the LCD screen gets dirty, clean it with the supplied cleaning cloth. When executing each item The green bar appears above the item. If the items are not available The color of the items changes to gray. Press FN to display the following buttons: In the memory camera PAGE1SELFTIMER, SPOT FOCUS, PLAY, INDEX, SPOT METER PAGE2LCD BRT, PLAY, INDEX, MEM MIX PAGE3SLIDE SHOW, PLAY, INDEX, 9PIC PRINT In the memory playback PAGE1PB ZOOM, CAM, INDEX, DELETE, + , – PAGE2LCD BRT, CAM, INDEX, + , – PAGE3SLIDE SHOW, CAM, INDEX, 9PIC PRINT, + , – 131 “Memory Stick” Operations Selecting the still image quality You can select the image quality in still image recording. The default setting is SUPER FINE. (1)Set the POWER switch to MEMORY/NETWORK (DCR-TRV950 only) or VCR. Make sure that the LOCK switch is set to the further side (unlock position). (2)Press MENU, then select STILL SET in with the SEL/PUSH EXEC dial (p. 211). (3)Turn the SEL/PUSH EXEC dial to select QUALITY , then press the dial. (4)Turn the SEL/PUSH EXEC dial to select the desired image quality , then press the dial. Using a “Memory Stick” – Introduction MENU 1 3 4 MEMORY SET STILL SET BURST QUALITY IMAGESIZE RETURN SUPER FINE FINE STANDARD [ MENU ] : END REMAIN 12 MEMORY SET STILL SET BURST QUALITY IMAGESIZE RETURN STANDARD [ MENU ] : END REMAIN 36 LOCK POWER OFF(CHG) CAMERA MEMORY/ NETWORK VCR 132 Image quality settings SettingMeaning SUPER FINE (SFN)This is the highest image quality in your camcorder. The number of still images you can record is less than in FINE mode. Super fine images are compressed to about 1/3. FINE (FINE)Use this mode when you want to record high quality images. Fine images are compressed to about 1/6. STANDARD (STD)This is the standard image quality in your camcorder. Standard images are compressed to about 1/10. Note In some cases, changing the image quality may not affect the image quality, depending on the type of images you are shooting. Differences in image quality Recorded images are compressed in JPEG format before being stored in memory. The memory capacity allotted to each image varies depending on the selected image quality and image size. Details are shown in the table below. (You can select 1152 × 864 or 640 × 480 image size in the menu settings.) 1152 × 864 image size Image qualityMemory capacity SUPER FINEAbout 600 KB FINEAbout 300 KB STANDARDAbout 200 KB 640 × 480 image size Image qualityMemory capacity SUPER FINEAbout 190 KB FINEAbout 100 KB STANDARDAbout 60 KB Image quality indicator The image quality indicator is not displayed during playback. When you select image quality The number of images you can shoot in the currently selected image quality appears on the screen. Using a “Memory Stick” – Introduction 133 “Memory Stick” Operations Selecting the image size You can select either of two image sizes Still images:1152 × 864 or 640 × 480. (When the POWER switch is set to CAMERA or VCR, the image size is automatically set to 640 × 480.) The default setting is 1152 × 864. Moving pictures: 320 × 240 or 160 × 112 The default setting is 320 × 240. (1)Set the POWER switch to MEMORY/NETWORK (DCR-TRV950 only). Make sure that the LOCK switch is set to the further side (unlock position). (2)Press MENU, then turn the SEL/PUSH EXEC dial to select STILL SET (still image) or MOVIE SET (moving picture) in , then press the dial (p. 211). (3)Turn the SEL/PUSH EXEC dial to select IMAGESIZE, then press the dial. (4)Turn the SEL/PUSH EXEC dial to select the desired image size, then press the dial. The indicator changes as follows: Still images: Moving pictures: Using a “Memory Stick” – Introduction 1152640 320160 3 4 1 320 1152 MEMORY SET STILL SET BURST QUALITY IMAGESIZE RETURN 1152 × 864 640 × 480 [ MENU ] : END MEMORY SET MOVIE SET IMAGESIZE REMAIN RETURN 320 × 240 160 × 112 [ MENU ] : END REMAIN 1min MEMORY SET STILL SET BURST QUALITY IMAGESIZE RETURN 640 × 480 [ MENU ] : END REMAIN 40 REMAIN 12 MEMORY SET MOVIE SET IMAGESIZE REMAIN RETURN 160 × 112 [ MENU ]…
Text truncated - open the document above for the full version.
Contact Information
Applicant
Kazuyuki Hori(Chief EMC/RF Compliance Specialist)
Test Firm
Kansai Electronic Industry Dev. Ct.Eizo Hariya
Technical Specifications
| # | Rule Parts | Frequency Range | Power Output |
|---|---|---|---|
| 1 | 15C | 2.40 GHz - 2.48 GHz | 26.00 µW |
Other Applications from Sony Group Corporation
AK8WW81782
Aug 21, 2026Radio Equipment
Equipment Class
DSS - Part 15 Spread Spectrum TransmitterAK8CFIZCP2
Aug 03, 2026Wireless Controller
Equipment Class
DSS - Part 15 Spread Spectrum TransmitterAK8OEV321MUH
Apr 14, 2026LCD Monitor
Equipment Class
JAD - Part 15 Class A Digital DeviceAK8OEV431MUH
Apr 14, 2026LCD Monitor
Equipment Class
JAD - Part 15 Class A Digital DeviceAK8OEV271MUH
Apr 14, 2026LCD Monitor
Equipment Class
JAD - Part 15 Class A Digital Device