BCE-GNELLIPSE24GN Ellipse 2G4 Wireless Headset
GN Audio USA Inc.
Click to zoom
Application Details
- Equipment Class
- DSS - Part 15 Spread Spectrum Transmitter
- Date of Grant
- Apr 21, 2002
- Application Purpose
- Original Equipment
- Date of Application
- Nov 25, 2001
- Equipment Note
- GN Ellipse 2G4 Wireless Headset
- Frequency Range
- 2400.00000000 - 2483.50000000
- Company
- GN Audio USA Inc.
- Country
- United States
Documents & Files
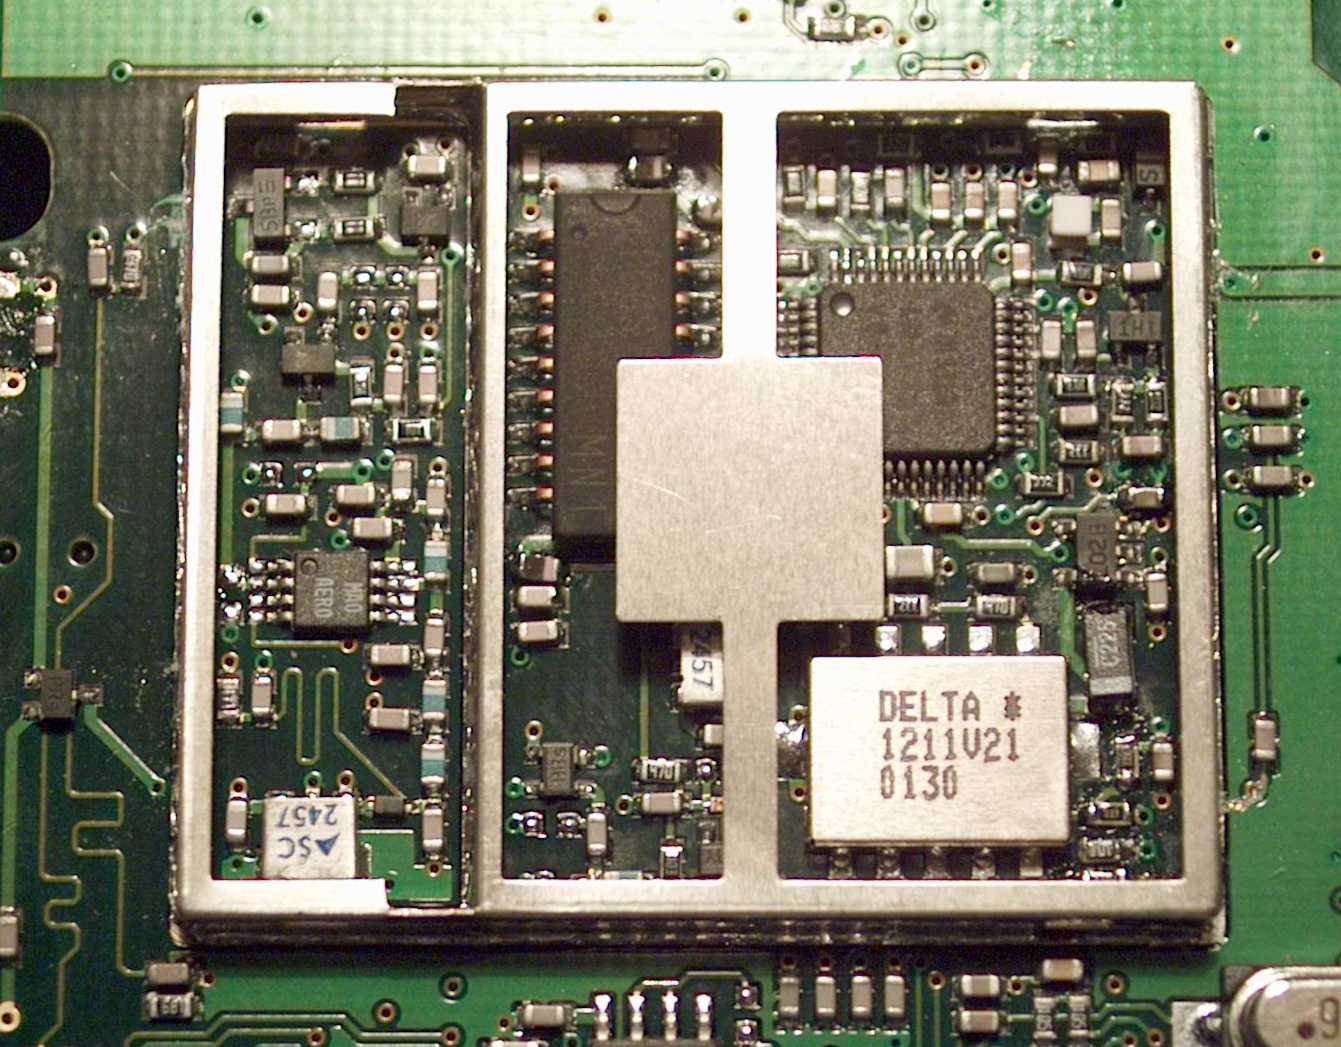
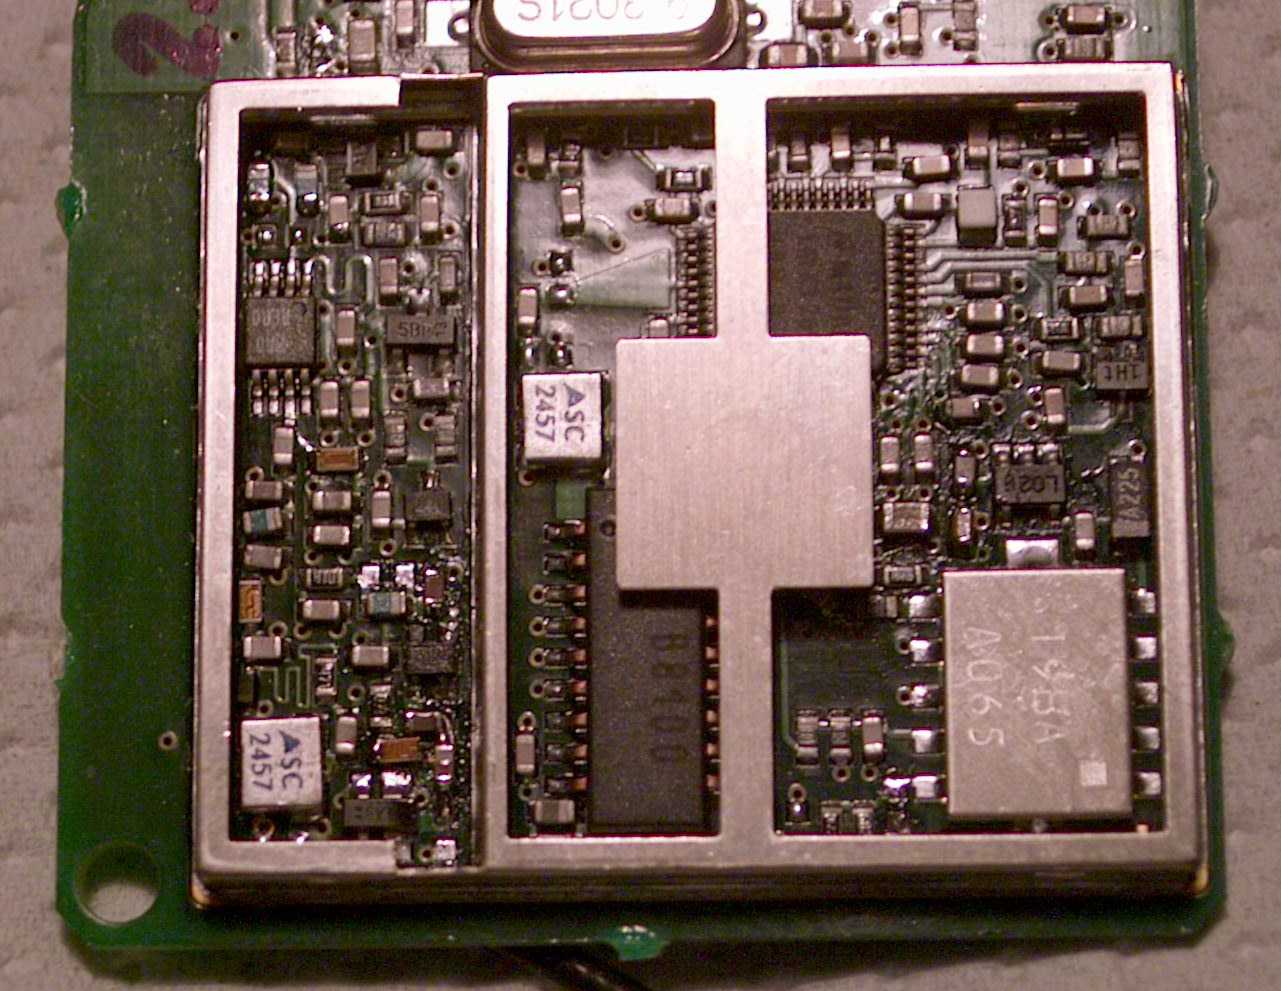
Document Text
Text extracted from the exhibit documents filed with the FCC. Open a document above to read the original.
Users Manual
For More Information: Pour Plus de Détails: Para Más Información: Para Obter Informações Adicionais: www.gnnetcom.com CORPORATE HEADQUARTERS 77 Northeastern Blvd. Nashua, NH • 03062 1-800-826-4656 1-603-598-1100 Fax: 1-603-598-1122 © 2001 GN Netcom, Inc. • All rights reserved. Preliminary • Printed in the U.S.A. GN Ellipse 2.4 Wireless Headset System * * Charge battery for 3 hours prior to initial use. User Guide Ellipse Components 1 Remote Backpack 2Base 3Base Stand 4Headset Holder 5 Headset (included with System purchase or as an option) 6AC Power Adapter 7Telephone Cord 8Remote Battery 9Remote Handset Lifter (included with System purchase or as an option) 10Pocket Clip 11Belt Clip 12Lanyard 1 2 3 4 5 6 7 9 11 8 10 12 6 5 Remote Beltpack Functions 1Headset Mode Indicator: Blinks when the system is in headset mode; no light in handset mode. 2Volume Control: Press + to increase volume. Press - to decrease volume. 3Mute Button: Press to activate Mute and disable the transmit/microphone; press again to enable transmit/microphone. 4Headset/Handset & Remote Handset Lifter Buttons: Press to enter headset or handset mode as desired (lights on remote and base light in head- set mode); press again to answer a call with the Remote Handset Lifter (optional). Base Functions/Indicators 5Transmit Settings: Adjusts the volume of your voice. 6Telephone Compatibility Settings: Fine tunes the system to your telephone system. 7Battery Charge Indicator: Lights when the remote is properly seated in the base charger. 8Headset Mode Indicator: Lights when the system is in headset mode; no light in handset mode. 2 3 4 1 8 7 Discharging the Battery For optimum Battery life, completely discharge the Battery approximately every 6 months. The Discharge/Recharge cycle takes approximately 2 hours. Removing the Remote from the Base during discharge cancels the operation. Only one Battery can be placed in the Base while discharging. A.Slide the Remote into the Charger on either side of the Base. B.Simultaneously press the Mute and Headset/Handset buttons for 5 seconds.The Headset Mode and Battery Charger Indicators will flash alternately during discharge. When fully discharged, the Battery automatically recharges. Recharging the Battery Slide the Remote into the Charger on either side of the base. To use your Headset while charging, put the System in Headset Mode. To charge overnight, put the System in the Handset Mode. Audio Indicators Mute Out of Range Low Battery Volume Tone sounds in headset every 3 seconds. Tone sounds in headset every 10 seconds. Tone sounds in headset every 20 seconds. Tone sounds in headset at maximum and minimum range. Nickel Metal Hydride (NiMH), 3.6 V 500 mAH (GN Netcom part number 27381101). Fully charged battery provides minimum of 12 hours continuous use without recharging.The base has two charging ports; additional battery can be purchased for 24/7 operation. Fully charged battery provides minimum 80 hours without recharging. Maximum 3 hours to completely recharge a discharged battery; battery cannot be overcharged. 2 years if battery is recharged when not in use and never completely discharged. Battery Information Battery Type Capacity On-Line Capacity Off-Line Recharging Time Battery Life Connect all cords. Attach the Base Stand. Attach the Headset Holder. Attach the Battery to the Remote. 1. 2. 3. 4. Slide the Remote into the Charger on either side of the Base. The Battery Chargelight on the side of the Base illuminates. Charge the Battery for a full 3 hours. Use the Handset while the Battery charges. 6. 7. Setting Up 5. Connect the Headset to the Remote. 8. Make sure the Mute is off. When Mute is on, a tone sounds in the Headset every 3 seconds. 9. Put the Headset on and select a telephone compatibility setting until dial tone is clear. If dial tone is clear for both A and G, set to A. 10. Remove the Handset and make a call. While switching between the Headset and Handset, adjust the transmit (microphone) setting until your voice is the same volume on both devices (1 is the softest, 8 is the loudest). Most settings are 5-7. If the best setting is 7 or 8, change the telephone compatibility setting to G. Disconnect the optional Remote Handset Lifter from the Base while setting the volume. Put the System in Headset Mode. The Headset Mode light on the top of the Remote blinks, and the Headset Mode light on the side of the Base illuminates. It will take up to 45 seconds to establish a channel with first use. 11. Use the Remote Beltpack to adjust the receive (speaker) volume. If your telephone has volume control, set it to mid-range. 2 1 To roam up to 200 ft. (150 m) from the base, remove the Remote from the Base Charger and clip it to your belt or pocket, or wear it with the Lanyard. 12. Using The Remote 13. Pocket Clip. 14. Belt Clip. 15. Lanyard. FAQs What should I check if I don’t hear a dial tone? • Check to see that all cords and jacks are connected • Make sure that the Headset cord is fully inserted into the remote • Make sure that the AC Adapter is plugged in and has power • Try the compatibility setting on A and G • Make sure the system is in Headset Mode • Make sure that the Battery is properly installed in the beltpack • Make sure that the Battery is fully charged (3 hours minimum) • Check that the serial numbers on the bottom of the Base unit and back of Beltpack units match; because of the security circuits, the Beltpack and Base unit must match for operation What should I check if the other party has a hard time hearing me? • Make sure the Mute on the Beltpack is off • Increase the transmit level (1 is the softest, 8 is loudest) • Check the position of the headset Microphone and make sure that it is placed at the corner of your mouth What should I do if I hear a buzz or humming sound in my Headset? • Move the Base farther away from the telephone What should I do if I hear an echo in my headset while speaking? • Lower your transmit adjustment. If this makes the transmit too we…
Text truncated - open the document above for the full version.
Users Manual
Cautionary Notes to Computer Users: When using any headset with a computer, care should be taken in dry or low humidity environments to protect the user from electrostatic discharge from the monitor (CRT). Computer monitors can induce a substantial electrostatic charge when turned on or off, or when there is a power failure, and the resulting electrostatic discharge can be passed through the headset to ground. A user in close proximity to or touching the computer may feel a common “shock” sensation, similar to touching a door knob after walking across a carpet, causing no harm to the user. This discharge is entirely due to the computer monitor, the handset is merely the shortest path to ground. To minimize the possibility of electrostatic discharge through the headset, you can: • Use a grounded screen in front of the monitor. • Use static dissipative wrist straps. • Increase the relative humidity in the room to 60% or more. • Install static dissipative carpets or floor covering. • Remove the headset before turning the computer on or off. GN Netcom, Inc. products meet all OSHA, UL, FCC and CSA standards. FCC Notice to Users: This equipment has been tested and found to comply with the limits for a Class B digital device, pursuant to part 15 of the FCC Rules. These lim- its are designed to provide reasonable protection against harmful inter- ference in a residential installation. This equipment generates, uses and can radiate radio frequency energy and, if not installed and used in accordance with the instructions, may cause harmful interference to radio communications. However, there is no guarantee that interference will not occur in a particular installation. If this equipment does cause harmful interference to radio or television reception, which can be determined by turning the equipment off and on, the user is encour- aged to try to correct the interference by one or more of the following measures: • Reorient or relocate the receiving antenna. • Increase the separation between the equipment and the receiver. • Connect the equipment into an outlet on a circuit different from that to which the receiver is connected. • Consult the dealer or an experienced radio/TV technician for help. Upon request only, you must notify your telephone utility company (telco) of your intention to install or permanently remove an FCC Part 68 registered device or system. Include the FCC Registration Number and the Ringer Equivalence Number (REN) located on the amplifier label. The telco has the right to make changes to their network, which may affect the operation of your equipment, provided you are given adequate advance written notice to permit correct operation. The user must place the base 2” (5cm) or more from any personnel in order to comply with FCC RF exposure requirements. Industry Canada Notice to Users: The Industry Canada label identifies certified equipment. This certification means that the equipment meets telecommunications network protective, operational and safety requirement as prescribed in the appropriate Terminal Equipment Technical Resource Document(s). The department does not guarantee the equipment will operate to the user’s satisfaction. Before installing this equipment, users should ensure that it is permissible to be connected to the facilities of the local telecommunications company. The equipment must also be installed using an acceptable method of connection. The customer should be aware that compliance with the above conditions may not prevent degradation of service in some situations. Repairs to certified equipment should be coordinated by a representative designated by the supplier. Any repairs or alterations made by the user to this equipment, or equipment malfunctions, may give the telecommuni- cations company cause to request the user to disconnect the equipment. Users should ensure for their own protection that the electrical ground connections of the power utility, telephone lines and internal metallic water pipe system, if present, are connected together. This precaution may be particularly important in rural areas. Caution: Users should NOT attempt to make such connections themselves, but should contact the appropriate electric inspection authority, or electrician, as appropriate. NOTICE: The Ringer Equivalence Number (REN) assigned to each terminal device provides an indication of the maximum number of terminals allowed to be connected to a telephone interface. The termination of an interface may consist of any combination of devices subject only to the requirement that the sum of the ringer equivalence numbers of all the devices does not exceed 5. This device requires a radio licence, unless it (including antenna) is installed totally inside a building. (User must obtain this licence from Industry Canada.) Warranty: GN Netcom, Inc. warrants these products against all defects in material and workmanship for a period of one year from the date of original purchase. The conditions of this warranty and our responsibilities under this warranty are as follows: •The warranty is limited to the original purchaser. •The warranty is void if the serial number, date code label, or product label is removed, or if the product has been subject to physical abuse, improper installation, modification, or repair by unauthorized third parties. •The responsibility of GN Netcom, Inc. under this warranty shall be limited to the repair or replacement of the product at the sole discretion of GN Netcom, Inc. •Any implied warranty on GN Netcom, Inc. products is limited to one year from the date of purchase on all parts, including the cords and connectors. Specifically exempt from warranty are limited-life consumable components subject to normal wear and tear, such as microphone windscreens, ear cushions, ear tips, decorative finishes, batteries, and other accessories. GN Netcom, Inc. is not liable for any incidental or consequential damages arising from the use of misuse of any GN Netcom, Inc. p…
Text truncated - open the document above for the full version.
Users Manual
For More Information: Pour Plus de Détails: Para Más Información: Para Obter Informações Adicionais: www.gnnetcom.com CORPORATE HEADQUARTERS 77 Northeastern Blvd. Nashua, NH • 03062 1-800-826-4656 1-603-598-1100 Fax: 1-603-598-1122 © 2001 GN Netcom, Inc. • All rights reserved. Preliminary • Printed in the U.S.A. GN Ellipse 2.4 Wireless Headset System * * Charge battery for 3 hours prior to initial use. User Guide Ellipse Components 1 Remote Backpack 2Base 3Base Stand 4Headset Holder 5 Headset (included with System purchase or as an option) 6AC Power Adapter 7Telephone Cord 8Remote Battery 9Remote Handset Lifter (included with System purchase or as an option) 10Pocket Clip 11Belt Clip 12Lanyard 1 2 3 4 5 6 7 9 11 8 10 12 6 5 Remote Beltpack Functions 1Headset Mode Indicator: Blinks when the system is in headset mode; no light in handset mode. 2Volume Control: Press + to increase volume. Press - to decrease volume. 3Mute Button: Press to activate Mute and disable the transmit/microphone; press again to enable transmit/microphone. 4Headset/Handset & Remote Handset Lifter Buttons: Press to enter headset or handset mode as desired (lights on remote and base light in head- set mode); press again to answer a call with the Remote Handset Lifter (optional). Base Functions/Indicators 5Transmit Settings: Adjusts the volume of your voice. 6Telephone Compatibility Settings: Fine tunes the system to your telephone system. 7Battery Charge Indicator: Lights when the remote is properly seated in the base charger. 8Headset Mode Indicator: Lights when the system is in headset mode; no light in handset mode. 2 3 4 1 8 7 Discharging the Battery For optimum Battery life, completely discharge the Battery approximately every 6 months. The Discharge/Recharge cycle takes approximately 2 hours. Removing the Remote from the Base during discharge cancels the operation. Only one Battery can be placed in the Base while discharging. A.Slide the Remote into the Charger on either side of the Base. B.Simultaneously press the Mute and Headset/Handset buttons for 5 seconds.The Headset Mode and Battery Charger Indicators will flash alternately during discharge. When fully discharged, the Battery automatically recharges. Recharging the Battery Slide the Remote into the Charger on either side of the base. To use your Headset while charging, put the System in Headset Mode. To charge overnight, put the System in the Handset Mode. Audio Indicators Mute Out of Range Low Battery Volume Tone sounds in headset every 3 seconds. Tone sounds in headset every 10 seconds. Tone sounds in headset every 20 seconds. Tone sounds in headset at maximum and minimum range. Nickel Metal Hydride (NiMH), 3.6 V 500 mAH (GN Netcom part number 27381101). Fully charged battery provides minimum of 12 hours continuous use without recharging.The base has two charging ports; additional battery can be purchased for 24/7 operation. Fully charged battery provides minimum 80 hours without recharging. Maximum 3 hours to completely recharge a discharged battery; battery cannot be overcharged. 2 years if battery is recharged when not in use and never completely discharged. Battery Information Battery Type Capacity On-Line Capacity Off-Line Recharging Time Battery Life Connect all cords. Attach the Base Stand. Attach the Headset Holder. Attach the Battery to the Remote. 1. 2. 3. 4. Slide the Remote into the Charger on either side of the Base. The Battery Chargelight on the side of the Base illuminates. Charge the Battery for a full 3 hours. Use the Handset while the Battery charges. 6. 7. Setting Up 5. Connect the Headset to the Remote. 8. Make sure the Mute is off. When Mute is on, a tone sounds in the Headset every 3 seconds. 9. Put the Headset on and select a telephone compatibility setting until dial tone is clear. If dial tone is clear for both A and G, set to A. 10. Remove the Handset and make a call. While switching between the Headset and Handset, adjust the transmit (microphone) setting until your voice is the same volume on both devices (1 is the softest, 8 is the loudest). Most settings are 5-7. If the best setting is 7 or 8, change the telephone compatibility setting to G. Disconnect the optional Remote Handset Lifter from the Base while setting the volume. Put the System in Headset Mode. The Headset Mode light on the top of the Remote blinks, and the Headset Mode light on the side of the Base illuminates. It will take up to 45 seconds to establish a channel with first use. 11. Use the Remote Beltpack to adjust the receive (speaker) volume. If your telephone has volume control, set it to mid-range. 2 1 To roam up to 200 ft. (150 m) from the base, remove the Remote from the Base Charger and clip it to your belt or pocket, or wear it with the Lanyard. 12. Using The Remote 13. Pocket Clip. 14. Belt Clip. 15. Lanyard. FAQs What should I check if I don’t hear a dial tone? • Check to see that all cords and jacks are connected • Make sure that the Headset cord is fully inserted into the remote • Make sure that the AC Adapter is plugged in and has power • Try the compatibility setting on A and G • Make sure the system is in Headset Mode • Make sure that the Battery is properly installed in the beltpack • Make sure that the Battery is fully charged (3 hours minimum) • Check that the serial numbers on the bottom of the Base unit and back of Beltpack units match; because of the security circuits, the Beltpack and Base unit must match for operation What should I check if the other party has a hard time hearing me? • Make sure the Mute on the Beltpack is off • Increase the transmit level (1 is the softest, 8 is loudest) • Check the position of the headset Microphone and make sure that it is placed at the corner of your mouth What should I do if I hear a buzz or humming sound in my Headset? • Move the Base farther away from the telephone What should I do if I hear an echo in my headset while speaking? • Lower your transmit adjustment. If this makes the transmit too we…
Text truncated - open the document above for the full version.
Users Manual
Cautionary Notes to Computer Users: When using any headset with a computer, care should be taken in dry or low humidity environments to protect the user from electrostatic discharge from the monitor (CRT). Computer monitors can induce a substantial electrostatic charge when turned on or off, or when there is a power failure, and the resulting electrostatic discharge can be passed through the headset to ground. A user in close proximity to or touching the computer may feel a common “shock” sensation, similar to touching a door knob after walking across a carpet, causing no harm to the user. This discharge is entirely due to the computer monitor, the handset is merely the shortest path to ground. To minimize the possibility of electrostatic discharge through the headset, you can: • Use a grounded screen in front of the monitor. • Use static dissipative wrist straps. • Increase the relative humidity in the room to 60% or more. • Install static dissipative carpets or floor covering. • Remove the headset before turning the computer on or off. GN Netcom, Inc. products meet all OSHA, UL, FCC and CSA standards. FCC Notice to Users: This equipment has been tested and found to comply with the limits for a Class B digital device, pursuant to part 15 of the FCC Rules. These lim- its are designed to provide reasonable protection against harmful inter- ference in a residential installation. This equipment generates, uses and can radiate radio frequency energy and, if not installed and used in accordance with the instructions, may cause harmful interference to radio communications. However, there is no guarantee that interference will not occur in a particular installation. If this equipment does cause harmful interference to radio or television reception, which can be determined by turning the equipment off and on, the user is encour- aged to try to correct the interference by one or more of the following measures: • Reorient or relocate the receiving antenna. • Increase the separation between the equipment and the receiver. • Connect the equipment into an outlet on a circuit different from that to which the receiver is connected. • Consult the dealer or an experienced radio/TV technician for help. Upon request only, you must notify your telephone utility company (telco) of your intention to install or permanently remove an FCC Part 68 registered device or system. Include the FCC Registration Number and the Ringer Equivalence Number (REN) located on the amplifier label. The telco has the right to make changes to their network, which may affect the operation of your equipment, provided you are given adequate advance written notice to permit correct operation. The user must place the base 8”(20cm) or more from any personnel in order to comply with FCC RF exposure requirements. Industry Canada Notice to Users: The Industry Canada label identifies certified equipment. This certification means that the equipment meets telecommunications network protective, operational and safety requirement as prescribed in the appropriate Terminal Equipment Technical Resource Document(s). The department does not guarantee the equipment will operate to the user’s satisfaction. Before installing this equipment, users should ensure that it is permissible to be connected to the facilities of the local telecommunications company. The equipment must also be installed using an acceptable method of connection. The customer should be aware that compliance with the above conditions may not prevent degradation of service in some situations. Repairs to certified equipment should be coordinated by a representative designated by the supplier. Any repairs or alterations made by the user to this equipment, or equipment malfunctions, may give the telecommuni- cations company cause to request the user to disconnect the equipment. Users should ensure for their own protection that the electrical ground connections of the power utility, telephone lines and internal metallic water pipe system, if present, are connected together. This precaution may be particularly important in rural areas. Caution: Users should NOT attempt to make such connections themselves, but should contact the appropriate electric inspection authority, or electrician, as appropriate. NOTICE: The Ringer Equivalence Number (REN) assigned to each terminal device provides an indication of the maximum number of terminals allowed to be connected to a telephone interface. The termination of an interface may consist of any combination of devices subject only to the requirement that the sum of the ringer equivalence numbers of all the devices does not exceed 5. This device requires a radio licence, unless it (including antenna) is installed totally inside a building. (User must obtain this licence from Industry Canada.) Warranty: GN Netcom, Inc. warrants these products against all defects in material and workmanship for a period of one year from the date of original purchase. The conditions of this warranty and our responsibilities under this warranty are as follows: •The warranty is limited to the original purchaser. •The warranty is void if the serial number, date code label, or product label is removed, or if the product has been subject to physical abuse, improper installation, modification, or repair by unauthorized third parties. •The responsibility of GN Netcom, Inc. under this warranty shall be limited to the repair or replacement of the product at the sole discretion of GN Netcom, Inc. •Any implied warranty on GN Netcom, Inc. products is limited to one year from the date of purchase on all parts, including the cords and connectors. Specifically exempt from warranty are limited-life consumable components subject to normal wear and tear, such as microphone windscreens, ear cushions, ear tips, decorative finishes, batteries, and other accessories. GN Netcom, Inc. is not liable for any incidental or consequential damages arising from the use of misuse of any GN Netcom, Inc. p…
Text truncated - open the document above for the full version.
Cover Letter(s)
__________________________________________________________________________________ ETSHandelsregister:Bankverbindung: Electronic Technology Systems Dr. Genz GmbHAmtsgericht Frankfurt/Oder HRB 5151Sparkasse Oder-Spree Storkower Strasse 38cGeschäftsführung: Dr. Dietmar GenzBLZ 170 550 50 D-15526 Reichenwalde b. Berlin Norbert KasparKto. Nr. 3105165974 ELECTRONIC TECHNOLOGY SYSTEMS DR.GENZ GMBH ELECTRONIC TECHNOLOGY SYSTEMS DR. GENZ GMBH - ETS - STORKOWER STRASSE 38c, D-15526 REICHENWALDE B. BERLIN Tel: 033631 888 000 FAX: 033631 888660 Federal Communications Commission Authorization and Evaluation Division Equipment Authorization Branch 7435 Oakland Mills Road Columbia, MD 21046 IHR ZEICHEN / YOUR REF.IHR SCHREIBEN / YOUR INFORM.UNSER ZEICHEN / OUR REF. DATUM / DATE 5-Mar-02 Subject:Applicant: GN Netcom Inc FCC ID: BCE-GNELLIPSE24 731 Confirmation number: EA636896 Correspondence Reference Number: 21905 Dear Sir, Submitted herewith, on behalf of our customer is an amendment to the subject application, provided in response to your request for technical information: Q1. Please measure peak power at antenna terminals as required by FCC Rules Part 15.247. Answer: Because using only internal antennas (permanently integrated into the PCB) radiated output power tests are performed as alternative procedures. With help of the attached antenna data sheets the value for maximum conducted peak power can be calculated as follows: P conducted = P radiated - GP conducted - conducted peak power P radiated - radiated peak power G- antenna gain [dBi] Antenna Gain according to data sheets: Base unit: Antenna I (BS F antenna) :3 dBi Base unit: Antenna II (BS monopol antenna):1.5 dBi Remote unit: HS antenna:1.5 dBi Calculation conducted peak power: Base unit / antenna I (BS F antenna):P conducted = 25.21 dBm - 3 dBi = 22.21 dBm Base unit / antenna II (BS monopol antenna):P conducted = 22.56 dBm - 1.5 dBi = 21.06 dBm Remote unit / HS antenna:P conducted = 29.26 dBm - 1.5 dBi = 27.76 dBm ... __________________________________________________________________________________ ETSHandelsregister:Bankverbindung: Electronic Technology Systems Dr. Genz GmbHAmtsgericht Frankfurt/Oder HRB 5151Sparkasse Oder-Spree Storkower Strasse 38cGeschäftsführung: Dr. Dietmar GenzBLZ 170 550 50 D-15526 Reichenwalde b. Berlin Norbert KasparKto. Nr. 3105165974 ELECTRONIC TECHNOLOGY SYSTEMS DR.GENZ GMBH Q2. Also give supporting statements as to how the SAR procedure used conforms to FCC/OET Bulletin 65, Supplement C, edition 97-01. Answer: In order to give support as to how the used SAR procedure conforms to FCC/OET Bulletin 65, Supplement C, edition 97-01 the SAR measurement report was revised and completed. Please find attached the revised test report which contains following completion: - liquid temperatures - probe conversation factors - crest factors - worst case calculation with a worst case conversation factor of 1 - power drift The most of the above mentioned parameters you will find above the test plots. Additional system validation 1800 MHz: Additionally to the system validation as mentioned in the measurement report, the probe had been validated with the same liquid but at a frequency of 1800 MHz with a 1800 MHz validation dipole with the following measurement parameters: Used dipole:SPEAG D1800V2, serial number 292 Dipole input power250 mW ± 1.5 % Measuring distance from dipole center to solution surface 10 mm Coarse grid spacing12 mm Relative permittivityεr = 40 Conductivityσ = 1.75 mho/m Validation result, averaged over 1g / 10g10.1 / 5.09 mW/g Manufacture specification for validation10.1 / 5.18 mW/g As the results of both validation measurements are close to the values specified by the manufacturer, a correct performance at 2.4 GHz can be assumed. Analysis regarding to the used liquid showing the effects on the SAR values: To achieve the necessary dielectric parameters above 1 GHz, glycol has to be used in the measurement liquid. As glycol reacts with the phantom-shell and E-field probe a liquid without any chemical agents was used, which results in a lower dielectric constant and a higher conductivity. Numerical calculations with the Maxwell-equation-solver MAFIA (CST Darmstadt) have shown that using this measurement liquid will overestimate the SAR-values by more than 25 %. This guarantees that the measurements comply with the FCC limits. ... __________________________________________________________________________________ ETSHandelsregister:Bankverbindung: Electronic Technology Systems Dr. Genz GmbHAmtsgericht Frankfurt/Oder HRB 5151Sparkasse Oder-Spree Storkower Strasse 38cGeschäftsführung: Dr. Dietmar GenzBLZ 170 550 50 D-15526 Reichenwalde b. Berlin Norbert KasparKto. Nr. 3105165974 ELECTRONIC TECHNOLOGY SYSTEMS DR.GENZ GMBH We hope this information is sufficient to issue the grant. If you have further questions please do not hesitate to contact us. Sincerely, Jürgen Baschin Electronic Technology Systems Dr. Genz GmbH Storkower Strasse 38c D-15526 Reichenwalde bei Berlin e-mail: [email protected]
Cover Letter(s)
__________________________________________________________________________________ ETSHandelsregister:Bankverbindung: Electronic Technology Systems Dr. Genz GmbHAmtsgericht Frankfurt/Oder HRB 5151Sparkasse Oder-Spree Storkower Strasse 38cGeschäftsführung: Dr. Dietmar GenzBLZ 170 550 50 D-15526 Reichenwalde b. Berlin Norbert KasparKto. Nr. 3105165974 ELECTRONIC TECHNOLOGY SYSTEMS DR.GENZ GMBH ELECTRONIC TECHNOLOGY SYSTEMS DR. GENZ GMBH - ETS - STORKOWER STRASSE 38c, D-15526 REICHENWALDE B. BERLIN Tel: 033631 888 000 FAX: 033631 888660 Federal Communications Commission Authorization and Evaluation Division Equipment Authorization Branch 7435 Oakland Mills Road Columbia, MD 21046 IHR ZEICHEN / YOUR REF.IHR SCHREIBEN / YOUR INFORM.UNSER ZEICHEN / OUR REF. DATUM / DATE 8-Apr-02 Subject:Applicant: GN Netcom Inc FCC ID: BCE-GNELLIPSE24 731 Confirmation number: EA636896 Correspondence Reference Number: 22347 Dear Sir, Submitted he…
Text truncated - open the document above for the full version.
Contact Information
Applicant
Steen Kaiser(Manager, Product Certifications)
Test Firm
Eurofins Product Service GmbHRobert Kschiwan-Kaspar
Technical Specifications
| # | Rule Parts | Frequency Range | Power Output |
|---|---|---|---|
| 1 | 15C | 2.40 GHz - 2.48 GHz | 843.30 mW |
Other Applications from GN Audio USA Inc.
BCE-OTE995
Aug 19, 2026Bluetooth Headset
Equipment Class
DSS - Part 15 Spread Spectrum TransmitterBCE-HSC240W
Aug 07, 2026Bluetooth Headset
Equipment Class
DSS - Part 15 Spread Spectrum TransmitterBCE-HSC260W
Aug 04, 2026Bluetooth Headset
Equipment Class
DTS - Digital Transmission SystemBCE-OTE800
Mar 24, 2026OTE985 Bluetooth Headset
Equipment Class
DTS - Digital Transmission SystemBCE-OTE810
Mar 19, 2026OTE985 Bluetooth Headset
Equipment Class
DSS - Part 15 Spread Spectrum Transmitter