E5MDS-EL806-242.4 GHz TransNet
GE MDS, LLC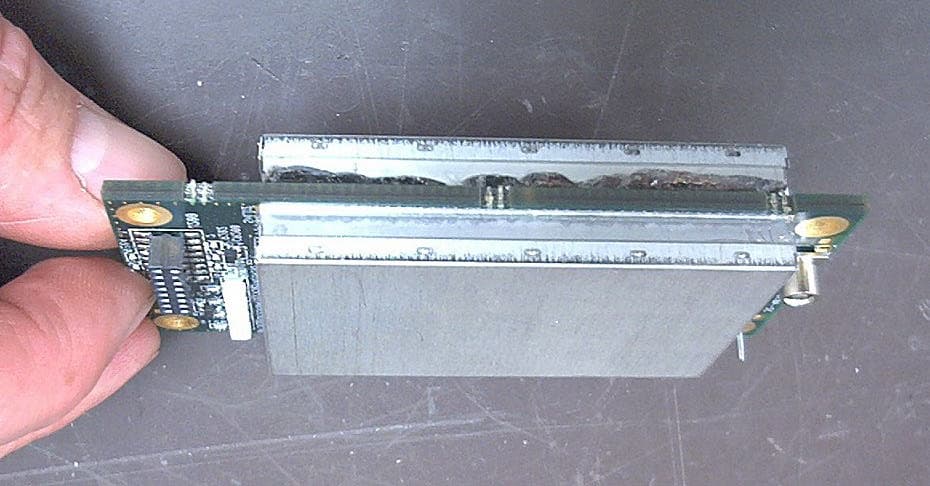
Click to zoom
Application Details
- Equipment Class
- DSS - Part 15 Spread Spectrum Transmitter
- Date of Grant
- Apr 02, 2004
- Application Purpose
- Original Equipment
- Date of Application
- Apr 02, 2004
- Equipment Note
- 2.4 GHz TransNet
- Frequency Range
- 2401.60000000 - 2477.80000000
- Company
- GE MDS, LLC
- Country
- United States
Documents & Files
Document Text
Text extracted from the exhibit documents filed with the FCC. Open a document above to read the original.
Users Manual
Installation & Operation Guide OEM Integration Guide MDS 05-xxxxA01, Rev. 01 MARCH 2004 PRELIMINARY Microwave Data Systems Inc. MDS TransNET OEM ™ 2.4 GHz Spread Spectrum Data Transceiver Transceiver Model EL806-2.4 Including Instructions for 03-4053A01 Evaluation Development Kit The steps below contain the essential information needed to place the OEM trans- ceiver in service. Because the transceiver is designed for use in other pieces of equipment, these steps assume that prior testing and evaluation have been conducted with the host device. If not, please refer to Section 3.0, Benchtop Setup and Evaluation for interface wiring and configuration details. 1. Mount the transceiver module using the four holes provided. • If possible, select a mounting location that allows viewing the status LEDs and provides ready access to the antenna connector. • Use standoff hardware to secure the board to the host device. • When mounting the board, use care to align the transceiver’s 16-pin header connector with the mating pins in the host device. 2. Connect the antenna system to the transceiver • Use only with antenna/feedline assemblies that have been expressly tested and approved for such service by Microwave Data Systems Inc. • Use an MCX-type male connector to attach the antenna to the transceiver. • For best performance, antennas should be mounted in the clear, with an unobstructed path in the direction of desired transmission/reception. 3. Apply power and observe the LEDs for proper operation. The LED command must be set to ON (LEDS ON). After 16 seconds... • The GP lamp should be lit continuously • The DCD lamp should be lit continuously—if synchronization with another unit has been achieved • The Remote radio(s) should be transmitting data (TXD) and receiving data (RXD) with its associated station LED Indicator Descriptions LED NameDescription RXD (CR3) Receive Data Serial receive data activity. Payload data from con- nected device. TXD (CR4) Transmit Data Serial transmit data activity. Payload data to con- nected device. DCD (CR5) Data Carrier Detect Continuous—Radio is receiving/sending synchro- nization frames On within 10 seconds of power-up under normal conditions GP (CR6) General Purpose • Continuous—Power is applied to the radio; no problems detected • Flashing (5 times-per-second)—Fault indication. See “TROUBLESHOOTING” on Page 52 • Off—Radio is unpowered or in Sleep mode QUICK START GUIDE RXD TXD DCD GP MDS 05-xxxxA01, Rev. 01TransNET OEM Integration Guidei CONTENTS 1.0 ABOUT THIS MANUAL........................................................... 1 2.0 PRODUCT DESCRIPTION..................................................... 1 2.1 Transceiver Features ........................................................ 2 2.2 Model Configuration Codes ............................................. 2 2.3 Spread Spectrum Transmission ....................................... 3 2.4 Typical Applications .......................................................... 3 Multiple Address Systems (MAS) ..................................... 3 Point-to-Point System ....................................................... 4 Tail-End Link to an Existing Network ................................ 5 Store-and-Forward Repeater ............................................ 5 2.5 Transceiver Accessories .................................................. 6 3.0 BENCHTOP SETUP & EVALUATION ..................................... 7 3.1 Evaluation Development Kit (P/N 03-4053A01) ............... 7 Evaluation Board .............................................................. 8 Connecting the Evaluation Board & Transceiver............... 9 3.2 Cable Connections for Benchtop Testing ......................... 10 Antenna Connection ......................................................... 10 Diagnostic Connection (J4)............................................... 11 Data Connector (J5) ......................................................... 12 DC Power Connector (J3) ................................................. 14 Jumper Block J1 (DC Power Configuration) ..................... 15 3.3 Initial Power-Up & Configuration ...................................... 15 Configuration Settings ...................................................... 16 LED Indicators .................................................................. 17 4.0 EVALUATION BOARD DOCUMENTATION ............................ 18 4.1 Assembly Drawing ........................................................... 18 4.2 Parts List .......................................................................... 18 4.3 Evaluation Board Fuse Replacement .............................. 20 5.0 TRANSCEIVER MOUNTING .................................................. 21 iiTransNET OEM Integration Guide MDS 05-xxxxA01, Rev. 01 5.1 Mounting Dimensions ....................................................... 21 5.2 Antennas & Feedlines ...................................................... 21 Feedlines........................................................................... 22 6.0 OPTIMIZING PERFORMANCE............................................... 23 6.1 Antenna Aiming ................................................................ 23 6.2 Antenna SWR Check ....................................................... 23 6.3 Data Buffer Setting ........................................................... 23 6.4 Hoptime Setting ................................................................ 23 6.5 Operation at 115200 bps .................................................. 24 6.6 Baud Rate Setting ............................................................ 24 6.7 Radio Interference Checks ............................................... 24 6.8 RF Output Setting ............................................................. 24 7.0 OPERATING PRINCIPLES & SPECIAL CONFIGURATIONS ........................................................................ 25 7.1 How Remotes Acquire Synchronization .............…
Text truncated - open the document above for the full version.
Users Manual
8TransNET OEM 2.4 Integration Guide MDS 05-xxxxA01, Rev. 01 Evaluation Board A key part of the Evaluation Development Kit is the Evaluation Board shown in Figure 7. It contains a 16-pin header connector (J2) that mates with female connector J3 the OEM transceiver board. It carries all signals (except RF) onto the Evaluation Board. Table 2 lists the basic pin functions of J2. For more detailed pinout information, including the differences between TTL and RS-232/485 configured radios, refer to Section 13.1 on Page 60. The Evaluation Board provides convenient connection points for diagnostics, payload data, and DC power. Each of these connectors are discussed in this section. The board also includes a series of test probe points to the left of J2. These may be used for monitoring logic signal activity with a multimeter or oscilloscope. The probe points are identified by printed markings on the board. The transceiver board’s RF/Antenna connection is not brought onto the Evaluation Board by the 16-pin header. The antenna connection is always made at J200 on the transceiver module using a male MMCX-type connector. Figure 7. OEM Evaluation Board (P/N 03-4051A01) Table 2. Basic Pin Functions of J2 (16-Pin Header Connector) Pin No.Pin Function 1Ground 2Diagnostic TXD 3Alarm Condition 4Diagnostic RXD TEST PROBE POINTS DIAGNOSTIC COMMUNICATIONS (RJ-11) DATA CONNECTOR (DB-9) DC POWER (5-25 VDC) STANDOFF SPACERS (4) 16-PIN HEADER JUMPER BLOCK J1 MDS 05-xxxxA01, Rev. 01 TransNET OEM 2.4 Integration Guide9 Connecting the Evaluation Board & Transceiver (Figure 8) To connect the Evaluation Board to the radio, carefully align the pins of the 16-pin header with J3 on the transceiver module and press down firmly. The radio PC board should seat solidly on the four standoff spacers. Use nuts to secure the board to the standoffs. Invisible place holder Figure 8. Connecting the Evaluation Board and Transceiver Together CAUTION: Take care to avoid short-circuiting the underside of the Evaluation PC board. The bottom of the board is not insulated, and contact with metallic objects on the work surface could cause damage to the board or connect- ed equipment. 5DC Input 6Sleep Mode Input 7Data Carrier Detect (DCD) 8Power Supply Shutdown Control 9Reserved—Do not connect. 10Transmitted Payload Data (TXD) 11DC Input 12Request to Send (RTS) 13Reserved—Do not connect. 14Received Payload Data (RXD) 15Ground 16Clear to Send (CTS) Table 2. Basic Pin Functions of J2 (16-Pin Header Connector) 10TransNET OEM 2.4 Integration Guide MDS 05-xxxxA01, Rev. 01 3.2Cable Connections for Benchtop Testing There are four basic requirements for operating the transceiver and evaluation board in a benchtop test environment. They are: • Adequate and stable primary power • A proper antenna system or RF load (50 Ohms) • The correct interface wiring between the transceiver and the connected DTE device (RTU, PLC, etc.) • A connected PC terminal to read/set transceiver parameters. Figure 9 shows a typical setup for bench testing an OEM Transceiver. Two such setups will be required if you intend to establish over-the-air communications with another OEM transceiver. Invisible place holder Figure 9. Typical Test Setup Antenna Connection (J200 on the transceiver module) The Antenna connector is located at the upper left corner of the transceiver module and is a female MMCX-type coaxial connector. Connect an antenna or other suitable RF load to this connector. Only approved antenna/cable assemblies may be used with the radio OEM Transceiver and Evaluation Board ANTENNA (OR 50-OHM RF LOAD) PC TERMINAL DATA TERMINAL EQUIPMENT Power Supply 13.6 VDC @ 500 mA (min.) MDS 05-xxxxA01, Rev. 01 TransNET OEM 2.4 Integration Guide11 Do not apply DC power to the transceiver without first attaching a proper RF load, or the transceiver may be damaged. Diagnostic Connection (J4) J4 is an RJ-11-6 modular connector used to connect the evaluation board/transceiver to a PC terminal for programming and interrogation. An RJ-11 to DB-9 Adapter Cable (Part No. 03-3246A01) is required for this connection. If desired, an cable may be constructed for this purpose as shown in Figure 10. Only Pins 4, 5, and 6 of the RJ-11 connector should be used. Pins 1, 2, and 3 are reserved for factory test purposes.) The data parameters of the diagnostics port are as follows: 8 data bits, 1 stop bit, and no parity. It automatically configures itself to function at 1200, 2400, 4800, 9600, 19200, 38400, 57600, and 115200 bps, as required. Invisible place holder Figure 10. RJ-11 to DB-9 Diagnostic Cable—Wiring Details (A pre-constructed cable is also available, Part No. 03-3246A01) Diagnostic Communication Modes Two methods may be used to communicate with the radio’s diagnostic port: • Terminal Interface —The PC is used in its basic terminal emulation mode, (i.e., HyperTerminal session) and commands are issued as simple text strings. • Radio Configuration Software —Proprietary software from MDS that runs under the Windows operating system. It provides a graphical user interface with “point and click” functionality. The program is included on the TransNET Support Package CD shipped with every radio order. Both of these control methods are described in more detail in the section titled “PROGRAMMING REFERENCE” on Page 34. This section also includes a chart listing all commands for the OEM transceiver. CAUTION POSSIBLE EQUIPMENT DAMAGE RXD TXD GND 2 3 5 DB-9 FEMALE (TO COMPUTER) TXD RXD GND 4 5 6 RJ-11 PLUG (TO TRANSCEIVER) RJ-11 PIN LAYOUT 1 6 12TransNET OEM 2.4 Integration Guide MDS 05-xxxxA01, Rev. 01 Data Connector (J5) J5 on the Evaluation Board (Figure 11) is the data interface for the transceiver. It is used to connect the transceiver to an external DTE terminal that supports the EIA/RS-232 or EIA/RS-485 format, depending on how the radio hardware was configured at the factory. The data connector supports interface data rates of 1200, 2400, 4800, 9600, 19200, 38400, 57600, and 115200 bps (asyn…
Text truncated - open the document above for the full version.
Users Manual
18TransNET OEM 2.4 Integration Guide MDS 05-xxxxA01, Rev. 01 4.0EVALUATION BOARD DOCUMENTATION This section contains an assembly drawing and parts list for the OEM Evaluation Board. In addition, a separate foldout schematic of the Board is included at the back of this manual. Board documentation is provided to assist integrators who need to create compatible interface circuitry between the OEM transceiver and host equipment. NOTE: The foldout schematic may also be accessed from the TransNET Support Package CD, or from our website at: www.microwavedata.com. 4.1Assembly Drawing Invisible place holder Figure 14. Evaluation Board Assembly Diagram 4.2Parts List Table 6 lists the electronic components used on the Evaluation Board. Table 6. OEM Evaluation Board Parts List Ref. Desig.Part Description CR1DIODE, SOT23 SMALL SIG 914 5D CR4 CR5 CR6RECTIFIER, 30V B13 CR2 CR3DIODE, SCHOTTKY POWER, SMT, SNGL, UPS840 Q1 Q2TRANSISTOR, SOT23 NPN 6429 M1LR C8 R10 R3 C26 R9 C9 C4 C1 C20 C18 C19 R5 TXD GND R11 NA A C CR1 R7 C23 C24 C10 C7 + C30 R4 R8 CTS REG_PWR C13 ALARM C29 C11 C2 C5 C3 o 28 U1 C31 C6 1 6 J4 CR2 C16 1 5 U4 5 1 U5 R6 R12 RTS K2 < CR4 < CR5 R15 C21 C17 R13 C14 + C12 DIAG_RXD DIAG_TXD GND SLEEP CR3 FH1 B E C Q1 B E Q2 C R14 C15 C22 C25 RXD UNREG_PWR K3 K1 SHUTDN DCD LED < CR6 o U3 o 1 U2 16 15 2 1 J2 2 1 J1 9 51 6 J5 L1 1 J3 MDS 05-xxxxA01, Rev. 01 TransNET OEM 2.4 Integration Guide19 U4 U5IC, LINEAR SC70-5 COMPARATOR SNGLE LMV33 U1IC, IN'FACE SSOP28 RS-232 TXVR SP3238E U3IC, IN'FCE 20PIN TSSOP DRIVER SP3222 U2IC, SWITCHING REG'R ADJ.4.5A LT1374HVIR K1 K2 K3RELAY, DPDT R10RESISTOR, CHIP 0603 1/16W 5% 2.2K R4 R5 R13 R14RESISTOR, CHIP 0603 1/10W 1% 10K R12RESISTOR, CHIP O603 1/10W 1% 100K R7 R9RESISTOR, CHIP 0603 1/10W 1% 1.5K R11RESISTOR, CHIP O603 1/10W 1% 1.82K R3RESISTOR, CHIP 0603 1/10W 1% 22.6K R15RESISTOR, CHIP O603 1/10W 1% 31.6K R8RESISTOR, CHIP 0603 1/10W 1% 470 OHM R6RESISTOR, CHIP O603 1/10W 1% 6.81K C12CAP, TANT 7343 20% 10V 100uf C6 C7 C9 C10 C11 C29 C31 CAP, CHIP 0603 50V NPO 5% 100pf C1 C2 C3 C4 C5 C17 C18 C19 C20 C21 C22 C23 C24 C25 C26 C8 CAP, CHIP 0603 X7R 10% 0.1uF C13CAP, CHIP 0603 X7R 10% 470 pf C14CAP, CHIP 0603 X7R 10% 4700pF C15Capacitor, Low ESR Chip Ceramic, 1210 22uF C16Capacitor, Low ESR Chip Ceramic, 1210 4.7 L1INDUCTOR, SWITCHING, 20%, 10uH J1CONN, HEADER, .100 DUAL STR 4-PIN P/O J1 1-2, P/O J1 3-4 CONN, JUMPER FH1FUSE HOLDER, PCB SMT W/2A SLO-BLO FUSE Table 6. OEM Evaluation Board Parts List (Continued) 20TransNET OEM 2.4 Integration Guide MDS 05-xxxxA01, Rev. 01 4.3Evaluation Board Fuse Replacement The Evaluation Board is protected by a 2 ampere fuse. The fuse can be blown by an over-current condition caused by an internal failure or over-voltage. Follow the procedure below to remove and replace the fuse: 1. Disconnect the primary power cable and all other connections to the Evaluation Board. 2. Locate the fuse holder assembly, FH1, behind the green power connector, J3. 3. Loosen the fuse from the holder using a very small screwdriver, then use a small pair of needle-nose pliers to pull the fuse straight up and out of the holder. 4. Use an ohmmeter or other continuity tester to verify that the fuse is open. 5. Install a new fuse in the holder. Replacement fuse information: Littelfuse #0454002; 452 Series, 2 Amp SMF Slo-Blo fuse (MDS Part No. 29-1784A03). J2CONN, HEADER, PC MOUNT .078, DUAL, 16 PIN Samtec TW Series, Part No: ASP 103812-01 (Mates with J3 on the OEM radio transceiver) J3CONN, TERM STRIP, 5MM PCB J4CONN, TELE JACK 6POS 6CON RT A SMT W/F J5CONN, D-SUB, PCB RCPT 90 DEGREE, 9 PIN Table 6. OEM Evaluation Board Parts List (Continued) MDS 05-xxxxA01, Rev. 01 TransNET OEM 2.4 Integration Guide21 5.0TRANSCEIVER MOUNTING This section provides information for mounting the OEM transceiver in a host device. The module need only be protected from direct exposure to the weather. No additional RF shielding is required. 5.1Mounting Dimensions Figure 15 shows the dimensions of the transceiver board and its mounting holes. If possible, choose a mounting location that provides an unobstructed view of the radio’s LED status indicators when viewing the board from outside the host device. Mount the transceiver module to a stable surface using the four mounting holes at the corners of the PC board. Standoff spacers should be used to maintain adequate clearance between the bottom of the circuit board and the mounting surface. (Fasteners/anchors are not normally supplied.) Figure 15. Transceiver Mounting Dimensions 5.2Antennas & Feedlines A number of omnidirectional and directional antennas are available for use with the radio. Contact your factory representative for specific recommendations on antenna types and hardware sources. In general, an omnidirectional antenna (Figure 16) is used at master station sites in order to provide equal coverage to all of the remote units. 3.11” (7.9 cm) 1.49 ̋ (3.8 cm) 0.63” (16 mm) 1.81 ̋ (46 mm) 3.45” (87.5 mm) T o p V ie w Side View 22TransNET OEM 2.4 Integration Guide MDS 05-xxxxA01, Rev. 01 At remote sites and in many point-to-point systems, a directional Yagi antenna (Figure 17) is generally recommended to minimize interference to and from other users and to maximize range. For systems operating in a very short range environment, small, flexible whip antennas may also be supplied. Such antennas are available for direct connection to the transceiver module, or for exterior mounting with various lengths of feedline. Invisible place holder Figure 17. Typical Yagi Antenna (shown mounted to mast) Feedlines The feedline supplied with the antenna was carefully selected to minimize RF loss and ensure regulatory compliance with the antenna being used. Do not make substitutions or change the lengths of the antenna system feedline. If you require a different length of feedline for your installation, contact your factory representative for assistance. NOTE: Strong fields near the antenna can interfere with the operation of the low level RTU circ…
Text truncated - open the document above for the full version.
Users Manual
MDS 05-xxxxA01, Rev. 01 TransNET OEM 2.4 Integration Guide33 5. If constant interference is present in a particular frequency zone, it may be necessary to “lock out” that zone from the radio’s hopping pattern. The radio includes built-in tools to help users do this. Refer to the discussion of the SKIP command (Page 49) for more information. In the USA, a maximum of four zones may be skipped, per FCC rules. Check the regulatory requirements for your region. 6. Interference can also come from out-of-band RF sources such as paging systems. Installation of a bandpass filter, such as Part No. 20-2822A02 in the antenna system may provide relief from this type of interference. 7. Proper use of the RETRY and REPEAT commands may be helpful in areas with heavy interference. The RETRY command sets the maximum number of times (1 to 10) that a radio will re-transmit upstream data over the air. Values greater than 1 successively improve the chances of a message getting through when interference is a problem. The REPEAT command sets a fixed number of unconditional retransmissions for downstream data. 8. The RF power output of all radios in a system should be set for the lowest level necessary for reliable communications. This lessens the chance of causing unnecessary interference to nearby systems and keeps power consumption to a minimum. 34TransNET OEM 2.4 Integration Guide MDS 05-xxxxA01, Rev. 01 10.0 PROGRAMMING REFERENCE All programming and control of the transceiver is performed through a PC terminal connected to the radio or the Evaluation Board DIAG connector. There are no manual adjustments or jumper settings used for configuration. This section explains how to establish terminal communication, and provides a complete list of user commands. 10.1 Programming Methods Terminal Interface Mode A PC may be used by operating it in a basic terminal mode (e.g., a HyperTerminal session) and entering the radio commands listed in the tables contained in this section. The PC must be connected to the radio via its 16-pin header connector, or, if using the Evaluation Board, via the modular diagnostics connector. In the latter case, an RJ-11 to DB-9 Adapter Cable (Part No. 03-3246A01) is required. A cable of this type may be constructed using the information shown in Figure 10 on Page 11. Once a PC terminal is connected, communication (baud rate) is automatically established through the command interface. To access the command interface, press the ESCAPE key, followed by one or more ENTER keystrokes (delivered at about half-second intervals), until the “>” prompt is displayed. NOTE: The diagnostic interface uses 8 data bits, 1 stop bit, and no parity. It automati- cally configures itself to function at 1200, 2400, 4800, 9600, 19200, 38400, 57600, and 115200 bps. If the DLINK setting is ON, the interface will start out in Diagnostic Link mode. This is a special protocol used to support Network-Wide Diagnostics. The pro- cess described in the paragraph above causes the radio to exit diagnostic link mode and enter command mode. If there is no input in command mode for 5 minutes, the interface will revert back to diagnostic link mode. PC-Based Configuration Software The Windows™-based TransNET Configuration Software (P/N 06-4059A01) is designed for use with the OEM Transceiver. This software provides access to all of the radio’s capabilities with the benefit of context-sensitive help. The program is shipped as part of the TransNET Support Package CD included with every order. 10.2 User Commands A series of tables begin on the next page listing the various user commands for the OEM transceiver. The tables provide abbreviated command descriptions. Complete descriptions follow in Section 9.3. MDS 05-xxxxA01, Rev. 01 TransNET OEM 2.4 Integration Guide35 Entering Commands The proper procedure for entering commands is to type the command, followed by an keystroke. For programming commands, the command is followed by , the appropriate information or values, and then . Table 11. Network Configuration—Master Station COMMAND DESCRIPTION BAND [abc] Details, page 41 Selects which of three frequency ranges the transceiver will operate in. BUFF [ON, OFF] Details, page 42 ON = Seamless data OFF = Fast byte throughput. FEC [ON, OFF] Details, page 44 Sets/disables FEC (Forward Error Correction) setting. HOPTIME [7, 28] Details, page 44 Displays hop-time or sets it to 7 or 28 ms. REPEAT [0–10] Details, page 47 Sets/displays the fixed downstream re-send count. RETRY [0–10] Details, page 47 Sets/displays the maximum upstream re-send count for ARQ (Automatic Repeat Request) operation SAF [ON, OFF] Details, page 49 Enables/disables the store-and-forward func- tion for the network controlled by this Master unit. SKIP [NONE, 1...8] Details, page 49 Skip one or more frequency zones Table 12. Network-Wide Diagnostics CommandDescription DLINK [xxxxx/ON/OFF] Details, page 43 Controls operation of diagnostic link function. DTYPE [NODE/ROOT] Details, page 44 Set radio’s operational characteristics for net- work-wide diagnostics ENTER SPACE ENTER 36TransNET OEM 2.4 Integration Guide MDS 05-xxxxA01, Rev. 01 Table 13. Operational Configuration—Set/Program CommandDescription ADDR [1–65000] Details, page 40 Program network address AMASK [0000 0000–FFFF FFFF] Details, page 41 Sets alarm response. Default: FFFF FFFF ASENSE [HI/LO] Details, page 41 Sense of the radio’s alarm output in the EIA-232 mode. Default: Alarm present = HI. BAND [abc] Details, page 41 Selects which of three frequency ranges the transceiver will operate in. BAUD [xxxxx abc] Details, page 41 Data communication parameters CODE [NONE, 1...255] Details, page 42 Select the security/encryption setting in the radio. CTS [0–255] Details, page 43 CTS delay in milliseconds. (A value of 0 returns CTS immediately) CTSHOLD [0–60000] Details, page 43 “Hold time” that CTS is present following last character from DATA port. DEVICE [DCE, CTS KEY] Details, page 43 Device behavior: DCE (normal) or…
Text truncated - open the document above for the full version.
Attestation Statements
175 Science Parkway, Rochester, New York 14620 USA (585) 242-9600 Phone (585) 242-9620 Fax January 22, 2004 FEDERAL COMMUNICATIONS COMMISSION 7435 Oakland Mills Road Columbia, MD 21046 U.S.A. Subject: Authority to Act as an Agent to FCC Applicant: Microwave Data Systems Inc. Product: MDS EL806-2.4 data transceiver NEW FCC ID: E5MDS-EL806-24 Dear Sir/Madam, I hereby appoint Elliott Labs of Sunnyvale Calif. to act as my agent in preparation of this application to F.C.C. for authorization of equipment under F.C.C. Rules. I also certify that the information provided, properly described the device or system for which authorization is required. If you have any queries, please do not hesitate to contact me at 585 242-8440: Yours truly, Dennis McCarthy Agency Compliance Engineer Microwave Data Systems 175 Science Parkway Rochester NY 14620 Phone (585) 242-8440 Email [email protected]
Cover Letter(s)
Page 1 of 4 RE: Microwave Data Systems, Inc. FCC ID: E5MDS-EL806-24 1) Please provide detailed information regarding the antennas for use with this device (gain, model, manufacturer, etc.). Although some specifications are given in the users manual, it appears the antennas may not be provided. For approval under part 15, please note that the device is expected to ship with an approved antenna. Additionally, please provide photographs or similar information to show the antennas to be approved with this application. Response: Picture of the antenna(s) has been uploaded. Also specification sheets from the manufacture website has been uploaded. 2) Some of the calculations given in the RF exposure (EIRP/Pd) exhibit do not appear correct. Please review and correct as necessary (i.e., for 27 dBm, 10 dBi, Pd = 0.997). Please note that while a distance < 20 cm may be calculated, this is not implied as the safe distance and the FCC has been asking that distance calculation information no longer be presented in mobile RF exposure exhibits. Response: Understood. We will only provide what the Power density values are at 20cm distance only. A new MPE calculation documents has been uploaded with the correct values. 3) It appears that professional installation will be used and is being justified, but the modular request letter mentions providing an adapter cable containing an N connector to customers. It is uncertain how professional installation will be maintained if a standard connector is being provided to customers. In addition, the users manual page 7 of 76 (labeled v) mentions all connections are non-standard while page 14 of 76 (labeled 6) offers additional cables with N connectors . This information appears contradictory. Please explain and/or correct exhibits as necessary. Response: An updated Module request letter and the revised manual have been uploaded for your review. 4) The modular approval letter states the device depends on its laptop host for shielding. The users manual mentions this device is for use in RTU's, PLC's, etc and examples do not appear to show the device installed in a laptop. Normally if a device is approved as a LMA due to shielding, the host will be limited to a specific laptop model series or host as tested since shielding characteristics from device to device are difficult to quantify. Additionally the device also appears to have been tested in a stand alone configuration as shown in the test configuration photos. Please justify the shielding requirement mentioned in the modular approval letter. Response: The module depending on the laptop for shielding statement has been removed. This module will never be installed inside a laptop. A new Modular letter has been uploaded to reflect the change. 5) The modular approval letter mentions a MiniPCI card, but the EUT does not appear to be of this form factor. Please explain. Response: The “MiniPCI” word has been removed. The module is not a PC peripheral device. A new Modular letter has been uploaded to reflect the change. Page 2 of 4 6) Information in the modular approval letter mentions, "The devices containing the module will be labeled with the FCC ID of the module". Information on page 7 of 76 (labeled v) in the users manual mentions " When this device is placed inside an enclosure, a durable label must be affixed to the outside of that enclosure indicating the unit’s FCC ID Number". Please note that the label on the exterior of the device must not simply be labeled with "FCC ID: E5MDS-EL806-24", as this label denotes the device as approved (which is not the case once it is integrated). The label on any final assembled device should indicate that the approved transmitter is internal by using a format such as "Contains TX FCC ID: E5MDS-EL806-24" or similar. Please adjust the documentation to make this clear. 7) Page 24 of 76 (labeled 24) of the users manual mentions the users ensuring that certain antennas have 1 dB loss in the feedline. This is not consistent with the professional installation mentioned throughout the application, as this is a professional installer issue, not the end users. Response: An updated manual has been uploaded for your review. 7) Page 24 of 76 (labeled 24) of the users manual mentions the users ensuring that certain antennas have 1 dB loss in the feedline. This is not consistent with the professional installation mentioned throughout the application as this is a professional installer issue, not the end users. Response: An updated manual has been uploaded for your review. 8) The users manual should instruct the OEM that their manual should NOT be provided any instructions on how to remove or install the device. Response: An updated manual has been uploaded for your review. 9) System receivers shall have input bandwidths that match the hopping channel bandwidths of their corresponding transmitters and shall shift frequencies in synchronization with the transmitted signals (2.1033(b)(10)/15.247(a)(1)). Please provide information that shows this device complies with this. Response: The mode master unit sends out a s…
Text truncated - open the document above for the full version.
Contact Information
Applicant
John Barenys(Senior Operations Manager)
Technical Contact
Elliott Laboratories Inc.Juan Martinez
[email protected]408-245-7800
684 West Maude Ave. · Sunnyvale, California · United States
Non-Technical Contact
Elliott Laboratories Inc.Juan Martinez
[email protected]408-245-7800
Test Firm
Elliott Laboratories LLCDavid Bare
Technical Specifications
| # | Rule Parts | Frequency Range | Power Output |
|---|---|---|---|
| 1 | 15C | 2.40 GHz - 2.48 GHz | 500.00 mW |
Other Applications from GE MDS, LLC

E5MDS-NET9S
Jul 13, 2023Frequency Hopping Radio
Equipment Class
DSS - Part 15 Spread Spectrum Transmitter
E5MDS-NET9L
Jul 11, 2023Frequency Hopping Radio
Equipment Class
DSS - Part 15 Spread Spectrum Transmitter
E5MDS-LN900
Jan 27, 2016Industrial Radio Module
Equipment Class
TNB - Licensed Non-Broadcast Station Transmitter
E5MDS-SDM4
Aug 20, 2015MDS SDM4 Licensed Spectrum Module
Equipment Class
TNB - Licensed Non-Broadcast Station Transmitter
E5MDS-LN400
Jul 09, 2015Industrial Radio Module
Equipment Class
TNB - Licensed Non-Broadcast Station Transmitter