EJE-WB0011LifeBook T Series w/ WLAN Calexico2 (11abg) & BT
Fujitsu Client Computing Limited (FCCL)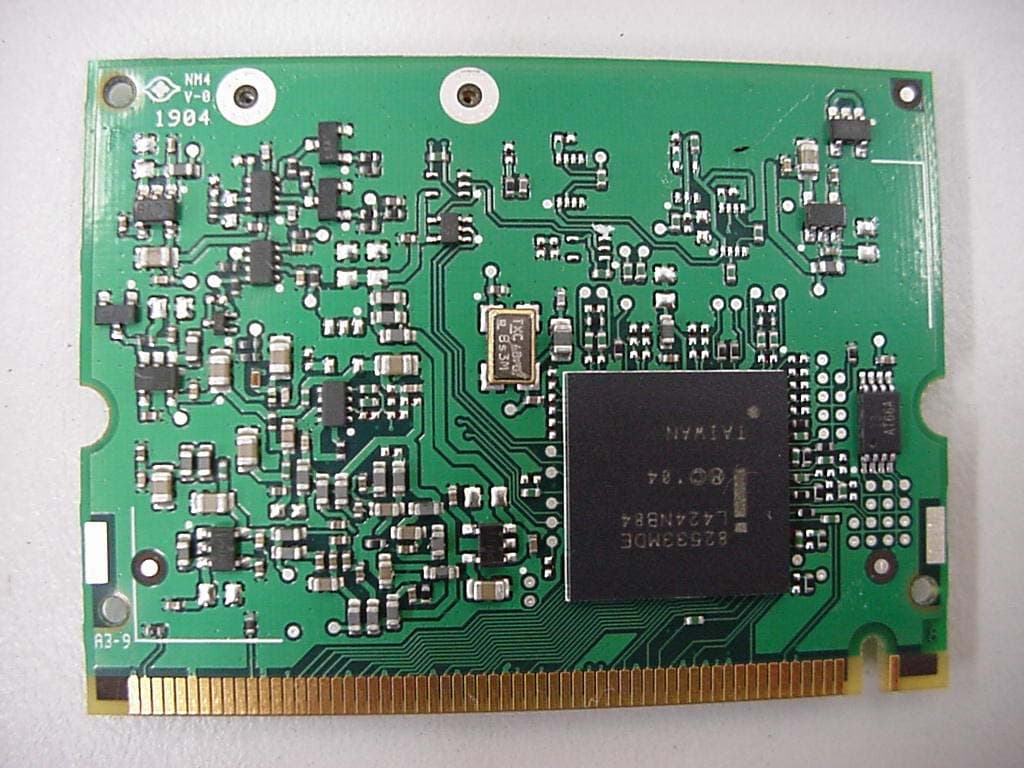
Click to zoom
Application Details
- Equipment Class
- DTS - Digital Transmission System
- Date of Grant
- Oct 31, 2004
- Application Purpose
- Original Equipment
- Date of Application
- Sep 02, 2004
- Equipment Note
- LifeBook T Series w/ WLAN Calexico2 (11abg) & BT
- Frequency Range
- 5745.00000000 - 5825.00000000
- Country
- Japan
Documents & Files
Document Text
Text extracted from the exhibit documents filed with the FCC. Open a document above to read the original.
Users Manual
Copyright Copyright & Trademark Information Fujitsu Computer Systems Corporation has made every effort to ensure the accuracy and completeness of this document. However, as ongoing development efforts are continually improving the capabilities of our products, we cannot guarantee the accuracy of the contents of this document. We disclaim liability for errors, omissions, or future changes. Fujitsu, the Fujitsu logo, and LifeBook are registered trademarks of Fujitsu Limited. MS, MS-DOS, and Windows are either registered trademarks or trademarks of Microsoft Corporation in the United States and/or other countries. PCMCIA is a trademark of the Personal Computer Memory Card International Association. Intel and Pentium are trademarks or registered trademarks of Intel Corporation or its subsidiaries in the United States and other countries. Bluetooth is a registered trademark of Bluetooth SIG, Inc. Adobe, Acrobat, and Acrobat Reader are either a registered trademarks or trademarks of Adobe Systems Incorporated in the United States and/or other countries. All other trademarks mentioned herein are the property of their respective owners. © Copyright 2004 Fujitsu Computer Systems Corpora- tion. All rights reserved. No part of this publication may be copied, reproduced, or translated, without prior written consent of Fujitsu Computer Systems Corpora- tion. No part of this publication may be stored or trans- mitted in any electronic form without the written consent of Fujitsu Computer Systems Corporation. B6FH-3071-01EN-00 Warning Handling the cord on this product or cords associated with accessories sold with this product, will expose you to lead, a chemical known to the State of California to cause birth defects or other reproductive harm. Wash hands after handling. DECLARATION OF CONFORMITY according to FCC Part 15 Responsible Party Name:Fujitsu Computer Systems Corporation Address: 1250 E. Arques Avenue, MS 122 Sunnyvale, CA 94085 Telephone:(408) 746-6000 Declares that product:Model Configuration: LifeBook T4010 Tablet PC LifeBook T4010D Tablet PC Complies with Part 15 of the FCC Rules. This device complies with Part 15 of the FCC rules. Operations are subject to the following two conditions: (1) This device must not be allowed to cause harmful interference, (2) This device must accept any interference received, including interference that may cause undesired operation. T Series.book Page 1 Wednesday, July 28, 2004 3:35 PM LifeBook T Series Tablet PC T Series.book Page 2 Wednesday, July 28, 2004 3:35 PM Table of Contents Fujitsu LifeBook ® T Series Tablet PC Table of Contents 1 PREFACE Preface About This Guide . . . . . . . . . . . . . . . . . . . . . . . . . 3 Fujitsu Contact Information . . . . . . . . . . . . . . . . . 3 Warranty . . . . . . . . . . . . . . . . . . . . . . . . . . . . . . . 3 2 GETTING TO KNOW YOUR TABLET PC Overview Unpacking . . . . . . . . . . . . . . . . . . . . . . . . . . . . . . 7 Optional Accessories . . . . . . . . . . . . . . . . . . . . . . 8 Locating the Controls and Connectors Top and Front Components . . . . . . . . . . . . . . . . 10 Left-Side Panel Components . . . . . . . . . . . . . . . 11 Right-Side Panel Components . . . . . . . . . . . . . . 12 Rear Panel Components . . . . . . . . . . . . . . . . . . . 13 Bottom Components . . . . . . . . . . . . . . . . . . . . . 14 Status Indicator Panel Power Indicator . . . . . . . . . . . . . . . . . . . . . . . . . 15 AC Adapter Indicator . . . . . . . . . . . . . . . . . . . . . 15 Battery Level Indicators . . . . . . . . . . . . . . . . . . . 15 Battery Charging Indicator . . . . . . . . . . . . . . . . . 16 Hard Drive Access Indicator . . . . . . . . . . . . . . . . 16 NumLk Indicator. . . . . . . . . . . . . . . . . . . . . . . . . 16 CapsLock Indicator . . . . . . . . . . . . . . . . . . . . . . . 16 ScrLk Indicator . . . . . . . . . . . . . . . . . . . . . . . . . . 16 Security Indicator . . . . . . . . . . . . . . . . . . . . . . . . 16 Display Panel Opening the Display Panel . . . . . . . . . . . . . . . . . 17 Using the System as a Tablet . . . . . . . . . . . . . . . 17 Adjusting Display Panel Brightness . . . . . . . . . . . 18 Keyboard Using the Keyboard . . . . . . . . . . . . . . . . . . . . . . 19 Numeric Keypad. . . . . . . . . . . . . . . . . . . . . . . . . 19 Windows Keys . . . . . . . . . . . . . . . . . . . . . . . . . . 19 Cursor Keys . . . . . . . . . . . . . . . . . . . . . . . . . . . . 20 Function Keys. . . . . . . . . . . . . . . . . . . . . . . . . . . 20 LifeBook Security/Tablet PC Buttons Changing Tablet PC Button Functions . . . . . . . . 22 Setting up LifeBook Security Panel . . . . . . . . . . . 22 Passwords . . . . . . . . . . . . . . . . . . . . . . . . . . . . . 22 Using Your LifeBook Security Panel . . . . . . . . . . 23 Precautions. . . . . . . . . . . . . . . . . . . . . . . . . . . . . 23 Uninstalling the Security Panel Application . . . . . 24 Touchpad Pointing Device Clicking . . . . . . . . . . . . . . . . . . . . . . . . . . . . . . . 25 Double-Clicking . . . . . . . . . . . . . . . . . . . . . . . . . 25 Dragging . . . . . . . . . . . . . . . . . . . . . . . . . . . . . . 26 Scrolling . . . . . . . . . . . . . . . . . . . . . . . . . . . . . . . 26 Touchpad Control Adjustment . . . . . . . . . . . . . . 26 Pen and Active Digitizer Using the Pen. . . . . . . . . . . . . . . . . . . . . . . . . . . 27 Calibrating the Pen . . . . . . . . . . . . . . . . . . . . . . . 27 Replacing the Pen Tip. . . . . . . . . . . . . . . . . . . . . 28 Using the Active Digitizer . . . . . . . . . . . . . . . . . . 28 Volume Control Controlling the Volume . . . . . . . . . . . . . . . . . . . 29 T Series.book Page 3 Wednesday, July 28, 2004 3:35 PM LifeBook T Series Tablet PC 3 USING YOUR TABLET PC Power Sources Connecting the Power Adapters. . . . . . . . . . . . . 33 Starting Your Tablet PC Power On . . . . . . . . . . . . . . . . . . . . . . . . . . . . . 34 Boot Sequence . . . . . . . . .…
Text truncated - open the document above for the full version.
Users Manual
13 Getting to Know Your Tablet PC Figure 2-5. LifeBook T Series Tablet PC left-side panel LEFT-SIDE PANEL COMPONENTS Following is a brief description of your Tablet PC’s left- side components. (Figure 2-5) USB 2.0 Port The USB 2.0 port allow you to connect Universal Serial Bus devices. See “Universal Serial Bus Ports” on page 52. WLAN/Bluetooth On/Off Switch The wireless LAN/Bluetooth On/Off Switch is used to power off the wireless antenna when not in use. IEEE 1394 Jack Allows you to connect IEEE 1394 (Firewire) peripherals such as digital video cameras or external hard drives to your Tablet PC. PC Card Slot The PC Card Slot allows you to install a Type I or Type II PC Card. The PC Card Eject Button is used when ejecting a PC Card from the slot. See “PC Cards” on page 47. PC Card Slot PC Card Eject/Lock Button Air Vents Wireless LAN On/Off Switch USB 2.0 Port IEEE 1394 Port T Series.book Page 13 Wednesday, July 28, 2004 3:35 PM 14 LifeBook T Series Tablet PC - Section 2 Figure 2-6. LifeBook T Series Tablet PC right-side panel RIGHT-SIDE PANEL COMPONENTS Following is a brief description of your Tablet PC’s right- side components. Flexible Bay The Flexible Bay can accommodate one of the following devices. See “Flexible Bay Devices” on page 18. ■ Modular DVD/CD-RW combo drive ■ Modular Super-Multi DVD drive ■ Modular Lithium ion battery ■ We i g h t S a v e r Flexible Bay Eject Lever The Flexible Bay eject lever releases the Flexible Bay device. Anti-theft Lock Slot The anti-theft lock slot allows you to attach a optional physical lock-down device. Flexible Bay Eject Lever Flexible Bay Anti-theft Lock Slot T Series.book Page 14 Wednesday, July 28, 2004 3:35 PM 15 Getting to Know Your Tablet PC Figure 2-7. LifeBook T Series Tablet PC rear panel REAR PANEL COMPONENTS DC Power Jack The DC power jack allows you to plug in the AC adapter or the optional Auto/Airline adapter to power your Tablet PC and charge the internal Lithium ion Battery. Modem (RJ-11) Telephone Port The Modem (RJ-11) telephone port is for attaching a telephone line to the internal multinational 56K modem. Infrared Port The fast IrDA compatible port allows you to communi- cate with another IrDA-compatible infrared device without a cable. (See “Infrared Port” on page 52.) External Monitor Port The external monitor port allows you to connect an external VGA or SVGA CRT monitor. Note that when the optional Port Replicator is attached to the system, you must use the external monitor port on the Port Replicator rather than the port on the system. See “External VGA Monitor Port” on page 53. USB 2.0 Ports The two USB 2.0 ports allow you to connect Universal Serial Bus devices. See “Universal Serial Bus Ports” on page 52. LAN (RJ-45) Jack The internal LAN (RJ-45) port is used for an internal GigaLAN Ethernet (10/100/1000 Base-T/TX) connec- tion. See “Internal LAN (RJ-45) jack” on page 52. DC External LAN (RJ-45) Jack USB 2.0 Port TBD - NEW GRAPHIC Power Jack Modem (RJ-11) Jack Monitor Port Infrared Port The internal multinational modem is not intended for use with Digital PBX systems. Do not connect the internal modem to a Digital PBX as it may cause serious damage to the internal modem or your entire LifeBook T Series Tablet PC. Consult your PBX manufacturer’s documentation for details. Some hotels have Digital PBX systems. Be sure to find out BEFORE you connect your modem. The internal modem is designed to the ITU-T V.90 standard. Its maximum speed of 53000 bps is the highest allowed by FCC, and its actual connection rate depends on the line conditions. The maximum speed is 33600 bps at upload. T Series.book Page 15 Wednesday, July 28, 2004 3:35 PM 16 LifeBook T Series Tablet PC - Section 2 Figure 2-8. LifeBook T Series Tablet PC bottom panel BOTTOM COMPONENTS Following is a brief description of your Tablet PC’s bottom panel components. (Figure 2-8) Lithium ion Battery Compartment The battery compartment contains the internal Lithium ion battery. The battery should be removed when the computer is stored over a long period of time or for swapping a discharged battery with a charged Lithium ion battery. See “Lithium ion Battery” on page 41. Port Replicator Connector This connector allows you to connect the optional port replicator. Main Unit and Configuration Label The configuration label shows the model number and other information about your LifeBook T Series Tablet PC. In addition, the configuration portion of the label has the serial number and manufacturer information that you will need to give your support representative. It identifies the exact version of various components of your Tablet PC. Memory Upgrade Compartment Your Tablet PC comes with high speed Synchronous Dynamic RAM (SDRAM). The memory upgrade compartment allows you to expand the system memory capacity of your Tablet PC, hence improving overall performance. See “Memory Upgrade Module” on page 43. Memory Lithium ion Battery Main Unit and Configuration Label (approximate Battery Port Replicator Connector location) Pack Latch Battery Pack Latch Compartment TBD - NEW GRAPHIC Upgrade Compartment T Series.book Page 16 Wednesday, July 28, 2004 3:35 PM 15 Getting to Know Your Tablet PC Figure 2-9. Status Indicator Panel Status Indicator Panel The Status Indicator Panel displays symbols that corre- spond to specific components of your LifeBook T Series Tablet PC. These symbols tell you how each of those components is operating. (Figure 2-9) POWER INDICATOR The Power indicator symbol states whether your system is operational. It has several different states, each of which tells you what mode your Tablet PC is in at that time. ■ Steady On: This means that there is power to your Tablet PC and that it is ready for use. ■ Flashing: This means that your Tablet PC is in Standby mode. ■ Steady Off: This means that your system is either in Hibernate mode, or that your Tablet PC has been turned off. If you are charging your battery, the Power indicator symbol will remain on even if…
Text truncated - open the document above for the full version.
Users Manual
18 LifeBook T Series Tablet PC - Section Two Figure 2-14. Rotating the display Figure 2-15. Display rotated completely Figure 2-16. System in tablet configuration ADJUSTING DISPLAY PANEL BRIGHTNESS Once you have turned on your Tablet PC, you may want to adjust the brightness level of the screen to a more comfortable viewing level. There are two ways to adjust the brightness, keyboard and power management utility. Using Keyboard to Adjust Brightness Adjusting the brightness using the keyboard changes the system setting (i.e., the settings you make via the func- tion keys automatically changes the brightness settings in the system’s Pen and Tablet Settings). ■ [Fn+F6]: Pressing repeatedly will lower the brightness of your display. ■ [Fn+F7]: Pressing repeatedly will increase the brightness of the display. Using Power Management to Adjust Brightness To adjust brightness with the power management utility, click Start -> Control Panel -> Tablet and Pen Settings. Select the Display tab and set the screen brightness slider for battery and AC power scenarios. Using the Fujitsu Menu to Adjust Brightness To adjust brightness using the Fujitsu menu, click on the Fujitsu Menu icon in the system tray in the lower right corner of the screen. From the menu that appears, select Brightness Control. The Tablet and Pen Settings window will open. Select the Display tab and set the screen brightness slider for battery and AC power scenarios. If using AC power your brightness setting is set to its highest level by default. If using battery power your brightness settings is set to approximately mid-level by default. The higher the brightness level, the more power the LifeBook T Series Tablet PC will consume and the faster your batteries will discharge. For maximum battery life, make sure that the brightness is set as low as possible. T Series.book Page 18 Wednesday, July 28, 2004 3:35 PM 19 Getting to Know Your Tablet PC Figure 2-17. Keyboard Keyboard USING THE KEYBOARD Your LifeBook T Series Tablet PC has an integral 83-key keyboard. The keys perform all the standard functions of a 101-key keyboard, including the Windows keys and other special function keys. This section describes the following keys. (Figure 2-17) ■ Numeric keypad: Your Tablet PC allows certain keys to serve dual purposes, both as standard characters and as numeric and mathematical keys. The ability to tog- gle between the standard character and numerical keys is controlled through the [NumLk] key. ■ Cursor keys: Your keyboard contains four arrow keys for moving the cursor or insertion point to the right, left, up, or down within windows, applications and documents. ■ Function keys: The keys labeled [F1] through [F12], are used in conjunction with the [Fn] key to produce special actions that vary depending on what program is running. ■ Windows keys: These keys work with your Windows operating system and function the same as the onscreen Start menu button, or the right button on your pointing device. NUMERIC KEYPAD Certain keys on the keyboard perform dual functions as both standard character keys and numeric keypad keys. NumLk can be activated by pressing the [NumLk] key. Turning off the NumLk feature is done the same way. Once this feature is activated you can enter numerals 0 through 9, perform addition ( + ), subtraction ( - ), multiplication ( * ), or division ( / ), and enter decimal points ( . ) using the keys designated as ten-key function keys. The keys in the numeric keypad are marked on the front edge of the key to indicate their secondary func- tions. (Figure 2-17) WINDOWS KEYS Your LifeBook T Series Tablet PC has two Windows keys: a Start key and an Application key. The Start key displays the Start menu. This button functions the same as your onscreen Start menu button. The Application key functions the same as your right mouse button and displays shortcut menus for the selected item. (Please refer to your Windows documentation for additional information regarding the Windows keys.) (Figure 2-17) End Home Fn Key Start Key Function Keys Numeric Keypad Application Key Cursor Keys (outlined with thick black line) If you are using the optional external numerical keypad, pressing the [NumLk] key will activate the external keypad. The indicator will come on, however it will not change any of the functionality of your keyboard keys. T Series.book Page 19 Wednesday, July 28, 2004 3:35 PM 20 LifeBook T Series Tablet PC - Section Two CURSOR KEYS The cursor keys are the four arrow keys on the keyboard which allow you to move the cursor up, down, left, and right in applications. In programs such as Windows Explorer, it moves the “focus” (selects the next item up, down, left, or right). (Figure 2-17) FUNCTION KEYS Your Tablet PC has 12 function keys, F1 through F12. The functions assigned to these keys differ for each application. You should refer to your software documen- tation to find out how these keys are used. (Figure 2-17) [Fn] Key The [Fn] key provides extended functions for the Tablet PC and is always used in conjunction with another key. ■ [Fn+F3]: Pressing [F3] while holding [Fn] will toggle the Audio Mute on and off. ■ [Fn+F4]: Pressing [F4] while holding [Fn] will toggle the built-in pointing device on and off. Note that the [Fn+F4] combination only works if Manual Setting is selected in the BIOS. (See “Entering the BIOS Setup Utility” on page 34) ■ [Fn +F5]: Pressing [F5] while holding [Fn] allows you to toggle between video compensation and no compensation. (Video compensation controls spacing on the display. When it is enabled, displays with less than 1024 x 768 or 800 x 600 pixel resolution will still cover the entire screen.) ■ [Fn+F6]: Pressing [F6] repeatedly while holding [Fn] will lower the brightness of your display. Note that adjusting the brightness using the keyboard changes the system setting. ■ [Fn+F7]: Pressing [F7] repeatedly while holding [Fn] will increase the brightness of the display. ■ [Fn+F8]: Pressing [F8] …
Text truncated - open the document above for the full version.
Users Manual
31 3 Using Your Tablet PC T Series.book Page 31 Wednesday, July 28, 2004 3:35 PM 32 LifeBook T Series Tablet PC - Section Three T Series.book Page 32 Wednesday, July 28, 2004 3:35 PM 34 LifeBook T Series Tablet PC - Section Three Starting Your Tablet PC POWER ON The Suspend/Resume button is used to turn on your LifeBook T Series Tablet PC from its off state. Once you have connected your AC adapter or charged the internal Lithium ion battery, you can power on your Tablet PC. (See figure 2-4 on page 11 for location) Press the Suspend/Resume button to start your system. When you are done working you can either leave your Tablet PC in Standby mode, See “Standby Mode” on page 36, or you can turn it off. See “Power Off ” on page 38 When you Power On your Tablet PC, it will perform a Power On Self Test (POST) to check the internal parts and configuration for correct functionality. If a fault is found, your Tablet PC will emit an audio warning and/ or an error message will be displayed. See “Power On Self Test Messages” on page 65 Depending on the nature of the problem, you may be able to continue by starting the operating system or by entering the BIOS setup utility and revising the settings. After satisfactory completion of the Power On Self Test (POST), your Tablet PC will load your operating system . BOOT SEQUENCE The procedure for starting-up your Tablet PC is termed the Bootup sequence and involves your Tablet PC’s BIOS. When your Tablet PC is first turned on, the main system memory is empty, and it needs to find instruc- tions to start up your Tablet PC. This information is in the BIOS program. Each time you power up or restart your Tablet PC, it goes through a boot sequence which displays a Fujitsu logo until your operating system is loaded. During booting, your Tablet PC is performing a standard boot sequence including a Power On Self Test (POST). When the boot sequence is completed without a failure and without a request for the BIOS Setup Utility, the system displays the operating system’s opening screen. The boot sequence is executed when: ■ You turn on the power to your Tablet PC. ■ You restart your Tablet PC from the Windows Shut Down dialog box. ■ The software initiates a system restart. Example: When you install a new application. BIOS SETUP UTILITY The BIOS Setup Utility is a program that sets up the operating environment for your Tablet PC. Your BIOS is set at the factory for normal operating conditions, therefore there is no need to set or change the BIOS’ environment to operate your Tablet PC. The BIOS Setup Utility configures: ■ Device control feature parameters, such as changing I/O addresses and boot devices. ■ System Data Security feature parameters, such as passwords. Entering the BIOS Setup Utility To enter the BIOS Setup Utility do the following: 1. Turn on or restart your Tablet PC. 2. Press the [F2] key once the Fujitsu logo appears on the screen. This will open the main menu of the BIOS Setup Utility with the current settings displayed. 3. Press the [RIGHT ARROW] or [LEFT ARROW] key to scroll through the other setup menus to review or alter the current settings. BIOS Guide A guide to your Tablet PC’s BIOS is available online. Please visit our service and support Web site at us.fujitsu.com/computers. Once there, select Support, then select Tablet PCs under User’s Guides. Select Life- Book Tablet PC BIOS Guides from the pull-down menu for your Tablet PC series. If you are unsure of your Tablet PC’s BIOS number, refer to your packing slip. When you turn on your Tablet PC, be sure you have a power source. This means that a battery is installed and charged, or that the AC or Auto/Airline adapter is connected and has power. When the system display is closed, the Suspend/Resume button is disabled. This feature prevents the system from being accidentally powered up when not in use. Never turn off your Tablet PC during the Power On Self Test (POST) or it will cause an error message to be displayed when you turn your Tablet PC on the next time. See “Power On Self Test Messages” on page 65 If your data security settings require it, you may be asked for a password before the BIOS main menu will appear. T Series.book Page 34 Wednesday, July 28, 2004 3:35 PM 35 Getting Started BOOTING THE SYSTEM We strongly recommend that you not attach any external devices until you have gone through the initial power-on sequence. When you turn on your LifeBook T Series Tablet PC for the first time, it will display a Fujitsu logo on the screen. If you do nothing the system will load the operating system, and then the Windows Welcome will begin. Designed to accommodate the needs of many users, in many different countries, Windows needs to be config- ured the first time you use them. Windows has two parts: ■ Getting Started: You have the opportunity to set up your modem so that your Tablet PC will be prepared to dial out. ■ Windows License Agreement and Final Settings: You have the opportunity to review the Windows License Agreement. Getting Started Read the instructions on the screens carefully and fill in the information as directed. You will be asked for such items as the language you wish to use, the country in which you live, your first and last name, and about how you dial out from where you will be using your Tablet PC. For the modem settings, enter your current location information where you will be using your Tablet PC. If you are not connected to a phone line and plan to register at a later time, you may click the Skip button, and you will go directly to the condition of use page. Once you have set up your Tablet PC to dial out, Windows will make a free telephone call to test the settings. If the call is unsuccessful, you will be returned to the phone settings page where you may try to fix them. If you are unable to fix the settings please contact Fujitsu Service and Support. See “Fujitsu Contact Infor- mation” on page 3 If you would simply like to move on, and register at a later time, …
Text truncated - open the document above for the full version.
Users Manual
75 7 Specifications T Series.book Page 75 Wednesday, July 28, 2004 3:35 PM 76 LifeBook T Series Tablet PC - Section Seven T Series.book Page 76 Wednesday, July 28, 2004 3:35 PM 77 Specifications Specifications This section provides the hardware and environmental specifications for your LifeBook T Series Tablet PC. Specifications of particular configurations will vary. CONFIGURATION LABEL Your LifeBook T Series Tablet PC has a configuration label located on the bottom. (See figure 2-8 on page 16 for location). This label contains specific information regarding the options you’ve chosen for your Tablet PC. Following is an example label and information on how to read your own configuration label. Figure 7-1. Configuration Label LifeBook T Series Tablet PC Specifications The specifications for your particular model may vary. To determine the specifications for your system, please visit our Web site at: us.fujitsu.com/computers. Physical Specifications Dimensions11.54” w x 9.61” d x 1.38" / 1.48" (293 mm x 244 mm x 35 / 37.5 mm) Processing Specifications CPU/SpeedIntel® Pentium® M Processor 725/745* Chip setIntel 855GME - 400 MHz Memory/Storage Specifications Main RAM• 256 MB SDRAM (DDR 333 MHz) • 144-pin SO DIMM slots x 2 256 MB, 512 MB, and 1.0 GB modules available, with a system maximum of 2.0 GB. L1 cache (CPU) 64 KB on-die L2 cache2 MB on-die T3010, PM 1.4G, 12.1 XGA, XPTE, 40G, 256M Configuration P/N: ATEXXXXXXXXXXXX FPC P/N: FPCXXXXXX Model Processor Screen Size Operating System Hard Drive Memory Part Number Configuration ID New Label BIOS ROM 1 MB (Boot Block Type Flash ROM) Hard disk drive • 2.5” HDD • Minimum 40 GB IDE (4200 rpm) Also available: 60 GB (4200 rpm) 80 GB (5400 rpm) • ATA 100 • Shock-mounted • SMART Support Display Specifications Display12.1" TFT XGA (1024 x 768), 16M colors: • Color LCD • Active Digitizer • 32-bit color • External monitor support: VGA (1024 x 768 maximum) • Brightness: 8 levels • Dot pitch: 0.240 x 0.240 mm • Viewing Angle: Horizontal: 80 degrees (min.) Vertical: 80 degrees (min.) 12.1" TFT SXGA+ (1400 x 1050), 16M colors: • Color LCD • Active Digitizer • 32-bit color • External monitor support: (TBD maximum) • Brightness: 8 levels • Dot pitch: 0.1755 x 0.1755 mm • Viewing Angle: Horizontal: 45 degrees (min.) Vertical: 50 degrees (min.) VRAMIntel 855GME chipset with 8 MB shared memory using Dynamic Video Memory Technology (DVMT) delivers low-power, high-performance 3D/2D graphics, video, and display capabilities. Dynamic Video Memory Technology (DVMT) dynamically responds to application requirements and efficiently allocates the proper amount of memory (maximum is 64 MB) for optimal graphics and system performance. LifeBook T Series Tablet PC Specifications (Continued) T Series.book Page 77 Wednesday, July 28, 2004 3:35 PM 78 LifeBook T Series Tablet PC - Section Seven Interface Specifications Integrated Interfaces • Modem (RJ-11) • LAN (RJ-45) • USB 2.0 x 2 •DC-In •IrDA • IEEE1394 • 15-pin D-SUB connector for external VGA monitor • Docking connector Interfaces on Optional Port Replicator • DC Power • Pass-through LAN Port • External Monitor • USB 2.0 x 4 •Line Out • Docking Port PC Card Slots • One Type I or Type II • PCMCIA CardBus version 3.0 SD/Memory Stick Slot • One slot for SD/Memory Stick card Smart Card Slot • Dedicated slot for SmartCard Modular Bay Devices One of the following devices is pre- installed: •Super-Multi DVD Drive: (modular 4x DVD-R, 2x DVD-RW, 2.4x DVD+R, 2.4x DVD+RW, 2x DVD-RAM, 8x DVD-ROM, 16x CD-R, 8x CD-RW, 24x CD-ROM) •DVD-RW Drive: 1x (DVD-R) / 1x (DVD-RW) / 8x (DVD-ROM) / 16x (CD-R) / 10x (CD-RW) / 24x (CD-ROM) •DVD/CD-RW Combo Drive: 16x (CD-R) / 10x (CD-RW) / 24x (CD) / plus 8x DVD • Modular Bay Battery • Weight Saver Infrared• System IR Port • IrDA version 1.1 (FIR, 4 Mbps) User Interface support • Keyboard Pitch: 19 mm, Stroke: 2.7 mm • TouchPad pointing device with scroll button • Active digitizer with pen input • On-screen keyboard LifeBook T Series Tablet PC Specifications (Continued) Audio• Sigmatel STAC9753A • Internal mono microphone x 2 • Stereo speaker x 2 • Mono microphone and stereo headphone jacks User Controls • Programmable Application Buttons, each with primary and secondary functions (default applications: Microsoft Journal and Calculator) • Security button support • Trusted Platform Module (TPM) support (on some models) • Suspend/Resume button Status Indicators (LCDs) • Power •Charge/DC-In • Battery level • TBD - SECOND BATTERY? • HDD • PC Card •Caps Lock •Num Lock • Scroll Lock • TBD - Security? Power Specifications Main Battery• 6-cell • Removable, Lithium ion • 10.8 V @4800 mAh, 51.8 Wh • Warm-swappable • TBD - Recharge Time: Approximately 3.2 hours • Suspend Life: Minimum 3 days Off State: Approximately 20 days Optional Bay Battery •6-cell • Removable, Lithium ion • 10.8V @ 3800 mAh, 41.0 Wh Bridge Battery • 6-cell NiMH, 35 mAh • Life (with Suspend-to-RAM on bridge battery only): 5 minutes from full charge AC Adapter Autosensing 100 - 240V, supplying 19 VDC, with a current of 3.15 A Environmental Specifications Temperature Operating: 41 o to 95 o F (5 o to 35 o C) Non-operating: 5 o to 140 o F (-15 o to 60 o C) LifeBook T Series Tablet PC Specifications (Continued) T Series.book Page 78 Wednesday, July 28, 2004 3:35 PM 79 Specifications Humidity Operating: 20 to 85% non-condensing Non-operating: 8 to 85% non-condensing Agency Approval Specifications Emissions TBD - VERIFY ALL • EN55022 (CISPR22) Class B • FCC 15, Class B • FCC 15C, 15.247 • ETSI EN 300-328 • ICES-003 • Canada RSS-210 Immunity • EN55024 (1998) • ETSI EN 301-489-17 V.1.1.1 (2000-9) Safety • UL and cUL Listed, UL 60950 • TuV T-Mark, EN60950 Te l e c o m • FCC Part 68 • IC CS-03 Additional Specifications Operating systems •Microsoft Windows XP Tablet PC Edition LifeBook T Series Tablet PC Specifications (Continued) T Series.book Page 79 Wednesday, July 28, 2004 3:35 PM 80 LifeBook T Series Tablet PC - Section Seven Regulatory Infor…
Text truncated - open the document above for the full version.
Contact Information
Applicant
Mr. Tsuyoshi Uchihara(Engineer)
Technical Contact
EMC Technologies Pty LtdChris Zombolas
[email protected]+613 9335 3333
57 Assembly Drive, Tullamarine · Melbourne, Victoria · Australia
Non-Technical Contact
EMC Technologies Pty LtdChris Zombolas
[email protected]+613 9335 3333
Test Firm
EMC Technologies Pty. Ltd.Chris Zombolas
Technical Specifications
| # | Rule Parts | Frequency Range | Power Output |
|---|---|---|---|
| 2 | 15C | 5.75 GHz - 5.83 GHz | 45.00 mW |
Other Applications from Fujitsu Client Computing Limited (FCCL)
EJE-KST001
May 13, 2020Tablet Computer
Equipment Class
DXX - Part 15 Low Power Communication Device Transmitter
EJE-KSC001
May 13, 2020Port Replicator
Equipment Class
DXX - Part 15 Low Power Communication Device Transmitter
EJE-WB0099
Jan 27, 2016STYLISTIC Q series
Equipment Class
DSS - Part 15 Spread Spectrum Transmitter
EJE-BT0004
Dec 06, 2015Ubiquitous-warecore module
Equipment Class
DTS - Digital Transmission System
EJE-WB0097
Nov 12, 2015FUJITSU STYLISTIC Q736
Equipment Class
DTS - Digital Transmission System