EW780-5412-00Cordless Telephone Base
VTech Telecommunications Ltd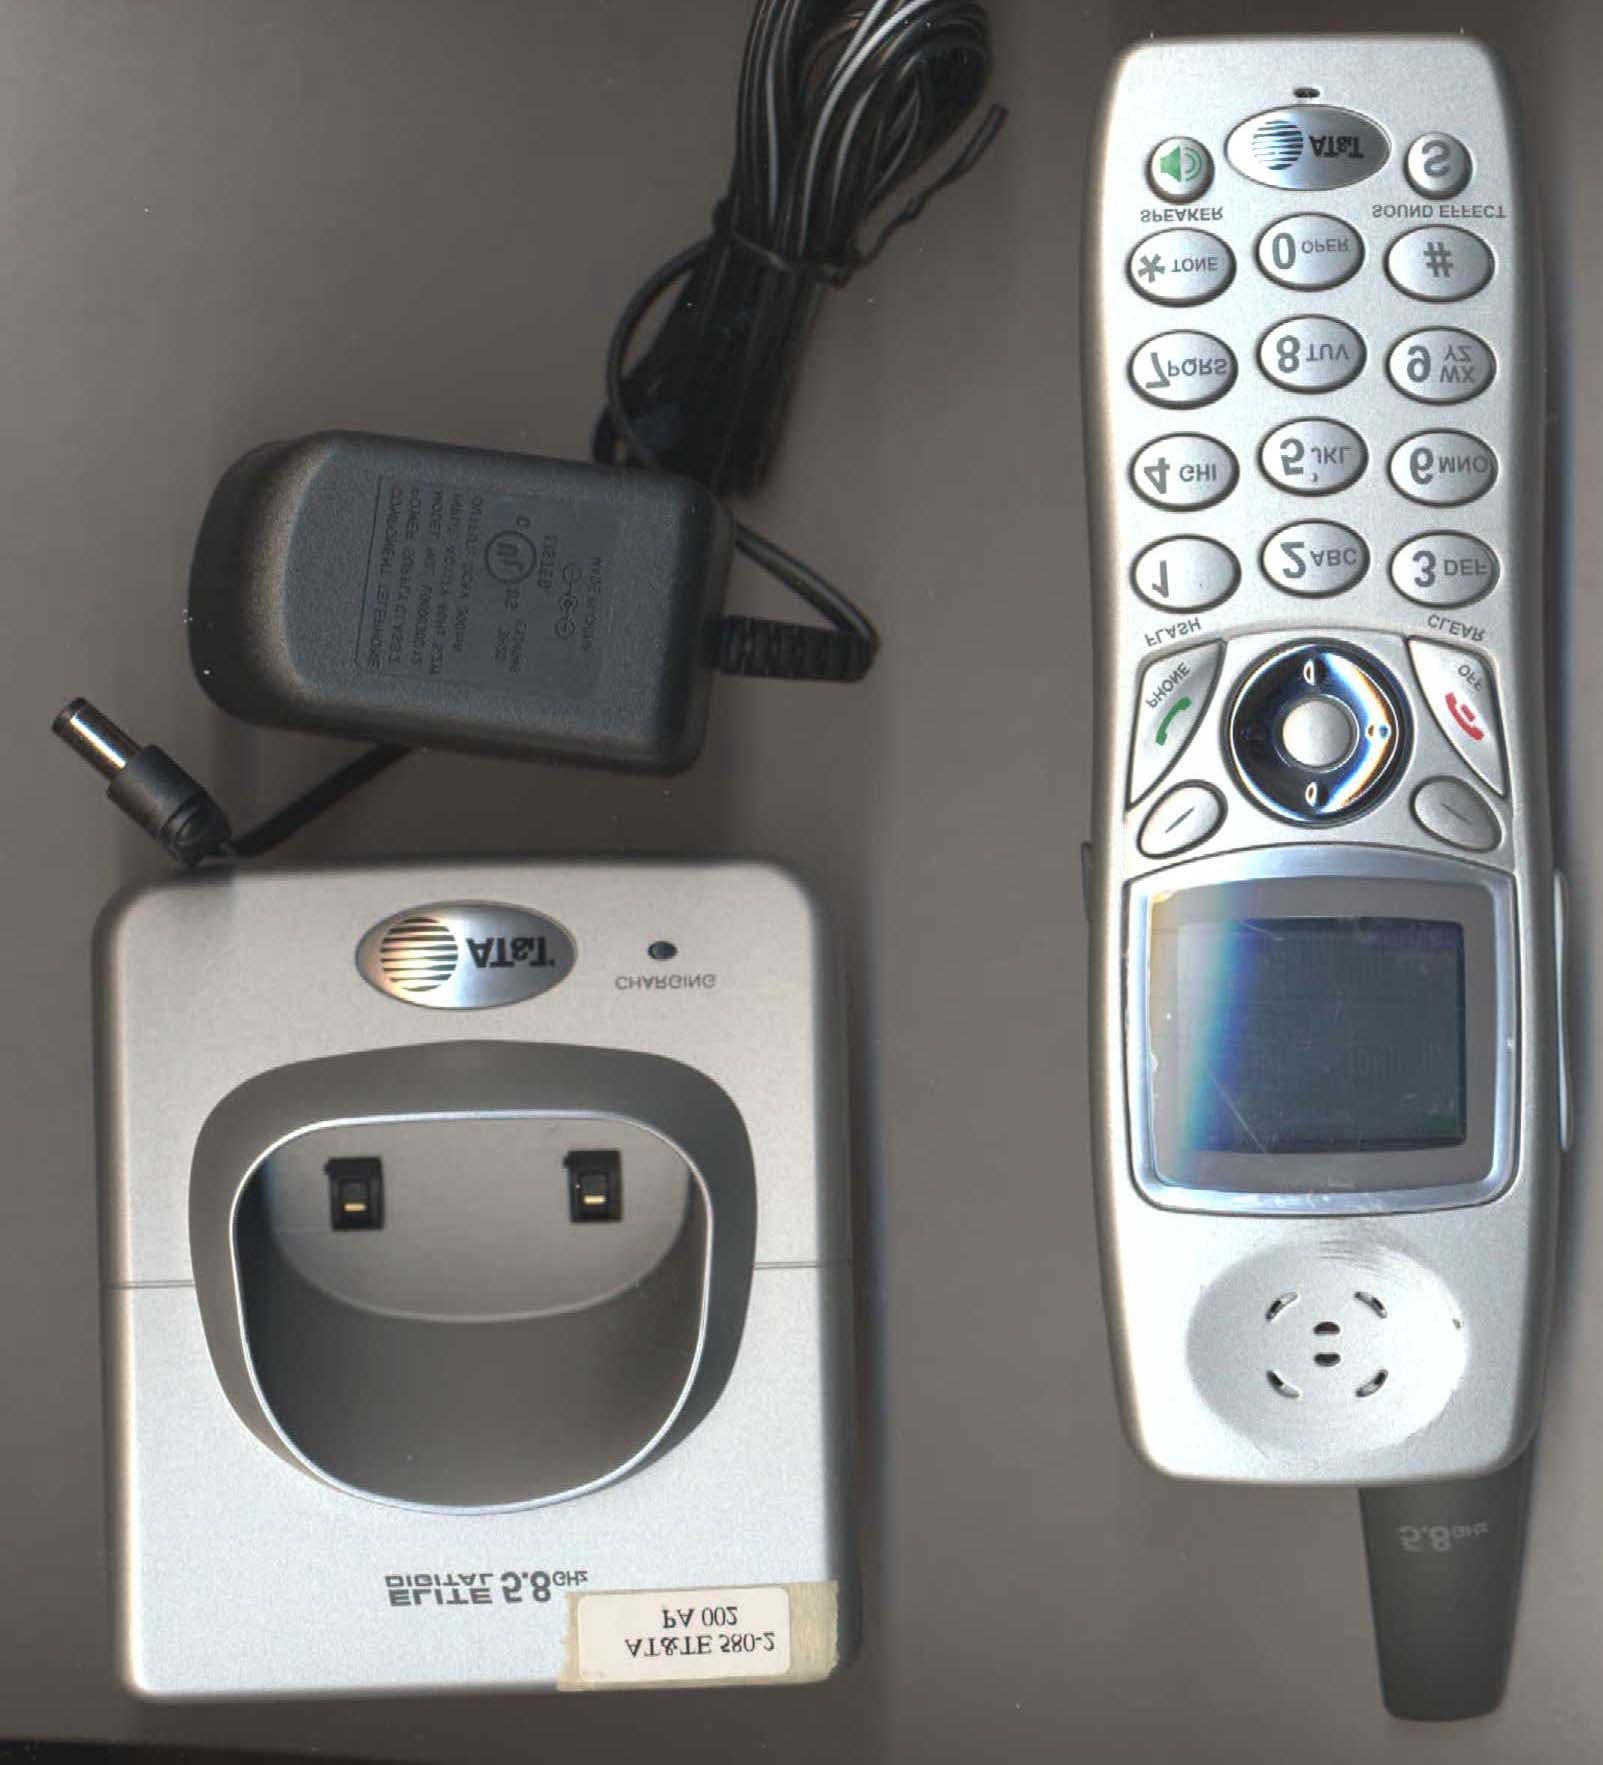
Click to zoom
Application Details
- Equipment Class
- DSS - Part 15 Spread Spectrum Transmitter
- Date of Grant
- Dec 11, 2003
- Application Purpose
- Original Equipment
- Date of Application
- Dec 11, 2003
- Equipment Note
- Cordless Telephone Base
- Frequency Range
- 5744.73600000 - 5825.95200000
- Company
- VTech Telecommunications Ltd
- Country
- Hong Kong
Documents & Files
Document Text
Text extracted from the exhibit documents filed with the FCC. Open a document above to read the original.
Users Manual
User Manual (Part 2)5.8 GHz CordlessSpeakerphone/ Answering System 5865with Caller ID & Call Waiting 1 Table of contents Copyright © 2003 Advanced American Telephones. All Rights Reserved. AT&T and the Globe Design are trademarks of AT&T Corporation., licensed to Advanced American Telephones. User Manual (Part 2)5.8 GHz CordlessSpeakerphone/Answering System 5865 STOP! See page 7for easy instructions You must install andcharge the battery beforeusing the telephone For customer service or productinformation, visit our web site atwww.telephones.att.comor call 1-800-222-3111 Please also readImportant Product InformationEnclosed in product package Add new handsets to make your phone more versatile (see page 46)Your telephone can accommodate up to six cordless handsets. You can add newhandsets (sold separately) at any time. Up to four handsets at a time can be used.The handset provided with your telephone is automatically registered as Handset 1. Additional handsets will be assigned numbers in the order they are registered (2, 3, 4,etc.) up to a maximum of six handsets. Handset 1 Handset 2 Handset 3 Getting Started Quick reference ...................................2Parts checklist .......................................4Before you begin ..................................5Telephone base installation................6Battery installation & charging ..........7Wall mounting ......................................8Belt clip & optional headset ...............9 Telephone Operation Basic handset operation ...................10Basic base operation .........................11Options during calls ..........................12Intercom calls .....................................13Handset screen images .....................14Handset sounds & alerts ..................15Handset settings.................................16Base settings........................................17 Handset Phonebook New phonebook entries ..................19Phonebook search .............................20To dial, edit or delete a listing ........21 Base Phonebook New phonebook entries ..................23Phonebook search .............................24To dial, edit or delete a listing ........25 Handset Calls Log To review voice messages ...............27To review Caller ID log ...................28To dial a Caller ID entry ..................29To review redial log ..........................30 Base Caller ID & Redial To review Caller ID log ...................32To dial a Caller ID entry ..................33To review redial log ..........................34 Answering System Operation Answering system operation ..........35Day and time announcements ........36Outgoing announcements................37Announce Only mode ......................38Changing feature options .................39Message playback ...............................40Recording and playing memos ........41Message window displays.................42Remote access....................................43 Appendix Display screen status icons..............44Alert tones & indicator lights..........45Adding new handsets ........................46Charging spare batteries ..................47In case of difficulty .............................48INDEX..................................................50Spare remote access card................53 3 Getting Started 2 Getting Started Joystick Press center button to display menus.Press arrow buttons to navigate throughmenus. Press center button to selectmenu item highlighted. Quick reference guide Quick reference guide SpeakerPress to activate handset speaker-phone. Press again to hang up.SoftkeysPress a softkey to select a menu item displayed just above the key. Off/Cancel During a call, press to hang up. While using menus, press to cancel anoperation, back up to the previous menu,or exit the menu display. Phone/FlashPress to begin a call, then dial a number.During a call, press to receive an incomingcall, if Call Waiting is activated (see page 12). Sound Select Press to customize speaker sound forclear speakerphone conversations. Answering system controls (see pages 35-43) ON/OFF ..................Press to turn answering system on or off DELETE ..................Press to delete message currently playing TIME SET ................Press to set date and time MENU ......................Press to review or change answering system options CHANGE ................Press to change a menu option RECORD ................Press to record a memo or outgoing announcement Telephone function keys (see pages 11-13) SOFTKEYS ............Press to select menu item displayed just above the key FLASH ....................During a call, press to receive an incoming call, if Call Waiting is activated VOLUME ................Press to adust speakerphone listening volume MUTE ......................Press to silence microphone; press again to resume SPEAKERPHONE ..Press to turn speakerphone on or off (begin or end a call) Handset Base/Speakerphone Answeringsystem controls Telephonefunction keys Swivel antenna fullyupright for best results Intercom See page 13 See page 18 See page 26 See page 14 See page 15 See page 16 Vibrate Ringer Control Ringers Low Batt Tone Keypad Tone Range Tone Appearance Set Time Contrast Register Language Reset Settings Phonebook Calls Log Pictures Sounds/Alerts Settings Main menuSounds & Alerts menu Settings menu Item 1 Item 2 Item 3 Press to play messages Press to repeat message.Press twice to hear previous message. Press to skip to next message. Left Right Up Down 5 Getting Started 4 Getting Started Before you begin Parts checklist Remember to save your sales receipt and original packaging in case you ever need toship your telephone for warranty service. Check to make sure the telephone packageincludes the following: Telephone base Telephone handset Poweradapter Belt clip Batteries Long line cordShort line cord About Caller Identification Caller ID with Call Waiting features inthis telephone let you see who’s callingbefore you answer the phone, eve…
Text truncated - open the document above for the full version.
Users Manual
9 Getting Started 8 Getting Started Belt clip & optional headset Install belt clip as shown below if desired.For hands-free telephone conversations, you can use any industry standard 2.5 mmheadset (purchased separately). For best results use an AT&T 2.5 mm headset. Wall mounting The speakerphone base can be installed on any standard wall-phone outlet as shownbelow. Choose a location away from electronic equipment, such as personal comput-ers, television sets or microwave ovens. Avoid excessive heat, cold, dust or moisture. Plug power cord transformerinto electrical outlet Connect cords as shown, then pressand slide down firmly so base is heldsecurely on outlet mounting pegs Plug short line cordinto telephone jack Snap belt clip into notches onside of handset. Rotate and pullto remove. Plug 2.5 mm headsetinto jack on side ofhandset (beneathsmall rubber cap) Clip wall-mount bracketsecurely into notches onunderside of base Place handset in base to chargefor 12 hours before first use. Rotate antennato fully upright position 11 Telephone Operation 10 Telephone Operation Basic handset operation Making and answering callsTo answer an incoming call, press any key except OFF . To make a call, press PHONE , then dial a number. Press OFF to hang up. To preview numbers before dialing, enter numbers first,then press PHONE to dial. Press CLEAR at any time to make corrections as you are entering numbers. Hands-free speakerphone callsTo answer an incoming call, press SPEAKER . To make a call, press SPEAKER , then dial a number. During a call you can press SPEAKER to toggle between hands-free speakerphone and normal handset use. Press OFF to hang up.Last number redialPress REDIAL to display a list of numbers recently called. Use the joystick control to select a number, then press PHONE to dial (or press DELETE to erase this number from the redial memory). Hold and mutePress HOLD to place a call on hold. Press PHONE to resume the call.Press MUTE to silence the microphone. You will be able to hear, but your caller will not be able to hear youuntil you press MUTE again to resume speaking. Call transferDuring a conversation you can transfer the call to thebase speakerphone (or to another handset if you havemore than one registered).Press the middle joystick button to display a list of sets.Use arrow buttons to highlight the set you want, thenpress the middle joystick button to transfer the call.The call will be placed on hold. You can then pressSPEAKER at the base to resume speaking. REDIAL CID LOG 2:10 PM 1 Transfer Call BASEHANDSET 2HANDSET 3 1 CALL ON HOLD HOLD MUTE 2:10 PM 1 Press joystick Basic base operation Making and answering callsTo answer an incoming call, press SPEAKERPHONE . To make a call, press SPEAKERPHONE , then dial a number. Press SPEAKERPHONE again to hang up. To preview numbers before dialing, enter numbers first,then press SPEAKERPHONE to dial. Press CLEAR at any time to make corrections as you are entering numbers. Last number redialPress REDIAL to display a list of numbers recently called. Use the joystick control to select a number, then press PHONE to dial (or press DELETE to erase this number from the redial memory). Hold and mutePress HOLD to place a call on hold. Press SPEAKER- PHONE to resume the call. Press MUTE to silence the microphone. You will be able to hear, but your caller will not be able to hear youuntil you press MUTE again to resume speaking. Call transferDuring a conversation you can transfer the call to ahandset. Press XFER to display a list of registered handsets. Use arrow buttons to highlight the set you want, then press OK to transfer the call. The call will be placed on hold. You can then pressPHONE or SPEAKER at the handset to resume speaking. 8 NEW CALLS REDIAL MENU MEM CALL ON HOLD XFER HOLD MUTE PHONE ON XFER HOLD MUTE HANDSET 1HANDSET 2HANDSET 3 V OK V Volume Speakerphone 13 Telephone Operation 12 Telephone Operation Options while on calls To adjust volume or sound qualityPress VOLUME buttons on the handset or the base to adjust listening volume. Each button press raises orlowers volume by one level.During a handset speakerphone call you can press SOUND SELECT to change sound quality. You can choose Natural Audio, Bass Boost, Mid Boost or TrebleBoost. Each button press changes to the next tone type. Call waitingIf you have Call Waiting service, you will hear a beep ifsomeone calls while you are already on a call. PressFLASH to put your current call on hold and take the new call. You can press FLASH at any time to switch back and forth between calls. Ring silencingPress OFF while the phone is ringing to silence the ringer. You can still answer, or let the caller leave a message. 3-way conference callsDuring an outside call, you can use both the handset andbase (or two local handsets) to allow a three-way conversation.While a call is in progress, others can press PHONE or SPEAKER to join the conference call. Others can press OFF (or SPEAKER ) to drop out of the conference call, but the call will not be terminated until the originatingset hangs up. Temporary tone dialingIf you have dial pulse (rotary) service, you can switch totouch tone dialing during a call by pressing * . This can be useful if you need to send tone signals for accessto answering systems or long-distance services. Volume Silence ringer Tone Flash Intercom calls Intercom callsThe intercom allows conversation between the handsetand base, or between handsets if you have registeredadditional handsets for use with your system.Select INTERCOM at the handset menu, or press the INTERCOM button at the base. Scroll down to select a station, or select GLOBAL PAGE to page all stations. To page, press the middle joystick button at the handset(or OK at the base). To answer an intercom page, press PHONE at the hand- set, or SPEAKERPHONE at the base. When your intercom call is finished, press OFF at the handset (or INTERCOM at the base) to end the call. Handling incoming callsIf the phone rings during an …
Text truncated - open the document above for the full version.
Users Manual
19 Handset Phonebook 18 HandsetPhonebookMemory capacityThere are separate phonebook directories in the hand-set and the base. Each phonebook can store up to 50entries. Each entry can contain a number up to 32 digits,and a name up to 15 letters long. In the handset phone-book you can also select a picture to be displayed witheach entry. A convenient search feature can help youfind and dial numbers quickly (see page 20).Timeouts and error tonesIf you pause for too long while making an entry thePhonebook will time out and you will have to beginagain.If all memory locations are in use, an error tone willsound when you attempt to enter a new number. Thismeans the memory is full, and you will not be able tostore a new number until you delete an existing one. Phonebook 1 New phonebook entries To enter a namePress dial pad buttons once for the first letter, twice forthe second, three times for the third. Continue forlower-case letters. To enter a number, continue press-ing the button until the number appears.The cursor moves to the right when you press anotherdial pad button or the > button. Press > twice to enter a space. When the name is complete, press OK . • Press < to erase letters if you make a mistake. • Press 1 repeatedly to enter an ampersand (&), apostrophe ('), comma (,) hyphen (-), period (.), orpound sign (#). To enter a numberUse the dial pad to enter up to 32 digits. When thenumber is complete, press OK . • Press < to erase numbers if you make a mistake. Customizing entriesPress V to choose a distinctive RINGER (see page 15). If you have Caller ID service, the ringer you assign willalert you when this person calls.Press V again to insert a PICTURE into this entry (see page 14). Press once to enter “A” (4 times for “a”) Press twice to enter “B” (5 times for “b”) Press 3 times to enter “C” (6 times for “c”) Press 7 times to enter “2” 2 Phonebook 1 Select Phonebook Phonebook Enter Name: Pat Johnson OK <— 1 Phonebook Enter Number: 123-555-6789 OK <— 1 Pat Johnson123-555-6789Ringer: < Default > Picture: < [none] > SAVE <— Press SAVE to complete entry, or down arrow to customizeentry with ringer or picture Pat Johnson123-555-6789Ringer: Melody 1 Picture: < [none] > SAVE <— Pat Johnson123-555-6789Ringer: Melody 1 Picture: SAVE <— Pat Johnson123-555-6789Ringer: Melody 1 Picture: EDIT NEW 21 Handset Phonebook 20 Handset Phonebook Phonebook search You can use the up/down arrows to browse throughthe phonebook, or search to find a specific entry. Youcan press CANCEL at any time to exit the directory. To browse through the directoryTo browse, press ^ or V to scroll through all entries one by one. To search alphabeticallyTo shorten your search, press FIND , then use the tele- phone dial pad to enter the first letter of a name. Whenyou press OK , the first name beginning with that letter will be displayed.Press dial pad buttons once for the first letter, twice forthe second, three times for the third, as shown below. 2 ........................Find names beginning with “A” 22 ..............Find names beginning with “B” 222 ......Find names beginning with “C” 3 ........................Find names beginning with “D” 33 ..............Find names beginning with “E” 333 ......Find names beginning with “F” To call a displayed numberWhen you find the entry you want, press PHONE (or SPEAKER ) to dial. Or press EDIT to modify the entry (see next page). Intercom 1 Select Phonebook Phonebook AliceBobChrisDeborah FIND NEW 1 of 37 1 Phonebook Search For: J OK <— 1 5 Phonebook JackJenniferJohnKristen FIND NEW 8 of 37 1 To dial, edit or delete entries To edit a listingWhen any phonebook entry is displayed, press EDIT to modify the entry. You can change the name, number,distinct ringer setting or picture by following the stepson page 19. To dial a numberPress PHONE (or SPEAKER ) to dial the displayed number. To delete an entryPress DELETE to delete the displayed entry from the phonebook. Once deleted an entry cannot be recovered. Jack123-555-4321Ringer: < Default > Picture: < [none] > EDIT DELETE 8 of 37 Intercom 1 Select Phonebook Phonebook AliceBobChrisDeborah FIND NEW 1 of 37 1 ALICE555-4321Ringer: Melody 1 Picture: EDIT DELETE 1 of 37 Press EDIT to change entry ALICE555-4321Ringer: Melody 1 Picture: EDIT DELETE 1 of 37 Press DELETE to delete entry ALICE555-4321Ringer: Melody 1 Picture: EDIT DELETE 1 of 37 Press PHONE to dial entry 23 Base Phonebook 22 Base PhonebookMemory capacityThere are separate phonebook directories in the hand-set and the base. Each phonebook can store up to 50entries. Each entry can contain a number up to 32 digits,and a name up to 15 letters long. A convenient searchfeature can help you find and dial numbers quickly (seepage 24).Timeouts and error tonesIf you pause for too long while making an entry thePhonebook will time out and you will have to beginagain.If all memory locations are in use, an error tone willsound when you attempt to enter a new number. Thismeans the memory is full, and you will not be able tostore a new number until you delete an existing one. REDIAL MENU MEM New phonebook entries To enter a numberUse the dial pad to enter up to 32 digits. When thenumber is complete, press MEM . • Press CLEAR to erase numbers if you make a mistake. To enter a namePress dial pad buttons once for the first letter, twice forthe second, three times for the third. Continue forlower-case letters. To enter a number, continue press-ing the button until the number appears.The cursor moves to the right when you press anotherdial pad button or the > button. Press > twice to enter a space. When the name is complete, press SAVE . • Press CLEAR to erase letters if you make a mistake. • Press 1 repeatedly to enter an ampersand (&), apostrophe ('), comma (,) hyphen (-), period (.), orpound sign (#). Storing the entryPress SAVE to store your new phonebook entry. To change it later, see page 25. Press once to enter “A” (4 times for “a”) Press twice to enter “B” (5 times for “b”) Press 3 times to enter…
Text truncated - open the document above for the full version.
Users Manual
39 Answering System Operation 38 Answering System Operation Changing feature options Menu features can be changed to customize how theanswering system operates. Press MENU repeatedly to hear each feature. Press CHANGE when you hear the feature you want to modify. Feature options (Default settings underlined) System announces: Feature description: 1 MENU 3 MENU Or Press until desired featureis heard(see list at right)Press until desired selectionis heardPress to set selection andmove to next menu option Press to set selection andexit menu 2 CHANGE “Change Announcement”Options: [record announcement]“Change remote access code”Options: [enter 2-digit code] 50 “Change message alert”Options: On / Off “Change announce only”Options: On / Off “Change call screening”Options: On / Off “Change number of rings”Options: 2 / 4 / 6 /Toll Saver Record your outgoing announcement(see page 37).Enter a 2-digit number (40-99) for remoteaccess from another phone (see page 43).When on, the telephone beeps every 10 seconds when you have new messages.When on, callers hear an announcementbut cannot leave messages (see page 38).When on, you can hear callers leavemessages, or answer the call.Choose number of rings before the systemanswers a call. When Toll Saver is active,the system answers after 2 rings if youhave new messages, and after 4 rings ifyou have no new messages. NOTE: Press and hold CHANGE to advance the remote access code number by 10. Announce Only mode In Announce Only mode, callers hear an announcementbut cannot leave messages. This option is useful, for example, to notify callers that you will be away for anextended period and request that they call back after acertain date.To turn Announce Only on or offPress MENU repeatedly until you hear “Change Announce Only.” Then press CHANGE until you hear the option you want (On or Off). Press PLAY/STOP to store your selection and exit, or press MENU again to modify other features (see page 39). To record your outgoing announcementWhen Announce Only is turned on, calls are answeredwith a pre-recorded announcement that says “We’re sorry, messages to this number cannot be accepted.”You can use this announcement, or replace it with a recording of your own voice.After turning on the Announce Only feature, follow thesteps on page 37 to record your announcement. Callerswill hear this announcement only when the AnnounceOnly feature is turned on. Otherwise they will hear thestandard announcement asking them to leave a message. 1 MENU“Change Announce Only” 2 CHANGE“Off” 3 CHANGE“On” 4 Beep(Option selected) A “A” is displayed when AnnounceOnly is activated 41 Answering System Operation 40 Answering System Operation Recording and playing memos Memos are messages you record yourself. They aresaved, played back and deleted exactly like incomingmessages. You can record a memo as a reminder toyourself, or leave a message for someone else if othersin your household use the answering system.To record a memoFollow the steps at left to record a memo. Elapsed time(in seconds) are shown in the message window as yourecord. You can record a memo up to 4 minutes long.Memos less than 1 second long will not be recorded.To play back a memoPress PLAY/STOP to hear messages and memos (see page 40 for other options). 1 RECORD“Now recording...” 3 Beep(Memo has beenrecorded) Message playback Press PLAY/STOP to hear messages. The system announces the number of messages, then begins playback.If you have new messages waiting, you will hear only thenew messages (oldest first). If there are no new messages,the system will play back all messages (oldest first). Announcements• When playback begins, you will hear the number of messages waiting. • Before each message, you will hear the day and time it was received. • After the last message, you will hear “End of messages.” If the system has less than 5 minutes of recordingtime left, you will hear time remaining. Options during playback• Press VOLUME button to adjust speaker volume. • Press SKIP to skip to next message (or hold down to speed up message playback). • Press REPEAT to repeat message currently playing. Press twice to hear previous message. (Hold downto slow message playback). • Press DELETE to delete message being played back. • Press PLAY/STOP to stop playback. To delete all messagesTo delete all messages, press DELETE while the phone is idle (not during a call, or during message playback). 1 “You have [xx] new and [xx] old messages” Number of new messages waiting (or, during playback, messagenumber currently playing) 14 Message playback begins. Seeoptions at right. 2 Message playback ends. NOTE: If “F” is flashing in the message window, memory isfull. You will have to delete somemessages before new ones canbe received. NOTE: New (unheard) messages cannot be deleted. Press PLAY/STOP to begin orend message playback 12 Elapsedrecording time(seconds) Press to stoprecording 2 Speak into microphone Microphone 43 Answering System Operation 42 Answering System Operation 1 Remote access A two-digit security code is required to access youranswering system from any touch-tone phone. Thiscode is “50” by default; see page 39 to change it. Dial your telephone number fromany touch-tone phone 2 When system answers, enter 2-digit Remote Access Code (“50”unless you have changed it) 3 Enter remote commands (see list at right) 4 Hang up to end call and save allundeleted messages Play messages#2Repeat or go back#4Skip to next message#6Stop#5Delete message#9Review announcement#7Record announcement*7 to begin recording #5 to stop recording Record memo*8 + mailbox number #5 to stop recording Turn system off#0Turn system on#0Help Menu#1Exit*0 Press to hear new messages (if none are new, all play back).Press to repeat current message. Presstwice ( # 4 # 4 ) to hear previous message. Press to skip current message andadvance to next message.Press to stop any operation (stop playback, stop recording).Press during playback to delete currentmessage.Press to review cu…
Text truncated - open the document above for the full version.
Users Manual
IMPORTANT PRODUCT INFORMATION Safety Information This symbol is to alert you to important operating or servicing instructions that may appear in this user’s manual. Always follow basic safety precautions when using this product to reduce the risk of injury, fire, or electric shock. 1Read and understand all instructions in the user’s manual. Observe all markings on the product. 2Avoid using a telephone during a thunderstorm. There may be a slight chance of electric shock from lightning. 3Do not use a telephone in the vicinity of a gas leak. If you suspect a gas leak, report it immediately, but use a telephone away from the area where gas is leaking. If this product is a cordless model, make sure the base is also away from the area. 4Do not use this product near water, or when you are wet. For example, do not use it in a wet basement or shower, or next to a swimming pool, bathtub, kitchen sink, or laundry tub. Do not use liquids or aerosol sprays for cleaning. If the product comes in contact with any liquids, unplug any line or power cord immediately. Do not plug the product back in until it has dried thoroughly. 5Install this product in a protected location where no one can trip over any line or power cords. Protect cords from damage or abrasion. 6If this product does not operate normally, read “In Case of Difficulty” in the user’s manual. If you cannot solve the problem, or if the product is damaged, refer to the Limited Warranty. Do not open this product except as may be directed in your user’s manual. Opening the product or reassembling it incorrectly may expose you to hazardous voltages or other risks. Part 1 (Continued) © 2001 Advanced American Telephones. All Rights Reserved. AT&T and the Globe Design are trademarks of AT&T Corp., licensed to Advanced American Telephones. 2 7If this product has user-replaceable batteries, replace batteries only as described in your user’s manual. Do not burn or puncture batteries — they contain caustic chemicals. 8If this product has a three-prong (grounding) plug or a polarized plug with one wide prong, it may not fit in non-polarized outlets. Do not defeat the purpose of these plugs. If they do not fit in your outlet, the outlet should be replaced by an electrician. CAUTION:Use only the power adapter provided with this product. To obtain a replacement, call 1 800 222–3111. SAVE THESE INSTRUCTIONS Especially About Cordless Telephones Privacy: The same features that make a cordless phone convenient create some limitations. Telephone calls are transmitted between the base and the handset by radio waves, so there is a possibility that your cordless phone conversations could be intercepted by radio receiving equipment within range of the cordless handset. For this reason, you should not think of cordless phone conversations as being as private as those on corded phones. Electrical Power:The base unit of this cordless telephone must be connected to a working electrical outlet. The electrical outlet should not be controlled by a wall switch. Calls cannot be made from the handset if the base unit is unplugged or switched off, or if the electrical power is interrupted. Potential TV Interference:Some cordless telephones operate at frequencies that may cause interference to TVs and VCRs. To minimize or prevent such interference, do not place the base unit of the cordless telephone near or on top of a TV or VCR. If interference is experienced, moving the cordless telephone farther away from the TV or VCR will often reduce or eliminate the interference. (Applies to 25-channel cordless phones only.) Rechargeable Batteries:This product contains either Nickel- Cadmium or Nickel-Metal Hydride rechargeable batteries. Exercise care in handling batteries in order not to short the battery with conducting material such as rings, bracelets, and keys. The battery or conductor may overheat and cause harm. Observe proper polarity between the battery and the battery charger. 3 Nickel-Cadmium Rechargeable Batteries:Must be recycled or disposed of properly. Do not dispose of in household garbage. Do not burn or puncture. Like other batteries of this type, if burned or punctured, they could release caustic material which could cause injury. The RBRC ™ Seal means that the manufacturer is voluntarily participating in an industry program to collect and recycle Nickel-Cadmium rechargeable batteries when taken out of service within the United States. These batteries may be taken to a participating local retailer of replacement batteries or recycling center. Or you may call 1 800 8BATTERY for locations accepting spent Nickel-Cadmium Batteries. Nickel-Metal Hydride Rechargeable Batteries:Dispose of these batteries in a safe manner. Do not burn or puncture. Like other batteries of this type, if burned or punctured, they could release caustic material which could cause injury. Precautions for Users of Implanted Cardiac Pacemakers Cardiac Pacemakers (applies only to 900 MHz Digital Cordless Telephones): Wireless Technology Research, LLC (WTR), an independent research entity, led a multidisciplinary evaluation of the interference between portable wireless telephones and implanted cardiac pacemakers. Supported by the U.S. Food and Drug Administration, WTR had recommended to physicians that: PACEMAKER PATIENTS •Should keep wireless phones at least six inches from the pacemaker •Should NOTplace wireless phones directly over the pacemaker, such as in a breast pocket, when it is turned ON •Should use the wireless phone at the ear opposite the pacemaker WTR’s evaluation did not identify any risk to bystanders with pacemakers from other persons using wireless phones. 4 Especially About Telephone Answering Systems Two-Way Recording:This unit does not sound warning beeps to let the other party know that the call is being recorded. To ensure that you are in compliance with any federal or state regulations regarding recording a telephone call, you should start the recording process and then inform …
Text truncated - open the document above for the full version.
Contact Information
Applicant
Michael Tsui(Approbation Supervisor)
Test Firm
Nemko Canada Inc.Stuart Beck
Technical Specifications
| # | Rule Parts | Frequency Range | Power Output |
|---|---|---|---|
| 1 | 15C | 5.74 GHz - 5.83 GHz | 930.00 mW |
Other Applications from VTech Telecommunications Ltd

EW780-2531-01
Sep 12, 2024Video Baby Monitor
Equipment Class
DSS - Part 15 Spread Spectrum Transmitter
EW780-2531-00
Sep 12, 2024Video Baby Monitor
Equipment Class
DXX - Part 15 Low Power Communication Device Transmitter
EW780-2792-00A
Sep 09, 2024Video Baby Monitor
Equipment Class
DSS - Part 15 Spread Spectrum Transmitter
EW780-H0HQ-13
Aug 20, 2024SIP cordless hotel phone
Equipment Class
PUB - Part 15 Unlicensed PCS Base Station
EW780-2365-00A
Aug 19, 2024Video Baby Monitor
Equipment Class
DSS - Part 15 Spread Spectrum Transmitter