G2R-1836Learning App TV Console
VTech Electronics Limited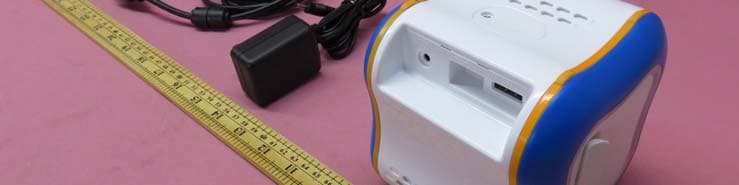
Click to zoom
Application Details
- Equipment Class
- DXX - Part 15 Low Power Communication Device Transmitter
- Date of Grant
- Aug 18, 2015
- Application Purpose
- Original Equipment
- Date of Application
- Aug 18, 2015
- Equipment Note
- Learning App TV Console
- Frequency Range
- 2412.00000000 - 2475.00000000
- Company
- VTech Electronics Limited
- Country
- Hong Kong
Documents & Files
Document Text
Text extracted from the exhibit documents filed with the FCC. Open a document above to read the original.
Users Manual
Product Information Guide Read this important Product Information Guide before using your InnoTV™. The full InnoTV™ User's Manual can be found online at http://www.vtechkids.com/innotv/manual 1 Included in This Package: Warning: All packing materials, such as tape, plastic sheets, packaging locks, wire ties, and tags are not part of this toy and should be discarded for your child’s safety. Note: Please keep the Quick Start Guide and Product Information Guide as they contain important information. Inserting a microSD Card You can insert a microSD memory card (not included) into your InnoTV™ to expand the memory available for downloaded content, photos, videos or music. The InnoTV™ is compatible with microSD memory cards up to 32GB. • Make sure the console is turned off. • Locate the microSD card slot on the side. Insert the microSD card as shown above. InnoTV™ Play & Learn Starter Pack Cartridge Power AdapterWrist Strap Quick Start Guide Product Information Guide HDMI CableInnoTV™ Controller Model: 2190InnoTV™ Console Model: 1836 2 Inserting Batteries into the Controller 1. Open the battery compartment located under the controller. 2. Insert 2 AA batteries, in accordance with the polarities indicated inside the battery compartment. 3. Replace the battery cover. BATTERY NOTICE • Non-rechargeable batteries are not to be recharged. • Standard size (AA) rechargeable batteries are to be removed from the toy before being charged (if removable). • Rechargeable batteries are only to be charged by an adult or by children 8 years or older. • Do not mix old and new batteries. • Do not mix batteries of different types: alkaline, standard (carbon-zinc), or rechargeable (Ni-MH). • Only batteries of the same or equivalent type as recommended are to be used. • Batteries are to be inserted with the correct polarity. • Exhausted batteries are to be removed from the toy. • The supply terminals are not to be short-circuited. • The toy is not to be connected to more than the recommended number of power supplies. • Do not dispose of batteries in fire. 3 Power Adapter • Using the included VTech ® Power Adapter (AC/DC 5V) is recommended. • Make sure the console is turned off. • Plug the adapter into the Power Adapter jack in the back of the InnoTV™. • Plug the adapter into a power outlet. Standard guidelines for adapter toys and electrically operated products • This adapter is not a toy. This adapter is not intended for use by children. • As with all electrical products, precautions should be used and observed during handling and use to prevent electric shock. • Disconnect the console from the Power Adapter and turn off the console before cleaning. • Do not leave the toy plugged-in for extended periods of time. • Never clean a plugged-in toy with liquid. • Never use more than one adapter. • Only use the Power Adapter that is included with this package. • To prevent fire or electric shock, do not expose the unit to rain or moisture. • Please examine the toy transformer periodically for conditions that may result in the risk of fire, electric shock, or injury to persons (such as damage to the output cord, blades, housing, or other parts) and that, in an event of such conditions, the transformer should not be used until properly repaired. Care & Maintenance 1. Keep your InnoTV™ console and controller out of direct sunlight and away from direct sources of heat. 2. Turn off your InnoTV™ console and controller when not using it for an extended period of time. 3. Avoid dropping your InnoTV™ console and controller and NEVER try to dismantle it. 4. Always keep your InnoTV™ console and controller away from water. 4 Cleaning the InnoTV™ Console and Controller: • Keep your InnoTV™ console and controller clean by wiping them with a slightly damp cloth. Never use solvents or abrasives. If your InnoTV™ does not respond to an inserted cartridge, please carefully try the following: • Turn off the InnoTV™ console and unplug all wiring. • Use a cotton swab dipped in rubbing alcohol or an alcohol-based window cleaner to gently clean the contact area of the cartridge slot. • If necessary, dry all the clean contact areas with a soft, lint-free cloth. • Make sure that all parts are completely dry before restoring electricity. Backup Battery Replacement • Make sure the console is turned off. • Locate the battery cover on the back of the console, and then open it with a screwdriver as shown in the image below. • Insert a CR2032 battery into the battery compartment with the “+” side facing up as shown in the image below. • Make sure to replace the battery cover. Static electricity may cause the InnoTV™ to malfunction. In some cases, the game play score stored in the console memory may be lost. In cases where the InnoTV™ has malfunctioned due to static electricity, disconnect the power by unplugging the Power Adaptor jack from the back of the console. Reconnect the Power Adaptor jack, and press the Power button to turn the unit on again. If the static electricity malfunction occurred during the file transferring process, reset the console as described above and try again. Then reconnect the USB cable and restart the file transfer process. For more information and troubleshooting tips, visit www.vtechkids.com/tutorials/innotv. 5 WARNING A very small percentage of the public, due to an existing condition, may experience epileptic seizures or momentary loss of consciousness when viewing certain types of flashing colors or patterns, especially on television. While the InnoTV™ does not contribute to any additional risks, we do recommend that parents supervise their children while they play video games. If your child experiences dizziness, altered vision, disorientation, or convulsions, discontinue use immediately and consult your physician. Please note that focusing on an LCD screen at close range for a prolonged period of time may cause fatigue or discomfort. We recommend that children take a 15-minute break for every hour of play. Technical …
Text truncated - open the document above for the full version.
Users Manual
Quick Start Guide Follow these instructions to set up your InnoTV™. The full InnoTV™ User's Manual can be found online at http://www.vtech.co.uk/innotv Dear Parent, At VTech®, we know you love prov iding your children with the lates t advancements in learning education, technology and fun. For this reason, we have developed the InnoTV™, our educational video gaming system for children aged 3-9. The InnoTV™ features a child friendly, wireless controller that not only switches for left or right handed use, it is also a joystick, motion control and a smart wheel for a unique and varied gaming experience. Children can use their InnoTV™ to engage in fun-filled learning experiences built just for them! The Wi-Fi connection enables access to VTech's Learning Lodge TM to download games, videos and music. All the games for InnoTV™ are curriculum-based offering a progressive learning experience that's age appropriate and full of fun. Bundled with the InnoTV™ are single player games and multi-player challenges for all the family to enjoy together. Licensed software cartridges featuring all the favourite characters are available that work across both the InnoTV™ and the InnoTab® Max so the fun can continue on the go. Entertaining games teach your child reading, maths, social studies, science and much, much more. We are dedicated to helping your children uncover their talents and are proud to partner with you to open up a world of learning fun! We thank you for your trust in our products to encourage active minds through imaginative play. Sincerely, Your friends at VTech® To learn more about the InnoTV™ and other VTech toys, visit www.vtech.co.uk 1 Power ButtonExit Button Enter Button Smart Wheel Help Button Joystick Red Button Status Light Green Button Cartridge Eject Button Cartridge Slot microSD Card Slot (microSD card not included) Microphone Jack (Microphone not included) Power Button Product Features InnoTV TM Console InnoTV TM Controller Backup Battery Slot & Cover HDMI Port Micro-USB Port Adaptor Jack Back View Left/Right Hand Switch Wrist Strap Hole Battery Door Player Selector 2 Connecting the InnoTV TM Console to a TV 1. Turn off your television set. 2. Plug one end (near the ferrite core) of the HDMI cable into the HDMI Out port located on the back of the console, and then connect the other end to the HDMI port on the television. 3. Insert the Power Adaptor plug into the InnoTV™, and then plug the Power Adaptor into a power outlet. 4. Turn on your television set and select the proper HDMI input. Turning on the Console Turn on the TV, and then set the TV input to HDMI. Press the (Power) button on the InnoTV™ console to turn it on. A green light will be shown around the button. Light Power Button HDMI Out Port Adaptor Jack HDMI In Port Ferrite core 3 Setting up the Controller Insert two AA batteries into the back of the controller. Attach the wrist strap to the controller. Press the (Power) button on the InnoTV™ controller to turn the controller on. A green light will come on. Make sure the player selector on the bottom of the controller is on player 1. Power Button Light The terms HDMI and HDMI High-Definition Multimedia Interface, and the HDMI Logo are trademarks or registered trademarks of HDMI Licensing LLC in the United States and other countries. 4 Setting up the InnoTV TM Follow these steps to set up your InnoTV™: 1. Set up an Internet connection. 2. Your InnoTV™ console may require a firmware update before use. If this is the case, follow the instructions on-screen to download and install the firmware update. 3. Once installation is completed the console will restart, and you will be prompted to register your InnoTV™. Complete the necessary steps to register your console. 4. Don't forget to set a Parental Controls passcode when you've finished to prevent your child from accessing the console settings. Inserting/Removing Cartridges Insert a cartridge into the cartridge slot on the top of the console. The cartridge should lock into place. Press the (Eject) button to remove the cartridge. 5 This warranty is valid for the UK and Eire only. For products purchased outside the UK and Eire, please contact your local distributor or place of purchase. UK 2015 © VTech Printed in China 91-003129-001
External Photos
INTERTEK TESTING SERVICES External Photos Test Report Number: 15051591HKG-003 FCC ID: G2R-1836 IC: 1135D-1836 INTERTEK TESTING SERVICES External Photos Test Report Number: 15051591HKG-003 FCC ID: G2R-1836 IC: 1135D-1836 INTERTEK TESTING SERVICES External Photos Test Report Number: 15051591HKG-003 FCC ID: G2R-1836 IC: 1135D-1836
ID Label/Location Info
1836xx console Engraving info Apr. 13. 2015 黑凸白凹 30-035209 Bottom Cabinet 30-035212 Button Move-Card 30-035226 Door Mic-SD 30-035217 Bracket standby-battery 30-035218 Door Standby-battery 30-035216 Bracket_Jack HDMI OUT This device complies with part 15 of the FCC rules. Operation is subject to the following two conditions: (1) This device may not cause harmful interference, and (2) This device must accept any interference received, including interference that may cause undesired operation. MADE IN CHINA / FABRIQUÉ EN CHINE FCC ID: G2R-1836 IC: 1135D-1836 Model: 1836 32mm 53mm 1.3mm
Internal Photos
INTERTEK TESTING SERVICES Internal photos Test Report Number: 15070911HKG-003 FCC ID: G2R-1836 IC: 1135D-1836 INTERTEK TESTING SERVICES Internal photos Test Report Number: 15070911HKG-003 FCC ID: G2R-1836 IC: 1135D-1836 INTERTEK TESTING SERVICES Internal photos Test Report Number: 15070911HKG-003 FCC ID: G2R-1836 IC: 1135D-1836 INTERTEK TESTING SERVICES Internal photos Test Report Number: 15070911HKG-003 FCC ID: G2R-1836 IC: 1135D-1836 INTERTEK TESTING SERVICES Internal photos Test Report Number: 15070911HKG-003 FCC ID: G2R-1836 IC: 1135D-1836 INTERTEK TESTING SERVICES Internal photos Test Report Number: 15070911HKG-003 FCC ID: G2R-1836 IC: 1135D-1836 INTERTEK TESTING SERVICES Internal photos Test Report Number: 15070911HKG-003 FCC ID: G2R-1836 IC: 1135D-1836 INTERTEK TESTING SERVICES Internal photos Test Report Number: 15070911HKG-003 FCC ID: G2R-1836 IC: 1135D-1836 INTERTEK TESTING SERVICES Internal photos Test Report Number: 15070911HKG-003 FCC ID: G2R-1836 IC: 1135D-1836
RF Exposure Info
INTERTEK TESTING SERVICES FCC ID: G2R-1836 RF exposure - 1 of 1 For Maximum Permissible Exposure (MPE) evaluation of the base unit, the maximum power density at 20 cm from this mobile transmitter shall be less than the General Population / Uncontrolled MPE limit in OET Bulletin 65 and meet the requirement listed in KDB447498. For the 2.4GHz WiFi Transmission of tested model: 1836, the measured powers among all the measured channels were within its production tolerance: +17 dBm (Minimum) and +24 dBm (Maximum). The antenna gain of 1836 is 0 dBi = 1.00 (num gain) and its maximum source-based time-averaging duty factor is 100.0% (24/24 x100%). From these data and its operating configuration – Mobile device, the exposed power density at a distance (R) of 20cm from the center of radiation of the antenna can be calculated according to OET Bulletin 65 as follow: The Conducted Power = 24 dBm = 251.2 mW The Conducted Power source-based time-averaging output power = (251.2 * 1.000) mW = 251.19 mW The power density at 20cm = 251.19 *1.00/ 4R 2 = 0.0500 mW cm -2 For the 2.4GHz Wireless Transmission of tested model: 1836, the measured powers among all the measured channels were within its production tolerance: -6 dBm (Minimum) and +3 dBm (Maximum). The antenna gain of 1836 is 0 dBi = 1.00 (num gain) and its maximum source-based time-averaging duty factor is 19.2% (19.2/100 x100%). From these data and its operating configuration – Mobile device, the exposed power density at a distance (R) of 20cm from the center of radiation of the antenna can be calculated according to OET Bulletin 65 as follow: The Conducted Power = 3 dBm = 2.0 mW The Conducted Power source-based time-averaging output power = (2.0 * 0.192) mW = 0.38 mW The power density at 20cm = 0.38 *1.00/ 4R 2 = 0.0001 mW cm -2 INTERTEK TESTING SERVICES FCC ID: G2R-1836 RF exposure - 1 of 1 Per KDB 447498 D01 v05, simultaneous transmission MPE test exclusion applies when the sum of the MPE ratios for all simultaneous transmitting antennas incorporated in a host device, based on calculated or measured field strengths or power density, is ≤ 1.0. The MPE ratio for WiFi Transmission can be calculated as follow: = The power density at 20cm / MPE limit = 0.0500 mW cm -2 / 1.0 mW cm -2 = 0.0500 The MPE ratio for Wireless Transmission can be calculated as follow: = The power density at 20cm / MPE limit = 0.0001 mW cm -2 / 1.0 mW cm -2 = 0.0001 The sum of the MPE ratios for all simultaneous transmitting antennas = 0.0500 + 0.0001 = 0.0501 As the sum of MPE ratios for all simultaneous transmitting antennas is ≤ 1.0, simultaneous transmission MPE test exclusion will be applied. Conclusion In frequency range of 1,500 - 100,000MHz, the MPE limit is 1.0 mWcm -2 for general population and uncontrolled exposure. As simultaneous transmission MPE test exclusion is applied and the measured power density at 20cm from all the standalone transmissions is lower than the MPE limit, the compliance to the MPE limit can be ensured by indicating the minimum 20cm separation between the transmitter's radiating structures and body of the user or nearby persons. The following RF exposure statement is proposed to be included in the user manual: “ FCC RF Radiation Exposure Statement Caution: To maintain compliance with the FCC’s RF exposure guidelines, place the base unit at least 20cm from nearby persons.”
Test Report
Issuing Laboratory: Intertek Testing Services Hong Kong Limited HKAS has accredited this laboratory (HOKLAS 005 – TEST) under HOKLAS for specific laboratory activities as listed in the HOKLAS directory of accredited laboratories. Report No.: 15070911HKG-003 i FCC ID: G2R-1836 IC: 1135D-1836 Intertek Testing Services Hong Kong Ltd. 2/F., Garment Centre, 576 Castle Peak Road, Kowloon, Hong Kong. Tel: (852) 2173 8888 Fax: (852) 2785 5487 Website: www.hk.intertek-etlsemko.com GENERAL INFORMATION Grantee: VTech Electronics Limited Grantee Address: 23/F., Tai Ping Industrial Center, Block 1, 57 Ting Kok Road, Tai Po, N.T., Hong Kong Contact Person: Colbert Tang Tel: 2680 1201 Fax: 2680 1228 e-mail: [email protected] Manufacturer: VTech Electronics Limited Manufacturer Address: 23/F., Tai Ping Industrial Center, Block 1, 57 Ting Kok Road, Tai Po, N.T., Hong Kong Brand Name: vtech Model: 1836 Type of EUT: Transceiver Description of EUT: Learning App TV Console Serial Number: N/A FCC ID / IC: G2R-1836 / 1135D-1836 Date of Sample Submitted: July 17, 2015 Date of Test: July 17, 2015 to August 10, 2015 Report No.: 15070911HKG-003 Report Date: August 11, 2015 Environmental Conditions: Temperature: +10 to 40°C Humidity: 10 to 90% Issuing Laboratory: Intertek Testing Services Hong Kong Limited HKAS has accredited this laboratory (HOKLAS 005 – TEST) under HOKLAS for specific laboratory activities as listed in the HOKLAS directory of accredited laboratories. Report No.: 15070911HKG-003 ii FCC ID: G2R-1836 IC: 1135D-1836 Intertek Testing Services Hong Kong Ltd. 2/F., Garment Centre, 576 Castle Peak Road, Kowloon, Hong Kong. Tel: (852) 2173 8888 Fax: (852) 2785 5487 Website: www.hk.intertek-etlsemko.com SUMMARY OF TEST RESULT TEST SPECIFICATION REFERENCE RESULTS Radiated Emission Radiated Emission on the Bandedge 15.249, 15.209 / RSS-210 A2.9, RSS-210 2.5 Pass Radiated Emission in Restricted Bands 15.205 / RSS-210 2.2 Pass The equipment under test is found to be complying with the following standards: FCC Part 15, October 1, 2014 Edition RSS-210 Issue 8, December 2010 RSS-Gen Issue 4, December 2014 Note: 1. The EUT uses a permanently attached antenna which, in accordance to section 15.203, is considered sufficient to comply with the pervisions of this section. 2. Pursuant to FCC part 15 Section 15.215(c), the 20 dB bandwidth of the emission was contained within the frequency band designated (mentioned as above) which the EUT operated. The effects, if any, from frequency sweeping, frequency hopping, other modulation techniques and frequency stability over excepted variations in temperature and supply voltage were considered. Issuing Laboratory: Intertek Testing Services Hong Kong Limited HKAS has accredited this laboratory (HOKLAS 005 – TEST) under HOKLAS for specific laboratory activities as listed in the HOKLAS directory of accredited laboratories. Report No.: 15070911HKG-003 iii FCC ID: G2R-1836 IC: 1135D-1836 Intertek Testing Services Hong Kong Ltd. 2/F., Garment Centre, 576 Castle Peak Road, Kowloon, Hong Kong. Tel: (852) 2173 8888 Fax: (852) 2785 5487 Website: www.hk.intertek-etlsemko.com Table of Contents 1.0 General Description.............................................................................................. 1 1.1 Product Description ............................................................................................. 1 1.2 Related Submittal(s) Grants................................................................................. 1 1.3 Test Methodology ................................................................................................ 2 1.4 Test Facility ......................................................................................................... 2 2.0 System Test Configuration ................................................................................... 3 2.1 Justification.......................................................................................................... 3 2.2 EUT Exercising Software..................................................................................... 3 2.3 Special Accessories ............................................................................................ 3 2.4 Measurement Uncertainty.................................................................................... 3 2.5 Support Equipment List and Description.............................................................. 4 3.0 Emission Results .................................................................................................. 5 3.1 Field Strength Calculation.................................................................................... 5 3.2 Radiated Emission Configuration Photograph ..................................................... 6 3.3 Radiated Emission Data ...................................................................................... 6 3.4Conducted Emission Configuration Photograph ......................................................... 6 3.5 Conducted Emission Data ................................................................................... 6 4.0 Equipment Photographs ..................................................................................... 13 5.0 Product Labelling ................................................................................................ 13 6.0 Technical Specifications .................................................................................... 13 7.0 Instruction Manual .............................................................................................. 13 8.0 Miscellaneous Information ................................................................................. 14 8.1 Radiated Emission on the Bandedge................................................................. 14 8.2 Discussion of Pulse Desensitization .................................................................. 15 8.3 Calculation of Average Factor.............................…
Text truncated - open the document above for the full version.
Test Setup Photos
INTERTEK TESTING SERVICES The Worst Case Configuration Photographs Test Report Number: 15070911HKG-003 FCC ID: G2R-1836 IC: 1135D-1836 Radiated Emission – Base Unit - (WiFi+Remote RF) On and Play Movie (from SD card) Front View Rear View INTERTEK TESTING SERVICES The Worst Case Configuration Photographs Test Report Number: 15070911HKG-003 FCC ID: G2R-1836 IC: 1135D-1836 AC Conducted Emission – Base Unit: (WiiFi+Remote RF)On + playback mic recorded file from SD card Front View Side View 1 INTERTEK TESTING SERVICES The Worst Case Configuration Photographs Test Report Number: 15070911HKG-003 FCC ID: G2R-1836 IC: 1135D-1836 AC Conducted Emission Side View 2
Contact Information
Applicant
Antony Wong(Senior Manager)
Technical Contact
Intertek Testing Services Hong Kong Ltd.Terry Chan
[email protected]852 2173 8888
2/F Garment Centre · Hong Kong
Non-Technical Contact
Intertek Testing Services Hong Kong Ltd.Terry Chan
[email protected]852 2173 8888
Test Firm
Intertek Testing Services Hong Kong Ltd.Billy Chow
Technical Specifications
| # | Rule Parts | Frequency Range | Power Output |
|---|---|---|---|
| 1 | 15C | 2.41 GHz - 2.48 GHz | - |
Other Applications from VTech Electronics Limited
G2R-5967
Sep 10, 2026Secret Safe Locker
Equipment Class
DSS - Part 15 Spread Spectrum TransmitterG2R-6250
Aug 03, 2026LET S RECORD LEARNING SPEAKER
Equipment Class
DSS - Part 15 Spread Spectrum TransmitterG2R-5909
Apr 08, 2026Microphone Pro
Equipment Class
DSS - Part 15 Spread Spectrum TransmitterG2R-5944
Mar 17, 2026My Mini Locker
Equipment Class
DSS - Part 15 Spread Spectrum TransmitterG2R-6150
Dec 30, 2025My Best Pal Scout, My Best Pal Violet
Equipment Class
DTS - Digital Transmission System