H8NWLL220CL2.4 GHz/ 5 GHz Mini-PCI in Laptop
Askey Computer Corp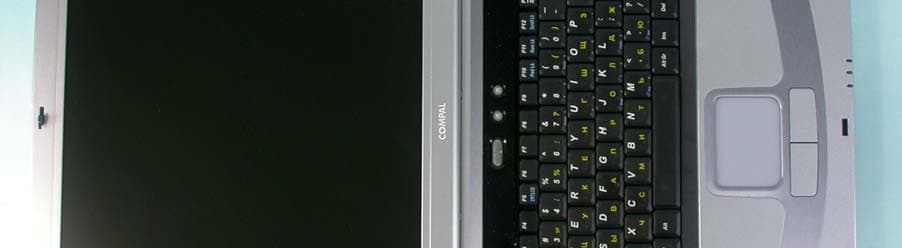
Click to zoom
Application Details
- Equipment Class
- DTS - Digital Transmission System
- Date of Grant
- Sep 10, 2003
- Application Purpose
- Original Equipment
- Date of Application
- May 08, 2003
- Equipment Note
- 2.4 GHz/ 5 GHz Mini-PCI in Laptop
- Frequency Range
- 2412.00000000 - 2462.00000000
- Company
- Askey Computer Corp
- Country
- Taiwan
Documents & Files
Document Text
Text extracted from the exhibit documents filed with the FCC. Open a document above to read the original.
Users Manual
[email protected] www.adt.com.tw ADVANCE DATA TECHNOLOGY CORPORATION FEDERAL COMMUNICATIONS COMMISSION DECLARATION OF CONFORMITY (DoC) FOR THE FOLLOWING EQUIPMENT: PRODUCT NAME: 2.4GHz/5GHz Mini - PCI Card (Receiver Part) MODEL NO.: WLL220 TRADE NAME: Askey IS HEREWITH CONFIRMED AND FOUND TO COMPLY WITH THE REQUIREMENTS OF CFR 47 PART 15 REGULATION. THE RESULTS OF ELECTROMAGNETIC EMISSION EVALUATION ARE SHOWN IN THE REPORT NO.: D920318R01 THIS DEVICE COMPLIES WITH PART 15 OF THE FCC RULES. OPERATION IS SUBJECT TO THE FOLLOWING TWO CONDITIONS: (1) THIS DEVICE MAY NOT CAUSE HARMFUL INTERFERENCE AND, (2) THIS DEVICE MUST ACCEPT ANY INTERFERENCE RECEIVED, INCLUDING INTERFERENCE THAT MAY CAUSE UNDESIRED OPERATION. THE FOLLOWING LOCAL MANUFACTURER/IMPORTER IS RESPONSIBLE FOR THIS DECLARATION: ManufacturerUSA Local Representative Company name: ASKEY COMPUTER CORP. To Be Determined. Address: 10F,NO.119, CHIENKANG RD., CHUNG- HO, TAIPEI TAIWAN R.O.C. Contact Person: John Chiou Title: Manager Tel/Fax: Tel: +886-2-2228-7588 Fax: +886-2-3234-9340
Users Manual
802.11a/b Wireless LAN Card User’s Manual Information in this document is subject to change without notice. No part of this document may be reproduced or transmitted in any form or by any means, electronic or mechanical, for any purpose, without the express written permission of the seller. The seller provides this documentation without warranty, term, or condition of any kind. The seller may make improvements or changes in the product(s) and/or the program(s) described in this documentation at any time. Atheros and the Atheros logo are registered trademarks of Atheros Communications, Inc. Cisco, Cisco Systems, and the Cisco Systems logo are registered trademarks of Cisco Systems, Inc. and/or its affiliates in the U.S. and certai n other countries. All other trademarks mentioned in this document are the property of their respective owners. 2002 All rights reserved. I Contents Chapter 1 In troduct ion ................................................................................................................................................ 1 Wireless LAN Basics ............................................................................................................ ....................................... 2 Local Area Netw ork (LAN) ....................................................................................................................................... 2 Wireless Network Topologies .................................................................................................... .............................. 3 Chapter 2 Installing the Dr iver and Utilit y Software .......................................................................... ....................... 6 System Requirements ............................................................................................................ ..................................... 7 Installing Wireless LA N Driver and Software .................................................................................... .......................... 7 Chapter 3 Stati on Configur ation ............................................................................................... ............................... 11 Accessing the Atheros Configurati on Utilit y .................................................................................... .......................... 11 Note to Windo ws XP Users ....................................................................................................... ............................ 13 Basic Configuration fo r Ad Hoc Network ......................................................................................... .......................... 14 Basic Configuration for Infrastructure Network ................................................................................. ........................ 15 Edit the Secu rity Tab .......................................................................................................... ....................................... 18 Edit the Advanced Tab .......................................................................................................... .................................... 21 To Connect to an Existing Network .............................................................................................. ............................. 24 802.11a/b Mini PCI Wireless LAN Card User's Manual II To Modify a Conf iguration Profile .............................................................................................. ................................ 25 To Remove a Conf iguration Profile .............................................................................................. ............................. 25 To Switch to a Different Profile ............................................................................................... ................................... 25 Chapter 4 Checking Stat us or St atistics ................................................................................................................. 27 Link Status .................................................................................................................... ............................................. 27 Advanced Link Status ........................................................................................................... ................................. 30 Driver Info rmation ...................................................................................................................................................... 32 WLAN Status .................................................................................................................... ......................................... 33 Statistics .................................................................................................................................................................... 35 Tools .......................................................................................................................... ................................................ 37 Chapter 5 Tools ................................................................................................................ ........................................... 39 Changing Disp lay Se ttings ...................................................................................................... .................................. 39 Select the Co untry Code ........................................................................................................ ................................... 40 Status Monito r Tray Icon ....................................................................................................... .................................... 41 Chapter 4 Uninstalling the Wireless LAN Card .................................................................................. ..................... 45 1 Chapter 1 Introduction This Wireless LAN Card …
Text truncated - open the document above for the full version.
Users Manual
Safety Instructions Use the following safety guidelines to help protect yourself and your computer. When Using Your Computer CAUTION: Do not operate your portable computer for an extended period of time with the base resting directly on your body. With extended operation, heat can potentially build up in the base. Allowing sustained contact with the skin could cause discomfort or, eventually, a burn. z Do not attempt to service the computer yourself. Always follow installation instructions closely. z Do not carry a battery in your pocket, purse, or other container where metal objects (such as car keys) could short-circuit the battery terminals. The resulting excessive current flow can cause extremely high temperatures and may result in damage from burns. z Be sure that nothing rests on your AC adapter’s power cable and that the cable is not located where it can be tripped over or stepped on. z Place the AC adapter in a ventilated area, such as a desktop or on the floor, when you use it to run the computer or to charge the battery. Do not cover the AC adapter with papers or other items that will reduce cooling; also, do not use the AC adapter while it is inside a carrying case. z Do not push objects into air vents or openings of your computer. Doing so can cause fire or electric shock by shorting out interior components. z Use only the AC adapter and batteries that are approved for use with this computer. Use of another type of battery or AC adapter may risk fire or explosion. z Danger of explosion if battery is incorrectly replaced. z Replace only with the same or equivalent type battery recommended by the manufacturer. z Dispose of used batteries according to the manufacturer’s instructions. z Before you connect the computer to a power source, ensure that the voltage rating of the AC adapter matches that of the available power source. - 115 V/60 Hz in most of North and South America and some Far Eastern countries such as South Korea and Taiwan. - 100 V/50 Hz in eastern Japan and 100 V/60Hz in western Japan. - 230 V/50 Hz in most of Europe, the Middle East, and the Far East. z If you use an extension cable with your AC adapter, ensure that the total ampere rating of the products plugged in to the extension cable does not exceed the ampere rating of the extension cable. z To remove power from the computer, turn it off, remove the battery, and disconnect the AC adapter from the electrical outlet. z To help avoid the potential hazard of electric shock, do not connect or disconnect any cables or perform maintenance or reconfiguration of this product during an electrical storm. z Do not dispose of batteries in a fire. They may explode. Check with local authorities for disposal instructions. z When setting up the computer for work, place it on a level surface. z When traveling, do not check the computer as baggage. You can put your computer through an X-ray security machine, but never put your computer through a metal detector. If you have the computer checked by hand, be sure to have a charged battery available in case you are asked to turn on the computer. z When traveling with the hard drive removed from the computer, wrap the drive in a non-conducting material, such as cloth or paper. If you have the drive checked by hand, be ready to install the drive in the computer. Your can put the hard drive through an X-ray security machine, but never put the drive through a metal detector. z When traveling, do not place the computer in overhead storage compartments where it could slide around. Do not drop your computer or subject it to other mechanical shocks. z Protect your computer, battery, and hard drive from environmental hazards such as dirt, dust, food, liquids, temperature extremes, and overexposure to sunlight. z When you move your computer between environments with very different temperature and/or humidity ranges, condensation may form on or within the computer. To avoid damaging the computer, allow sufficient time for the moisture to evaporate before using the computer. Î NOTICE: When taking the computer from low-temperature conditions into a warmer environment or from high-temperature conditions into a cooler environment, allow the computer to acclimate to room temperature before turning on power. z When you disconnect a cable, pull on its connector or on its strain relief loop, not on the cable itself. As you pull out the connector, keep it evenly aligned to avoid bending any connector pins. Also, before you connect a cable make sure both connectors are correctly oriented and aligned. z Before you clean your computer, turn it off, unplug it from its power source, and remove the battery. z Handle components with care. Hold a component such as a memory module by its edges, not its pins. CAUTION: When using your telephone equipment, basic safety precautions should always be followed to reduce the risk of fire, electric shock and injury to persons, including the following: z Do not use this product near water, for example, near a bathtub, washing bowl, kitchen sink or laundry tub, in a wet basement or near a swimming pool. z Avoid using a telephone (other than a cordless type) during an electrical storm. There may be a remote risk of electric shock from lightning. z Do not use the telephone to report a gas leak in the vicinity of the leak. z Use only the power cord indicated in this manual. Regulatory Notices This equipment has been tested and found to comply with the limits for a Class B digital device, pursuant to Part 15 of the FCC rules. These limits are designed to provide reasonable protection against harmful interference in a residential installation. Any changes or modifications made to this equipment may void the user's authority to operate this equipment. This equipment generates, uses, and can radiate radio frequency energy and, if not installed and used in accordance with the instructions, may cause harmful interference to radio communications. However, there is no guarantee th…
Text truncated - open the document above for the full version.
Users Manual
3 Caring For Your Notebook 3.1 Caring For Your Notebook Cleaning Your Notebook and Keyboard Cleaning the Display Cleaning the TouchPad Cleaning the Diskette Drive Cleaning the CD/DVD Drive Precautions Never spray cleaning products directly onto your notebook's case or display. Only use products designed for cleaning computer displays. 3.1.1 Cleaning Your Notebook and Keyboard Shut your notebook down, turn it off and disconnect it from the electrical outlet and any external devices, such as a printer. 1. Remove batteries. 2. Using the brush attachment of your vacuum cleaner, gently remove dust from your notebook's openings and keyboard. 3. Using a slightly moistened soft, lint-free cloth, wipe your notebook and keyboard. Use only water or a recommended computer cleaner. 3.1.2 Cleaning the Display 1. Shut your notebook down, turn it off and disconnect it from the electrical outlet and any external devices, such as a printer. 2. Remove batteries. 3. Using a slightly moistened soft, lint-free cloth, wipe your notebook's display. Use only water or a recommended computer cleaner. 3.1.3 Cleaning the TouchPad 1. Shut your notebook down, turn it off and disconnect from the electrical outlet and any external devices, such as a printer. 2. Remove batteries. 3. Using a slightly moistened soft, lint-free cloth, carefully wipe the TouchPad, being careful not to allow any moisture into the gaps. Use only water or a recommended computer cleaner. 3.1.4 Cleaning the CD/DVD Drive Never touch the lens. Use only compressed air to clean the lens. If you experience problems playing CDs or DVDs, including skipping, clean the unlabelled side of the disc with a soft, lint-free cloth or using a commercial product. 3.1.5 Precautions z Don't spill liquids on the keyboard. If liquid is spilt on the keyboard, turn your notebook off immediately. Leave off overnight to let it completely dry out before using it again. z Don't turn off your notebook if a drive light indicates a drive is active. Turning off your notebook while it is reading from or writing to a disk may damage the disk, the drive, or both. z Keep your notebook and disks away from objects that generate strong magnetic fields, such as stereo speakers. Information on disks is stored magnetically. Placing a magnet too close to a disk can erase important files. z Scan all new files for viruses. This precaution is especially important for files you receive via email, disk or download from the Internet. You will need a special program to scan for viruses. For further information, talk to your computer dealer. 3.2 Traveling Identifying Your Notebook Packing Your Notebook Setting a Password Travel Tips If Your Notebook Is Lost or Stolen 3.2.1 Identifying Your Notebook Attach a nametag or business card to your notebook, or use a permanent marker or stencil to write a unique identifying mark (such as your driver's license number) on the case. Write down your service tag sequence and store it in a safe place away from the notebook or carrying case. Use the service tag sequence if you need to report a loss or theft to law enforcement officials. Create a file on the Desktop called if found. Place information such as your name, address, and telephone number in this file. Contact your credit card company, and ask if it offers coded identification tags. 3.2.2 Packing Your Notebook Remove any external devices attached to the computer and store them in a safe place. Remove any cables attached to installed PC Cards, and remove any extended PC Cards. Fully charge the main battery and any spare batteries you plan to carry with you. Turn off the computer or put the computer into hibernate mode. Disconnect the AC adapter. Remove any extraneous items, such as paper clips, pens, and paper, from the keyboard and then close the display. Pack your notebook and accessories in their carrycase. Avoid packing the computer with items such as shaving cream, colognes, perfumes, or food. Protect the computer, the batteries, and the hard drive from hazards such as extreme temperatures and dirt, dust, liquids, or overexposure to sunlight. Pack the computer so that it does not slide around in the trunk of your car or in an overhead storage compartment. When traveling by air, never check your notebook as baggage. 3.2.3 Setting a Password To provide extra protection for your data and documents, it is advisable to set a password. As your notebook is booting (starting up), press F2 to take you to the BIOS Setup Utility. Use the right arrow key to highlight Security. Use the down arrow key to select: Set Supervisor Password... [Enter]. Press Enter. Type your password, press Enter and re-type to confirm. Press Enter. Your changes will be saved. Press Enter to continue. To enable password protection, use the down key to select Password Required to Boot. Press Enter. To turn on password protection, use the down key to select Enabled; to turn password protection off, select Disabled. Press Enter. Use the right arrow key to select Exit. Your notebook will now boot as normal. 3.2.4 Travel Tips z If you are traveling internationally, carry proof of ownership—or of your right to use the computer if it is company-owned—to speed your passage through customs. Investigate the customs regulations of the countries you plan to visit and consider acquiring an international carnet (also known as a merchandise passport) from your government. z Ensure that you know which electrical outlets are used in the countries you will visit, and have appropriate power adapters. z Check with your credit card company for information about the kinds of emergency travel assistance it offers to users of portable computers. z When traveling by air, ensure that you have a charged battery available in case you are asked to turn on the computer. z Before you use the computer on an airplane, verify that such usage is permitted. Some airlines forbid the use of electronic devices during the flight. All airlines forbid the use of electronic d…
Text truncated - open the document above for the full version.
Users Manual
7 The BIOS Setup Program 7.1 Introduction The BIOS (Basic Input and Output System) Setup program is a menu driven utility that enables you to make changes to the system configuration and tailor the operation of your Notebook to your individual work needs. A ROM-based configuration utility displays the system's configuration status and provides you with a tool to set system parameters. These parameters are stored in nonvolatile battery backed-up CMOS RAM, which saves this information even when the power is turned off. When the computer is turned back on, the system is configured with the values found in CMOS. Using easy-to-use menus, you can configure such items as: z Hard drives, diskette drives and peripherals z Video display options z Password protection from unauthorized use z Boot devices The settings made in the Setup program intimately affect how the Notebook performs. It is important, therefore, first to try to understand all the available options, and second, to make settings appropriate for the way you use the Notebook. This chapter will guide you through the Setup program by providing clear explanations for all Setup options. A standard configuration has already been set in the Setup program by the factory technicians, so you will very likely have little to worry about for now. However, eventually you may want to customize your system to suit your own performance needs. It is recommended that you read this chapter and become familiar with the adjustments that can be made in the BIOS. The next section explains how to move around in the Setup program, as well as how to specify and save your new settings. A brief discussion of the optional settings among the different submenus follows. 7.2 Navigating through the BIOS Setup Program The Setup program has been designed to make it as easy to use as possible. It is a menu driven program, which means you can scroll through the various directories and make your selections among the various predetermined choices. If you accidentally make a setting and do not know which one to switch back to, use the BIOS hot keys to return to the previous value. The hot keys are discussed in more detail later in this chapter. When turning on the Notebook for the first time you may get a message prompting you to run the BIOS Setup program. A warning message may appear on the screen if the hardware configuration is changed or the POST fails. This message will inform you of any errors or invalid settings and prompt you to run the Setup program to correct the problem. Even if you are not prompted by a message instructing you to use the Setup program, at some time in the future you may want to change the configuration of your computer. For example, you may want to make changes to the display option settings or enable the Notebook's password function for security purposes. It will then be necessary to reconfigure your system using the Setup program so that the computer can recognize these changes. The list below gives a few examples of reasons why you may want or need to run the BIOS Setup program. z You have set up the computer for the first time and you got a message stating that you should run the BIOS Setup program. z You want to redefine the communication ports to prevent any conflicts. z You want to change the password or make other changes to the security setup. The few examples listed above are by no means a complete list. 7.2.1 Accessing the BIOS Setup program To access the BIOS Setup program, press the F2 key as soon as the computer starts up and you see the INSYDE BIOS screen. The Menu Bar The top of the Setup screen has a menu bar with the following selections: Main Use this menu to make changes to the basic system configuration. Advanced Use this menu to enable and make changes to the advanced features available on your system. Security Use this menu to set User and Supervisor passwords. Boot Use this menu to specify the order in which the Notebook is to check for a device to boot the system. Exit Use this menu to specify how to exit the Setup program. To move between menu bar items, use the [◄] and [►] arrow keys until the desired item is highlighted. For example, if you want to move from the Main menu to the Advanced menu, press the right arrow key [►] once. Item Specific Help At the bottom of the Setup screen, you will notice an item specific help bar. For each item that you select on the menu, the bar informs of its specific function as well as the hot keys related specifically to that item and/or submenu. 7.2.2 Launching submenus A submenu contains additional options for a field parameter. To call up a submenu, simply move the highlight to the desired field and press the [Enter] key. The submenu opens. If you are a first time user or are not familiar with BIOS Setup programs, it is highly recommended that you take a few minutes to familiarize yourself with each of the submenus and their corresponding functions. If you accidentally make unwanted changes to the current configuration, go to the Exit menu and select Discard Changes. 7.2.3 Saving Changes and Exiting the Setup Program Refer to the Exit Menu section of this chapter for detailed information on saving changes and exiting the Setup program. 7.3 The Main Menu When the Setup program is accessed, the Information screen appears. Use the down key to select the Main Menu. Enter the Main Menu of the BIOS setup program to make changes to the Notebook's basic system configuration. Each of the fields displayed in this menu is covered below in detail. Date and Time Sets your system to the time that you specify (usually the current time). The format is hour, minute, and second, using the 24-hour clock. Insert the appropriate information. Use the mouse to move between the hour, minute, and second fields. Splash Boot Logo Selecting this option displays the INSYDE BIOS splash logo when you start your computer. If you do not select it, the startup system check sequence is displayed. Use the [SPACE] bar…
Text truncated - open the document above for the full version.
Users Manual
A Specifications CPU • Intel Mobile Banias 1.3GMHz, 1.4GMHz, 1.5MHz, 1.6GMHz • 1 MB L2 Cache on CPU • Intel Odem system controller System Memory • Upgradable to 1024MB with two 512MB SO-DIMM modules. Hard Disk Drive (HDD) • One 2.5in. (9.5 mm) up to 60GB Optical Disc Drive (ODD) • 5.25 in. CD-ROM device, or • 5.25 in. DVD-RW device, or • 5.25 in. DVD-ROM & CD-RW combo device, or • 5.25 in. DVD-ROM device Display • Color TFT 15 in. LCD panel supporting 1400 X 1050 SXGA+ Resolution, or • Color TFT 15 in. LCD panel supporting 1024 X 768 XGA Resolution, or • Color TFT 14.1 in LCD panel supporting 1024 X 768 XGA Resolution Keyboard • 85 US (standard)Key with 101/102 key emulation • 1 Windows Keys, 1 Application Key • Standard pitch, 2.5 mm travel length • Palm-rest External Interfaces • One 25-pin Parallel port with EPP/ECP capability • One 15-pin CRT port with DDC 2B support • One 7-pin TV-out port • One MIC-in port • One headphone-out port • One 2-pin AC Adapter jack • One type II PCMCIA Card Bus slot • Three 4-pin USB ports • One RJ11/RJ45 port • FIR transmitter-receiver • Secure Digital disc slot External Controls • Power switch • Lid switch • Wireless Communication switch • 2 User-Defined buttons AC Adapter • Universal AC adapter module. Lite-on 60W 90-264V AC, 47-63Hz, or • Universal AC adapter module. ASTEC 60W 90-264V AC, 47-63Hz Power Management Functions • Standby mode, Suspend to RAM, or Suspend to Disk mode, by time out or by hot key • HDD Local Stand-By mode by time out • LCD Local Stand-By mode by time out • Low battery alarm by beep • Auto-backlight off when LCD cover closed • Full ACPI 1.0B supported • LCD Auto-DIM mode by time out
Users Manual
802.11a/b Wireless LAN Card User’s Manual Information in this document is subject to change without notice. No part of this document may be reproduced or transmitted in any form or by any means, electronic or mechanical, for any purpose, without the express written permission of the seller. The seller provides this documentation without warranty, term, or condition of any kind. The seller may make improvements or changes in the product(s) and/or the program(s) described in this documentation at any time. Atheros and the Atheros logo are registered trademarks of Atheros Communications, Inc. Cisco, Cisco Systems, and the Cisco Systems logo are registered trademarks of Cisco Systems, Inc. and/or its affiliates in the U.S. and certai n other countries. All other trademarks mentioned in this document are the property of their respective owners. 2002 All rights reserved. I Contents Chapter 1 In troduct ion ................................................................................................................................................ 1 Wireless LAN Basics ............................................................................................................ ....................................... 2 Local Area Netw ork (LAN) ....................................................................................................................................... 2 Wireless Network Topologies .................................................................................................... .............................. 3 Chapter 2 Installing the Dr iver and Utilit y Software .......................................................................... ....................... 6 System Requirements ............................................................................................................ ..................................... 7 Installing Wireless LA N Driver and Software .................................................................................... .......................... 7 Chapter 3 Stati on Configur ation ............................................................................................... ............................... 11 Accessing the Atheros Configurati on Utilit y .................................................................................... .......................... 11 Note to Windo ws XP Users ....................................................................................................... ............................ 13 Basic Configuration fo r Ad Hoc Network ......................................................................................... .......................... 14 Basic Configuration for Infrastructure Network ................................................................................. ........................ 15 Edit the Secu rity Tab .......................................................................................................... ....................................... 18 Edit the Advanced Tab .......................................................................................................... .................................... 21 To Connect to an Existing Network .................................................…
Text truncated - open the document above for the full version.
Contact Information
Applicant
Jack Po(Manager)
Technical Contact
Advance Data Technology CorporationEllis Wu
[email protected]+886-3-327-0910
13-1, Lane 19, WenShan 3rd., St. · Taoyuan · Taiwan
Non-Technical Contact
Advance Data Technology CorporationEllis Wu
[email protected]+886-3-327-0910
Test Firm
Bureau Veritas CPS (H.K.) Ltd. Taoyuan BranchTommy Wu
Technical Specifications
| # | Rule Parts | Frequency Range | Power Output |
|---|---|---|---|
| 1 | 15C | 2.41 GHz - 2.46 GHz | 44.00 mW |
Other Applications from Askey Computer Corp
H8N-NUQ2006
Sep 11, 2026enterprise-grade 5G NR outdoor unit
Equipment Class
CBD - Citizens Band Category A and B DevicesH8NSCU5000
Jun 18, 20265G Small cell
Equipment Class
CBD - Citizens Band Category A and B DevicesH8N-EAI2620P
Jan 29, 2026Indoor Wi-Fi 7 Enterprise Access Point
Equipment Class
DTS - Digital Transmission SystemH8N-CTX0800
Oct 07, 2024OBU
Equipment Class
NII - Unlicensed National Information Infrastructure TX
H8NEAO2522P-2
Jul 04, 2024Outdoor WiFi6 AP
Equipment Class
DTS - Digital Transmission System