HEDEAP111Wi-Fi 6 Access Point
Accton Technology Corp
Click to zoom
Application Details
- Equipment Class
- DTS - Digital Transmission System
- Date of Grant
- Mar 17, 2024
- Application Purpose
- Original Equipment
- Date of Application
- Mar 12, 2024
- Equipment Note
- Wi-Fi 6 Access Point
- Frequency Range
- 2412.00000000 - 2462.00000000
- Company
- Accton Technology Corp
- Country
- Taiwan
Documents & Files
Document Text
Text extracted from the exhibit documents filed with the FCC. Open a document above to read the original.
Users Manual
– 1 – Quick Start Guide E022024-CS-R01 www.edge-core.com Wi-Fi 6 Access Point EAP111 (T) Package Contents Mount the AP a. Mounting on a Wall 1.At the installation location on the wall, use the mounting bracket to mark four holes for the wall plugs and screws (included in the screw kit). Drill four holes for the wall plugs, and then insert the plugs and tap them flush with the wall surface. Use the four screws to secure the bracket to the wall. 2.With its ports facing down, place the AP over the bracket flanges and then slide it down until it snaps into its secured position. b. Mounting on a Suspended Ceiling T-Bar 1.Slide the bracket accessory onto the base of the AP until it clicks into its locked position. 2.Use the included security screw to secure the bracket to the AP. 3.Position the ceiling-mount clip holders on either side of the T-bar, and then turn the AP until the two clips lock it to the T-bar. Note: Drill 2.5 mm (±0.2 mm) holes for M3 self-tapping screws, or 4.5 mm (±0.2 mm) holes for nylon wall plugs. 1 2 1 Note: The AP mounting supports two different sizes of suspended ceiling T-bars. The position illustrated above is for 24.5 mm bars. Use the position at a 90 degrees angle for 15 mm bars. 2 3 3 1 Overview Installation 1.12 VDC power input 2.Restart/Reset button: A quick press restarts the system. Press and hold for 5 seconds resets to factory defaults. 3.Uplink (PoE) Port: 10/100/1000BASE-T, 802.3at PoE 4.LAN Port: 10/100/1000BASE-T 5.Ground screw 6.System LED Indicator: Green: On (power OK), Blinking (boot up) Blue: On (cloud managed) Purple: Blinking (uplink activity in cloud-managed mode) Orange: Blinking (uplink activity in stand-alone mode) 7.Kensington lock slot 23 4 5 1 7 6 1.EAP111 (T) access point 2.Mounting bracket accessory 3.Mounting bracket security screw 4.Screw kit—4 screws and 4 plugs 5.(Option) AC power adapter with international socket converters 6.(Option) Pole-mount kit—bracket and 2 steel-band hose clamps 7.(Option) PoE injector and power cord 8.QR code card 15234867 Quick Start Guide – 2 – c. Mounting on a Ceiling Without T-Bars 1.At the installation location on the ceiling, use the mounting bracket to mark four holes for the plugs and screws (included in the screw kit). Drill four holes for the plugs, and then insert the plugs and tap them flush with the ceiling surface. Use the four screws to secure the bracket to the ceiling (screw torque must be less than 6 kgf.cm). 2.Place the AP over the bracket flanges and then slide it onto the bracket until it snaps into its secured position. d. (Optional) Mounting on a Pole (max. 2.5 inch diameter) 1.Slide the pole-mount bracket onto the base of the AP until it clicks into its locked position. 2.Feed the two steel-band clamps through the pole-mount bracket mounting points. 3.Fasten the steel-band clamps around the pole to secure the AP to the pole. Connect Cables a. Connect LAN Cables 1.Connect Category 5e or better cable to the Uplink (PoE) 1000BASE-T RJ-45 port. When connected to a PoE source, the Uplink (PoE) port connection provides power to the unit. 2.(Optional) Connect a local LAN switch or computer to the LAN 1000BASE-T RJ-45 port. b. (Optional) Connect AC Power Adapter 1.When not connected to a PoE source, connect the AC power adapter to the DC power jack on the AP and then plug the adapter into a nearby AC power source. Check the System LED 1.When operating normally, the System LED should be on green. Blinking indicates the device is booting up. Initial Setup and AP Registration There are two options for setting up the AP for your network: When the AP is first connected to the Internet through the Uplink port, it is automatically redirected to ecOpen (https://cloud.openwifi.ignitenet.com/). Enter the AP’s MAC address and serial number for device registration. By default, the AP is assigned an IP address through DHCP. If the AP cannot connect to ecOpen, access the AP’s web interface through the AP’s LAN port to make configuration changes (for example, to change from DHCP to a static IP). See section “Connecting to the Web Interface”. 1 2 1 2 3 2 1 2 1 3 1 4 Quick Start Guide – 3 – Connecting to the Web Interface Note that you can only connect to the AP’s web interface when the AP is not connected to the Internet. Follow these steps to connect to the AP’s web interface through a network connection to the AP’s LAN port. 1.Connect a PC directly to the AP’s LAN port. 2.Set the PC IP address to be on the same subnet as the AP LAN port default IP address. (The PC address must start 192.168.1.x with subnet mask 255.255.255.0.) 3.Enter the AP’s default IP address of 192.168.1.1 into the web browser address bar. 4.Log in to the web interface using the default user name “root” and password “openwifi”. Safety and Regulatory Information FCC Class B This equipment has been tested and found to comply with the limits for a Class B digital device, pursuant to Part 15 of the FCC Rules. These limits are designed to provide reasonable protection against harmful interference in a residential installation. This equipment generates, uses and can radiate radio frequency energy and, if not installed and used in accordance with the instructions, may cause harmful interference to radio communications. However, there is no guarantee that interference will not occur in a particular installation. If this equipment does cause harmful interference to radio or television reception, which can be determined by turning the equipment off and on, the user is encouraged to try to correct the interference by one of the following measures: Reorient or relocate the receiving antenna Increase the separation between the equipment and receiver Connect the equipment into an outlet on a circuit different from that to which the receiver is connected Consult the dealer or an experienced radio/TV technician for help FCC Caution: Any changes or modifications not expressly approved by the party responsible for compliance could void the u…
Text truncated - open the document above for the full version.
Users Manual
– 1 – Quick Start Guide E022024-CS-R01 www.edge-core.com Wi-Fi 6 Access Point EAP111e Package Contents Mount the AP a. Mounting on a Wall 1.At the installation location on the wall, use the mounting bracket to mark four holes for the wall plugs and screws (included in the screw kit). Drill four holes for the wall plugs, and then insert the plugs and tap them flush with the wall surface. Use the four screws to secure the bracket to the wall. 2.With its ports facing down, place the AP over the bracket flanges and then slide it down until it snaps into its secured position. b. Mounting on a Suspended Ceiling T-Bar 1.Slide the bracket accessory onto the base of the AP until it clicks into its locked position. 2.Use the included security screw to secure the bracket to the AP. 3.Position the ceiling-mount clip holders on either side of the T-bar, and then turn the AP until the two clips lock it to the T-bar. Note: Drill 2.5 mm (±0.2 mm) holes for M3 self-tapping screws, or 4.5 mm (±0.2 mm) holes for nylon wall plugs. 1 2 1 Note: The AP mounting supports two different sizes of suspended ceiling T-bars. The position illustrated above is for 24.5 mm bars. Use the position at a 90 degrees angle for 15 mm bars. 2 3 3 1 Overview Installation 1.12 VDC power input 2.Restart/Reset button: A quick press restarts the system. Press and hold for 5 seconds resets to factory defaults. 3.Uplink (PoE) Port: 10/100/1000BASE-T, 802.3at PoE 4.LAN Port: 10/100/1000BASE-T 5.Ground screw 6.System LED Indicator: Green: On (power OK), Blinking (boot up) Blue: On (cloud managed) Purple: Blinking (uplink activity in cloud-managed mode) Orange: Blinking (uplink activity in stand-alone mode) 7.Kensington lock slot 8.External antenna connectors 23 4 5 1 7 8 6 1.EAP111e access point 2.2 external antennas 3.Mounting bracket accessory 4.Mounting bracket security screw 5.Screw kit—4 screws and 4 plugs 6.(Option) AC power adapter with international socket converters 7.(Option) Pole-mount kit—bracket and 2 steel-band hose clamps 8.(Option) PoE injector and power cord 9.QR code card 163459728 Quick Start Guide – 2 – c. Mounting on a Ceiling Without T-Bars 1.At the installation location on the ceiling, use the mounting bracket to mark four holes for the plugs and screws (included in the screw kit). Drill four holes for the plugs, and then insert the plugs and tap them flush with the ceiling surface. Use the four screws to secure the bracket to the ceiling (screw torque must be less than 6 kgf.cm). 2.Place the AP over the bracket flanges and then slide it onto the bracket until it snaps into its secured position. d. (Optional) Mounting on a Pole (max. 2.5 inch diameter) 1.Slide the pole-mount bracket onto the base of the AP until it clicks into its locked position. 2.Feed the two steel-band clamps through the pole-mount bracket mounting points. 3.Fasten the steel-band clamps around the pole to secure the AP to the pole. Install External Antennas 1.Attach two external antennas to the connectors on the AP. Connect Cables a. Connect LAN Cables 1.Connect Category 5e or better cable to the Uplink (PoE) 1000BASE-T RJ-45 port. When connected to a PoE source, the Uplink (PoE) port connection provides power to the unit. 2.(Optional) Connect a local LAN switch or computer to the LAN 1000BASE-T RJ-45 port. b. (Optional) Connect AC Power Adapter 1.When not connected to a PoE source, connect the AC power adapter to the DC power jack on the AP and then plug the adapter into a nearby AC power source. Check the System LED 1.When operating normally, the System LED should be on green. Blinking indicates the device is booting up. Connect to the Web User Interface 1.Connect a PC directly to the AP’s LAN port. 2.Set the PC IP address to be on the same subnet as the AP LAN port default IP address. (The PC address must start 192.168.2.x with subnet mask 255.255.255.0.) 3.Enter the AP’s default IP address of 192.168.2.1 into the web browser address bar. 1 2 1 2 3 2 1 1 Note: To connect to the web interface using the Uplink (PoE) port, the IP address is automatically assigned through DHCP by default. If a DHCP server is unreachable, the Uplink (PoE) port reverts to a fallback IP address of 192.168.1.10. 3 1 2 1 4 1 5 Quick Start Guide – 3 – 4.On first-time log in to the web interface, the Setup Wizard starts and you must select how the AP will be managed, either using the ecCLOUD controller, an EWS-Series controller, or in stand-alone mode. 5.Continue with the Setup Wizard to make other settings: Cloud-Managed Mode: Select the country of operation. EWS-Series Controller Mode: Complete the CAPWAP setup, use the default wireless network setting or customize the network name, then set a password (the default user name is “admin” with password “admin”), and select the country of operation. Stand-Alone Mode: Use the default wireless network setting or customize the network name, then set a password (the default user name is “admin” with password “admin”), and select the country of operation. 6.Click “Done” to finish the setup wizard. (Optional) QR Code Onboarding For quick set up and registration of your AP with the ecCLOUD controller, you can scan the QR code on the AP using a phone. Follow these steps: 1.Make sure the AP is powered on and connected to the Internet. 2.Use the camera (iPhone) or a barcode app (Android) on your phone to scan the AP’s QR code. The QR code is printed on a label next to the AP’s ports. 3.When a message pops up, tap “yes” to join the Wi-Fi network (iPhone requires you to go to Settings > Wi-Fi or open the browser for the message to pop up). The web browser should open and redirect to the Setup Wizard page. 4.After setting a new password and the regulatory country, select to manage the AP using the ecCLOUD controller, an EWS-Series controller, or to manage the AP in stand-alone mode. a.Stand-Alone Mode: Use the default wireless network setting or customize the network name and password. Tap “Done” to finish the Setup Wizard.…
Text truncated - open the document above for the full version.
External Photos
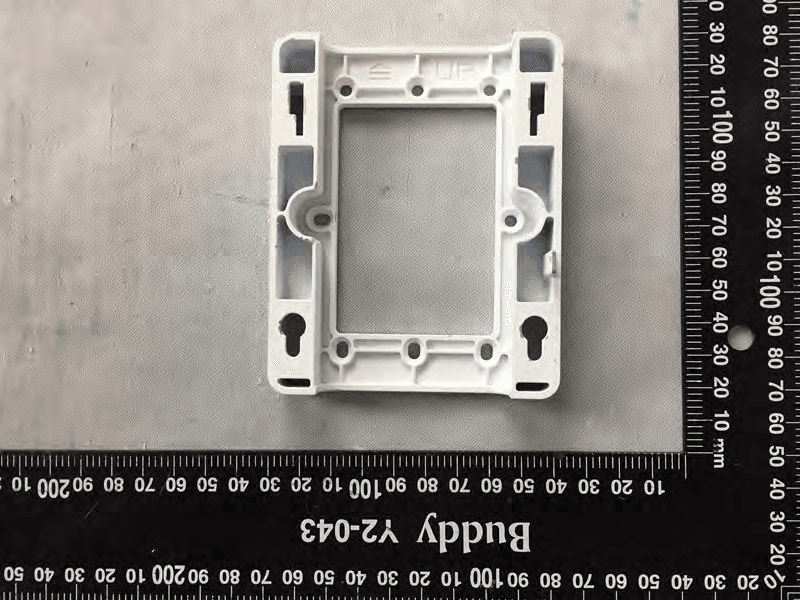
Report No.: 23B0423R TEL : +886-3-582-8001 Page Number : 1 of 49 FAX : +886-3-582-8958 EUT External Photograph Model No.: EAP111 (1) EUT Photo (2) EUT Photo Report No.: 23B0423R TEL : +886-3-582-8001 Page Number : 2 of 49 FAX : +886-3-582-8958 (3) EUT Photo (4) EUT Photo Report No.: 23B0423R TEL : +886-3-582-8001 Page Number : 3 of 49 FAX : +886-3-582-8958 (5) EUT Photo (6) EUT Photo Report No.: 23B0423R TEL : +886-3-582-8001 Page Number : 4 of 49 FAX : +886-3-582-8958 Model No.: EAP111e (1) EUT Photo (2) EUT Photo Report No.: 23B0423R TEL : +886-3-582-8001 Page Number : 5 of 49 FAX : +886-3-582-8958 (3) EUT Photo (4) EUT Photo Report No.: 23B0423R TEL : +886-3-582-8001 Page Number : 6 of 49 FAX : +886-3-582-8958 (5) EUT Photo (6) EUT Photo Report No.: 23B0423R TEL : +886-3-582-8001 Page Number : 7 of 49 FAX : +886-3-582-8958 (7) EUT Photo / Ant. 1 and Ant. 2, Model No.: 98623PRSX001 (External Antenna) (8) EUT Photo Report No.: 23B0423R TEL : +886-3-582-8001 Page Number : 8 of 49 FAX : +886-3-582-8958 (9) EUT Photo (Adapter) (10) EUT Photo Report No.: 23B0423R TEL : +886-3-582-8001 Page Number : 9 of 49 FAX : +886-3-582-8958 (11) EUT Photo (US Plug) (12) EUT Photo (EU Plug) Report No.: 23B0423R TEL : +886-3-582-8001 Page Number : 10 of 49 FAX : +886-3-582-8958 (13) EUT Photo (UK Plug) (14) EUT Photo (UK Plug Power Cord) Report No.: 23B0423R TEL : +886-3-582-8001 Page Number : 11 of 49 FAX : +886-3-582-8958 (15) EUT Photo (PoE Injector) (16) EUT Photo Report No.: 23B0423R TEL : +886-3-582-8001 Page Number : 12 of 49 FAX : +886-3-582-8958 (17) EUT Photo / Wall Mount (Metal) (18) EUT Photo / Wall Mount (Plastic) Report No.: 23B0423R TEL : +886-3-582-8001 Page Number : 13 of 49 FAX : +886-3-582-8958 (19) EUT Photo / Wall Mount (Pole-mount kit)
Internal Photos
Report No.: 23B0423R TEL : +886-3-582-8001 Page Number : 14 of 49 FAX : +886-3-582-8958 EUT Internal Photograph Model No.: EAP111 (1) EUT Photo (2) EUT Photo Report No.: 23B0423R TEL : +886-3-582-8001 Page Number : 15 of 49 FAX : +886-3-582-8958 (3) EUT Photo (4) EUT Photo Report No.: 23B0423R TEL : +886-3-582-8001 Page Number : 16 of 49 FAX : +886-3-582-8958 (5) EUT Photo (6) EUT Photo / Ant. 1, Model No.: KG568-T4-175B17U7S (Internal Antenna) Report No.: 23B0423R TEL : +886-3-582-8001 Page Number : 17 of 49 FAX : +886-3-582-8958 (7) EUT Photo / Ant. 2, Model No.: KG568-T4-105W17U7S (Internal Antenna) (8) EUT Photo / Ant. 3, Model No.: KG568-T4-175G17U7S (Internal Antenna) Report No.: 23B0423R TEL : +886-3-582-8001 Page Number : 18 of 49 FAX : +886-3-582-8958 (9) EUT Photo (10) EUT Photo Report No.: 23B0423R TEL : +886-3-582-8001 Page Number : 19 of 49 FAX : +886-3-582-8958 (11) EUT Photo (12) EUT Photo Report No.: 23B0423R TEL : +886-3-582-8001 Page Number : 20 of 49 FAX : +886-3-582-8958 (13) EUT Photo (14) EUT Photo Report No.: 23B0423R TEL : +886-3-582-8001 Page Number : 21 of 49 FAX : +886-3-582-8958 (15) EUT Photo (16) EUT Photo Report No.: 23B0423R TEL : +886-3-582-8001 Page Number : 22 of 49 FAX : +886-3-582-8958 (17) EUT Photo (18) EUT Photo Report No.: 23B0423R TEL : +886-3-582-8001 Page Number : 23 of 49 FAX : +886-3-582-8958 (19) EUT Photo (20) EUT Photo Report No.: 23B0423R TEL : +886-3-582-8001 Page Number : 24 of 49 FAX : +886-3-582-8958 (21) EUT Photo (22) EUT Photo Report No.: 23B0423R TEL : +886-3-582-8001 Page Number : 25 of 49 FAX : +886-3-582-8958 (23) EUT Photo (24) EUT Photo Report No.: 23B0423R TEL : +886-3-582-8001 Page Number : 26 of 49 FAX : +886-3-582-8958 (25) EUT Photo (26) EUT Photo Report No.: 23B0423R TEL : +886-3-582-8001 Page Number : 27 of 49 FAX : +886-3-582-8958 (27) EUT Photo (28) EUT Photo Report No.: 23B0423R TEL : +886-3-582-8001 Page Number : 28 of 49 FAX : +886-3-582-8958 (29) EUT Photo (30) EUT Photo Report No.: 23B0423R TEL : +886-3-582-8001 Page Number : 29 of 49 FAX : +886-3-582-8958 (31) EUT Photo (32) EUT Photo Report No.: 23B0423R TEL : +886-3-582-8001 Page Number : 30 of 49 FAX : +886-3-582-8958 (33) EUT Photo (34) EUT Photo Report No.: 23B0423R TEL : +886-3-582-8001 Page Number : 31 of 49 FAX : +886-3-582-8958 (35) EUT Photo Report No.: 23B0423R TEL : +886-3-582-8001 Page Number : 32 of 49 FAX : +886-3-582-8958 Model No.: EAP111e (1) EUT Photo (2) EUT Photo Report No.: 23B0423R TEL : +886-3-582-8001 Page Number : 33 of 49 FAX : +886-3-582-8958 (3) EUT Photo (4) EUT Photo Report No.: 23B0423R TEL : +886-3-582-8001 Page Number : 34 of 49 FAX : +886-3-582-8958 (5) EUT Photo (6) EUT Photo Report No.: 23B0423R TEL : +886-3-582-8001 Page Number : 35 of 49 FAX : +886-3-582-8958 (7) EUT Photo / Ant. 3, Model No.: KG568-T4-175G17U7S (Internal Antenna) (8) EUT Photo Report No.: 23B0423R TEL : +886-3-582-8001 Page Number : 36 of 49 FAX : +886-3-582-8958 (9) EUT Photo (10) EUT Photo Report No.: 23B0423R TEL : +886-3-582-8001 Page Number : 37 of 49 FAX : +886-3-582-8958 (11) EUT Photo (12) EUT Photo Report No.: 23B0423R TEL : +886-3-582-8001 Page Number : 38 of 49 FAX : +886-3-582-8958 (13) EUT Photo (14) EUT Photo Report No.: 23B0423R TEL : +886-3-582-8001 Page Number : 39 of 49 FAX : +886-3-582-8958 (15) EUT Photo (16) EUT Photo Report No.: 23B0423R TEL : +886-3-582-8001 Page Number : 40 of 49 FAX : +886-3-582-8958 (17) EUT Photo (18) EUT Photo Report No.: 23B0423R TEL : +886-3-582-8001 Page Number : 41 of 49 FAX : +886-3-582-8958 (19) EUT Photo (20) EUT Photo Report No.: 23B0423R TEL : +886-3-582-8001 Page Number : 42 of 49 FAX : +886-3-582-8958 (21) EUT Photo (22) EUT Photo Report No.: 23B0423R TEL : +886-3-582-8001 Page Number : 43 of 49 FAX : +886-3-582-8958 (23) EUT Photo (24) EUT Photo Report No.: 23B0423R TEL : +886-3-582-8001 Page Number : 44 of 49 FAX : +886-3-582-8958 (25) EUT Photo (26) EUT Photo Report No.: 23B0423R TEL : +886-3-582-8001 Page Number : 45 of 49 FAX : +886-3-582-8958 (27) EUT Photo (28) EUT Photo Report No.: 23B0423R TEL : +886-3-582-8001 Page Number : 46 of 49 FAX : +886-3-582-8958 (29) EUT Photo (30) EUT Photo Report No.: 23B0423R TEL : +886-3-582-8001 Page Number : 47 of 49 FAX : +886-3-582-8958 (31) EUT Photo (32) EUT Photo Report No.: 23B0423R TEL : +886-3-582-8001 Page Number : 48 of 49 FAX : +886-3-582-8958 (33) EUT Photo (34) EUT Photo Report No.: 23B0423R TEL : +886-3-582-8001 Page Number : 49 of 49 FAX : +886-3-582-8958 (35) EUT Photo
RF Exposure Info
Report No.:23B0423R-RFUSV17S-A TEL : +886-3-582-8001 Page Number : 1 of 7 FAX : +886-3-582-8958 Issued Date : Mar. 12, 2024 Report Version : V1.0 Test Report No: 23B0423R-RFUSV17S-A RF EXPOSURE EVALUATION DECLARATION Product Name Wi-Fi 6 Access Point Brand Name Model No. EAP111 (XXXXX), EAP111e (XXXXX) (Please refer to the section 1.1 for detail.) FCC ID HEDEAP111 Applicant ́s Name / Address Accton Technology Corporation No. 1, Creation Rd. III, Science-based Industrial Park, Hsinchu 300, Taiwan, R.O.C. Manufacturer’s Name / Address (1) Accton Technology Corporation Zhunan Factory 1F & 4F & 5F, No. 1, Keyi St., Zhunan Townhsip, Miaoli County 350, Taiwan, R.O.C. Manufacturer’s Name / Address (2) Accton Technology Corporation No. 1, Creation Rd. III, Science-based Industrial Park, Hsinchu 300, Taiwan, R.O.C. Manufacturer’s Name / Address (3) VIETNAM ACCTON TECHNOLOGY COMPANY LIMITED Lot F1-2-3 Thang Long Industrial Park (Vinh Phuc), Tam Hop Commune Binh Xuyen District,Vinh Phuc Province, Vietnam Test Method Requested, Standard FCC CFR Title 47 Part 2.1091 Radiofrequency radiation exposure evaluation: mobile devices. Verdict Summary IN COMPLIANCE Documented By Amelia Wu Approved By Rueyyan Lin Date of Receipt Nov. 14, 2023 Date of Issue Mar. 12, 2024 Report Version V1.0 Report No.:23B0423R-RFUSV17S-A TEL : +886-3-582-8001 Page Number : 2 of 7 FAX : +886-3-582-8958 Issued Date : Mar. 12, 2024 Report Version : V1.0 INDEX page Competences and Guarantees ................................................................................................................................ 3 General Conditions .................................................................................................................................................. 3 Revision History ....................................................................................................................................................... 4 1. General Information ............................................................................................................................... 5 1.1. EUT Description .................................................................................................................................... 5 1.2. Testing Location Information ................................................................................................................. 5 2. RF Exposure Evaluation ........................................................................................................................ 6 2.1. Test Limit ............................................................................................................................................... 6 2.2. Test Result of RF Exposure Evaluation ................................................................................................. 7 Report No.:23B0423R-RFUSV17S-A TEL : +886-3-582-8001 Page Number : 3 of 7 FAX : +886-3-582-8958 Issued Date : Mar. 12, 2024 Report Version : V1.0 Competences and Guarantees DEKRA is a testing laboratory competent to carry out the tests described in this report. In order to assure the traceability to other national and international laboratories, DEKRA has a calibration and maintenance program for its measurement equipment. DEKRA guarantees the reliability of the data presented in this report, which is the result of the measurements and the tests performed to the item under test on the date and under the conditions stated in the report and it is based on the knowledge and technical facilities available at DEKRA at the time of performance of the test. DEKRA is liable to the client for the maintenance of the confidentiality of all information related to the item under test and the results of the test. The results presented in this Test Report apply only to the particular item under test established in this document. IMPORTANT: No parts of this report may be reproduced or quoted out of context, in any form or by any means, except in full, without the previous written permission of DEKRA. General Conditions 1. The test results relate only to the samples tested. 2. The test results shown in the test report are traceable to the national/international standard through the calibration report of the equipment and evaluated measurement uncertainty herein. 3. This report must not be used to claim product endorsement by TAF or any agency of the government. 4. The test report shall not be reproduced without the written approval of DEKRA Testing and Certification Co., Ltd. 5. Measurement uncertainties evaluated for each testing system and associated connections are given here to provide the system information for reference. Compliance determinations do not take into account measurement uncertainties for each testing system, but are based on the results of the compliance measurement. Report No.:23B0423R-RFUSV17S-A TEL : +886-3-582-8001 Page Number : 4 of 7 FAX : +886-3-582-8958 Issued Date : Mar. 12, 2024 Report Version : V1.0 Revision History Version Description Issued Date V1.0 Initial issue of report Mar. 12, 2024 Report No.:23B0423R-RFUSV17S-A TEL : +886-3-582-8001 Page Number : 5 of 7 FAX : +886-3-582-8958 Issued Date : Mar. 12, 2024 Report Version : V1.0 1. General Information 1.1. EUT Description RF General Information Evaluation Mode Frequency Range (MHz) Operating Frequency (MHz) Modulation Type WiFi 2.4 GHz 2400 ~ 2483.5 2412 ~ 2462 802.11b: DSSS 802.11g/n/ac: OFDM 802.11ax: OFDMA WiFi 5 GHz 5150 ~ 5250 5250 ~ 5350 5470 ~ 5725 5725 ~ 5850 5180 ~ 5240 5260 ~ 5320 5500 ~ 5700 5745 ~ 5825 802.11a/n/ac: OFDM 802.11ax: OFDMA Bluetooth 2400 ~ 2483.5 2402 ~ 2480 LE: GFSK The difference for each model is shown as below: EUT Model No. Antenna Ant. Model No. Remark 1 EAP111 (XXXXX) 1 KG568-T4-175B17U7S Internal Antenna 2 KG568-T4-105W17U7S Internal Antenna 3 KG568-T4-175G17U7S Internal Antenna 2 EAP111e (XXXXX) 1 98623PRSX001 External Antenna 2 98623PRSX001 External Antenna 3 KG568-T4-175G17U7S Internal …
Text truncated - open the document above for the full version.
Test Report
1 Antenna Test Result of Tooling ACCTON 2 Contents Antenna Description Experimental Setup & Coordinate System Efficiency & Gain 2D Radiation Pattern Results 3 Revised History REV. Date Revised Record Prepared by V01 09/13/2023 EAP111 T0 Antenna Test report Kent V02 09/20/2023 Update for FCC Kent 4 Antenna Location Antenna location( 天線位置 ) Antenna test diagram( 天線測試圖 ) Company name(製造商公司名稱) Address(製造商地址) ACCTON Technology Corporation No.1, Creation Road3, Hsinchu Science Park, Hsinchu 30077,Taiwan, R.O.C Antenna Description item Antenna Model Antenna Application Material Antenna Type Peak Gain 1 KG568-T4- 175B17U7S WiFi Dual Band 1 PCB Dipole 2.4G 4.90dBi 5G 5.53dBi 2 KG568-T4- 105W17U7S WiFi Dual Band 2 PCB Dipole 2.4G 4.81dBi 5G 5.53dBi 3 KG568-T4- 175G17U7S WiFi Dual Band 3 PCB Dipole 2.4G 5.21dBi 5G 5.82dBi 5 Experimental Setup & Coordinate System Chamber name: ETS AMS-8500 Rectangular CTIA-Compliant Test Lab Describe Manufacturer Model No. Serial No. Cal.Date Cal. Due Date Network Analyzer Agilent E5071B MY42402996 Dec.-2022 Dec. -2024 6 Efficiency & Gain Dual Band Antenna 1 Frequency (GHz) 2.412 2.447 2.4835 5.15 5.50 5.85 Efficiency (%) 63 67 65 67 63 65 Peak Gain (dBi) 4.16 4.90 4.51 5.53 5.08 5.36 Peak gain at polarization (Φ)120° (Θ)60° (Φ)105° (Θ)60° (Φ)135° (Θ)75° (Φ)90° (Θ)105° (Φ)90° (Θ)105° (Φ)75° (Θ)120° Test date: 2023/09/14 ※Φ(Phi) ; Θ(Theta) ※Peak Gain (G) and directivity (D) are linked by the formula G = k x D, where the antenna effective factor k (0 ≤ k ≤ 1) corresponds to the overall losses of the antenna. Accordingly antenna gain can be calculated by the following formula, where represents antenna losses comprising of all ohm and dielectric losses between the input connector and the outer surface of the radome and the loss due to the impedance mismatch. Dual Band Antenna 2 Frequency (GHz) 2.412 2.447 2.4835 5.15 5.50 5.85 Efficiency (%) 66 61 65 75 75 75 Peak Gain (dBi) 4.81 4.16 4.78 5.53 5.48 5.52 Peak gain at polarization (Φ)90° (Θ)90° (Φ)90° (Θ)90° (Φ)90° (Θ)90° (Φ)45° (Θ)90° (Φ)45° (Θ)105° (Φ)45° (Θ)105° Dual Band Antenna 3 Frequency (GHz) 2.412 2.447 2.4835 5.15 5.50 5.85 Efficiency (%) 63 65 62 68 65 65 Peak Gain (dBi) 4.32 5.21 4.52 5.82 5.25 5.15 Peak gain at polarization (Φ)120° (Θ)105° (Φ)120° (Θ)105° (Φ)120° (Θ)105° (Φ)90° (Θ)60° (Φ)90° (Θ)60° (Φ)90° (Θ)60° 7 2D Radiation Pattern Dual Band antenna 1 ZX-Plane ZY-Plane XY-Plane 2447MHz 5500MHz Test date: 2023/09/14 Z X Z Y X Y 8 Dual Band antenna 2 ZX-Plane ZY-Plane XY-Plane 2447MHz 5500MHz Test date: 2023/09/14 Z X Z Y X Y 9 Dual Band antenna 3 ZX-Plane ZY-Plane XY-Plane 2447MHz 5500MHz Test date: 2023/09/14 Z X Z Y X Y
Test Report
1 Antenna Test Result of Tooling ACCTON 2 Contents Antenna Description Experimental Setup & Coordinate System Efficiency & Gain 2D Radiation Pattern Results 3 Revised History REV. Date Revised Record Prepared by V01 09/18/2023 EAP111 External T0 Antenna Test report Kent 4 Antenna Location Antenna location( 天線位置 ) Antenna test diagram( 天線測試圖 ) Company name(製造商公司名稱) Address(製造商地址) ACCTON Technology Corporation No.1, Creation Road3, Hsinchu Science Park, Hsinchu 30077,Taiwan, R.O.C Antenna Description item Antenna Model Antenna Application Material Antenna Type Peak Gain 1 98623PRSX001 WiFi Dual Band 1 PCB Dipole 2.4G 4.67dBi 5G 5.08dBi 2 98623PRSX001 WiFi Dual Band 2 PCB Dipole 2.4G 4.2Bi 5G 5.02dBi 3 KG568-T4- 175G17U7S WiFi Dual Band 3 PCB Dipole 2.4G 5.21dBi 5G 5.82dBi 2 1 3 5 Experimental Setup & Coordinate System Chamber name: ETS AMS-8500 Rectangular CTIA-Compliant Test Lab Describe Manufacturer Model No. Serial No. Cal.Date Cal. Due Date Network Analyzer Agilent E5071B MY42402996 Dec.-2022 Dec. -2024 6 Efficiency & Gain Dual Band Antenna 1 Frequency (GHz) 2.412 2.447 2.4835 5.15 5.50 5.85 Efficiency (%) 56.3 56.7 55 45.6 50.5 50.1 Peak Gain (dBi) 4.42 4.67 4.50 4.91 4.92 5.08 Peak gain at polarization (Φ)60° (Θ)90° (Φ)60° (Θ)90° (Φ)60° (Θ)90° (Φ)260° (Θ)90° (Φ)260° (Θ)90° (Φ)260° (Θ)90° Test date: 2023/09/14 ※Φ(Phi) ; Θ(Theta) ※Peak Gain (G) and directivity (D) are linked by the formula G = k x D, where the antenna effective factor k (0 ≤ k ≤ 1) corresponds to the overall losses of the antenna. Accordingly antenna gain can be calculated by the following formula, where represents antenna losses comprising of all ohm and dielectric losses between the input connector and the outer surface of the radome and the loss due to the impedance mismatch. Dual Band Antenna 2 Frequency (GHz) 2.412 2.447 2.4835 5.15 5.50 5.85 Efficiency (%) 51.9 50.3 51.9 43.8 44.5 49.1 Peak Gain (dBi) 3.99 3.97 4.19 5.02 4.96 4.95 Peak gain at polarization (Φ)60° (Θ)90° (Φ)60° (Θ)90° (Φ)60° (Θ)90° (Φ)260° (Θ)90° (Φ)260° (Θ)90° (Φ)260° (Θ)90° Dual Band Antenna 3 Frequency (GHz) 2.412 2.447 2.4835 5.15 5.50 5.85 Efficiency (%) 63 65 62 68 65 65 Peak Gain (dBi) 4.32 5.21 4.52 5.82 5.25 5.15 Peak gain at polarization (Φ)120° (Θ)105° (Φ)120° (Θ)105° (Φ)120° (Θ)105° (Φ)90° (Θ)60° (Φ)90° (Θ)60° (Φ)90° (Θ)60° 7 2D Radiation Pattern Dual Band antenna 1 ZX-Plane ZY-Plane XY-Plane 2447MHz 5500MHz Test date: 2023/09/18 Z X Z Y X Y 8 Dual Band antenna 2 ZX-Plane ZY-Plane XY-Plane 2447MHz 5500MHz Test date: 2023/09/18 Z X Z Y X Y 9 Dual Band antenna 3 ZX-Plane ZY-Plane XY-Plane 2447MHz 5500MHz Test date: 2023/09/18 Z X Z Y X Y
Test Report
Report No.:23B0423R-RFUSV01S-B TEL : +886-3-582-8001 Page Number : 1 of 23 FAX : +886-3-582-8958 Issued Date : Mar. 12, 2024 Report Version : V1.0 Test Report No: 23B0423R-RFUSV01S-B TEST REPORT FCC Rules&Regulations Product Name Wi-Fi 6 Access Point Brand Name Model No. EAP111 (XXXXX), EAP111e (XXXXX) (Please refer to the section 1.1 for detail.) FCC ID HEDEAP111 Applicant ́s Name / Address Accton Technology Corporation No. 1,…
Text truncated - open the document above for the full version.
Contact Information
Applicant
Abby Wei(Manager)
Technical Contact
DEKRA Testing and Certification Co., Ltd.Phoenix Chen
[email protected]886-3-275-7255
No. 26, Hwaya 1st Road., Guishan Distric, Taoyuan, · Taiwan
Non-Technical Contact
DEKRA Testing and Certification Co., Ltd.Vera Hsu
[email protected]886-3-275-7255
Test Firm
DEKRA TESTING AND CERTIFICATION CO., LTD.Warren Lin
Technical Specifications
| # | Rule Parts | Frequency Range | Power Output |
|---|---|---|---|
| 2 | 15C | 2.41 GHz - 2.46 GHz | 250.00 mW |
Other Applications from Accton Technology Corp
HEDEAP115
Jan 27, 2026Wi-Fi 7 AP
Equipment Class
NII - Unlicensed National Information Infrastructure TX
HEDEAP112
Oct 13, 2024Wi-Fi 6 IoT Gateway
Equipment Class
DTS - Digital Transmission System
HEDOAP101E
Oct 24, 2023Outdoor Access Point
Equipment Class
DTS - Digital Transmission System
HEDEAP104
Dec 14, 2022Indoor Wall Plate WiFi 6 Access Point
Equipment Class
DTS - Digital Transmission System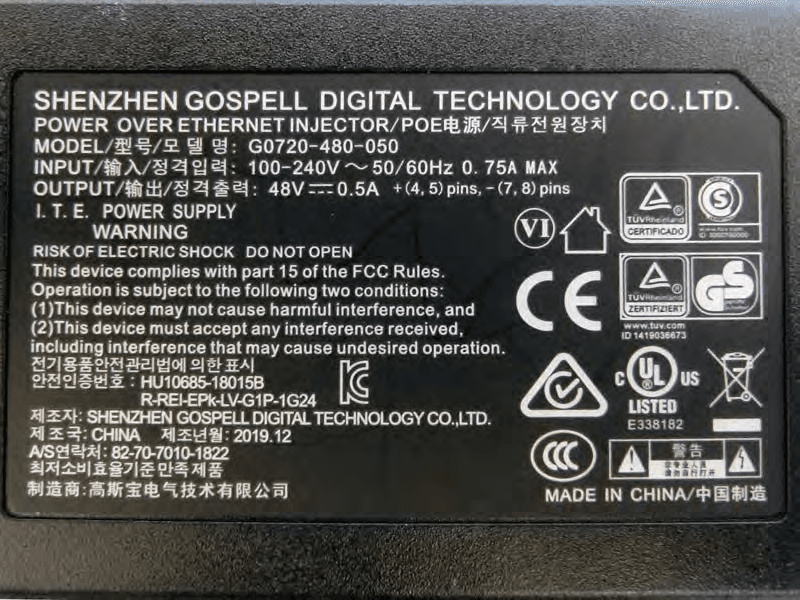
HEDMLTGCN
Nov 09, 202060GHz Access Point
Equipment Class
DXX - Part 15 Low Power Communication Device Transmitter