JFZBT03WIRELESS BLUETOOTH HEADSET
Audio-Technica Corporation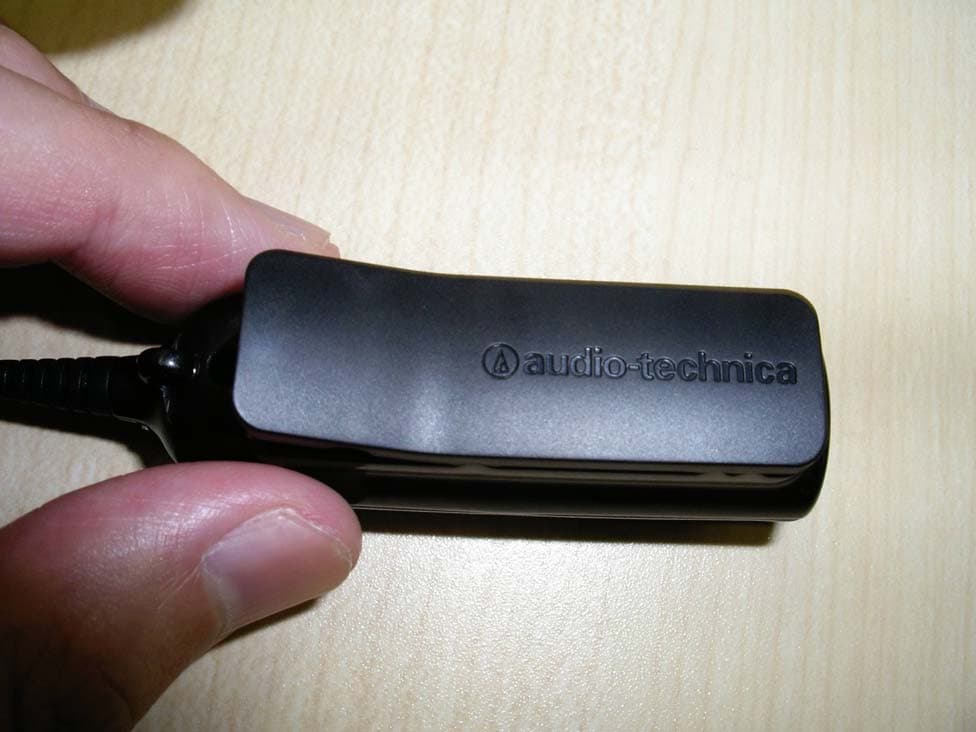
Click to zoom
Application Details
- Equipment Class
- DXX - Part 15 Low Power Communication Device Transmitter
- Date of Grant
- Mar 09, 2011
- Application Purpose
- Original Equipment
- Date of Application
- Mar 09, 2011
- Equipment Note
- WIRELESS BLUETOOTH HEADSET
- Frequency Range
- 2402.00000000 - 2480.00000000
- Company
- Audio-Technica Corporation
- Country
- Japan
Documents & Files
Document Text
Text extracted from the exhibit documents filed with the FCC. Open a document above to read the original.
Users Manual
The ATH-BT03 Stereo headset contains the following devices as user interface: - 2 color LED (Red, Blue) to indicate different status of ATH-BT03 Stereo headset - 8 buttons for software defined functions - 1 reset button to reset ATH-BT03 Stereo Headset in case the headset is in abnormal condition - 1 mini-USB connector for battery charge 1. Turning on or off the headset 1) To turn on the headset, press and hold the Power button until indicator light flashes blue. 2) To turn off the headset, press and hold the Power button for more than 3 seconds. - The indicator light flashes red several times and then the headset is powered off. 2. Paring the headset * You must pair the headset with a Bluetooth mobile phone or other Bluetooth device to use before you can connect it to them. * When pairing the headset, it is recommended to keep the interval in less than 1 meter between two devices. 1) In the power-off condition, press and hold the Pair button for 4 seconds. * The indicator light blinks blue and red alternately. 2) Select the Bluetooth menu on the Bluetooth device you use. 3) Select <Stereo Headset> on that device to use and choose < ATH-BT03 > in the search result. * For more information, refer to the device's user manual. 4) If the PIN code input window appears, enter <0000>. * Pairing is completed and connection between Bluetooth device and headset will be automatically made. Notes * You only need to pair it once. * Check the PIN code of a Bluetooth universal adapter if you use it to connect this headset to other device. If the PIN code is other than <0000>, the connection will not be made. * Bluetooth connection may not be automatically made to some Bluetooth devices, depending on the device. If this happens, refer to 'Connecting the Headset' for help. 3. Using Call Functions 1) Answering a call - Press the MFB button when you receive an incoming call. 2) Ending a call - Press the MFB button during a call. 3) Rejecting a call - Press and hold the MFB button for more than 3 seconds when you receive an incoming call. 4) Dialing a recent call - Press and hold the MFB button for more than 3 seconds. The most recent call number will be dialed. 6) Transferring a call - If you want to switch a call from your mobile phone to the headset, or the headset to your mobile phone, press and hold the MFB button for 3 seconds during a call. * There may be a malfunction of the headset depending on the mobile phone model you use. User Interface 4. Listening to Music 1) Play a music file on the connected Bluetooth device. - Pressing the Play/Pause button on the headset may play the music automatically needless to manipulate the connected Bluetooth device. 2) Button operation - Pause : Press the Play/Pause button during music playback. - Stop : Press the Play/Pause button for 1 second. - Vol. control : Use the Volume control button to adjust the volume. You can adjust the volume level from 1 to 16. - Previous/Next track : Press the Previous/Next track button. - SRS Effect : Press the Power button to turn SRS effect Mode 1 and Mode 2. 5. Making Phone Conversations While Listening to Music. 1) Answering a call while listening to music. - Press the MFB button when you hear a ring from the headset. * The music stops and you can make conversations. 2) Ending a call - Press the MFB button during a call. 6. Charging Operation 1) Plug USB cable into the charging jack on the headset. 2) Headset will be reset automatically by hardware pin. 3) Red LED solid on during charging state. 4) Red LED turned off after full charging. 7. Battery Operation 1) Headset enters low battery state on 3.5V battery 2) Headset indicates low battery state by LED, beep 3) Headset will be turned off automatically on 3.2V battery 8. DFU Operation 1) Plug UART data cable into the charging jack on the headset. 2) Press and hold Reset and Power buttons at once for 3 seconds 3) Headset will be changed to DFU mode with blinking blue LED. 4) CSR DFU wizard tool can make firmware upgrade.
Users Manual
If this product fails to respond (to buttons being pressed, for example), use the Reset button to clear up the problem. Use the steps below to reset this product using the Reset button on the right side of the controller. perform pairing again. A2. Check whether the other device is a compatible device. Check compatibility. A2. Check whether the battery is recharging. The power will not go on during charging. 1. With this product in power off mode, press and hold the POWER/EFFECT button for three seconds or longer to turn the power on. 2. Refer to the instruction manual of the transmitting device to connect the device. “ATH-BT03” appears in the list on the mobile phone screen. When a mobile phone supporting HFP and HSP is used, connect using HFP. Making calls Before making calls on a mobile phone with , confirm the following. ● The on the mobile is enabled. ● This product and the mobile phone have been paired and set to use HSP or HFP. For details on profiles, see “Supported version and profile” (--> page 2). Power/Effect button Receiving phone calls When there is an incoming call, a ring tone is heard from the headphones. Press the Call button to take the call. Press and hold the Call button for two seconds or longer to reject a call. Making a call Use your mobile phone to make a call. If you cannot hear the dial tone from this product, press and hold the Call button for two seconds or longer. Redialing a call Press and hold the Call button for two seconds or longer when the mobile phone is in standby mode. The phone dials last dialed number again. The procedure for redialing may differ depending on mobile phone. Use the top and bottom part of the Operation button to adjust the sound volume. Ending a call Press the Call button on this product to end the call. Set the transmitting device to disconnect connection. After use, press and hold the POWER/EFFECT button for three seconds or longer to turn this product off. After use Microphone Operation button Press the top or bottom of the button to adjust the sound volume Call button Calls during music playback To call during music playback requires not only A2DP, but also HFP or HSP connection. Use the steps described under “Making calls” (on page 10) using HFP or HSP to make a connection from your mobile phone. For details, refer to the instruction manual supplied with your mobile phone. Operate the device (portable player or mobile phone) that plays back music to establish a connection using A2DP with this product. Redialing during music playback Press and hold the Call button for two seconds or longer during music playback to redial. The music pauses while a call is made to the last dialed phone number. Receiving a call during music playback When an incoming call is received, the music pauses and the ring tone is heard from the headphones of this product. 1. Press the Call button on this product to take the call. 2. When the call ends, press the Call button to end it. This product resumes music playback. Call button Operation button Press the top or bottom of the button to adjust the sound volume. Pause music playback. When the ring tone is heard, press the Call button to take the call. If the ring tone cannot be heard during music playback, use the following steps. Cleaning Get into the habit of regularly cleaning your headphones to ensure that they will last for a long time. Do not use alcohol, paint thinners or other solvents for cleaning purposes. Controller To clean, wipe with a dry cloth. Headphones To clean, wipe with a dry cloth. Do not touch the parts used for sound reproduction ( see figure at right) as they are delicate. Damage to the headphones may result. Side view of headphones Sound producing part Cords Wipe away perspiration and any other dirt with a dry cloth after use. Cords that are not cleaned may deteriorate and cause a malfunction. Earpieces Remove a worn earpiece and replace it with a new one as shown in the figure on the right. Be sure to fully insert the earpiece so that it is flush with the base of the earpiece. Size and type of earpieces Unless the earpieces properly fit the ear, you will not hear the bass properly. This product comes with four sizes of silicon earpieces: XS, S, M and L. The medium sized earpieces are attached to the earpieces at shipment. The earpieces must fit the inner ear to provide a high quality music experience. If the medium sized earpieces do not fit, change to a size that does. Cleaning procedure Remove earpieces from the headphones and clean them with a diluted detergent. After cleaning, dry before use. Replacing earpieces CAUTION The earpieces pick up dirt easily and should be regularly cleaned. If the earpieces are not cleaned, the sound producing parts may become contaminated and sound quality will degrade. The earpieces are consumable parts and will deteriorate from storage and use. Earpieces that no longer fit properly or show signs of wear should be replaced at the earliest opportunity. Contact your Audio-Technica dealer for purchasing consumables and other parts. Make sure that a removed earpiece is properly installed on the earpiece before use. Otherwise the earpiece could be lodged inside the ear and would have to be removed to prevent injury or disease. Troubleshooting Guide Q1. The power does not go on A1. Check whether the battery is properly charged. Q2. Pairing is not possible or does not complete A1. Check whether this product and the other device are placed too far apart. --> Place this product and the other device within one meter of each other and A3. Check whether profiles have been set up. --> Refer to the instruction manual of the other device to complete the profile setup on that device. Q3. A connection cannot be made A1. Check whether this product and the other device are powered up. --> If not on, turn them on. A2. Check whether the function on the other device is enabled. --> Enable the function. Q4. No music output A1. Check whether this product and the other …
Text truncated - open the document above for the full version.
Users Manual
WIRELESS STEREO HEADSET ATH-BT03 INSTRUCTIONS This equipment has been tested and found to comply with the limits for a Class B digital device, pursuant to Part 15 of the FCC Rules. These limits are designed to provide reasonable protection against harmful interference in a residential installation. This equipment generates, uses and can radiate radio frequency energy and, if not installed and used in accordance with the instructions, may cause harmful interference to radio or television reception, which can be determined by turning the equipment off and on, the user is encouraged to try to correct the interference by one or more of the following measures: -Reorient or relocate the receiving antenna. -Increase the separation between the equipment and receiver. -Connect the equipment into an outlet on a circuit different from that to which the receiver is connected. -Consult the dealer or an experienced radio/TV technician for help. This device complies with Part 15 of FCC Rules and RSS-Gen of IC Rules. Operation is subject to the following conditions: (1) this device may not cause harmful interference, and (2) this device must accept any interference received, including interference that may cause undesired operation of this device. You are cautioned that any changes or modifications not expressly approved in this manual could void your authority to operate this equipment. Note Information Verifying package contents • XS size x 2 pcs • S size x 2 pcs • M size x 2 pcs • L size x 2 pcs This product is supplied with the M size earpieces on the product. Earpieces (ER-CKM55) Charging USB cable (1.0 m) ATH-BT03 Before you start using the product, make sure that all the following articles have been supplied. If any article is not supplied or is damaged, contact your Audio-Technica dealer. Headset parts ■Headphones Housing External view Earpieces L/R display Bushing 60 cm cord Slider Reset button For details, see page 13. ■Control Operation button Use to listen to music or make a call. Microphone Call button Press to make a call. Clip LED (red) LED (blue) Micro USB jack Pairing button Cap Release the cap from the claw. Power/Effect button Turns this product on and off. Doubles as a 3D BASS effect mode switch*. * For details, see 3D BASS effect function on page 9. Press and hold the Power/Effect button for three seconds or longer. Pairing Use this procedure to pair devices beforehand to allow them to communicate with each other. devices should first be paired before connection. To hear the verifying beep of pairing, put on the headphones before you start the pairing procedure. ※For information on how to put on the headphones, see “Listening to music” on page 7. ※Also read the instruction manuals supplied with the products that are to be connected. 1. Place the devices within one meter of each other. 2. With the product in power off mode, press and hold the Power/Effect button for three seconds or longer. The blue LED will blink three times as the product is turned on. 3. Press and hold the Pairing button for three seconds or longer to activate the pairing mode. A beep sound will be heard to indicate that pairing has started. The red and blue LEDs will blink alternately during pairing. ※Pairing may take a while. 4. Perform pairing on the other device to find the product. The screen of the other device will display a list of found devices. This product will appear as “ATH-BT03” on the screen. 5. Select “ATH-BT03” displayed on the screen of the other device. ※When you are prompted for a pass code on the screen of the other device, enter 0000. When the blue LED changes to slow blinking, pairing is complete. ■Operation during pairing The red and blue LEDs will blink alternately during pairing. Press and hold the Pairing button for three seconds or more. The frequency band used by the product is also used by microwave ovens and other industrial, scientific and medical instruments as well as short range wireless base stations for identifying mobile devices (requires a license) on plant production lines, specified low power base stations (does not require a license) and amateur radio stations (requires a license). 1. Before using this product, make sure there are no short range wireless base stations for identifying mobile devices, specified low power base stations or amateur radio stations nearby. 2. In the unlikely event that use of this product causes serious interference with a short range wireless base station for identifying mobile devices, stop transmitting radio waves immediately. Then contact your Audio-Technica dealer regarding interferences countermeasures (for example, installing partitions, etc.) to prevent interferences. 3. Also contact your Audio-Technica dealer regarding other problems involving serious interference with a short range wireless base station for identifying mobile devices and amateur radio stations or questions regarding such interference. devices Supported version and profile ● Available operating range The product operates up to 10 meters from a transmitting device, however obstacles between the transmitting device and the product or the structure of the building you are in may reduce the operating distance. ● Interference with other devices Microwave ovens, digital cordless phones, devices using wireless LAN, devices and other devices using the same 2.4 GHz frequency band may cause dropouts. Similarly, since this product will also interfere with such devices, it is essential that devices that are likely to interfere with each other are kept apart. ● Note that Audio-Technica accepts no liability whatsoever for leakage of data during transmission. This product supports the following version and profile. ■Communication system: Ver. 2.1 + EDR ■Compatible Profiles: • A2DP (Advanced Audio Distribution Profile): Sends and receives stereo quality audio data • AVRCP (Audio Video Remote Control Profile): Play, stop, skip, volume control and other AV device controls • HSP (Headset P…
Text truncated - open the document above for the full version.
ID Label/Location Info
S=1/1 S=3/1 MODEL:ATH-BT03 FCC IC ID MADE IN CHINA ID:JFZBT03 :1752B-BT03 3.7V 25.5mA MODEL:ATH-BT03 FCC IC ID MADE IN CHINA ID:JFZBT03 :1752B-BT03 3.7V 25.5mA MODEL:ATH-BT03 FCC IC ID MADE IN CHINA ID:JFZBT03 :1752B-BT03 3.7V 25.5mA
Test Report
FCC PART 15.249 TEST REPORT UNLICENSED INTENTIONAL RADIATOR Applicant AUDIO TECHNICA CORPORATION Address 2206 NARUSE, MACHIDA TOKYO 194 JAPAN FCC ID JFZBT03 IC 1752B-BT03 MODEL ATH-BT03 Product Description WIRELESS BLUETOOTH HEADSET Date Sample Received 11/1/2010 Date Tested 1/25/2011 Tested By Joe Scoglio Approved By Richard Block Report Number 2508AT10TestReport.doc Test Results PASS FAIL THE ATTACHED REPORT SHALL NOT BE REPRODUCED EXCEPT IN FULL WITHOUT THE WRITTEN APPROVAL OF TIMCO ENGINEERING, INC. 849 NW State Road 45 Newberry, FL 32669 USA Ph: 888.472.2424 or 352.472.5500 Fax: 352.472.2030 Email: [email protected] Website: www.timcoengr.com Certificate # 0955-01 APPLICANT: AUDIO TECHNICA CORPORATION FCC ID: JFZBT03 IC: 1752B-BT03 REPORT #: A\AudioTechnica_JFZ\2508AT10\2508AT10TestReport.doc Page 2 of 16 Mdea 9.20.2007 TABLE OF CONTENTS GENERAL REMARKS ........................................................................................................................... 3 GENERAL INFORMATION.................................................................................................................... 4 EMC EQUIPMENT LIST ....................................................................................................................... 5 TEST PROCEDURES ........................................................................................................................... 6 RADIATION INTERFERENCE ............................................................................................................... 7 OCCUPIED BANDWIDTH..................................................................................................................... 8 BAND EDGE COMPLIANCE ................................................................................................................. 9 DUTY CYCLE ..................................................................................................................................... 15 POWER LINE CONDUCTED INTERFERENCE ................................................................................... 16 APPLICANT: AUDIO TECHNICA CORPORATION FCC ID: JFZBT03 IC: 1752B-BT03 REPORT #: A\AudioTechnica_JFZ\2508AT10\2508AT10TestReport.doc Page 3 of 16 Mdea 9.20.2007 GENERAL REMARKS The attached report shall not be reproduced except in full without the written permission of Timco Engineering Inc. Summary The device under test does: fulfill the general approval requirements as identified in this test report not fulfill the general approval requirements as identified in this test report Attestations This equipment has been tested in accordance with the standards identified in this test report. To the best of my knowledge and belief, these tests were performed using the measurement procedures described in this report. All instrumentation and accessories used to test products for compliance to the indicated standards are calibrated regularly in accordance with ISO 17025 requirements. Certificate # 0955-01 I attest that the necessary measurements were made, under my supervision, at: Timco Engineering Inc. 849 NW State Road 45 Newberry, Fl 32669 Authorized Signatory Name: Richard Block Compliance Engineer Date: 3/3/2011 APPLICANT: AUDIO TECHNICA CORPORATION FCC ID: JFZBT03 IC: 1752B-BT03 REPORT #: A\AudioTechnica_JFZ\2508AT10\2508AT10TestReport.doc Page 4 of 16 Mdea 9.20.2007 GENERAL INFORMATION DUT Specification The test results relate only to the items tested. Applicable Standard Part 15.249, RSS-210 DUT Description WIRELESS BLUETOOTH HEADSET FCC ID JFZBT03 IC 1752B-BT03 Model Number ATH-BT03 Operating Frequency TX: 2.402-2.480 GHz RX: Same Modulations FHSS DUT Power Source 110–120Vac/50– 60Hz DC Power Battery Operated Exclusively Test Item Prototype Pre-Production Production Type of Equipment Fixed Mobile Portable Antenna Connector FCC Rules require that the antenna connector be unique. Test Facility Timco Engineering Inc. located at 849 NW State Road 45 Newberry, FL 32669 USA. Test Conditions Temperature: 26ºC Relative humidity: 50% Test Exercise The DUT was placed in continuous transmit mode of operation. Test Supporting Equipment Supporting Device Manufacturer Model / FCC ID Serial Number N/A APPLICANT: AUDIO TECHNICA CORPORATION FCC ID: JFZBT03 IC: 1752B-BT03 REPORT #: A\AudioTechnica_JFZ\2508AT10\2508AT10TestReport.doc Page 5 of 16 Mdea 9.20.2007 EMC EQUIPMENT LIST Device Manufacturer Model Serial Number Cal/Char Date Due Date 3-Meter Semi- Anechoic Chamber Panashield N/A N/A Listed 3/10/10 3/10/12 AC Voltmeter HP 400FL 2213A14499 CAL 3/23/09 3/23/11 Antenna: Dipole Kit Electro- Metrics TDA-30/1-4 153 CHAR 6/10/09 6/10/11 Frequency Counter HP 5385A 3242A07460 CAL 5/26/09 5/26/11 Hygro- Thermometer Extech 445703 0602 CAL 1/30/09 1/30/11 Modulation Analyzer HP 8901A 3435A06868 CAL 5/26/09 5/26/11 Digital Multimeter Fluke FLUKE-77-3 79510405 CAL 5/18/09 5/18/11 Analyzer Tan Tower Preamplifier HP 8449B-H02 3008A00372 CAL 11/21/09 11/21/11 Analyzer Tan Tower Quasi- Peak Adapter HP 85650A 3303A01690 CAL 11/22/09 11/22/11 Analyzer Tan Tower RF Preselector HP 85685A 3221A01400 CAL 11/21/09 11/21/11 Analyzer Tan Tower Spectrum Analyzer HP 8566B Opt 462 3138A07786 3144A20661 CAL 11/24/09 11/24/11 Temperature Chamber Tenney Engineering TTRC 11717-7 CHAR 4/25/10 4/25/12 APPLICANT: AUDIO TECHNICA CORPORATION FCC ID: JFZBT03 IC: 1752B-BT03 REPORT: A\AudioTechnica_JFZ\2508AT10\2508AT10TestReport.doc Page 6 of 16 Mdea 9.20.2007 TEST PROCEDURES Radiation Interference: ANSI C63.4-2003 using a spectrum analyzer, a preselector, a quasi- peak adapter, and an appropriate antenna. The analyzer was calibrated in dB above a microvolt at the output of the antenna. The resolution bandwidth was 100 kHz with an appropriate sweep speed and the video bandwidth was 300 kHz up to 1 GHz and 1 MHz with a video BW of 3 MHz above 1 GHz. When an emission was found, the table was rotated to produce the maximum signal strength. The antenna was placed in both the horizontal…
Text truncated - open the document above for the full version.
Contact Information
Applicant
Fumio Kamimura(General Manager, Engineering Planning Division)
Test Firm
Timco Engineering, Inc.Bruno Clavier
Technical Specifications
| # | Rule Parts | Frequency Range | Power Output |
|---|---|---|---|
| 1 | 15C | 2.40 GHz - 2.48 GHz | - |
Other Applications from Audio-Technica Corporation
JFZDT3207DF2
Apr 06, 2026DESK STAND TRANSMITTER
Equipment Class
DWM - Part 15 Wireless MicrophoneJFZT210CS
Jul 17, 2024UniPak Transmitter
Equipment Class
TLD - Licensed LPAS DeviceJFZT220CS
Jul 17, 2024Handheld Transmitter
Equipment Class
TLD - Licensed LPAS DeviceJFZCKS50TW2R
Jun 10, 2024Wireless Headphones
Equipment Class
DTS - Digital Transmission SystemJFZCKS30TWPR
Apr 02, 2024Wireless Headphones
Equipment Class
DSS - Part 15 Spread Spectrum Transmitter