JFZT1000DWireless Microphone
Audio-Technica Corporation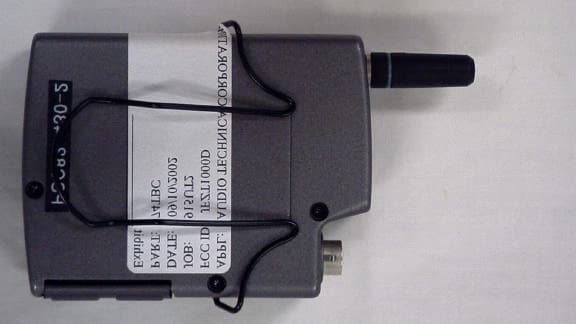
Click to zoom
Application Details
- Equipment Class
- TBT - Licensed Broadcast Transmitter Worn on Body
- Date of Grant
- Nov 18, 2002
- Application Purpose
- Original Equipment
- Date of Application
- Nov 18, 2002
- Equipment Note
- Wireless Microphone
- Frequency Range
- 655.00000000 - 681.00000000
- Company
- Audio-Technica Corporation
- Country
- Japan
Documents & Files
Document Text
Text extracted from the exhibit documents filed with the FCC. Open a document above to read the original.
Users Manual
AUDIO TECHNICA MODEL AEW-5200, AEW-4100 SERIES UHF WIRELESS SYSTEM USER INFORMATION. INTRODUCTION Thank you for purchasing the AEW-5200, AEW-4100 series wireless system. It is our hope that the system will bring you years of trouble free pleasure and performance. Please follow the information contained in this manual closely as it will assist you in using your equipment effectively. PART1. REGULATORY REQUIREMENTS. FCC PART 15 COMPLIANCE STATEMENT CANADA RSS-210 COMPLIANCE STATEMENT “This device complies with Part 15 of the FCC rules. Operation is subject to the condition that this device does not cause harmful interference” “This device complies with INDUSTRY CANADA R.S.S. 210, en confomite avec IC: RSS-210/CNR210. Operation is subject to the following conditions: (1) This device may not cause harmful interference and (2) This device must accept any interference received, including interference which may cause undesired operation.” Please note that your AEW-5200, AEW-4100 systems operates in a frequency band in a way which may make its use subject to certain FCC and other regulatory agency restrictions and licensing requirements. For further information, Please contact your local office of the FCC as applicable. NOTE: THE MANUFACTURER IS NOT RESPONSIBLE FOR ANY RADIO OR TV INTERFERENCE CAUSED BY UNAUTHORIZED MODIFICATIONS TO THIS EQUIPMENT. SUCH MODIFICATIONS COULD VOID THE USER'S AUTHORITY TO OPERATE THE EQUIPMENT. PART 2. USING THE AEW-T1000 BELTPACK TRANSMITTER The beltpack transmitter operates on 2 “AA” batteries. Please make sure that your batteries are fresh. We recommend that you use Alkaline batteries and that you avoid using NiCad if possible. Open the battery door by slide door lock towards arrow direction and lift door. Insert two batteries into the battery compartment and close the battery door Slides the LCD set up buttons cover down to bottom Push and hold the power switch and turn the AEW-T1000 on Push the set button once Using up or down arrow buttons and scrolls the menu until frequency menu appeared. If current frequency setup appeared on the LCD is not the same as corresponding receiver frequency, push set button once. Push down or up arrow button and set frequency to the corresponding frequency as set on receiver. Push and hold set button until word “Stored” displayed in a while. Push up or down arrow button and scrolls the menu until input menu (MIC or INSTRUMENT) appeared. If current input setup appeared on LCD screen is not correct, push set button once Using up or down arrow button to select input. Push and hold set button until word “Stored” displayed in a while. Connect your microphone or guitar cable to the connector on the top of the transmitter. Confirm that the receiver is receiving RF and the audio is passing through the receiver. Push up or down arrow button and scrolls the menu until “ESCAPE” appeared. Push the set button once to return default menu. You are now ready to use the system. PART 3. USING THE AEW-T5000SERIES HANDHELD TRANSMITTER AEW-T5000 transmitter family is as follows: AEW-T5400 AEW-T3300 AEW-T6100 AEW-T4100 The handheld transmitter operates on 2 “AA” batteries. Please make sure that your batteries are fresh. We recommend that you use Alkaline batteries and that you avoid using NiCad if possible. Hold the bottom grip and turn the top grip counter clockwise until bottom grip free to slide. Slide the bottom grip, insert two batteries into the battery compartment and slide the battery compartment back into place. To change the frequency of operation, push and hold the power /mute button located on bottom of the transmitter to turn it on. Unscrew the battery cover and pull the cover back. Push the set button once Using up or down arrow button and scrolls the menu until frequency menu appeared.
Cover Letter(s)
Audio-Technica U.S., Inc. 1221 Commerce Drive Phone: 330-686-2600 [email protected] Stow, OH 44224-1760 Fax: 330-688-3752 August 26, 2002 Equipment Authorization Division Office of Engineering and Technology Federal Communications Commission 7435 Oakland Mills Road Columbia, MD 21046 Ref: FCC ID: JFZT1000D Request for Confidentiality Dear Sirs: With regard to the referenced application, Audio Technica, is requesting confidentiality of certain sections of the accompanying documents. The documents for which Audio Technica is requesting confidentiality are: Schematic for AEW-T1000D wireless transmitter Block diagram for AEW-T1000D wireless transmitter This request is made under the provisions of Section 0.457(d) of the Commission’s Rules, and Section 552(b)(4) of the Freedom of Information Act. The material for which confidentiality is requested falls within the scope of Section 552(b)(4) as trade secrets and includes material covered by Section 0.459 of the Commission’s Rules. Sincerely, Jacquelynn Green Vice President R&D Audio-Technica U.S., Inc.
Operational Description
APPENDIX CIRCUIT TO SUPPRESS SPURIOUS RADIATION AND CONTROL MODULATION AUDIO CIRCUIT AF signal obtained from the connector CN3 is feed in to the IC1 and amplified by the internal AF-AMP. Amplified AF signal is then feed in to Compander circuit that consists with the IC101 op-amp and the compander IC3, compressed to 2 to 1 ratio. Compressed signal is then Pre-Emphasized by the IC1 internal AF-AMP. The 32.15KHz pilot tone signal produced by the Tone-Generator circuit in the IC1 is superposed by control signal produced by the IC201 micro controller. Above two signals are adjusted appropriately by the VR51 (32.15KHz) and the VR1 (AF signal), then mixed and send to the VCO301. The Q1 detect peak signal that applied to the CN3 and dimmer the power LED D207 MODULATOR CIRCUIT The modulator circuit is a direct FM type built around the VCO, VCO301. The modulated output from the VCO is sent to the RF final amplifier, which boosts the output to a nominal level of .002W ERP (Low) or .005W ERP (High). RF PRE-AMPLIFIER & FINAL AMPLIFIER RF signal out from the VCO301 is feed in to the two stages RF amplifier consisted by tow 2SC5226 transistors, Q351 and Q354. Q352 is switch for the RF amp first stage Q351. Q353 is switch for the RF amp second stage Q351 and it controls RF output level to 10mW(Low) or 35mW(Hi) that sets individually by adjust power level control trimmers, VR351 (35mW) and VR352 (10mW). The output filter comprised of L356 to 360 and C357 to 378 suppresses the output harmonics RF signal passed output filter is then feed in to the antenna connector C352 and then transmitted to the air by the external antenna connected to the C352. CIRCUIT TO SUPPRESS SPURIOUS RADIATION & CONTROL MODULATION FCC ID: JFZT1000D APPENDIX APPENDIX CIRCUITS AND DEVICES TO STABILIZE FREQUENCY Operating frequency is determined and stabilized by a PLL circuit using a 9MHz crystal- Controlled reference oscillator. CIRCUIT AND DEVICES TO STABILZE FREQUENCY FCCID: JFZ T1000D APPENDIX
Parts List/Tune Up Info
Subsection 2.983(d)(9): Factory Tune-up Procedure Test Equipment 1. BNC-P to MM121454 Coaxial RF cable Audio Technica custom RF cable 2. DC Power Supply Leader LPS-160-2 3. Audio Signal Generator Leader LAG-126S 4. Modulation Meter (FM liner detector) Anritsu MS61A 5. Spectrum Analyzer Advantest R3361D 6. RF Power Meter Anritsu MS 4803A 7. RF Power Sensor Anritsu MA4701A 8. Oscilloscope Tektronix 475A 9. DC Volt Meter Fluke 79 10. AC milli Volt Meter Leader LMV-1817 Adjustment of T1000 circuit board 1. Adjusting the frequency: 1-1. Measurement equipment and T1000D set up a. Spectrum Analyzer Set up - Center frequency: 668.00 MHz - Frequency span: 200kHz - Counter mode: ON b. T1000D LCD Setting - Frequency: 668.000MHz - RF-POWER: HI - GAIN: -6dB 1-2. Frequency set up: a. Adjust the T1000D carrier frequency by rotating the TC201 on the PCB of T1000D and set the main carrier peak to the spectrum analyzer’s center frequency. 2. RF Power Adjustment 2-1. Measurement equipment and T1000D set up a. RF Power meter set up - Measurement range: Auto-mode b. T1000D Setting - Frequency: 668.000MHz - RF-POWER HI & LOW - GAIN -6dB 2-2. T1000D adjustment a. Adjust the RF output power by rotating the VR351 on PCB of T1000D and set VR351 to have RF power meter at .005 W ERP b. Adjust the LCD POWER of T1000D to LOW. c. Adjust and set the VR352 to have RF power meter at .002 W ERP 3. Deviation adjustment 3-1. Measurement equipment and T1000D set up a. Deviation Meter set up - Sensitivity: P-P/2 - Measurement Range: 100kHz - HPF: 50Hz - LPF: 20kHz - Measurement Frequency: 668.000MHz b. Audio Signal (Apply to CN3) - Frequency: 1kHz - Signal level: +4dBV (CN2 terminal voltage) c. T1000D setting - Frequency: 668.000MHz - RF-POWER: HI - GAIN: -6dB 3-2. Adjusting T1000D a. Adjust and set the VR3 on PCB of T1000D to have deviation meter to set +/-40kHz. 4. Tone Deviation Adjustment 4-1. Measurement equipment and T1000D set up a. Setting of Deviation Meter - Sense: P-P/2 - Measurement range: 3kHz - HPF: 4kHz - LPF: 120kHz - Measurement frequency: 668.000MHz b. T1000D Setting - Frequency: 668.000MHz - RF-POWER: HI - GAIN: -6dB 4-2. T1000D Adjustment a. Adjust the tone signal modulation level by rotating the VR51 on PCB of T1000D and set the VR51 to have the deviation meter to set +/-2kHz.
Contact Information
Applicant
Fumio Kamimura(General Manager, Engineering Planning Division)
Test Firm
Timco Engineering, Inc.S Sanders
Technical Specifications
| # | Rule Parts | Frequency Range | Power Output | Emission | Tolerance |
|---|---|---|---|---|---|
| 2 | 74.861 | 655 MHz - 681 MHz | 2.00 mW | 80K0F3E | 50 ppm |
Other Applications from Audio-Technica Corporation
JFZDT3207DF2
Apr 06, 2026DESK STAND TRANSMITTER
Equipment Class
DWM - Part 15 Wireless MicrophoneJFZT210CS
Jul 17, 2024UniPak Transmitter
Equipment Class
TLD - Licensed LPAS DeviceJFZT220CS
Jul 17, 2024Handheld Transmitter
Equipment Class
TLD - Licensed LPAS DeviceJFZCKS50TW2R
Jun 10, 2024Wireless Headphones
Equipment Class
DTS - Digital Transmission SystemJFZCKS30TWPR
Apr 02, 2024Wireless Headphones
Equipment Class
DSS - Part 15 Spread Spectrum Transmitter