O5XHP-420MPDP Monitor
Harsper Co., Ltd.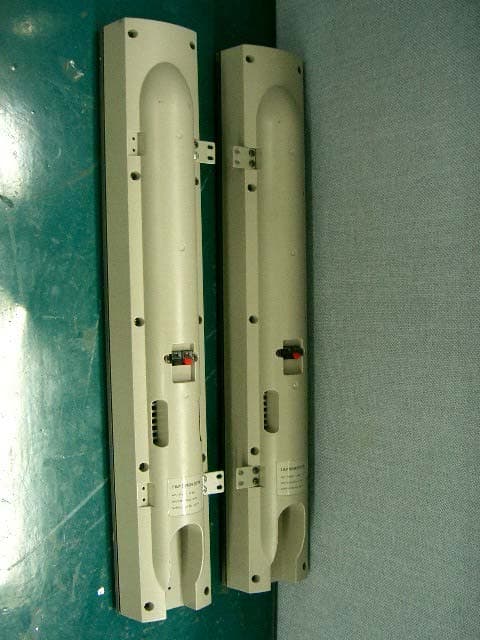
Click to zoom
Application Details
- Equipment Class
- JBP - Part 15 Class B Computing Device Peripheral
- Date of Grant
- Jul 25, 2004
- Application Purpose
- Original Equipment
- Date of Application
- Jul 25, 2004
- Equipment Note
- PDP Monitor
- Company
- Harsper Co., Ltd.
- Country
- South Korea
Documents & Files
Document Text
Text extracted from the exhibit documents filed with the FCC. Open a document above to read the original.
Users Manual
NTSC z z z z ’ Contents 1 OWNER'S MANUAL Important Safety Information ................................................................................................................ 2 Overview Of Your New PDP.................................................................................................................. 8 OSD Button ........................................................................................................................................................ 8 OSD Key Function .............................................................................................................................................. 8 Connecting To External Equipment .................................................................................................................. 9 RS-232C Configurations .................................................................................................................................... 10 Accessories ............................................................................................................................................ 12 Features Of The Remote Control .......................................................................................................... 13 Loading The Batteries ........................................................................................................................................ 14 Reception Range Of Remote Control .............................................................................................................. 14 Monitor Installation ................................................................................................................................15 Wall Mount (optional) Installation ...................................................................................................................... 15 Table Stand (optional) Installation ...................................................................................................................... 19 Speaker Installation ............................................................................................................................................ 21 Optional Extras........................................................................................................................................ 25 Watching TV ............................................................................................................................................ 26 To watch TV (When the Interface board is installed) ...................................................................................... 26 Watching VCR ........................................................................................................................................ 27 To watch VCR (When the Interface board is installed) .................................................................................... 27 Watching DVD (Interlace) ...................................................................................................................... 28 How to connect (When the Interface board is installed) .................................................................................. 28 How to use (When the Interface board is installed) .......................................................................................... 28 Watching DVD (Progressive) ................................................................................................................ 29 How to use (When the Interface board is installed) .......................................................................................... 29 Connecting The PC .............................................................................................................................. 30 Displayable Monitor Specification........................................................................................................ 31 OSD Structure.......................................................................................................................................... 32 PICTURE (TV&VIDEO)............................................................................................................................ 33 PICTURE (PC).......................................................................................................................................... 35 SOUND (TV&VIDEO+PC) ...................................................................................................................... 37 MISC (TV&VIDEO+PC) .......................................................................................................................... 38 TIME ........................................................................................................................................................ 40 TV SET-UP.............................................................................................................................................. 41 PIP (PC).................................................................................................................................................... 42 Hot Key Function By Remote Control.................................................................................................. 43 Specification............................................................................................................................................ 46 Troubleshooting...................................................................................................................................... 48 Waranty Card .......................................................................................................................................... 49 Important Safety Information 2 OWNER'S MANUAL CAUTION - TO PREVENT DAMAGE WHICH MAY RESULT IN FIRE OR SHOCK HAZARD. - DO NOT EXPOSE THIS APPLIANCE TO RAIN OR MOISTURE. - SHOCK HAZARD DO NOT OPEN. CAUTION These servicing in…
Text truncated - open the document above for the full version.
Users Manual
3 OWNER'S MANUAL Important Safety Information Always be careful when using your PDP. To reduce the risk of fire, electrical shock, and other injuries, keep these safety precautions in mind when installing, using, and maintaining your machine. 1. Read these instructions. 2. Keep these instructions. 3. Heed all warnings. 4. Follow all instructions. 5. Do not use this apparatus near water. 6. Clean only with a dry cloth. 7. Do not block any of the ventilation openings. Install in accordance with the manufacturer's instructions. 8. Do not install near any heat sources such as radiators, heat registers, stoves, or other apparatus (including amplifiers) that produce heat. 9. Do not defeat the safety purpose of the polarized or grounding type plug. A polarized plug has two blades with one wider than the other. A grounding type plug has two blades and a third grounding prong. The wide blade or the third prong is provided for your safety. When the provided plug does not fit into your outlet, consult an electrician for replacement of the obsolete outlet. 10. Protect the power cord from bong walked on or pinched particularly at plugs, convenience receptacles, and the point where they exit from the apparatus. 11.Only use the attachments/accessories specified by the manufacturer. 12. Use only with a cart, stand, tripod, bracket, or table specified by the manufacturer, or sold with the apparatus. When a cart is used, use caution when moving the cart/apparatus combination to avoid injury from tip-over. 13. Unplug this apparatus during lightning storms or when unused for long periods of time. 14. Refer all servicing to qualified service personnel. Servicing is required when the apparatus has been damaged in any way, such as power supply cord or plug is damaged, liquid has been spilled or objects have fallen into the apparatus, the apparatus has been exposed to rain or moisture, does not operate normally, or has been dropped. Important Safety Information 4 OWNER'S MANUAL Follow all operating and use instructions. Do not use the Monitor where contact with or immersion in water is a possibility, such as near bath tubs, sinks, washing machines, swimming pools, etc. This plasma display is designed to be mounted horizontally (wide viewing). Any inquiry regarding its vertical position should be forwarded to the manufacture directly. When installing the Monitor on a table, be careful not to place the edge of its stand. - This may cause the Monitor to fall, causing serious injury to a child or adult, and serious damage to the Monitor. Unplug the Monitor from the wall outlet before cleaning. Use a damp cloth; do not use liquid or aerosol cleaners. Never add any attachments and/or equipment without approval of the manufacturer. Such additions can increase the risk of fire, electric shock, or other personal injury. 5 OWNER'S MANUAL Provide ventilation for the Monitor. The unit is designed with slots in the cabinet for ventilation to protect it from overheating. Do not block these openings with any object, and do not place the Monitor on a bed, sofa, rug or other similar surface. Do not place it near a radiator or heat register. If you place the Monitor on a rack or bookcase, ensure that there is adequate ventilation and that you've followed the manufacturer's instructions for mounting. Use only the accessory cord designed for this product to prevent shock. The power supply voltage rating of this product is AC100-240V, the power cord attached conforms to the following power supply voltage. Use only the power cord designated by our dealer to ensure Safety and EMC. When it is used by other power supply voltage, power cable must be changed. Consult your product dealer. Use only a grounded or polarized outlet. For your safety, this Monitor is equipped with a polarized alternating current line plug having one blade wider than the other. This plug will fit into the power outlet only one way. If you are unable to insert the plug fully into the outlet, try reversing the plug. If the plug still does not fit, contact your electrician to replace your outlet. Avoid overhead power lines. An outside antenna system should not be placed in the vicinity of overhead power lines or other electric light or power circuits or where it can fall into such power lines or circuits. When installing an outside antenna system, be extremely careful to keep from touching the power lines or circuits. Contact with such lines can be fatal. Unplug the Monitor from the wall outlet and disconnect the antenna or cable system during a lightning storm or when left unattended and unused for long periods of time. This will prevent damage to the unit due to lightning and power-line surges. Protect the power cord. Power supply cords should be routed so that they won't be walked on or pinched by objects placed on or against them. Pay particular attention to cords at plugs, convenience receptacles, and the point where they exit from the unit. Important Safety Information Important Safety Information 6 OWNER'S MANUAL Ground outdoor antennas. If an outside antenna or cable system is connected to the Monitor, be sure the antenna or cable system is grounded so as to provide some protection against voltage surges and built-up static charges. Section 810 of the National Electrical Code, ANSI/NFPA No.70-1984, provides information about proper grounding of the mast and supporting structure, grounding of the lead-in wire to an antenna discharge unit, size of grounding conductors, location of antenna discharge unit, connection to grounding electrodes, and requirements for the grounding electrode. Do not overload the wall outlet or extension cords. Overloading can result in fire or electric shock. Do not insert anything through the openings in the unit, where they can touch dangerous voltage points or damage parts. Never spill liquid of any kind on the Monitor. Bend antenna cable between inside and outside building to prevent rain from flowing in. - This may cause water d…
Text truncated - open the document above for the full version.
Users Manual
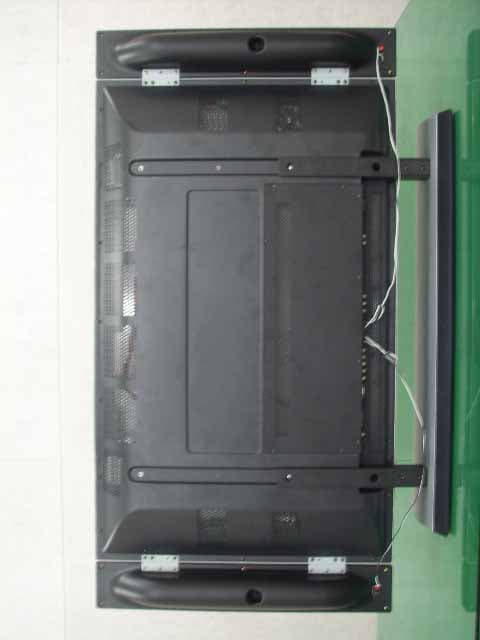
Monitor Installation 23 OWNER'S MANUAL 50" Speaker (Optional) Installion • Match red to red, black to black of Speaker / TV. • Always lift the monitor itself (not the speakers) when handling or moving the monitor after speakers have been installed. Assemble the monitor to speaker with using the supporter hanger and bolt. As shown above A, assemble the a and b of supporter hanger to the monitor with using the bolt(M4x8). Assemble the c, d and e to the speaker with using the bolt(4x16). If the bolts are tightened too much, the product could be damaged. Monitor Installation 24 OWNER'S MANUAL Connecting Speakers to the Monitor using the speakers wires provided 2-Supporter Hanger (Mount speakers to Monitor) 6-4 X 16 Bolts (Attach Supporter Hanger to speakers) 8-M4 X 8 Bolts (Attach Supporter Hanger to monitor) 2-Speaker Wires 2-Speaker Wire Holders (for arranging the speaker wires) Accessories R L • Be sure monitor power is turned off before making any connections. Place the speakers in the position you want. Install the speaker wires on the monitor and speaker. Be sure to connect the positive "+" wire to the "+" input and the negative "-" wire to the "-" input. Connect left monitor input to left speaker and right monitor input to right speaker. Any extra speaker wire length remaining can be bunched into the wire holders provided. (Caution: Once installed, the speaker wire holders lock into position and can't be removed.) Optional Extras 25 OWNER'S MANUAL Table Stand (Type United) Table Stand (Type Separated) Fixed Wall Mount BracketSide Mount Speaker Watching TV 26 OWNER'S MANUAL 1 2 3 4 Connect the Antenna or CATV signal source to TV input. Press TV/VIDEO button on the Remote Control and select TV on OSD. Use CH+, CH- button or numeric button to change TV channel for your channel selection. You can watch the previous channel by pressing PRE CH. Button on Remote Control. Also, you can tune to cable service provided channels using the cable box. For further information regarding cable TV service, contact cable TV service provider(s). To watch TV (When the Interface board is installed.) Watching VCR 27 OWNER'S MANUAL Press TV/ Video button on the Remote Control and select Video Sources. (When connection with S-Video, select the S-Video.) Insert a video tape into the VCR and press the PLAY button on the VCR. 1 2 •No Signal "No Signal" on display will disappear after 5 minutes, then the TV will go in to Sleep Mode (dark). < To avoid picture noise (interference), leave an adequate distance (over 3m) between the VCR and monitor. > When connecting the Plasma Monitor with external equipment, match the colors of connecting ports (Video - yellow, Audio(L) - white, Audio(R) - red). If you have a mono VCR, connect the audio cable from the VCR to the AUDIO(L/MONO) input of the Plasma Monitor. If you connect an S-VIDEO VCR to the S-VIDEO input, the picture quality is improved; compared to connecting a regular VCR to the Video input. Avoid having a fixed image remain on the screen for a long period of time. Typically a frozen still picture from a VCR 4:3 picture format or if a CH label is present. To watch VCR (When the Interface board is installed.) Watching DVD (Interlace) 28 OWNER'S MANUAL Connect DVD video inputs to Y, PB, PR of COMPONENT (480i) (DVD INPUT) and audio inputs to Audio sockets of AV INPUT. How to connect (When the Interface board is installed.) Component Input ports You can get better picture quality if you connect DVD player with component input ports as below. Video output ports of DVD player Y Y Y Y Pb B-Y Cb P B Pr R-Y Cr P R Y P B P R Component ports of the Monitor Turn on the DVD player. Press TV / Video button on the remote control of the monitor to select Component. 1 2 How to use (When the Interface board is installed.) Watching DVD (Progressive) 29 OWNER'S MANUAL Turn on the DVD player or Settop Box. Press TV / Video button on the remote control of the monitor to select Component. (Select "DTV YPbPr") 1 2 How to use (When the Interface board is installed.) •Connect normal 480i, DVD source, through normal YPbPr of Componect signal only. •No Signal "No Signal" on display will disappear after 5 minutes, then the TV will go in to Sleep Mode (dark). •Normal DVD source is based on 480i, which should be through normal YPbPr of Component signal. DVD/HDTV Watching through RGB Input for Progressive(480p, 720p, 1080i) mode(YPbPr) Connecting The PC 30 OWNER'S MANUAL You can enjoy vivid picture and sound with connecting a PC with the Monitor. Connecting a PC to the PDP Connect a PC (15pin) cable between the Video Output jack on the PC and the RGB (480p, 720p, 1018i) in (15p D-SUB) on the PDP. Pin Configuration 15Pin Signal Cable (based on mate pin) DVI Cable To see the PC through DVI, Select "Digital RGB" in your OSD. 1 2 3 4 5 6 7 8 9 10 11 12 13 14 15 Red (R) Green (G) Blue (B) Grounding Grounding (DDC) Red (R) Grounding Green (G) Grounding Blue (B) Grounding Reserved Sync Grounding Grounding Data (DDC) Horizontal sync. Vertical sync. Clock (DDC) Pin No.Description Displayable Monitor Specification 31 OWNER'S MANUAL 31.468 37.861 31.469 37.927 31.469 35.000 37.861 37.500 43.269 45.913 53.011 64.062 35.156 37.879 48.077 46.875 53.674 56.000 64.016 49.725 31.468 48.363 56.476 60.023 64.000 48.387 70.09 85.08 70.08 85.03 59.94 66.66 72.80 75.00 85.00 90.03 100.04 120.00 56.25 60.31 72.18 75.00 85.06 90.00 100.00 74.55 60.05 60.00 70.06 75.02 60.00 60.00 ResolutionHorizontal Frequency (KHz)Vertical Frequency (Hz) •Synchronization input form : separate •852 x 480 : 42" Native Resolution Horizontal Polarity is Positive(+) Vertical Polarity is Negative(-) • 1366 x 768 : 50" Native Resolution Horizontal Polarity is Positive(+) Vertical Polarity is Negative(-) •The PDP recognizes 640x480@60Hz signal as 480p DTV signal. (They has almost same frequencies.) So the signal is expanded, please try other signals like 640x480@75Hz. •The PDP operates abnormally if a non-standard video format is selected. •D…
Text truncated - open the document above for the full version.
Block Diagram
http://www.Harsper.co.kr U101 PW166B-10T MAIN Scaler FlASH Memory CN2 Board to Board Connector CN1 Board to Board Connector MAPLE MAPLE - - MAIN MAIN U531 THC63 LVDS 823 Tx LVDS out 1. HP-4200M System Block RGB24bit LVDS Front Key Board SPK PANEL Flash Memory SRAM U103 SDA5550M TELETEXT Controllert U61 MCU U302 PW1230 DEINTERLACE U202 AD9883 ADC U401 DIGITAL INPUT VIDEO DECODER U301 VPC-3230D VIDEO DECODER U3 MSP3450 Sound Controller U4 TAD8944J AUDIO AMP FIFO Memory U303 SDRAM CC/VCHIP Conttroller CONTROLLER TUNER VIDEO SW 3D Y/C SEPERATOR SVHS DTV YPbPr In 480p720p1080i A/V IN1,2 DVI PC audio Component In 480i S-VIDEO In MAPLE MAPLE - - SUB SUB AIR Cable POWER CON1 Line OUT POWER CON2 32.73Mhz http://www.Harsper.co.kr X-tal 18.432M SOUND MSP3450 X-tal 14.318M SCALER PW166B X-tal 20.25M NTSC Proc. VPX3230 X-tal 10M TTX 5550M X-tal 6M DEINTERLACE PW1230 1.1 HP-4200M Clock Contribution MCU W78E65P-40 X-tal 18.432M
Cover Letter(s)
FCC ID : O5XHP-420M HYUNDAI C–TECH JULY 15, 2004 Federal Communications Commission Equipment Approval Services 7435 Oakland Mills Road Columbia, MD 21046 SUBJECT : HASRPER CO., LTD. FCC ID: O5XHP-420M FCC Part 15 Subpart B Certification Gentlemen: Transmitted herewith, on behalf of HASPER CO., LTD. is an application for a FCC Part 15 Subpart B Certification of the following PDP MONITOR: FCC ID : O5XHP-420M Model : HP-4200M Attached is the applicant’s Cover Letter, External/Internal Photos, Test Set-Up Photos, FCC ID & Label Location, User Manual, Block Diagram and Test Report. Should you have any questions or comments concerning the above, please contact the undersigned. KI SOO KIM EMC MANAGER cc: Mr. CHANG-SUP UM ------- R & D / ASSISTANT MANAGER FCC ID : O5XHP-420M HYUNDAI C–TECH • Solution for EMI We, HARSPER CO., LTD. , announce that all modifications will be incorporated into each unit sold in the U.S. 1. Apply a ferrite Core to the Main Board 2. Attach a gasket on the panel (Please refer to next page of the photographs for Solution for EMI) HARSPER CO., LTD. 2004. 07. 15. CHANG-SUP UM R & D Team / ASSISTANT MANAGER FCC ID : O5XHP-420M HYUNDAI C–TECH 1. Apply a ferrite Core to the Speaker 2. Attach a gasket on the panel
External Photos
REPORT NO : HCT-F04-0710 FCC ID : O5XHP-420M DATE : JULY 15, 2004 HYUNDAI CALIBRATION & CERTIFICATION TECHNOLOGIES CO., LTD. SAN 136-1, AMI-RI , BUBAL-EUP, ICHEON-SI,KYOUNKI-DO, 467-701,KOREA TEL : +82 31 639 8518 FAX : +82 31 639 8525 AT TA CH MEN T B. - EXTERNAL PHOTOS REPORT NO : HCT-F04-0710 FCC ID : O5XHP-420M DATE : JULY 15, 2004 HYUNDAI CALIBRATION & CERTIFICATION TECHNOLOGIES CO., LTD. SAN 136-1, AMI-RI , BUBAL-EUP, ICHEON-SI,KYOUNKI-DO, 467-701,KOREA TEL : +82 31 639 8518 FAX : +82 31 639 8525 REPORT NO : HCT-F04-0710 FCC ID : O5XHP-420M DATE : JULY 15, 2004 HYUNDAI CALIBRATION & CERTIFICATION TECHNOLOGIES CO., LTD. SAN 136-1, AMI-RI , BUBAL-EUP, ICHEON-SI,KYOUNKI-DO, 467-701,KOREA TEL : +82 31 639 8518 FAX : +82 31 639 8525 REPORT NO : HCT-F04-0710 FCC ID : O5XHP-420M DATE : JULY 15, 2004 HYUNDAI CALIBRATION & CERTIFICATION TECHNOLOGIES CO., LTD. SAN 136-1, AMI-RI , BUBAL-EUP, ICHEON-SI,KYOUNKI-DO, 467-701,KOREA TEL : +82 31 639 8518 FAX : +82 31 639 8525 REPORT NO : HCT-F04-0710 FCC ID : O5XHP-420M DATE : JULY 15, 2004 HYUNDAI CALIBRATION & CERTIFICATION TECHNOLOGIES CO., LTD. SAN 136-1, AMI-RI , BUBAL-EUP, ICHEON-SI,KYOUNKI-DO, 467-701,KOREA TEL : +82 31 639 8518 FAX : +82 31 639 8525 REPORT NO : HCT-F04-0710 FCC ID : O5XHP-420M DATE : JULY 15, 2004 HYUNDAI CALIBRATION & CERTIFICATION TECHNOLOGIES CO., LTD. SAN 136-1, AMI-RI , BUBAL-EUP, ICHEON-SI,KYOUNKI-DO, 467-701,KOREA TEL : +82 31 639 8518 FAX : +82 31 639 8525 REPORT NO : HCT-F04-0710 FCC ID : O5XHP-420M DATE : JULY 15, 2004 HYUNDAI CALIBRATION & CERTIFICATION TECHNOLOGIES CO., LTD. SAN 136-1, AMI-RI , BUBAL-EUP, ICHEON-SI,KYOUNKI-DO, 467-701,KOREA TEL : +82 31 639 8518 FAX : +82 31 639 8525 REPORT NO : HCT-F04-0710 FCC ID : O5XHP-420M DATE : JULY 15, 2004 HYUNDAI CALIBRATION & CERTIFICATION TECHNOLOGIES CO., LTD. SAN 136-1, AMI-RI , BUBAL-EUP, ICHEON-SI,KYOUNKI-DO, 467-701,KOREA TEL : +82 31 639 8518 FAX : +82 31 639 8525 REPORT NO : HCT-F04-0710 FCC ID : O5XHP-420M DATE : JULY 15, 2004 HYUNDAI CALIBRATION & CERTIFICATION TECHNOLOGIES CO., LTD. SAN 136-1, AMI-RI , BUBAL-EUP, ICHEON-SI,KYOUNKI-DO, 467-701,KOREA TEL : +82 31 639 8518 FAX : +82 31 639 8525 REPORT NO : HCT-F04-0710 FCC ID : O5XHP-420M DATE : JULY 15, 2004 HYUNDAI CALIBRATION & CERTIFICATION TECHNOLOGIES CO., LTD. SAN 136-1, AMI-RI , BUBAL-EUP, ICHEON-SI,KYOUNKI-DO, 467-701,KOREA TEL : +82 31 639 8518 FAX : +82 31 639 8525
ID Label/Location Info
REPORT NO : HCT-F04-0710 FCC ID : O5XHP-420M DATE : JULY 15, 2004 HYUNDAI CALIBRATION & CERTIFICATION TECHNOLOGIES CO., LTD. SAN 136-1, AMI-RI , BUBAL-EUP, ICHEON-SI,KYOUNKI-DO, 467-701,KOREA TEL : +82 31 639 8518 FAX : +82 31 639 8525 www.hctec.co.kr ATTACHMENT A. - ID LABEL INFORMATION AND LOCATION PHOTOS REPORT NO : HCT-F04-0710 FCC ID : O5XHP-420M DATE : JULY 15, 2004 HYUNDAI CALIBRATION & CERTIFICATION TECHNOLOGIES CO., LTD. SAN 136-1, AMI-RI , BUBAL-EUP, ICHEON-SI,KYOUNKI-DO, 467-701,KOREA TEL : +82 31 639 8518 FAX : +82 31 639 8525 www.hctec.co.kr 1.1 ID Label Information Following is a copy of the label that will be placed on the rear side of the cabinet. Figure 3.1 PRODUCT LABEL Both the FCC ID and compliance statement are included in the product label REPORT NO : HCT-F04-0710 FCC ID : O5XHP-420M DATE : JULY 15, 2004 HYUNDAI CALIBRATION & CERTIFICATION TECHNOLOGIES CO., LTD. SAN 136-1, AMI-RI , BUBAL-EUP, ICHEON-SI,KYOUNKI-DO, 467-701,KOREA TEL : +82 31 639 8518 FAX : +82 31 639 8525 www.hctec.co.kr 1.2 Label Location Photos The label shown shall be permanently affixed at a conspicuous location on the device and be readily visible to the user at the time purchase.(Labeling requirements per 2.925) LABEL LOCATION
Internal Photos
REPORT NO : HCT-F04-0710 FCC ID : O5XHP-420M DATE : JULY 15, 2004 HYUNDAI CALIBRATION & CERTIFICATION TECHNOLOGIES CO., LTD. SAN 136-1, AMI-RI , BUBAL-EUP, ICHEON-SI,KYOUNKI-DO, 467-701,KOREA TEL : +82 31 639 8518 FAX : +82 31 639 8525 ATTACHMENT F. - INTERNAL PHOTOS 1 REPORT NO : HCT-F04-0710 FCC ID : O5XHP-420M DATE : JULY 15, 2004 HYUNDAI CALIBRATION & CERTIFICATION TECHNOLOGIES CO., LTD. SAN 136-1, AMI-RI , BUBAL-EUP, ICHEON-SI,KYOUNKI-DO, 467-701,KOREA TEL : +82 31 639 8518 FAX : +82 31 639 8525 REPORT NO : HCT-F04-0710 FCC ID : O5XHP-420M DATE : JULY 15, 2004 HYUNDAI CALIBRATION & CERTIFICATION TECHNOLOGIES CO., LTD. SAN 136-1, AMI-RI , BUBAL-EUP, ICHEON-SI,KYOUNKI-DO, 467-701,KOREA TEL : +82 31 639 8518 FAX : +82 31 639 8525 REPORT NO : HCT-F04-0710 FCC ID : O5XHP-420M DATE : JULY 15, 2004 HYUNDAI CALIBRATION & CERTIFICATION TECHNOLOGIES CO., LTD. SAN 136-1, AMI-RI , BUBAL-EUP, ICHEON-SI,KYOUNKI-DO, 467-701,KOREA TEL : +82 31 639 8518 FAX : +82 31 639 8525 REPORT NO : HCT-F04-0710 FCC ID : O5XHP-420M DATE : JULY 15, 2004 HYUNDAI CALIBRATION & CERTIFICATION TECHNOLOGIES CO., LTD. SAN 136-1, AMI-RI , BUBAL-EUP, ICHEON-SI,KYOUNKI-DO, 467-701,KOREA TEL : +82 31 639 8518 FAX : +82 31 639 8525 REPORT NO : HCT-F04-0710 FCC ID : O5XHP-420M DATE : JULY 15, 2004 HYUNDAI CALIBRATION & CERTIFICATION TECHNOLOGIES CO., LTD. SAN 136-1, AMI-RI , BUBAL-EUP, ICHEON-SI,KYOUNKI-DO, 467-701,KOREA TEL : +82 31 639 8518 FAX : +82 31 639 8525 REPORT NO : HCT-F04-0710 FCC ID : O5XHP-420M DATE : JULY 15, 2004 HYUNDAI CALIBRATION & CERTIFICATION TECHNOLOGIES CO., LTD. SAN 136-1, AMI-RI , BUBAL-EUP, ICHEON-SI,KYOUNKI-DO, 467-701,KOREA TEL : +82 31 639 8518 FAX : +82 31 639 8525 REPORT NO : HCT-F04-0710 FCC ID : O5XHP-420M DATE : JULY 15, 2004 HYUNDAI CALIBRATION & CERTIFICATION TECHNOLOGIES CO., LTD. SAN 136-1, AMI-RI , BUBAL-EUP, ICHEON-SI,KYOUNKI-DO, 467-701,KOREA TEL : +82 31 639 8518 FAX : +82 31 639 8525 REPORT NO : HCT-F04-0710 FCC ID : O5XHP-420M DATE : JULY 15, 2004 HYUNDAI CALIBRATION & CERTIFICATION TECHNOLOGIES CO., LTD. SAN 136-1, AMI-RI , BUBAL-EUP, ICHEON-SI,KYOUNKI-DO, 467-701,KOREA TEL : +82 31 639 8518 FAX : +82 31 639 8525 REPORT NO : HCT-F04-0710 FCC ID : O5XHP-420M DATE : JULY 15, 2004 HYUNDAI CALIBRATION & CERTIFICATION TECHNOLOGIES CO., LTD. SAN 136-1, AMI-RI , BUBAL-EUP, ICHEON-SI,KYOUNKI-DO, 467-701,KOREA TEL : +82 31 639 8518 FAX : +82 31 639 8525 REPORT NO : HCT-F04-0710 FCC ID : O5XHP-420M DATE : JULY 15, 2004 HYUNDAI CALIBRATION & CERTIFICATION TECHNOLOGIES CO., LTD. SAN 136-1, AMI-RI , BUBAL-EUP, ICHEON-SI,KYOUNKI-DO, 467-701,KOREA TEL : +82 31 639 8518 FAX : +82 31 639 8525 REPORT NO : HCT-F04-0710 FCC ID : O5XHP-420M DATE : JULY 15, 2004 HYUNDAI CALIBRATION & CERTIFICATION TECHNOLOGIES CO., LTD. SAN 136-1, AMI-RI , BUBAL-EUP, ICHEON-SI,KYOUNKI-DO, 467-701,KOREA TEL : +82 31 639 8518 FAX : +82 31 639 8525 REPORT NO : HCT-F04-0710 FCC ID : O5XHP-420M DATE : JULY 15, 2004 HYUNDAI CALIBRATION & CERTIFICATION TECHNOLOGIES CO., LTD. SAN 136-1, AMI-RI , BUBAL-EUP, ICHEON-SI,KYOUNKI-DO, 467-701,KOREA TEL : +82 31 639 8518 FAX : +82 31 639 8525 REPORT NO : HCT-F04-0710 FCC ID : O5XHP-420M DATE : JULY 15, 2004 HYUNDAI CALIBRATION & CERTIFICATION TECHNOLOGIES CO., LTD. SAN 136-1, AMI-RI , BUBAL-EUP, ICHEON-SI,KYOUNKI-DO, 467-701,KOREA TEL : +82 31 639 8518 FAX : +82 31 639 8525 REPORT NO : HCT-F04-0710 FCC ID : O5XHP-420M DATE : JULY 15, 2004 HYUNDAI CALIBRATION & CERTIFICATION TECHNOLOGIES CO., LTD. SAN 136-1, AMI-RI , BUBAL-EUP, ICHEON-SI,KYOUNKI-DO, 467-701,KOREA TEL : +82 31 639 8518 FAX : +82 31 639 8525 REPORT NO : HCT-F04-0710 FCC ID : O5XHP-420M DATE : JULY 15, 2004 HYUNDAI CALIBRATION & CERTIFICATION TECHNOLOGIES CO., LTD. SAN 136-1, AMI-RI , BUBAL-EUP, ICHEON-SI,KYOUNKI-DO, 467-701,KOREA TEL : +82 31 639 8518 FAX : +82 31 639 8525 REPORT NO : HCT-F04-0710 FCC ID : O5XHP-420M DATE : JULY 15, 2004 HYUNDAI CALIBRATION & CERTIFICATION TECHNOLOGIES CO., LTD. SAN 136-1, AMI-RI , BUBAL-EUP, ICHEON-SI,KYOUNKI-DO, 467-701,KOREA TEL : +82 31 639 8518 FAX : +82 31 639 8525 REPORT NO : HCT-F04-0710 FCC ID : O5XHP-420M DATE : JULY 15, 2004 HYUNDAI CALIBRATION & CERTIFICATION TECHNOLOGIES CO., LTD. SAN 136-1, AMI-RI , BUBAL-EUP, ICHEON-SI,KYOUNKI-DO, 467-701,KOREA TEL : +82 31 639 8518 FAX : +82 31 639 8525 REPORT NO : HCT-F04-0710 FCC ID : O5XHP-420M DATE : JULY 15, 2004 HYUNDAI CALIBRATION & CERTIFICATION TECHNOLOGIES CO., LTD. SAN 136-1, AMI-RI , BUBAL-EUP, ICHEON-SI,KYOUNKI-DO, 467-701,KOREA TEL : +82 31 639 8518 FAX : +82 31 639 8525 REPORT NO : HCT-F04-0710 FCC ID : O5XHP-420M DATE : JULY 15, 2004 HYUNDAI CALIBRATION & CERTIFICATION TECHNOLOGIES CO., LTD. SAN 136-1, AMI-RI , BUBAL-EUP, ICHEON-SI,KYOUNKI-DO, 467-701,KOREA TEL : +82 31 639 8518 FAX : +82 31 639 8525 REPORT NO : HCT-F04-0710 FCC ID : O5XHP-420M DATE : JULY 15, 2004 HYUNDAI CALIBRATION & CERTIFICATION TECHNOLOGIES CO., LTD. SAN 136-1, AMI-RI , BUBAL-EUP, ICHEON-SI,KYOUNKI-DO, 467-701,KOREA TEL : +82 31 639 8518 FAX : +82 31 639 8525
Internal Photos
REPORT NO : HCT-F04-0710 FCC ID : O5XHP-420M DATE : JULY 15, 2004 HYUNDAI CALIBRATION & CERTIFICATION TECHNOLOGIES CO., LTD. SAN 136-1, AMI-RI , BUBAL-EUP, ICHEON-SI,KYOUNKI-DO, 467-701,KOREA TEL : +82 31 639 8518 FAX : +82 31 639 8525 ATTACHMENT F. - INTERNAL PHOTOS 2 REPORT NO : HCT-F04-0710 FCC ID : O5XHP-420M DATE : JULY 15, 2004 HYUNDAI CALIBRATION & CERTIFICATION TECHNOLOGIES CO., LTD. SAN 136-1, AMI-RI , BUBAL-EUP, ICHEON-SI,KYOUNKI-DO, 467-701,KOREA TEL : +82 31 639 8518 FAX : +82 31 639 8525 REPORT NO : HCT-F04-0710 FCC ID : O5XHP-420M DATE : JULY 15, 2004 HYUNDAI CALIBRATION & CERTIFICATION TECHNOLOGIES CO., LTD. SAN 136-1, AMI-RI , BUBAL-EUP, ICHEON-SI,KYOUNKI-DO, 467-701,KOREA TEL : +82 31 639 8518 FAX : +82 31 639 8525 REPORT NO : HCT-F04-0710 FCC ID : O5XHP-420M DATE : JULY 15, 2004 HYUNDAI CALIBRATION & CERTIFICATION TECHNOLOGIES CO., LTD. SAN 136-1, AMI-RI , BUBAL-EUP, ICHEON-SI,KYOUNKI-DO, 467-701,KOREA TEL : +82 31 639 8518 FAX : +82 31 639 8525 REPORT NO : HCT-F04-0710 FCC ID : O5XHP-420M DATE : JULY 15, 2004 HYUNDAI CALIBRATION & CERTIFICATION TECHNOLOGIES CO., LTD. SAN 136-1, AMI-RI , BUBAL-EUP, ICHEON-SI,KYOUNKI-DO, 467-701,KOREA TEL : +82 31 639 8518 FAX : +82 31 63…
Text truncated - open the document above for the full version.
Contact Information
Applicant
Harry Noh(Manager of Quality Control)
Test Firm
HCT Co., LTDSang Lee
Technical Specifications
| # | Rule Parts | Frequency Range | Power Output |
|---|---|---|---|
| 1 | 15B | - | - |
Other Applications from Harsper Co., Ltd.
O5XHP-421VTM
Aug 14, 2006PDP Monitor
Equipment Class
JBP - Part 15 Class B Computing Device Peripheral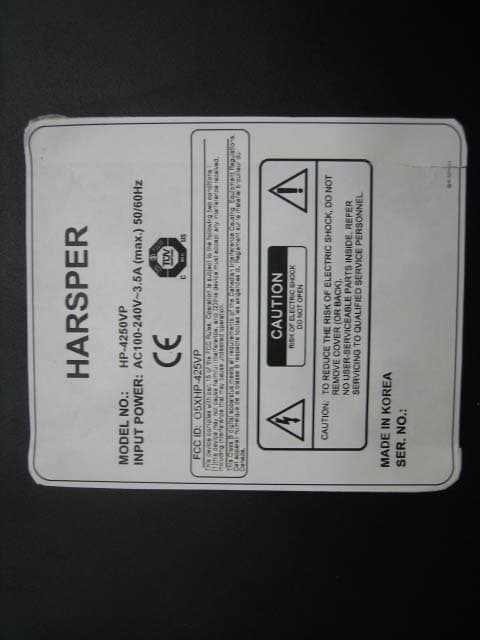
O5XHP-425VP
Nov 27, 2005PDP TV Monitor
Equipment Class
JBP - Part 15 Class B Computing Device Peripheral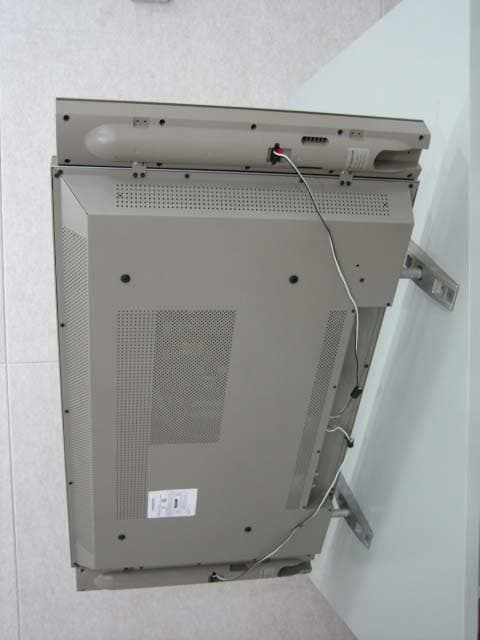
O5XHL-420V
Sep 27, 2005LCD Monitor TV
Equipment Class
JBP - Part 15 Class B Computing Device Peripheral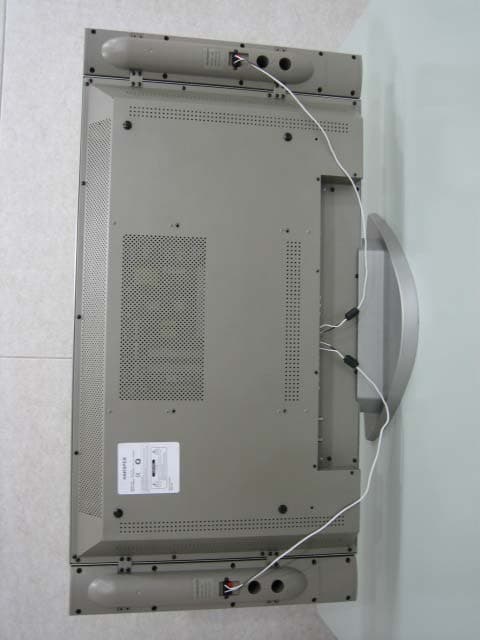
O5XHL-370V
Sep 27, 2005LCD Monitor TV
Equipment Class
JBP - Part 15 Class B Computing Device Peripheral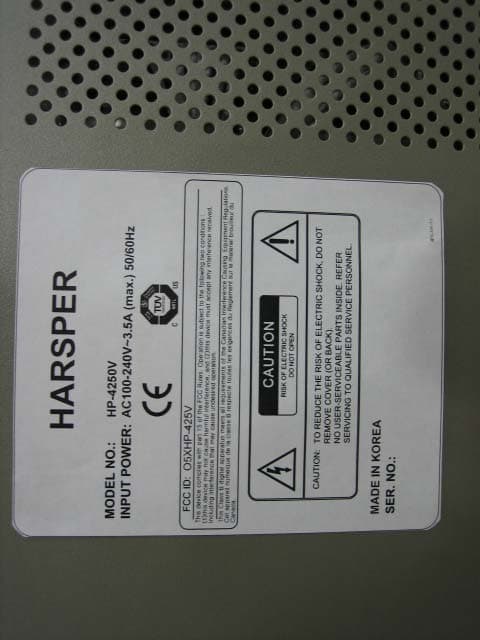
O5XHP-425V
Sep 27, 2005PDP Monitor TV
Equipment Class
JBP - Part 15 Class B Computing Device Peripheral