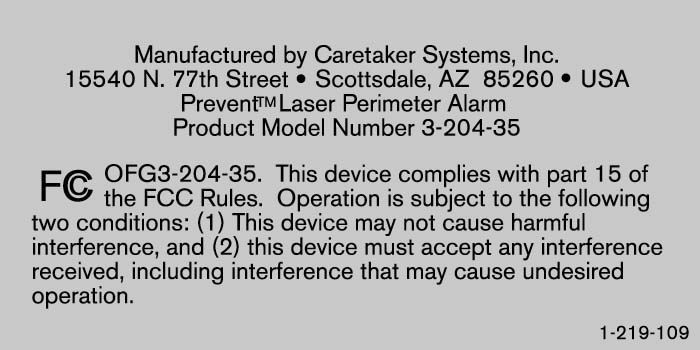
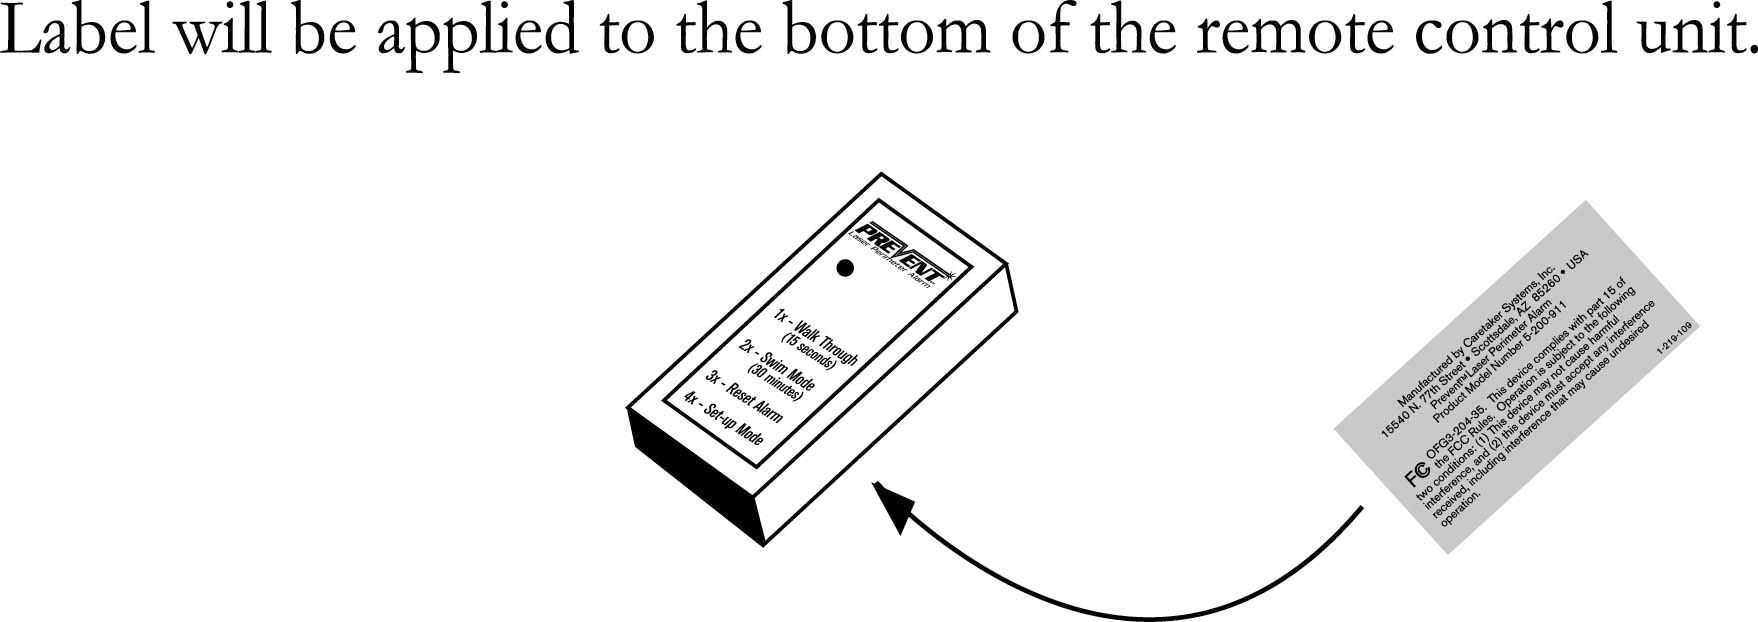
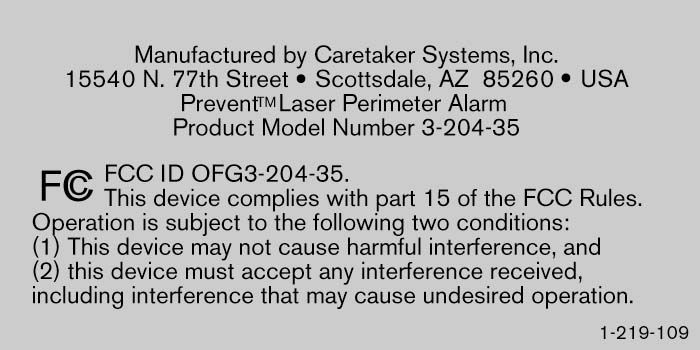
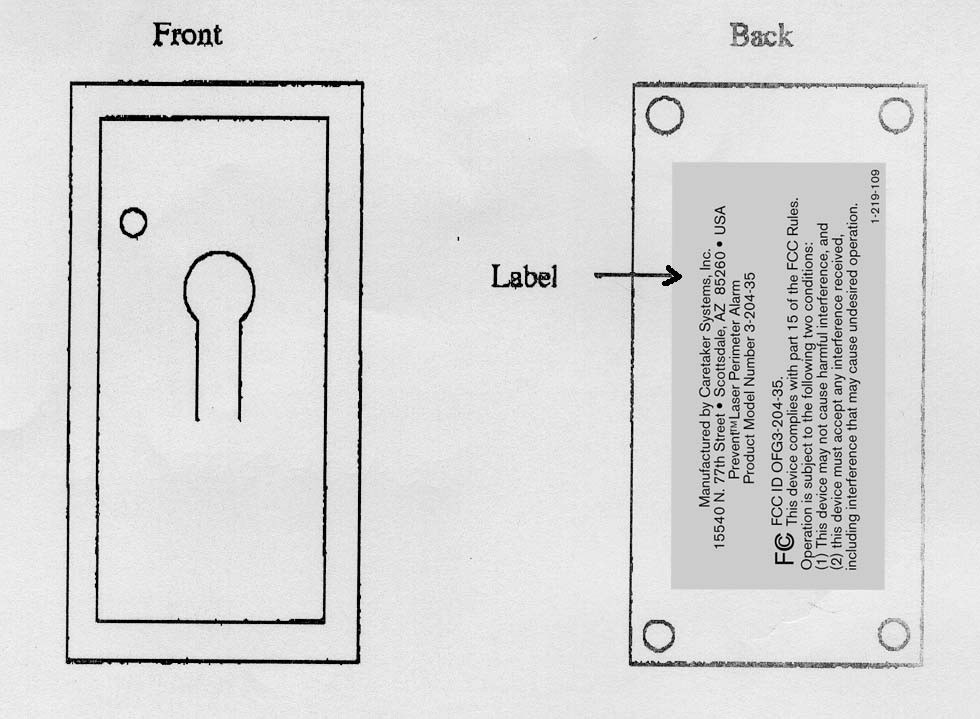
OFG3-204-35
Caretaker Systems, Inc.
Click to zoom
Application Details
- Equipment Class
- DSC - Part 15 Security/Remote Control Transmitter
- Date of Grant
- Mar 29, 1999
- Application Purpose
- Original Equipment
- Date of Application
- Feb 16, 1999
- Frequency Range
- 433.92000000 - 433.92000000
- Company
- Caretaker Systems, Inc.
- Country
- United States
Documents & Files
Document Text
Text extracted from the exhibit documents filed with the FCC. Open a document above to read the original.
Users Manual
1 10 Jan 99 Copy _____ of 6 2 IMPORTANT SAFETY INSTRUCTIONS 1. There is NO replacement for direct adult supervision of children. The Prevent Laser Perimeter Alarm was designed as an early warning system in the event a child should slip away from your supervision or that an unexpected child should gain access to the protected area. 2. Prevent is not a security system, but an additional layer of protection. When used in conjunction with other “layers,” Prevent is an early warning system to let you know that someone or something has entered a restricted or dangerous area. 3. Prevent is intended for operation by adults only. Do not allow your children to operate the system. 4. Do not explain the system to children. Do not refer to the system as a “beam to be avoided” rather a device that watches and tells on them if they get too close to the water. 5. The Prevent beam can be adjusted to allow for change in elevation and child height. If you have a crawling toddler, adjust the beam height accordingly. If older children, adjust beam higher. Refer to Page 8 for a list of Tools and Materials Required 3 READ THIS NEXT, PLEASE! We know you are anxious to install your new Prevent Laser Perimeter Alarm system as soon as possible, but we strongly urge you to take a few minutes to become familiar with the various components of the product, and to take advantage of the installation hints and instructions included in this manual. A good place to start is to unpack the shipping cartons. Separate all of the parts from the packing materials and check each item against the parts list and illustration on the right. If parts are missing, or have been damaged in shipment, do not attempt to complete the installation until all of the correct parts are on hand. Become familiar with the names we call each item. We will use those same names throughout this manual, and in any correspondence or conversations that might be required in the future. THE NEXT STEP... is the planning of your installation. On the next three pages we have provided you with information that will make the installation of your system go more smoothly. A few minutes spent in planning can save hours later on. Pay particular attention to the Typical Installation diagrams on pages 4 and 5. Find a diagram that comes close to depicting your yard and use it as a guide for placing the various system components . WHEN ALL ELSE FAILS... get in touch with someone that can help. You may contact us directly at 1-800-*** Parts Included Your prevent system includes everything you need for a variety of installation methods. Included in your system are the following parts: Item NameQty. APrevent Transceiver1 BMounting Post - Transceiver1 CMounting Base -Transceiver1 DPower cable assembly – 50’1 ESwivel Mount4 FRemote Controller1 GMirrors 4”x6”2 HReflectors 4”x4”2 JMounting Post – Mirror/Reflector4 KMounting Base –Mirror/Reflector4 LMounting Post Cap4 MEpoxy Adhesive Tube1 NMixing Nozzles5 ?Thum Plunger1 ?Cable Ties – 4”2 OBatteries - “AAA”4 PNeighbor Alert Card6 QWarranty Card1 4
Users Manual
TYPICAL Single Beam, “L” Shaped System with Transceiver at One End Reflect Existing Mirro House Gat Door to Yd Beam AnyPool Single Beam, Straight Line System with Transceiver at One End Beam Reflect Door to Yd House Gat Dual Beam, “L” Shaped System with Transceiver at the Corner Beam Reflector Reflector House Door to d Gat Beam INSTALLATIONS Reflector Mirro Dual Beam, Three Sided System with Transceiver at a Corner Door to Yd Beam Beam Hous Existing F Reflector “ B” Dual Beam, Straight Line System with Transceiver in the Middle House Gat Door to Yd Beam Beam Reflector Reflector •The beam path of every system must start at the Transceiver and end at a Reflector. •A Mirror is used to change direction of a beam path, such as going around a corner. A Mirror can be installed in a beam path only between the Transceiver and a Reflector. •The maximum length of a beam path from the Transceiver to each Reflector is 150 feet (45 meters). When Mirrors are included in the path, this measurement must be made along the actual beam path, from Transceiver to Mirror to Reflector. Transce Reflec Mirr Important Points: Dual Beam, Four-Sided System Beam Beam Reflector Mirror Mirr Reflector Door to Yd Hous INSTALLATIONS CONSIDER THE THINGS THAT MIGHT GET IN THE WAY... Two types of things can intrude into the beam path, causing an alarm – things placed there by people, and things moved there by nature. Try to visualize the beam paths selected for the installation – will the plants grow into the path? Will breezes blow the flowers into the path? Sprinkler systems normally pose no problems for Prevent; however, an excessive heavy stream of water could. Ideally, the Prevent system should be “out of the way,” providing a valuable service rather than becoming a nuisance. Careful planning o f the relationship between the beam path and everyday life around the pool will assure years of beneficial, trouble-free service. USE AS FEW MIRRORS AS POSSIBLE As specified on the preceding page, the maximum beam path for each beam is 150 feet (45 meters) measured from the Transceiver to a Mirror, or Mirrors, then to the Reflector. More than one Mirror may be used in a beam path, providing that the total path for that beam does not exceed 150 feet. However, great care must be taken during the Mirror/Reflector alignment stage of the installation to assure that the beam is centered on each Mirror and Reflector in the path. When multiple Mirrors are installed in one beam path, the slightest misalignment, or movement during use is magnified significantly. This can lead to nuisance false alarms. INSTALLATION BEAM PATHS AWAY FROM THE POOL EDGE ARE BEST By Installing the Prevent system with the beam paths as far away from the pool edge as possible, the alarm will sound when the intruder is farther away from the pool. In the case of a very small child, this could mean that an adult, upon hearing the alarm, could get to the child before the child ever reached the water. CONSIDER THE CRITTER S THAT MIGHT WANDER BY Keep in mind the fact that the Prevent system does not discriminate. Anything – man, beast or any moving inanimate object breaking the laser beam will cause the alarm to sound. Most people prefer to protect their pets, but should the alarm become annoying, check with your dealer or directly with the factory Custome r Service on the availability of the optional Pet Safety Alarm. This add-on device emits a high-pitched sound that only animals can hear. Household pets may learn quickly, and avoid the area altogether. The reaction by the large variety of wild animals that might come prowling is unknown.
Users Manual
PICTURE THE FROLICKING CHILD Pay particular attention to low walls, benches, stairways and similar climbable places when selecting the beam path. If the beam path is established too close to structures such as these, a child may jump over the laser beam, defeating the system. Keep the beam an adequate distance away from such areas if possible. The objective is to prevent the child from jumping over the beam. Supplementary fences may have to be erected atop such structures to assure the maximum in protection if the adequate distance cannot be achieved. CONSIDERATIONS A STANDARD 120 VOLT RECEPTACLE IS REQUIRED Electric power for the Prevent system is obtained from a step-down transformer that converts regular 120 volt household current to 12 volts. The Transformer plugs directly into a standard receptacle as shown at the right. The transformer is equipped with a 50 foot (15 meter) power cord fo r connection to the Transceiver. This cord length must be considered when selecting a mounting location for the Transceiver. The cord may be protected by attaching it to a building, suspending from an overhead trellis, awning or sun screen; or it may be run underground. THE TRANSCEIVER PREFERS A SHADY SPOT The Prevent Transceiver was designed and tested to provide years o f service in virtually all outdoor climatic conditions. However, because the system depends upon light from its lasers to function, it is not desirable to allow the intense light from the sun to shine directly into the Transceiver. To assure that the system performs in the manner intended, it is recommended that the Transceiver not be mounted where it will be exposed to direct sunlight. Installation under a shady roof overhang, or where it is protected by trees or shrubs, eliminating direct sunlight, will provide a highly desirable added mar gin of security. House 50 PLAN AHEAD, IF THE OPTIONAL INDOOR ALARM IS TO BE INSTALLED An optional Indoor Alarm can be linked to the Transceiver through its own data-link laser beam. This beam, just like the two beams transmitted by the Transceiver, travels in a straight line. The Indoo r Alarm may be mounted in any window that has direct visual access to the Transceiver. When planning the installation, it is recommended that this visual access be confirmed by going into the house and actually looking out of various windows to assure that an unobstructed view of the transceiver will be available upon completion of the installation. The Indoor Alarm receiver sounds an indoor audible alarm 3 7 Transceiv er Required for ALL installation Methods • Pencil or Marker • Saw • Builder’s Level • Square • Phillips Screwdriver • Weatherproof Receptacle Cover (optional) Depending in Installation Method • Stack of bricks cardboard box (Methods 1A, 1B) • Masking Tape (1B & 6B) • 1-1/2” PVC elbow (1C) • Can gray spray paint (1C) • Mounting screws and inserts (1C) • Sack of pre-mix concrete (1B & 6B) • Wheel-barrel for mixing concrete (1B & 6B) • Crumpled cardboard or rocks (1B & 6B) • Trowel or gardening shovel (1B & 6B) Mounting the Transceiver Select type of mount A, B, or C INSTALLING THE TRANSCEIVER MOUNTING POST TO THE POOL DECK OR OTHER SOLID, HORIZONTAL SURFACE After selecting the location for mounting the Transceiver and determining the ideal beam path, proceed as follows: 1.Determine the desired height of the beam path above the mounting surface of the deck or patio by measuring the distance from the center of the front face of the Transceiver downward to the mounting surface. This is accomplished most easily by having an assistant hold the Transceiver in position while the measurement is being taken, or by propping the Transceiver on a temporary stand such as a cardboard box, a stack of bricks, or similar structure. 2.Transfer the measurement taken in Step 1, above, to the Transceiver Mounting Post, which is the larger Post, with a threaded coupling bonded onto one end. Start the measurement from the threaded end and place a mark on the Mounting Post at the correct point. 3.Make a second mark on the Mounting Post at a point 4½ inches (11.4 cm) from the first mark, toward the threaded end of the Post. 4. Cut the Mounting Post at this second mark using a hacksaw or fine-toothed wood saw. Try to make the cut square, with no jagged or broken edges. TOOLS/MATERIALS REQUIRED Deck, Patio or Desired Beam Path Desired Beam Pth Transcei Transceiver Mounting Cut Mark 4½” Desired Beam Path Disca 1 1A 8 Should you need additional length, the material used for the mounting posts is 1-1/2” schedule 80 PVC pipe available in hardware or home improvement stores. 5.Press the Mounting Post into the large hole in the Mounting Base, making sure there is a very tight fit. A small amount of epoxy (provided) should be used for a more secure fit. Protect the threads of connector with masking tape. 6.Remove the cap from the epoxy and twist a new, mixing nozzle into place on the end. Insert the Thum Plunger. (The amount of adhesive included will bond all bases and posts required.) Please read the safety precautions included in with the epoxy. 7.Press the Thum plunger to squeeze out an appropriate amount of epoxy onto the bottom of the Mounting Base. 8.Clean and dry the surface on which the Mounting Base is to be attached to. Remove any dirt and debris. 9. Press the Mounting Base firmly against the mounting surface. Depending upon the local temperature, the epoxy will dry in approximately 15 minutes. DO NOT attempt to install the Transceiver to the Mounting Post before this epoxy has set up. If mounting to deck, skip items 1-B and 1-C and move to Step 2 INSTALLING THE TRANSCEIVER MOUNTING POST INTO A HOLE IN THE GROUND. The Transceiver may be mounted directly into the earth by inserting the Transceiver Mounting Post into a hole and applying concrete to hold the Transceiver Mounting Post in an upright, vertical position. Proceed as follows: 1.In earth, dig a hole 8” (** cm) in diameter and 12” (** cm) deep. 12 8 ” Directly in 9 Wr…
Text truncated - open the document above for the full version.
Users Manual
2.Determine the desired height of the beam path (Refer to Safety Instructions on Page 2) above the mounting surface of the ground by measuring the distance from the center of the front face of the Transceiver downward to the mounting surface. This is accomplished most easily by having an assistant hold the Transceiver in position while the measurement is being taken, or by propping the Transceiver on a temporary stand such as a cardboard box, a stack of bricks, or similar structure. 3.Determine the correct length for the Transceiver Mounting Post by placing the Post into the hole upside-down (with the taped threaded collar at the bottom of the hole.) 4.Transfer the measurement taken in Step 2, above, to the Mounting Post by placing a mark on the Post at the correct distance from the mounting surface. 5.Make a second mark on the Mounting Post at a point 4½ inches (10 cm) from the first mark, toward the threaded end of the Post. 6.Remove the Mounting Post from the hole and cut at the second mark, using a hacksaw or fine toothed wood saw. 7.Return the Mounting Post to the hole right side- up (with the taped threaded end upward.) 8.Insert Mounting Post into the Mounting Base as noted in Step 5 on Page 9. This will add stability to the Mounting Post. 9. While holding the Mounting Post in a vertical position, fill the hole with concrete. A carpenter’s level or framing square will help in determining when the Mounting Post is plumb and vertical. 10. Work the concrete into the hole with a slender rod or trowel to force out any air pockets in the material, and to assure that the material is tightly packed around the Mounting Post. 11. For maximum strength and rigidity of the Mounting Post, additional concrete may be poured inside of the taped Post, filling it completely. Post is Upside-Down in 4½” Disca Desired Beam Path Mark Cut Desired Beam Pth Transcei Ground Surfa e Desired Beam Path Taped Concrete 10 Taped 12. Do not attempt to mount the Transceiver onto the Mounting Post until the concrete has had a chance to set – this will take several hours, depending upon local conditions. INSTALLING THE TRANSCEIVER MOUNTING POST TO A WALL OR OTHER VERTICAL SURFACE The Transceiver may be mounted to a vertical surface such as a wall, fence or post by using the Mounting Base and sections cut from the Transceiver Mounting Post. In addition, one 90 degree, 1½ inch elbow is required, as well as a small quantity of the provided epoxy for bonding the parts together, and hardware for installing the Mounting Base to the selected surface. The 90 degree elbow is a standard plumbing item available in hardware or home improvement stores. Its full technical name is: 1½ inch, Schedule 40, PVC, Slip-by-Slip, 90 degree Elbow. Painting the elbow using gray spray paint is optional. 1.Cut the Transceiver Mounting Post into two sections, “A” & “B” as shown above. 2Bond the parts together using epoxy, keeping Section “A” vertically aligned with the vertical edge of the Transceiver Mounting Base. 3. Attach the Transceiver Mounting Base assembly washers and the screw holes on the four corners of the Base, into suitable anchors. A minimum of size #8 screws is recommended for this purpose. **Need to get sizing and descriptions NOTE: Mounting the unit to a wire fence, or other flexible or movable surface is not recommended. Such installations virtually guarantee false alarms due to movement of the laser beam. 3” 6” Section “” Discar d Section “B” Transceiver Mounting Post Section “B” Section “” Mounting Base 90 Degree PVC Elbow Washers 1C Insert s 11 *Not ATTACHING THE TRANSCEIVER TO THE MOUNTING POST The threaded union on the bottom of the Transceiver mates to the threaded portion at the top of the Mounting Post. 1.Remove masking tape from Transceiver Mounting Post. 2.Align the union on the Transceiver with the top of the Mounting Post and engage the threads by rotating the union clockwise (as viewed from above the unit.) Do not tighten the union completely at this time. 2.Rotate the transceiver left or right until the front face of the unit is pointing in the approximate direction of the desired beam path or paths. 3.Tighten the union on the bottom of the Transceiver. Hand-tight is sufficient. 4.Remove the Transceiver Top Cover from the Transceiver by removing the two Phillips screws from the bottom of the unit, and lifting the cover straight upward. 5.Remove the Transceiver Door from the rear of the Transceiver by removing one screw and lifting the bottom of the cover away from the Transceiver until the tabs at the top of the cover disengage. 2 12 Union Transcei ver Door Transcei ver Top
Users Manual
INSTALLING THE POWER CABLE ASSEMBLY The system is supplied with a Power Cable Assembly, equipped with a 50 foot (15 meters) long, low-voltage power cable. The end of the cable has a factory-installed plug that mates with a socket in the Transceiver. The Transformer must be plugged into a standard 120-volt receptacle. It is best if this receptacle is not controlled by a switch. If it is controlled by a switch, consideration should be given to marking the switch to indicate that the Prevent system is controlled by that switch; or, a qualified electrician can remove the switch 1. DO NOT PLUG THE TRANSFORMER INTO THE WALL RECEPTACLE AT THIS TIME. 2. Starting at the receptacle end, route the cable toward the Transceiver. The cable may be buried in the ground, routed along the edge of decking or fastened to woodwork using insulated staples or non-metallic fasteners. Route the cable so that it is out of the way, and does not create a tripping hazard. Excess cable may be formed into a knotted loop at the Transformer. 3. If the selected receptacle is located outdoors where it may be subjected to direct rain, a weatherproof cover, such as the one shown at the right, is recommended. These covers are available at hardware and home improvement stores. 4. At the rear of the Transceiver, insert the power plug on the end of the power cable assembly into the mating socket on the left side of the panel. Do not force the plug into the socket – it will fit only one way. If it fails to snap into place, rotate the plug, and try again. NOTE: Because the Power Cable Assembly is not plugged into the wall outlet at this time, nothing will happen when the power plug is inserted into the Transceiver. This is normal. 13 3 *Cover Not In luded SELECTING THE OPERATING MODE If the system configuration requires only one beam path, one of the two lasers in the Transceiver may be turned OFF. The RIGHT-SIDE laser (when viewed from the rear of the Transceiver) is controlled by switch #3 on the DIP switch located inside of the Transceiver. 1.To turn the right-side laser OFF, move the #3 switch handle UPWARD. All of the other switches should remain in their factory settings, as shown at the right. INSTALLING THE BATTERIES AND APPLYING ELECTRIC POWER 1.Install the four “AAA” size batteries into the battery holder inside of the Transceiver. Note the polarity markings on the holder, and install the batteries accordingly. PLEASE NOTE: IN THE NEXT STEPS BATTERIES WILL BE INSTALLED AND THE POWER CABLE ASSEMBL Y WILL BE PLUGGED INTO ITS ELECTRICAL OUTLET. ELECTRIC POWER WILL BE APPLIED TO THE TRANSCEIVER, AND THE LASER BEAMS WILL BE ACTIVATED. THIS WILL CREATE BEAMS OF BRILLIANT RED LIGHT EMERGING FROM THE FRONT OF THE TRANSCEIVER. A BRIGHT RED “LASER DOT” CAN BE SEEN ON ANY SURFACE OR OBJECT THAT THE BEAM STRIKES. DURING THE INSTALLATION AND SETUP PHASE THE LASER BEAMS WILL BE ON CONTINUOUSLY. DO NOT ALLOW THE BEAM TO REACH THE EYES OF ANY HUMANS O R PETS. IF THE LASER DOT CANNOT BE SEEN ON ANY NEARBY OBJECT, HOLD A PIECE OF WHITE PAPER IN FRONT OF EACH LASER TRANSMITTER TO DETERMINE THE BEAM PATH. THE BEAMS MAY BE TURNED OFF ONLY BY UNPLUGGING THE POWER CABLE FROM THE OUTLET, AND REMOVING THE BATTERIES FROM THE TRANSCEIVER. 14 Right- Side Move #3 UP Factory Settings #2 & #3 DOWN, ll Oth UP 4 5 2.AT THIS POINT, PLUG THE POWER CABLE ASSEMBLY INTO THE ELECTRICAL OUTLET. The lasers have been energized. The GREEN indicator light is FLASHING, indicating the system is in the Installation/Set-Up Mode. In this Mode the laser beams will stay ON for beam path alignment purposes, and the alarm will NOT sound when the beam path is broken. The RED indicator light is OFF. This is the battery condition indicator. When the Red indicator turns ON, it indicates that the four batteries in the Transceiver need replacing. INSTALLING MIRRORS AND REFLECTORS The first step in mounting the Mirrors and Reflectors is to determine the location for each unit. It may be helpful to review the Typical Installation diagrams on pages 4 and 5, and the Installation Considerations on pages 6 and 7. Keep in mind the most important feature of a laser beam system – the beam travels in a perfectly straight line called the beam path, and nothing can be allowed to interfere. There can be no plants, buildings, furniture or toys in the beam path. The primary goal at this point is to place the Mirrors and Reflectors so that the laser beam travels unimpeded from the Transceiver, along the beam path until it gets to a Reflector. Each beam path must begin at the Transceiver and end at a Reflector. If it is necessary to “bend” the beam path around a corner, or to jog around an obstacle, a Mirror may be installed in the beam path. THE VERSATILE SWIVEL MOUNT The Swivel Mount was designed to make the installation of Mirrors and Reflectors as simple as possible. The Fitting consists of two sections: the Swivel Mount, and the Ball Assembly which is attached to the back of the Mirrors and Reflectors. The Swivel Mount can be attached to a Mirror/ Reflector Mounting Post, wall, fence or pillar by means of its Mounting Flange. The Ball Assembly allows the attachment and adjustment, of either a Mirror or a Reflector. Transce Reflec Mirr Ball bl Mirror or fl Mounti ng Swivel Mount Union GREEN RED Idi t Laser 6 15 INSTALLATION OPTIONS Like the Transceiver installed earlier, Mirrors and Reflectors may be mounted onto the pool deck, patio surface, or to some other solid surface using the Mirror/Reflector Mounting Bases and the Mirror/Reflector Mounting Posts supplied. Or, these Mounting Posts may be set in concrete directly into holes in the ground. As a third option, the Mirror/Reflector Mounting may be installed directly onto a wall, fence or pillar by using the supplied epoxy or purchased hardware applied to the mounting flange. PREPARING TO MOUNT WITH A MOUNTING BASE 1.Press a Mounting Post firmly into the socket of a Mounting Base. The supplied epoxy glue should be used for a permanent conn…
Text truncated - open the document above for the full version.
Users Manual
INSTALLATION AND ALIGNMENT Select from the following CONFIGURATIONS and follow the appropriate instructions: CONFIGURATION 1: FIRST ITEM IN THE BEAM PATH IS A POST MOUNTED MIRROR OR REFLECTOR NOTE: THE MOUNTING POSTS HAVE NOT BEEN PERMANENTLY ATTACHED AT THIS POINT. 1.At the Transceiver, while holding the laser mount to prevent it from turning, loosen the Union under the laser mount by rotating it clockwise as viewed from above. Aim the laser until it is hitting the Mirror/Reflector Mounting Post at the desired height. The beam will be readily seen as a bright red spot on the Mounting Post. 2.Tighten the Union, making sure you have not moved the laser. ATTACH A SWIVEL MOUNT TO EACH POST 1. Slide a Swivel Mount downward over the Mounting Post until the Laser Spot appears in the center of the face of the Swivel Mount as shown at the right. ALIGN THE SWIVEL MOUNT HORIZONTALLY Rotate the Swivel Mount to the left or right while viewing the Mounting Post from above. 3a. If a MIRROR is to be mounted onto the Swivel Mount, rotate the Mount so that it faces a point approximately half way between the Transceiver and the selected location for the Reflector. The Laser Spot should be in the middle of the face of the Swivel Mount. (See Illustration 3a.) Laser Mt Laser St Beam Pth OR Temporary Fill Beam Path From Beam Path From Mirror To Mirro r 3a. Beam Path Laser Swivel Mount 7A 17 Screw s 3b. If a REFLECTOR is be mounted onto the Swivel Mount, the face of the Mount should be perpendicular to the beam path. The Laser Spot should be in the middle of the face of the Swivel Mount. (See Illustration 3b.) LOCK THE SWIVEL MOUNT TO THE POST 4.While holding the Swivel Mount to prevent it from turning on the Mounting Post, tighten the Phillips head screw on the back of the Swivel Mount. NOTE: THE MOUNTING POSTS HAVE NOT BEEN PERMANENTLY ATTACHED AT THIS POINT. SKIP TO STEP 8 CONFIGURATION 2: FIRST ITEM IN THE BEAM PATH IS A WALL MOUNTED MIRROR OR REFLECTOR. 1.At the Transceiver, while holding the laser mount to prevent it from turning, loosen the Union under the laser mount by rotating it clockwise as viewed from above. Aim the laser until it is hitting the wall or other surface at the proper height. The beam will be readily seen as a bright red spot on the wall. If the surface does not allow the laser spot to be seen readily, a piece of white paper may he taped to the surface temporarily. 2.Tighten the Union, making sure you have not moved the laser. 2. By holding a Swivel Mount against the wall, determine that it can be mounted so that the Laser Spot will hit in the center of the face of the Swivel Mount. COMPLETE THE INSTALLATION OF A SWIVEL MOUNT TO A WALL 4a. If the Swivel Mount is to be attached with epoxy, follow the procedures described on page 9 for applying epoxy to the unit. Use a fresh Mixing Nozzle. Press the Swivel Mount firmly against the wall, making sure the Laser Spot is still hitting the center of the face of the Swivel Mount. Hold for 2 minutes, then let the adhesive dry for 15 minutes before attaching a Mirror or Reflector to the Swivel Mount. Wal Beam Pth Laser Mt Laser St Phillips Head Reflect Beam Path From 3b. Wal Beam laser Epoxy or Hardware 7B 18 4b. If screws are to be used to attach the Swivel Mount to a wall or other surface, follow the procedures described on page 11. 5.If both laser beams are being used, repeat these procedures for the second Beam Path. ATTACH THE MIRRORS AND REFLECTORS NOTE - A REMINDER: The Mounting Posts have not been permanently attached at this point. Try to keep the Posts from moving while attaching the Mirrors or Reflectors. 1. Attach the Mirror or Reflector by inserting the attached ball into the mating ball socket on the Swivel Mount. 2. Align the threads of the Union with the threads on the Swivel Mount and rotate the Union clockwise to tighten. Do not over-tighten -The Mirror or Reflector should be movable for adjustment purposes. 3. Remove protective film from Mirrors. 4. The Laser Spot should be readily visible in the center of the Mirror or Reflector. If it is not, the Mounting Post may have been moved during this step. Realign the Mounting Post as necessary to get the Laser Spot back to the center of the Mirror or Reflector. IF ONLY REFLECTORS WERE INSTALLED... If a single beam system is being installed, with a Reflector as the only object; or a two beam system with Reflectors as the only objects in both beam paths, the Reflectors should now be aiming directly at the Transceiver, and the Laser Spot should be visible in the center of each Reflector. If not, adjustments may be made as follows: Loosen the Union and move the Reflector right- left or up-down. Loosen the Phillips screw on the rear of the Swivel Mount Tube and rotate the Mount right- left or slide it up-down on the Mounting Post. Rotate the Mounting Post right-left. Proceed to the STEP 9: “TIME FOR A QUICK SURVEY OF THE SYSTEM” Reflect Reflect Reflectors Are Aiming Directly i Top View Of Assembled i Laser Beam Pth Bal l Mirror or fl Union Swivel Mount 8 8A Union 19
Users Manual
IF MIRRORS WERE INSTALLED... If Mirrors were installed in either or both Beam Paths, those mirrors must be adjusted to "bounce" the laser beam onward to a Reflector. 1. Refer to pages 15 - 19 for installation details on adding the Swivel Mount for the Reflector. The mounting may be a Mounting Post in a Mounting Base or directly into a hole in the ground; or by attaching a Swivel Mount 2. After completing the installation of the final Reflectors, the Mirrors must be adjusted to cause the Laser Spot to appear in the center of the Reflector. Be gentle - a small movement of the Mirror will cause the laser beam to swing over a wide arc. COMPLETING THE INSTALLATION 1.If desired, the Mounting Posts may be cut to remove some of the excess. It is recommended that at least 12 inches (.30 meter) be left above the beam path to allow for future adjustment. The Posts are easily cut with a hacksaw or fine- toothed wood saw. 2.Install a Mounting Post Cap onto the top of each Mounting Post to cover the cut edge and to prevent water from collecting in the Post. 3. Realign each Post-mounted Mirror or Reflector so that the Laser Spot is in the approximate center of each Mirror or Reflector. 12" Discar Cut Temporary Filli Not Permanently A tt h d Mounti ng 8B TIME FOR A QUICK SURVEY OF THE SYSTEM At this point the Transceiver and any wall mounted Swivel Mounts have been permanently mounted and all of the Mirror/Reflector Mounting Posts have been temporarily installed. A Laser Spot should be visible in the approximate center of each Mirror and Reflector in the system. Now is a good time to pause in the installation …
Text truncated - open the document above for the full version.
Contact Information
Applicant
Les Mathews(President/CEO)
602-948-1199Fax: 602-951-4319
Technical Contact
Caretaker Systems, Inc.Tom Berk
[email protected]602-948-1199
15540 N. 77th. Street · Scottsdale, Arizona · United States
Non-Technical Contact
Caretaker Systems, Inc.Tim Cone
602-948-1199
Test Firm
TUV Rheinland of North AmericaMichael Moranha
Technical Specifications
| # | Rule Parts | Frequency Range | Power Output | Tolerance |
|---|---|---|---|---|
| 1 | 15C | 433.92 MHz - 433.92 MHz | 1.00 mW | ppm |