OZ5URCMX350RF REMOTE CONTROLLER
Ohsung Electronics Co., Ltd.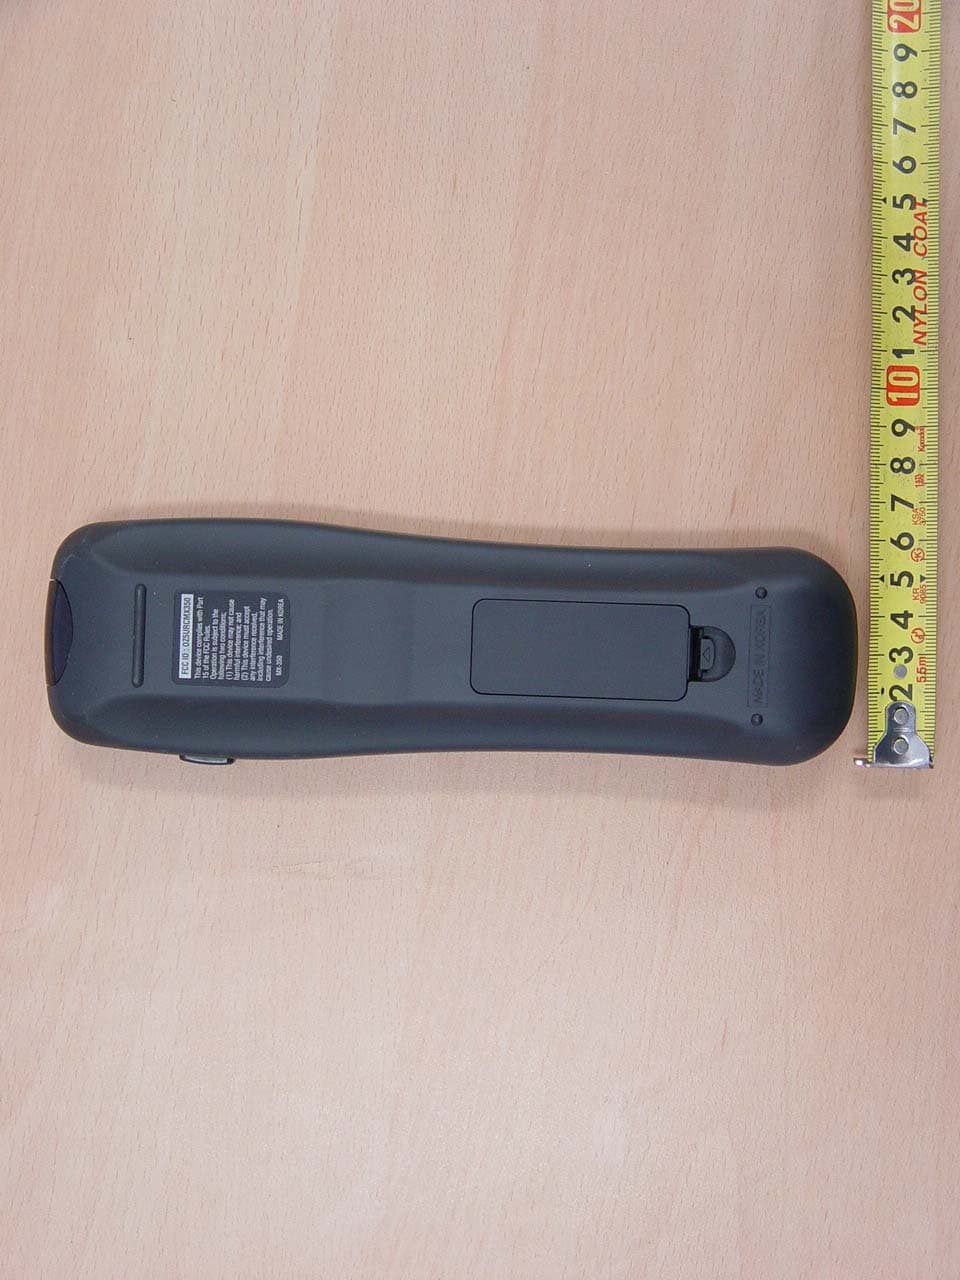
Click to zoom
Application Details
- Equipment Class
- DSC - Part 15 Security/Remote Control Transmitter
- Date of Grant
- Oct 03, 2006
- Application Purpose
- Original Equipment
- Date of Application
- Oct 02, 2006
- Equipment Note
- RF REMOTE CONTROLLER
- Frequency Range
- 417.50000000 - 418.50000000
- Company
- Ohsung Electronics Co., Ltd.
- Country
- South Korea
Documents & Files
Document Text
Text extracted from the exhibit documents filed with the FCC. Open a document above to read the original.
Users Manual
Test Report No.: GETEC-E3-06-061 FCC Part 15 Subpart C EUT Type: Remote Control APPENDIX I : USER’S MANUAL FCC ID: OZ5URCMX350 Owner’s Manual Osiris Owner’s Manual © 2004 Universal Remote Control, Inc. The information in this manual is copyright protected. No part of this manual may be copied or reproduced in any form without prior written consent from Universal Remote Control, Inc. UNIVERSAL REMOTE CON- TROL, INC. SHALL NOT BE LIABLE FOR OPERATIONAL, TECHNICAL OR EDITORIAL ERRORS/OMIS- SIONS MADE IN THIS MANUAL. The information in this manual may be subject to change without prior notice. Osiris is a registered trademark of Universal Remote Control, Inc. Power of Simple is a trademark of Universal Remote Control, Inc. All other brand or product names are trademarks or registered trademarks of their respective companies or organizations. 500 Mamaroneck Avenue, Harrison, NY 10528 Phone: (914) 835-4484 Fax: (914) 835-4532 Thank You! Thank you for purchasing the Osiris Pre-Programmed and Learning Remote Control. This manual is designed to assist you step-by-step as you setup the Osiris to replace all of your remote controls and automate your home entertainment system. TM 1 Table of Contents Getting Started2 Button Layout3 Basic Setup5 Pre-Programmed Method5 Learning Method9 Volume Control Punch Through12 Advanced Operation14 Advanced Setup16 Editing Button Labels16 Macro Button Setup19 Favorite Channel Setup21 Hiding and Adding Pages23 Erasing25 Cloning One Osiris to Another26 Recalling Pre-Programmed Settings27 Utilizing Optional RF Base Stations28 IR/RF Signal Setting31 ID # - Setting Base Station Address33 EMITT - Setting IR Emitter Outputs34 BLAST - Setting the Front Panel Blaster On or Off35 Pre-Programmed Code Tables37 Frequently Asked Questions55 Warranty56 Specifications56 Memo57 2 Getting Started Congratulations! You’ve purchased one of the most advanced and easy to setup control sys- tems available. The Osiris’s built-in library includes thousands of different brands and models of remote controls. In most systems, all you have to do to setup the Osiris is enter which brands and models you own. If you own a component too new to be in the library, the Osiris uses advanced learn- ing technology to quickly set each Osiris button, one at at time. Setting up your Osiris to replace all your existing remote controls can be done in a few minutes. Basic Setup is described on pages 5 to 13. The Osiris’s exciting advanced features automate and customize operation in many ways. You could use Macro Setup to power on all of your compo- nents and start the show with the press of one button! With the Osiris’s unique Favorite Channel capability, you can tune in a channel with the press of one button instead of entering the entire channel number. Any of the button names on the display can be edited as you like. It is best to delay any Advanced Setup (described on pages 14 to 36) until after you finish Basic Setup. Battery Installation Remove the battery compartment cover by pressing up the cover lock. Insert four AAA batteries into the battery compartment as shown in the diagram. The Osiris + + + + - - - - 3 MAIN Button takes you to the MAIN Menu. Screen Labeled Display Buttons LIGHT Button PAGE Numbers FUNCTION Buttons TITLE FAVORITE CHANNEL Button PAGE Buttons change the page of Display Buttons. Button Layout Universal Remote Control, Inc. Transmitting “Busy” Signal Indicator* *Note: When a command, macro or favorite channel is being transmitted, an icon will appear in the top right corner of the display. While the Osiris is “busy”, it will ignore a button push. 4 The Osiris Selecting a New DEVICE Changes All Button Commands Instantly The Osiris can operate ten different devices even though it is only one remote control. Let’s try it now! Press the MAIN button, then press the TV DEVICE button. The top of the screen changes from MAIN to TV. Now all of the buttons change their function to operate a TV. Press the page buttons. Watch the labels of the display buttons change with each press. There are five pages of display buttons already labeled for TV operation. To operate another component (e.g., VCR, DVD etc.), press the MAIN button to return to the MAIN menu. The MAIN menu displays five of your Devices on the screen. Simply press one of the screen-labeled Device buttons to operate another device. If you don’t see the device name you want, then use the PAGE buttons to display the remaining five devices on page 2 of the MAIN menu. Light Button Press the LIGHT button to backlight all the buttons. To turn off the back- lighting, press the LIGHT button again, or just wait ten seconds (the back- lighting automatically shuts itself off). TV DEVICE Button MAIN Button LIGHT Button 5 Basic Setup You can start setting up your Osiris using either the Pre-Programmed Method or the Learning Method. However, all the buttons of the Osiris are setup at once with the Pre-Programmed Method, so it is usually faster than the one-button-at-a-time Learning Method. Pre-Programmed Method Power on the A/V component you wish to setup, so that you can test codes by sending power off commands. Refer to the pre-programmed code tables on pages 37 - 51 and write down the code numbers listed for your A/V component. The code numbers are listed by categories of devices, then by brand. See page 37 for a category list. Press and hold both the MAIN and ENT (Enter) buttons for approxi- mately three seconds. The top of the display will show “SETUP”. You are in SETUP mode now. Note:You have 30 seconds to perform a step while you are in SETUP mode. If you don’t press a button within that time, the Osiris will time out and return to normal operation. MAIN Button ENT Button 1 2 3 Universal Remote Control, Inc. 6 Press the P-PRO button to select the Pre-Programmed Method. The display changes so that you can select which Device button to setup. In this step youchoose the name of the device you’d like to setup. Use the cursor UP or DOWN buttons…
Text truncated - open the document above for the full version.
Attestation Statements
Test Report No.: GETEC-E3-06-061 FCC Part 15 Subpart C EUT Type: Remote Control APPENDIX A : ATTESTATION STATEMENT FCC ID: OZ5URCMX350 April 01, 2006 Federal Communications Commission Authorization and Evaluation Division Equipment Authorization Branch 7435 Oakland Mills Road Columbia, MD 21046 U.S.A To whom it may concern: We, the undersigned, hereby authorize GUMI College EMC Center to act on our behalf in all matters relating to applications for equipment authorization, including the signing of all documents relation to these matters. Any and all acts carried out by GUMI College EMC Center on our behalf shall have the same effect as acts of our own. We also hereby certify that no party to the application is subject of a denial of benefits, including FCC benefits, pursuant 5301 of the Anti-Drug Abuse Act of 1988, 21 U.S.C. 853(a). Sincerely, Kwang-jae Ok, Manager OHSUNG Electronics Co., Ltd.
Block Diagram
Test Report No.: GETEC-E3-06-061 FCC Part 15 Subpart C EUT Type: Remote Control APPENDIX D : BLOCK DIAGRAM(S) FCC ID: OZ5URCMX350
External Photos
Test Report No.: GETEC-E3-06-061 FCC Part 15 Subpart C EUT Type: Remote Control APPENDIX G : EXTERNAL PHOTOGRAPHS FCC ID: OZ5URCMX350 Test Report No.: GETEC-E3-06-061 FCC Part 15 Subpart C EUT Type: Remote Control FCC ID: OZ5URCMX350 Test Report No.: GETEC-E3-06-061 FCC Part 15 Subpart C EUT Type: Remote Control FCC ID: OZ5URCMX350
ID Label/Location Info
Test Report No.: GETEC-E3-06-061 FCC Part 15 Subpart C EUT Type: Remote Control APPENDIX C : FCC ID LABEL & LOCATION FCC ID: OZ5URC MX350 Test Report No.: GETEC-E3-06-061 FCC Part 15 Subpart C EUT Type: Remote Control LABELLING REQUIREMENTS The label shown shall be permanently affixed at a conspicuous location on the device and be readily visible to the user at the time of purchase. ID Label ID Label Location of EUT I.D Label FCC ID: OZ5URC MX350
Internal Photos
Test Report No.: GETEC-E3-06-061 FCC Part 15 Subpart C EUT Type: Remote Control APPENDIX H : INTERNAL PHOTOGRAPHS FCC ID: OZ5URCMX350 Test Report No.: GETEC-E3-06-061 FCC Part 15 Subpart C EUT Type: Remote Control FCC ID: OZ5URCMX350 Test Report No.: GETEC-E3-06-061 FCC Part 15 Subpart C EUT Type: Remote Control FCC ID: OZ5URCMX350 Test Report No.: GETEC-E3-06-061 FCC Part 15 Subpart C EUT Type: Remote Control FCC ID: OZ5URCMX350 Test Report No.: GETEC-E3-06-061 FCC Part 15 Subpart C EUT Type: Remote Control FCC ID: OZ5URCMX350 Test Report No.: GETEC-E3-06-061 FCC Part 15 Subpart C EUT Type: Remote Control FCC ID: OZ5URCMX350 Test Report No.: GETEC-E3-06-061 FCC Part 15 Subpart C EUT Type: Remote Control FCC ID: OZ5URCMX350 Test Report No.: GETEC-E3-06-061 FCC Part 15 Subpart C EUT Type: Remote Control FCC ID: OZ5URCMX350
Test Report
Test Report No.: GETEC-E3-06-061 FCC Part 15 Subpart C EUT Type: Remote Control APPENDIX B : TEST PLOTS FCC ID: OZ5URC MX350 Test Report No.: GETEC-E3-06-061 FCC Part 15 Subpart C EUT Type: Remote Control <Plot of occupied bandwidth > FCC ID: OZ5URC MX350 Test Report No.: GETEC-E3-06-061 FCC Part 15 Subpart C EUT Type: Remote Control < Maximum with rate of pulse train > FCC ID: OZ5URC MX350
Test Setup Photos
Test Report No.: GETEC-E3-06-061 FCC Part 15 Subpart C EUT Type: Remote Control APPENDIX F : TEST SET UP PHOTOS FCC ID: OZ5URCMX350 Test Report No.: GETEC-E3-06-061 FCC Part 15 Subpart C EUT Type: Remote Control Radiated Test Picture ( X axis ) Radiated Test Picture ( Y axis ) FCC ID: OZ5URCMX350 Test Report No.: GETEC-E3-06-061 FCC Part 15 Subpart C EUT Type: Remote Control Radiated Test Picture ( Z axis ) < RF/IF mode > FCC ID: OZ5URCMX350
Contact Information
Applicant
Hak-Ki Kim(General Manager)
Test Firm
GUMI UNIVERSITY EMC CENTERTea-Sig Park
Technical Specifications
| # | Rule Parts | Frequency Range | Power Output |
|---|---|---|---|
| 1 | 15.231 | 417.5 MHz - 418.5 MHz | - |
Other Applications from Ohsung Electronics Co., Ltd.
OZ5PSRMT
Jan 13, 2026RF4CE RCU
Equipment Class
DTS - Digital Transmission SystemOZ5G32
Dec 29, 2025Remote Controller
Equipment Class
DTS - Digital Transmission SystemOZ5PSEMR
Dec 19, 2025RF Module
Equipment Class
DTS - Digital Transmission SystemOZ5G22
Dec 16, 2025Remote Controller
Equipment Class
DTS - Digital Transmission SystemOZ5G12
Dec 16, 2025Remote Controller
Equipment Class
DTS - Digital Transmission System