Text extracted from the exhibit documents filed with the FCC. Open a document above to read the original.
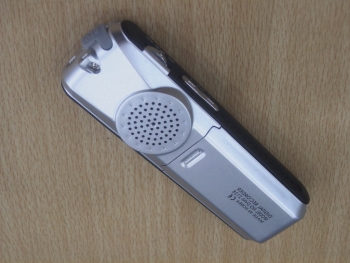
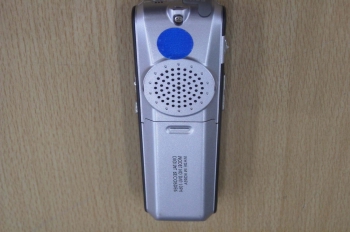
21 Features3 Locations of Function and Control Buttons 5 LCD Description6 Battery Installation7 Battery Life Time 7 Power On & Off 8 Recording 9 Playback11 Erasing13 Adjusting Volume14 Message Transfer between folders15 Hold Function 16 Setting the Record Mode 16 Setting the VOS Mode 17 Setting Mic Sensitivity18 Repeating the Playback19 Setting Beep On/Off Function20 Setting Hearing-aid Function21 Setting Preengaged Recording22 Setting Alarm Function23 Connecting External Equipments (Optional) 24 Phone Recording (Optional)26 Voice Manager Program Installation 28 Using Voice Manager Program 32 Troubleshooting36 Cautions 37 Specifications39 FCC Note40 Guarantee42 C o n t e n t sC o n t e n t s 43 LCD Backlight LCD is designed to backlight for about 3 seconds when pressing any button so that user can easily see the display where it is dark. Time Pre-set Recording Presetting of recording-start time within 4 hours. Time Pre-set Playback Presetting of playback-start time within 4 hours for the message at 01 of A folder. 4 different message folders and an additional lock folder A/B/C/D folders and 1 lock(L) folder are provided for message management. Each folder accommodates 99 messages in maximum. Recording quality modes - HQ : High Quality Play mode - The shortest recording time. - SP : Standard Play mode. - LP : Low Play mode - The longest recording time. Automatic Power Off The unit will be automatically turned off when not in use. Monitoring of the remaining recording time You can check the remaining recording time by pressing FOLD/REPEAT button during recording. Repeat modes - ALL repeat : repeats all recorded messages of all folders. - FOLD repeat : repeats all recorded messages of the current folder. User can define the certain repeat section of a message by pressing FOLD/REPEAT button during playback. Monitoring of recording User can listen to the message being recorded by using the provided earphone. External jack for Input(MIC)/Output(EAR) User can record songs or messages by direcly connecting the jack of MIC/EAR to input/output of other equipment i.e. the stereo radio or cassette player. VOS recording On VOS ON mode, the recorder automatically stops recording unless it hears any sound around. Scan Search Helps user to find a certain recorded message by playback the beginning part of each message. P a u s e Enables to pause during recording/playback by pressing MODE/PAUSE button. USB PC interface User can save recorded messages on his PC through the provided USB cable. Also, user can use the flash memory of the recorder as USB disk for general data files of PC. H e a r i n g - A i d User can use the recorder as a hearing aid through the earphone to listen to weak or delicate sounds. F e a t u r e sF e a t u r e s 65 Top HAND STRAP HOLE F F P L A Y / S T O P R E W I N D V O L U M E (+, -) USB PORT BUILT-IN MIC MICROPHONE J A C K H O L D E R A S E EARPHONE J A C K LCD DISPLAY R E C / S T O P S P E A K E R M O D E / P A U S E F O L D / R E P E A T FrontBack Right Side Left Side Locations of Function and Control Buttons LCD Description Folder Lock Folder Hold Remaining Battery Capacity One Folder Repeat VOS Message Number Preengaged Record Recording Mode Section Repeat All Folders Repeat Amount of Recorded Time and Recording Time Left Alarm MIC Sensitivity Operation Graphic 87 Be sure to replace batteries at stop mode. 1. Open the battery cover. Press and slide the battery cover off. 2. Install two(2) AAA size batteries and slide the cover back into place. Battery should be LR03 or equivalent (AAA Size or UM-4) 3. Press REC/STOP button to check the battery condition. Recorded messages will not be erased when replacing batteries. Recording ModeAbout 10 Hours Speaker playbackAbout 8 Hours(VOL: 5) Earphone playbackAbout 9 Hours(VOL: 5) 1) Set the HOLD switch to "Off" mode and press the REC/STOP button for more than one second. Then, LCD is displayed, which means power on. 2) Automatic power off : the unit will be automatically turned off within one minute when not in use without pressing any button. 1 Power On & Off Battery Installation Battery Life time 109 1) Release the HOLD switch and press the REC/STOP button for recording. 2) The unit starts recording when the red LED lights ON. (The unit displays the recording number, level and time on the LCD.) Recording Time Indicaton on the LCD hourminutesecond To record on the following number during recording During recording, move the button upwards and then, you can continue to record on the following number. Indication of the remaining recording time If you press the FOLD/REPEAT button during recording, the LCD indicates the remaining time. Monitoring of recording You can listen to the recorded messages by connecting earphone to EAR jack during recording. (During monitoring, the volume level can not be controlled.) Using an external pin microphone (Optional) Record by connecting an external microphone to MIC jack for higher guality recording. 3) To stop recording, press the REC/STOP button again. Pause function Press the MODE/PAUSE button during recording. The "PAUSE" letter blinks on LCD, which means pause function is being operated. To release the pause function, press the MODE/PAUSE button again. 2 R e c o r d i n g 1211 1) Release the HOLD button and select your desired message number by moving the upwards( ) or downwards( ) buttons on side. 2) Push the / button to playback. The LED lights in green on playback. 3) Push the / button again to stop. Fast-forwarding() and rewinding() during playback Up or Down the / button until it moves fast forward( ) or rewind ( ) to search a certain part of the current message. Up or Down the / button shortly to turn to the next or previous number of message. Pause function Press the MODE/PAUSE button during playback. The "PAUSE" letter blinks on LCD, which means pause function is being operated. To release the pause function, press the MODE/PAUSE button again. Scanning At stop mode, push the / button fo…
Text truncated - open the document above for the full version.
GGGOXWXXXY[_Y[GP
| # | Rule Parts | Frequency Range | Power Output |
|---|---|---|---|
| 1 | 15B | - | - |

Digital Voice Recorder
Equipment Class
JBP - Part 15 Class B Computing Device Peripheral