R3W-S1P12Wireless Torque Meter
Dyno Pro LLC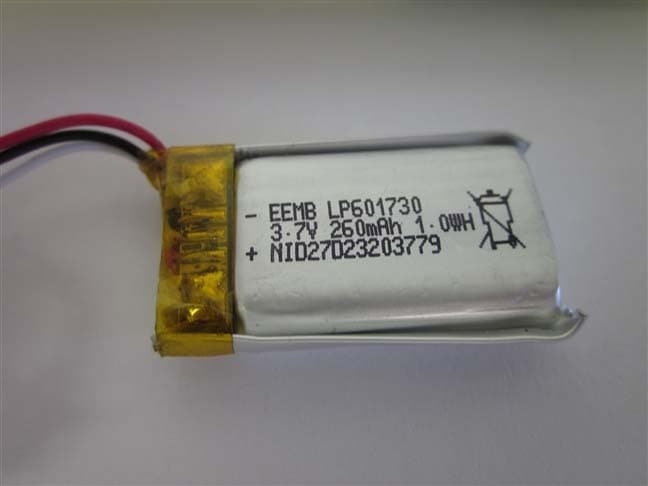
Click to zoom
Application Details
- Equipment Class
- DXX - Part 15 Low Power Communication Device Transmitter
- Date of Grant
- Aug 04, 2015
- Application Purpose
- Original Equipment
- Date of Application
- Aug 04, 2015
- Equipment Note
- Wireless Torque Meter
- Frequency Range
- 2456.80000000 - 2456.80000000
- Company
- Dyno Pro LLC
- Country
- United States
Documents & Files
Document Text
Text extracted from the exhibit documents filed with the FCC. Open a document above to read the original.
Users Manual
IMPORTANT NOTICES: ∑ The Dyno S1 USB adapter is ONLY used for charging/communicating. Do NOT use to tighten or loosen Dyno S1 Cap as this could cause the adapter to break. Care should be taken when connecting and/or disconnecting the adapter to the Dyno S1. ∑ Should the crankset installation require removal and reinstallation of the Dyno S1 electronics for crankset installation, use a spanning wrench (Park Tool SPA-6 or equivalent). ∑ When removing a crankset having a Dyno S1, NEVER hammer on the cap as this will cause damage to cap and electronics. Follow ‘Installing/Removal of the Crankset’ procedure for removing and installing the electronic module. ∑ Always use a 2.0 USB Hub and never a 3.0 USB Hub for communicating/charging the Dyno S1. Please follow the following steps to start riding with power. Do not install the crankset until first confirming communication by using the Dyno Calibration Wizard. What you will need: ∑ USB 2.0 –Mini or Micro B USB to Type A USB cable depending on the Dyno S1 USB Adapter shipped with the power meter. Cable length shall not exceed 3 meters. ∑ Windows PC for the Dyno Calibration Wizard Quick Start Guide What’s included: ∑ Dyno S1 preinstalled in an OEM crankset. ∑ Dyno S1 USB adapter (micro or mini) Figure 1. Non-Chain Arm in the 6 o’clock position. Always use this position for the zero offset calibration ∑ Internet Connection ∑ ANT+ Display unit (Cycle computer with Power) such as an Garmin Edge 510 or equivalent. ∑ Park Tool SPA-6 or equivalent spanner wrench Warning: To reduce the risk of injury to persons and damage to the Dyno S1: ∑ Do not submerge the Dyno S1 in water if not installed in a crankset as there is no water protection. ∑ Do not reach for an uninstalled Dyno S1 that has accidentally fallen into water or other liquid. ∑ If an uninstalled/ installed Dyno S1 is damaged, do not attempt to charge the battery. ∑ Other than use in a power meter, Dyno Velo is not responsible or liable for any other uses of this product. ∑ Use only a Dyno Velo rechargeable battery. ∑ Use only USB 2.0 computer ports. Battery Warning and Environmental Notice: If these guidelines are not followed, the internal lithium ion battery may experience a shortened life span or may present risk of damage to the device or personal injury. Dispose of a spent or a damaged battery according to local laws and regulations. ∑ Do not use sharp objects, or an electrically conductive object (such as a small metal screwdriver) to remove the battery. ∑ Keep the battery away from children or pets. ∑ Do not disassemble, puncture, or damage the battery. ∑ Do not expose the battery to extreme temperatures less -20C and greater than 60C ∑ Do not charge the battery at temperatures less than 0C or greater than 45C ∑ Do not long term store batteries at less than -20C or greater than +25C. ∑ If using an external battery charger, use the Dyno S1 USB adapter. ∑ Only replace the battery with the correct replacement battery. ∑ Stop using the battery if abnormal heat, odor, discoloration, deformation, or abnormal condition detected during use, charge, or storage. ∑ If liquid leaks onto your skin or clothes, wash well with fresh water immediately. ∑ If liquid leaking from a battery gets into your eyes, do not rub your eyes. Wash them well with clean edible oil and go see a doctor immediately. Water Resistance Notice Properly installed the Dyno S1 has a water ingress protection of lPX7 (up to 1 meter). This will permit water protection for normal cycling conditions either on-road or off-road. The cap’s USB cover is for water splash and dust/dirt protection. Replacement dust covers can be replaced by the user using a T3 driver. In the event of a lost/torn dust cover, a piece of electrical tap covering the USB adapter pins will provide adequate dust protection. Do not subject the power meter to direct spray from a high pressure sprayer. There is high probability that water will be forced past the O-ring seals, and under these conditions, damage to the electronics may occur. Should the Dyno S1 be accidentally subjected to a high pressure water spray, the power meter should be immediately serviced to avoid potential damage from water. Should the external USB electrical pins ever require cleaning, a soft toothbrush may be used. Power Meter (Crankset) Installation Follow the 10 steps below to getting the power meter up and working with your display. 1. Install the Dyno Calibration Wizard which can be found at www.dynovelo.com/downloads. You will need the Dyno Calibration Wizard in order to unlock the Dyno S1 power meter. The Dyno S1 is locked in order to keep the power meter from transmitting during shipment. When first connecting to the Wizard, the Dyno S1 will automatically be unlocked. 2. Connect the Dyno S1 to a USB 2.0 hub on your PC using the Dyno S1 USB adapter with a USB cable. Do not connect to a USB 3.0 hub (damage to your computer or the Dyno S1 could occur if your USB cable has a short). Your PC will recognize a new device and install drivers automatically. 3. Unlock the Dyno S1 power meter. Launch the Dyno Calibration Wizard. The Wizard will recognize your Dyno S1 and automatically unlock it. 4. Retrieve your ANT+ ID. This number is unique to your torque sensor. 5. Charge the battery. Leave the Dyno S1 connected to your PC (or after Step 4, attach to an external USB 2.0 not exceeding 5V) and let it fully charge the battery. Either terminate charging after 2 hours or when the red light turns off. See Battery Charging and Indicator Lights below. 6. Install the crankset following the manufacturer’s procedure. 7. Pair the Power Meter. After installing the crankset, follow the ANT+ display unit instructions (See Pairing the Power Meter below) and pair the display to the Dyno S1 (connecting wirelessly to the Dyno S1) using the ANT+ ID obtained during Step 4. Always manually enter this number into the ANT+ display if the display does not automatically find the Dyno S1. NOTE: When the Dyno S1 is conn…
Text truncated - open the document above for the full version.
ID Label/Location Info
14.8mm/0.58in 13mm/0.51in 5mm 5mm
ID Label/Location Info
July 15, 2015 Label material: Nylon; permanant adhesion. Label dimension:13x15mm
Test Setup Photos
Retlif Testing Laboratories, Test Report R-5976N, Rev. A, Dyno Pro, LLC FCC ID: R3W-S1P12, IC: 10704A-V1P12 Test Photograph(s) Field Strength of Fundamental Emissions Horizontal Antenna Polarization Vertical Antenna Polarization 11 of 33 Retlif Testing Laboratories, Test Report R-5976N, Rev. A, Dyno Pro, LLC FCC ID: R3W-S1P12, IC: 10704A-V1P12 Test Photograph(s) Field Strength of Emissions Test Configuration 12 of 33 Retlif Testing Laboratories, Test Report R-5976N, Rev. A, Dyno Pro, LLC FCC ID: R3W-S1P12, IC: 10704A-V1P12 Test Photograph(s) Field Strength of Emissions Horizontal Antenna Polarization, 30 MHz to 1 GHz Vertical Antenna Polarization, 30 MHz to 1 GHz 13 of 33 Retlif Testing Laboratories, Test Report R-5976N, Rev. A, Dyno Pro, LLC FCC ID: R3W-S1P12, IC: 10704A-V1P12 Test Photograph(s) Field Strength of Emissions Horizontal Antenna Polarization, 1 to 18 GHz Vertical Antenna Polarization, 1 to 18 GHz 14 of 33 Retlif Testing Laboratories, Test Report R-5976N, Rev. A, Dyno Pro, LLC FCC ID: R3W-S1P12, IC: 10704A-V1P12 Test Photograph(s) Field Strength of Emissions Horizontal Antenna Polarization, 18 to 25 GHz Vertical Antenna Polarization, 18 to 25 GHz 15 of 33 Retlif Testing Laboratories, Test Report R-5976N, Rev. A, Dyno Pro, LLC FCC ID: R3W-S1P12, IC: 10704A-V1P12 Test Photograph(s) 99% Bandwidth Test Configuration 16 of 33
Contact Information
Applicant
Michael Grassi(VP of Engineering)
Technical Contact
Retlif Testing LaboratoriesScott Wentworth
[email protected]6034974600
101 New Boston Rd. · Goffstown · United States
Non-Technical Contact
Retlif Testing LaboratoriesScott Wentworth
[email protected]6034974600
Test Firm
Retlif Testing LaboratoriesScott Wentworth
Technical Specifications
| # | Rule Parts | Frequency Range | Power Output |
|---|---|---|---|
| 1 | 15C | 2.46 GHz - 2.46 GHz | - |
Other Applications from Dyno Pro LLC
R3W-V1P12
Jun 17, 2013Dyno Sensor Module
Equipment Class
DXX - Part 15 Low Power Communication Device Transmitter