RLXVIP15XBALL- IN- ONE PC
IDnet Co.,Ltd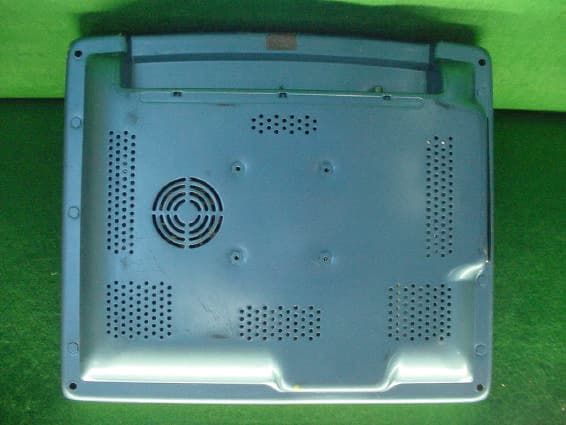
Click to zoom
Application Details
- Equipment Class
- JBC - Part 15 Class B Computing Device/Personal Computer
- Date of Grant
- Nov 06, 2003
- Application Purpose
- Original Equipment
- Date of Application
- Nov 06, 2003
- Equipment Note
- ALL- IN- ONE PC
- Company
- IDnet Co.,Ltd
- Country
- South Korea
Documents & Files
Document Text
Text extracted from the exhibit documents filed with the FCC. Open a document above to read the original.
Users Manual
Notice Copyright VIP Systems hold copyright of this manual, which is protected by the Copyright Act. Therefore, without previous permission of VIP Systems, any part of this manual may not be copied in any way of machinery, electronics, or any method. The contents of this manual could be changed without previous notice for a reason of trust, improvement of design and function, etc. Manufacturing company does not guarantee loss regarding data. Therefore, take care of important data not to be lost, and always back up them. Although this manual was written making assurance doubly sure, manufa cturing company and supplier do not assume the responsibility for the result caused by an error, omitted contents of this manual. RegisteredinElectromagneticcompatibility(ClassB) This product was registered in electromagnetic compatibility(Class B). you can use it safely at any place. Suggestions For right and safe set up and use of this product, please read this user's manual carefully in advance. Safetydeviceisalreadyinstalledinthisproducttopreventuser'sinjury,but payregardtothefollowingdetailsforsafeuse. Suggestions when installing Prevent injury or damage of product by installing on the safe place(on the firm and even surface) Install at a place of good ventilation for preventing over moisture and overheating. Install away from magnetic objects. Confirm where voltage used is appropriate when connecting to power source. For AC adapter and power source cord, use belongings wrapped up with the product, and do not put heavy stuff on them. To prevent danger of an electric shock and fire, do not use damaged consent or the one that is insufficient for standard. If you connect power source cord to extended cord, make sure that electric current of every equipments connected to extended cord is less than standard value stated on extended cord. Suggestions for use In case peripheral instruments are connected to this product, turn on peripheral instruments first when approving power source, and turn off this product first when cutting off power source to prevent damage of product. Make sure that any liquid should not get in to this product. It may cause damage of product, fire, or electric shock. When cleaning of this product, separate AC adapter before wiping, and never use liquid or spray detergent. Wipe it using paper or cloth wetted with exclusive detergent for computers. When the product is not used for a long time, separate it from the main power source consent to prevent damage caused by excessive electric current. To pull out power source cord, grip plug firmly rather than pulling the line. Do not leave this product at a place where ventilation is bad, and temperature is over 60(140), which may damage the product. Maximum temperature at which this product can operate normally is 35, so keep it away from electric range including heater. Pay attention not to damage hard disk data built in this product, and please always back up important data for preventing the worst case. Do not take this product to pieces at your will. For safety, only qualified service staff can dismantle repair and convert. If the following situations happen, please inquire of service staff about those matters for inspections. In case liquid gets into the product, or it is exposed to moisture. In case a product does not operate well, or you can not operate it according to user's manual. In case product is damaged or there is distinct damage by dropping. Notice Suggestions Contents Chapter 1 Introduction Undo a product package Chapter 2 Look into computer computer rear side(connecting part of connectors) Chapter3C o mputerse ttingch ange BIOS setup utility OSD(On Screen Display) program System upgrade Chapter4R e installingco mputer Reinstalling windows XP Installing TV driver, program Installing touch screen program and setup Chapter5U s ingco mputer Using windows XP Home Edition TV User's Guide 1 2 4 5 5 7 8 9 9 13 14 15 15 16 28 28 28 30 Contents Congraturation on your purchase of eSTATION ALL-In-On PC. Characteristicsofproduct Estation is one body PC of 15 inch TFT-LCD monitor and desktop PC. And it harmonizes with any working environment due to ultra light weight(5.7 Kg) and polished design of space-saving type. Furthermore, in case of separating stand and applying exclusive adapter, you can use it as wall mounted. Because necessary main function is built in the body so that anyone can use easily by connecting power source cord. It adjusts to various working envir onment of user, and supports not only the existing all kinds of peripheral instruments, but also PCMCIA card slot, USB port, IEEE1304 adapter, TV tuner/capture function(option), etc. To rebuilt, the newest peripheral instruments can be used through built in network adapter, wire networking is possible without installing additional devices. And it supports to be able to operate wireless networking by using PCMCIA wireless lan card, which improves office working environment, maintenance, and mobility. Because it supports Window XP, the latest operation system of Microsoft, more safe and faster computing environment is provided. By adopting 15 inch TFT-LCD monitor, harmful electron is wave and electricity used is minimized, and it prevents eye fatigue even while using for the long time. Chapter 1 Introduction Undo product package Thisp roductis s afelyw rappedu pin f irmc ardboardp aperb ox. Thef ollowingg oodss houldb e includedin t heb ox. 15 inch TFT-LCD monitor one body type PC main body network adapter(RealTek RTL8130C Ethernet-based 10/100Mbps, basic built in) PCMCIA(PC) card slot(Type / support, basic built in) Combined use of 110/220V AC/DC adadpter AC power source cord Combo cable(for 2 serial communication devices and printer connection) CD for installing Microsoft operating system and user's manual eSTATION user's manual(this pamphlet) Touch screen CD, TV Install program TV tuner(main body built in type) adapter for wall tapestry Basic optional equipment It suppo…
Text truncated - open the document above for the full version.
Users Manual
Info: Because of the inherent limitations of the Windows operating system in handling files over 2 GB, PowerVCR will automatically save and chunk your video files into 600 MB files if the file's size is over this limit. Thus, when you select the appropriate playlist for playback, all the chunked files will play continuously like a single file. 10To delete all the file(s), click Delete. Note: When you click Delete, the file(s) will be deleted from your playlist. 11Click OK when the dialog box appears to confirm your deletion. 12Click on Save to... to save it to another folder other than the default folder. 13A dialog box will appear for you to save it in another folder or to rename it. Click Save when you are finished. Recording Analog Video from a Variety Of Sources Not only can you record TV programming with PowerVCR, there are a lot more sources you may record from. Converting all the analog video content (e.g. videotapes) in your private collection into everlasting digital technology is also not out of the question: PC cameras camcorders VCRs TVs For the aforementioned capturing devices, make sure they are installed properly with the proper drivers. Refer to their respective user's guide for more information. 1Start PowerVCR. 2Select the correct source by clicking on the source indicator. 3If the screen is still blank, click System Settings to properly configure the source. Refer to "Chapter 5: Changing System Settings" on page 39 for more details. 4After it is properly configured, a live shot of the current video source should be displayed. Note: If the video display is blank, be sure your video source is functioning properly. Other possibilities may be that the connections aren't set up properly or you selected the wrong input settings. 5Click Record when you're ready. Tips: While recording, click on the recording button again to display the Recording Timer menu. Select one of the time durations and PowerVCR will automatically stop the recording once the set time duration has expired. 6Click Stop when you are finished. 7The playlist will appear for you to save it. Info: Because of the inherent limitations of the Windows operating system in handling files over 2 GB, PowerVCR will automatically save and chunk your video files into 600 MB files if the file's size is over this limit. Thus, when you select the appropriate playlist for playback, all the chunked files will play continuously like a single file. 8To delete all the file(s), click Delete. Note: When you click Delete, all the files will be deleted from your playlist. 9Click OK when the dialog box appears to confirm your deletion. 10You may save it to another folder other than the default folder with a different name. Click on Save to... 11A dialog box will appear for you to save it in another folder or to rename it. Click Save when you are finished. Tips: To enlarge the video display to full screen, click anywhere on the screen. To restore to original size, click again. Recording from a DV Camcorder Whether your DV is playing video or filming special moments, PowerVCR records in real-time. With the astounding FireWire transfer rate, you can also record crystal clear video and audio from your DV camcorder. Note: Before beginning, make sure all devices are installed properly with the proper drivers and that your DV camcorder is already turned on. Refer to the respective user's guide for more information. 1Start PowerVCR. 2Select the correct source by clicking on the source indicator. 3If the screen is still blank, click System Settings to properly configure the source. Refer to "Chapter 5: Changing System Settings" on page 39 for more details. 4After it is properly configured, a live shot of the current video source should be displayed. 5Turn the DV camcorders power switch to play (VCR) mode. 6Fast forward or rewind to the beginning of the segment that you want to record. Press your camcorders play button. 7Or, turn the DV camcorders power switch to record (Camera) mode if you would like PowerVCR to record real-time content through the DV camcorder, which is in standby mode but not recording. 8 Then, begin recording by clicking PowerVCRs Record button. 9Click Stop when you are finished. 10The playlist will appear for you to save it. 11To delete all the file(s), click Delete. Note: When you click Delete, all the files will be deleted from your playlist. 12Click OK when the dialog box appears to confirm your deletion. 13You may save it to another folder other than the default folder with a different name. Click on Save to... 14A dialog box will appear for you to save it in another folder or to rename it. Click Save when you are finished. Tips: To enlarge the video display to full screen, click anywhere on the screen. To restore to original size, just click again. Snapshots PowerVCR captures still images with the snapshot function. With one easy click of the mouse, you may capture images during the preview mode before recording begins. To set the directory your snapshots are placed in, go to "Chapter 5: Changing System Settings" on page 39 for more details. Instant TV Replay Your own personal up-close and instant replay is at your fingertips with PowerVCR's sterling new Replay feature. No more annoying and prolonged periods of waiting for an instant replay from your TV station, you can simply invoke the Replay function while watching TV for your own private instant replay! Note: Replay files are temporarily stored in your hard drive, but are automatically deleted as soon as exiting Replay mode. 1While watching TV with PowerVCR, switch to the Instant TV Replay function by clicking it in the Master panel and instant replay playback will commence. Refer to "Chapter 5: Changing System Settings" on page 39 for more details. 2Refer to the next section for more details on Navigating in Replay Mode. Note: There is no Stop function in Instant TV Replay mode. Navigating in Replay Mode Skip forward (skip commercials) or backward (instant repla…
Text truncated - open the document above for the full version.
Block Diagram
SYSTEM BLOCK DIAGRAM ENTERSYS Intel Processor (Pentium-/Celeron) System Bus(66/100/133MHz) Intel 81oE Chipset Graphic & Memory Controller Hub (Intel 82810E) TFT-LCD Smart Panel System Memory (1 DINN, PC 100 SDRAN Shared VGA memory) Hub Interface 2 USB Ports HDD AC '97 Codec I/O Controller Hub (Intel 82801AA) PCI Video Decoder TV Tuner (Option) A/V Input Device TV Antenna PCI Bus PC Card & OHCI Controller LAN Adapter (10/100 Mbps) IEEE 1394 Device PC Card Hub/Fouter Internet V 1.0.0ENTERSYS System BIOS (512KB) Super I/O PS/2 Keyboard PS/2 Mouse 2 Built-in speakers 2 USB Devices Ext.Microphone EXT.Speaker 2SerialDevices Parallel Device
ID Label/Location Info
Model name: My-Pos Win Idnet Co., Ltd.
Operational Description
NETWORKING Networking Protocols TCP/IP, 10/100 Base-T Fast Ethernet Built-in Ethernet Controller: RealTek RTL8139C Wireless LAN through PCMCIA socket SOFTWARE Operating Sytem Microsoft Windows 98 Second Edition Microsoft Windows 98 Millennium Edition Microsoft Windows XP Home Edition Application Progrom T PCI TV Program ENVIRONMENTAL REGULATORY COMPLIANCE Environmental Specifications RF Interference Operating temperature 5 to 35 Storage temperture 0 to 60 Humidity 30% to 80% non-condensing FCC Class B Power Specifications External power supply 100-240 VAC at 50-60Hz Max 6.67A
Test Report
EMI TEST REPORT Emission of electromagnetic disturbance Test Report No. : ERI-FCC03-0061 Equipment : All-in-one PC Name of basic model : My-Pos Win Family model : None Manufacturer : Idnet Co., Ltd. Applicant : Idnet Co., Ltd. Tested date : 2003. 9. 22 – 9. 29 Issued date : 2003. 10. 7 Test results : PASS Test Standards : FCC Part 15 Subpart B (Class B) /digital devices & peripherals Test Procedure and Items: - AC Power line Conducted emissions measurement : ANSI C63.4-1992 - Radiated emissions measurement : ANSI C63.4-1992 Tested by: GWEON, HUR Approved by: UK-CHO, RIM The results in this report apply only to the sample tested. This test report shall not be reproduced except in full, without the written approval of ERI Laboratory. ELECTROMAGNETIC RESEARCH INSTITUTE CONTENTS 1. CLIENT INFORMATION 2. LABORATORY INFORMATION 3. EQUIPMENT UNDER TEST INFORMATION(EUT) 3.1 Identification of the EUT 3.2 Additional information about the EUT 3.3 Peripheral equipment 4. CONTINUOUS DISTURBANCE VOLTAGE, MAIN TERMINAL 4.1 Operating environment 4.2 Test set-up and test procedures 4.3 Operation Conditions 4.4 Test instrument 4.5 Test results(Test mode: Ground) 4.6 Test results(Test mode: Non-Ground) 5. RADIATED DISTURBANCE : 30MHz – 5000MHz 5.1 Operating environment 5.2 Test set-up 5.3 Test conditions 5.4 Test instrument 5.5 Test results(PC mode) 5.6 Test results(TV Tuner mode) 5.7 Test results(TV- Voltage at the Antenna terminals) APPENDIX (None) ELECTROMAGNETIC RESEARCH INSTITUTE 1. CLIENT INFORMATION The EUT has been tested by request of : Company : Idnet Co., Ltd. Address : Hongpa Bldg. 712 Jegi-dong, Dongdaemun-gu, Seoul, Korea. Name of contact : Chang Sik You Telephone : +82-2-3292-1155 Facsimile : +82-2-3295-1152 2. LABORATORY INFORMATION The 10m full-anechoic chamber and/or EMC facilities are used for these testing. These facilities were accredited by KOLAS, EK, MIC of Korea and FCC of USA. Address ELECTROMAGNETIC RESEARCH INSTITUTE. 66-6, JEIL-RI, YANGJI-MYUN, YOUNGIN-CITY, KYUNGGI-DO, KOREA Telephone No. : +82-31-336-1186~7 Facsimile No. : +82-31-336-1184 Registered No. KOLAS : 111 EK : J MIC : KR0030 FCC Filing No. : 302567 3. EQUIPMENT UNDER TEST INFORMATION(EUT) 3.1 Identification of the EUT Type of equipment : All-in-one PC Model name : My-Pos Win Manufacturer : Idnet Co., Ltd. Address : Hongpa Bldg. 712 Jegi-dong, Dongdaemun-gu, Seoul, Korea. Telephone : +82-2-3292-1155 Facsimile : +82-2-3295-1152 Country of origin : KOREA Rating : 120V, 60Hz Clock rate : CPU clock : 1GHz ( Pentium III : 1GHz ) ELECTROMAGNETIC RESEARCH INSTITUTE 3.2 Additional information about the EUT Class B, Family Models List: None 3.3 Peripheral equipment Defined as equipment needed for correct operation of the EUT. Description Model No. Serial No. Manufacture AC/DC adaptor PW116 02143A Ault Inc Mouse AGM6524 007718 SHANGHAI SYSGRATION Keyboard E03633QLUSQ MX03432804 HP Printer Deskjet930c CN13V1B1RY HP TV pattern generator PM5418TDSI LD642864 Philips ELECTROMAGNETIC RESEARCH INSTITUTE 4. CONTINUOUS DISTURBANCE VOLTAGE, MAIN TERMINAL : Frequency range 0.15 MHz to 30 MHz 4.1 Operating environment Temperature : 22.0 Relative Humidity : 52.0 % 4.2 Test set-up and test procedures The mains terminal disturbance voltage was measured with the equipment under test(EUT) in a shield room. The EUT was connected to an artificial mains network(LISN) placed on the floor. The EUT was placed on non-metallic table 0.4m above the metallic, grounded floor. The distance to other metallic surface was at least 0.8m. Amplitude measurements were performed with a quasi-peak detector and an average detector. 4.3 Operation Conditions During the test, we kept receiving data from TV pattern generator, and then we have the data came out on the monitor. 4.4 Test instrument Instrument Model No Serial No. Makers Next cal.date Used Test receiver ESCS30 100021 R&S 2004. 1. 24 ESH3-Z5 827246/008 R&S 2004. 3. 19 L.I.S.N. ESH3-Z5 831887/018 R&S 2004. 3. 19 Shield room 8 6 3.3m/H - - - AC Main LISN LISN TV PATTERN GENERATOR EUT AC/DC adaptor Mouse Printer Keyboard ELECTROMAGNETIC RESEARCH INSTITUTE 4.5 Test results(Test mode: Ground) Date of test: Sep 29, 2003. An overview sweep performed with peak detector & average detector are included in the report as test reports. Frequency Tested LISN Meter Range Freq. Reading Limits Margin QP AV QP AV QP AV [MHz] [MHz] [dBuV] [dBuV] [dBuV] 0.150 N 50.0 22.8 66.0 56.0 16.0 33.2 0.201 H 51.6 49.9 63.5 53.5 11.9 3.6 0.15-30 0.399 N 43.7 43.0 57.9 47.9 14.2 4.9 0.600 N 39.4 37.9 56.0 46.0 16.6 8.1 0.699 N 39.9 39.0 56.0 46.0 16.1 7.0 0.897 N 39.1 38.8 56.0 46.0 16.9 7.2 1.497 N 39.6 38.4 56.0 46.0 16.4 7.6 1.698 N 39.0 36.9 56.0 46.0 17.0 9.1 2.298 N 38.4 36.6 56.0 46.0 17.6 9.4 3.100 N 38.9 34.0 56.0 46.0 17.1 12.0 * <5 : mean less than 5dB * Other frequency keep over 20dB margin. ELECTROMAGNETIC RESEARCH INSTITUTE [Hot line] [Neutral line] ELECTROMAGNETIC RESEARCH INSTITUTE 4.6 Test results(Test mode: Non-Ground) Date of test: Sep 29, 2003. An overview sweep performed with peak detector & average detector are included in the report as test reports. Frequency Tested LISN Meter Range Freq. Reading Limits Margin QP AV QP AV QP AV [MHz] [MHz] [dBuV] [dBuV] [dBuV] 0.150 H 50.8 23.9 66.0 56.0 15.2 32.1 0.198 H 50.1 48.5 63.7 53.7 13.6 5.2 0.15-30 0.399 N 43.1 43.0 57.9 47.9 14.8 4.9 0.597 N 39.2 37.7 56.0 46.0 16.8 8.3 0.699 N 39.6 39.2 56.0 46.0 16.4 6.8 0.897 N 39.6 38.4 56.0 46.0 16.4 7.6 1.200 N 39.7 39.3 56.0 46.0 16.3 6.7 1.500 N 39.7 38.6 56.0 46.0 16.3 7.4 1.698 N 39.0 37.7 56.0 46.0 17.0 8.3 3.100 N 38.0 32.4 56.0 46.0 18.0 13.6 * <5 : mean less than 5dB * Other frequency keep over 20dB margin. ELECTROMAGNETIC RESEARCH INSTITUTE [Hot line] [Neutral line] ELECTROMAGNETIC RESEARCH INSTITUTE 5. RADIATED DISTURBANCE & VOLTAGE AT THE ANTENNA TERMINALS: 30MHz – 5000MHz, 30MHz – 1000MHz 5.1 Operating environment Temperature : 21.0 Relative Humidity : 73.0 % 5.2 Test set-up The frequency range investigated was 30 MHz to 1…
Text truncated - open the document above for the full version.
Contact Information
Applicant
Chang-sik You(manager)
Test Firm
EMC Compliance LTDMin Seok Chung
Technical Specifications
| # | Rule Parts | Frequency Range | Power Output |
|---|---|---|---|
| 1 | 15B | - | - |
Other Applications from IDnet Co.,Ltd
RLXELLIPSIS
Oct 04, 2005All-in-One PC(Computer)
Equipment Class
JBC - Part 15 Class B Computing Device/Personal Computer