SS3-800TC1504RONIN TC
SZ DJI TECHNOLOGY CO., LTD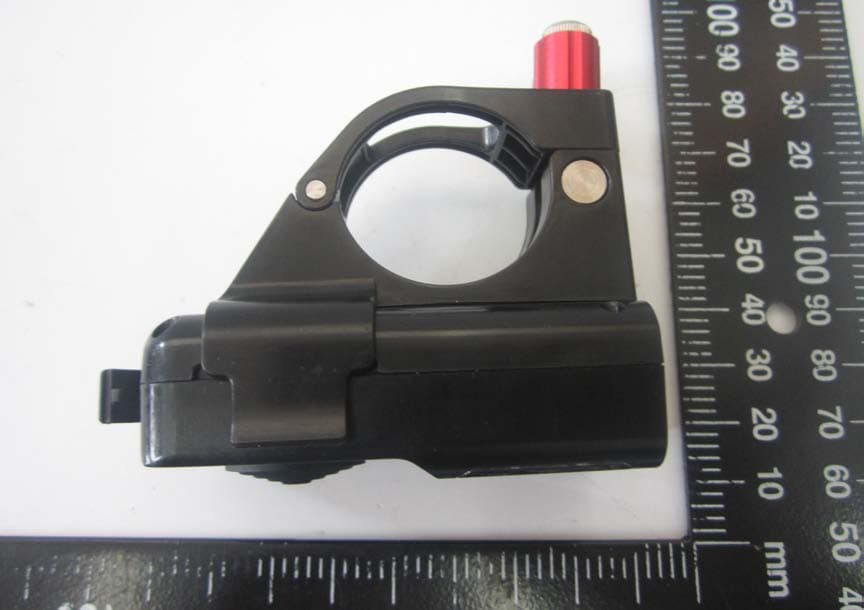
Click to zoom
Application Details
- Equipment Class
- JBP - Part 15 Class B Computing Device Peripheral
- Date of Grant
- May 03, 2015
- Application Purpose
- Original Equipment
- Date of Application
- May 03, 2015
- Equipment Note
- RONIN TC
- Company
- SZ DJI TECHNOLOGY CO., LTD
- Country
- China
Documents & Files
Document Text
Text extracted from the exhibit documents filed with the FCC. Open a document above to read the original.
Users Manual
Thumb Controller V1.02015.4 User Manual 2 © 2015 DJI. All Rights Reserved. Disclaimers and Warnings Congratulations on purchasing your new DJI product. Carefully read the manual and all disclaimers before using this product. By using this product, you hereby agree to this disclaimer and signify that you have read it in its entirety. You agree that you are responsible for your own conduct, for all content that is created using this product, and for any consequences that may arise from either. You agree to use this product only for purposes that are proper and in accordance with local regulations, stated terms, and all applicable polices and guidelines. By reading this disclaimer, you also agree that: 1. Any part of this disclaimer is subject to change without prior notice. Refer to www.dij.com for the latest version. 2. DJI reserves the right of final interpretation of this disclaimer. As DJI has no control over use, setup, final assembly, modification, or misuse of its products, no liability shall be assumed or accepted for any resulting damage or injury. By using, setting up, or assembling the product, the user accepts all resulting liability. DJI assumes no liability for damages or injuries incurred directly or indirectly from the use of this product. DJI is a registered trademark. All names of products, brands, etc. appearing in this manual are trademarks or registered trademarks of their respective owner companies. This product and manual are copyrighted by DJI, with all rights reserved. No part of this product or manual shall be reproduced in any form without the prior written consent or authorization of DJI. No patent liability is assumed with respect to the use of the product or information contained herein. © 2015 DJI. All Rights Reserved. 3 Content Disclaimers and Warnings 2 In the Box 4 Introduction 5 Thumb Controller 5 External Receiver (For Ronin Only) 6 Installation 7 Installing the Thumb Controller 7 Installing the External Receiver (For Ronin Only) 8 Connecting the Thumb Controller to the Gimbal 9 Connecting the Thumb Controller to the Ronin-M 9 Connecting the Thumb Controller to the Ronin 9 Indicator Status 11 Using the Thumb Controller 12 Mode 12 Function 13 Gimbal Settings 13 Device Settings 14 DJI Assistant App Tuning 16 DJI PC/MAC Assistant Tuning 17 Settings 17 Updating the Thumb Controller and the Receiver 18 Specifications 20 4 © 2015 DJI. All Rights Reserved. In the Box Check to ensure that all of the following items are included in the package. If any items are missing, contact DJI or your local dealer. The following items are included with the Thumb Controller for the Ronin-M: The following items are included with the Thumb Controller for the Ronin: Thumb Controller×1Quick Release Accessory Mount×1 USB Cable×1Rubber Ring×1 Receiver×1Adhesive Tape×14-Pin Cable×1 Thumb Controller×1Quick Release Accessory Mount ×1 USB Cable×1 © 2015 DJI. All Rights Reserved. 5 Introduction The Thumb Controller is designed specifically for DJI Ronin series handheld gimbals. It provides a simple, intuitive interface for controlling the gimbal’s pan, tilt, and roll motion. The pressure- sensitive stick and the easy-to-read OLED display give Ronin users more control than ever before. The Thumb Controller communicates with the Ronin-M via a preinstalled internal receiver. An external receiver is needed when the Thumb Controller is used with the Ronin. Thumb Controller [1] Power Button Press and hold the power button to turn on/off the Thumb Controller [2] Status Indicator Indicates the status of the Thumb Controller [3] OLED Display Displays the menu of the Thumb Controller [4] Pressure-Sensitive Stick Transmits the user’s input to the force sensor [1] [2] [3] [4] 6 © 2015 DJI. All Rights Reserved. [5] Micro-USB Port For charging the Thumb Controller and upgrading its firmware [6] Override Button Allow the Thumb Controller to reactivated and updated following a failure update process [1] CAN Port Connects the receiver to the Ronin [2] Bind Button Connects the Thumb Controller to the Ronin [3] LED Indicator Indicates the status of the receiver [4] Micro-USB Port For upgrading the firmware External Receiver (For Ronin Only) [5] [6] [1] [2] [3] [4] © 2015 DJI. All Rights Reserved. 7 Installation Installing the Thumb Controller 1. Install the quick-release accessory mount by clamping it around the handlebar of the Ronin and tightening the screw. Remember to place the rubber ring on the on the handlebar and clamp the accessory mount around it when installing the unit on the Ronin-M. 2. Insert the Thumb Controller into the quick-release accessory mount and ensure that it is secure. 8 © 2015 DJI. All Rights Reserved. Installing the External Receiver (For Ronin Only) 1. Use the 4-pin cable to connect the CAN port on the Ronin to the CAN 1 or Can 2 port on the receiver. 2. Use the adhesive tape to secure the receiver on the Ronin. © 2015 DJI. All Rights Reserved. 9 Connecting the Thumb Controller to the Gimbal Connecting the Thumb Controller to the Ronin-M 1. Turn on the Ronin-M. 2. Press the Ronin-M’s Bind Button (shown below) one time. The LED indicator on the Ronin-M will rapidly blink green. 3. Turn on the Thumb Controller. If the LED indicator on the Ronin-M and the LED indicator on the Thumb Controller both glow solid green, they have been successfully connected. Connecting the Thumb Controller to the Ronin 1. Turn on the Ronin. 2. Press the Bind Button on the receiver one time. The LED indicator on the receiver will rapidly blink green. 3. Turn on the Thumb Controller. If the LED indicator on the receiver and the LED indicator on the Thumb Controller both glow solid green, they have been successfully connected. Bind Button 10 © 2015 DJI. All Rights Reserved. The binding process only needs to be completed one time, unless the bind button is pressed or the Ronin/Ronin-M needs to be connected to another Thumb Controller. Bind Button © 2015 DJI. All Rights Reserved. 11 Indicator Status Thumb …
Text truncated - open the document above for the full version.
External Photos
External Photos 1. EUT full view 2. EUT front view 3. EUT rear view 4. EUT left side view 5. EUT right side view 6. EUT top view 7. EUT bottom view
ID Label/Location Info
1. Label 2. Label location
Internal Photos
Internal Photos 1. EUT uncover view 2. Mainboard front view 3. Mainboard rear view 4. RF chip view 5. Antenna view
Test Report
MMORLAB 1. TECHN 1.1. APPL 1.2. EQUI 2. TEST R 2.1. APPL 3. TEST C 3.1. TEST 3.2. TEST 3.2.1. CO 3.2.2. RAD 4. 47 CFR 4.1. COND 4.1.1. REQ 4.1.2. TES 4.1.3. TES 4.2. RADIA 4.2.1. REQ 4.2.2. TES 4.2.3. FRE 4.2.4. TES ANNEX A ANNEX B 1. IDENT 2. IDENT B GROU NICAL INFO LICANT INFO PMENT UND E RESULTS ∙ LIED REFERE CONDITION T MODE ∙∙∙∙∙∙∙ T SETUP AND NDUCTED E DIATED EMIS R PART 15B DUCTED EMI QUIREMENT ST DESCRIPT ST RESULT ∙∙ ATED EMISS QUIREMENT ST DESCRIPT EQUENCY RA ST RESULT ∙∙ TEST UNC TESTING TIFICATION O TIFICATION O UP FL1-3, Bu Block67, ORMATION RMATION ∙∙∙∙ ER TEST (EU ∙∙∙∙∙∙∙∙∙∙∙∙∙∙∙∙∙∙ ENCE DOCUM NS SETTIN ∙∙∙∙∙∙∙∙∙∙∙∙∙∙∙∙∙∙ D EQUIPMEN MISSION ∙∙∙∙∙ SSION ∙∙∙∙∙∙∙∙∙∙ B REQUIRE ISSION ∙∙∙∙∙∙∙∙ ∙∙∙∙∙∙∙∙∙∙∙∙∙∙∙∙∙∙∙ TION ∙∙∙∙∙∙∙∙∙∙∙ ∙∙∙∙∙∙∙∙∙∙∙∙∙∙∙∙∙∙∙∙ SION ∙∙∙∙∙∙∙∙∙∙∙∙ ∙∙∙∙∙∙∙∙∙∙∙∙∙∙∙∙∙∙∙ TION ∙∙∙∙∙∙∙∙∙∙∙ ANGE OF ME ∙∙∙∙∙∙∙∙∙∙∙∙∙∙∙∙∙∙∙∙ CERTAINT G LABORAT OF THE RESP OF THE RESP uilding A, FeiYang Sc BaoAn District, She DIR N ∙∙∙∙∙∙∙∙∙∙∙∙∙∙∙∙∙∙ ∙∙∙∙∙∙∙∙∙∙∙∙∙∙∙∙∙∙∙ UT) DESCRI ∙∙∙∙∙∙∙∙∙∙∙∙∙∙∙∙∙∙∙ MENTS ∙∙∙∙∙∙∙∙ NG ∙∙∙∙∙∙∙∙∙∙∙∙∙∙∙ ∙∙∙∙∙∙∙∙∙∙∙∙∙∙∙∙∙∙∙ TS LIST ∙∙∙∙∙∙∙ ∙∙∙∙∙∙∙∙∙∙∙∙∙∙∙∙∙∙∙∙ ∙∙∙∙∙∙∙∙∙∙∙∙∙∙∙∙∙∙∙∙ EMENTS ∙∙∙ ∙∙∙∙∙∙∙∙∙∙∙∙∙∙∙∙∙∙∙ ∙∙∙∙∙∙∙∙∙∙∙∙∙∙∙∙∙∙∙∙ ∙∙∙∙∙∙∙∙∙∙∙∙∙∙∙∙∙∙∙∙ ∙∙∙∙∙∙∙∙∙∙∙∙∙∙∙∙∙∙∙∙ ∙∙∙∙∙∙∙∙∙∙∙∙∙∙∙∙∙∙∙ ∙∙∙∙∙∙∙∙∙∙∙∙∙∙∙∙∙∙∙∙ ∙∙∙∙∙∙∙∙∙∙∙∙∙∙∙∙∙∙∙∙ EASUREMENT ∙∙∙∙∙∙∙∙∙∙∙∙∙∙∙∙∙∙∙∙ TY ∙∙∙∙∙∙∙∙∙∙∙∙∙∙∙∙ TORY INFO PONSIBLE T PONSIBLE T cience Park, No.8 Lo enZhen , GuangDon RECTOR ∙∙∙∙∙∙∙∙∙∙∙∙∙∙∙∙∙∙∙ ∙∙∙∙∙∙∙∙∙∙∙∙∙∙∙∙∙∙∙ IPTION ∙∙∙∙∙∙∙∙∙ ∙∙∙∙∙∙∙∙∙∙∙∙∙∙∙∙∙∙∙ ∙∙∙∙∙∙∙∙∙∙∙∙∙∙∙∙∙∙∙ ∙∙∙∙∙∙∙∙∙∙∙∙∙∙∙∙∙∙∙ ∙∙∙∙∙∙∙∙∙∙∙∙∙∙∙∙∙∙∙ ∙∙∙∙∙∙∙∙∙∙∙∙∙∙∙∙∙∙∙ ∙∙∙∙∙∙∙∙∙∙∙∙∙∙∙∙∙∙∙∙ ∙∙∙∙∙∙∙∙∙∙∙∙∙∙∙∙∙∙∙∙ ∙∙∙∙∙∙∙∙∙∙∙∙∙∙∙∙∙∙∙ ∙∙∙∙∙∙∙∙∙∙∙∙∙∙∙∙∙∙∙ ∙∙∙∙∙∙∙∙∙∙∙∙∙∙∙∙∙∙∙∙ ∙∙∙∙∙∙∙∙∙∙∙∙∙∙∙∙∙∙∙∙ ∙∙∙∙∙∙∙∙∙∙∙∙∙∙∙∙∙∙∙∙ ∙∙∙∙∙∙∙∙∙∙∙∙∙∙∙∙∙∙∙ ∙∙∙∙∙∙∙∙∙∙∙∙∙∙∙∙∙∙∙∙ ∙∙∙∙∙∙∙∙∙∙∙∙∙∙∙∙∙∙∙∙ T ∙∙∙∙∙∙∙∙∙∙∙∙∙∙∙∙∙∙ ∙∙∙∙∙∙∙∙∙∙∙∙∙∙∙∙∙∙∙∙ ∙∙∙∙∙∙∙∙∙∙∙∙∙∙∙∙∙∙∙ ORMATION ESTING LAB ESTING LOC ngChang Road, ng Province, P. R. C RE RY ∙∙∙∙∙∙∙∙∙∙∙∙∙∙∙∙∙∙∙ ∙∙∙∙∙∙∙∙∙∙∙∙∙∙∙∙∙∙∙ ∙∙∙∙∙∙∙∙∙∙∙∙∙∙∙∙∙∙∙ ∙∙∙∙∙∙∙∙∙∙∙∙∙∙∙∙∙∙∙ ∙∙∙∙∙∙∙∙∙∙∙∙∙∙∙∙∙∙∙ ∙∙∙∙∙∙∙∙∙∙∙∙∙∙∙∙∙∙∙ ∙∙∙∙∙∙∙∙∙∙∙∙∙∙∙∙∙∙∙ ∙∙∙∙∙∙∙∙∙∙∙∙∙∙∙∙∙∙∙ ∙∙∙∙∙∙∙∙∙∙∙∙∙∙∙∙∙∙∙ ∙ ∙∙∙∙∙∙∙∙∙∙∙∙∙∙∙∙∙∙∙∙ ∙∙∙∙∙∙∙∙∙∙∙∙∙∙∙∙∙∙∙ ∙∙∙∙∙∙∙∙∙∙∙∙∙∙∙∙∙∙∙ ∙∙∙∙∙∙∙∙∙∙∙∙∙∙∙∙∙∙∙ ∙ ∙∙∙∙∙∙∙∙∙∙∙∙∙∙∙∙∙∙∙∙ ∙∙∙∙∙∙∙∙∙∙∙∙∙∙∙∙∙∙∙∙ ∙∙∙∙∙∙∙∙∙∙∙∙∙∙∙∙∙∙∙ ∙∙∙∙∙∙∙∙∙∙∙∙∙∙∙∙∙∙∙ ∙ ∙∙∙∙∙∙∙∙∙∙∙∙∙∙∙∙∙∙∙∙ ∙∙∙∙∙∙∙∙∙∙∙∙∙∙∙∙∙∙∙∙ ∙∙∙∙∙∙∙∙∙∙∙∙∙∙∙∙∙∙∙∙ ∙∙∙∙∙∙∙∙∙∙∙∙∙∙∙∙∙∙∙ ∙∙∙∙∙∙∙∙∙∙∙∙∙∙∙∙∙∙ BORATORY ∙∙ CAT I O N ∙∙∙∙∙∙∙∙ Tel: 86-75 China Http://www PORTNo ∙∙∙∙∙∙∙∙∙∙∙∙∙∙∙∙∙∙∙ ∙∙∙∙∙∙∙∙∙∙∙∙∙∙∙∙∙∙∙ ∙∙∙∙∙∙∙∙∙∙∙∙∙∙∙∙∙∙∙ ∙∙∙∙∙∙∙∙∙∙∙∙∙∙∙∙∙∙∙ ∙∙∙∙∙∙∙∙∙∙∙∙∙∙∙∙∙∙∙ ∙∙∙∙∙∙∙∙∙∙∙∙∙∙∙∙∙∙∙ ∙∙∙∙∙∙∙∙∙∙∙∙∙∙∙∙∙∙∙ ∙∙∙∙∙∙∙∙∙∙∙∙∙∙∙∙∙∙∙ ∙∙∙∙∙∙∙∙∙∙∙∙∙∙∙∙∙∙∙∙ ∙∙∙∙∙∙∙∙∙∙∙∙∙∙∙∙∙∙∙∙ ∙∙∙∙∙∙∙∙∙∙∙∙∙∙∙∙∙∙ ∙ ∙∙∙∙∙∙∙∙∙∙∙∙∙∙∙∙∙∙∙ ∙∙∙∙∙∙∙∙∙∙∙∙∙∙∙∙∙∙∙∙ ∙∙∙∙∙∙∙∙∙∙∙∙∙∙∙∙∙∙∙∙ ∙∙∙∙∙∙∙∙∙∙∙∙∙∙∙∙∙∙∙∙ ∙∙∙∙∙∙∙∙∙∙∙∙∙∙∙∙∙∙ ∙ ∙∙∙∙∙∙∙∙∙∙∙∙∙∙∙∙∙∙∙∙ ∙∙∙∙∙∙∙∙∙∙∙∙∙∙∙∙∙∙∙∙ ∙∙∙∙∙∙∙∙∙∙∙∙∙∙∙∙∙∙∙∙ ∙∙∙∙∙∙∙∙∙∙∙∙∙∙∙∙∙∙∙∙ ∙∙∙∙∙∙∙∙∙∙∙∙∙∙∙∙∙∙ ∙ ∙∙∙∙∙∙∙∙∙∙∙∙∙∙∙∙∙∙∙ ∙∙∙∙∙∙∙∙∙∙∙∙∙∙∙∙∙∙∙ ∙∙∙∙∙∙∙∙∙∙∙∙∙∙∙∙∙∙∙ 5-36698555 Fax: w.morlab.cn E-m o.:SZ1503 ∙∙∙∙∙∙∙∙∙∙∙∙∙∙∙∙∙∙∙ ∙∙∙∙∙∙∙∙∙∙∙∙∙∙∙∙∙∙∙ ∙∙∙∙∙∙∙∙∙∙∙∙∙∙∙∙∙∙∙ ∙∙∙∙∙∙∙∙∙∙∙∙∙∙∙∙∙∙∙ ∙∙∙∙∙∙∙∙∙∙∙∙∙∙∙∙∙∙∙ ∙∙∙∙∙∙∙∙∙∙∙∙∙∙∙∙∙∙∙ ∙∙∙∙∙∙∙∙∙∙∙∙∙∙∙∙∙∙∙ ∙∙∙∙∙∙∙∙∙∙∙∙∙∙∙∙∙∙∙ ∙∙∙∙∙∙∙∙∙∙∙∙∙∙∙∙∙∙∙ ∙∙∙∙∙∙∙∙∙∙∙∙∙∙∙∙∙∙∙ ∙∙∙∙∙∙∙∙∙∙∙∙∙∙∙∙∙∙∙ ∙∙∙∙∙∙∙∙∙∙∙∙∙∙∙∙∙∙∙ ∙∙∙∙∙∙∙∙∙∙∙∙∙∙∙∙∙∙∙ ∙∙∙∙∙∙∙∙∙∙∙∙∙∙∙∙∙∙∙ ∙∙∙∙∙∙∙∙∙∙∙∙∙∙∙∙∙∙∙ ∙∙∙∙∙∙∙∙∙∙∙∙∙∙∙∙∙∙∙ ∙∙∙∙∙∙∙∙∙∙∙∙∙∙∙∙∙∙∙ ∙∙∙∙∙∙∙∙∙∙∙∙∙∙∙∙∙∙∙ ∙∙∙∙∙∙∙∙∙∙∙∙∙∙∙∙∙∙∙ ∙∙∙∙∙∙∙∙∙∙∙∙∙∙∙∙∙∙∙ ∙∙∙∙∙∙∙∙∙∙∙∙∙∙∙∙∙∙∙ ∙∙∙∙∙∙∙∙∙∙∙∙∙∙∙∙∙∙∙ ∙∙∙∙∙∙∙∙∙∙∙∙∙∙∙∙∙∙∙ ∙∙∙∙∙∙∙∙∙∙∙∙∙∙∙∙∙∙∙ : 86-755-36698525 ail: service@morlab . Page 2 0f 19 30100E03 ∙∙∙∙∙∙∙∙∙∙∙∙∙∙∙∙∙∙∙ ∙∙∙∙∙∙∙∙∙∙∙∙∙∙∙∙∙∙∙ ∙∙∙∙∙∙∙∙∙∙∙∙∙∙∙∙∙∙∙ ∙∙∙∙∙∙∙∙∙∙∙∙∙∙∙∙∙∙∙ ∙∙∙∙∙∙∙∙∙∙∙∙∙∙∙∙∙∙∙ ∙∙∙∙∙∙∙∙∙∙∙∙∙∙∙∙∙∙∙ ∙∙∙∙∙∙∙∙∙∙∙∙∙∙∙∙∙∙∙ ∙∙∙∙∙∙∙∙∙∙∙∙∙∙∙∙∙∙∙ ∙∙∙∙∙∙∙∙∙∙∙∙∙∙∙∙∙∙∙∙ ∙∙∙∙∙∙∙∙∙∙∙∙∙∙∙∙∙∙∙∙ ∙∙∙∙∙∙∙∙∙∙∙∙∙∙∙∙∙ 1 ∙∙∙∙∙∙∙∙∙∙∙∙∙∙∙∙∙ 1 ∙∙∙∙∙∙∙∙∙∙∙∙∙∙∙∙∙ 1 ∙∙∙∙∙∙∙∙∙∙∙∙∙∙∙∙∙ 1 ∙∙∙∙∙∙∙∙∙∙∙∙∙∙∙∙∙ 1 ∙∙∙∙∙∙∙∙∙∙∙∙∙∙∙∙∙ 1 ∙∙∙∙∙∙∙∙∙∙∙∙∙∙∙∙∙ 1 ∙∙∙∙∙∙∙∙∙∙∙∙∙∙∙∙∙ 1 ∙∙∙∙∙∙∙∙∙∙∙∙∙∙∙∙∙ 1 ∙∙∙∙∙∙∙∙∙∙∙∙∙∙∙∙∙ 1 ∙∙∙∙∙∙∙∙∙∙∙∙∙∙∙∙∙ 1 ∙∙∙∙∙∙∙∙∙∙∙∙∙∙∙∙∙ 1 ∙∙∙∙∙∙∙∙∙∙∙∙∙∙∙∙∙ 1 ∙∙∙∙∙∙∙∙∙∙∙∙∙∙∙∙∙ 1 .cn 5 5 5 6 6 7 7 8 8 9 11 11 1 1 1 14 4 4 5 5 18 19 19 19 MMORLAB 3. TEST Issue 1.0 B GROU T ENVIRONME Date 2015-04-17 UP FL1-3, Bu Block67, ENT CONDIT 7 uilding A, FeiYang Sc BaoAn District, She TIONS ∙∙∙∙∙∙∙∙∙∙ Cha cience Park, No.8 Lo enZhen , GuangDon ∙∙∙∙∙∙∙∙∙∙∙∙∙∙∙∙∙∙∙ ange Histo Re ngChang Road, ng Province, P. R. C RE ∙∙∙∙∙∙∙∙∙∙∙∙∙∙∙∙∙∙∙ ory ason for ch First editio Tel: 86-75 China Http://www PORTNo ∙∙∙∙∙∙∙∙∙∙∙∙∙∙∙∙∙∙∙ hange on 5-36698555 Fax: w.morlab.cn E-m o.:SZ1503 ∙∙∙∙∙∙∙∙∙∙∙∙∙∙∙∙∙∙∙ : 86-755-36698525 ail: service@morlab . Page 3 0f 19 30100E03 ∙∙∙∙∙∙∙∙∙∙∙∙∙∙∙∙∙ 1 .cn 19 MMORLAB 1. Tec Note: Pro 1.1. App Company Address: 1.2. Equ Hard Sof Work Wo NOTE: 1. The E 2. The E for ch 3. For a m applic B GROU chnica ovide by ap plicant y: SZ D : 14th Sou t uipment EUT T Serial dware Vers ftware Vers king Press orking Curr Power sup EUT is a Th EUT equipp harging and more detaile cant and/or UP FL1-3, Bu Block67, al Info pplicant. Informa DJI TECHNO floor, West th 4th Ave, N t under Type: Thu m l No: (n.a . sion: V1. 0 sion: V1. 0 sure: 3.6 V rent: 100 m pply: Bat t Bran Mod Seria Cap Rate Cha umb Contro ed with a M software u ed descripti manufactu r uilding A, FeiYang Sc BaoAn District, She ormat ation OLOGY CO t Wing, Skyw Nanshan D Test (E mb Controll ., marked # 0 0 VDC - 4.2VD mA tery nd Name: del No.: al No.: acity: ed Voltage: rge Limit: oller, it supp Micro-B USB pgrading. on, please rer. cience Park, No.8 Lo enZhen , GuangDon tion O., LTD. worth Semi istrict, She n EUT) De ler 1 by test sit DC N/A EU6630 (n.a. ma 1150mA 3.7V 4.2V ports DSSS B port which refer to Spe ngChang Road, ng Province, P. R. C RE conductor D nzhen, Chin scriptio te) 048P arked #1 by Ah (2.4GHz) w h can be co ecification o Tel: 86-75 China Http://www PORTNo Design Build na on y test site) wireless typ nnected to or User’s Ma 5-36698555 Fax: w.morlab.cn E-m o.:SZ1503 ding NO.18 e. ancillary e q anual suppl : 86-755-36698525 ail: service@morlab . Page 5 0f 19 30100E03 Gaoxin quipments i…
Text truncated - open the document above for the full version.
Test Setup Photos
Test Setup Photos 1. Conducted emission main’s port front view 2. Conducted emission main’s port side view 3. Radiated emission (30MHz-1GHz)
Contact Information
Applicant
Gary Zeng(PM)
Test Firm
Shenzhen Morlab Communications Technology Co., LtdIvy zhu
Technical Specifications
| # | Rule Parts | Frequency Range | Power Output |
|---|---|---|---|
| 1 | 15B | - | - |
Other Applications from SZ DJI TECHNOLOGY CO., LTD
SS3-T55A2510
Dec 19, 2025DJI AGRAS T55
Equipment Class
NII - Unlicensed National Information Infrastructure TXSS3-T100A2510
Dec 19, 2025DJI AGRAS T100S, DJI AGRAS T70S
Equipment Class
NII - Unlicensed National Information Infrastructure TXSS3-TKMI2507
Dec 19, 2025DJI RC Mini
Equipment Class
DTS - Digital Transmission SystemSS3-RD60B2510
Dec 18, 2025Fixed Millimeter Wave Radar
Equipment Class
FDS - Part 15 Field Disturbance SensorSS3-RD60A2510
Dec 18, 2025Rotational Active Phased Array Radar
Equipment Class
FDS - Part 15 Field Disturbance Sensor