SS3-GL3581511C1
SZ DJI TECHNOLOGY CO., LTD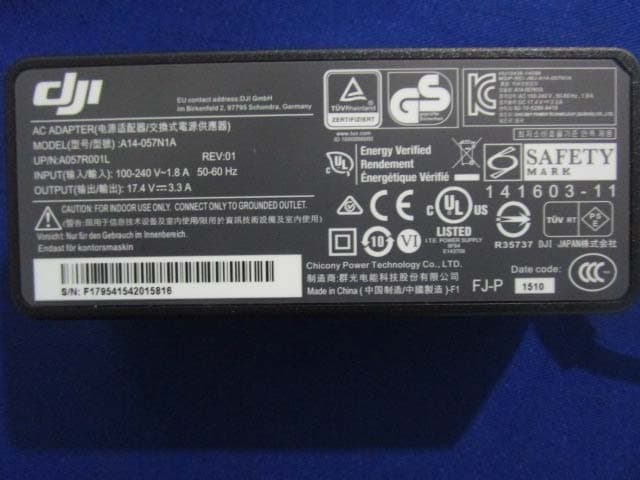
Click to zoom
Application Details
- Equipment Class
- DXX - Part 15 Low Power Communication Device Transmitter
- Date of Grant
- Dec 03, 2015
- Application Purpose
- Original Equipment
- Date of Application
- Dec 03, 2015
- Equipment Note
- C1
- Frequency Range
- 5738.00000000 - 5813.00000000
- Company
- SZ DJI TECHNOLOGY CO., LTD
- Country
- China
Documents & Files
Document Text
Text extracted from the exhibit documents filed with the FCC. Open a document above to read the original.
Users Manual
PHANTOM 3 V1.0 2015.11 User Manual 4K 2 © 2015 DJI. All Rights Reserved. Using this manual Legends WarningImportantHints and TipsReference Read Before the First Flight Read the following documents before using the Phantom 3 4K: 1. In the Box 2. Phantom 3 4K User Manual 3. Phantom 3 4K Quick Start Guide 4. Phantom 3 4K Safety Guidelines and Disclaimer 5. Phantom 3 4K Intelligent Flight Battery Safety Guidelines We recommend that you watch all tutorial videos on the official DJI website and read the Disclaimer before you fly. Prepare for your first flight by reviewing the Phantom 3 4K Quick Start Guide and refer to the User Manual for more detailed information . Video Tutorials Please watch the tutorial videos at the link below, which demonstrates how to use Phantom 3 4K safely: http://www.dji.com/product/phantom-3/video Download the DJI GO app Download and install the DJI GO app before using the aircraft. Scan the QR code to the right to download the latest version. The Android version of the DJI GO app is compatible with Android 4.1.2 or later. The iOS version of the DJI GO app is compatible with iOS 8.0 or later. Searching for Keywords Search for keywords such as “battery” and “install” to find a topic. If you are using Adobe Acrobat Reader to read this document, press Ctrl+F on Windows or Command+F on Mac to begin a search. Navigating to a Topic View a complete list of topics in the table of contents. Click on a topic to navigate to that section. © 2015 DJI. All Rights Reserved. 3 Contents Using this manual Legends 2 Read Before the First Flight 2 Video Tutorials 2 Download the DJI GO app 2 Product Profile Introduction 6 Feature Highlights 6 Preparing the Aircraft 6 Aircraft Diagram 8 Remote Controller Diagram 8 Aircraft Flight Controller 11 Flight Mode 11 Flight Status Indicator 11 Return-to-Home (RTH) 12 Smart RTH 12 Low Battery RTH 13 Failsafe RTH 14 Vision Positioning System 15 Flight Recorder 16 Attaching and Detaching the Propellers 17 DJI Intelligent Flight Battery 18 Remote Controller Remote Controller Profile 23 Using the Remote Controller 23 Remote Controller Status LED 27 Linking the Remote Controller 28 Remote Controller Compliance Version 29 4 © 2015 DJI. All Rights Reserved. Camera and Gimbal Camera Profile 31 Gimbal 32 DJI GO app Camera 35 Director 38 Store 38 Discovery 38 Flight Flight Environment Requirements 40 Flight Limits and No-Fly Zones 40 Preflight Checklist 44 Calibrating the Compass 44 Auto Takeoff and Auto Landing 45 Flight Test 46 Starting/Stopping the Motors 46 Troubleshooting (FAQ) Appendix Specifications 54 Firmwares Update 56 Intelligent Flight Mode 56 After-Sales Information 56 FCC Compliance 57 © 2015 DJI. All Rights Reserved. 5 Product Profile This section introduces the Phantom 3 4K and lists the components of the aircraft and remote controller. 6 © 2015 DJI. All Rights Reserved. Product Profile Product Profile Introduction The Phantom 3 4K represents the next generation of DJI quadcopters. It is capable of capturing 4K video and transmitting an HD video signal out of the box. The built-in camera has an integrated gimbal to max- imize stability while minimizing both weight and size. Even when no GPS signal is available, the Vision Positioning System allows the aircraft to hover accurately in place. Feature Highlights Camera and Gimbal: With the Phantom 3 4K, you’re shooting 4K video at up to 30 frames per second and capturing 12 megapixel photos that look crisper and cleaner than ever. An enhanced sensor gives you greater clarity, lower noise, and better pictures than any previous flying camera. HD Video Downlink: The low-latency long range HD downlink is powered by an enhanced version of DJI Lightbridge. DJI Intelligent Flight Battery: The 4480 mAh DJI Intelligent Flight Battery features upgraded battery cells and an advanced power management system. Flight Controller: The next-generation flight controller has been updated to provide a safer, more reliable flight experience. A newly implemented flight recorder stores critical data from each flight and the Vision Positioning System enhances hovering precision when flying indoors or in environments where GPS is unavailable. Preparing the Aircraft Removing Gimbal Clamp Remove the gimbal clamp by sliding it to the right (when facing the nose of the aircraft), as shown below. © 2015 DJI. All Rights Reserved. 7 Product Profile Phantom 3 4K User Manual Attaching the Propellers: Mount the propellers with black dots on to motors with black axes and spin counter-clockwise to secure. Mount the propellers with sliver dots on to motors with sliver axes and spin clockwise to secure. Be sure all propellers are securely in place. Preparing the Remote Controller: The mobile device holder is designed for securing tablet or mobile device. Tilt the mobile device holder to the desired position, then adjust the antennas so they are facing outward. 1. Press the button on the top right side of the mobile device holder to release the clamp, then adjust the clamp to fit the size of your mobile device. 2. Secure your mobile device in the clamp by pressing down. 3. Press and hold the Power Button to turn on the remote controller. The Status LED will become solid green if the remote controller is functioning properly Place all propellers onto the correct motors and tighten by hand to lock them in position. Battery Installation Slide battery into the battery compartment according to the arrow’s direction shown below. Make sure that you hear a click sound indicates the battery is firmly installed. Failure to do so may affect the flight safety of your aircraft. 3 1 2 8 © 2015 DJI. All Rights Reserved. Product Profile Phantom 3 4K User Manual Aircraft Diagram Remote Controller Diagram [1] Antennas Relays aircraft control and video signal. [2] Mobile Device Holder Securely mounts your mobile device to the remote controller. [3] Control Stick Controls the orientation and movement of the aircraft. [4] Return Home (RTH) Button Press an…
Text truncated - open the document above for the full version.
Users Manual
© 2015 DJI. All Rights Reserved. 21 Aircraft Phantom 3 4K User Manual Battery Level Indicators While Charging LED1LED2LED3LED4Battery Level 0%~25% 25%~50% 50%~75% 75%~100% Fully Charged Battery Protection LED Display The table below shows battery protection mechanisms and corresponding LED patterns. Battery Level Indicators while Charging LED1LED2LED3LED4Blinking PatternBattery Protection Item LED2 blinks twice per second Over current detected LED2 blinks three times per secondShort circuit detected LED3 blinks twice per secondOver charge detected LED3 blinks three times per secondOver-voltage charger detected LED4 blinks twice per secondCharging temperature is too low LED4 blinks three times per secondCharging temperature is too high After these issues are resolved, press the Power Button to turn off the Battery Level Indicator. Unplug the Intelligent Flight Battery from the charger and plug it back in to resume charging. Note that you do not need to unplug and plug in the charger in the event of a room temperature error; the charger will resume charging when the temperature is within the allowable range. DJI does not take any responsibility for damage caused by third-party chargers. How to discharge your Intelligent Flight Battery: Slow : Place the Intelligent Flight Battery into the Phantom 3 4K’s Battery Compartment and turn it on. Leave it on until there is less than 8% of power left, or until the battery can no longer be turned on. Launch the DJI GO app to check battery levels. Rapid : Fly the Phantom 3 4K outdoors until there is less than 8% of power left, or until the battery can no longer be turned on. 22 © 2015 DJI. All Rights Reserved. Remote Controller This section describes the features of the remote controller and includes instructions for controlling the aircraft and the camera. © 2015 DJI. All Rights Reserved. 23 Remote Controller Remote Controller Remote Controller Profile The Phantom 3 4K remote controller is a multi-function wireless communication device that integrates the video downlink system and aircraft remote control system. The video downlink and aircraft remote control system operate at 2.4 GHz. The remote controller features a number of camera control functions, such as taking and previewing photos and videos, as well as controlling gimbal motion. The remote controller is powered by a 2S rechargeable battery. The battery level is displayed via LED indicators on the front panel of the remote controller. Compliance Version: The remote controller is compliant with both CE and FCC regulations. Operating Mode: Control can be set to Mode 1 or Mode 2, or to a custom mode. Mode 1: The right stick serves as the throttle. Mode 2: The left stick serves as the throttle. To prevent transmission interference, do not operate more than three aircrafts in the same area. Using the Remote Controller Turning the Remote Controller On and Off The Phantom 3 4K remote controller is powered by a 2S rechargeable battery that has a capacity of 6000 mAh. The battery level is indicated via the Battery Level LEDs on the front panel. Follow the steps below to turn on your remote controller: 1. When the remote controller is turned off, press the Power Button once. The Battery Level LEDs will display the current battery level. 2. Press and hold the Power Button to turn on the remote controller. 3. The remote controller will beep when it is turned on. The Status LED will rapidly blink green, indicating that the remote controller is linking to the aircraft. The Status LEDs will glow solid green when linking is complete. 4. Repeat Step 2 to turn off the remote controller. Charging the Remote Controller Charge the remote controller using the included charger. Refer to the figure on next page below for more details. 24 © 2015 DJI. All Rights Reserved. Remote Controller Phantom 3 4K User Manual Charger Power Outlet Power Button Controlling the Camera Shoot videos/pictures, view recorded images, and adjust camera settings via the Shutter Button, Camera Settings Dial, Playback Button, and Video Recording Button on the remote controller. [1] Camera Settings Dial Turn the dial to adjust camera settings such as ISO, shutter speed, and aperture without letting go of the remote controller. Move the dial to left or right to scroll through pictures and videos in playback mode. Press down on the dial to toggle between these settings. [2] Playback Button Press to view images and videos that have already been captured. [3] Shutter Button Press to take a photo. If burst mode is activated, multiple photos will be taken with a single press. [4] Video Recoding Button Press once to start recording video, then press again to stop recording. [5] Gimbal Dial Use this dial to control the tilt of the gimbal. Controlling Aircraft This section explains how to control the orientation of the aircraft through the remote controller. The Remote Control is set to Mode 2 by default. [1] [2] [3] [4] [5] © 2015 DJI. All Rights Reserved. 25 Remote Controller Phantom 3 4K User Manual Stick Neutral/Mid-Point: Control sticks are in the center position. Moving the Control Stick: The control stick is pushed away from the center position. Remote Controller (Mode 2) Aircraft ( Indicates Nose Direction) Remarks Moving the left stick up and down changes the aircraft’s elevation. Push the stick up to ascend and down to descend. When both sticks are centered, the Phantom 3 4K will hover in place. The more the stick is pushed away from the center position, the faster the Phantom 3 4K will change elevation. Always push the stick gently to prevent sudden and unexpected elevation changes. Moving the left stick to the left or right controls the rudder and rotation of the aircraft. Push the sick left to rotate the aircraft counter- clockwise, push the stick right to rotate the aircraft clockwise. If the stick is centered, the Phantom 3 4K will maintain its current orientation. The more the stick is pushed away from the center position, the faster t…
Text truncated - open the document above for the full version.
External Photos
EXHIBIT B - EUT EXTERNAL PHOTOGRAPHS EUT – All View EUT – Top View EUT – Bottom View EUT –Side View EUT –Side View EUT –Port View EUT –AntennaView EUT – Adapter Top View 2.4G Antenna 2.4G & 5G Antenna EUT –Adapter Bottom View EUT –Adapter Label View
ID Label/Location Info
EXHIBIT A - FCC ID LABELING AND LOCATION FCC ID Label Proposed FCC ID Label Location The label shown shall be permanently affixed at a conspicuous location on the device and be readily visible to the user at the time purchase (Labeling requirements per 2.925) Label Here
Internal Photos
EXHIBIT C - EUT INTERNAL PHOTOGRAPHS EUT –Uncover View EUT –Uncover View EUT –Control Board Top View EUT –Control Board Bottom View EUT –Uncover View EUT –Uncover View EUT –Main Board Top View EUT –Main Board Top Uncover View EUT –Main Board Bottom View EUT –RF Circuit View EUT –RF Chip View EUT –Main Chip View EUT –Uncover View EUT – Battery Top View EUT – Battery Bottom View
Test Report
Note: This test report is prepared for the customer shown above and for the device described herein. It may not be duplicated or used in part without prior written consent from Bay Area Compliance Laboratories Corp. (Dongguan). This report is valid only with a valid digital signature. The digital signature may be available only under the Adobe software above version 7.0. FCC PART 15.249 TEST REPORT For SZ DJI TECHNOLOGY CO., LTD 14th floor, West Wing, Skyworth Semiconductor Design Building NO.18 Gaoxin South 4th Ave, Nanshan, Shenzhen, Guangdong, China Report Type: Original Report Product Type: Remote Controller Test Engineer: Allen Qiao Report Number: RDG151112003-00B Report Date: 2015-11-24 Reviewed By: Sula Huang RF Leader Test Laboratory: Bay Area Compliance Laboratories Corp. (Dongguan) No.69 Pulongcun, Puxinhu Industrial Zone, Tangxia, Dongguan, Guangdong, China Tel: +86-769-86858888 Fax: +86-769-86858891 www.baclcorp.com.cn FCC ID: SS3-GL3581511 Bay Area Compliance Laboratories Corp. (Dongguan) Report No.: RDG151112003-00B FCC Part 15.249 Page 2 of 23 TABLE OF CONTENTS GENERAL INFORMATION ....................................................................................................................................... 3 PRODUCT DESCRIPTION FOR EQUIPMENT UNDER TEST (EUT) ..................................................................................... 3 OBJECTIVE ................................................................................................................................................................... 3 RELATED SUBMITTAL(S)/GRANT(S) ............................................................................................................................. 3 TEST METHODOLOGY .................................................................................................................................................. 3 TEST FACILITY ............................................................................................................................................................. 3 SYSTEM TEST CONFIGURATION .......................................................................................................................... 4 JUSTIFICATION ............................................................................................................................................................. 4 EUT EXERCISE SOFTWARE .......................................................................................................................................... 4 BLOCK DIAGRAM OF TEST SETUP ................................................................................................................................ 4 SUMMARY OF TEST RESULTS ............................................................................................................................... 5 FCC§15.203 - ANTENNA REQUIREMENT .............................................................................................................. 6 APPLICABLE STANDARD .............................................................................................................................................. 6 ANTENNA CONNECTOR CONSTRUCTION ...................................................................................................................... 6 FCC §15.207 (A) – AC LINE CONDUCTED EMISSIONS ...................................................................................... 7 APPLICABLE STANDARD .............................................................................................................................................. 7 MEASUREMENT UNCERTAINTY .................................................................................................................................... 7 EUT SETUP .................................................................................................................................................................. 7 EMI TEST RECEIVER SETUP ......................................................................................................................................... 8 TEST PROCEDURE ........................................................................................................................................................ 8 CORRECTED AMPLITUDE & MARGIN CALCULATION ................................................................................................... 8 TEST EQUIPMENT LIST AND DETAILS ........................................................................................................................... 9 TEST RESULTS SUMMARY ............................................................................................................................................ 9 TEST DATA .................................................................................................................................................................. 9 FCC§15.205, §15.209&§15.249- RADIATED EMISSIONS .................................................................................... 12 APPLICABLE STANDARD ............................................................................................................................................ 12 MEASUREMENT UNCERTAINTY .................................................................................................................................. 12 EUT SETUP ................................................................................................................................................................ 13 TEST EQUIPMENT SETUP ............................................................................................................................................ 14 TEST PROCEDURE ...................................................................................................................................................... 14 CORRECTED AMPLITUDE & MARGIN CALCULATION .........................................................…
Text truncated - open the document above for the full version.
Test Setup Photos
EXHIBIT D - TEST SETUP PHOTOGRAPHS Conducted Emissions – Front View Conducted Emissions - Side View Radiated Emission Below 1GHz View Radiated Emission Above 1GHz View
Contact Information
Applicant
Gary Zeng(PM)
Test Firm
Bay Area Compliance Laboratories Corp. (Dongguan)John Chan
[email protected]86-769-86858888
Technical Specifications
| # | Rule Parts | Frequency Range | Power Output |
|---|---|---|---|
| 1 | 15C | 5.74 GHz - 5.81 GHz | - |
Other Applications from SZ DJI TECHNOLOGY CO., LTD
SS3-T55A2510
Dec 19, 2025DJI AGRAS T55
Equipment Class
NII - Unlicensed National Information Infrastructure TXSS3-T100A2510
Dec 19, 2025DJI AGRAS T100S, DJI AGRAS T70S
Equipment Class
NII - Unlicensed National Information Infrastructure TXSS3-TKMI2507
Dec 19, 2025DJI RC Mini
Equipment Class
DTS - Digital Transmission SystemSS3-RD60B2510
Dec 18, 2025Fixed Millimeter Wave Radar
Equipment Class
FDS - Part 15 Field Disturbance SensorSS3-RD60A2510
Dec 18, 2025Rotational Active Phased Array Radar
Equipment Class
FDS - Part 15 Field Disturbance Sensor