UOI3496931SMART THERMOMETER
Charbroil, LLC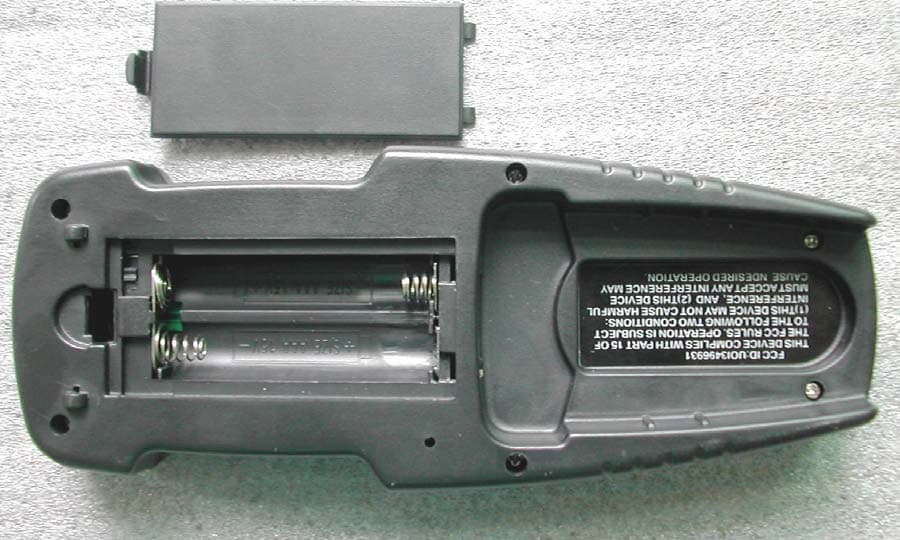
Click to zoom
Application Details
- Equipment Class
- DSC - Part 15 Security/Remote Control Transmitter
- Date of Grant
- Dec 26, 2006
- Application Purpose
- Original Equipment
- Date of Application
- Dec 26, 2006
- Equipment Note
- SMART THERMOMETER
- Frequency Range
- 433.96000000 - 433.96000000
- Company
- Charbroil, LLC
- Country
- United States
Documents & Files
Document Text
Text extracted from the exhibit documents filed with the FCC. Open a document above to read the original.
Users Manual
READ ALL CAUTIONS BEFORE OPERATING THIS DEVICE. CAUTIONS ?Always wear heat resistant glove to touch the stainless steel probe sensor or wire during or just after cooking. Do not touch with bare hands. ?Keep the stainless steel wire and probe away from children. ?Clean the stainless steel probe and dry thoroughly after each use. ?Do not use either the transmitter or receiver in the rain, they are not waterproof. ?Do not expose wire, the plug of the stainless steel probe or the plug in the hole of the transmitter to water or any liquid. This will result in a bad connection and a faulty reading. ?Do not expose the receiver or transmitter to direct heat or heated surface. ?Do not use the stainless steel probe in a microwave oven. FOR BEST RESULTS: Preheat your grill to your desired grill temperature and ensure the temperature has stabilized before programming the thermometer. NOTE: Don’t change your grill conditions, such as the temperature, etc., once the estimated cook time has started calculating. TRANSMITTER DIRECTIONS 1.Insert batteries 2.Insert probe (the program will not work without the probe inserted into the unit) 3.Press the (ON/OFF) button once to turn the unit on 4.Select the meat type with the “MEAT” button (CHKN, STK, PRK, HAM, USER) NOTE: Under the meat selection is the “USER” function that allows you to select the temperature you want to cook your meat from 120 – 180 degrees Fahrenheit if the pre- selected temperatures are not what you desire. It is preset at 160 degrees Fahrenheit. 5.Set desired doneness with the “TASTE” button (WELL, MED WELL, MED, MED RARE) NOTE: The chicken and ham have preset temperatures that can not be changed. 6.Press the “GRILL ALARM” button once and it will start the temp blinking. Adjust the temp using the up/down buttons 7.Press the “GRILL ALARM” button a second time to change the “Sensitivity” to High, Med, or Low if desired. It is preset to M for medium. High is +/- 25 degrees Med is +/- 50 degrees (preferred) Low is +/- 75 degrees 8.Once the “Sensitivity” is selected, then press the “START/STOP” button once. 9.After the “Estm Cook Time” shows a blinking 88:88, (The temperature must stabilize before the “Estm Cook Time” will show 88:88; it may take a few seconds.) the unit is ready to start the estimated cook time calculation. 10.Press the “START/STOP” button and the “Estm Cook Time” will show “CALC” which means the program is running. (see Estimated Cook Time information) NOTE: Do not press any other buttons once the Estimated Cook Time shows “CALC.” Once the time is calculated it will automatically show in the “Estm Cook Time” window. NOTE: The time the unit takes to calculate the Estimated cook time will be referenced as “INPUT TIME.” 11.To reset the program, press the “START/STOP” button for two seconds. 12.Turn the unit off by press and hold the “ON/OFF” button for three seconds. FAHRENHEIT/CELSIUS SWITCH Slide the Fahrenheit/Celsius switch to the desired location (switch is located inside the battery compartment). Change is effective after the unit is turned off and turned on again. TIMER DIRECTIONS 1.Turn the unit on by pressing the “ON/OFF” button once. 2.Press the “Timer” button once 3.Adjust the time by minutes with the “Up/Down” buttons 4.Press the “Start/Stop” button once to start the timer 5.Press the “Start/Stop” button again to stop the timer 6.Press the “Start/Stop button again to restart the timer 7.Press and hold the “Start/Stop” button for two seconds to reset the timer to zero. 8.Turn the unit off by pressing and holding the “ON/OFF” button for three seconds. COOKING TIPS Once the meat is on the grill close the lid and let the temperature stabilize. Good cooking performance is about 300 – 350 degrees Fahrenheit. Two pounds of meat will take about 50 - 65 minutes to cook at this temperature. Use off-set cooking techniques (burner turned-on on one side of the grill and the meat on the other side of the grill). It is not necessary to flip the meat on lower temperatures but if you want to flip your meat, then do it one time about the half way thorough the Estimated Cook Time to ensure even doneness. Don’t open the lid except to flip the meat once, check for flare-ups, etc. Every time you open the lid heat escapes and it may affect the remaining estimated cook time. Cleaning/Storage CAUTION: Always wear heat resistant glove to touch the stainless steel probe sensor or wire during or just after cooking. Do not touch with bare hands. CAUTION: Keep the stainless steel wire and probe away from children. Wash the metal probe tip with hot soapy water and dry thoroughly. DO NOT immerse the wire or probe in water while cleaning. Wipe the transmitter and receiver with damp cloth. Do not immerse either in water. If the transmitter and/or pager is stored for prolonged periods of time remove the batteries. NOTE: 1.Alarm signals received on the receiver may be delayed due to the fact that the transmitter is transmitting signals every 12 seconds. 2.In case there are obstacles between the transmitter and the receiver, the transmitter distance will be shortened. LIMITED WARRANTY Char-Broil® guarantees this production both material and workmanship for a 90 day period from the date of purchase to the original purchaser if used for home use. If this product fails to operate due to manufacturing defect, the defective part will be repaired or replaced at Char-Broil’s option. The product, return authorization number, and proof of purchase must be returned postage paid. The return authorization number must be on the outside of the box and placed inside. Please contact Char-Broil® for the required return authorization number at 1-800-241-7548 (USA) or 1-800- 387-6057 (Canada). RECEIVER (PAGER) DIRECTIONS 1.Insert battery 2.Turn on unit moving the slide switch to the “ON” position. Note: the unit will light up the front three lights and beep as a diagnostic test. 3.The “CHECK GRILL” LED light comes on when the grill needs to be checked if the grill tempe…
Text truncated - open the document above for the full version.
External Photos
CHARBROIL, LLC. FCC ID: UOI3496931 EXTERNAL PHOTOS
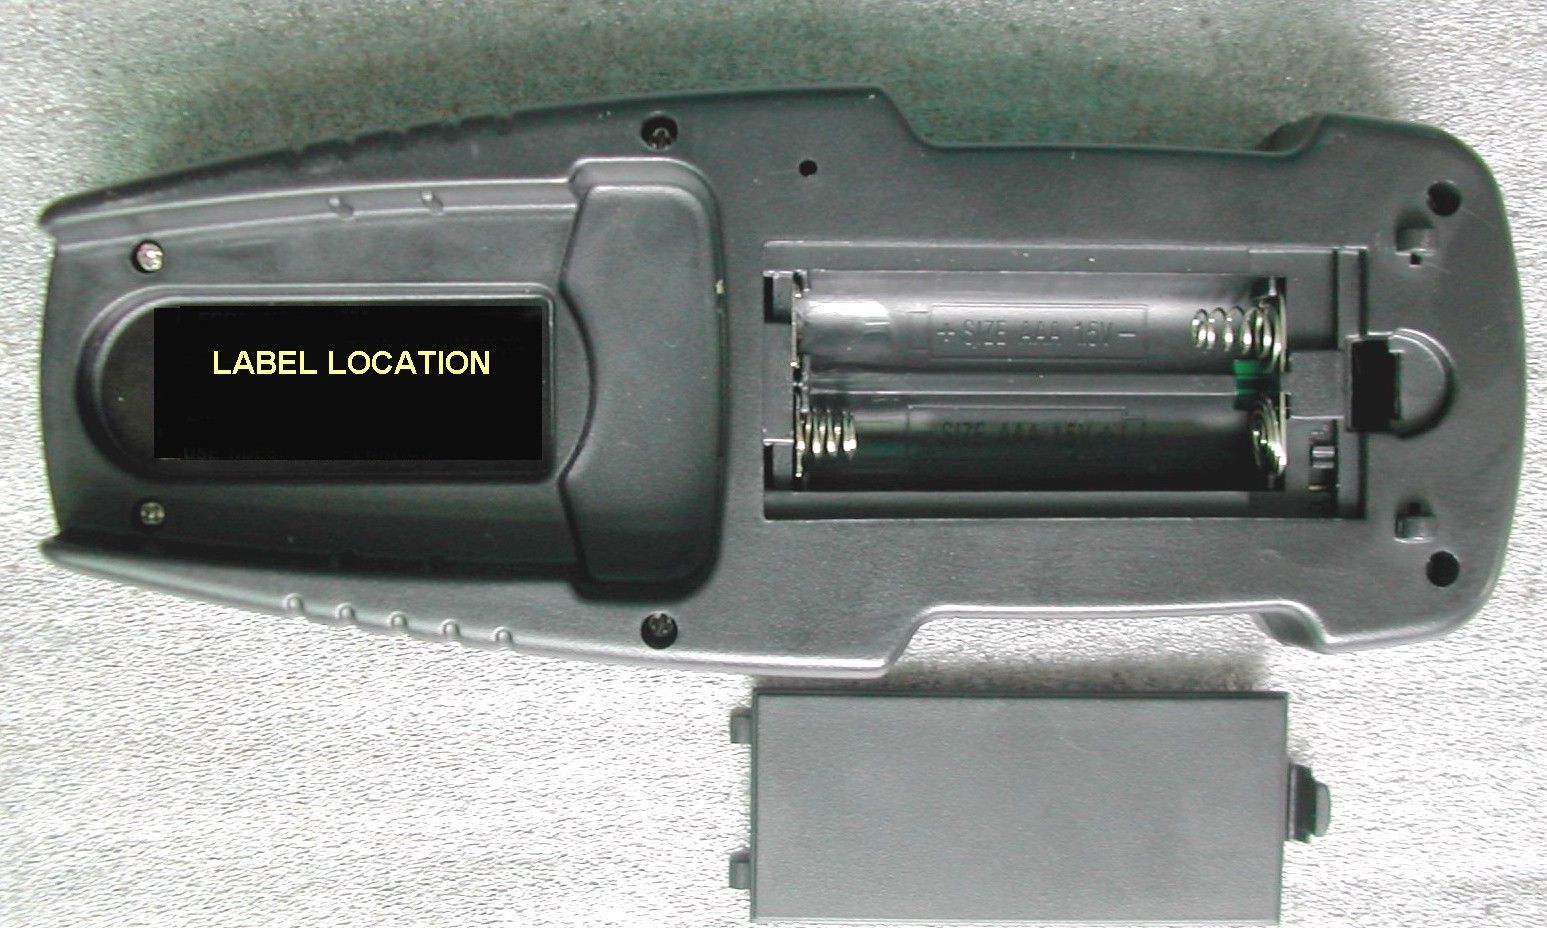
ID Label/Location Info
December 20, 2006 Below is the required information in the format as requested per our phone conversation. Please advise if you require additional information. Chris Ramsey Char-Broil P&A Product Manager TRANSMITTER INFORMATION ON LABEL FCC ID:UOI3496931 IC: 6858A-3496931 THIS DEVICE COMPLIES WITH PART 15 OF THE FCC RULES. OPERATION IS SUBJECT TO THE FOLLOWING TWO CONDITIONS (1)THIS DEVICE MAY NOT CAUSE HARMFUL INTERFERENCE, AND (2)THIS DEVICE MUST ACCEPT ANY INTERFERENCE RECEIVED, INCLUDING INTERFERENCE THAT MY CAUSE UNDESIREABLE OPERATION.
Internal Photos
CHARBROIL, LLC. FCC ID: UOI3496931 INTERNAL PHOTOS
Test Report
FCC TEST REPORT PART 15.231(e) APPLICANT CHARBROIL, LLC ADDRESS 1442 BELFAST AVENUE COLUMBUS GA 31902 FCC ID UOI3496931 MODEL NUMBER 3496931 PRODUCT DESCRIPTION SMART THERMOMETER DATE SAMPLE RECEIVED 12/11/2006 DATE TESTED 12/12/06 TESTED BY RICHARD BLOCK APPROVED BY MARIO DE ARANZETA TIMCO REPORT NO. C\CHARBROIL_UOI\3361AUT6\3361AUT6TestReport.doc TEST RESULTS PASS FAIL TOTAL PAGES 13 THE ATTACHED REPORT SHALL NOT BE REPRODUCED EXCEPT IN FULL WITHOUT THE WRITTEN APPROVAL OF TIMCO ENGINEERING, INC. 849 NW STATE ROAD 45 NEWBERRY, FL 32669 USA PH: 888.472.2424 OR 352.472.5500 FAX: 352.472.2030 EMAIL: [email protected] HTTP://WWW.TIMCOENGR.COM APPLICANT: CHARBROIL, LLC FCC ID: UOI3496931 REPORT: C\CHARBROIL_UOI\3361AUT6\3361AUT6TestReport.doc Page 2 of 13 TABLE OF CONTENTS GENERAL INFORMATION.................................................. 3 COMPLIANCE WITH PART 15.231(e)....................................... 4 EMC EQUIPMENT LIST................................................... 5 TEST PROCEDURE....................................................... 6 RADIATION INTERFERENCE............................................... 7 CALCULATION OF DUTY CYCLE............................................ 9 OCCUPIED BANDWIDTH.................................................. 11 TEST SET UP PHOTO................................................... 13 APPLICANT: CHARBROIL, LLC FCC ID: UOI3496931 REPORT: C\CHARBROIL_UOI\3361AUT6\3361AUT6TestReport.doc Page 3 of 13 GENERAL INFORMATION EUT Specification The test results relate only to the items tested. FCC ID UOI3496931 Model Number 3496931 Product Description SMART THERMOMETER Operating Frequency 433.96Mhz Primary Power 3VDC EUT Power Secondary Power N/A Prototype Pre-Production Test Item Production Fixed Mobile Type of Equipment Portable Test Standards FCC Part 15, Subpart C and ANSI C63.4-2003 Modifications to DUT None Test Exercise The EUT was set in continuous transmit APPLICANT: CHARBROIL, LLC FCC ID: UOI3496931 REPORT: C\CHARBROIL_UOI\3361AUT6\3361AUT6TestReport.doc Page 4 of 13 COMPLIANCE WITH PART 15.231(a) Part 15.231(a): • Continuous operation: Yes No • Control signal only: Yes No • Data transmission with a control signal Yes No N/A Description of control signal: _______________(notes: indicate whether such info is included in supporting exhibit such as operation description page xx) Part 15.231(a)(1): • Manually operated device: Yes No • Does it meet the 5s deactivation requirement after the switch is being released: Yes No Description: _______________(notes: a plot showing the pulse train does not necessarily constitute an objective evidence of compliance with the deactivation requirement. A plot should be accompanied by an explanation and/or statement of compliance, if not otherwise clearly stated in supporting documentation e.g. operation description page xx) Part 15.231(a)(2): • Automatically operated device: Yes No • Does it meet the 5s deactivation requirement after being activated: Yes No Description: _______________(notes: a plot showing the pulse train does not necessarily constitute an objective evidence of compliance with the deactivation requirement. A plot should be accompanied by an explanation and/or statement of compliance, if not otherwise clearly stated in supporting documentation e.g. operation description page xx) Part 15.231(a)(3): • Periodic transmission at regular predetermined intervals: Yes No N/A Description: ________________ • Polling or supervision transmissions, including data, to check system integrity check requires a total transmission time not exceeding 2s per hour: Yes No N/A Part 15.231(a)(4): Operation involving fire, security, or safety of life, when activated to signal an alarm, may operate during the pendency of the alarm condition. Does the transmitter meet the condition? Yes No N/A APPLICANT: CHARBROIL, LLC FCC ID: UOI3496931 REPORT: C\CHARBROIL_UOI\3361AUT6\3361AUT6TestReport.doc Page 5 of 13 EMC EQUIPMENT LIST Device Manufacturer Model Serial Number Cal/Char Date Due Date 3-Meter OATS TEI N/A N/A Listed 1/11/06 1/10/09 3/10-Meter OATS TEI N/A N/A Listed 3/27/04 3/26/07 Analyzer Tan Tower Spectrum Analyzer HP 8566B Opt 462 3138A07786 3144A20661 CAL 12/7/05 12/7/07 Analyzer Tan Tower RF Preselector HP 85685A 3221A01400 CAL 12/7/05 12/7/07 Analyzer Tan Tower Quasi- Peak Adapter HP 85650A 3303A01690 CAL 12/8/05 12/8/07 Analyzer Tan Tower Preamplifier HP 8449B-H02 3008A00372 CAL 12/8/05 12/8/07 Analyzer Blue Tower Spectrum Analyzer HP 8568B 2928A04729 2848A18049 CAL 4/13/05 4/13/07 Analyzer Blue Tower RF Preselector HP 85685A 2926A00983 CAL 9/5/05 9/5/07 Analyzer Blue Tower Quasi- Peak Adapter HP 85650A 2811A01279 CAL 4/13/05 4/13/07 Analyzer Silver Tower Spectrum Analyzer HP 8566B Opt 462 3552A22064 3638A08608 CAL 10/30/06 10/30/08 Analyzer Silver Tower RF Preselector HP 85685A 2620A00294 CAL 10/30/06 10/30/08 Analyzer Silver Tower Quasi- Peak Adapter HP 85650A 3303A01844 CAL 10/30/06 10/30/08 Analyzer Open- Frame Tower Preamplifier HP 8449B 3008A01075 CAL 8/8/05 8/8/07 Antenna: Biconnical Electro-Metrics BIA-25 1171 CAL 4/29/05 4/29/07 Antenna: Biconnical Eaton 94455-1 1096 CAL 10/11/06 10/11/08 Antenna: Biconnical Eaton 94455-1 1057 CAL 12/12/05 12/12/07 APPLICANT: CHARBROIL, LLC FCC ID: UOI3496931 REPORT: C\CHARBROIL_UOI\3361AUT6\3361AUT6TestReport.doc Page 6 of 13 TEST PROCEDURE RADIATION INTERFERENCE: The test procedure used was ANSI Standard C63.4-2003 using a spectrum analyzer with a preselector. The bandwidth of the spectrum analyzer was 100 kHz with an appropriate sweep speed. The analyzer was calibrated in dB above a microvolt at the output of the antenna. The resolution bandwidth was 100 kHz and the video bandwidth was 300 kHz. The ambient temperature of the UUT was 78.3ºF with a humidity of 40%. FORMULA OF CONVERSION FACTORS: The Field Strength at 3m was established by adding the meter reading of the spectrum analyzer (which is set to read in units of dBuV) to the antenna correction factor supp…
Text truncated - open the document above for the full version.
Test Setup Photos
READ ALL CAUTIONS BEFORE OPERATING THIS DEVICE. CAUTIONS ?Always wear heat resistant glove to touch the stainless steel probe sensor or wire during or just after cooking. Do not touch with bare hands. ?Keep the stainless steel wire and probe away from children. ?Clean the stainless steel probe and dry thoroughly after each use. ?Do not use either the transmitter or receiver in the rain, they are not waterproof. ?Do not expose wire, the plug of the stainless steel probe or the plug in the hole of the transmitter to water or any liquid. This will result in a bad connection and a faulty reading. ?Do not expose the receiver or transmitter to direct heat or heated surface. ?Do not use the stainless steel probe in a microwave oven. FOR BEST RESULTS: Preheat your grill to your desired grill temperature and ensure the temperature has stabilized before programming the thermometer. NOTE: Don’t change your grill conditions, such as the temperature, etc., once the estimated cook time has started calculating. TRANSMITTER DIRECTIONS 1.Insert batteries 2.Insert probe (the program will not work without the probe inserted into the unit) 3.Press the (ON/OFF) button once to turn the unit on 4.Select the meat type with the “MEAT” button (CHKN, STK, PRK, HAM, USER) NOTE: Under the meat selection is the “USER” function that allows you to select the temperature you want to cook your meat from 120 – 180 degrees Fahrenheit if the pre- selected temperatures are not what you desire. It is preset at 160 degrees Fahrenheit. 5.Set desired doneness with the “TASTE” button (WELL, MED WELL, MED, MED RARE) NOTE: The chicken and ham have preset temperatures that can not be changed. 6.Press the “GRILL ALARM” button once and it will start the temp blinking. Adjust the temp using the up/down buttons 7.Press the “GRILL ALARM” button a second time to change the “Sensitivity” to High, Med, or Low if desired. It is preset to M for medium. High is +/- 25 degrees Med is +/- 50 degrees (preferred) Low is +/- 75 degrees 8.Once the “Sensitivity” is selected, then press the “START/STOP” button once. 9.After the “Estm Cook Time” shows a blinking 88:88, (The temperature must stabilize before the “Estm Cook Time” will show 88:88; it may take a few seconds.) the unit is ready to start the estimated cook time calculation. 10.Press the “START/STOP” button and the “Estm Cook Time” will show “CALC” which means the program is running. (see Estimated Cook Time information) NOTE: Do not press any other buttons once the Estimated Cook Time shows “CALC.” Once the time is calculated it will automatically show in the “Estm Cook Time” window. NOTE: The time the unit takes to calculate the Estimated cook time will be referenced as “INPUT TIME.” 11.To reset the program, press the “START/STOP” button for two seconds. 12.Turn the unit off by press and hold the “ON/OFF” button for three seconds. FAHRENHEIT/CELSIUS SWITCH Slide the Fahrenheit/Celsius switch to the desired location (switch is located inside the battery compartment). Change is effective after the unit is turned off and turned on again. TIMER DIRECTIONS 1.Turn the unit on by pressing the “ON/OFF” button once. 2.Press the “Timer” button once 3.Adjust the time by minutes with the “Up/Down” buttons 4.Press the “Start/Stop” button once to start the timer 5.Press the “Start/Stop” button again to stop the timer 6.Press the “Start/Stop button again to restart the timer 7.Press and hold the “Start/Stop” button for two seconds to reset the timer to zero. 8.Turn the unit off by pressing and holding the “ON/OFF” button for three seconds. COOKING TIPS Once the meat is on the grill close the lid and let the temperature stabilize. Good cooking performance is about 300 – 350 degrees Fahrenheit. Two pounds of meat will take about 50 - 65 minutes to cook at this temperature. Use off-set cooking techniques (burner turned-on on one side of the grill and the meat on the other side of the grill). It is not necessary to flip the meat on lower temperatures but if you want to flip your meat, then do it one time about the half way thorough the Estimated Cook Time to ensure even doneness. Don’t open the lid except to flip the meat once, check for flare-ups, etc. Every time you open the lid heat escapes and it may affect the remaining estimated cook time. Cleaning/Storage CAUTION: Always wear heat resistant glove to touch the stainless steel probe sensor or wire during or just after cooking. Do not touch with bare hands. CAUTION: Keep the stainless steel wire and probe away from children. Wash the metal probe tip with hot soapy water and dry thoroughly. DO NOT immerse the wire or probe in water while cleaning. Wipe the transmitter and receiver with damp cloth. Do not immerse either in water. If the transmitter and/or pager is stored for prolonged periods of time remove the batteries. NOTE: 1.Alarm signals received on the receiver may be delayed due to the fact that the transmitter is transmitting signals every 12 seconds. 2.In case there are obstacles between the transmitter and the receiver, the transmitter distance will be shortened. LIMITED WARRANTY Char-Broil® guarantees this production both material and workmanship for a 90 day period from the date of purchase to the original purchaser if used for home use. If this product fails to operate due to manufacturing defect, the defective part will be repaired or replaced at Char-Broil’s option. The product, return authorization number, and proof of purchase must be returned postage paid. The return authorization number must be on the outside of the box and placed inside. Please contact Char-Broil® for the required return authorization number at 1-800-241-7548 (USA) or 1-800- 387-6057 (Canada). RECEIVER (PAGER) DIRECTIONS 1.Insert battery 2.Turn on unit moving the slide switch to the “ON” position. Note: the unit will light up the front three lights and beep as a diagnostic test. 3.The “CHECK GRILL” LED light comes on when the grill needs to be checked if the grill tempe…
Text truncated - open the document above for the full version.
Contact Information
Applicant
Terrence Keller(Quality Assurance Manager)
Test Firm
Timco Engineering, Inc.Sid Sanders
Technical Specifications
| # | Rule Parts | Frequency Range | Power Output |
|---|---|---|---|
| 1 | 15.231(e) | 433.96 MHz - 433.96 MHz | - |