2AAPEC2665DNFDell C2665dnf Color Laser Multifunction Printer
FUJIFILM Business Innovation Corp.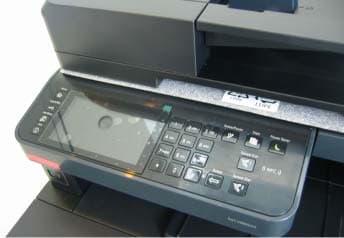
Click to zoom
Application Details
- Equipment Class
- DXX - Part 15 Low Power Communication Device Transmitter
- Date of Grant
- Aug 25, 2013
- Application Purpose
- Original Equipment
- Date of Application
- Aug 25, 2013
- Equipment Note
- Dell C2665dnf Color Laser Multifunction Printer
- Frequency Range
- 13.56000000 - 13.56000000
- Country
- Japan
Documents & Files
Document Text
Text extracted from the exhibit documents filed with the FCC. Open a document above to read the original.
Users Manual
PLEASE READ THIS DOCUMENT CAREFULLY! IT CONTAINS VERY IMPORTANT INFORMATION ABOUT YOUR RIGHTS AND OBLIGATIONS, AS WELL AS LIMITATIONS AND EXCLUSIONS. THESE TERMS REQUIRE THE USE OF ARBITRATION TO RESOLVE DISPUTES ON AN INDIVIDUAL BASIS, and, where applicable, specify arbitration INSTEAD OF JURY TRIALS OR CLASS ACTIONS. Dell™ Printers Important Information Informations importantes | Informações importantes Información importante booke9.book Page 1 Monday, August 6, 2012 11:09 AM booke9.book Page 2 Monday, August 6, 2012 11:09 AM www.dell.com | support.dell.com Dell™ Printers Important Information booke9.book Page 1 Monday, August 6, 2012 11:09 AM Notes, Cautions, and Warnings NOTE: A NOTE indicates important information that helps you make better use of your printer. CAUTION: A CAUTION indicates either potential damage to hardware or loss of data and tells you how to avoid the problem. WARNING: A WARNING indicates a potential for property damage, personal injury, or death. ____________________ Information in this document is subject to change without notice. © 2009-2012 Dell Inc. All rights reserved. Reproduction of these materials in any manner whatsoever without the written permission of Dell Inc. is strictly forbidden. Trademarks used in this text: Dell™ and the DELL logo are trademarks of Dell Inc. Other trademarks and trade names may be used in this document to refer to either the entities claiming the marks and names or their products. Dell Inc. disclaims any proprietary interest in trademarks and trade names other than its own. booke9.book Page 2 Monday, August 6, 2012 11:09 AM Important Information3 U.S. Consumer Terms of Sale - Direct PLEASE READ THIS DOCUMENT CAREFULLY! IT CONTAINS VERY IMPORTANT INFORMATION ABOUT YOUR RIGHTS AND OBLIGATIONS, AS WELL AS LIMITATIONS AND EXCLUSIONS. THESE TERMS REQUIRE THE USE OF ARBITRATION ON AN INDIVIDUAL BASIS TO RESOLVE DISPUTES, RATHER THAN JURY TRIALS OR CLASS ACTIONS. IF YOU DO NOT AGREE WITH THESE TERMS, DO NOT ORDER/KEEP YOUR PRODUCT. NOTE: These U.S. Consumer Terms of Sale apply to direct purchases made from Dell by phone, the Internet, or the Dell Direct store. These Terms of Sale ("Agreement") apply to your purchase of products and/or services and support ("Product") sold in the United States by Dell, including its affiliates or subsidiaries. By placing your order for Product, you accept and are bound to the terms of this Agreement. If you have placed an order but do not wish to be subject to these Terms of Sale, you must promptly cancel your order before it enters production and becomes non-cancellable (see:www.dell.com/ordersupport), or return your purchase in accordance with Dell’s Return Policy (see: www.dell.com/returnpolicy) within 21 days of the invoice date for a refund of your purchase price minus shipping, handling, and up to a 15% restocking fee. 1Other Documents. This Agreement may NOT be altered, supplemented, or amended by the use of any other document(s) unless otherwise agreed to in a written agreement signed by both you and Dell. If you do not receive an invoice or acknowledgement in the mail, via e-mail, or with your Product, information about your purchase may be obtained at https://support.dell.com/dellcare/Invoice.aspx or or by contacting your sales representative. 2Payment Terms; Orders; Quotes; Interest. Terms of payment are within Dell's sole discretion, and unless otherwise agreed to by Dell, payment must be received by Dell prior to Dell's acceptance of an order. Payment for the products will be made by credit card, wire transfer, or some other prearranged payment method unless credit terms have been agreed to by Dell. Invoices are due and payable within the time period noted on your invoice, measured from the date of the invoice. Dell may invoice parts of an order separately. Your order is subject to cancellation by Dell, in Dell's sole discretion. Unless you and Dell have agreed to a different discount, Dell's standard pricing policy for Dell-branded systems, which include both hardware and services in one discounted price, allocates the discount off list price applicable to the service portion of the system to be equal to the overall calculated percentage discount off list price on the entire system. Dell is not responsible for pricing, typographical, or other errors in any offer by Dell and reserves the right to cancel any orders arising from such errors. Invoices must be paid within 30 days of the invoice date. booke9.book Page 3 Monday, August 6, 2012 11:09 AM 4Important Information 3Shipping Charges; Taxes; Title; Risk of Loss. Shipping, handling and tax are additional unless otherwise expressly indicated at the time of sale. Title to products passes from Dell to Customer upon shipment to Customer. Loss or damage that occurs during shipping by a carrier selected by Dell is Dell's responsibility. Loss or damage that occurs during shipping by a carrier selected by you is your responsibility. You must notify Dell within 21 days of the date of your invoice or acknowledgement if you believe any part of your purchase is missing, wrong or damaged. Unless you provide Dell with a valid and correct tax exemption certificate applicable to your purchase of Product and the Product ship-to location, you are responsible for sales and other taxes associated with the order. Shipping and delivery dates are estimates only. 4Warranties. THE LIMITED WARRANTIES APPLICABLE TO DELL-BRANDED HARDWARE PRODUCT CAN BE FOUND AT www.dell.com/warranty OR IN THE DOCUMENTATION DELL PROVIDES WITH DELL-BRANDED PRODUCT. DELL MAKES NO OTHER WARRANTIES FOR DELL-BRANDED PRODUCT, AND MAKES NO WARRANTIES WHATSOEVER FOR SERVICE, SOFTWARE, MAINTENANCE OR SUPPORT OR FOR NON-DELL BRANDED PRODUCT. SUCH PRODUCT, SOFTWARE, SERVICE, MAINTENANCE OR SUPPORT IS PROVIDED BY DELL "AS IS" AND ANY THIRD-PARTY WARRANTIES, PRODUCTS, SOFTWARE, SERVICES, MAINTENANCE OR SUPPORT ARE PROVIDED BY THE ORIGINAL MANUFACTURER OR SUPPLIER, NOT BY DELL. SOME STATES DO NOT…
Text truncated - open the document above for the full version.
Users Manual
C2665dnf | Dell Document Hub Color Laser Multifunction Printer User's Guide Regulatory Model: C2665dnf Template Last Updated - 2/7/2007Contents1 Contents Before Beginning . . . . . . . . . . . . . . . . . . . . . . . . . . . . . . 23 Notes, Cautions, and Warnings . . . . . . . . . . . . . . . . . . . . . . . . 25 As for RSA BSAFE . . . . . . . . . . . . . . . . . . . . . . . . . . . . . . . . . . . . . . . . . . . . . . . . . . . . . . . . . . 25 1Dell™ C2665dnf Color Laser Multifunction Printer User's Guide . . . . . . . . . . . . . . . . . . . . . . . . . . . . . . . . . . . . . . . . . 27 Conventions. . . . . . . . . . . . . . . . . . . . . . . . . . . . . . . . . . . . . . 27 2Finding Information . . . . . . . . . . . . . . . . . . . . . . . . . . . . . . 29 3Product Features . . . . . . . . . . . . . . . . . . . . . . . . . . . . . . . . 33 4About the Printer . . . . . . . . . . . . . . . . . . . . . . . . . . . . . . . . 35 Front and Rear View . . . . . . . . . . . . . . . . . . . . . . . . . . . . . . . . . 35 Front View . . . . . . . . . . . . . . . . . . . . . . . . . . . . . . . . . . . . 35 Rear View . . . . . . . . . . . . . . . . . . . . . . . . . . . . . . . . . . . . 36 Duplex Automatic Document Feeder (DADF) . . . . . . . . . . . . . . . . . . . . 37 Space Requirements . . . . . . . . . . . . . . . . . . . . . . . . . . . . . . . . . 37 Operator Panel . . . . . . . . . . . . . . . . . . . . . . . . . . . . . . . . . . . . 38 Additional Components . . . . . . . . . . . . . . . . . . . . . . . . . . . . . . . . 38 Optional Accessories . . . . . . . . . . . . . . . . . . . . . . . . . . . . . . 38 Non-bundled Items . . . . . . . . . . . . . . . . . . . . . . . . . . . . . . . 38 Securing the Printer . . . . . . . . . . . . . . . . . . . . . . . . . . . . . . . . . 39 Ordering Supplies . . . . . . . . . . . . . . . . . . . . . . . . . . . . . . . . . . 39 2ContentsTemplate Last Updated - 2/7/2007 Setting up the Printer (Printer Setup) . . . . . . . . . . . . . . 41 5Preparing Printer Hardware. . . . . . . . . . . . . . . . . . . . . . . . 43 Removing Tape . . . . . . . . . . . . . . . . . . . . . . . . . . . . . . . . . . . . 43 6Installing Optional Accessories. . . . . . . . . . . . . . . . . . . . . 45 Installing the Optional 550-Sheet Feeder. . . . . . . . . . . . . . . . . . . . . . . 45 Updating Your Driver to Detect 550-Sheet Feeder . . . . . . . . . . . . . . . . 47 Installing the Optional Wireless Adapter . . . . . . . . . . . . . . . . . . . . . . 50 Verifying the Contents of the Box . . . . . . . . . . . . . . . . . . . . . . . . 51 Installing the Optional Wireless Adapter . . . . . . . . . . . . . . . . . . . . 51 Determining the Wireless Network Settings . . . . . . . . . . . . . . . . . . 52 Configuring the Optional Wireless Adapter . . . . . . . . . . . . . . . . . . . . . 53 Configuring the Wireless Adapter Using Dell Printer Setup . . . . . . . . . . 53 Configuring the Wireless Adapter Without Using Dell Printer Setup . . . . . . 54 Reconfiguring the Wireless Setting . . . . . . . . . . . . . . . . . . . . . . . . . 57 Reconfiguring the Wireless Setting Using Dell Printer Configuration Web Tool . . . . . . . . . . . . . . . . . . . . . . . . . . . . . . . . . . . . . 57 Reconfiguring the Wireless Setting Using Dell Printer Setup . . . . . . . . . . 58 7Connecting Your Printer. . . . . . . . . . . . . . . . . . . . . . . . . . . 59 Connecting Printer to Computer or Network. . . . . . . . . . . . . . . . . . . . . 60 Direct Connection . . . . . . . . . . . . . . . . . . . . . . . . . . . . . . . . 60 Network Connection. . . . . . . . . . . . . . . . . . . . . . . . . . . . . . . 61 Connecting the Telephone Line. . . . . . . . . . . . . . . . . . . . . . . . . . . . 61 Turning on the Printer . . . . . . . . . . . . . . . . . . . . . . . . . . . . . . . . . 63 Setting Initial Settings on the Operator Panel . . . . . . . . . . . . . . . . . . . . 63 8Setting the IP Address. . . . . . . . . . . . . . . . . . . . . . . . . . . . 71 Assigning an IP Address . . . . . . . . . . . . . . . . . . . . . . . . . . . . . . . 71 When Using the Dell Printer Setup . . . . . . . . . . . . . . . . . . . . . . . 71 When Using the Operator Panel . . . . . . . . . . . . . . . . . . . . . . . . . 71 When Using the Tool Box . . . . . . . . . . . . . . . . . . . . . . . . . . . . 72 Verifying the IP Settings . . . . . . . . . . . . . . . . . . . . . . . . . . . . . . . 73 Verifying the Settings Using Operator Panel . . . . . . . . . . . . . . . . . . 73 Template Last Updated - 2/7/2007Contents3 Verifying the Settings Using System Settings Report. . . . . . . . . . . . . . 73 Verifying the Settings Using Ping Command . . . . . . . . . . . . . . . . . . 73 9Loading Paper . . . . . . . . . . . . . . . . . . . . . . . . . . . . . . . . . . 75 10 Installing Printer Drivers on Windows ® Computers . . . . . 79 Identifying Printer Driver Pre-install Status. . . . . . . . . . . . . . . . . . . . . 79 Changing the firewall settings before installing your printer . . . . . . . . . . 79 Inserting the Software and Documentation Disc . . . . . . . . . . . . . . . . . . 79 Direct Connection Setup . . . . . . . . . . . . . . . . . . . . . . . . . . . . . . . 80 Network Connection Setup . . . . . . . . . . . . . . . . . . . . . . . . . . . . . 83 Network Printer Setup on a Local Network . . . . . . . . . . . . . . . . . . . 83 Setting Up for Shared Printing . . . . . . . . . . . . . . . . . . . . . . . . . . . . 88 Specifying the Shared Settings of the Printer . . . . . . . . . . . . . . . . . 88 Point and Print. . . . . . . . . . . . . . . . . . . . . . . . . . . . . . . . . . 89 Peer-to-Peer . . . . . . . . . . . . . . . . . . . . . . . . . . . . . . . . . . . 92 11 Installing Printer Drivers on Macintosh Computers . . . . . 95 Installing the Drivers and Software . . . . . . . . . . . . . . . . . . . . . . . . . 95 Adding a Printer on Mac OS X 10.5, 10.6, 10.7, or 10.8 . . . . . . . . . . . . . 95 Con…
Text truncated - open the document above for the full version.
Users Manual
107 Using Your Printer 13 Operator Panel .......................................................................... 109 14 Dell™ Printer Configuration Web Tool................................... 117 15 Understanding the Tool Box Menus....................................... 185 16 Understanding the Printer Menus.......................................... 213 17 Print Media Guidelines............................................................. 293 18 Loading Print Media ................................................................. 299 108 Operator Panel109 13 Operator Panel About the Operator Panel The operator panel has a touch panel, a status LED, control buttons, and a number pad, which allows you to control the printer. 1 (Home) button •Moves to the Home screen. 2 (Login/Logout) button •Logs out if pressed while the user is logged in. 3Touch Panel •Specifies the settings by directly tapping the screen. •Displays various settings, instructions, and error messages. 4Status LED (Ready / Error) •Shows a green light when the printer is ready and a blinking green light when data is being received. •Shows an amber light when an error occurs and a blinking amber light when an unrecoverable print error occurs. 5Number Pad •Enters numbers and characters. 6 (Redial / Pause) button •Re-dials a telephone number. •Inserts a pause into a telephone number. 7 (Copy) button •Starts copying the document. Effective only from the Home screen while you are logged in to the printer. 8 (Power Saver) button •Enters or exits the Power Saver mode. When the printer is not used for a while, it enters the Power Saver mode to reduce power consumption. When the Power Saver mode is active, the (Power Saver) button blinks. 1345762 1191213 8 10 110Operator Panel 9 (NFC) reader •Starts NFC communication between the tapping device/card and the printer when the device/card is waved over the reader. 10/(Quick Dial 1 / Quick Dial 2) button •Starts faxing the document to the number registered as "001" and "002" respectively of the FAX Speed Dial. Effective only when the Home screen is displayed. 11 (Delete) button •Deletes numbers and characters. 12 (Job Status) button •Moves to the Job Status screen. From this screen, you can check or cancel active jobs. 13 (Information) button •Moves to the Information screen. You can access various information and settings menu, check consumable levels and network status, and print various types of reports and lists. NOTE: Moving to a different menu or returning to a previous screen cancels the current entry or setting. Make sure to select OK to save the current entry or setting. Basic Operations on the Touch Panel You can operate the touch panel as with a smart phone or a tablet. To Select the Item on the Screen Tap the item. To Scroll the Screen or the Listed Items Swipe the screen by dragging your finger on the screen. Copy Fax Scan to USB ID Copy Scan to E- mail Print Home Guest Copy Fax Scan to USB ID Copy Scan to E- mail Print Home Guest Operator Panel111 To scroll faster, flick the screen. NOTE: You cannot swipe or flick on some screens depending on the screen design and specifications. In this case, operate by tapping the buttons shown on the screen. About the Home Screen This section describes the fields and buttons on the Home screen which is displayed by pressing the (Home) button while the user is logged in to the printer. The Home screen is the default screen that appears when the printer is turned on. NOTE: To display the HHome screen, the user must be registered beforehand and log in to the printer. For more information, see "User Authentication." Notification Bar Displays the status of the printer when the handle is dragged down. To close, drag up the handle. You can adjust the screen brightness, see the toner information, or monitor the jobs currently progressing. Warnings are displayed in this area, too. To adjust the screen brightness, drag the slider in Screen Brightness. To see the Toner Information, tap Supplies. The information of the toner is displayed with one toner at a time. To see the information of other toners, swipe the screen. Copy Fax Scan to USB ID Copy Scan to E- mail Print Home Guest Copy Fax Scan to USB ID Copy Scan to E- mail Print Home Guest Notification Bar Lock Icon Wireless LAN Connection Status Icon Time/Network Information Account Name Tiles Wi-Fi Direct Connection Status Icon 112Operator Panel Lock Icon Shows that any of the functions controlled by the Function Enabled setting has been enabled. While the Lock icon is displayed on the left to the account name, you can access the password-locked functions without entering the password. Wi-Fi Direct Connection Status Icon Displays the Wi-Fi Direct connection status. This icon is displayed only when Wi-Fi Direct is enabled. Wireless LAN Connection Status Icon Displays the intensity of wireless signal when the wireless adapter is connected to the printer. Time/Network Information Displays the current time or the network information (IPv4 address or host name). Account Name Displays the name of the user currently logging in to the printer. Tiles Displays the tiles of the functions you can select from. When the tile color is pale and disabled, you cannot select the function. When the Lock icon is displayed on the tile, the function is controlled by the Function Enabled setting and you will need to enter the password to enable the function. For more information about Function Enabled, see "Function Enabled." Moving, Adding or Deleting the Tiles To M o v e t h e Ti l e s Tap and hold the tile you want to move, and drag it to the desired place. The short orange bar appears between the tiles to show the nearest drop point when you are dragging the tile. You can move the tile between pages as well. Copy Fax Scan to USB ID Copy Scan to E- mail Print Home Guest Add App ID Copy Home Guest Operator Panel113 To Add the Tiles Find the Add App tile in the last page of the Home screen, and tap it. The Apps List…
Text truncated - open the document above for the full version.
Users Manual
467 Maintaining Your Printer 32 Maintaining Your Printer .......................................................... 469 33 Removing Options ..................................................................... 509 34 Clearing Jams ............................................................................ 515 468 Maintaining Your Printer469 32 Maintaining Your Printer You need to complete certain tasks to maintain optimum print quality. Determining the Status of Supplies If your printer is connected to the network, the Dell™ Printer Configuration Web Tool can provide instant feedback on remaining toner levels. Type the printer's IP address in your web browser to view this information. To use the E- Mail Alert Setup feature that notifies you when the printer requires new supplies, type the desired e-mail address in the e-mail list box. On the touch panel screen, you can also confirm the following: •Any supply or maintenance items that require attention replacing (However, the printer can only display information about one item at a time). •Amount of toner remaining in each toner cartridge. Conserving Supplies You can change several settings in your printer driver to conserve toner cartridge and paper. Ordering Supplies You can order consumables (toner cartridges, drum cartridges, and waste toner box) from Dell on the Internet when using a networked printer. Type the IP address of your printer in your web browser, launch the Dell Printer Configuration Web Tool, and click the Order Supplies at: to order consumables for your printer. You can also order consumables by the following method. 1 Click Starto All Programso Dell Printerso Additional Color Laser Softwareo Dell Supplies Management System . The Dell Supplies Management System window appears. 2Select your printer from the Select Printer Model list. 3If ordering from the web: aSelect a URL from the Select Reorder URL list. bClick Visit Dell printer supplies ordering web site. NOTE: When you cannot get information from the printer automatically by two-way communication, a window that prompts you to type the Service Tag appears. Type your Dell printer Service Tag in the field provided. Your Service Tag number is located inside the front cover of your printer. 4If ordering by phone, call the number that appears under the Order by Phone heading. SupplySettingFunction Toner cartridgeTo n e r S a v e r in the Others tabThis check box allows the users to select a print mode that uses less toner. The image quality will be lower when this feature is used. Print mediaMultiple Up in the Layout tabThe printer prints two or more pages on one side of a sheet. Print mediaDuplex in the General tabThe printer prints on both sides of a sheet of paper. 470Maintaining Your Printer Storing Print Media To avoid potential paper feeding problems and uneven print quality, there are several things you can do: •To achieve the best possible print quality, store print media in an environment where the temperature is approximately 21 °C (70 °F) and the relative humidity is 40 %. •Store cartons of print media on a pallet or shelf, rather than directly on the floor. •If you store individual packages of print media out of the original carton, ensure that they rest on a flat surface so the edges do not buckle or curl. •Do not place anything on top of the print media packages. Storing Consumables Store consumables in their original packaging until you need to use them. Do not store consumables in: •Temperatures greater than 40 °C (104 °F). •An environment with extreme changes in humidity or temperature. •Direct sunlight. •Dusty places. •A car for a long period of time. •An environment where corrosive gases are present. •A humid environment. Maintaining Your Printer471 Replacing the Toner Cartridges WARNING: Before performing any of the following procedures, read and follow the safety instructions in the Important Information. Dell toner cartridges are available only through Dell. You can order cartridges online at http://www.dell.com/supplies or by phone. To order by phone, see "Contacting Dell." It is recommended to use Dell toner cartridges for your printer. Dell does not provide warranty coverage for problems caused by using accessories, parts, or components not supplied by Dell. WARNING: Never throw used toner cartridges into fire. The residual toner could explode resulting in burns and injuries. WARNING: Do not shake the used toner cartridge. This may cause toner spills. Removing the Toner Cartridge NOTE: Ensure that you remove all the paper from the MPF and close the MPF cover before removing the toner cartridge. 1Grasp the grips on both sides of the front cover, and then pull it down to open. 2Grasp the handle on the toner cartridge that you want to replace, and then pull it out. WARNING: Do not shake the toner cartridge as it may cause toner spills. 472Maintaining Your Printer Installing a Toner Cartridge 1Unpack a new toner cartridge of the desired color. 2Shake the new toner cartridge five or six times to distribute the toner evenly. 3Insert the toner cartridge into the associated cartridge slot, and then push until it stops. 4Close the front cover. Maintaining Your Printer473 Replacing the Drum Cartridges You need to replace all drum cartridges (yellow, magenta, cyan, and black) at a time. WARNING: Before performing any of the following procedures, read and follow the safety instructions in the Important Information . CAUTION: Protect the drum cartridges against bright light. If the right side cover remains open for more than three minutes, print quality may deteriorate. Removing the Drum Cartridge 1Open the right side cover. 2Turn the waste toner box lock lever 90-degrees counterclockwise to unlock the waste toner box. 474Maintaining Your Printer 3Grasp the handle on the waste toner box and pull it out making sure to hold it upright so that the waste toner does not spill out. CAUTION: Take care not to drop the waste toner box while you are removing it. CAUTI…
Text truncated - open the document above for the full version.
Users Manual
Removing Options509 33 Removing Options If the printer location needs to change or the printer and print media handling options need to be shipped to a new location, all print media handling options must be removed from the printer. For shipping, pack the printer and print media handling options securely to avoid damage. Removing the Optional 550-Sheet Feeder WARNING: When you remove the optional 550-sheet feeder (Tray2), be sure to turn off the printer, unplug the power cable, and disconnect all cables from the back of the printer before starting these tasks. 1Ensure that the printer is turned off, and then disconnect all cables from the back of the printer. 2Pull the tray1 out of the printer about 200 mm. 3Hold tray1 with both hands, and remove it from the printer. 510Removing Options 4Remove the two screws joining the printer and the optional 550-sheet feeder by unscrewing them with a coin or similar object. 5Gently lift the printer off the optional 550-sheet feeder, and place it on a level surface. WARNING: Two people are required to lift the printer. Removing Options511 6Insert the tray1 into the printer, and push until it stops. CAUTION: Do not use excessive force on the tray. Doing so could damage the tray or the inside of the printer. 7Re-connect all cables into the back of the printer and turn on the printer. 512Removing Options Removing the Optional Wireless Adapter WARNING: When you remove the optional wireless adapter, be sure to turn off the printer, unplug the power cable, and disconnect all cables from the back of the printer before starting these tasks. 1Ensure that the printer is turned off. 2Turn the screw on the left side cover counterclockwise to remove it. 3Slide the left side cover towards the back of the printer. 4Open the left side cover completely. Removing Options513 5Remove the wireless adapter from the printer by releasing the adapter's hook while pushing the wireless adapter towards the front of the printer. 6Close the left side cover, and then slide it towards the front of the printer. 7Turn the screw clockwise. 8Turn on the printer. 514Removing Options Clearing Jams515 34 Clearing Jams Careful selection of appropriate print media and proper loading allow you to avoid paper jams. See "Print Media Guidelines " for more information. NOTE: Before buying large quantities of any print media, it is recommended to try a sample first. Avoiding Jams •Use only recommended print media. See "Print Media Guidelines" for more information. •See "Loading Print Media in Tray1 and the Optional 550-Sheet Feeder" and "Loading Print Media in the MPF" to load print media properly. •Do not overload the print media sources. Ensure that the print media stack height does not exceed the maximum height indicated by the load-line labels in the tray. •Do not load wrinkled, creased, damp, or curled print media. •Flex, fan, and straighten print media before you load it. If a jam occurs with print media, try feeding one sheet at a time through the multipurpose feeder (MPF). •Do not use print media that you have cut or trimmed yourself. •Do not mix print media sizes, weights, or types in the same print media source. •Ensure that the recommended print side is face up when you insert the print media. •Keep print media stored in an acceptable environment. For more information, see "Storing Print Media." •Do not remove the feeding tray during a print job. •Push tray1 or the optional 550-sheet feeder (tray2) in firmly after loading. •Ensure that all cables that connect to the printer are correctly attached. •Overtightening the guides may cause jams. •Wipe the retard rollers in the tray or MPF with a cloth that is slightly dampened with water if jams caused by misfeeding paper occur frequently. 516Clearing Jams Identifying the Location of Paper Jams WARNING: Do not attempt to clear any jams using tools or instruments. This may permanently damage the printer. The following illustration shows where paper jams may occur along the print media path. 1Duplex Automatic Document Feeder (DADF) 2Fusing Unit 3Tray1 4MPF 5Optional 550-Sheet Feeder 1 2 345 Clearing Jams517 Clearing Paper Jams From the DADF When a document jams while it passes through the DADF, remove the jam according to the following procedure. NOTE: To prevent document jams, use the document glass for thick, thin, or mixed documents. 1Remove the remaining documents from the DADF. If the document is jammed in the paper feed area: aOpen the DADF cover. bLift the release lever 90 degrees and remove the jammed document by carefully pulling it to the right. If you find it difficult to pull the document: 518Clearing Jams cRemove the DADF feed roller assembly and remove the document by gently pulling it straight up. dInsert the DADF feed roller assembly and press down the release lever. If the document is jammed in the paper exit area: eRemove the jammed document from the document output tray. Clearing Jams519 fClose the DADF cover, and then load the documents back into the DADF. NOTE: Ensure that you adjust the document guides before printing a Legal-size document. 2If you cannot see the jammed document or the jammed document do not move when you pulled, open the document cover. 3Remove the document from the white sheet by carefully pulling it to the right. 4Close the document cover, and then load the documents back into the DADF. 5Ta p Start. Clearing Paper Jams From the MPF NOTE: To resolve the error displayed on the touch panel, you must clear all print media from the print media path. If error code: 050-112 appears: 1Remove any paper loaded on the MPF 520Clearing Jams 2Grasp both sides of the MPF, and then pull it out of the printer. 3Pull tray1 out of the printer about 200 mm. 4Hold tray1 with both hands, and remove it from the printer. Clearing Jams521 5Remove the jammed paper. 6Insert tray1 into the printer, and push until it stops. 7Insert the MPF into the printer. If error code: 050-129 appears: Follow the instructions in "If error code: …
Text truncated - open the document above for the full version.
Contact Information
Applicant
Makoto Fuchigami(Manager, Environment & Product Safety)
Technical Contact
UL Japan, Inc.Toyokazu Imamura
1-22-3 Megumigaoka, Hiratsuka-shi · Kanagawa-ken · Japan
Test Firm
UL Japan, Inc. Shonan EMC EMC Lab.Tetsuya Hashimoto
Technical Specifications
| # | Rule Parts | Frequency Range | Power Output |
|---|---|---|---|
| 1 | 15C | 13.56 MHz - 13.56 MHz | - |
Other Applications from FUJIFILM Business Innovation Corp.
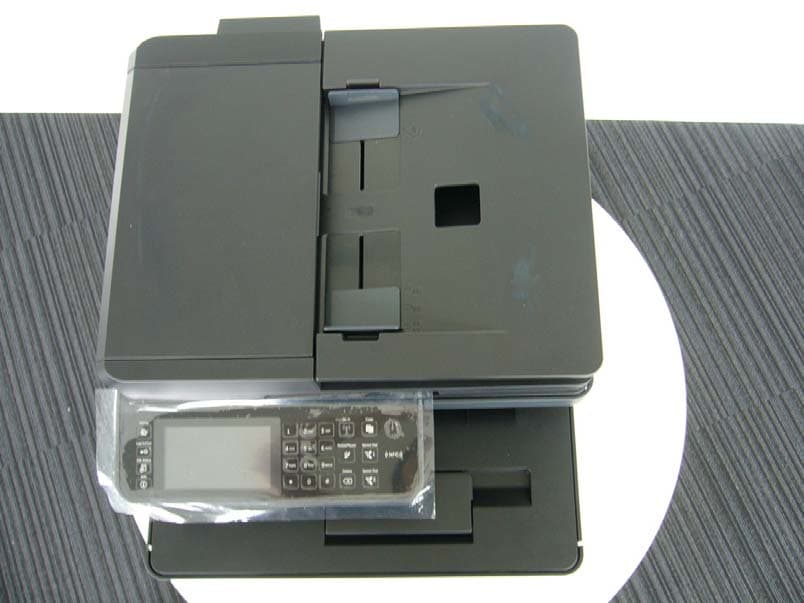
2AAPEH825CDW
Sep 13, 2015Color Multifunction Printer
Equipment Class
DXX - Part 15 Low Power Communication Device Transmitter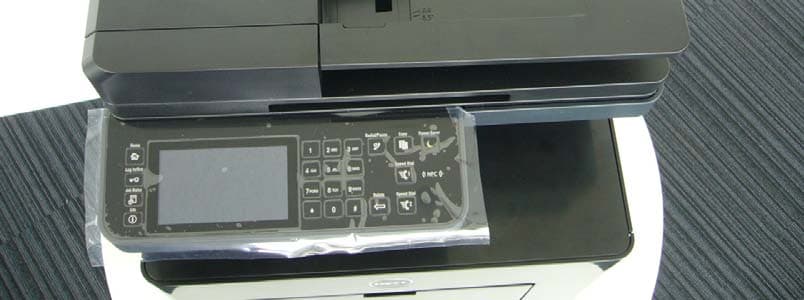
2AAPEH815DW
Feb 02, 2015Multifunction Laser Printer
Equipment Class
DXX - Part 15 Low Power Communication Device Transmitter