Text extracted from the exhibit documents filed with the FCC. Open a document above to read the original.
A-ONE TAB with Wi-Fi Mobile Skin Diagnosis System (SD) & Hair Diagnosis System (HD) 1 Bomtech Electronics Contents 1. Composition of Product 2. Specification 3. Precaution 4. Name of each Part 5. Main Function 6. Strengths 7. How to use A-ONE TAB 1) On/Off 2) Client management 3) SD Skin Diagnosis 4) HD Hair Diagnosis 5) Configuration 6) Client Registration 2 1) Main body 2) Battery 2Ea 3) USB cable 4) Stand (Optional) 1. Composition of product 3 2. Specification Classification Description Size Width : 13cm , Length : 6.5cm , Height : 1.5cm Weight 147.8g CPU Samsung SP5V210 (1 GHz) LCD TFT 4’ (480*800) OS Window CE 6.0 Camera CMOS ( 640*480) Rating 3.7 V, 1500 mAh Battery 3.7 V, 1500 mAh (Lithium Polymer) Adaptor Input: 100-240V, 50/60Hz Output: 5 V, 1.2A operating temperature 5°C~35°C Internal Memory 2 GB External Memory microSD slot support (Maximum 16 GB) Others WiFi Moisture Sensor Elasticity Sensor UV LED for sebum test Normal LED 4 3. Precaution 5 1. Risk of explosion if battery is replaced by an incorrect type. Dispose of used batteries according to the instructions. 2. NEVER aim the beam in or near anyone's eyes. 3. Do not be exposed to UV light for a long time unnecessarily. 4.Separation distance between antenna and skin/scalp is 3.3cm. This d evice complies with part 1 5 o f th e F CC R ule s. Operation is s ubject to th e f ollowing t wo c onditions: (1) This d evi ce may not cause harmful interference, and (2) This devi ce must accept an y i nterference received, including interference that may cau se undesired operation. Caution: Any changes or modifications to the e quipment not expressly approved by the party responsible for c ompliance could void user’s authority to operate the e quipment. 4. Name of each part 6 Micro SD card slot VGA cable socket On/Off button Moisture/ Elasticity Sensor CCD Camera Micro USB socket Battery Indicator Capture button Reset button Touch screen - Accurate Diagnosis ∙ Accurate diagnosis through vivid and magnified skin & hair scalp photos by the digital scope ∙ Scientific diagnosis and description of customer’s real condition - Automatic Analysis ∙ Accurate understanding on diagnosis result by analyzed photos and result graph - Diverse Analysis Data ∙ Skin : Skin types, Pore, Wrinkle, Pigmentation, Elasticity, Sebum, Moisture, ∙ Hair : Scalp types, Sebum, Hair loss, Hair density, Hair thickness and Hair damage - Automatic Recommendation of product and service ∙ Generates automatic recommendation of suitable products - Diverse Function ∙ Customer database / Diagnosis / Purchase Records / Providing standard sample image / Color pencil function 5. Main Function 7 - Wi-Fi Function Available to transfer the image and data to computer through Wi-Fi. - Easy to use (Touch screen) Very easy to operate program with finger -Mobile solution Very compact and light embedded computer system -Embedded Sensor Equipped with ‘Moisture’ and ‘Elasticity’ sensor inside the body. - Integrated with ‘Skin’ and ’Hair’ diagnosis Built in skin and hair diagnosis software -Easy to back-up data Data back-up is possible with USB or mini-SD- card 6. Strengths 8 (1) Start Diagnosis 9 1)Press On/Off switch at the side for 5 seconds to turn A- One Tab on. 2) Click <TAB> button to go to diagnosis page.. 7. How to use A-ONE TAB 1)Click ‘Registration’ button. 2) Click the edit box. 3) Enter the name of the client by using keyboard and click ‘OK 4) Click birth date. * You can go back to previous page by clicking ‘Back’ button. 5) Click Year/ Month/ Day and enter the number using the below keyboard. ** Do not forget to enter birth date and gender as the result is based on age and gender. 6) Click ‘OK’ to go to diagnosis page. . ◈New client ◈ (2) Client management 6. How to use A-ONE TAB 10 You can select a registered client to start a test or edit the registered information. 1) Click ‘Search’ button to find the registered client . 2) Click the edit box and enter the name of the client 3) You can see the searched information on the screen. Click ‘ Diagnosis’ button to go to diagnosis page. * Diagnosis page <SD> – Skin Diagnosis <HD> – Hair Diagnosis ◈ Search◈ 7. How to use A-ONE TAB (2) Client management 11 ◈ Search◈ 7. How to use A-ONE TAB (2) Client management 12 If you press a name of client for 2 seconds, pop-up window will appear. ① Record by Date : Check the previously tested data. ② Edit : Edit the registered client’s information ③ Purchase List : Show the purchase history of the selected client. ④ Delete : Remove the registered client’s information & previously tested data. ② ④ ③ ① ① ③ ② You can just enter age & sex and start a test without registration, as guest. 1)Click ‘Simple Diagnosis’ button. 2) Click the edit box and enter age using keyboard then click ‘OK’. ** Age & Gender are necessary to get the result. 3) Select gender and Click ‘ Diagnosis’. M – Man W – Woman ◈ Simple Diagnosis◈ 7. How to use A-ONE TAB (2) Client management 13 <SD> BUTTON Moisture / Elasticity / Pore / Wrinkle / Sebum / Pigmentation Click ‘SD’ to start skin diagnosis. ◈ Individual Diagnosis ◈ Select certain test among pore, wrinkle, pigment, sebum, moisture / elasticity and diagnose separately. ◈ Integrated Diagnosis ◈ Diagnose every part of pore, wrinkle, pigment, sebum, moisture / elasticity step by step. ◈ SD Diagnosis ◈ (3) SD Skin Diagnosis 7. How to use A-ONE TAB 14 ◈ How to use– Camera ◈ Put the sensor below your cheekbone to measure Moisture/Elasticity test. Do not put it on your cheekbone. ◈ How to use–Sensor ◈ (3) SD Skin Diagnosis 7. How to use A-ONE TAB Proper use Improper use 15 Put the camera on your skin and take a photo to measure Pigmentation/Sebum/Wrinkle /Pore. Press the Shot/Sensor Test Button or capture button on the side to take a photo or measure by sensor. ◈ Shot / Sensor Test ◈ ◈ Individual Diagnosis ◈ Click ‘Individual Diagnosis’. <Pore> diagnosis 1) Click ‘Pore’ to measure pore condition. 2) put camera on the skin and click ‘shot’ ** Click <Shot> to re- take a photo. The…
Text truncated - open the document above for the full version.
◈ <Sebum> Diagnosis result ◈ 3) Click ‘Result’ button. <Do you want to save the test result?> 4) Select ‘Yes’ or ‘No’ 5) Move to result page. (3) SD Skin Diagnosis 7. How to use A-ONE TAB 23 ◈ <Moisture/Elasticity> Diagnosis ◈ 1) Click ‘Moisture/Elasticity’. Moisture and elasticity are measured by sensor. 2) put the sensor on skin and click ‘sensor Test’ * Put the sensor below your cheekbone to measure Moisture/Elasticity test. ** Do not put it on your cheekbone. the test value will be shown automatically at the bottom of left. (3) SD Skin Diagnosis 7. How to use A-ONE TAB 24 3) Click ‘Result’ button. <Do you want to save the test result?> 4) Select ‘Yes’ or ‘No’ 5) Move to result page. ◈ <Moisture/Elasticity> Diagnosis result ◈ (3) SD Skin Diagnosis 7. How to use A-ONE TAB 25 ◈ Integrated Diagnosis◈ (3) SD Skin Diagnosis 7. How to use A-ONE TAB 26 Diagnose Moisture/Elasticity/Pore/Sebum/Pigment /Wrinkle. 1)Click ‘Integrated Diagnosis’. 2)Click ‘Start’ or select one of test item on the left. * Tip *** If user did all tests on the first page by clicking each test item, no need to diagnose each test item again after pressing Start button. *** if you want to re- take a photo, click the test item or ‘shot’ button at camera screen. ◈ Integrated Diagnosis◈ Moisture and elasticity are measured by sensor. 1) put the sensor on skin and click ‘sensor Test’ * Put the sensor below your cheekbone to measure Moisture/Elasticity test. ** Do not put it on your cheekbone. the test value will be shown automatically at the bottom of left. 2) Click ‘Next’. 3) put camera on skin and click ‘shot’ to measure sebum condition . The test value will be shown automatically at the bottom of left. 4) Click ‘Next’. (3) SD Skin Diagnosis 7. How to use A-ONE TAB 27 NEVER aim the beam in or near anyone's eyes. 1) put camera on skin and click ‘shot’ to measure pore condition . the test value will be shown automatically at the bottom of left. 2) Click ‘Next’. 3) put camera on skin and click ‘shot’ to measure wrinkle condition . the test value will be shown automatically at the bottom of left. 4) Click ‘Next’. . ◈ Integrated Diagnosis◈ (3) SD Skin Diagnosis 7. How to use A-ONE TAB 28 (3) SD Skin Diagnosis 7. How to use A-ONE TAB ◈ Integrated Diagnosis◈ 29 1) put camera on skin and click ‘shot’ to measure pigment condition . the test value will be shown automatically at the bottom of left. *** In case select each test item and take a photo, the photo of pore is used for pigment. You can re- take photo of pigment when you check the edit page, by double-clicking ‘shot’. 2) Click ‘Result’ button <Do you want to save the test result?> Select ‘Yes’ or ‘No’. ◈ Result page ◈ Result 1 - Skin age(Optional) - Result graph - intensive skincare zone, ** Touch the screen with a finger and drag upward to move to the next page Drag downward to Move back to the preceding page. Result 2 : - Skin type and description Result 3 -Compare the customer’s skin with standard (ideal) skin image. - Skin status simulation Current status: current skin condition. Without treatment: If the skin is left untreated, the skin condition may worsen than its current state. (3) SD Skin Diagnosis 7. How to use A-ONE TAB 30 Drag Result 4,5,6,7,8,9 : -Specific description of each test Sebum/moisture/elasticity/pore/wrinkle/ pigment (3) SD Skin Diagnosis 7. How to use A-ONE TAB ◈ Result page ◈ 31 ◈ Cart function ◈ 1)Click ‘Cart’ button to go to the product recommendation page. 2) Select Skin type. Recommendable product is displayed according to each skin type. ** in case of guest, you can’t use cart function. 3) Select the product and click . the selected product moves to the cart list. 4) Double- click the product name on the cart to change the quantity. 5) Enter the quantity and click ‘OK’. (3) SD Skin Diagnosis 7. How to use A-ONE TAB 32 1) Click the product to purchase. in case select all items in the list, mark the black box. 2)Click ‘Purchase’. 3) Click ‘Purchase’ after check the product , quantity and price. Purchasing is done. ◈ Cart function ◈ (3) SD Skin Diagnosis 7. How to use A-ONE TAB 33 1) You can see previous purchase list. Click ‘Purchase list’. 2) The purchased products is displayed with name, quantity, price, the purchase date and type(for skin or hair). Click OK button to close the Purchase list (3) SD Skin Diagnosis 7. How to use A-ONE TAB ◈ Cart function ◈ 34 ◈ Record by date ◈ You can see the previous records of each client by date. 1)Click ‘Record by Date’ 2)Select a date to see photo and record. 3)Drag a below image to above screen. 4)Click top -right icon to see the image with full screen. 5) Drag Before & After image to left & right screen and click full screen icon to compare both. (3) SD Skin Diagnosis 7. How to use A-ONE TAB 35 6) Click the icon. 7) Click ‘Edit’ or ‘Result’ - Edit : see the taken photo or retake a photo - Result : go to the result page of the date. (3) SD Skin Diagnosis 7. How to use A-ONE TAB ◈ Record by date ◈ 36 ◈ HD Diagnosis ◈ Diagnose Scalp Type / Hair Density / Sebum / Hair Loss / Hair Damage / Hair Thickness Put the camera on your scalp and take a photo to measure. 7. How to use A-ONE TAB (4) HD Hair Diagnosis 37 ◈ Individual Diagnosis ◈ Select certain test item and diagnose separately. 1) Click ‘Scalp type’ to diagnose scalp type. 2) Put camera on scalp and take a photo by clicking ‘shot’. ** ** Click <Shot> to re- take a photo. 3) Click ‘compare’ and select similar sample. 4) Click ‘OK’ and ‘Result’ to go to result page. 7. How to use A-ONE TAB (4) HD Hair Diagnosis ◈ <Scalp> Diagnosis ◈ 38 ◈ <Sebum> Diagnosis ◈ 1) Click ‘Sebum,’ to diagnose Sebum. 2) Put camera on scalp and take a photo by clicking ‘shot’. ** Click <Shot> to re- take a photo. the test value will be shown automatically at the bottom of left. 3) Click ‘Result’ to go to result page. 7. How to use A-ONE TAB (4) HD Hair Diagnosis 39 NEVER aim the beam in or near anyone's eyes. ◈ <Sebum> Diagnosis ◈ Option: <Sebum> Diagnosis with Sebum Tape 1) Click …
Text truncated - open the document above for the full version.
◈ <Damage> Diagnosis ◈ 1) Click ‘Damage’ . 2) Put camera on hair and take a photo by clicking ‘shot’. ** ** Click <Shot> to re- take a photo. 3) Click ‘compare’ and select similar sample. 4) Click ‘OK’ and ‘Result’ to go to result page. 7. How to use A-ONE TAB (4) HD Hair Diagnosis 44 ◈ <Thickness> Diagnosis ◈ 1) Click ‘Thickness’ . 2) Put camera on hair and take a photo by clicking ‘shot’. ** ** Click <Shot> to re- take a photo. 3) Drag a hair and check thickness. 4) Click ‘Result’ to go to result page. 7. How to use A-ONE TAB (4) HD Hair Diagnosis 45 Drag : To widen the hair thickness : To narrow the hair thickness ◈ Integrated Diagnosis ◈ Diagnose Scalp type/Density/Sebum/Damage /Thickness. 1)Click ‘Comprehensive Diagnosis’. 2)Click ‘Start’. 7. How to use A-ONE TAB (4) HD Hair Diagnosis 46 * Tip *** If user did all tests on the first page by clicking each test item, no need to diagnose each test item again after pressing Start button. *** if you want to re- take a photo, click the test item or ‘shot’ button at camera screen. 1) Put camera on scalp and take a photo by clicking ‘shot’. ** Click <Shot> to re- take a photo. 2) Click ‘compare’ and select similar sample. 3) Click ‘OK’ and ‘Next’. 7. How to use A-ONE TAB (4) HD Hair Diagnosis ◈ Integrated Diagnosis ◈ 47 1) Put camera on scalp and take a photo by clicking ‘shot’. ** Click <Shot> to re-take a photo. the test value will be shown automatically at the bottom of left. 2) Click ‘Next’. *If you want to use sebum tape, please refer to the page 39. 7. How to use A-ONE TAB (4) HD Hair Diagnosis ◈ Integrated Diagnosis ◈ 48 NEVER aim the beam in or near anyone's eyes. 1) Put camera on scalp and take a photo by clicking ‘shot’. ** ** Click <Shot> to re- take a photo. 2) Click ‘compare’ and select similar sample. 3) Click ‘OK’ and ‘Next’. 7. How to use A-ONE TAB (4) HD Hair Diagnosis ◈ Integrated Diagnosis ◈ 49 • Hair Density uses the image of scalp type. 1) If you want to re-take a photo, Put camera on scalp and take a photo by clicking ‘shot’. 2) Click the most empty part and click each hair to mark. 3) Click ‘Next’. 7. How to use A-ONE TAB (4) HD Hair Diagnosis ◈ Integrated Diagnosis ◈ 50 1) Select the most similar type of when you see the scalp at top position. 2) Click ‘Next’. 3) Put camera on hair and take a photo by clicking ‘shot’. ** ** Click <Shot> to re-take a photo. 4) Click ‘compare’ and select similar sample. 5) Click ‘OK’ and ‘Next’. 7. How to use A-ONE TAB (4) HD Hair Diagnosis ◈ Integrated Diagnosis ◈ 51 • Hair Thickness uses the image of Hair Damage. 1) If you want to re-take a photo, Put camera on scalp and take a photo by clicking ‘shot’. 2) Drag a hair and check thickness. 3) Click ‘Result’. <Do you want to save the test result?> 4) Select ‘Yes’ or ‘No’ Move to result page. 7. How to use A-ONE TAB (4) HD Hair Diagnosis ◈ Integrated Diagnosis ◈ 52 ◈ Result page ◈ Result 1 - Result graph - intensive skincare zone, Result 2 : - Result of each test Result 3,4,5,6,7,8,9 - Specific description of each result 7. How to use A-ONE TAB (4) HD Hair Diagnosis 53 ◈ Cart ◈ Press <Cart> button to move to purchase page It Recommends the products according to the test result Individual diagnosis – recommends the products for selected test item Comprehensive diagnosis – recommends the products for all test item ** If user logged on as a guest, <Cart> button is not displayed on result page To purchase a product, select a skin or hair / scalp type Select on a product image and press arrow button To change the quantity, double-click on the selected product Enter the quantity and press OK button 7. How to use A-ONE TAB (4) HD Hair Diagnosis 54 ◈ Cart ◈ To remove a product from the cart, select the product and press <Delete> button To purchase the selected products, press the checkbox and select <Purchase> button Check the product, quantity and price and press <Purchase> button 7. How to use A-ONE TAB (4) HD Hair Diagnosis 55 ◈ Cart ◈ When selecting <Purchase List>, user can check the purchase history User can check the purchased product name, price, quantity, date Products are classified Skin and Hair 7. How to use A-ONE TAB (4) HD Hair Diagnosis 56 ◈ Record ◈ Test data is recorded per date and time Select the date and time to see the previous data Drag a image which you want to edit or see to the window for thumbnail image Click red- circled icon on the thumbnail image to see the image on full screen 7. How to use A-ONE TAB (4) HD Hair Diagnosis 57 . ◈ Record ◈ - User can magnify / minimize the image by dragging on the image - Double-click on a image to see the full screen image of the image. Click red- circled icon and select Edit button When clicking Edit button, it returns to diagnosis process User can retake the image or edit the test result by measuring or selecting other sample When selecting Result button, it moves to the recorded test result on the selected date and time 7. How to use A-ONE TAB (4) HD Hair Diagnosis 58 <Config> - Change the configuration Click <Config > button to change the configuration ◈ Configuration ◈ 7. How to use A-ONE TAB ◈ Set Date / Time ◈ Newly set date and time RTC is equipped in it, so date and time is saved once user changes the date and time Change the date and time with ∧ , ∨ button (5) Configuration 59 ◈ Sensitivity ◈ Adjust the sensitivity of moisture / Elasticity Adjust the sensitivity by moving button on the bar ** in case clicking default button, sensitivity return to default value(0) 7. How to use A-ONE TAB (5) Configuration 60 Client can change the logo image To change the logo, click Open button and load the image file in the storage ◈ Logo ◈ (5) Configuration 7. How to use A-ONE TAB 61 ◈ WIFI ◈ Connect to another device(PC) at close range with Wifi Transfer the capture screen and file to the connected device(PC) There are two way to connect to the device at close range <Connection through Wireless Line Sharer> or <Connection by Ad- Hoc> (5) Configuration 7. How to use A-ONE TAB 62 ◈ How to s…
Text truncated - open the document above for the full version.
BOMTECH ELECTRONICS CO., LTD 3F, Yeon-san Bldg., 1547-15, Seocho-dong, Seocho-gu, Seoul, Korea Tel. +82-2-523-8293/ Fax. +82-2-523-8297 Date: August 30, 2013 To: SIEMIC, INC. 775 Montague Expressway, Milpitas, CA 95035 USA Dear Sir/Madam, Re: Project and Product Certification Representative Authorization Letter We, BOMTECH ELECTRONICS CO., LTD, hereby authorize SIEMIC, INC. to act as a Certification Body for certifying for the following project : - Product : Mobile Skin Diagnosis System & Hair Diagnosis System - Model name : A-One Tab with Wi-Fi - FCC ID : 2AAXE-A-ONETABWI-FI We affirm that between SIEMIC and BOMTECH ELECTRONICS CO., LTD, any difference in und erstanding, including test plan, measurement methods, applicable standards and relevant procedures and processes have been resolved prior to commencement of testing activities. I, the undersigned, hereby certify that we are not subject to a denial of federal benefits, that includes FCC benefits, pursuant to Section 5301 of the Anti-Drug Abuse Act of 1988, 21 U.S.C. 853(a). This authorization is valid until further written notice from the applicant. Sincerely Yours, ______________________________________ Colleen Hong /Director /BOMTECH ELECTRONICS CO., LTD
FCC Confidentiality Request Letter Federal Com munications Commission Authorization and Evaluation Division 7435 Oakland Mills Road Columbia MD 21046 Subject: Permanent Confidentiality Request for FCC ID: 2AAXE-A-ONETABWI-FI We h ereby request confidential treatment of information accompanying this application as outlined below: •Block diagram •Schematics •Operation Description The above materials contain trade secrets and proprietary information not customarily released to the public. The public disclosure of these materials may be harmful to the applicant and provide unjustified benefits to its competitors. The applicant understands that pursuant to Section 0.457 & 0.459 of the Rules, disclosure of this application and all accompanying documentation will not be made before the date of the Grant for this application. Sincerely Yours, BOMTECH ELECTRONICS CO., LTD 3F, Yeon-san Bldg., 1547-15, Seocho-dong, Seocho-gu, Seoul, Koreaea Tel. +82-2-523-8293/ Fax. +82-2-523-8297 Date: August 30, 2013 ______________________________________ Colleen Hong /Director /BOMTECH ELECTRONICS CO., LTD
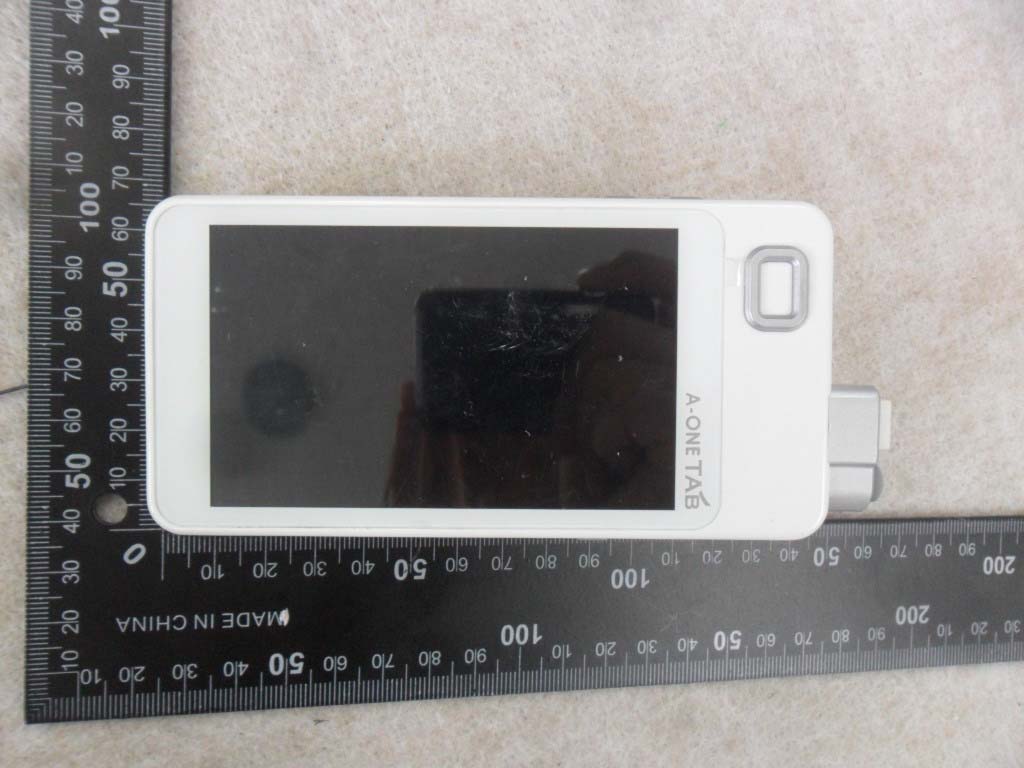
http://www.emc2000.co.kr FCC TEST REPORT Report No.: EMC-FCC-R External photos of EUT http://www.emc2000.co.kr FCC TEST REPORT Report No.: EMC-FCC-R http://www.emc2000.co.kr FCC TEST REPORT Report No.: EMC-FCC-R
http://www.emc2000.co.kr EMCcompliance Ltd. 480-5 Shin-dong, Yeongtong-gu, Suwon-city, Gyunggi-do, 443-390, Korea 82 31 336 9919 (Main) 82 31 336 4767 (Fax) This test report shall not be reproduced except in full, Without the written approval. Label Location FCC TEST REPORT Report No.: EMC-FCC-R
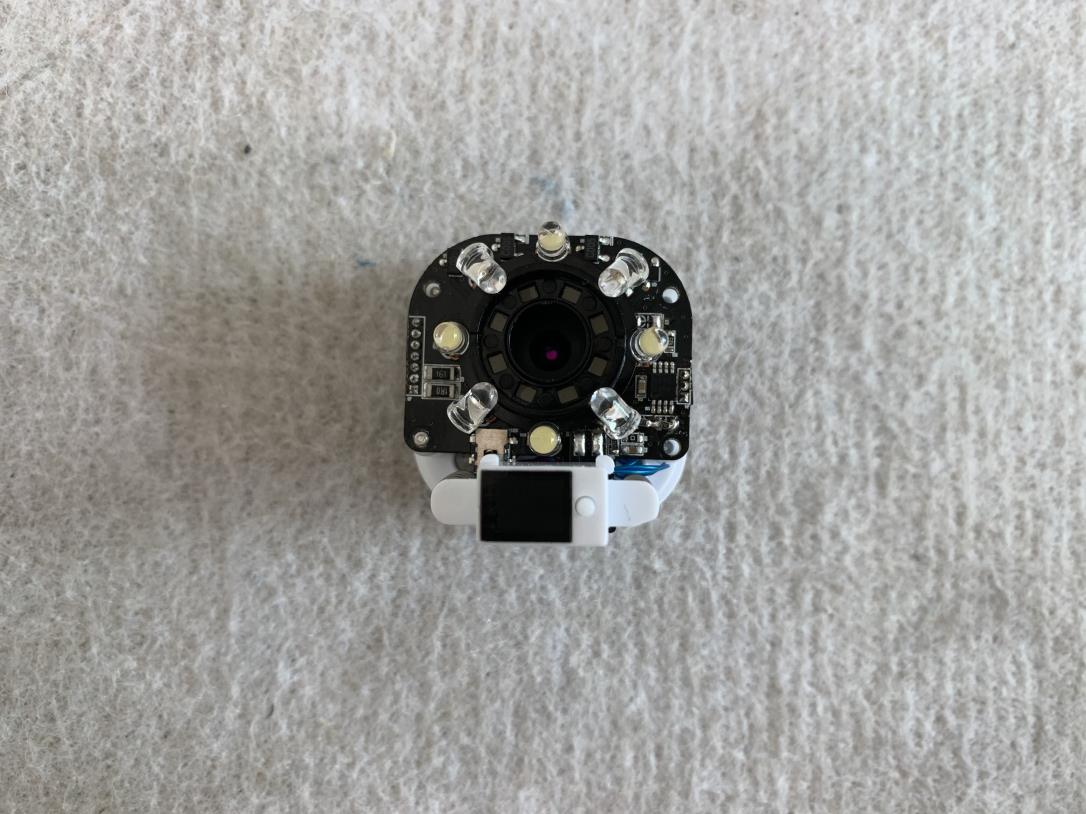
http://www.emc2000.co.kr FCC TEST REPORT Report No.: EMC-FCC-R EMC compliance Ltd. 480-5 SHIN-DONG, YEONGTONG-GU, SUWON-CITY, GYEONGGI-DO, KOREA 443-390 82 31 336 9919 (Main) 82 31 336 4767 (Fax) This test report shall not be reproduced except in full, Without the written approval. Internal photos Chip Antenna Main Board Module http://www.emc2000.co.kr EMC compliance Ltd. 480-5 SHIN-DONG, YEONGTONG-GU, SUWON-CITY, GYEONGGI-DO, KOREA 443-390 82 31 336 9919 (Main) 82 31 336 4767 (Fax) This test report shall not be reproduced except in full, Without the written approval. WIFI Module http://www.emc2000.co.kr EMC compliance Ltd. 480-5 SHIN-DONG, YEONGTONG-GU, SUWON-CITY, GYEONGGI-DO, KOREA 443-390 82 31 336 9919 (Main) 82 31 336 4767 (Fax) This test report shall not be reproduced except in full, Without the written approval. Main SUB Board http://www.emc2000.co.kr EMC compliance Ltd. 480-5 SHIN-DONG, YEONGTONG-GU, SUWON-CITY, GYEONGGI-DO, KOREA 443-390 82 31 336 9919 (Main) 82 31 336 4767 (Fax) This test report shall not be reproduced except in full, Without the written approval. CCD Board http://www.emc2000.co.kr EMC compliance Ltd. 480-5 SHIN-DONG, YEONGTONG-GU, SUWON-CITY, GYEONGGI-DO, KOREA 443-390 82 31 336 9919 (Main) 82 31 336 4767 (Fax) This test report shall not be reproduced except in full, Without the written approval. LCD http://www.emc2000.co.kr EMC compliance Ltd. 480-5 SHIN-DONG, YEONGTONG-GU, SUWON-CITY, GYEONGGI-DO, KOREA 443-390 82 31 336 9919 (Main) 82 31 336 4767 (Fax) This test report shall not be reproduced except in full, Without the written approval. LED Board
http://www.emc2000.co.kr FCC TEST REPORT Report No.: EMC-FCC-R0121 EMCcompliance Ltd. Page: 48 of 49 65, Sinwon-ro, Yeongtong-gu, Suwon, Kyunggi-do, 443-390, Korea 82-31-336-9919 (Main) 82-505-299-8311 (Fax) This test report shall not be reproduced except in full, Without the written approval. G 5.8 RF Exposure 5.8.1 Regulation According to §15.247(i), systems operating under the provisions of this section shall be operated in a manner that ensures that the public is not exposed to radio frequency energy levels in excess of the Commission's guidelines. See § 1.1307(b)(1) of this Chapter. KDB447498 was used as the guidance. According to §1.1310 and §2.1093 RF exposure is calculated. The 1-g and 10-g SAR test exclusion thresholds for 100 MHz to 6 GHz at test separation distances 50 mm are determined by: [(max. power of channel, including tune-up tolerance, mW)/(min. test separation distance, mm)] · [¥f(GHz)] 3.0 for 1-g SAR and 7.5 for 10-g extremity SAR, where • f(GHz) is the RF channel transmit frequency in GHz • Power and distance are rounded to the nearest mW and mm before calculation • The result is rounded to one decimal place for comparison • 3.0 and 7.5 are referred to as the numeric thresholds in the step 2 below The test exclusions are applicable only when the minimum test separation distance is 50 mm and for transmission frequencies between 100 MHz and 6 GHz. When the minimum test separation distance is < 5 mm, a distance of 5 mm according to 5) in section 4.1 is applied to determine SAR test exclusion. 5.8.2 Result 1.Conducted output power (EIRP) (mW) = Conducted output power(mW) x Antenna gain (Numeric) 2.[(max. power of channel, including tune-up tolerance, mW)/(min. test separation distance, mm)] · [¥f(GHz)] 3.0 Conducted output powerAntenna gain Conducted output power (EIRP) Minimum test separation distance SAR test exclusion calculation (dBm) (mW) (dBm) (mW) (mW) (mm) 5.45 3.51 3.50 2.24 7.85 5.00 1.09 5.8.3 RF Exposure Compliance Issue Therefore, EUT is not required the SAR Evaluation.
http://www.emc2000.co.kr FCC TEST REPORT Report No.: EMC-FCC-R0121 EMC compliance Ltd. Page: 1 of 49 65, Sinwon-ro, Yeongtong-gu, Suwon, Kyunggi-do, 443-390, Korea 82-31-336-9919 (Main) 82-505-299-8311 (Fax) This test report shall not be reproduced except in full, Without the written approval. FCC TEST REPORT Test report No.: EMC- FCC- R0121 FCC ID: 2AAXE-A-ONETABWI-FI Type of equipment: Mobile Skin Diagnosis System & Hair Diagnosis System Basic Model Name: A-One Tab with Wi-Fi Variant Model name: Advisor-mom Applicant: BOMTECH ELECTRONICS CO., LTD Max.RF Output Power: 13.96 dBm FCC Rule Part(s): FCC Part 15 Subpart C 15.247 Frequency Range: 2 412 MHz ~ 2 462 MHz Test result: Complied The above equipment was tested by EMC compliance Testing Laboratory for compliance with the requirements of FCC Rules and Regulations. The results of testing in this report apply to the product/system which was tested only. Other similar equipment will not necessarily produce the same results due to production tolerance and measurement uncertainties. Date of test: May 08, 2013 ~ May 23, 2013 Issued date: September 03, 2013 Tested by: Approved by: . SON, MIN GI YU, SANG HOON http://www.emc2000.co.kr FCC TEST REPORT Report No.: EMC-FCC-R0121 EMC compliance Ltd. Page: 2 of 49 65, Sinwon-ro, Yeongtong-gu, Suwon, Kyunggi-do, 443-390, Korea 82-31-336-9919 (Main) 82-505-299-8311 (Fax) This test report shall not be reproduced except in full, Without the written approval. [ Contents ] 1. Client information ............................................................................................................................................. 3 2. Laboratory information .................................................................................................................................... 4 3. Description of E.U.T. ......................................................................................................................................... 5 3.1 Basic description ........................................................................................................................................... 5 3.2 General description ....................................................................................................................................... 5 3.3 Test frequency ............................................................................................................................................... 6 3.4 Test Voltage ................................................................................................................................................... 6 4. Summary of test results ..................................................................................................................................... 7 4.1 Standards & results ....................................................................................................................................... 7 4.2 Uncertainty ................................................................................................................................................... 7 5. Test results .......................................................................................................................................................... 8 5.1 Antenna Requirement ................................................................................................................................... 8 5.2 Maximum Peak Output Power ...................................................................................................................... 9 5.3 Peak Power Spectral Density ...................................................................................................................... 15 5.4 6 dB Bandwidth(DTS Bandwidth) ............................................................................................................. 19 5.5 SPURIOUS EMISSION, BAND EDGE, AND RESTRICTED BANDS .................................................. 23 5.6 Receiver Spurious Emissions...................................................................................................................... 40 5.7 Conducted Emission ................................................................................................................................... 41 5.8 RF Exposure ............................................................................................................................................... 48 6. Test equipment used for test ........................................................................................................................... 49 Appendix 1 Test setup photos Appendix 2 External photos of EUT Appendix 3 Internal photos of EUT Appendix 4 Block diagram Appendix 5 Schematics Appendix 6 User manual Appendix 7 Part list Appendix 8 Layout diagram Appendix 9 Antenna Specification http://www.emc2000.co.kr FCC TEST REPORT Report No.: EMC-FCC-R0121 EMC compliance Ltd. Page: 3 of 49 65, Sinwon-ro, Yeongtong-gu, Suwon, Kyunggi-do, 443-390, Korea 82-31-336-9919 (Main) 82-505-299-8311 (Fax) This test report shall not be reproduced except in full, Without the written approval. 1. Client information Applicant: BOMTECH ELECTRONICS CO., LTD Address: 3F, Yeon-san Bldg., 1547-15, Seocho-dong, Seocho-gu, Seoul, Korea Telephone number: +82-2-523-8293 Facsimile number : +82-2-523-8297 Contact person: Colleen Hong / [email protected] Manufacturer : BOMTECH ELECTRONICS CO., LTD Address: 3F, Yeon-san Bldg…
Text truncated - open the document above for the full version.
| # | Rule Parts | Frequency Range | Power Output |
|---|---|---|---|
| 1 | 15C | 2.41 GHz - 2.46 GHz | 24.88 mW |

Skin&Hair diagnosis system
Equipment Class
DTS - Digital Transmission System