2ASWB-S12VPSMART VACUUM CLEANER
Ecovacs Robotics Co Ltd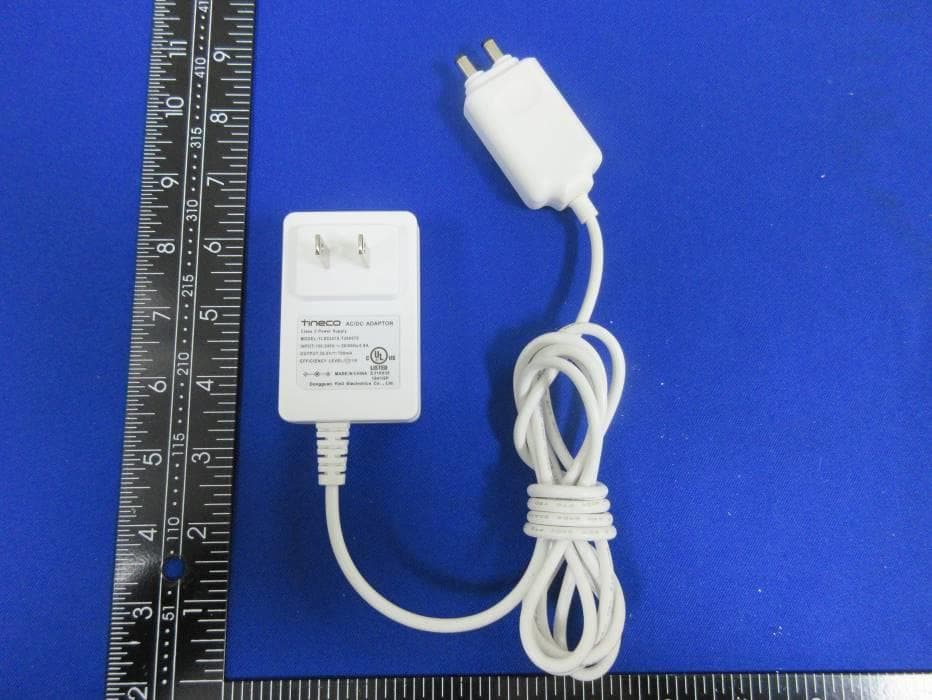
Click to zoom
Application Details
- Equipment Class
- DTS - Digital Transmission System
- Date of Grant
- Aug 10, 2020
- Application Purpose
- Original Equipment
- Date of Application
- Aug 10, 2020
- Equipment Note
- SMART VACUUM CLEANER
- Frequency Range
- 2412.00000000 - 2462.00000000
- Company
- Ecovacs Robotics Co Ltd
- Country
- China
Documents & Files
Document Text
Text extracted from the exhibit documents filed with the FCC. Open a document above to read the original.
Users Manual
SERIES Smart Vacuum Cleaner Instruction Manual Manual De Uso Mode D’emploi *Actual product may differ from illustration. 1 EN CONTENTS Important Safety Instructions ............................................................... 2 Overview ................................................................................................ 5 Accessories ............................................................................................ 7 Assembly ............................................................................................... 9 Operation ............................................................................................ 11 Maintenance ....................................................................................... 21 Specifications ...................................................................................... 24 Troubleshooting .................................................................................. 25 Warranty .............................................................................................. 27 EN 2 SAVE THESE INSTRUCTIONS Household use only. When using an electrical appliance, basic precautions should always be followed, including the following: READ ALL INSTRUCTIONS BEFORE USING (THIS APPLIANCE). Failure to follow the warnings and instructions may result in electric shock, fire and/or serious injury. WARNING – To reduce the risk of fire, electric shock, or injury: 1. This appliance can be used by children aged from 8 years and above and persons with reduced physical, sensory or mental capabilities or lack of experience and knowledge if they have been given supervision or instruction concerning use of the appliance in a safe way and understand the hazards involved. Children shall not play with the appliance. Cleaning and user maintenance shall not be made by children without supervision. 2. The appliance is not to be used by persons (including children) with reduced physical, sensory or mental capabilities, or lack of experience and knowledge, unless they have been given supervision or instruction. 3. For INDOOR use ONLY. Do not use the appliance in outdoors, nor in commercial or industrial environments. Do not use the appliance on wet surfaces or surfaces with standing water. 4. Do not allow to be used as a toy. Close attention is necessary when used by or near children, pets or plants. 5. Use only as described in this manual. Use only manufacturer’s recommended attachments. 6. Do not use with a damaged cord or plug. If appliance has been dropped, damaged, left outdoors, dropped into water, or is not working as it should, return it to a service center. 7. Do not handle charger, including charger plug, and charger terminals with wet hands. 8. Do not put any object into openings. Do not use with any openings blocked; keep free of dust, lint, hair, and anything that may reduce air flow. 9. Keep hair, loose clothing, fingers, and all parts of your body away from openings and moving parts. 10. Use extra care when cleaning on stairs. 11. Do not use to pick up flammable or combustible liquids, such as gasoline, or use in areas where they may be present. 12. Do not pick up anything that is burning or smoking, such as cigarettes, matches, or hot ashes. 13. Do not use without a filter. 14. Prevent unintentional activation. Ensure the switch is in the off position before connecting to the battery pack, picking up or carrying the appliance. Carrying the appliance with your finger on the switch or powering on the appliance with the switch on may cause accidents. Important Safety Instructions EN 3 15. Disconnect the battery pack from the appliance before making any adjustments, changing accessories, storing the appliance. Such preventive safety measures reduce the risk of starting the appliance accidentally. 16. For the purposes of recharging the battery, only use the detachable supply unit provided with this appliance. A charger that is suitable for one type of battery pack may create a risk of fire when used with another battery pack. 17. Use appliances only with specifically designated Tineco battery packs. Use of any other battery packs may create a risk of injury and fire. 18. When battery pack is not in use, keep it away from other metal objects, like paper clips, coins, keys, nails, screws or other small metal objects, that can make a connection from one terminal to another. Shorting the battery terminals together may cause burns or a fire. 19. Under abusive conditions, liquid may be ejected from the battery; avoid contact. If contact accidentally occurs, flush with water. If liquid comes into eye contact, seek medical help. Liquid ejected from the battery may cause irritation or burns. 20. Do not use a battery pack or appliance that is damaged or modified. Damaged or modified batteries may exhibit unpredictable behavior resulting in fire, explosion or risk of injury. 21. Do not expose a battery pack or appliance to fire or excessive temperature. Exposure to fire or temperature above 266°F (130°C) may cause an explosion. 22. Follow all charging instructions and do not charge the battery pack or appliance outside of the temperature range specified in the instructions. Charging improperly or at temperatures outside of the specified range may damage the battery and increase the risk of fire. 23. Have servicing performed by a qualified repair person using only identical replacement parts. This will ensure that the safety of the product is maintained. 24. This appliance contains battery cells that are non-replaceable. Do not modify or attempt to repair the appliance or the battery pack except as indicated in the instructions for use and care. 25. Always turn off this appliance before connecting or disconnecting the motorized nozzle. 26. Do not charge or store the appliance outdoors or inside a car. Only charge, store or use the battery in a dry indoor area where the temperature is higher than 39.2°F (4°C) but lower than 104°F (40°C)…
Text truncated - open the document above for the full version.
Users Manual
EN 13 Adhesive Magnet With a dustless cloth, wipe the main body and the back of your phone to remove all dust. With the magnet attached, place the phone on the magnetic attachment zone in order to secure on the main body. Remove the cover from the adhesive surface and place the magnet on the back of the phone. Wait 10 minutes before using. MAX AUTO Note: • The ideal ambient temperature when attaching the magnet is 59 °F (15°C) - 100.4 °F (38 °C). Do not attach if ambient temperature is below 50 °F (10 °C). • To prevent air bubbles, start at one end and gently move to the other end. • Do not re-use the magnet if it falls off, and contact Customer Service to purchase a new one. • If the phone is moved, return to original position to prevent from slipping and falling. • The adhesive magnet is suitable for use on metal and plastic surfaces. It is unsuitable for use on glass, pottery or porcelain. • As such, we recommend using phone cases made from metal, plastic, silicone, TPU, etc. • To prevent the phone from falling due to oversized/overweight, recommended phone size/weight: less than 7.2 inches/230g. • Magnetic attachment zone should be kept away from other magnetic objects. 1 3 2 EN 14 Discover More Work with Alexa Connect your devices to Alexa and you can give voice commands to check work status, obtain a cleaning report, etc. Built-in Bluetooth Speaker (for PURE ONE S12V Plus) With successful pairing, the Bluetooth speaker can play audio from your phone. 1.Pull the trigger to activate Bluetooth on the appliance. 2.Enable Bluetooth on your phone and select “Tineco_XXXX” from the device list. Note: • If the device is not used for 30 minutes or more, Bluetooth will automatically disconnect. MAX AUTO Voice Prompt (for PURE ONE S12V Plus) The appliance can report the work status in real time. List of voice prompt “Auto mode”“Please clean the pre-filter” (when WiFi connected) “Max mode”“Please clean the dustbin” (when WiFi connected) “WiFi connected”“Dust sensor malfunction” “Bluetooth enabled”“Brush roller tangled” “Bluetooth connected” “Air channel blocked, please remove blockages and clean the filters.” “Bluetooth disconnected”“Voice prompts on” “Low battery, please charge”“Voice prompts off” “Charging” • Press to disable voice prompts when the indicator is illuminated. Press again to turn the voice prompts on. EN 15 App • All functions can be performed using the Tineco app. Download the Tineco app to access more features. TinecoTineco iOS 9.0 or later Android 5.0 or later App Downloads www.tineco.com Support App Downloads NFC Reader • The appliance is equipped with NFC technology, enabling for simpler connection to the Tineco app. 1.Enable NFC functionality and place the phone within the reading area. 2.Follow the prompts on your phone screen to go to the app download page; no need to search in the App Store. 3.After the app is downloaded, the login page will automatically appear. 4.After login, the Tineco device list page will open. Note: • Please enable the NFC function on your phone before use. • First test the NFC sensing area of your phone during use to ensure compatibility with your phone model. • Android: Only for NFC-enabled phones; iOS: Only for iPhone XR or above. ①②③④iOSAndroid EN 16 Battery Battery level in real time. Total dust: 0 dust/0 min Cleaning Performance 0 0 dust min / Cleaning report Displays the dust amount, working hours and working status. Suction adjustment When in manual mode, swipe the phone screen to adjust suction power. Filter status reminder Records the severity of the dirty filter and provides a cleaning reminder as required. Contact us You can contact the Customer Service about any problems during the working hours. Feedback If you have any comments, please send us your feedback. App Function Introduction Note: • To disable the WiFi module, pull the trigger to activate the appliance. Remove the dustbin to access the WiFi button, press and hold it for 20 seconds until lights off. • To enable the WiFi module, pull the trigger to activate the appliance, then press the WiFi button for 2 seconds with blinking and the WiFi module is turned on. WiFi MAX AUTO MAX AUTO EN 17 Cleaning Mode Selection AUTO mode • In AUTO mode, the suction power will change in real time according to the amount of dust detected. MAX mode Start in two ways: The default setting on startup is AUTO. The appliance then takes 3 seconds to initially detect blockages or dust. If no dust is detected, power is reduced to conserve energy. In Max mode, press MAX/AUTO button or click AUTO in the App to enter the AUTO mode. In AUTO mode, press the MAX/AUTO button to switch to MAX mode. Remark: You can also swipe in the App to adjust suction power as needed. ① ② MAX AUTO MAX AUTO MAX AUTO EN 18 Emptying the Dustbin Charging the Battery When finished, press the release button on the side of the dustbin to empty the contents. Close and click the dustbin flap back into place. Connect the adaptor to the dock and outlet. To charge, secure the main body with the battery on the dock. Note: * If you need a spare battery, please purchase from Tineco. When secured on the wall-mounted dock, the battery attached to the main body will charge first, followed by the spare battery. Warning: • Only use the Tineco-provided adapter to charge the battery. • During long periods of not being used, store the lithium battery in a cool, dry place. Ensure the battery is half-charged every 3 months. spare battery sold separately* EN 19 Runtime Charging Time • When in AUTO mode, the runtime is approximately 50 minutes. When MAX power is used, the runtime is approximately 10.5 minutes. • Estimate data has been obtained by Tineco laboratory testing using one battery and non-motorized accessories. • A full charge takes approximately 3-4 hours for one battery. • Estimated data was obtained by a Tineco Laboratory using ambient temperatures between 39.2°F (4°C) to 104°F (40°C). Indicator When in Use Battery level > 20%: solid green …
Text truncated - open the document above for the full version.
Users Manual
EN 22 Pre-filter Dust Sensor Ensure the appliance is switched off before cleaning, and remove the dirty pre-filter from the mesh filter-holder. Run the appliance in MAX mode, and rotate the side cover to clean the dirty pre-filter. To avoid dust accumulation which can affect cleaning performance, wipe the suction mouth with a damp cloth. Replace a clean filter to the main body. Put the dirty pre-filter into the cleaning tool and connect the cleaning tool to the main body. After cleaning, insert the clean pre-filter into mesh filter properly and it clicks into place. Install the clean filters and dustbin back into the main body, then close the dustbin flap. ① ② ③ ④ EN 23 HEPA Filter Brush Roller Press the HEPA release button and gently remove for cleaning. Do not use the appliance without first installing the HEPA filter. Use a coin or other tool, to unlock the brush roller lock, then remove the brush from the brush window. Gently clean the transparent brush window. The HEPA filter can be washed under running water and must be completely dry before reinstalling. Remove the debris wrapped around the roller with the Tineco Hair Cleaning Tool. After cleaning, reinstall the brush. Warning: • The power brush contains electrical components which must not be soaked or washed with water. EN 24 Product 1.PURE ONE S12V(VS12200AUS ,VS12220AUS, VS12230AUS) 2.PURE ONE S12V PLUS (VS12210AUS,VS12240AUS,VS12250AUS) Voltage21.6V 2500mAh Li-ion Rated Power500W Dustbin Capacity0.6L Charging Time3-4 hrs Charging Input100-120V~ Running TimeAUTO: ~50 mins MAX: ~10.5 mins Disposal • The battery contains materials that are harmful to the environment and must be removed from the appliance before it is discarded. • When removing the battery, the appliance must be powered off. • Batteries, chargers, accessories and packaging should be sorted for environmental friendly recycling. Do not put them into fire, water or soil. Do not dispose of batteries and chargers into household waste! • If battery leakage contacts skin or clothing, immediately flush with water to avoid irritation and seek medical help. Specifications EN 25 Troubleshooting ProblemPossible causeSolution The appliance does not turn on No powerCharge the battery Auto protection for overheatingRestart after cooling down The suction mouth is blockedCheck and remove blockages Weak suction power Dustbin and filters are fullClean the dustbin and filters The pre-filter is not installedInstall the pre-filter The appliance is blocked (i.e. the tube, suction mouth or some other parts) Remove blockages The brush roller tangled with hairs or fibers Clean the brush roller Abnormal motor sounds The appliance is blocked (i.e. the tube, suction mouth or some other parts) Remove blockages Battery won’t charge The adaptor is not correctly inserted Reinsert the adaptor correctly Insufficient contact between the main body and battery Check that the main body and battery are correctly placed The adaptor is not designed for PURE ONE S12V Use the original adaptor EN 26 ProblemPossible causeSolution Indicator light blinking during charging Light off after 6s, charging error Check if the adaptor and battery are in good condition Keep blinking, no battery pack on the main body Insert the battery on the main body Indicator light blinking on work Motor failureRemove blockages and restart Air channel blockedRemove blockages Brush roller tangledClean the brush roller Full of dust in filter Follow Maintenance to clean the filter Dust sensor malfunction 1. Clean the dust on the inner sensor 2. Install the dustbin correctly Battery indicator blinking red on work Battery failure Remove the battery pack and let it cool Note: If the above troubleshooting guide fails to provide a solution, please contact us at [email protected] or visit our website www.tineco.com for further support. MAXAUTO MAXAUTO EN 27 Warranty 2-YEAR LIMITED WARRANTY • Only applies to purchases made from authorized retailers of Tineco. • Is subject to the adherence of the requirements outlined in this instruction manual, and is subject to further conditions outlined below. WHAT IS COVERED? • Your Tineco appliance has a 2-year warranty against original defects in material and workmanship, when used for private household purposes in accordance with the Tineco Instruction Manual. Motorized accessories and battery bought separately come with a 1-year warranty. • This warranty provides, at no extra cost to you, all labor and parts necessary to ensure your appliance is in proper operating condition during the warranty period. • This warranty will only be valid if the appliance is used in the country in which it was sold. WHAT IS NOT COVERED? Tineco shall not be liable for costs, damages or repairs incurred as a result of: • Appliances purchased from an unauthorized dealer. • Careless operation or handling, misuse, abuse and/or lack of maintenance or use not in accordance with the Tineco Instruction Manual. • Use of the appliance other than for normal domestic purposes, e.g. for commercial or rental purposes. • Use of parts not in accordance with the Tineco Instruction Manual. • Use of parts and accessories other than those produced or recommended by Tineco. • External factors unrelated to product quality and use, such as weather, modifications, accidents, electrical outages, power surges or acts of God. • Repairs or alterations carried out by unauthorized parties or agents. • Failing to clear blockage and other hazardous material from the appliance. • Normal wear and tear, including normal wearing parts, such as clear bin, belt, filter, HEPA, brush bar, and power cord (or where external damage or abuse is diagnosed), carpet or floor damage due to use not in accordance with manufacturer’s instructions or failure to turn the brush bar off when necessary. • Reduction in battery discharge time due to battery age or use. EN 28 WARRANTY LIMITATIONS • Any implied warranties relating to your appliance including but not limited to wa…
Text truncated - open the document above for the full version.
Users Manual
ES 38 Instalación del cesto de basura Instalación de la batería A fin de limpiar más a fondo el cesto de basura, presione su botón de liberación para separarlo completamente del aparato. Presione el botón de liberación de la batería y retírela. Para reemplazarla, deslice la batería en la ranura de la base del cuerpo principal. La batería quedará fija en su lugar cuando esté correctamente colocada. Al volver a colocar el cesto de basura, sujételo en ángulo y coloque su parte superior en el gancho del cuerpo principal. Empuje hacia arriba hasta que el gancho se fije en la ranura del cesto de basura y quede en su lugar. ① ② ES 39 Preparación para el uso Presione el gatillo para activar la aspiración. De manera predeterminada, el aparato se iniciará en el modo AUTO. Después de 3 segundos, presione el botón MAX/AUTO para cambiar al modo MAX. Presione el seguro del gatillo para mantenerlo en el modo de funcionamiento continuo. Nota: • Antes del primer uso, cargue el aparato (consulte la sección "Carga de la batería") durante 3 a 4 horas en un área donde la temperatura ambiente sea entre 4 °C (39,2 °F) y 40 °C (104 °F). • Seleccione un accesorio y colóquelo en el aparato antes de usarlo (consulte la sección "Accesorios"). Operación MAX AUTO MAX AUTO ES 40 • Determine la mejor ubicación en la pared para montar el soporte. Elija un lugar cerca de una toma de corriente y mida la longitud del cable de alimentación para asegurarse de que esté dentro del alcance. • Coloque el aparato en el soporte de pared para disfrutar un almacenamiento y una carga prácticas después del uso. Monte los dos componentes del soporte. Escuchará un "clic", el cual le indicará que se ha montado correctamente. Una vez que haya terminado, utilice los tornillos que suministra Tineco para fijar el soporte a la pared. Advertencia: • Asegúrese de que la pared que rodea el área de montaje esté libre de tuberías de gas o agua y de cables y alambres eléctricos. • Para evitar que se caiga el soporte, asegúrese de que esté firmemente instalado. Coloque el cuerpo principal en el soporte. Para evitar que se dañen las cerdas, siempre coloque los accesorios en el soporte después de su uso. clic ① ② clic ES 41 Imán adhesivo Con un paño sin polvo, limpie el cuerpo principal y la parte posterior del teléfono para quitar todo el polvo. Con el imán adherido, coloque el teléfono en la zona de conexión magnética para fijarlo en el cuerpo principal. Quite la cubierta de la superficie adhesiva y coloque el imán en la parte posterior del teléfono. Espere 10 minutos antes de usarlo. MAX AUTO Nota: • La temperatura ambiente ideal cuando se conecta el imán es entre 15 °C (59 °F) y 38 °C (100,4 °F). No lo coloque si la temperatura ambiente es inferior a 10 °C (50 °F). • Para evitar las burbujas de aire, comience por un extremo y pase cuidadosamente al otro extremo. • No vuelva a utilizar el imán si se cae y comuníquese con el servicio de atención al cliente para comprar uno nuevo. • Si se mueve el teléfono, vuelva a colocarlo en la posición original para evitar que se resbale y caiga. • El imán adhesivo es adecuado para usar en superficies metálicas y plásticas. No es apto para usar en vidrios, cerámicas ni porcelanas. • Por lo tanto, recomendamos el uso de fundas de teléfono de metal, plástico, silicona, TPU, etc. • Para evitar que el teléfono caiga por exceso de tamaño/peso, se recomienda un tamaño/peso de teléfono: menos de 7,2 pulgadas/230 g. • La zona de unión magnética debe estar alejada de otros objetos magnéticos. 1 3 2 ES 42 Más información Compatibilidad con Alexa Conecte sus dispositivos a Alexa y podrá utilizar los comandos de voz para comprobar el estado de funcionamiento, obtener un informe de limpieza, etc. Altavoz Bluetooth integrado (en el caso de PURE ONE S12V Plus) Si se empareja correctamente, el altavoz Bluetooth puede reproducir audio de su teléfono. 1. Presione el gatillo para activar la función Bluetooth del aparato. 2. Active la función Bluetooth en su teléfono y seleccione "Tineco_XXXX" en la lista de dispositivos. Nota: • Si el dispositivo no se utiliza durante 30 minutos o más, se desconectará automáticamente la función Bluetooth. MAX AUTO Comando de voz (para PURE ONE S12V Plus) El aparato puede informar del estado de funcionamiento en tiempo real. Lista de comandos de voz "Modo AUTO""Limpiar el prefiltro" (cuando esté conectado a la red Wi-Fi) "Modo MAX" "Limpiar el cesto de basura" (cuando esté conectado a la red Wi-Fi) "Conexión Wi-Fi establecida""Falla del sensor de polvo" "Bluetooth activado""Rodillo del cepillo enredado" "Bluetooth conectado" "Canal de aire obstruido, quite las obstrucciones y limpie los filtros". "Bluetooth desconectado""Comandos de voz encendidos" "Queda poca batería, cargue el aparato" "Comandos de voz apagados" "Carga en curso" • Presione para desactivar los comandos de voz cuando el indicador esté encendido. Presione de nuevo para activar los comandos de voz. ES 43 Aplicación • Se pueden ejecutar todas las funciones con la aplicación Tineco. Descargue la aplicación Tineco para acceder a más funciones. Lector de NFC • El aparato está equipado con tecnología NFC, lo que permite establecer más fácilmente una conexión con la aplicación Tineco. 1. Habilite la funcionalidad NFC y coloque el teléfono en el área de lectura. 2. Siga las indicaciones de su teléfono para acceder a la página de descarga de aplicaciones; no necesita buscarla en la App Store. 3. Después de descargar la aplicación, se mostrará automáticamente la página de inicio de sesión. 4. Después de iniciar sesión, se abrirá la página de la lista de dispositivos de Tineco. Nota: • Active la función NFC en su teléfono antes de usarlo. • Primero, pruebe el área de detección de NFC del teléfono durante el uso para garantizar la compatibilidad con su modelo de teléfono. • Android: Solo para teléfonos con NFC; iOS: Solo para iPhone XR o modelos posteriores. ①②③④iOSAndroid Tineco Descargas de aplicaciones Descárgalo en el App Store DISPONIBLE E…
Text truncated - open the document above for the full version.
Users Manual
ES 46 Vaciado del cesto de basura Carga de la batería Cuando finalice, presione el botón de liberación al costado del cesto de basura para vaciar el contenido. Cierre y fije la tapa del cubo de basura en su lugar. Conecte el adaptador al soporte y a la toma de corriente. Para cargar, fije el cuerpo principal con la batería en el soporte. Nota: * Si necesita una batería de repuesto, cómprela en Tineco. Cuando se fija en el soporte de pared, se cargará primero la batería conectada al cuerpo principal y, luego, la batería de repuesto. Advertencia: • Utilice únicamente el adaptador que suministra Tineco para cargar la batería. • Si no utilizará el aparato durante un período prolongado, guarde la batería de litio en un lugar fresco y seco. Cada 3 meses, asegúrese de que la batería tenga un nivel intermedio de carga. La batería de repuesto se vende por separado* ES 47 Tiempo de funcionamiento Tiempo de carga • Cuando está en modo AUTO, el tiempo de funcionamiento es de aproximadamente 50 minutos. Cuando se utiliza la potencia MAX, el tiempo de funcionamiento es de aproximadamente 10,5 minutos. • Los datos estimados se obtuvieron a partir de pruebas realizadas en el laboratorio de Tineco, en las que se utilizó una batería y accesorios no motorizados. • La carga completa de una batería toma aproximadamente entre 3 y 4 horas. • Los datos estimados se obtuvieron en un laboratorio de Tineco usando temperaturas ambientales entre 4 °C (39,2 °F) y 40 °C (104 °F). Indicador Durante el uso Nivel de la batería > 20 %: luz verde fija. Nivel de la batería ≤ 20 %: luz roja fija. Luz roja intermitente: falla. Luz encendida: en funcionamiento. Luz intermitente: fallas de motor, canal de aire obstruido, mal funcionamiento del sensor de polvo, rodillo del cepillo enredado o filtro demasiado sucio podrían ser las posibles causas. MAXAUTO MAXAUTO ES 48 MAXAUTO MAXAUTO MAXAUTO MAXAUTO MAXAUTO Durante la conexión a la red Durante la carga Luz encendida: Se conectó correctamente a la red Wi-Fi. Luz intermitente: Se está conectando a la red Wi-Fi. Carga en curso (nivel de batería entre el 0 % y el 99 %) Indicador de batería: luz verde de notificación. Indicador de MAX/AUTO: luz blanca de notificación. Carga completa (nivel de la batería hasta el 100 %) En 5 minutos: Indicador de batería: verde fijo. Indicador de MAX/AUTO: blanco fijo. Después de 5 minutos: se apagan ambas luces indicadoras. Luz indicadora intermitente: falla. ES 49 Nota: • Limpie el cesto de basura y los filtros después de cada uso. • Para mantener un alto rendimiento, lave y seque el prefiltro mensualmente y reemplácelo cada 6 meses. Lave y seque el filtro de aire HEPA cada 3 meses y reemplácelo cada 12 meses. Mantenimiento Filtros y cesto de basura (filtro de malla, prefiltro y filtro de aire HEPA) Presione el botón de liberación del cesto de basura para sacarlo. Gire a la izquierda para quitar los filtros. Limpie con un paño húmedo cuidando evitar que entre agua en el cuerpo principal y la batería del aparato. Limpie el cesto de basura y el filtro de malla con un paño húmedo. Deje secar al aire completamente antes de volver a colocarlo. 1 3 2 4 Advertencia: • No lave el cesto de basura, ya que contiene un sensor de polvo. Si entra en contacto con el agua, séquelo con un secador de pelo. ES 50 Prefiltro Sensor de polvo Asegúrese de que el aparato esté apagado antes de limpiarlo y saque el prefiltro sucio del portafiltro de malla. Haga funcionar el aparato en el modo MAX y gire la cubierta lateral para limpiar el prefiltro sucio. Para evitar la acumulación de polvo que puede afectar el rendimiento de la limpieza, limpie la boca de aspiración con un paño húmedo. Coloque un filtro limpio en el cuerpo principal. Ponga el prefiltro sucio en la herramienta de limpieza y conéctela al cuerpo principal. Después de la limpieza, inserte correctamente el prefiltro limpio en el filtro de malla en su lugar. Coloque los filtros limpios y el cesto de basura de nuevo en el cuerpo principal; a continuación, cierre la tapa del cesto de basura. ① ② ③ ④ ES 51 Filtro de aire HEPA Rodillo del cepillo Presione el botón de liberación del filtro de aire HEPA y retírelo cuidadosamente para limpiarlo. No utilice el aparato sin haber instalado antes el filtro de aire HEPA. Utilice una moneda u otra herramienta para abrir el seguro del rodillo del cepillo y saque el cepillo por su ventana. Limpie cuidadosamente la ventana transparente del cepillo. El filtro de aire HEPA puede lavarse con agua corriente y debe estar completamente seco antes de volverlo a colocar. Retire los residuos enredados en el rodillo con la herramienta para limpiar el cabello de Tineco. Después de la limpieza, vuelva a colocar el cepillo. Advertencia: • El cepillo eléctrico contiene componentes eléctricos que no deben ser mojados ni lavados con agua. ES 52 ProductoSERIE PURE ONE S12V Voltaje21,6 V 2500 mAh Li-ion Potencia nominal500 W Capacidad del cesto de basura0,6 L Tiempo de carga3-4 h Entrada de carga100-120 V aproximadamente Tiempo de funcionamiento AUTO: 50 min aproximadamente MAX: 10,5 min aproximadamente Desechos • La batería contiene materiales nocivos para el medioambiente y se debe sacar del aparato antes de desecharlo. • Al retirar la batería, debe estar apagado el aparato. • Se deben clasificar las baterías, los cargadores, los accesorios y el empaque para permitir un reciclaje respetuoso con el medioambiente. No los ponga en el fuego, el agua o la tierra. No deseche las baterías ni los cargadores en la basura doméstica. • Si la filtración de la batería entra en contacto con la piel o la ropa, lávese inmediatamente con agua para evitar la irritación y busque asistencia médica. Especificaciones ES 53 Solución de problemas El aparato no enciende No tiene energíaCargue la batería Protección automática ante el sobrecalentamiento Reinicie después de que se enfríe La boca de aspiración está obstruida Revise y quite las obstrucciones Potencia débil de aspiración El cesto de basura y los filtros está…
Text truncated - open the document above for the full version.
Contact Information
Applicant
Yonghua Huang(Certification Engineer)
Test Firm
UL-CCIC Company LimitedChris Zhong
[email protected]+86 512 68758596
Technical Specifications
| # | Rule Parts | Frequency Range | Power Output |
|---|---|---|---|
| 1 | 15C | 2.41 GHz - 2.46 GHz | 41.20 mW |
Other Applications from Ecovacs Robotics Co Ltd
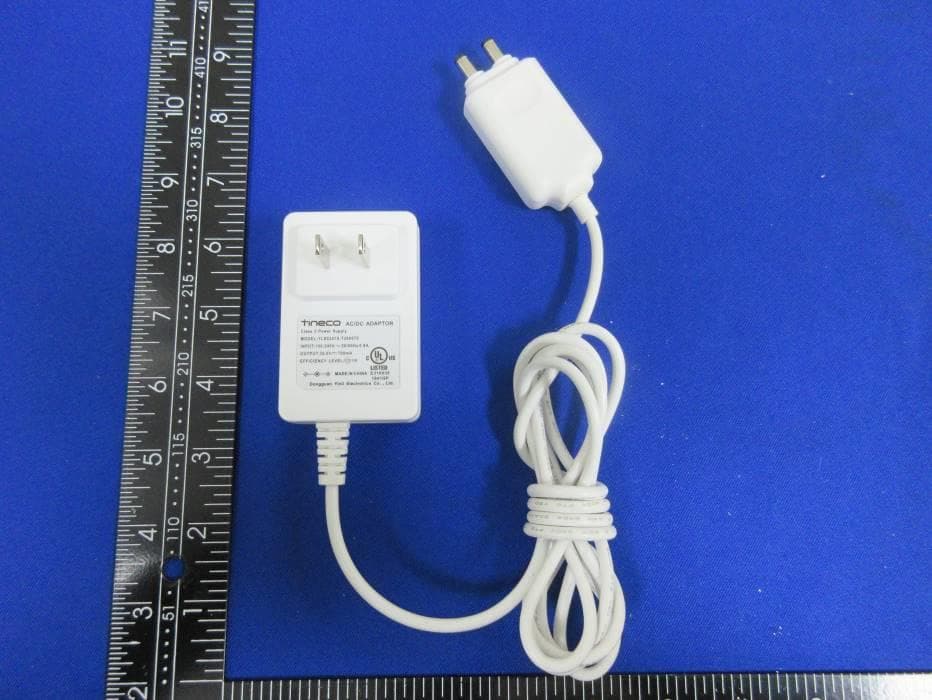
2ASWB-S12V
Jun 14, 2020SMART VACUUM CLEANER
Equipment Class
DTS - Digital Transmission System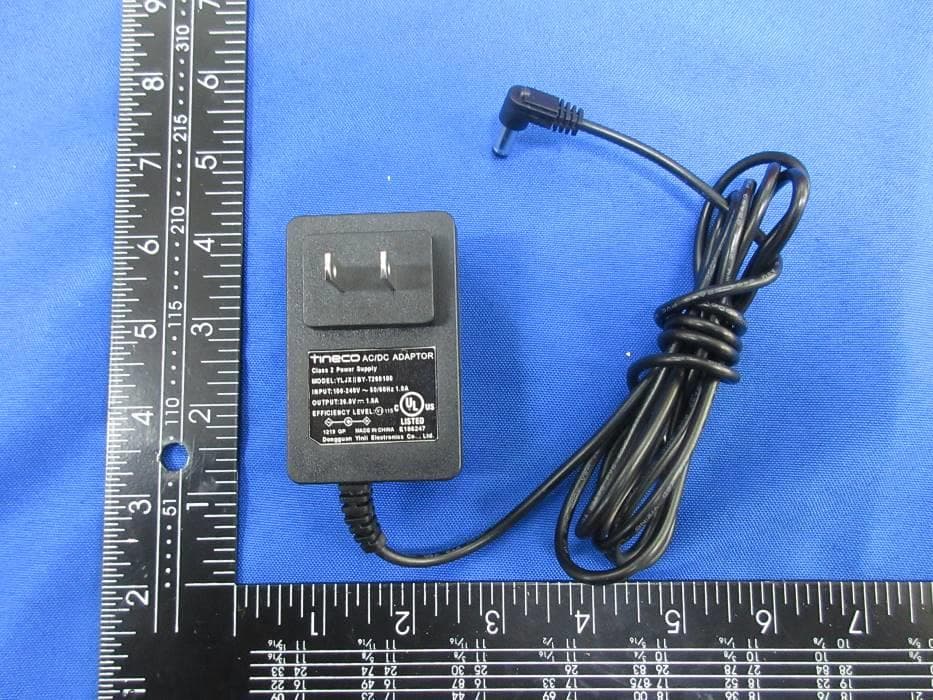
2ASWB-FS3
Jan 21, 2020Smart Cordless Hard Floor Cleaner
Equipment Class
DTS - Digital Transmission System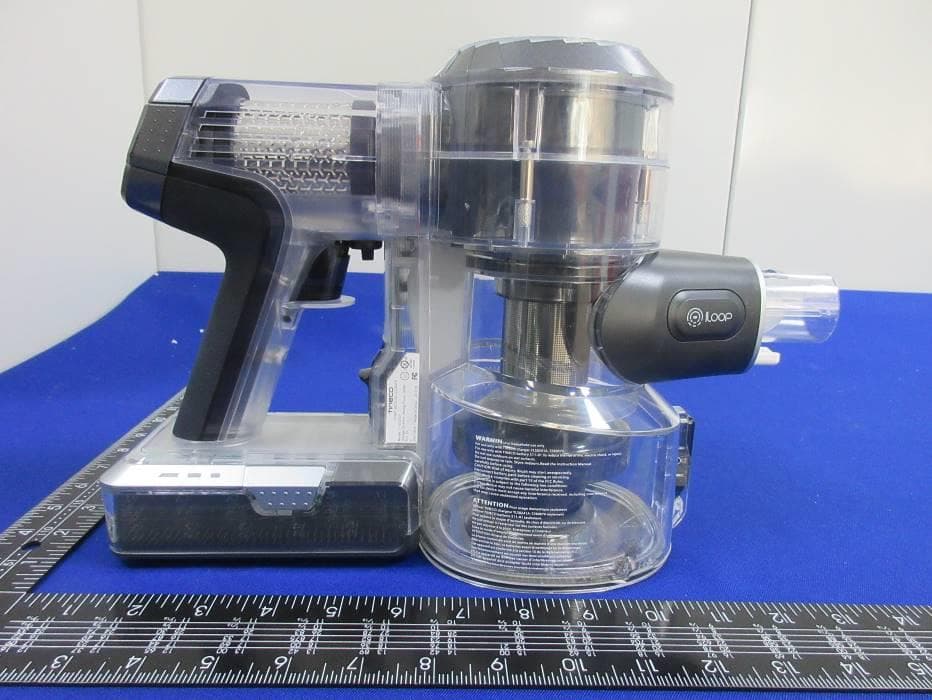
2ASWB-S11
Jan 21, 2020SMART VACUUM CLEANER
Equipment Class
DTS - Digital Transmission System