2BCCIQUADC2ASenquip QUAD
Senquip Pty Ltd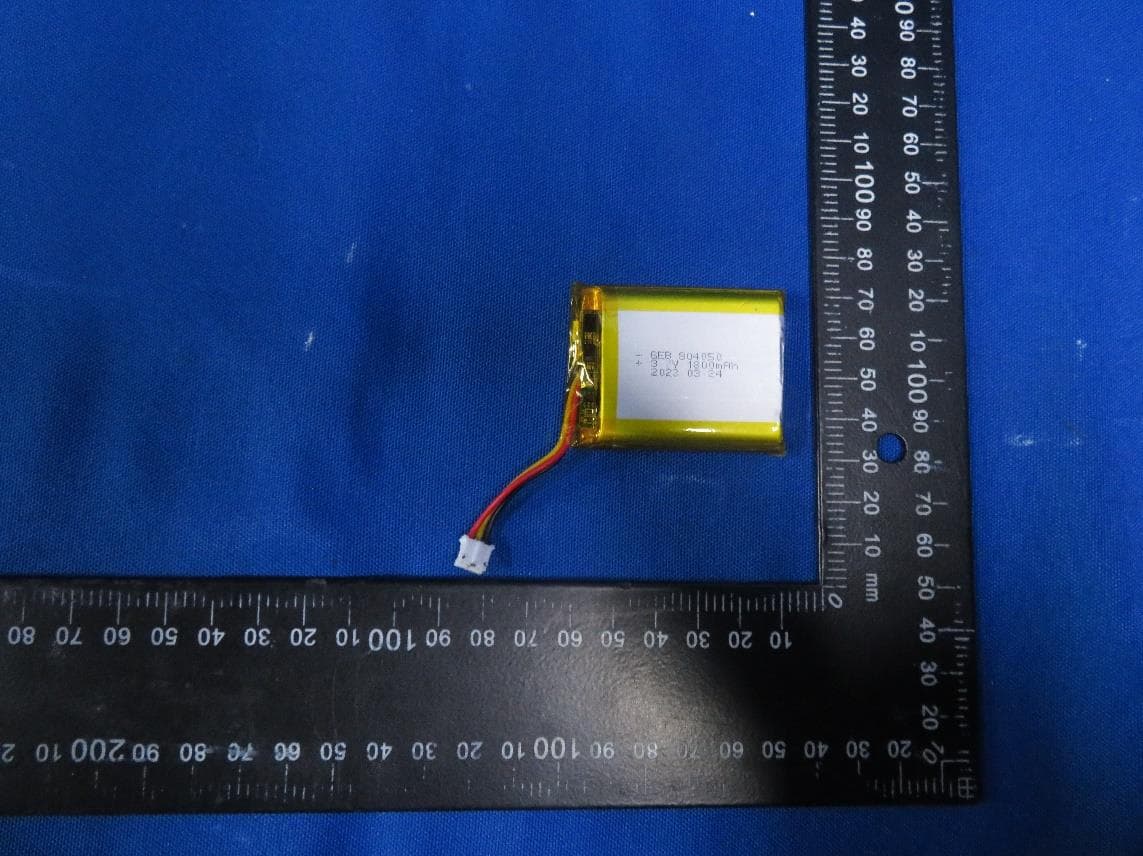
Click to zoom
Application Details
- Equipment Class
- DTS - Digital Transmission System
- Date of Grant
- Apr 01, 2024
- Application Purpose
- Original Equipment
- Date of Application
- Apr 01, 2024
- Equipment Note
- Senquip QUAD
- Frequency Range
- 2402.00000000 - 2480.00000000
- Company
- Senquip Pty Ltd
- Country
- Australia
Documents & Files
Document Text
Text extracted from the exhibit documents filed with the FCC. Open a document above to read the original.
Users Manual
Senquip QUAD User Guide Release Read the Docs, Inc \& contributors Jan 24, 2024 Table of Contents List of Figures iii 1 Introduction 1 1.1 What is the Senquip QUAD . . . . . . . . . . . . . . . . . . . . . . . . . . . . . . . . . . . . . 1 1.2 Who can use the Senquip QUAD . . . . . . . . . . . . . . . . . . . . . . . . . . . . . . . . . . 2 1.3 You can rely on the Senquip QUAD . . . . . . . . . . . . . . . . . . . . . . . . . . . . . . . . 2 1.4 What is included with your Senquip QUAD . . . . . . . . . . . . . . . . . . . . . . . . . . . 3 1.5 Regulatory Information . . . . . . . . . . . . . . . . . . . . . . . . . . . . . . . . . . . . . . . 4 2 Getting Started 7 2.1 Opening the Box . . . . . . . . . . . . . . . . . . . . . . . . . . . . . . . . . . . . . . . . . . . 7 2.2 Mounting . . . . . . . . . . . . . . . . . . . . . . . . . . . . . . . . . . . . . . . . . . . . . . . 8 2.3 User access . . . . . . . . . . . . . . . . . . . . . . . . . . . . . . . . . . . . . . . . . . . . . . 9 2.4 Anti tamper screw . . . . . . . . . . . . . . . . . . . . . . . . . . . . . . . . . . . . . . . . . 11 2.5 SIM card install . . . . . . . . . . . . . . . . . . . . . . . . . . . . . . . . . . . . . . . . . . . 13 2.6 Wiring guide . . . . . . . . . . . . . . . . . . . . . . . . . . . . . . . . . . . . . . . . . . . . 14 2.7 Fitting the antenna . . . . . . . . . . . . . . . . . . . . . . . . . . . . . . . . . . . . . . . . . 17 2.8 Initial setup . . . . . . . . . . . . . . . . . . . . . . . . . . . . . . . . . . . . . . . . . . . . . 18 3 Power Supply 27 3.1 Permanent power . . . . . . . . . . . . . . . . . . . . . . . . . . . . . . . . . . . . . . . . . . 27 3.2 Internal rechargeable battery . . . . . . . . . . . . . . . . . . . . . . . . . . . . . . . . . . . 28 3.3 Power consumption . . . . . . . . . . . . . . . . . . . . . . . . . . . . . . . . . . . . . . . . . 29 3.4 Freight mode . . . . . . . . . . . . . . . . . . . . . . . . . . . . . . . . . . . . . . . . . . . . 29 4 General Setup 31 4.1 Measurement and transmit intervals . . . . . . . . . . . . . . . . . . . . . . . . . . . . . . . 31 4.2 Power supply . . . . . . . . . . . . . . . . . . . . . . . . . . . . . . . . . . . . . . . . . . . . 33 4.3 Settings . . . . . . . . . . . . . . . . . . . . . . . . . . . . . . . . . . . . . . . . . . . . . . . . 34 5 Internal Sensors 37 5.1 Light sensor . . . . . . . . . . . . . . . . . . . . . . . . . . . . . . . . . . . . . . . . . . . . . 37 5.2 Accelerometer . . . . . . . . . . . . . . . . . . . . . . . . . . . . . . . . . . . . . . . . . . . . 37 5.3 Pressure sensor . . . . . . . . . . . . . . . . . . . . . . . . . . . . . . . . . . . . . . . . . . . 40 5.4 Magnetic switch . . . . . . . . . . . . . . . . . . . . . . . . . . . . . . . . . . . . . . . . . . . 40 5.5 Temperature sensor . . . . . . . . . . . . . . . . . . . . . . . . . . . . . . . . . . . . . . . . . 41 5.6 GPS . . . . . . . . . . . . . . . . . . . . . . . . . . . . . . . . . . . . . . . . . . . . . . . . . . 42 5.7 Bluetooth interface . . . . . . . . . . . . . . . . . . . . . . . . . . . . . . . . . . . . . . . . . 44 5.8 Internal sensor settings . . . . . . . . . . . . . . . . . . . . . . . . . . . . . . . . . . . . . . . 45 6 External Sensors 49 i 6.1 Inputs and Outputs . . . . . . . . . . . . . . . . . . . . . . . . . . . . . . . . . . . . . . . . . 49 6.2 Serial interface . . . . . . . . . . . . . . . . . . . . . . . . . . . . . . . . . . . . . . . . . . . . 57 6.3 CAN Bus interface . . . . . . . . . . . . . . . . . . . . . . . . . . . . . . . . . . . . . . . . . 61 6.4 External Sensor Settings . . . . . . . . . . . . . . . . . . . . . . . . . . . . . . . . . . . . . . 62 7 Scripting 71 7.1 Risks . . . . . . . . . . . . . . . . . . . . . . . . . . . . . . . . . . . . . . . . . . . . . . . . . 71 7.2 Access . . . . . . . . . . . . . . . . . . . . . . . . . . . . . . . . . . . . . . . . . . . . . . . . 71 7.3 Writing and deploying a script . . . . . . . . . . . . . . . . . . . . . . . . . . . . . . . . . . 72 8 Network Connection 75 8.1 Wi-Fi specification . . . . . . . . . . . . . . . . . . . . . . . . . . . . . . . . . . . . . . . . . 75 8.2 4G LTE specification . . . . . . . . . . . . . . . . . . . . . . . . . . . . . . . . . . . . . . . . 75 8.3 Connecting to a Wi-Fi network . . . . . . . . . . . . . . . . . . . . . . . . . . . . . . . . . . 76 8.4 Connecting to a mobile network . . . . . . . . . . . . . . . . . . . . . . . . . . . . . . . . . 79 8.5 Network settings . . . . . . . . . . . . . . . . . . . . . . . . . . . . . . . . . . . . . . . . . . 80 9 Endpoint Setup 81 9.1 Data security . . . . . . . . . . . . . . . . . . . . . . . . . . . . . . . . . . . . . . . . . . . . 81 9.2 Data format . . . . . . . . . . . . . . . . . . . . . . . . . . . . . . . . . . . . . . . . . . . . . 81 9.3 Data buffer . . . . . . . . . . . . . . . . . . . . . . . . . . . . . . . . . . . . . . . . . . . . . . 82 9.4 UDP . . . . . . . . . . . . . . . . . . . . . . . . . . . . . . . . . . . . . . . . . . . . . . . . . 83 9.5 HTTP . . . . . . . . . . . . . . . . . . . . . . . . . . . . . . . . . . . . . . . . . . . . . . . . . 83 9.6 HTTPS . . . . . . . . . . . . . . . . . . . . . . . . . . . . . . . . . . . . . . . . . . . . . . . . 83 9.7 MQTT . . . . . . . . . . . . . . . . . . . . . . . . . . . . . . . . . . . . . . . . . . . . . . . . 83 9.8 MQTT over TLS . . . . . . . . . . . . . . . . . . . . . . . . . . . . . . . . . . . . . . . . . . . 83 9.9 Settings . . . . . . . . . . . . . . . . . . . . . . . . . . . . . . . . . . . . . . . . . . . . . . . . 84 10 Senquip Portal 87 10.1 Using the Senquip Portal . . . . . . . . . . . . . . . . . . . . . . . . . . . . . . . . . . . . . . 87 10.2 Management and Hosting on the Senquip Portal . . . . . . . . . . . . . . . . . . . . . . . . 98 11 Mechanical Specification 101 11.1 Mechanical drawings . . . . . . . . . . . . . . . . . . . . . . . . . . . . . . . . . . . . . . . 101 11.2 Mechanical Fittings . . . . . …
Text truncated - open the document above for the full version.
Users Manual
1.4 What is included with your Senquip QUAD When you open your the Senquip QUAD box, the following are included: Figure 1.1. 1 x Senquip QUAD Figure 1.2. 1 x GNSS and 4G LTE combination antenna Figure 1.3. 1 x 2-hole and 1 x 3-hole gland insert Figure 1.4. 1 x 3mm Allen key Senquip QUAD User Guide, Release 1.4. What is included with your Senquip QUAD 3 Figure 1.5. 1 x Getting started guide 1.5 Regulatory Information USA: Federal Communications Commission (FCC) statement This device complies with FCC part 15 FCC Rules. Operation is subject to the following two conditions: 1. This device may not cause harmful interfer- ence and 2. This device must accept any interference, including interference that may cause undesired operation of the device. FCC Warning Changes or modifications not expressly approved by the party responsible for compliance could void the user authority to operate the equipment. Note: This equipment has been tested and found to comply with the limits for a Class B digital device, pursuant to part 15 of the FCC Rules. These limits are designed to provide reasonable protection against harmful interference in a residential installation. This equipment generates, uses and can radiate radio frequency energy and, if not installed and used in accordance with the instructions, may cause harmful interference to radio communications. However, there is no guarantee that interference will not occur in a particular installation. If this equipment does cause harmful interference to radio or television reception, which can be determined by turning the equipment off and on, the user is encouraged to try to correct the interference by one or more of the following measures: •Reorient or relocate the receiving antenna. •Increase the separation between the equipment and receiver. •Connect the equipment into an outlet on a circuit different from that to which the receiver is connected. •Consult the dealer or an experienced radio/TV technician for help. This device meets the FCC and IC requirements for RF exposure in public or uncontrolled environ- ments. 1.5.1 Accessing Regulatory Information You can view the device FCC ID on the Senquip Portal. To view the FCC ID 1.Launch the Senquip Portal. Senquip QUAD User Guide, Release 4 Chapter 1. Introduction
Users Manual
2.Browse to the device page 3.On the Device Info widget, select Regulatory Information Senquip QUAD User Guide, Release 1.5. Regulatory Information 5 The following regulatory information will be shown. Figure 1.6. Regulatory information including FCC ID Senquip QUAD User Guide, Release 6 Chapter 1. Introduction Chapter 2 Getting Started 2.1 Opening the Box The Senquip QUAD is shipped in a box with a security seal that ensures that the packaging has not been opened. If this seal is compromised, the box may have been opened, in which case, a non-autho- rised party could have had access to the device password. If the device is to be used in a critical appli- cation, please ensure that the seal is intact upon receipt and remember to change your password as soon as possible. Figure 2.1. Senquip QUAD packaging with intact security seal 7
Users Manual
2.2 Mounting The Senquip QUAD can be wall or bulkhead mounted, or can be attached to a DIN rail using the inte- grated mounting clips. When wall or bulkhead mounting, use M5 bolts. Figure 2.2. Senquip QUAD mounting points circled in red If attaching to a DIN rail, push the enclosure onto the rail, ensuring that the clips have fully engaged around the rail. Senquip QUAD User Guide, Release 8 Chapter 2. Getting Started Figure 2.3. Rail mounting the Senquip QUAD Remove the Senquip QUAD from the DIN Rail using the Allen Key as shown in the image below. Figure 2.4. Removing from a DIN Rail The Senquip QUAD should be mounted with the cable gland and antenna entry facing down. Mounting the device with the gland in another orientation may result in water ingress via the cable entry gland. In-field orientation checks can be performed using the built-in accelerometer and associ- ated tilt measurements. 2.3 User access The user access panel is accessed by removing the front cover. From the user access panel, a SIM card can be inserted, external devices can be wired, diagnostics can be performed, and the device can be reset or placed in setup mode. Senquip QUAD User Guide, Release 2.3. User access 9 Figure 2.5. User access for the Senquip QUAD To open the cover: 1.Un-fasten the 4 hex-head screws that secure the cover using the 3mm Allen key provided. The screws are captive and will not fall out when loose. Do not attempt to remove the screws from the lid. Senquip QUAD User Guide, Release 10 Chapter 2. Getting Started Figure 2.6. Four cover screws 2.When the lid is opened, an internal light detector will recognise the increase in brightness and will enable the LEDs and configuration switches. Note When closing the device, please ensure that the seal is correctly seated and is clean. A poorly seated or dirty seal may result in water ingress. 2.4 Anti tamper screw In some installations, evidence needs to be provided where unauthorised access to the Senquip QUAD has occurred. All devices include a tamper feature that can be configured to raise an alert when the lid is opened. In some instances however, a physical tamper indication is required. Senquip can provide tamper evident screws for the lid of the Senquip QUAD. Once a tamper evident screw is in place, opening the device will require breaking the seal on the tamper evident screw. Senquip QUAD User Guide, Release 2.4. Anti tamper screw 11 Figure 2.7. Tamper evident screw To fit a tamper evident screw, remove one of the lid screws closest to the cable gland using the 3mm Allen key provided. Replace the lid screw with the tamper evident version. The tamper screw is compatible with most available seals. Note The tamper evident screw should be inserted last and removed first. The tamper evident screw should be inserted and removed with a 4mm Allen key. Figure 2.8. Tamper evident screw in place on a Senquip QUAD Senquip QUAD User Guide, Release 12 Chapter 2. Getting Started 2.5 SIM card install The Senquip QUAD uses a micro-SIM card with dimensions as shown in the figure below. Both 1.8V and 3.3V SIM Cards are supported. If 4G LTE is the chosen communications method, then a SIM card should be installed now. The Senquip QUAD is available with an internal SIM card included. An internal SIM card provides for the most reliable communications in high-vibration environments. Note If your Senquip QUAD has an internal SIM card, you do not need to install an additional card. Figure 2.9. SIM Card sizes To access the SIM card holder, the lid must be opened. The SIM card holder is located at position 1 in the diagram below. The holder is a “push-push” type, meaning that the SIM card is pushed in to install and is then pushed and released to eject. Figure 2.10. Identifying the SIM card slot To insert a micro-SIM card into the holder, place it in the recess to the left of the SIM card slot and apply a gentle pressure to the right. The SIM card should be orientated with contacts facing up and the removed corner on the bottom right as in the diagram below. Senquip QUAD User Guide, Release 2.5. SIM card install 13 Figure 2.11. Correct insertion of a SIM card Because the Senquip QUAD is expected to be used in harsh environments, there is a plastic locking mechanism moulded into the plastics. Once the SIM card is inserted, the plastic lock will lift, securing the SIM card in the holder. Figure 2.12. Insert SIM to the right It is recommended that the device be reset, by pressing the reset button, after inserting a SIM card. To remove the SIM card, hold the locking mechanism down; press the edge of the SIM card gently and let go. The SIM card will be ejected. 2.6 Wiring guide The Senquip QUAD is fitted with a 14 way 3.5mm pitch terminal block that can be used to provide power and for connection to external sensors and systems. With the cable gland facing down, pin 1 is on the left hand side of the header and pin 14 on the right. All references to pin numbers in this docu- ment will assume this definition. Senquip QUAD User Guide, Release 14 Chapter 2. Getting Started
Users Manual
Figure 2.13. Interface pin numbers The following pinout applies to the 14 way terminal block: Pin numberName Terminal block marking Application 1Positive voltage inPWR+ Positive system power; either perma- nent or intermittent such as from a solar panel 2 Negative voltage in (ground) GNDNegative system power or ground 3 General purpose input output 1 IO1 Voltage, current, frequency, pulse input and sink or source output 4 General purpose input output 2 IO2 Voltage, current, frequency, pulse input and sink or source output 5 General purpose input output 3 IO3 Voltage, current, frequency, pulse input and sink or source output 6 General purpose input output 4 IO4 Voltage, current, frequency, pulse input and sink or source output 7 General purpose input output 5 IO5 Voltage, current, frequency, pulse input and sink or source output Senquip QUAD User Guide, Release 2.6. Wiring guide 15 8GroundGNDSpare ground for sensor connection 9Serial inB / RX RS485B in RS485 mode and receive in RS232 mode 10Serial outA / TX RS485A in RS485 mode and transmit in RS232 mode 11CAN 1 HighCAN2 HCAN bus 1 CAN high input 12CAN 1 LowCAN2 LCAN bus 1 CAN low input 13CAN 2 HighCAN2 HCAN bus 2 CAN high input 14CAN 2 LowCAN2 LCAN bus 2 CAN low input The terminal block allows for push-in connection, meaning that no tools are required. A defined contact force ensures that the contact remains stable over the long term and is high vibration environ- ments. A finger operated release button for each terminal allows for convenient, tool-free operation. Wire Specification: Wire stripping length8 mm Conductor cross section solid min.0.2 mm Conductor cross section solid max.1.5 mm Conductor cross section flexible min.0.2 mm Conductor cross section flexible max.1.5 mm Conductor cross section AWG min.24 Conductor cross section AWG max.16 Warning Please ensure that all external power is removed from the device before wiring fitment begins. Power and ground wires must be rated to at least 1A and should have a voltage rating suitable for the application. A 1A fuse in-line with the power connection is recommended. Signal wires should be chosen based on the application and may require specific features such as individual shielding, twisted pairs or impedance matching. In extremely noisy electrical environments, it is recommended that a shielded cable be used and that the shield only be connected to ground on the power supply end. Do not ground the shield on both ends. The material from which the chosen cable is manufactured should be suitable for the environment in which it is used. Be sure to check chemical resistance, UV stability and flex durability of the cable being used. Senquip QUAD User Guide, Release 16 Chapter 2. Getting Started Figure 2.14. Wiring example with a sheathed cable To ensure IP rating is retained, a sheathed cable with diameter suitable for use with the cable gland insert should be used. Three cable gland seals are supplied as specified in the table below. The gland with the single hole should be used when a single cable is required; the gland with two holes should be used where two cables are required etc. Cable seals are manufactured using NBR (Nitrile Buta- diene Rubber) and are resistant to oils and biological oils, solvents and most industrial chemicals. Always check the suitability of the cable gland insert with all chemicals found in the operating envi- ronment. Part NoNo. holesHole diameterCable A111mm6-11mm B25mm3-5mm C34mm2-4mm 2.7 Fitting the antenna Every Senquip QUAD is shipped with a dual GNSS and 4G LTE antenna. The antenna is fitted with 2 FAKRA plugs that engage with the matching sockets at the base of the Senquip QUAD. FAKRA connectors were chosen for use on the Senquip QUAD because: •They offer vibration tolerant operation •The colour coding and keying make it simple to match the antennas with the correct connectors Senquip QUAD User Guide, Release 2.7. Fitting the antenna 17 •FAKRA connectors avoid the opportunity to over tighten the RF connectors, causing damage Figure 2.15. GNSS and 4G LTE combination antenna To connect the GNSS or LTE antenna lead to the Senquip QUAD, press the antenna connector into the socket until you hear it click. To remove the connector, depress the small tab and pull. Warning When removing the antenna, do not pull on the RF cable. Figure 2.16. Press the tab to remove the connector The GNSS and 4G LTE antenna cables are colour coded and are keyed. Connector details are given in the table below. FunctionFAKRA TypeColourPosition 4G LTEFAKRA DPurpleLeft GNSSFAKRA CBlueRight 2.8 Initial setup Initial setup can be performed using the integrated web-server using any Wi-Fi enabled phone, tablet or computer. Once the device is connected to a network, configuration can be performed remotely using the in-built webserver or via the Senquip Portal. Senquip QUAD User Guide, Release 18 Chapter 2. Getting Started Note For volume opportunities, devices can be pre-configured to connect immediately to a network; please contact Senquip to discuss this option. With the cover open, two push-button switches (setup and reset) and two LEDs (network and status) are available. The switches and LEDs are used to configure the device. Figure 2.17. Buttons and LEDs for setup The status and network LEDs indicate the current state of the device. These LEDs are only active if the lid is open. When the lid is closed, the LEDs will remain off to conserve energy. A summary of LED function is given in the table below. Note During normal operation, the LEDs will be off when the device is sleeping or hibernating and will not turn on when the lid is opened until the next measurement interval. Status LEDNetwork LEDMeaning (Green)(Orange) OffOffDevice is sleeping or lid is closed Flash (1Hz)OffSetup Mode OnFlash (1Hz)Device has been configured, but no network connection OnOnNetwork connection via Wi-Fi or 4G LTE Fast FlashFast FlashFactory reset in progress OffFast FlashFirmware update in progress Slow FlashO…
Text truncated - open the document above for the full version.
Users Manual
IO channel will be enabled. 6.1.1 Powering external devices IO on the Senquip QUAD can be used to power and provide signals to external sensors, relays, lights, buzzers, and other devices. To permanently power an external device by supplying it with a voltage, set the IO Default State to VIN or VSET in which case the connected device will be permanently powered. To power a device by connecting it to ground, select GND as the Default State. The default state will continue to be applied between measurement cycles. Alternatively, the IO can made to switch power on only at a measurement cycle, and for a defined period. To enable switched power, set the default for the IO to OFF and enable the Measurement State as VIN or VSET. Set the Measurement Time as the time for which the externally connected sensor must be powered before being measured. This time is typically the boot time for a sensor. In this case, Vin or Vset will only be made available on the IO during a measurement interval and for the time speci- fied. This is the preferred method for installs that are solar powered or have intermittent power. Measurement of CAN, RS232, and RS485 are delayed by the longest of all specified measurement times to allow for the case where an IO is being used to power a serially connected device. The figure below shows an RS232 sensor that is powered by IO5 and measured on the RS232 port and a relay that is energised by setting an IO to ground. Figure 6.2. Powering external devices on an IO Note Where switched power is used to power a sensor that is read by another input, the Measurement Time specified for the IO and the input must be the same to ensure that the sensor is powered when measured. For advanced users, the state of an IO can be switched from within a script. This allows for the control of complex sensors and systems and precise timing. If changes to the IO are made from within a script, the default will only be re-applied the next time the device boots. Output states are held when the Senquip QUAD enters sleep. Senquip QUAD User Guide, Release 6.1. Inputs and Outputs 51 6.1.2 Current Measurement Loop powered (2-wire) and externally powered (3-wire) 4-20mA devices can be used with the Senquip QUAD. For 2-wire devices, Vin or Vset power can be supplied by an IO and the current drawn measured by that same IO. A typical 2-wire install is shown in the figure below. Figure 6.3. 2-wire 4-20mA device install 3-wire devices are externally powered as they typically draw more than 4mA at a minimum and so are not suitable for loop powering. The Senquip QUAD can power a 3-wire device with Vin or Vset from one IO and measure the output current on a second IO. A typical 3-wire install in shown in the figure below. Senquip QUAD User Guide, Release 52 Chapter 6. External Sensors Figure 6.4. 3-wire 4-20mA device install Current out of the IO terminal is defined as positive (2-wire) and current into the terminal (3-wire) is defined as negative. Although optimised for 4-20mA, the IO can measure currents in the range -100mA to 100mA. 6.1.3 Pulse Count Measurement The Senquip QUAD can count pulses from devices like water-meters, rain guages, and speed-sensors. The inputs can be from voltage free contacts like reed switches, hall effect sensors, or pulse trains from powered devices. When connecting to voltage free switches, am optional pullup (wetting) resistor can be enabled in the settings. The Senquip QUAD can count pulses while awake and between cycles when sleeping. Although all IO can count in a very low power mode, IO1 and IO2 have additional circuitry that allows ultra low power pulse counting. Along with a total pulse count, frequency and duty cycle are also measured at the measurement interval. The figure shows how to wire a voltage free contact and powered pulse train to the Senquip QUAD IO. Senquip QUAD User Guide, Release 6.1. Inputs and Outputs 53 Figure 6.5. Pulse counting Calibration Calibration can be applied to each measurement so that the value returned by the Senquip QUAD is in units that are meaningful in the end application. For instance, a fuel level sensor that outputs a voltage between 0 and 5V may represent a level between 0 and 100 litres of diesel. The voltage measurement can be calibrated to convert from Volts to the more meaningful unit of litres. In any system, the measurement instrument (the Senquip QUAD), the sensor and possibly the measured value will be subject to errors that may accumulate to reduce accuracy. In a system that measures fluid volume in a 100 litre tank using a 4-20mA sensor, offset errors may result in a non-zero or negative reading when the tank is empty. Sensor gain may also not be perfectly linear and so a 1 litre change may be measured differently when the tank is empty versus when it is full. The sensor may report in inches of liquid height where a more meaningful unit may be litres. To achieve an accu- rate and meaningful measurement, a calibration can be performed. In this example, the tank could be calibrated by adding a small amount of liquid, say 10 litres at which point the current measured may be 4.1mA. Now add more liquid to take the level to say 80l. The sensor now reads 16.2mA. The calibration would then be filled into the IO setting as shown below: Low In4.1This is the value in mA measured by the Senquip QUAD Low Out10This is the actual value that we would like to report High In16.2This is the value in mA measured by the Senquip QUAD Low Out80This is the actual value that we would like to report Senquip QUAD User Guide, Release 54 Chapter 6. External Sensors UnitlThe unit to be reported is litres Warnings and Alarms For each measurement type, high and low warning and alarm levels can be set. Once enabled, each time a measurement is completed, the returned value will be compared with low and high warning and alarm thresholds. If a warning or alarm level is breached, a message will immediately be transmit- ted. As long as the warning or alarm condit…
Text truncated - open the document above for the full version.
Users Manual
battery with the same polarity. Figure 12.5. Battery plug removed. •The LiPo battery is secured to the PCB with removable 3M double sided tape. To remove the battery, pull gently, ensuring that you do not damage the battery. •Remove the old tape; new batteries supplied by Senquip will ship with replacement double sided tape. Figure 12.6. Remove the old tape. Note Used LiPo batteries can be dangerous and are harmful to the environment and should only be disposed of using an authorised disposal service. •Reverse the above procedure to re-assemble the device. Senquip QUAD User Guide, Release 110 Chapter 12. Maintenance Chapter 13 Frequently Asked Questions 13.1 Introduction This document is a collection of responses to questions that are commonly asked by new users of the Senquip telemetry devices. If you cannot find an answer to your question below, please contact us at [email protected]. Table of Contents 13.2 Senquip Portal 13.2.1 Do I need a hosted subscription to remotely configure my device? No. The purchase of a Senquip device entitles the owner to make configuration changes, perform firmware updates and view data using the Senquip Portal for the life of the device. 13.2.2 Do I need a hosted subscription to perform firmware updates? No. The purchase of a Senquip device entitles the owner to perform firmware updates using the Senquip Portal for the life of the device. 13.2.3 Can I view data on the Senquip Portal for free? Yes, you can view data on the Senquip Portal on a free basic plan. Updates to the Senquip Portal will be limited to 5 minute intervals and the data will not be stored for more than a day. 13.2.4 I cannot see historical raw data on the Senquip Portal. If your device is on a free basic plan, Senquip will not store more than 1 day of historical data. Continuous backups of data storage becomes expensive so is feature of hosted plans where data will be saved for 2 years. Updating a device plan to hosted can be done on the Senquip Portal by using the subscriptions facility. 13.2.5 Do I have to use the Senquip Portal to view my data? Senquip devices can send measured data to any endpoint via UDP, HTTP, and MQTT. Data transfers can be secured through the upload of customer certificates to the device. 13.2.6 Can I completely disconnect from the Senquip Portal? Yes. To stop sending data to the Senquip Portal, unselect the Send Data to Senquip Portal option in the endpoint settings. To stop configuration settings from the Senquip Portal unselect Configuration via Senquip Portal. Further settings updates will have to be done using the Senquip webserver. 111 13.2.7 Does Senquip have access to my data? No. Unless you give a Senquip employee access to a device by giving them view, operator, user, or admin status, Senquip employees will not be able to view your data. Sometimes, you may give a Senquip employee access to your device so that they can assist you in setup. As an administrator, you can remove this access at any time. 13.2.8 Can I secure proprietary scripts? Yes. You can use the lock feature on the Senquip Portal to lock scripts so that only you can access the content of the script. 13.2.9 I have added a measurement in the settings, but the widget is not show- ing in the portal. Browsers typically cache most of the elements in a webpage. Refresh your Chrome or Edge browser by: * Hold down Ctrl and click the Reload button. * Or Hold down Ctrl and press F5. Check that the widget has not been turned off in the portal display settings. To turn on (or off) a widget, press the eye icon on the device page and select which widgets you would like to show, and the order in which you want to show them. Remember to refresh your browser. 13.2.10 There are measurements missing in the data stored on the Senquip Portal. When a …
Text truncated - open the document above for the full version.
Contact Information
Applicant
Norman Ballard(Mr)
Test Firm
MRT Technology (Suzhou) Co., Ltd.Mr. Marlin Chen
[email protected]8651266308358
Technical Specifications
| # | Rule Parts | Frequency Range | Power Output |
|---|---|---|---|
| 2 | 15C | 2.40 GHz - 2.48 GHz | 4.70 mW |
Other Applications from Senquip Pty Ltd
2BCCIORBC1A
Sep 19, 2023Senquip ORB
Equipment Class
DTS - Digital Transmission System