2BK3M-K100U001Kids Electric Scooter
SPACEWALKER PTE. LTD.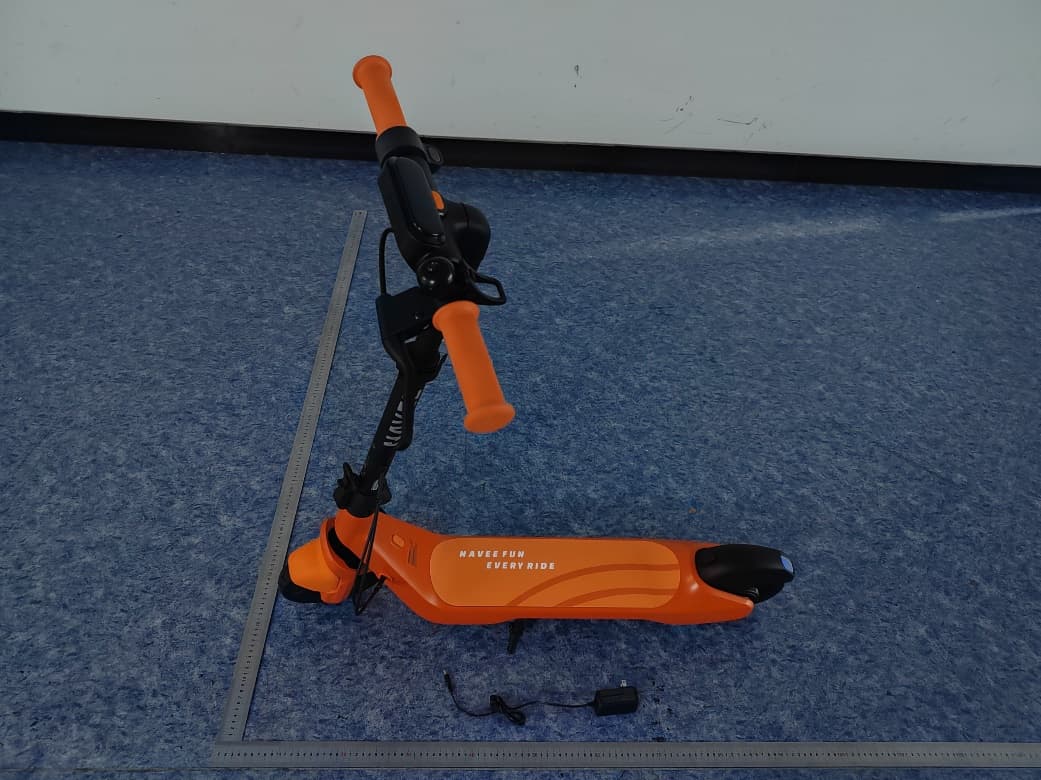
Click to zoom
Application Details
- Equipment Class
- DTS - Digital Transmission System
- Date of Grant
- Sep 04, 2025
- Application Purpose
- Original Equipment
- Equipment Note
- Kids Electric Scooter
- Frequency Range
- 2402.00000000 - 2480.00000000
- Company
- SPACEWALKER PTE. LTD.
- Country
- Singapore
Documents & Files
Document Text
Text extracted from the exhibit documents filed with the FCC. Open a document above to read the original.
Users Manual
NAVEE Kids Electric Scooter K100 Pro US EN Quick User Guide FR-CA Guide d'utilisation rapide ES-LA Guía rápida de usuario 0201 K100 6–10 yrs 44-110 lbs (20-50 kg) 3’8”–4’8”(115–145 cm) K100 Pro 6–14 yrs 44–110 lbs (20–50 kg) 3’8”–5’6” (115–170 cm) K100 Max 6–14 yrs 44–132 lbs (20–60 kg) 3’8”–5’6” (115–170 cm) Assembly/Montage/Armado Spring Button Bouton à ressort Botón de resorte 1 2 Positioning Hole Trou de positionnement Orificio de posicionamiento K100 1 2 ENOpen the kickstand. Align the positioning hole with the spring button, and press the spring button and insert the stem fully. FR-CADépliez la béquille. Alignez le trou de positionnement avec le bouton à ressort, appuyez sur ce dernier, puis insérez complètement le tube de direction. ES-LAAbra la pata de apoyo. Alinee el orificio de posicionamiento con el botón de resorte, presione el botón e inserte completamente el tubo de dirección. ENAlternately tighten the two screws several times until secure. FR-CASerrez les deux vis en alternance à plusieurs reprises jusqu’à ce que l’ensemble soit bien fixé. ES-LAApriete alternativamente los dos tornillos varias veces hasta que queden firmes. ENPlease read the user manual carefully before use to understand how to assemble and operate the scooter. Before use, ensure the rider meets the specified age, height, and weight requirements. FR-CAVeuillez lire attentivement le manuel d'utilisation avant d’utiliser la trottinette pour bien comprendre comment l’assembler et la faire fonctionner. Avant utilisation, assurez-vous que l’utilisateur respecte les exigences d'âge, de taille et de poids spécifiées. ES-LALea detenidamente el manual antes de usar el scooter para comprender cómo ensamblarlo y operarlo correctamente. Antes del uso, asegúrese de que el conductor cumpla con los requisitos de edad, estatura y peso indicados. WARNING/AVERTISSEMENT/ADVERTENCIA ENThis product must be assembled and adjusted by adults ONLY. FR-CACe produit doit être assemblé et ajusté UNIQUEMENT par des adultes. ES-LAEste producto debe ser ensamblado y ajustado ÚNICAMENTE por adultos. 8±1N·m 0403 1 2 3 4 3±0.5N·m 3 1 24 K100 Pro & K100 Max Click 1 2 3 ENInstall the handlebar onto the stem, and make sure to install the handlebar in the correct direction. FR-CAInstallez le guidon sur le tube de direction et assurez-vous de le positionner dans le bon sens. ES-LAInstale el manillar en el tubo de dirección, asegurándose de colocarlo en la dirección correcta. ENPut down the kickstand, and hold up the stem until it is completely in an upright position. Then push the quick release lever inward until it locks into place. FR-CAAbaissez la béquille, puis relevez le tube de direction jusqu’à ce qu’il soit complètement en position verticale. Ensuite, poussez le levier de serrage rapide vers l’intérieur jusqu’à ce qu’il se verrouille. ES-LABaje la pata de apoyo y levante el tubo de dirección hasta que esté completamente en posición vertical. Luego, empuje la palanca de liberación rápida hacia adentro hasta que se bloquee. ENInstall the handlebar onto the stem, and make sure to install the handlebar in the correct direction. FR-CAInstallez le guidon sur le tube de direction, en respectant le bon sens d'installation. ES-LAInstale el manillar en el tubo de dirección, asegurándose de colocarlo en la dirección correcta. ENFollow the order as illustrated to pre-tighten the four screws using the included Allen key. Once the handlebar is in the correct position, fully tighten the screws. Note: After tightening, gently wiggle the handlebar and try pulling up the stem to ensure it is safely secured. FR-CASuivez l’ordre illustré pour préserrer les quatre vis à l’aide de la clé Allen fournie. Une fois le guidon correctement positionné, serrez complètement les vis. Remarque: Après le serrage, bougez doucement le guidon et tentez de tirer le tube de direction vers le haut pour vous assurer qu’il est bien fixé. ES-LASiga el orden indicado para preajustar los cuatro tornillos con la llave Allen incluida. Una vez que el manillar esté en la posición correcta, apriete completamente los tornillos. Nota: Después de apretar, mueva ligeramente el manillar y trate de tirar hacia arriba del tubo para asegurarse de que esté bien fijado. 0605 1 2 3 4 3±0.5N·m 3 4 Spring Button Bouton à ressort Botón de resorte 12 Clamp Pince de serrage Abrazadera Charging/Chargement/Carga ENThe scooter is fully charged when the LED on the battery charger changes from red to green. FR-CALe scooter est complètement chargé lorsque le voyant LED du chargeur de batterie passe du rouge au vert. ES-LAEl scooter está completamente cargado cuando el indicador LED del cargador de batería cambia de rojo a verde. EN WARNING: Only use the original charger. Use only the charger specified by the manufacturer. Charge your scooter indoors, and never expose it to rain. Do not allow minors to operate the charging device. The battery charger is not a toy, keep it in a safe place out of reach of children when charging. FR-CA AVERTISSEMENT: Utilisez uniquement le chargeur d’origine. Utilisez seulement le chargeur spécifié par le fabricant. Rechargez votre trottinette à l’intérieur et ne l’exposez jamais à la pluie. Ne permettez pas aux mineurs d’utiliser le dispositif de charge. Le chargeur n’est pas un jouet – conservez-le dans un endroit sûr, hors de portée des enfants pendant le chargement. ES-LA ADVERTENCIA: Use únicamente el cargador original. Utilice solo el cargador especificado por el fabricante. Cargue su scooter en interiores y nunca lo exponga a la lluvia. No permita que menores operen el dispositivo de carga. El cargador no es un juguete; manténgalo en un lugar seguro fuera del alcance de los niños durante la carga. ENFollow the order as illustrated to pre-tighten the four screws using the included Allen key. Once the handlebar is in the correct position, fully tighten the screws. FR-CASuivez l’ordre illustré pour préserrer les quatre vis à l’aide de la clé Allen. Une fois le guidon corre…
Text truncated - open the document above for the full version.
Users Manual
NAVEE Kids Electric Scooter K100 US EN Quick User Guide FR-CA Guide d'utilisation rapide ES-LA Guía rápida de usuario 0201 K100 6–10 yrs 44-110 lbs (20-50 kg) 3’8”–4’8”(115–145 cm) K100 Pro 6–14 yrs 44–110 lbs (20–50 kg) 3’8”–5’6” (115–170 cm) K100 Max 6–14 yrs 44–132 lbs (20–60 kg) 3’8”–5’6” (115–170 cm) Assembly/Montage/Armado Spring Button Bouton à ressort Botón de resorte 1 2 Positioning Hole Trou de positionnement Orificio de posicionamiento K100 1 2 ENOpen the kickstand. Align the positioning hole with the spring button, and press the spring button and insert the stem fully. FR-CADépliez la béquille. Alignez le trou de positionnement avec le bouton à ressort, appuyez sur ce dernier, puis insérez complètement le tube de direction. ES-LAAbra la pata de apoyo. Alinee el orificio de posicionamiento con el botón de resorte, presione el botón e inserte completamente el tubo de dirección. ENAlternately tighten the two screws several times until secure. FR-CASerrez les deux vis en alternance à plusieurs reprises jusqu’à ce que l’ensemble soit bien fixé. ES-LAApriete alternativamente los dos tornillos varias veces hasta que queden firmes. ENPlease read the user manual carefully before use to understand how to assemble and operate the scooter. Before use, ensure the rider meets the specified age, height, and weight requirements. FR-CAVeuillez lire attentivement le manuel d'utilisation avant d’utiliser la trottinette pour bien comprendre comment l’assembler et la faire fonctionner. Avant utilisation, assurez-vous que l’utilisateur respecte les exigences d'âge, de taille et de poids spécifiées. ES-LALea detenidamente el manual antes de usar el scooter para comprender cómo ensamblarlo y operarlo correctamente. Antes del uso, asegúrese de que el conductor cumpla con los requisitos de edad, estatura y peso indicados. WARNING/AVERTISSEMENT/ADVERTENCIA ENThis product must be assembled and adjusted by adults ONLY. FR-CACe produit doit être assemblé et ajusté UNIQUEMENT par des adultes. ES-LAEste producto debe ser ensamblado y ajustado ÚNICAMENTE por adultos. 8±1N·m 0403 1 2 3 4 3±0.5N·m 3 1 24 K100 Pro & K100 Max Click 1 2 3 ENInstall the handlebar onto the stem, and make sure to install the handlebar in the correct direction. FR-CAInstallez le guidon sur le tube de direction et assurez-vous de le positionner dans le bon sens. ES-LAInstale el manillar en el tubo de dirección, asegurándose de colocarlo en la dirección correcta. ENPut down the kickstand, and hold up the stem until it is completely in an upright position. Then push the quick release lever inward until it locks into place. FR-CAAbaissez la béquille, puis relevez le tube de direction jusqu’à ce qu’il soit complètement en position verticale. Ensuite, poussez le levier de serrage rapide vers l’intérieur jusqu’à ce qu’il se verrouille. ES-LABaje la pata de apoyo y levante el tubo de dirección hasta que esté completamente en posición vertical. Luego, empuje la palanca de liberación rápida hacia adentro hasta que se bloquee. ENInstall the handlebar onto the stem, and make sure to install the handlebar in the correct direction. FR-CAInstallez le guidon sur le tube de direction, en respectant le bon sens d'installation. ES-LAInstale el manillar en el tubo de dirección, asegurándose de colocarlo en la dirección correcta. ENFollow the order as illustrated to pre-tighten the four screws using the included Allen key. Once the handlebar is in the correct position, fully tighten the screws. Note: After tightening, gently wiggle the handlebar and try pulling up the stem to ensure it is safely secured. FR-CASuivez l’ordre illustré pour préserrer les quatre vis à l’aide de la clé Allen fournie. Une fois le guidon correctement positionné, serrez complètement les vis. Remarque: Après le serrage, bougez doucement le guidon et tentez de tirer le tube de direction vers le haut pour vous assurer qu’il est bien fixé. ES-LASiga el orden indicado para preajustar los cuatro tornillos con la llave Allen incluida. Una vez que el manillar esté en la posición correcta, apriete completamente los tornillos. Nota: Después de apretar, mueva ligeramente el manillar y trate de tirar hacia arriba del tubo para asegurarse de que esté bien fijado. 0605 1 2 3 4 3±0.5N·m 3 4 Spring Button Bouton à ressort Botón de resorte 12 Clamp Pince de serrage Abrazadera Charging/Chargement/Carga ENThe scooter is fully charged when the LED on the battery charger changes from red to green. FR-CALe scooter est complètement chargé lorsque le voyant LED du chargeur de batterie passe du rouge au vert. ES-LAEl scooter está completamente cargado cuando el indicador LED del cargador de batería cambia de rojo a verde. EN WARNING: Only use the original charger. Use only the charger specified by the manufacturer. Charge your scooter indoors, and never expose it to rain. Do not allow minors to operate the charging device. The battery charger is not a toy, keep it in a safe place out of reach of children when charging. FR-CA AVERTISSEMENT: Utilisez uniquement le chargeur d’origine. Utilisez seulement le chargeur spécifié par le fabricant. Rechargez votre trottinette à l’intérieur et ne l’exposez jamais à la pluie. Ne permettez pas aux mineurs d’utiliser le dispositif de charge. Le chargeur n’est pas un jouet – conservez-le dans un endroit sûr, hors de portée des enfants pendant le chargement. ES-LA ADVERTENCIA: Use únicamente el cargador original. Utilice solo el cargador especificado por el fabricante. Cargue su scooter en interiores y nunca lo exponga a la lluvia. No permita que menores operen el dispositivo de carga. El cargador no es un juguete; manténgalo en un lugar seguro fuera del alcance de los niños durante la carga. ENFollow the order as illustrated to pre-tighten the four screws using the included Allen key. Once the handlebar is in the correct position, fully tighten the screws. FR-CASuivez l’ordre illustré pour préserrer les quatre vis à l’aide de la clé Allen. Une fois le guidon correctem…
Text truncated - open the document above for the full version.
Attestation Statements
Company name: SPACEWALKER PTE. LTD. ADD: 60 PAYA LEBAR ROAD SINGAPORE Singapore TEL: +86 18861121657 FAX: N/A E-mail: [email protected] Attestation Letter Date: 2025/05/19 FEDERAL COMMUNICATIONS COMMISSIONS Authorization and Evaluation Division 7435 Oakland Mills Road Columbia, MD 21046 Ref: Attestation Statements CFR 47 §2.911 (d) (5) (i) (ii) Filing FCC ID: 2BK3M-K100U001 SPACEWALKER PTE. LTD. (“the applicant”) certifies that the equipment for which authorization is sought is not “covered” equipment prohibited from receiving an equipment authorization pursuant to section 2.903 of the FCC rules. SPACEWALKER PTE. LTD. (“the applicant”) certifies that as of the date of the filing of the application, the applicant is not identified on the Covered List as an entity producing “covered” equipment. SPACEWALKER PTE. LTD. (“the applicant”) certifies that the equipment does not use Kaspersky's software information. Sincerely, Signature: Printed Name: xingyu hu Title: Certification Engineer
Attestation Statements
U.S. AGENT LETTER OF ATTESTATION Date: 2025-06-20 FEDERAL COMMUNICATIONS COMMISSION Authorization and Evaluation Division 7435 Oakland Mills Road Columbia, MD 21046 Ref: Attestation Statements CFR 47 §2.911(d)(7) FCC ID: 2BK3M-K100U001 SPACEWALKER PTE. LTD. certifies that, as of the date of the filing of the application, FCC US Agent, LLC is our designated U.S. agent for service of process for the above referenced FCC ID. SPACEWALKER PTE. LTD. accepts to maintain an agent for no less than one year after the grantee has terminated all marketing and importation or the conclusion of any Commission-related proceeding involving the equipment. FCC US Agent, LLC accepts, as of the date of the filing of the application, the obligation of the designated U.S. agent for service of process for the above referenced FCC ID. Designated U.S. Agent Information: Company Name: FCC US Agent, LLC Address: 3722 Illinois Avenue, Saint Charles,IL 60174, USA FRN: 0033402884 Tel.: 708-571-3148 Email: [email protected] Signed by (printed name): Tim Payne Signature: Applicant: SPACEWALKER PTE. LTD. Address: 60 PAYA LEBAR ROAD SINGAPORE Singapore FRN: 0035939636 Tel: +86 18861121657 Email: [email protected] Signed by (printed name): xingyu hu Signature: Filing
Cover Letter(s)
QA-FR-170-B Company name: SPACEWALKER PTE. LTD. ADD: 60 PAYA LEBAR ROAD SINGAPORE Singapore TEL: +86 18861121657 FAX: N/A E-mail: [email protected] FCC Authorization Date: 2025/05/19 FEDERAL COMMUNICATIONS COMMISSION Authorization and Evaluation Division 7435 Oakland Mills Road Columbia, MD 21046 Subject: Agent Authorization To whom it may concern: We, SPACEWALKER PTE. LTD., hereby authorizes Bay Area Compliance Laboratories Corp. (Kunshan) to act on its behalf in all matters relating to application for Equipment authorization, including the signing of all documents relating to these matters. All acts carried out by Bay Area Compliance Laboratories Corp. (Kunshan) on our behalf shall have the same effect as our own action. We, the undersigned, hereby certify that we are not subject to a denial of federal benefits, that includes FCC benefits, pursuant to Section 5301 of the Anti-Drug Abuse Act of 1988, 21 U.S.C. 862. This authorization is valid until further written notice from the applicant. Sincerely, Signature: Printed Name: xingyu hu Title: Certification Engineer
Cover Letter(s)
QA-FR-171-A Company name: SPACEWALKER PTE. LTD. ADD: 60 PAYA LEBAR ROAD SINGAPORE Singapore TEL: +86 18861121657 FAX: N/A E-mail: [email protected] FCC Confidential Authorization Date: 2025/05/19 FEDERAL COMMUNICATIONS COMMISSIONS Authorization and Evaluation Division 7435 Oakland Mills Road Columbia, MD 21046 Subject: Confidentiality Request regarding application for certification of FCC ID: 2BK3M-K100U001 In accordance with Sections 0.457 and 0.459 of the Commission’s Rules, SPACEWALKER PTE. LTD. hereby requests long-term confidential treatment of information accompanying this application as outlined below: Block Diagram Schematics Operation Description The above materials contain proprietary and confidential information not customarily released to the public. The public disclosure of these materials provides unjustified benefits to its competitors in the market. Sincerely, Signature: Printed Name: xingyu hu Title: Certification Engineer
Cover Letter(s)
Company name: SPACEWALKER PTE. LTD. ADD: 60 PAYA LEBAR ROAD SINGAPORE Singapore TEL: +86 18861121657 FAX: N/A E-mail: [email protected] DECLARATION Date:2025/5/19 FEDERAL COMMUNICATIONS COMMISSION Authorization and Evaluation Division 7435 Oakland Mills Road Columbia, MD 21046 We, SPACEWALKER PTE. LTD. hereby declare that product name: Kids Electric Scooter (model name: K100 Pro US, K100 US; FCC ID: 2BK3M-K100U001 ) are electrically identical with the PCB design, components and electromagnetic compatibility characteristics, and model: K100 Pro US has been tested by Bay Area Compliance Laboratories Corp.(Kunshan). The differences of them are as follows: 1. The K100 US does not have a mechanical bell, while the K100 Pro US has. 2.The upright pipe of K100 US does not have a folding mechanism, while the K100 Pro US has. Please contact me if there is need for any additional clarification or information. Best Regards. Signature: Printed Name: xingyu hu Title: Certification Engineer Model K100 US K100 Pro US Vehicle: L × W × H 35.0 × 17.0 × 37.1 in (890 × 430 × 942 mm) 35.0 × 17.0 × 40.5 in (890 × 430 × 1028 mm) After Folding: L × W × H / 35.0 × 16.9 × 16.7 in (888 × 428 × 423 mm) Vehicle Net Weight 19.0 lbs (8.6 kg) 19.8 lbs (9 kg)
External Photos
Bay Area Compliance Laboratories Corp. (Kunshan) Project No.: RKSA250519001 1 / 8 EXHIBIT A - EUT EXTERNAL PHOTOGRAPHS Model: K100 Pro US Bay Area Compliance Laboratories Corp. (Kunshan) Project No.: RKSA250519001 2 / 8 Have a mechanical Have a folding mechanismbell Bay Area Compliance Laboratories Corp. (Kunshan) Project No.: RKSA250519001 3 / 8 Bay Area Compliance Laboratories Corp. (Kunshan) Project No.: RKSA250519001 4 / 8 Bay Area Compliance Laboratories Corp. (Kunshan) Project No.: RKSA250519001 5 / 8 Model: K100 US Bay Area Compliance Laboratories Corp. (Kunshan) Project No.: RKSA250519001 6 / 8 Bay Area Compliance Laboratories Corp. (Kunshan) Project No.: RKSA250519001 7 / 8 Not have a mechanical bell Not have a folding mechanism Bay Area Compliance Laboratories Corp. (Kunshan) Project No.: RKSA250519001 8 / 8
Internal Photos
Bay Area Compliance Laboratories Corp. (Kunshan) Project No.: RKSA250519001 1 / 12 EXHIBIT B - EUT INTERNAL PHOTOGRAPHS Model: K100 Pro US Bay Area Compliance Laboratories Corp. (Kunshan) Project No.: RKSA250519001 2 / 12 Bay Area Compliance Laboratories Corp. (Kunshan) Project No.: RKSA250519001 3 / 12 BT/BLE Antenna Bay Area Compliance Laboratories Corp. (Kunshan) Project No.: RKSA250519001 4 / 12 Bay Area Compliance Laboratories Corp. (Kunshan) Project No.: RKSA250519001 5 / 12 Bay Area Compliance Laboratories Corp. (Kunshan) Project No.: RKSA250519001 6 / 12 Model: K100 US
Internal Photos
Bay Area Compliance Laboratories Corp. (Kunshan) Project No.: RKSA250519001 7 / 12 Bay Area Compliance Laboratories Corp. (Kunshan) Project No.: RKSA250519001 8 / 12 BT/BLE Antenna Bay Area Compliance Laboratories Corp. (Kunshan) Project No.: RKSA250519001 9 / 12 Bay Area Compliance Laboratories Corp. (Kunshan) Project No.: RKSA250519001 10 / 12 Bay Area Compliance Laboratories Corp. (Kunshan) Project No.: RKSA250519001 11 / 12 Bay Area Compliance Laboratories Corp. (Kunshan) Project No.: RKSA250519001 12 / 12
RF Exposure Info
Bay Area Compliance Laboratories Corp. (Kunshan) Report No.: RKSA250519001-00A FCC Part 15.247 Page 14 of 56 FCC §1.1307(b) & §2.1093 - RF EXPOSURE Applicable Standard According to§2.1093and §1.1307(b)(1), systems operating under the provisions of this section shall be operated in a manner that ensure that the public is not exposed to radio frequency energy level in excess of the Commission’s guideline. According to KDB 447498 D01 General RF Exposure Guidance The 1-g and 10-g SAR test exclusion thresholds for 100 MHz to 6 GHz at test separation distances ≤ 50 mm are determined by: [(max. power of channel, including tune-up tolerance, mW)/ (min. test separation distance, mm)] · [√f (GHz)] ≤ 3.0 for 1-g SAR and ≤ 7.5 for 10-g extremity SAR, where 1. f (GHz) is the RF channel transmit frequency in GHz. 2. Power and distance are rounded to the nearest mW and mm before calculation. 3. The result is rounded to one decimal place for comparison. 4. When the minimum test separation distance is < 5 mm, a distance of 5 mm is applied to determine SAR test Exclusion. Calculated Data: Mode Frequency Range (MHz) Max Tune-up Conducted Power Calculated Distance (mm) Calculated Value Threshold (1-g SAR) SAR Test Exclusion (dBm) (mW) BLE 2402-2480 2.0 1.58 5 0.5 3.0 Yes BT 2402-2480 3.0 2 5 0.6 3.0 Yes Note: BT and BLE cannot transmit simultaneously. Result: No SAR test is required.
Test Report
WiFi antenna test report * This report is a confidential archive of Shenzhen Jie Xuntong Wireless Technology Co., LTD. and relevant customers. Please keep it properly and do not disclose it without permission. Test items and equipment systems Test item Test parameter Testing facility 1 、 S parameter VSWR; Smith;Network analyzer: Agilent 5071B 2 、 Passive testing Productiveness Comprehensive tester: Network analyzer: Agilent 5071B Microwave anechoic chamber: GTS Chamber VSWR: VSWR is the abbreviation for Voltage Standing Wave Ratio, referring to the ratio of the amplitude of the reflected wave to that of the incident wave. In an ideal situation where impedance is perfectly matched, the standing wave ratio is 1 . In practical engineering, reflections are inevitable, making the standing wave ratio greater than 1 . The larger the reflection, the higher the standing wave ratio. Therefore, for this technical parameter, the lower the value of the standing wave ratio, the better it is to be close to 1. Return Loss: Return Loss RL refers to the ratio of the power reflected back from the RF input signal to the input signal power. It is measured in dB and can be negative. In an ideal scenario, the impedance between the antenna and the RF circuit matches perfectly, with no reflected power at all , resulting return loss is infinitesimally small. However, in practical applications, impedance matching is impossible, so some reflection power always exists. The worst case is when the input power is completely reflected, in which case the return loss is zero. Therefore, for this technical parameter, a lower value indicates better antenna performance. Effi: Efficiency is the ratio of the power radiated by the antenna (that is, the power effectively converted from part of the electromagnetic wave) to the power input into the antenna. It is a constant value less than 100%. Gain: Antenna gain refers to the ratio of the power density of the signal produced by the actual antenna and the ideal radiation unit at the same point in space under the condition of equal input power. It quantitatively describes the degree to which an antenna concentrates the input power. Generally expressed in dBi units. Smith graph: Impedance circle is a trajectory graph that uses the one-to-one correspondence between normalized impedance and reflection coefficient to represent normalized impedance on the complex plane of reflection coefficient. Key terms: TRP: Total radiation power (Total Radiated Power) is the integral value of the spherical area integral of the effective radiation power EIRP in three-dimensional space (spherical average value) , which reflects the transmission characteristics of the mobile station in all directions. TIS: Total omnidirectional sensitivity (Total Isotropic Sensitivity) is the integral value (average value over the sphere) obtained by integrating the effective radiation reception sensitivity EIS of the mobile station over the three-dimensional space. It reflects the receiving characteristics of the mobile station in all directions. Schematic diagram of whole machine/dark room test Schematic diagram of the whole machine 1 Schematic diagram of dark room test The main board is connected in parallel with 1PF capacitor The main board is connected to a 3NH inductor 2 Antenna diagram 3 Antenna standing wave diagram Note: The main board E2 is connected in series with a 3NH inductor and E1 is connected in parallel with a 1PF capacitor 3PF 1NH NC RF Antenna E2 E3 E1 ↓ ↓ ≡ ≡ 4 Matching instructions Freq (MHz) Gain(dBi)Efficiency (dB)Efficiency (%) 2400 0.307662387-3.874739229 40.97567128 2410 0.260288327 -3.97051999240.08187237 2420 -0.158495319-4.084248116 39.04587759 2430 -0.338371129 -4.089766538.99629526 2440 -0.056188314-4.13931495538.55391668 2450 0.159251499 -4.020785248 39.62063897 2460 0.011375509 -3.99797570539.8292776 2470 -0.135391618-4.001993536 39.79244699 2480 0.013310725-4.153682995 38.42657707 2490 0.294409622 -4.13238510238.61548464 2500 0.193458534-4.14674935638.48797523 5 2.4 G Passive efficiency gain whole machine test data 6 Passive test 3D&2D diagrams 6 Passive test 3D&2D diagrams 6 Passive test 3D&2D diagrams Antenna Mode:AN-IN727 1.The above is the BLE passive test data. 2 .Please be aware of the above. If you have any questions, please contact us. Thank you! 7 Remarks
Test Report
Note: This test report is prepared for the customer shown above and for the device described herein. It may not be duplicated or used in part without prior written consent from Bay Area Compliance Laboratories Corp. (Kunshan). This report must not be used by the customer to claim product certification, approval, or endorsement by NVLAP, or any agency of the U.S. Government. FCC PART 15.247 TEST REPORT For SPACEWALKER PTE. LTD. 60 PAYA LEBAR ROAD SINGAPORE Singapore FCC ID: 2BK3M-K100U001 Report Type: Original Report Product Name: Kids Electric Scooter Report Number: RKSA250519001-00A Report Date: 2025-08-13 Reviewed By: Bard Liu Approved By: Kyle Xu Prepared By: Bay Area Compliance Laboratories Corp. (Kunshan) No.248 Chenghu Road, Kunshan, Jiangsu Province, China Tel: +86-512-86175000 Fax: +86-512-88934268 www.baclcorp.com.cn Bay Area Compliance Laboratories Corp. (Kunshan) Report No.: RKSA250519001-00A FCC Part 15.247 Page 2 of 56 TABLE OF CONTENTS REPORT REVISION HISTORY................................................................................................................................. 4 GENERAL INFORMATION ....................................................................................................................................... 5 PRODUCT DESCRIPTION FOR EQUIPMENT UNDER TEST (EUT) ..................................................................................... 5 OBJECTIVE ................................................................................................................................................................... 5 TEST METHODOLOGY .................................................................................................................................................. 5 MEASUREMENT UNCERTAINTY .................................................................................................................................... 6 TEST FACILITY ............................................................................................................................................................. 6 SYSTEM TEST CONFIGURATION .......................................................................................................................... 7 DESCRIPTION OF TEST CONFIGURATION ...................................................................................................................... 7 EUT EXERCISE SOFTWARE .......................................................................................................................................... 7 SPECIAL ACCESSORIES ................................................................................................................................................. 7 EQUIPMENT MODIFICATIONS ....................................................................................................................................... 7 SUPPORT EQUIPMENT LIST AND DETAILS .................................................................................................................... 9 EXTERNAL I/O CABLE.................................................................................................................................................. 9 BLOCK DIAGRAM OF TEST SETUP ................................................................................................................................ 9 TEST EQUIPMENT LIST ......................................................................................................................................... 11 SUMMARY OF TEST RESULTS ............................................................................................................................. 13 FCC §1.1307(b) & §2.1093 - RF EXPOSURE ........................................................................................................... 14 APPLICABLE STANDARD ............................................................................................................................................ 14 CALCULATED DATA: .................................................................................................................................................. 14 FCC §15.203 – ANTENNA REQUIREMENT .......................................................................................................... 15 APPLICABLE STANDARD ............................................................................................................................................ 15 ANTENNA CONNECTOR CONSTRUCTION .................................................................................................................... 15 FCC §15.207 (a) – AC LINE CONDUCTED EMISSIONS ..................................................................................... 16 APPLICABLE STANDARD ................…
Text truncated - open the document above for the full version.
Contact Information
Applicant
xingyu hu
[email protected]Fax: NA
Test Firm
Bay Area Compliance Laboratories Corp. (Kunshan)John Chan
Technical Specifications
| # | Rule Parts | Frequency Range | Power Output |
|---|---|---|---|
| 1 | 15C | 2.40 GHz - 2.48 GHz | 2.00 mW |
Other Applications from SPACEWALKER PTE. LTD.

2BK3M-NT5UXU
Aug 06, 2026Electric Scooter
Equipment Class
DTS - Digital Transmission System
2BK3M-BIR3X03
Jul 17, 2026Electric Golf Push Cart
Equipment Class
UWB - Ultra Wideband Transmitter
2BK3M-BIR3XA3
Jul 17, 2026Electric Golf Push Cart Remote Control
Equipment Class
UWB - Ultra Wideband Transmitter
2BK3M-UT5ULTRAUS
Feb 27, 2026Electric Scooter
Equipment Class
DSS - Part 15 Spread Spectrum Transmitter
2BK3M-NT5MAXU
Jan 09, 2026Electric Scooter
Equipment Class
DTS - Digital Transmission System