A3LSCHI300Dual-Band Analog/PCS Phone (AMPS/CDMA)
Samsung Electronics Co Ltd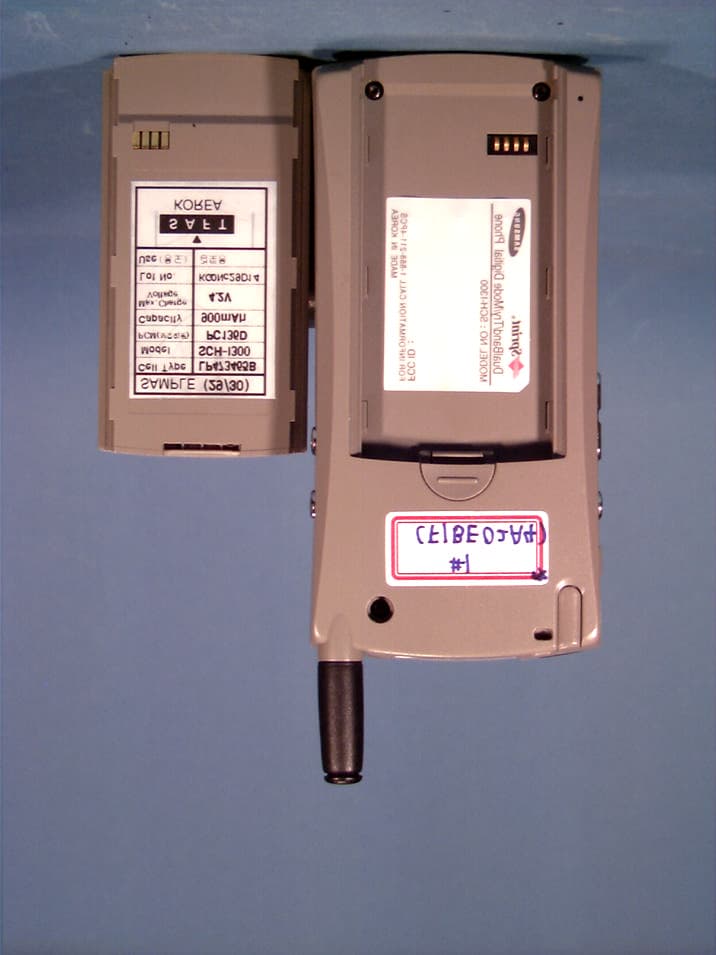
Click to zoom
Application Details
- Equipment Class
- PCE - PCS Licensed Transmitter held to ear
- Date of Grant
- May 17, 2001
- Application Purpose
- Original Equipment
- Date of Application
- Mar 08, 2001
- Equipment Note
- Dual-Band Analog/PCS Phone (AMPS/CDMA)
- Frequency Range
- 1851.25000000 - 1908.75000000
- Company
- Samsung Electronics Co Ltd
- Country
- United States
Documents & Files
Document Text
Text extracted from the exhibit documents filed with the FCC. Open a document above to read the original.
Users Manual
SCH-I300(Dual-BandTri-Mode) CONFIDENTIAL February15,2001 8.USERSMANUAL SCH-I300(Dual-BandTri-Mode) CONFIDENTIAL February15,2001 8.USERSMANUAL ELECTRONICS Printed in Korea Code No. : GHxxxxxxxxA English. 2000/09. Rev.1.0 World Wide Web http://www.samsungmobile.com Samsung Smartphone SCH-i300 User’s Guide I Contents CHAPTER 1 Getting Started.................................. 1 Unpacking ................................................................................... 2 Your Smartphone ........................................................................ 3 Front View ............................................................................... 3 Rear View ............................................................................... 5 Connecting the Cradle ................................................................ 7 Installing and Charging the Battery ............................................ 8 Viewing the Remaining Battery Power ................................ 10 Palm Desktop Software ............................................................ 11 System Requirements .......................................................... 12 Installing Palm Desktop Software ............................................ 12 Calibrating the Screen and First Setup .................................... 14 Adjusting Screen Contrast ........................................................ 18 Using the Backlight ................................................................... 19 CHAPTER 2 Entering Data in Your Smartphone ..... 21 Using the Onscreen Keyboard .................................................. 21 Entering Data Using Graffiti ..................................................... 23 Writing Graffiti Characters ................................................... 23 Graffiti Tips ............................................................................ 25 The Graffiti Alphabet ............................................................ 26 Writing Capital Letters ......................................................... 27 Writing Numbers .................................................................. 28 Writing Punctuation Marks .................................................. 29 Writing Symbols and Extended Characters ......................... 30 Writing Accented Characters ............................................... 31 Contents CONTENTSII Additional Non-English Characters ...................................... 31 Navigations Strokes ............................................................. 32 Using Graffiti ShortCuts ........................................................... 32 Using Your Computer Keyboard ................................................ 33 Importing Data .......................................................................... 34 CHAPTER 3 Using Phone and Messaging ............. 37 Turning the Phone On and Off .................................................. 38 Turning the Phone On ........................................................... 39 Turning the Phone Off ........................................................... 40 Opening the Phone Screen ....................................................... 41 Features on the Phone Screen ............................................. 42 Features on the Phone LCD .................................................. 43 Making a Call ............................................................................ 44 Correcting the Number ......................................................... 45 Advanced Calling Features ....................................................... 45 Voice Dialing ......................................................................... 45 Speed Dialing ....................................................................... 47 Redialing the Last Number .................................................. 49 Using the Address Book ....................................................... 49 Using Call History ................................................................. 50 Using Four-digit Dial ............................................................. 52 Making Emergency Calls ...................................................... 53 Using Speakerphone ............................................................ 54 Answering Calls ........................................................................ 55 In-Call Options .......................................................................... 56 Record ................................................................................... 56 Mute .................................................................................... 56 Silent Key ............................................................................. 56 DTMFs Send ......................................................................... 57 Tone List ................................................................................ 57 Call Waiting .......................................................................... 58 Making a Conference Call .................................................... 59 III Contents Advanced Phone Features ........................................................ 60 Viewing Missed Calls ........................................................... 60 Viewing Air Time .................................................................. 61 Using Keyguard .................................................................... 62 Voice Recorder .......................................................................... 63 SMS (Short Message Service) ................................................. 66 Sending a Short Message .................................................... 66 Receiving Messages ............................................................ 69 Sorting the Message List ..................................................... 72 Deleting a SMS Message .................................................... 73 Setting Phone …
Text truncated - open the document above for the full version.
Users Manual
38 USINGPHONE ANDMESSAGING Turning the Phone On and Off You can turn the phone’s power on and off separately from the electronic organizer. When the phone is off, you can use the Palm applications on your Smartphone. If the phone’s power is off, the small LCD at the top of the phone is off and the Phone Off indicator appears at the top left corner of the Smartphone main screen. When the phone is turned on: • The time and date appear at the top of the screen, along with symbols showing battery and signal strength. • You can send and receive calls. If there is an incoming, outgoing, or active phone call, information about the call appears on the screen. • You can use the phone. You can use Palm applications while making a phone call. If you are using an application when the phone rings, you can answer the call with confidence. The Smartphone stores your work for you automatically. Phone LCD turns off when the phone is off. Phone Off Phone Off indicator When the phone is turned off: • You can use all the organizer features. • You cannot send or receive calls, send or receive e-mail, or search the Web. Turning the Phone On Press and hold button on the front panel of the Smartphone until the Phone LCD at the top of the Smartphone turns on. Phone screen opens and the phone’s power is on. U SINGPHONE ANDMESSAGING39 3 oper 8 tuv 7 pqrs 9 wxyz 5 jkl 4 ghi 6 mno 2 abc 1 TALKEND 3 def 0 Phone Off Press and hold this button to turn the phone on. 19:42P 09/18/200 40 USINGPHONE ANDMESSAGING Turning the Phone Off When you don’t use the phone feature, you can turn the phone off. If you turn the phone off, you can still use all other organizer features. To turn the phone off: 1. Open the Phone screen. For details, see page xx. 2. Tap and hold the END button on the phone screen. The phone LCD at the top of the Smartphone turns off and Phone Off indicator appears at the top of the Smartphone main screen. Now, you can not use phone or message feature. Tip:When the phone is off, you can still use phone features not related to making or receiving a call, for example, viewing outgoing call list or setting phone options. USINGPHONE ANDMESSAGING41 3 Opening the Phone Screen 1. Wake up the Smartphone screen, if necessary, by pressing the power button at the right side of the Smartphone. 2. To open the Phone screen, choose from the following options: • Tap the icon to open the Applications Launcher, then tap the Phone icon. • Tap the icon at the right side of Graffiti writing area. • Press button on the front panel of the Smartphone. Note:You can open the Phone screen without turning the phone’s power on. With the phone’s power off, you can use phone menus but cannot make or receive calls and messages. Phone icon Phone button Tentative 42 USINGPHONE ANDMESSAGING Features on the Phone Screen 1. Display indicators Shows the received signal strength. The greater the number of bars, the better the signal strength. Appears when a call is in progress. Appears when you are out of your home area and have registered with a different network. Appears when a new text message has been received. Appears when the phone is set to vibration mode. Shows the level of your battery. Appears when the phone application is off. 2. END key :Disconnects a call. When you press and hold this key in Standby mode, the phone application turns off. 3. TALK key :Sends a call. oper 8 tuv 7 pqrs 9 wxyz 5 jkl 4 ghi 6 mno 2 abc 1 TALKEND 3 def 0 USINGPHONE ANDMESSAGING43 3 4. key :Allows you to activate voice dial. 5. Number keys :Enters a phone number or open the menus. 6. Bottom strip icons Tap the Bottom Strip icons with the stylus to do the following: Move to home. Open the menu items. Access the address book. Open the outgoing call log. Activate or cancel key guard when you hold it down. Activate or cancel speakerphone. Features on the Phone LCD In Standby mode, the phone LCD displays current time and date. The indicators available are as follows: Signal strength indicator Vibrator indicator Roaming indicator Battery charge indicator Text or page message indicator Voice message indicator ??? 12:39P Dec 31 Current time and date Making a Call You can make a phone call using the Dialer on the screen. To make a call using the Dialer: 1. If the phone is not powered on, press and hold the phone button on the front of the Smartphone. For details, see page xx. 2. Key in the area code and the phone number by tapping the number digits in the Phone screen with the stylus. The number displays on the top of the screen as you tap them. 3. When the number is correctly displayed, tap the TALK button to dial the number. 4. During a call, the call duration time displays. If matching number is in the Address list, the corresponding name also appears. 5. When you have finished your call, tap the END button. 44 U SINGPHONE ANDMESSAGING 21 TALKEND 3 01:20 John Smith 123-456-7890 Blinks then remains on when connected Call time USINGPHONE ANDMESSAGING45 3 Correcting the Number When you key in the number button on the screen, the button is replaced with the CLR button until the call ends. To clear the last digit displayed, tap the CLR button briefly. To clear the whole display, touch and hold down the CLR button for more than one second. Advanced Calling Features In addition to calls that you make by dialing the number, you can make calls directly from the Voice Dial, Speed Dial, Address Book, and Call History menu options. Voice Dialing If you have set voice dial for the number you want to call (see page xx), you can use voice to make a call. To set a voice dial: To use voice dial, you first set the phone to recognize the name of the person you are calling. You can record up to 20(??) names using the Address application. See page xx for information on how to record name. 21 TALKEND CLR 3 00-182 To place voice dialing calls: 1. In the Phone screen, tap the button on the screen. 2. At the voice prompt, say the name into the phone. • If the phone recognizes the name, the…
Text truncated - open the document above for the full version.
Users Manual
88 WORKING WITHAPPLICATIONS Opening an Application Choose from the following options: • Tap to open the Applications Launcher, and then tap the icon of the application you want to open. If you have many applications installed on your Smartphone, tap the scroll bar on the screen or press the scroll buttons or on the front panel to move between screens. • Press an application button on the front panel to display the selected application immediately. • To switch between applications, tap or press an application button on the front panel of your Smartphone. Your Smartphone automatically saves your work in the current application and displays it when you return to that application. Applications Launcher Application buttons. Default settings are: Data Book Address To D o Phone Scroll buttons > > Scroll bar Applications icons WORKING WITHAPPLICATIONS89 4 Displaying Applications by Category You can put the applications on your Smartphone into categories so they are easier to see. For example, you could put all the phone applications into a category called Phone. After assigning applications to categories, you can choose to look at a single category or to see all your applications. 1. Tap to open the Applications Launcher. 2. Tap to open the Applications Launcher menus. 3. Tap App, then tap Category. 4. Tap the pick list next to each application to select to a category. Note: You can create your own categories. Tap Edit Category in the pick list. In the Edit Categories dialog, tap New and enter the category name. Tap OK to add the category. Tap OK again to close the dialog. 5. Tap Done to return to the Applications Launcher. 6. Tap the pick list in the upper-right corner of the screen. From the pick list, tap the application category you want to see. You can also tap to scroll through the application categories. 90 WORKING WITHAPPLICATIONS Changing the Applications Launcher Display By default, the Applications Launcher displays each applications as an icon. If you prefer, you can display applications as a list of names. To change the view of applications: 1. Tap to open the Applications Launcher. 2. Tap to open the Applications Launcher menus. 3. Tap Options, then tap Preferences. 4. In the View By pick list, tap List. 5. Tap OK to display the Applications Launcher in list format. WORKING WITHAPPLICATIONS91 4 Tip: In addition to displaying applications by icon or list, you can set an option to display the last-selected category of applications each time you open the Applications Launcher. To display the last-selected category of applications, tap Remember Last Category checkbox in the Preferences dialog box shown at step 3. If you do not select the Remember Last Category option, all applications are displayed when you select the Applications Launcher. Assigning Applications to Buttons Buttons preferences let you assign different applications to the Application buttons on the front of the Smartphone, and to the HotSync button on the cradle and on an optional modem. For example, if you find that you seldom use the To Do List and often use Expense, you can assign the To Do List button to start the Expense application. You can also change whether the full-screen pen stroke activates the Graffiti Help application or one of your Smartphone controls using Buttons preferences. If you assign a different application to a button, you can still select the original application using the Applications Launcher. Changes made in the Buttons Preferences screen or HotSync Buttons dialog box take effect immediately. For details on Buttons Preferences, see page xx. 92 WORKING WITHAPPLICATIONS Elements of the Applications Screen Menu barA set of commands that are specific to the application. Not all applications have a menu bar. CommandTap icons or write a Graffiti shortcut to initiate a barcommand instead of tapping a command in the menu bar. The icons displayed in the Command bar very within each application. Pick list Scroll bar Command bar Previous/next arrows Check box Icons Command buttons Menu bar WORKING WITHAPPLICATIONS93 4 CommandTap a button to perform a command. Command buttonsbuttons appear in dialog boxes and at the bottom of application screens. Icons Tap the icons to open applications, menus, Calculator, and to find text anywhere in your data. AWith the cursor in an input field, tap the dot to activate the alphabetic keyboard. 1With the cursor in an input field, tap the dot to activate the numeric keyboard. Check boxWhen a check mark appears in a check box, the corresponding option is active. If a check box is empty, tapping it inserts a check mark. If a check box is checked, tapping it removes the check mark. Pick listTap the arrow to display a list of choices, and then tap an item in the list to select it. Scroll barDrag the slider, or tap the top or bottom arrow, to scroll the display one line at a time. To scroll to the previous page, tap the scroll bar just above the slider. To scroll to the next page, tap the scroll bar just below the slider. You can also scroll to the previous and next pages by pressing the upper and lower portions of the scroll button on the front panel of the Smartphone. Next/Tap the up and down arrows to display the previousprevious and next page of information; tap the arrowsleft and right arrows to display the previous and next record. 94 WORKING WITHAPPLICATIONS Using Menus Menus on your Smartphone are easy to use. Once you have mastered them in one application, you can use them the same way in all other applications. The menus of each application are described in the corresponding application’s chapter, with the exception of the Edit menu. For information on Edit menu command, see “Using the Edit Menu” on page xx. Opening the Menu Bar 1. Open an application (such as Memo Pad). 2. Choose one of the following: • Tap the Menu icon . • Tap on the inverted title area at the top of the screen. Tap the Menu icon Tap the tile area ➜ ➜ WORKING WITHAPPLICATIONS95 4 In this example,…
Text truncated - open the document above for the full version.
Users Manual
CALCULATOR141 6 Places the current number in memory. Each new number you enter with the M+ button is added to the total stored in memory. The number that you add can be either a calculated value or any number you enter by pressing the number buttons. Pressing this button has no effect on the current calculation (or series of calculations); it merely places the value into memory until it is recalled. Recalls the stored value from memory and inserts it in the current calculation. Clears any value that is stored in the Calculator memory. Displaying Recent Calculations The Recent Calculations command lets you review the last series of calculations and helps you confirm a chain of calculations. To display recent calculations: 1. In the Calculator application, tap the Menu icon to open the Calculator menus. 2. Tap Options, and then tap recent Calculations. 3. When you have finished reviewing the calculations, tap OK. DAT EBOOK143 Date Book The Date Book lets you quickly and easily schedule appointments or any activity associated with a date or date and time. When you open the Date Book, the current date and a list of times for a standard business day are displayed. Use the Date Book to: • Schedule events: timed events, which have both times and dates; untimed events, for example, birthdays or anniversaries; repeating events, such as a weekly meeting held on the same day at the same time; continuous events, such as a vacation or three-day conference; and all day events, which reflect the default hours of a day as set by the user. • Display your schedule in different ways: by Day, Week, Month, or Agenda view. • Set an alarm to sound minutes, hours, or days before a scheduled appointment. • Attach notes to events to describe or clarify Date Book entries. • Rearrange or delete events from your schedule. CHAPTER7 7 144 DAT EBOOK Opening the Date Book Press the Date Book button on your Smartphone to open the Date Book to today’s schedule. The date is displayed at the top right of the screen. Note:Press the Date Book button repeatedly to cycle through the Day, Week, Month, and Agenda views. The Date Book views are displayed at the bottom left of the screen. You can also open the Data Book application by tapping the Date Book icon in the Application Launcher. Date Book button DAT EBOOK145 7 Scheduling Events An entry in the Date Book is called an event. When you schedule an event, its description appears on the time line, and its duration is set to 1 hour by default. You can easily change the start time and duration for any event. You can schedule the following types of events in the Date Book: • Timed events, such as meetings, that have a specific date and a specific start and end time. • Untimed events, such as birthdays, holidays, and anniversaries. These events occur on a particular date but have no specific start or end times; they appear at the top of the list of times marked with a diamond. You can schedule more than one untimed event on the same date. • Repeating events, such as a weekly meeting that is held on the same day at the same time each week. • Continuous events, such as a vacation or three-day conference. • All day events, which reflect the default length of the day as set by the user. Scheduling Timed Events You can schedule timed events for the current date or for future dates. To schedule a event for the current date: 1. Press the Date Book button on your Smartphone to open the Date Book to today’s schedule. The current date and a list of times for a normal business day are displayed in Day view. 146 DAT EBOOK 2. With the current day selected, tap the line next to the time that corresponds to the start of the event. 3. Enter a description of the event, up to 255 characters in length. 4. Set the event’s duration: • If the event is 1-hour long, tap OK, and skip to the end of this procedure. • If the event is longer or shorter than an hour, tap directly on the time to open the Set Time dialog box. Tip: You can open the Set Time dialog box (to select a start time) by making sure no event is selected, and then writing a number on the number side of the Graffiti writing area. Time bar shows default duration. Tap the time to display the Set Time dialog box. Tap a line next to desired time; then enter text. ➜ ➜ DAT EBOOK147 7 5. Set the duration of the event in either of the following ways: • Tap the time columns in the Set Time dialog box to set the Start Time; Tap End Time; then tap the time columns to set the End Time. • Tap All Day if the event lasts all day. (The default hours of a standard business day are set by the user, and may be changed using the Preference command in the Date Book application.) 6. Tap OK. Tap to scroll to earlier hour. Tap to change minutes. Tap to change hours. Tap to scroll to later hours. Start Time highlighted 148 DAT EBOOK To schedule a timed event for another date: 1. Select the date you want in one of the following ways: • Tap the desired day of the week in the date bar at the top of the screen. If necessary, tap the Previous week or Next week scroll arrows to move to another week. • Tap Go To at the bottom of the screen to open the Go to Date dialog box. Select a date by tapping a year, month, and day in the calendar. 2. After locating the desired date, follow the steps for scheduling an event for the current day. Previous week Tap to select the day of the current week Next week Go to Date Previous year Previous year Tap to scroll to earlier hours Tap to scroll to earlier hours Tap to select current date DAT EBOOK149 7 Adding Address Book Information to an Event You can add a name, address, and telephone number to an event using the Phone Lookup option. For instructions, see “Phone Lookup” in Chapter x, Common Tasks.” Scheduling Untimed Events You can schedule untimed events for any date. Untimed events appear at the top of the list of times marked with a diamond. To schedule an untimed event: 1. Select the event date you want, as described in the prev…
Text truncated - open the document above for the full version.
Users Manual
MAIL193 9 3. To send a copy of the e-mail item to additional recipients, tap the CC field, and enter the e-mail addresses of the additional recipients, separating the addresses with a comma followed by a space. 4. Tap the Subject (Subj:) field and enter a subject for your e-mail item. 5. Tap the Body field and enter the text of your e-mail item. Tip: If the address, CC, subject, or body exceeds the capacity of the screen display, tap the name of the field (for example, tap “To:”) to expand that field. Tap Done to return to the New Message screen. Tap to return to New Message screen. Tap the name of the field to open it. ➜ ➜ 194 MAIL To reply to an e-mail item: 1. Tap an e-mail item in the Message List to display it on the screen. 2. Tap Reply. 3. In the Reply Options dialog box, tap the Reply To pick list. Tap to select who should receive the reply—the sender only or all recipients; or tap Forward to reply to someone who didn’t see the original e-mail item. 4. Tap Include Original Text to include the original e-mail message in the reply. Clearing the option creates a blank reply. 5. If you selected Include Original Text, tap Comment Original Text to let you edit the original text. 6. Tap OK. 7. Enter the text of your reply. 8. If you are forwarding the message, enter a recipient in the To field. 9. Tap Send to place your reply in the Outbox. MAIL195 9 Looking Up an Address To identify the recipient of an e-mail item, you must enter that person’s e-mail address. You can either enter the data directly in the To or CC field, or use the Look Up command to access the information in your Address Book. To look up an e-mail address: 1. Tap either the To or CC field name to expand it. 2. Choose from the following options: • Tap Lookup to display the Lookup dialog box. The Lookup screen lists all records that contain information in an e-mail field. • Enter the first few letters of the last name of the person whose address you want to find, and tap Lookup. If your Smartphone completes the desired address for you, tap Done to return to the New Message screen. Tip: You can also display the Lookup dialog box from the New Message, To or CC screens by tapping the Menu icon on the front of your Smartphone; then tap Options and tap Lookup. Or use the Graffiti® Command stroke /L. 3. In the Lookup dialog box, enter the first letter of the entry you want, to scroll to the first entry that begins with that letter. Enter additional letters to have the list scroll to the first entry that starts with those letters. Tap Lookup. ➜ ➜ 196 MAIL 6. Tap Done to return to the New Message screen. Adding Details to E-mail Items Before you send your e-mail item, you can additional information to the message if your desktop e-mail application supports the feature. For example, you can specify the message’s priority, create a blind courtesy copy, add a signature, or confirm that the message was delivered or read. Your Smartphone cannot attach to an e-mail items details or attributes that your desktop e-mail application doesn’t support. To add details to an e-mail item: 1. In the New Message screen, tap Details. 5. Tap an address to select it. Tap Add. Tap here to enter address in field. Tap to select. Tap here MAIL197 9 2. Choose from the following options: PrioritySelects a ranking for the e-mail item from the Priority pick list. Choices are High, Normal, or Low priority. The Priority setting must be set for each e-mail item you create. BCCCreates a blind courtesy copy. The BCC option must be set for each e-mail item. SignatureAttaches your signature to all subsequently created e-mail items until you deselect this option. The signature is visible only to the e-mail recipient, and does not appear in your e-mail item. See “Creating a signature for your e-mail item” for information on defining a signature. ConfirmRequests a confirmation that the e-mail item was Readread. ConfirmRequests a confirmation that the e-mail item was Deliverydelivered. 3. Tap OK. BCC field 4. If you selected the BCC option, in the New Message screen, tap the BCC field and enter an address. 198 MAIL Adding a Signature for Your Message By defining information as a signature, you can automatically attach it to the close of e-mail items and avoid recreating the information for each e-mail item. A signature can contain information on you or your company—such as your name, address, phone and fax numbers, and any other text you want to include. The signature is visible only to the e-mail recipient, and does not appear in your e-mail item. For information on attaching a signature to an e-mail item, see “Adding details to e-mail items.” To create a signature: 1. Tap the Menu icon to open the Mail menus. 2. Tap Options, and then tap Preferences. 3. Tap the Signature text field and enter the text of your signature. 4. Tap OK. Add signature text here MAIL199 9 Storing and Editing E-mail Items Sending an e-mail item from your Smartphone stores it in the Outbox folder until you perform a HotSync operation. You can edit unsent e-mail as long as you have not yet performed a HotSync operation. You can also draft e-mail items and store them until you’re ready to send them, and you can file e-mail items. Storing and Editing Unsent E-mail Items The e-mail items you send from your Smartphone are actually stored in the Smartphone Outbox folder until you perform a HotSync operation to synchronize your device with your computer. During synchronization, your Smartphone transfers e- mail items stored in the Outbox folder to your desktop e-mail application. The next time you send mail from this desktop application, it sends the mail created on your Smartphone. When you edit an e-mail item, your Smartphone removes the item from the Outbox folder and displays the New Message screen, where you can edit the item and resend it, save it as a draft, or delete it. For instructions on synchronizing your device, see “Synchronizing Mail with your e-mail application.” To store an e-mail it…
Text truncated - open the document above for the full version.
Contact Information
Applicant
Jenni Chun(General Manager)
Technical Contact
PCTEST Engineering Laboratory, Inc.Randy Ortanez
[email protected]410-290-6652
6660-B Dobbin Road · Columbia, Maryland · United States
Non-Technical Contact
PCTEST Engineering Laboratory, Inc.Randy Ortanez
[email protected]410-290-6652
Test Firm
PCTEST Engineering Laboratory, Inc.Randy Ortanez
Technical Specifications
| # | Rule Parts | Frequency Range | Power Output | Emission | Tolerance |
|---|---|---|---|---|---|
| 4 | 24 | 1.85 GHz - 1.91 GHz | 261.00 mW | 1M25F9W | 2.5 ppm |
Other Applications from Samsung Electronics Co Ltd
A3LSMU600
Sep 15, 2026Bluetooth Headset
Equipment Class
DTS - Digital Transmission SystemA3LSMA185G
Sep 08, 2026Portable Handset
Equipment Class
CXX - Communications Rcvr for use w/ licensed Tx and CBsA3LSMS741B
Aug 05, 2026Portable Handset
Equipment Class
6VL - 15E 6 GHZ Very Low Power DeviceA3LSMX940
Jul 31, 2026BT,BLE Tablet DTS,UNII a,b,g,n,ac,ax,be and digitizer
Equipment Class
DTS - Digital Transmission SystemA3LSMS741U
Jul 30, 2026Portable Handset
Equipment Class
6CD - 15E 6 GHz Low Power Dual Client