A3LSWDSC01ECellular/ PCS GSM/ EDGE and Cellular WCDMA Tablet PC with WLAN and Bluetooth
Samsung Electronics Co Ltd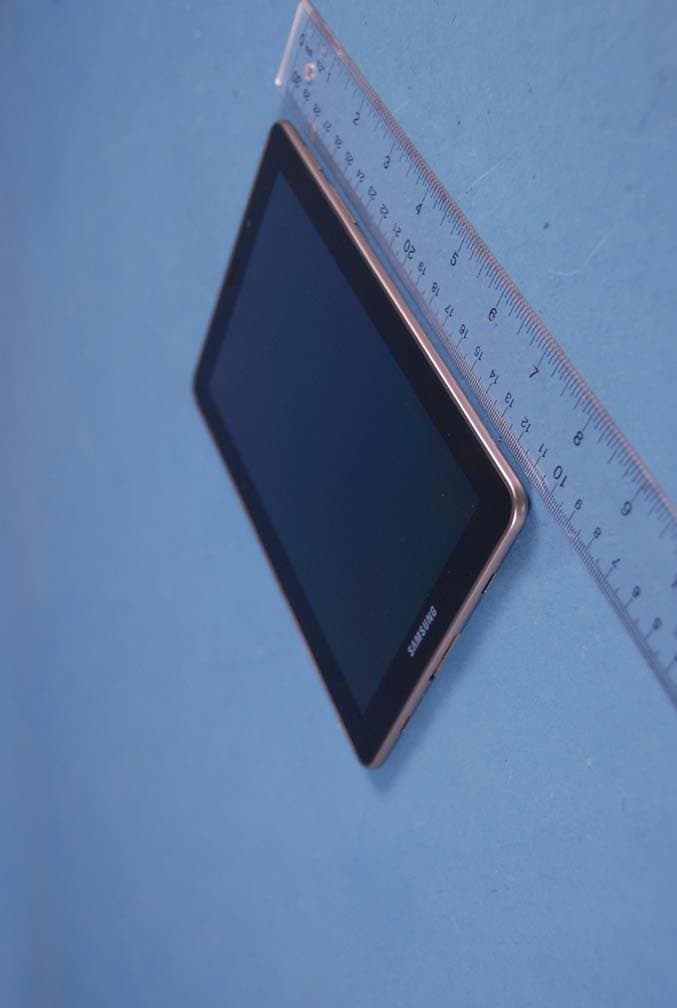
Click to zoom
Application Details
- Equipment Class
- DTS - Digital Transmission System
- Date of Grant
- Oct 24, 2012
- Application Purpose
- Original Equipment
- Date of Application
- Oct 15, 2012
- Equipment Note
- Cellular/ PCS GSM/ EDGE and Cellular WCDMA Tablet PC with WLAN and Bluetooth
- Frequency Range
- 5745.00000000 - 5825.00000000
- Company
- Samsung Electronics Co Ltd
- Country
- United States
Documents & Files
Document Text
Text extracted from the exhibit documents filed with the FCC. Open a document above to read the original.
Users Manual
SC-01E Introduction Thank you for purchasing "SC-01E" mobile terminal. Before and during use of your terminal, be sure to thoroughly read this manual to ensure you are able to correctly use your terminal. About manual ■"クイックスタートガイド (Quick start guide)" (included in basic package) (In Japanese only) Screen view contents and operations of basic function are explained. ■"Guide" (guide application of the terminal) (In Japanese only) Detailed guidance of each function and the operations are explained. From the Home screen of SC-01E, → Tap "取扱説明書". For some functions, tap the written contents, and you can see the content or start the function directly from the description. • For the first time, download and install the application according to onscreen instructions. ■"INSTRUCTION MANUAL" (PDF file) Detailed guidance of each function and operations are explained. Download from NTT DOCOMO website http://www.nttdocomo.co.jp/english/support/trouble/manual/download/index. html ※ URL and the contents are subject to change without prior notice. 1 Operation descriptions In this manual, the operation steps such as the menu operations are simply described as follows. • "Tap" is an operation of touching lightly the display of the terminal with finger (P.<?>). (Example) For tapping on the Home screen to display the application menu and tapping (Google Search icon), the operation is described as follows. 1 From the Home screen, → "検索" • In this manual, the operation steps and screen images are described in default status. The operation steps or screen image on the terminal may vary by the service you use or application you installed. • The images and illustration used in this manual are examples. They may differ from the actual displays. • In this manual, function or setting that is available in multiple operations are explained mostly with the easily understandable operation steps. • In this manual, "SC-01E" mobile terminal is usually referred to as "the terminal". Please be forewarned. 2 Assembling Accessories and samples ■Basic package SC-01E (including the written warranty) Quick start guideAC adapter SC02 (including the written warranty) USB Cable SC01 IN PROGRESS 3 Assembling ■Samples microSD card (1GB) (with operation manual) Stereo Headset with microphone (with operation manual) R L • Other options → P.<?> IN PROGRESS 4 Assembling Contents Assembling Getting started P.48 docomo Palette UI P.118 Phonebook Mail/ Web browser Accessories and samples ����������������������2 Contents �������������������������������4 About usage of this terminal ���������������������7 Precautions (ALWAYS FOLLOW THESE DIRECTIONS) �������10 Handling precautions ������������������������35 Part names and functions ���������������������46 docomo mini UIM card �����������������������49 Using microSD card ������������������������52 Charging ������������������������������55 Turning power ON/OFF �����������������������63 Basic operation ��������������������������65 Entering characters ������������������������72 Initial settings ���������������������������99 Screen/Icon ���������������������������107 Home screen ���������������������������118 Managing Home screen ���������������������120 Application screen ������������������������130 Managing applications ����������������������140 Managing groups �������������������������141 Searching applications ����������������������143 Switching Application screen ������������������143 Installing “おすすめ” applications �����������������143 Home screen information ���������������������144 Phonebook ����������������������������145 sp-mode mail ���������������������������157 Messaging (SMS) ������������������������158 Email �������������������������������165 5 Assembling Mail/Web browser P.157 Settings P.193 File management P.242 Application P.260 Gmail �������������������������������175 Area Mail �����������������������������176 Web browser ���������������������������178 Setting menu ��������������������������193 Wireless and network ����������������������194 Device ������������������������������213 Personal �����������������������������222 System ������������������������������235 File operation ���������������������������242 Bluetooth communication ��������������������252 AllShare �����������������������������258 dmenu ������������������������������260 dmarket �����������������������������261 ToruCa ������������������������������262 mobacas �����������������������������265 1Seg �������������������������������273 Camera ������������������������������296 Gallery ������������������������������305 Video Player ���������������������������307 Music Player ���������������������������311 Play Store ����������������������������318 Samsung Apps ��������������������������320 GPS/Navigation �������������������������321 Google Talk ���������������������������328 YouTube �����������������������������329 S Planner �����������������������������331 Alarm �������������������������������334 World clock ����������������������������335 Calculator ����������������������������336 6 Assembling Application P.260 International roaming P.353 Appendix/ Index P.362 Pen memo ����������������������������337 Polaris Office ���������������������������340 Dictionaries ���������������������������343 Downloading ���������������������������346 Backing up SD card �����������������������347 Pulse �������������������������������350 Social Hub ����������������������������351 Photo editor ���������������������������352 Overview of international roaming (WORLD WING) ��������353 Available services overseas �������������������354 Before using terminal overseas �����������������355 After returning to Japan ���������������������358 Setting for overseas network connection ������������359 Enabling data roaming ����������������������361 Introduction of options and related devices �����������362 Sample (microSD card (1GB), Stereo Headset with microphone) �363 Troubleshooting (FAQ) ����������������������367 Device Anshin Remote Support �������������…
Text truncated - open the document above for the full version.
Users Manual
97 Getting started Setting Swype 1 From the Home screen, → "Settings" → "言語と文字入力" → "入 力方法を設定" → "設定" under "Swype" 2 Tap an item to set 項目説明 入力方法を選択Switch Keyboard. Swypeの使い方Display Tutorial of Swype to check operation. 個人辞書Save words, etc. 優先設定音声フィー ドバック Set whether to sound key operation sound when a key is tapped. バイブレー ション設定 Set whether to vibrate the terminal when a key is tapped. ヒントを表 示 Set whether to show hints for Swype when performing specified operations such as selecting a candidate highlighted in blue from the word suggestions twice in a row. IN PROGRESS 98 Getting started Checking/Ending a running application 1 → "タスクマネージャー " a b c d a Close Task manager. b Tabs are displayed. • Tap "Active applications" tab to display running applications. • Tap "RAM manager" tab to display RAM use. Tap "Clear memory" tab to erase RAM contents. c Running applications are displayed. Tap to end the application. d End all running applications. IN PROGRESS 99 Getting started Initial settings When you turn this terminal ON for the first time after purchasing, follow the onscreen instructions to make settings for language, Google account settings, Google location information settings, and initial setting for docomo service. 1 "開始" • To change the language, select "English" → Language you want to use. 2 Set a Google account • Tap "今は設定しない" to set an account later. ■When not connecting to the internet Follow the onscreen instructions to set the Wi-Fi (P.●●) then set a Google account or perform operations for setting later. 3 Set whether to purchase by Google Play 4 Set whether to restore or back up using a Google account → "次 へ" 5 Set whether to permit to use Google location → "次へ" • When an entry screen for owner of the terminal, operate according to the onscreen instructions. 6 "完了" • Continue to perform initial settings for DOCOMO Services. 100 Getting started 7 "進む" • A screen for installing applications collectively appears. • Select "インストールする" to install applications for service you have already subscribed. To stop installing them, select "インストールしない". 8 "進む" • Setting screen for docomo apps password appears. 9 Set a docomo apps password. • If you select "設定する", enter a docomo apps password. 10 "進む" • A screen for the location information appears. • Select "位置提供ON" to permit sending location information. • Select "位置提供OFF" to reject sending location information. • Select "電話帳登録外拒否" not to send location information to the other party who is not saved in Phonebook. 11 "進む" → "OK" • A Home selection screen appears. 12 "docomo Palette UI" → "OK" • Select "TouchWizホーム" to use the Home for the terminal. • From the Home screen, tap → "Settings" → "ホーム選択" to change the Home. 101 Getting started Setting Wi-Fi You can use Wi-Fi function of the terminal to connect to wireless access point of your home or company network. Also, you can connect to Public wireless LAN service access point to use mails and Internet. Enabling Wi-Fi and connecting to network 1 From the Home screen, → "Settings" → "Wi-Fi" A Wi-Fi setting screen appears. 2 Mark "Wi-Fi" • Scanning available Wi-Fi networks starts automatically and a list is displayed. • ネットワークが表示されない場合は「スキャン」をタップすると再度検索できます。 3 Tap a Wi-Fi network you want to connect → "接続" • To connect to a network protected by security, enter a password and tap "OK". • Entered password is displayed with "●". Mark "Show password" to display password. To use Static IP address Mark "拡張オプションを表示"→"IP設定" field → "静的" → Set IP address, Gateway, Network prefix length, DNS 1, DNS 2. 102 Getting started Information • The network password connected once is automatically saved so that you do not need to enter it next time. • You can use packet communication even when Wi-Fi function is ON. However, Wi-Fi takes precedence while connecting Wi-Fi network. When Wi-Fi network is disconnected, connection switches to 3G/GPRS network automatically. Note that packet communication fee applies for using 3G/ GPRS network. ■To change network password 1 Touch and hold a Wi-Fi network you want to change on the Wi-Fi settings screen → "ネットワーク設定を変更" 2 Enter the password → "OK" • Entered password is displayed with "●". Mark "パスワードを表示" to display password. Disconnecting Wi-Fi network 1 On the Wi-Fi setting screen, tap a connected Wi-Fi network → "切 断" 103 Getting started Setting online service accounts Online service accounts such as Facebook, LinkedIn, mixi, Twitter, Google can be created on the terminal and you can synchronize or send/ receive data between the terminal and each online service server. • You can set a Microsoft Exchange ActiveSync account to synchronize with Microsoft Exchange Server 2010 (or version before that). Information • For setting for each account, perform under the environment where Internet connection is available. • Depending on country/region, some function such as auto-synchronization may not be available. • For setting each account, refer to the following website. - docomo account: http://www.nttdocomo.co.jp/ - Facebook account: http://www.facebook.com/ - LinkedIn Account: http://www.linkedin.com/ - mixi account: http://mixi.jp/ - Twitter account: http://www.twitter.com/ - Google account: http://www.google.co.jp/ • To set Microsoft Exchange ActiveSync account, ask your network administrator for the setting information. 104 Getting started Setting synchronization 1 From the Home screen, → "設定" → "アカウントと同期" 2 Mark an item to set ItemDescription Background dataAll applications installed to the terminal execute data communication automatically. Auto-syncData of Google applications such as Gmail, S Planner or Contacts are synchronized automatically. Setting account 1 From the Home screen, → "設定" → "アカウントと同期" 2 "アカウントを追加" → Tap a type of account you want to add • To set Exchange account for synchronization/transfer of data with Exchange server, tap "Microsoft Exchange ActiveSync". When the contract conditions for the Social Hub appears Select country → Check the contract conditions →…
Text truncated - open the document above for the full version.
Users Manual
137 docomo Palette UI IconApplicationDescription SMSSend/receive SMS. Sプランナー Manage schedule. あんしんスキャンProtect the terminal from the viruses. Detect virus hidden in installed applications or microSD card. しゃべってコンシェルWhen you tell this terminal “what you want to know” or “what you want to do”, this application replies and displays it by reading intent of your word. アラームSound alarm at specified time. カメラ Shoot still images/videos. ギャラリー View/Organize still images/videos. タスクマネージャー Check/Exit running application. ダウンロード Check downloaded or downloading data information. ドコモ海外利用Support overseas packet communication. Make easy settings for data roaming or network operator setting when using Global Pake-hodai (flat rate service for packet communication overseas). IN PROGRESS 138 docomo Palette UI IconApplicationDescription ハイカムAn application for analyzing shot videos or photos to create automatically edited videos. You can use templates or BGM suitable for various scenes, and you can also upload created videos to SNS easily. フォトエディターEdit an image. フォトコレクション ペンメモCreate memo by handwritten input. マイファイルView/Manage data such as still images, videos, music, etc. ワンセグWatch 1Seg. 世界時計Check the time of a specified country/region. 動画Play videos. 取扱説明書The instruction manual for the terminal. You can activate desired functions from instructions. 辞典Check words, etc. in the dictionary. IN PROGRESS 139 docomo Palette UI IconApplicationDescription 遠隔サポートAn application to use “スマートフォンあんしん遠 隔サポート”. “スマートフォンあんしん遠隔サポート” is a service with which a Call Center staff helps your operation checking your terminal’s screens remotely. 電卓Calculate. 音楽プレーヤーPlay music. Information • Tap to return to the Home screen. • When email or SMS is received, number of received mails is displayed in the right upper part of the “Eメール”, “SMS” or “Social Hub” icon. IN PROGRESS 140 docomo Palette UI Managing applications Adding shortcuts to Home screen 1 On the application list screen, touch and hold an application you want to add to the Home screen 2 “ホームへ追加” Uninstalling applications 1 On the Application screen, touch and hold an application you want to uninstall 2 “アンインストール” → “OK” • Uninstallation completion screen appears. 3 “OK” Moving applications 1 On the Application screen, touch and hold an application you want to move 2 Drag to the position you want to move to and release it • Alternatively, touch and hold an application and tap “移動” → Select a location to move the application to other group. 141 docomo Palette UI Managing groups Adding groups 1 On the Application list screen, → “グループ追加” 2 Enter group name → “OK” Sorting groups 1 On the Application list screen, touch and hold a group label 2 Drag to the position you want to move to and release it Editing group name 1 On the Application list screen, touch and hold a group label 2 “名称変更” → Enter group name → “OK” Information • “最近使ったアプリ”, “ドコモサービス”, and “ダウンロードアプリ” groups cannot be renamed. 142 docomo Palette UI Changing group color 1 On the Application list screen, touch and hold a group label 2 “ラベル変更” → Select label color Adding groups to Home screen 1 On the Application list screen, touch and hold a group label 2 “ホームへ追加” Deleting groups 1 On the Application list screen, touch and hold a group label 2 “削除” → “OK” Information • “最近使ったアプリ”, “ドコモサービス”, and “ダウンロードアプリ” groups cannot be deleted. 143 docomo Palette UI Searching applications 1 On the Application list screen, → “検索” 2 Enter application name you want to search → Tap searched application • To search installed applications, on the search screen, → “設定” → “検 索対象” → Mark “アプリケーション”. Switching Application screen 1 On the Application list screen, → “リスト形式”/“タイル形式” Installing “おすすめ” applications Applications recommended by DOCOMO are displayed in the “おすす め” tab. To download applications, tap an application icon to display the download screen and follow the onscreen instructions. • Downloaded application appears on the “ダウンロードアプリ” group in the “アプ リ” tab. • Tap “もっとアプリを見る” in the “おすすめ” tab to activate Browser to display the top of dmenu. 144 docomo Palette UI Home screen information You can view the descriptions or instructions, etc. about docomo PaletteUI. 1 From the Home screen, → “ヘルプ” Version information 1 On the Application list screen, 2 “アプリケーション情報” • You can view the provider/version information of docomo Palette UI. 157 Mail/Web browser Mail/Web browser sp-mode mail Send/Receive the mail using i-mode mail address (@docomo.ne.jp). Pictogram and Deco-mail ® are available. Auto reception is also supported. For details of sp-mode mail, refer to "ご利用ガイドブック (spモード編) Mobile Phone User's Guide (sp-mode)". 1 From the Home screen, "spモードメール (sp-mode mail)" → Follow the onscreen instruction to install sp-mode mail 158 Mail/Web browser Messaging (SMS) SMS You can send and receive text messages up to 70 two-byte characters (160 one-byte alphanumeric characters) to/from a mobile number. Creating and sending message (SMS) 1 From the Home screen, → "SMS" SMS screen appears. A thread (the parties you sent/received SMS to/from) list appears on the left, and selected thread SMS list appears on the right of the screen. 2 An SMS creation screen appears. 3 In to field, enter a mobile phone number to send • To send an SMS to multiple recipients, separate with a comma (,). • You can enter an address selecting a mobile phone number from the Contacts, Favorites or a group of Contacts by tapping respectively. • To delete/edit/store in Contacts an entered recipient, tap the recipient displayed as a button → Tap "削除"/"編集"/"連絡先に追加". If recipients are not displayed as buttons, tap "メッセージを入力" field and tap to field again to display the recipients in each button. 159 Mail/Web browser 4 Tap "メッセージを入力" field → Enter a message text 5 To save composing SMS as a draft When a recipient and a message text is entered and the keypad is not displayed, tap . Information • If a party you want to send an SMS is included in the SMS thread list, you can send an SM…
Text truncated - open the document above for the full version.
Users Manual
279 Application a Image • Channel can be switched by flicking to the left or right. • Details of the program displays by touching and holding the image. b Subtitle • → "設定" → "画面設定" → Mark "字幕" to show subtitles. c Broadcast data d Channel/Program name e TV operation panel • Channel can be switched with /. • " CH " tab of the operation screen appears by tapping the number of the channel. • Adjust the volume with . f Operation panel for broadcast data • Adjust the cursor with / and select an item tap " 選択 " to select an item. The broadcast data of the link displays. • Tap " 戻る " to return to the previous linked program. ■Key operations on viewing screen • Lock the screen with (Power/screen lock key). • Adjust the volume with (Volume key). 280 Application Operation screen 1 On the watching screen, tap a channel number 2 Tap a tab at the top of the screen Ch. list 1 2 5 6 3 4 IN PROGRESS 281 Application a Tab • Switch the operating target by tapping the tab. b Preview image • The watching screen appears by tapping it. c Channel/Program name d Channel list • Watching screen appears by tapping the channel. • Channel can be deleted from the Channel list by touching and holding the channel → Tap " 削除". e Program list • The watching program list appears by tapping it. f TV full view • The watching screen appears by tapping it. ■Key operations on Ch. list tab • Adjust the volume with (Volume key). 282 Application Schedule tab 2 1 IN PROGRESS 283 Application a Tab • Switch the operating target by tapping the tab. b Schedule list : Recording schedule (including the completed schedule) : Watching schedule (including the completed schedule) : Failed recording schedule : Failed watching schedule • Change the schedule by tapping the unexecuted schedule. • Delete the schedule by touching and holding the unexecuted schedule → Tap "削除". • Confirm the result and delete the schedule from the list by tapping the executed schedule. 284 Application TV files tab 2 3 4 5 1 8 6 7 IN PROGRESSIN PROGRESS IN PROGRESS 285 Application a Tab • Switch the operating target by tapping the tab. b TV file list • Play or display TV file by tapping it. c Image • TV file to be played can be switched by flicking to the left or right. d Play time, slider • Tap video screen to display. • Change any time point of the file to be viewed with . e Broadcast data f Channel/Program name g Play operation panel • TV file to be played can be changed with /. • Play/Pause the TV file with /. • Adjust the volume with . h Broadcast data operation panel • Adjust the cursor with / and select an item with "選択". The broadcast data of the link displays. • Tap "戻る" to return to the previous linked program. ■Key operations on the playing file screen • Lock the screen with (Power/screen lock key). • Adjust the volume with (Volume key). 286 Application TV link tab 2 1 a Tab • Switch the operating target by tapping the tab. b TV link • Connect to registered site (P.●●). IN PROGRESS 287 Application Recording 1Seg 1 On the watching screen, → "録画" • To stop recording, tap "停止". Information • According to the airwave status, the images and sounds may be interrupted. • During recording, channel cannot be changed. • If you activate any other application during recording, the program may not be recorded correctly. Playing recorded programs 1 On the watching screen, → "ファイル" 2 Tap a program to be played Capturing the watching screen 1 On the watching screen, → "キャプチャ " • Captured images can be checked in "ファイル" tab on the operation screen. 288 Application Reserving to record or watch 1Seg Reserving from channel schedule 1 On the watching screen, tap a channel number • "CH" tab of the operation screen appears. 2 "番組表" → Tap the program to be scheduled • Channel can be changed by tapping the channel name on the top of the screen. • Detail of the program can be confirmed by tapping the program. 3 "予約" → "録画予約"/"視聴予約" Reserving from G-Guide program list 1 On the watching screen, → "Gガイド番組表を起動" • For the first activation, an agreement appears. Read the contents and then tap "利用規約に同意する (Agree with Terms of Use)". Then perform "地 域設定 (Select regions)". 2 Select a program from the G-Guide program list, "ワンセグ連携 (link to 1Seg)" → "ワンセグ録画予約 (1Seg recording reservation)"/"ワン セグ視聴予約 (1Seg watching reservation)" 289 Application 3 Confirm/Change each items at the New program reservation screen • Details of the item can be changed by tapping it. 4 Tap Scheduling manually 1 On the watching screen, tap a channel number • "CH" tab of the operation screen appears. 2 "予約" tab 3 → "マニュアル予約" 4 Enter each items on New program reservation screen 5 Tap Deleting reservations 1 On the watching screen, tap a channel number • "CH" tab of the operation screen appears. 2 "予約" tab 3 Touch and hold the reservation to be deleted 4 "削除" → "OK" 290 Application Setting channels Setting area information 1 On the watching screen, tap a channel number • "CH" tab of the operation screen appears. 2 → "エリア情報設定" → Select the area to be registered 3 Select regions → Select province → Select local area • Channels are searched and the selected area is registered to the channel list. 4 "OK" Switching area information 1 On the watching screen, tap a channel number • "CH" tab of the operation screen appears. 2 → "エリア切替" → Tap the area to be switched • When the area to be switched to is not registered to the channel list, area information is set (P.●●). 291 Application Deleting area information 1 On the watching screen, tap a channel number • "CH" tab of the operation screen appears. 2 → "エリア情報設定" → Touch and hold the area to be deleted 3 "設定リセット" 292 Application Using TV link Registering TV link 1 Operate broadcast data and select the item which can be registered to TV link • The registration method of TV link varies depending on each program. Information • TV link may not be registered depending on each link. Displaying TV link 1 On the watching screen, tap a channel number • "CH" tab of the operation screen a…
Text truncated - open the document above for the full version.
Attestation Statements
SAMSUNG ELECTRONICS CO., LTD 416,Maetan-3dong,Yeongtong-gu Suwon-si,Gyeonggi-do, 443-742 Korea October 11, 2012 Federal Communications Commission 7435 Oakland Mills Roaad Columbia, MD 21046 SUBJECT : Label Statement FCC ID : A3LSWDSC01E Gentlemen: We hereby provide the label statement letter for the above-mentioned device by a new label statement policy instituted at the September 12, 2006, TCB-FCC Teleconference. The label statement is as follows: The FCC ID will be readily visible at the time of purchase because the FCC ID is permanently engravued on the rear of device. This s tatement could not be included in the label. So we inform you of it through this letter. Should you have any questions or comments concerning the above, please contact the undersigned. Sincerely Yours, Seoung Ho Park Senior Manager SAMSUNG ELECTRONICS CO.,LTD Telecommunication Network Business Mobile Communication Division Regulatory Compliance Group.
Cover Letter(s)
SAMSUNG ELECTRONICS AMERICA, INC. American QA Lab 19 Chapin Rd, Building D. Pine Brook, NJ 07058 Date: October 4, 2012 Federal Communications Commission Authorization and Evaluation Division 7435 Oakland Mills Road, Columbia, MD 21046 RE: Request of Confidentiality for FCC ID: A3LSWDSC01E To Whom It May Concern: Pursuant to Sections 0.457 and 0.459 of the Commission’s Rules (CFR 47), and Section 552 (b) (4) of the Freedom of Information Act, SAMSUNG ELECTRONICS CO.,LTD. hereby requests confidentiality and treatment of certain information accompanying this application. The materials contain trade secrets and proprietary information not customarily released to the public. The public disclosure of these matters might be harmful to the Applicant and provide unjustified benefits to its competitors. We are also hereby request Short-Term Confidentiality for 180 days after the grant as outlined in Public Notice DA 04-1705. This provision will give SAMSUNG ELECTRONICS CO.,LTD. temporary confidentiality of commercially sensitive information prior to product release. The requested Permanent and Short-Term Confidential exhibits are listed as follows: PERMANENT AND SHORT-TERM CONFIDENTIAL LIST Exhibit Description 1 Block Diagram 2 Operational Description PERMANENT 3 Schematics 4 External Photos 5 Internal Photos 6 Test-Setup Photos SHORT-TERM 7 Users Manual The Applicant understands that pursuant to Rule 0.457, disclosure of this application and all accompanying documentations, where applicable, will not be made public before the date of the Grant for this application. Sincerely, Peter Ra General Manager American QA Lab SAMSUNG Electronics America INC.
External Photos
Samsung FCC ID: A3LSWDSC01E Model: SC-01E External Photos EUT Type: Portable Tablet Page 1 of 4 © 2012 PCTEST Engineering Laboratory Inc. EXTERNAL PHOTOGRAPHS Samsung FCC ID: A3LSWDSC01E Model: SC-01E External Photos EUT Type: Portable Tablet Page 2 of 4 © 2012 PCTEST Engineering Laboratory Inc. Samsung FCC ID: A3LSWDSC01E Model: SC-01E External Photos EUT Type: Portable Tablet Page 3 of 4 © 2012 PCTEST Engineering Laboratory Inc. Samsung FCC ID: A3LSWDSC01E Model: SC-01E External Photos EUT Type: Portable Tablet Page 4 of 4 © 2012 PCTEST Engineering Laboratory Inc.
ID Label/Location Info
Label and Location Samsung Tablet Model: SC-01E FCC ID: A3L SWDSC01E Label: Model : SC-01E FCC ID : A3L SWDSC01E This device complies with part 15 of the Rules, Opeation is subject to the following two conditions: (1) This device may not cause harmful interference. And (2) this device must accept any interference received, including interference that may cause undesired operation Location: Top Back plate of SC-01E Label Bottom FCC ID is printed on the Rear of device.
Internal Photos
Samsung FCC ID: A3LSWDSC01E Model: SC-01E Internal Photos EUT Type: Portable Tablet Page 1 of 10 © 2012 PCTEST Engineering Laboratory Inc. INTERNAL PHOTOGRAPHS Samsung FCC ID: A3LSWDSC01E Model: SC-01E Internal Photos EUT Type: Portable Tablet Page 2 of 10 © 2012 PCTEST Engineering Laboratory Inc. Samsung FCC ID: A3LSWDSC01E Model: SC-01E Internal Photos EUT Type: Portable Tablet Page 3 of 10 © 2012 PCTEST Engineering Laboratory Inc. Samsung FCC ID: A3LSWDSC01E Model: SC-01E Internal Photos EUT Type: Portable Tablet Page 4 of 10 © 2012 PCTEST Engineering Laboratory Inc. Samsung FCC ID: A3LSWDSC01E Model: SC-01E Internal Photos EUT Type: Portable Tablet Page 5 of 10 © 2012 PCTEST Engineering Laboratory Inc. Samsung FCC ID: A3LSWDSC01E Model: SC-01E Internal Photos EUT Type: Portable Tablet Page 6 of 10 © 2012 PCTEST Engineering Laboratory Inc. Samsung FCC ID: A3LSWDSC01E Model: SC-01E Internal Photos EUT Type: Portable Tablet Page 7 of 10 © 2012 PCTEST Engineering Laboratory Inc. Samsung FCC ID: A3LSWDSC01E Model: SC-01E Internal Photos EUT Type: Portable Tablet Page 8 of 10 © 2012 PCTEST Engineering Laboratory Inc. Samsung FCC ID: A3LSWDSC01E Model: SC-01E Internal Photos EUT Type: Portable Tablet Page 9 of 10 © 2012 PCTEST Engineering Laboratory Inc. Samsung FCC ID: A3LSWDSC01E Model: SC-01E Internal Photos EUT Type: Portable Tablet Page 10 of 10 © 2012 PCTEST Engineering Laboratory Inc.
RF Exposure Info
Reviewed by: FCC ID: A3LSWDSC01E SAR EVALUATION REPORT Quality Manager Document S/N: Test Dates: DUT Type: 0Y1208221188.A3L 08/27/12 - 10/04/12 Portable Tablet Page 1 of 30 © 2012 PCTEST Engineering Laboratory, Inc. REV 11.3 M 04/23/2012 Applicant Name: Date of Testing: Samsung Electronics Co., Ltd. 08/27/12 - 10/04/12 416, Maetan 3-dong, Yeongtong-gu, Suwon-si Test Site/Location: Gyeonggi-do, 443-742 PCTEST Lab, Columbia, MD, USA Republic of Korea Document Serial No.: 0Y1208221188.A3L FCC ID: A3LSWDSC01E APPLICANT: SAMSUNG ELECTRONICS CO., LTD. DUT Type: Portable Tablet Application Type: Certification FCC Rule Part(s): Model(s): CFR §2.1093 SC-01E Test Device Serial No.: Pre-Production [S/N: FJ-221-C, FJ-221-G] 1 gm Body (W/kg) GPRS/EDGE 850824.20 - 848.80 MHz29.85 0.81 UMTS 850826.40 - 846.60 MHz22.88 0.98 GPRS/EDGE 19001850.20 - 1909.80 MHz23.95 1.08 2.4 GHz WLAN2412 - 2462 MHz12.92 0.82 5.8 GHz WLAN5745 - 5825 MHz9.690.53 …
Text truncated - open the document above for the full version.
Contact Information
Applicant
Jenni Chun(General Manager)
Technical Contact
PCTEST Engineering Lab., Inc.Randy Ortanez
[email protected]410-290-6652
6660-B Dobbin Road · Columbia, Maryland · United States
Test Firm
PCTEST Engineering Laboratory, Inc.Randy Ortanez
Technical Specifications
| # | Rule Parts | Frequency Range | Power Output |
|---|---|---|---|
| 2 | 15C | 5.75 GHz - 5.83 GHz | 10.00 mW |
Other Applications from Samsung Electronics Co Ltd
A3LSMS741B
Aug 05, 2026Portable Handset
Equipment Class
6VL - 15E 6 GHZ Very Low Power DeviceA3LSMX940
Jul 31, 2026BT,BLE Tablet DTS,UNII a,b,g,n,ac,ax,be and digitizer
Equipment Class
DTS - Digital Transmission SystemA3LSMS741U
Jul 30, 2026Portable Handset
Equipment Class
6CD - 15E 6 GHz Low Power Dual ClientA3LSMX840
Jul 27, 2026BT,BLE Tablet DTS,UNII a,b,g,n,ac,ax and Digitizer
Equipment Class
DSS - Part 15 Spread Spectrum TransmitterA3LSMX848U
Jul 27, 2026WCDMA, LTE, 5G NR Tablet BT,BLE, DTS,UNII a b g n ac ax and Digitizer
Equipment Class
JBP - Part 15 Class B Computing Device Peripheral