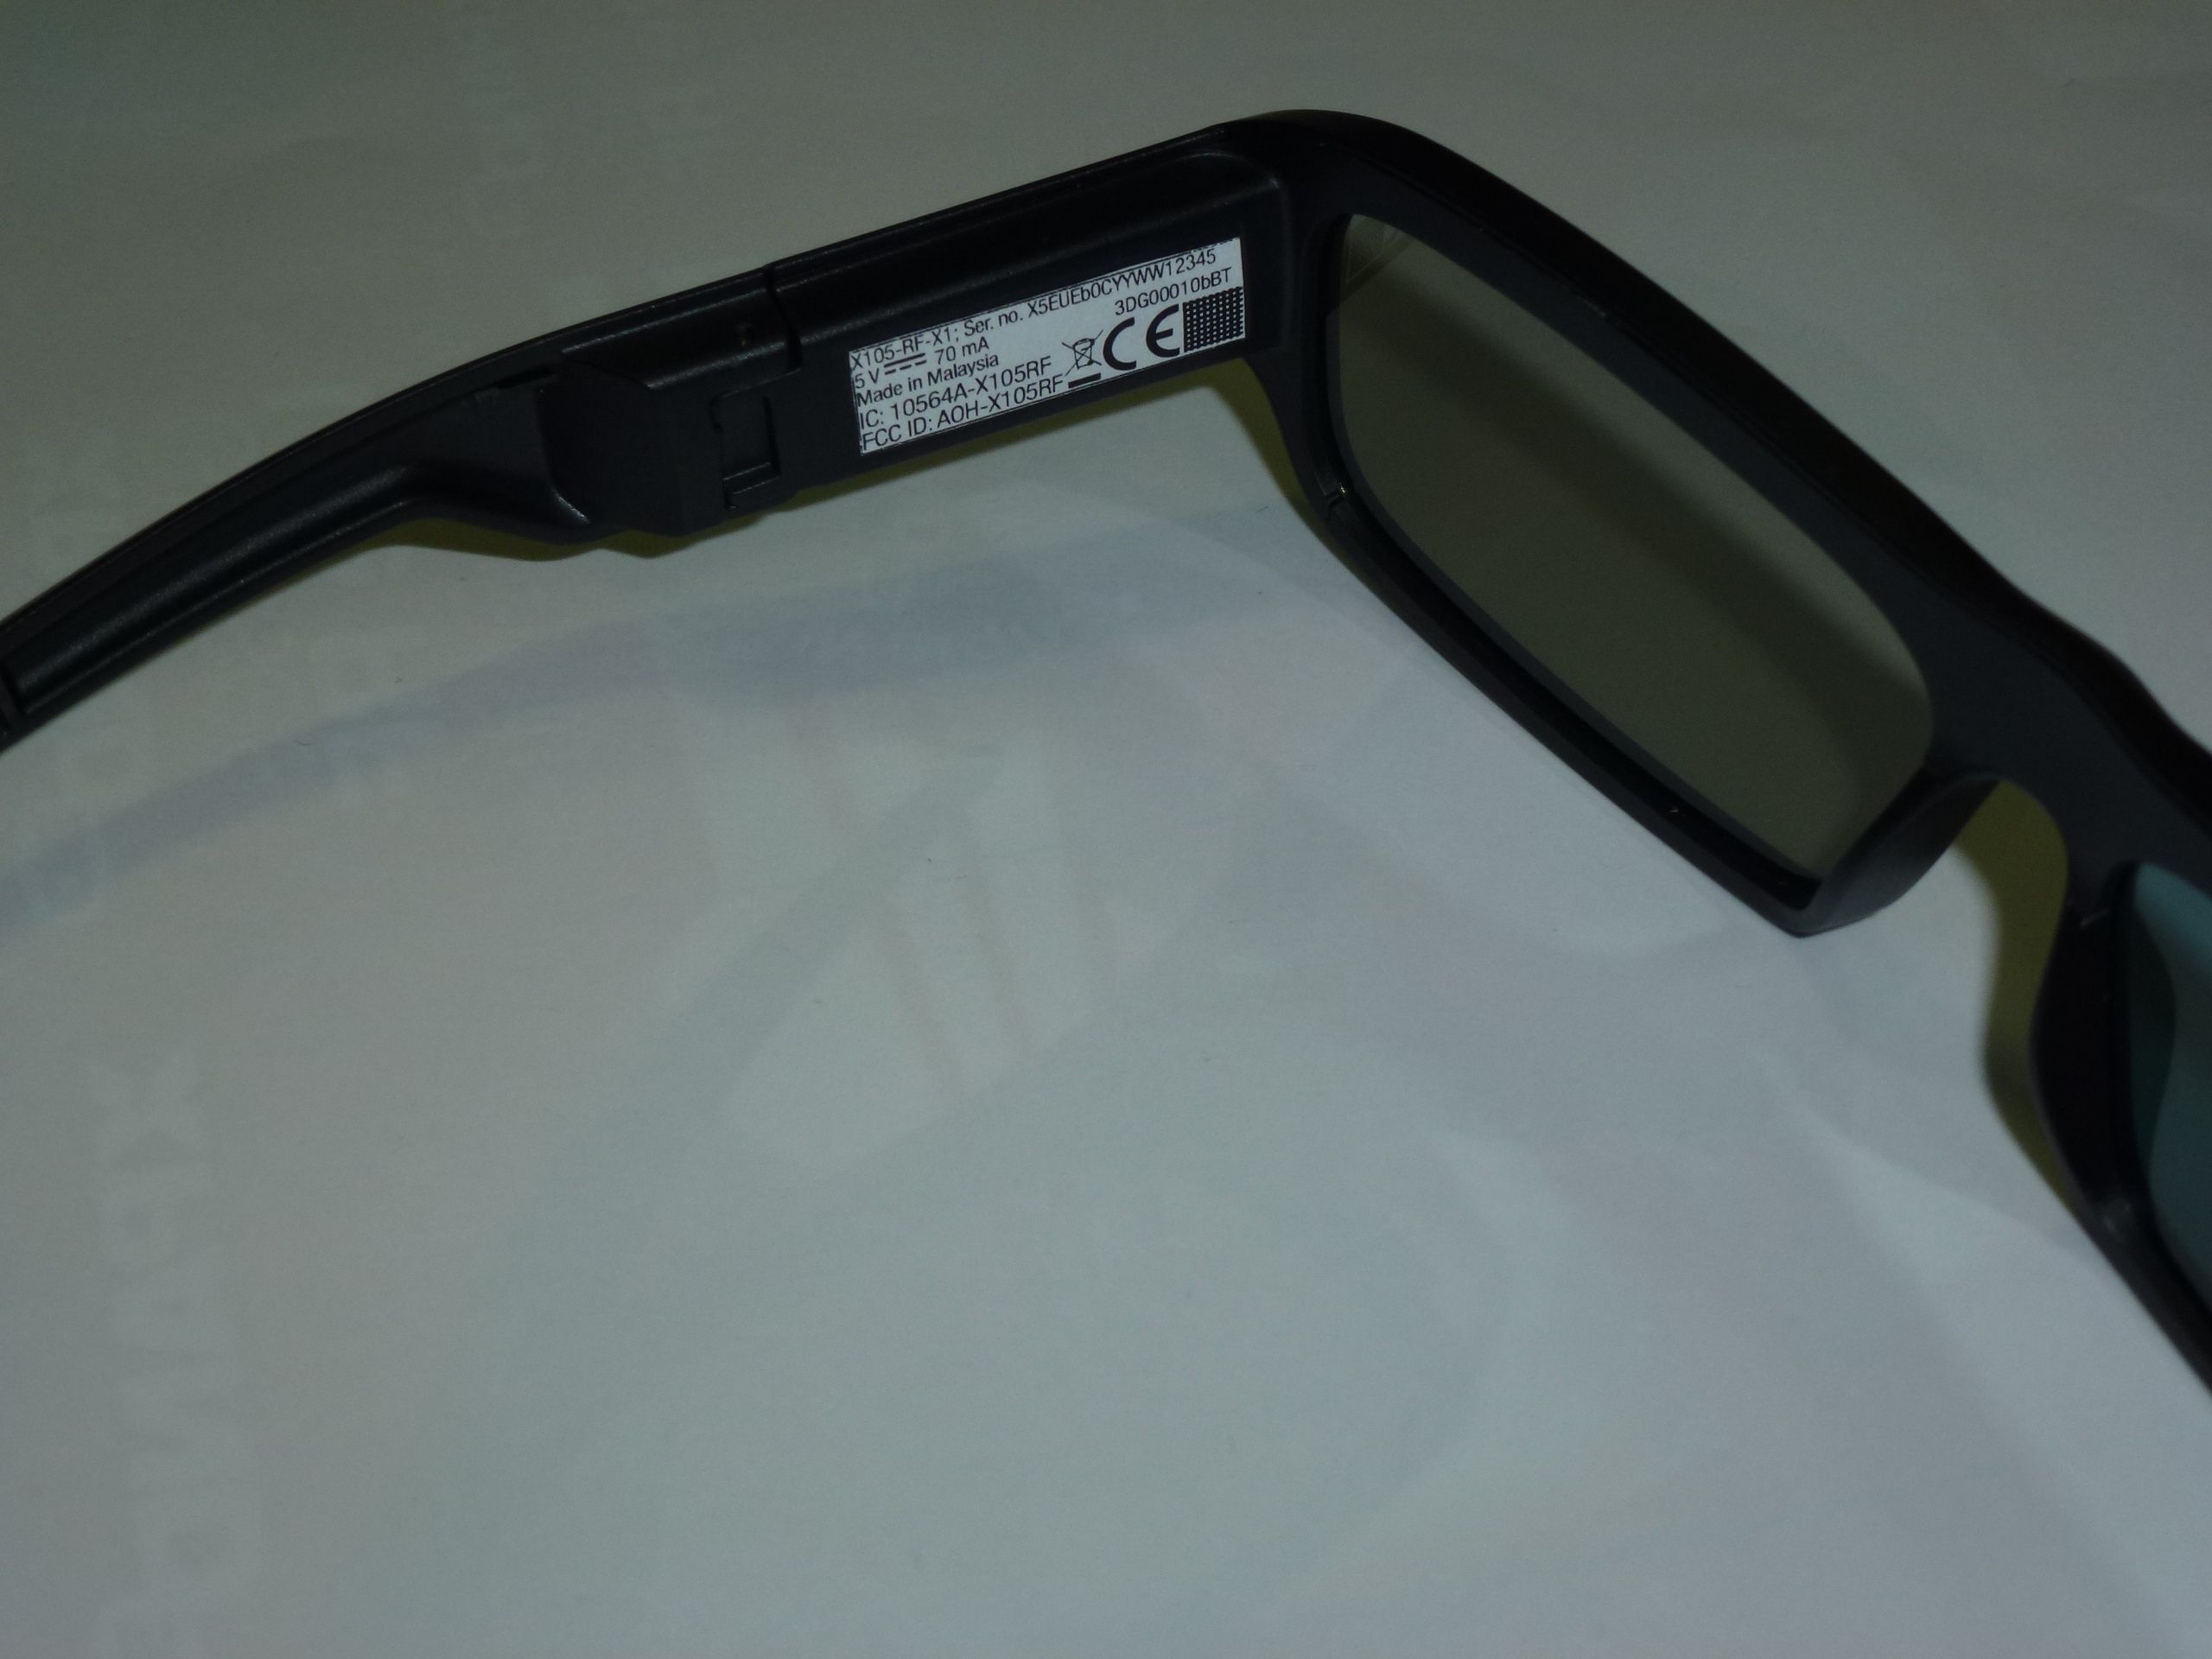
AOH-X105RF3D glasses controlled by spread spectrum transceiver
X6D Limited
Click to zoom
Application Details
- Equipment Class
- DTS - Digital Transmission System
- Date of Grant
- Oct 03, 2012
- Application Purpose
- Original Equipment
- Date of Application
- Oct 03, 2012
- Equipment Note
- 3D glasses controlled by spread spectrum transceiver
- Frequency Range
- 2402.00000000 - 2480.00000000
- Company
- X6D Limited
- Country
- Cyprus
Documents & Files
Document Text
Text extracted from the exhibit documents filed with the FCC. Open a document above to read the original.
Users Manual
XPAND Light 3D Glasses (RF) Model No. X105-RF-X1 (3D Glasses) and AD025-RF-X1 (RF-emitter) User Guide manual-X105-RF-X1-xpand.indd 128.9.2012 9:51:21 manual-X105-RF-X1-xpand.indd 228.9.2012 9:51:21 © XPAND, All Rights Reserved. 1 www.xpand.me Glasses Overview (1) Button (ON, OFF, Pairing) – located at the inner side of right earpiece. (2) LED – located at the outer side of right earpiece, near earpiece hinge. Turning ON Your Glasses »Shortly press button once. »Red LED will ramp from off to bright. »If glasses cannot fi nd 3D host within few seconds LED will ramp from bright to off and glasses will automatically shut down. If glasses fi nd the host they will automatically connect to it, indicating by lit LED for 1 second. Turning OFF Your Glasses »Shortly press button once. »Red LED will ramp from bright to off. »Glasses will shut down. Proximity Association with 3D RF Host This procedure shall be done every time the glasses are introduced to new RF (radio frequency like for example Bluetooth®) 3D host. During the proximity association, 3D glasses shall be located within 1m from 3D RF host (3D TV, Emitter...). »Switch on the glasses (1 short press). »LED will ramp from off to bright, indicating glasses power on. »Press button for minimum of 1 second. »After 1 second, LED will start to blink with a rate of 1 blink per 2 seconds. »Release the button. »Successful proximity association is indicated with 6 short LED blinks. »If glasses could not proximity associate LED will ramp from bright to off and glasses will go in power off state. manual-X105-RF-X1-xpand.indd 128.9.2012 9:51:22 © XPAND, All Rights Reserved. 2 www.xpand.me Connecting Glasses to 3D RF Host Once glasses are associated with host, they will automatically connect to that host every time they are switched on. If during the operation glasses lost the connection to host, they will automatically try to reconnect to that host (LED is blinking with a rate of 1 blink per 2 seconds). If glasses cannot successfully reconnect to host within 60 seconds LED will ramp from bright to off and glasses will automatically go in power off state. Set Glasses to operate in Dual View Mode With the selection of Dual View Mode XPAND 3D Glasses Lite can be used for dual gaming. Dual View Mode can be used during normal 3D viewing as well to disable 3D viewing for people that face uncomfortable feeling when watching 3D. When 3D device is emitting dual view sync signal, double click on the button (see 1 in Glasses Overview) to change Dual View Mode between player 1 and player 2. Not all 3D devices support dual view sync signal. When the 3D device is emitting normal 3D sync signal, double click on the button (see 1 in Glasses Overview) to change between player 1, player 2 and normal 3D viewing mode. When double click is detected, LED light (see 2 in Glasses Overview) indicates the eyewear mode: Player 1: One Quick Blink Player 2: Two Quick Blinks Normal 3D*: One Long Blink *Accessible only if the 3D device is not emitting dual view sync. Indicating the Battery State »If LED flashes every couple of seconds during the operation, battery level is low. »Charging is indicated with lit LED. manual-X105-RF-X1-xpand.indd 228.9.2012 9:51:23 © XPAND, All Rights Reserved. 3 www.xpand.me Charging the Battery To charge the glasses, plug the micro USB cable in computer or other USB device capable of supplying power. LED will remain lit while glasses are charging. When battery is fully charged LED will go off. Technical Specifi cations 3D Technology: Active Shutter Glasses Lens type: LCD, TN cell Sync Method: RF Refresh: 96 Hz to 144 Hz Temperature: 5 – 45° C Battery Life: more than 100 hours (for RF models) Battery Type: Rechargeable Lithium-ion Polymer cell Frame Specifi cations Lens Size: 2,2” diagonal (58 mm) Weight: 1.9 oz (39,3 g) Dimensions (W x H x D): 6.7” x 1.6” x 6.5” (170 mm x 40 mm x 165mm) Frame Colour: Black RF Emitter Overview (Applies to XPAND Glasses Lite RF with RF Emitter kit with Emitter included in the package) (1) Standard VESA connector (2) LED Red light indicator (in the shape of an X) manual-X105-RF-X1-xpand.indd 328.9.2012 9:51:25 © XPAND, All Rights Reserved. 4 www.xpand.me Using with 3D TVs 1. Connect the emitter connector to the corresponding VESA stereo connector in the TV or projector. 2. Once the emitter is connected to the TV/projector, please make sure that the TV/ projector is in 3D mode. Check the X sign on the emitter; the red light should be on, indicating that the emitter is functioning. 3. For maximum range emitter should not be placed on the ground/floor but should be placed at least 10cm above ground (like on a shelf). The emitter does not require a battery. Troubleshooting The emitter is connected but the glasses still do not work: Please make sure that your glasses are turned ON and that your TV/projector is in 3D mode. If problem persists try unplugging the emitter for a couple of seconds and then plug it back in the corresponding VESA stereo connector in the TV/projector. Technical Specifications Weight: 2.72 oz (77 g) Power Supply: via standard stereoscopic VESA connector Operating Temperature: 5 °C (41 °F) – 40 °C (104 °F) ATTENTION – Consult Accompanying Documentation Important Safety Instructions »Read these instructions. »Keep these instructions. »Heed all warnings. »Follow all instructions. »Do not use this apparatus near water. »Clean only with dry cloth. »Only use the attachments/accessories specified by the manufacturer. manual-X105-RF-X1-xpand.indd 428.9.2012 9:51:25 © XPAND, All Rights Reserved. 5 www.xpand.me Battery The 3D Glasses Battery is not user replaceable. WARNING, Battery May Explode If Mistreated. Do Not Disassemble, Or Dispose of In Fire. Viewers need to refer to the recommendations described below. »Stop watching moving images, if you have any symptoms of headache, dizziness, nausea, malaise and any uncomfortable feelings that might be caused by the images. It is advisable to take a break for 5 min …
Text truncated - open the document above for the full version.
Cover Letter(s)
Coverletter: X6D Limited wants to get FCC-Certification for the following product: 3D Glasses controlled by a separate RF emitter (two-way digital transmission using Bluetooth Protocol) X105RF. The unit will get the following FCC-ID: AOH-X105RF List of documents: Exhibit Thema File Exhibit 01 Label and placement label-compliance-markings-X105-RF-X1-xpand.pdf XPAND X105 Placing of Label.jpg Exhibit 02 Not needed -------------------- Exhibit 03 External Photos extern 12-132.pdf * Exhibit 04 Block Diagrams XPAND_X105RF_3DGlasses_Functional_Block_Des cription.pdf * Exhibit 05 Schematic Diagrams PCB_X105RF_1-C_Schematic.PDF Exhibit 06 Testreport 12-132.pdf Exhibit 07 Test Set-up Photos setup 12-132.pdf Exhibit 08 User Manual manual-X105-RF-X1 and AD025-RF-X1-xpand.pdf Exhibit 09 Internal Photos intern 12-132.pdf Exhibit 10 Informations -------------------- Exhibit 11 RF exposure -------------------- * Exhibit 12 Operational Description XPAND_X105RF_3DGlasses_Functional_Block_Des cription.pdf Exhibit 13 Cover letter Request for confidentiality This file FCCconfidentiality RequestX105RF.pdf For the Exhibits marked with ‘*’ X6D Limited requested Confidentiality according to 47 CFR 0.457 and 0.459 of the FCC rules because these are sensitive parts owned by this company and include much of Know-How or sensitive data, it will not be provided to the public. The labelling on some photos may be not the actual status. The correct labelling you can see on the label and placement photos in Exhibit 1.
ID Label/Location Info
label-compliance-markings-X105-RF-X1-xpand.pdf X105-RF-X1; Ser. no. X5EUEb0CYYWW12345 5 V 70 mA Made in Malaysia Helvetica Condensed Label size: 29,5 x 9 mm Scale 1:1 Flattened IC: 10564A-X105RF FCC ID: AOH-X105RF 3DG00010bBT
Contact Information
Applicant
Karel van Gorp(Compliance Manager)
Test Firm
TUV AustriaIng Wilhelm Seier
Technical Specifications
| # | Rule Parts | Frequency Range | Power Output | Emission |
|---|---|---|---|---|
| 1 | 15C | 2.40 GHz - 2.48 GHz | 200.00 µW | 812KF1D |
Other Applications from X6D Limited

AOH-D104X1
Mar 25, 2012RF dongle for synchronization of 3D glasses
Equipment Class
DXT - Part 15 Low Power Transceiver, Rx Verified