BCG-E8146ASMARTPHONE
Apple Inc.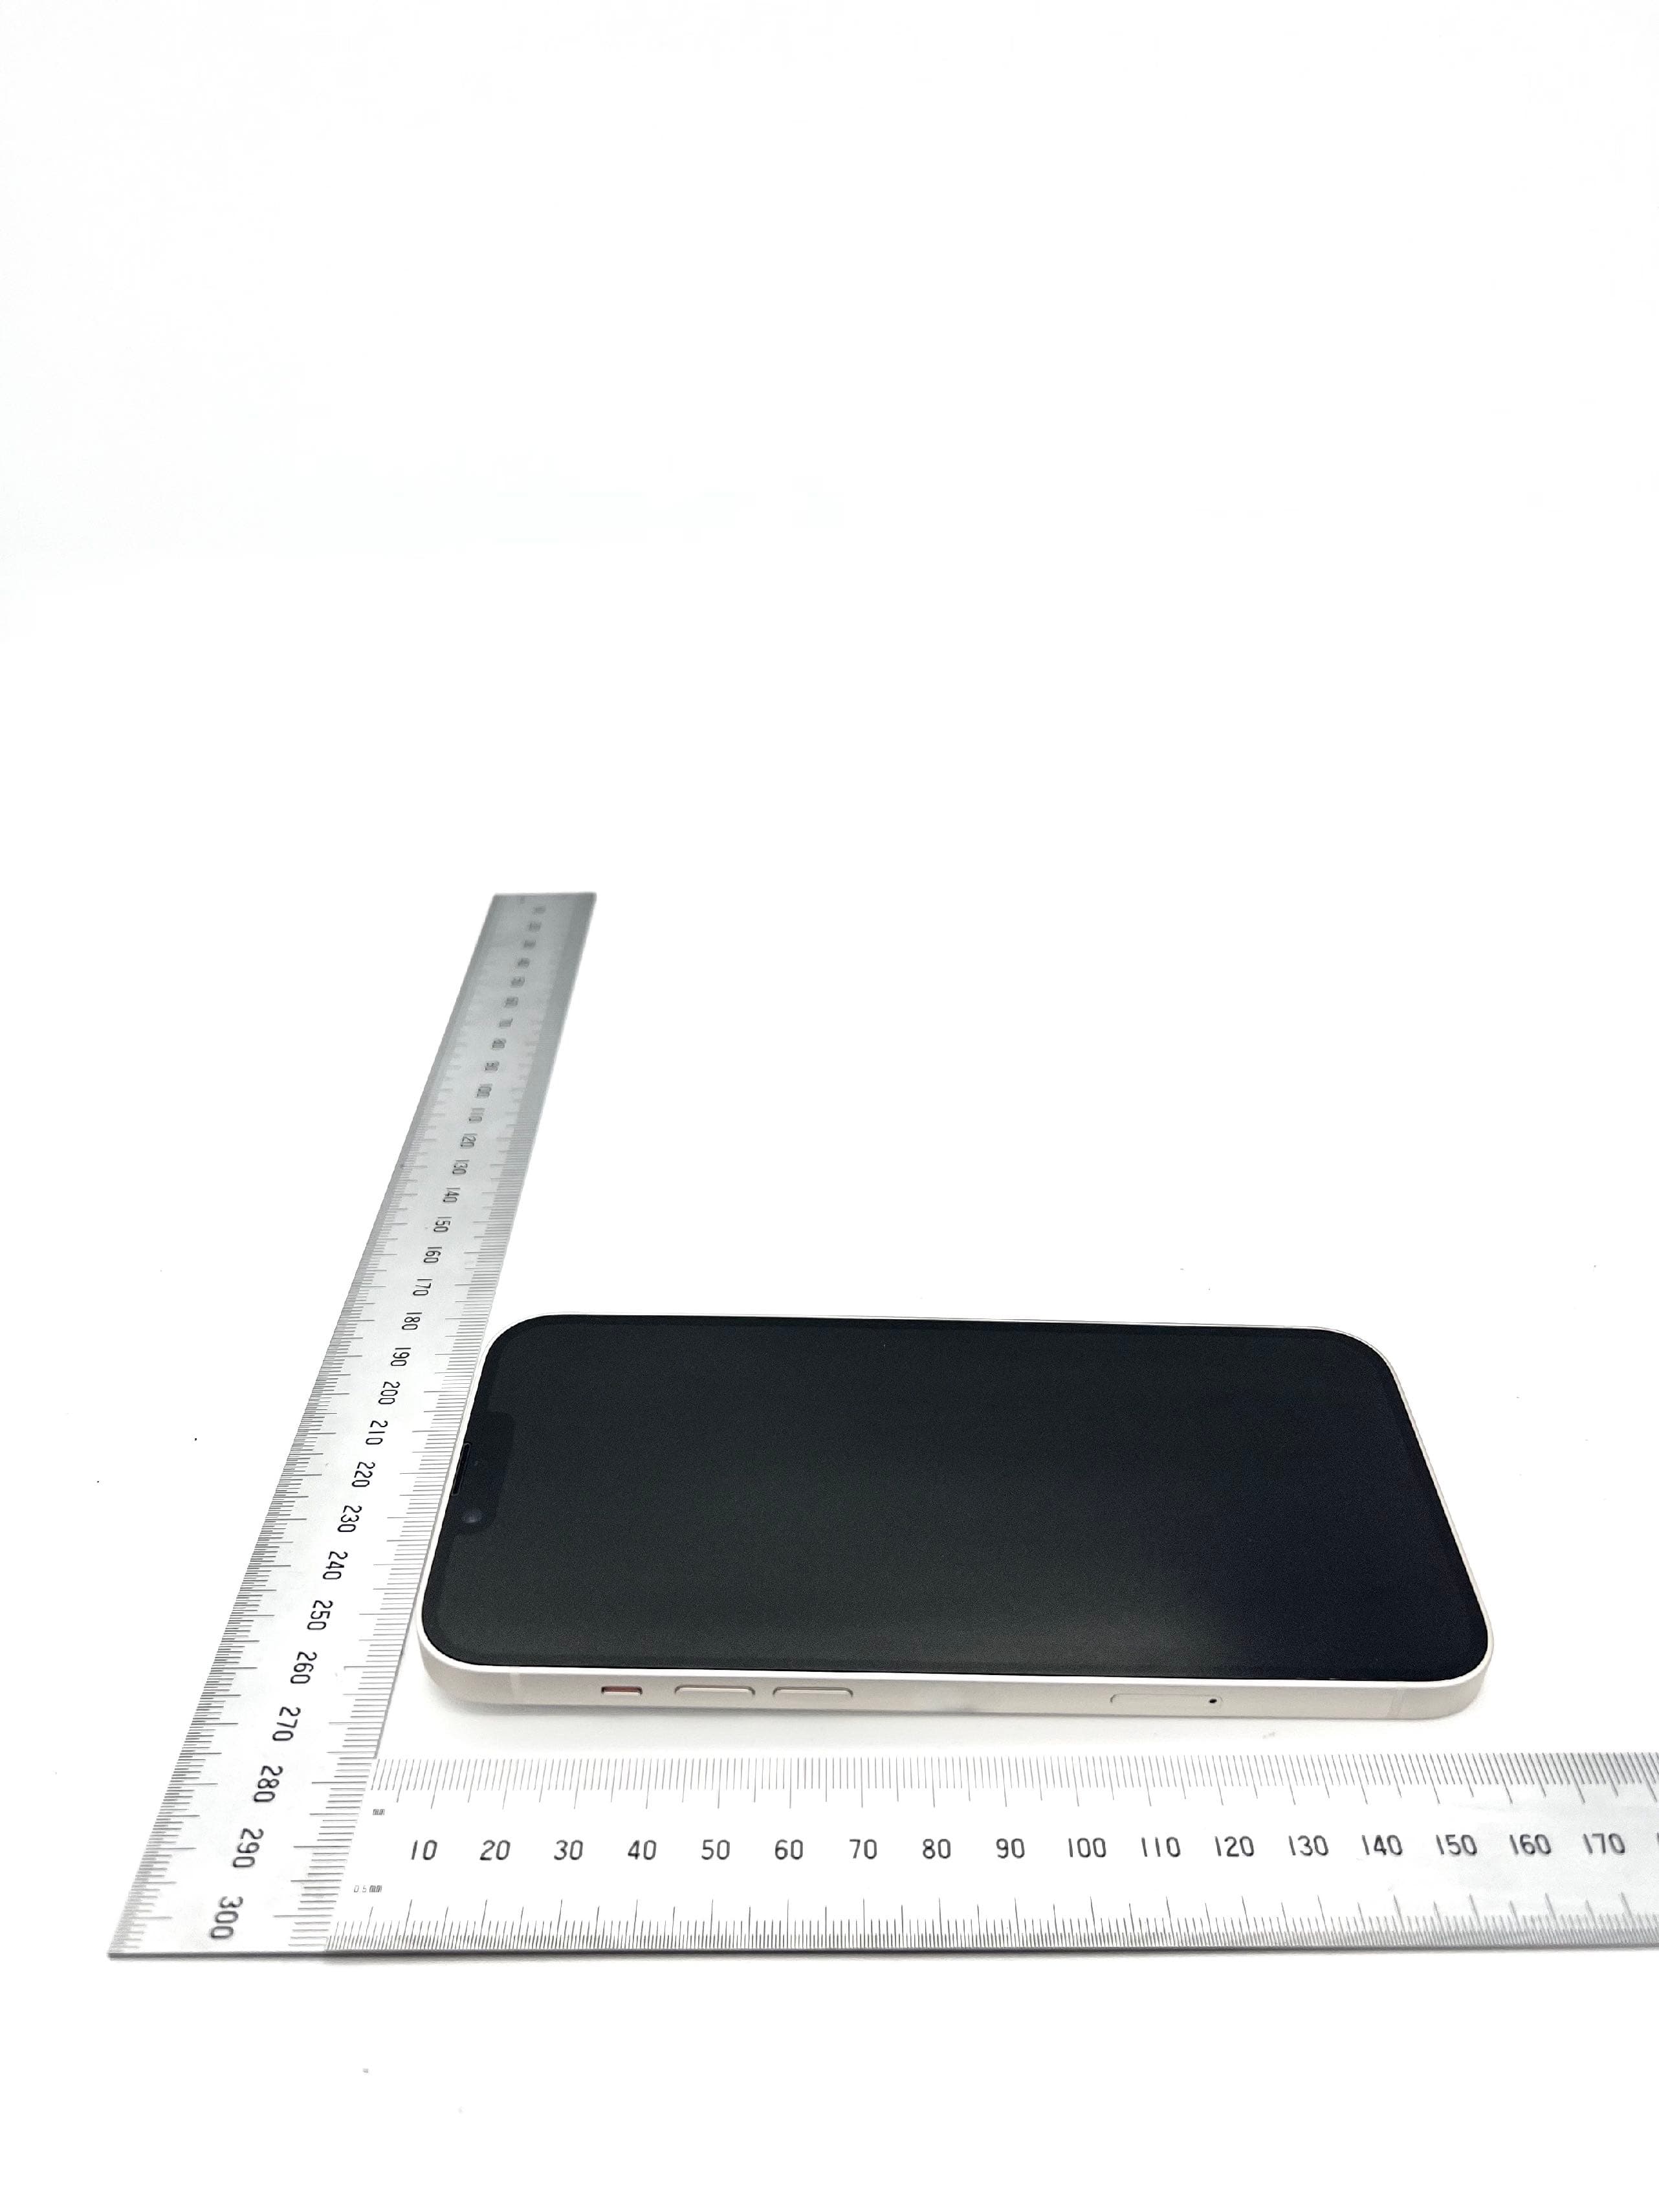
Click to zoom
Application Details
- Equipment Class
- TNE - Licensed Non-Broadcast Transmitter Held to Ear
- Date of Grant
- Sep 21, 2022
- Application Purpose
- Original Equipment
- Date of Application
- Sep 05, 2022
- Equipment Note
- SMARTPHONE
- Frequency Range
- 2488.50000000 - 2490.00000000
- Company
- Apple Inc.
- Country
- United States
Documents & Files
Document Text
Text extracted from the exhibit documents filed with the FCC. Open a document above to read the original.
Users Manual
Before using iPhone, review the iPhone User Guide at support.apple.com/ guide/iphone. You can also download the guide from Apple Books (where available). Retain documentation for future reference. Safety and Handling See “Safety, handling, and support” in the iPhone User Guide. Exposure to Radio Frequency On iPhone, go to Settings > General > Legal & Regulatory > RF Exposure. Or go to apple.com/legal/rfexposure. Battery and Charging An iPhone battery should only be repaired by a trained technician to avoid battery damage, which could cause overheating, fire, or injury. Batteries should be recycled or disposed of separately from household waste and according to local environmental laws and guidelines. For information about Apple lithium-ion batteries and battery service and recycling, go to apple.com/batteries/service-and-recycling. For information about charging, see “Important safety information” in the iPhone User Guide. Lasers The proximity sensor, the TrueDepth camera system, and the LiDAR Scanner contain one or more lasers. These laser systems may be disabled for safety reasons if the device is damaged or malfunctions. If you receive a notification on your iPhone that the laser system is disabled, you should always have it repaired by Apple or an authorized service provider. Improper repair, modification, or use of non-genuine Apple components in the laser systems may prevent the safety mechanisms from functioning properly, and could cause hazardous exposure and injury to eyes or skin. Hearing Aid Compatibility (HAC)—U.S. only iPhone is hearing aid compatible as determined by ANSI C63.19-2011. This standard has two ratings: M (for reduced radio-frequency interference to enable acoustic coupling) and T (for inductive coupling with hearing aids operating in telecoil mode) on a scale from 1-4, where 4 is most compatible. This iPhone is rated M3/T4. Note: the 2019 ANSI C63.19 standard does not use this rating system nor do any test standards exist for any wireless technologies that transmit above 6 GHz. Therefore, 5G NR mmWave frequency bands cannot be tested. Compulsory FCC statement: This phone has been tested and certified for use with hearing aids for some of the wireless technologies that it uses. However, there may be some newer wireless technologies used in this phone that have not been tested yet for use with hearing aids. It is important to try the different features of this phone thoroughly and in different locations, using your hearing aid or cochlear implant, to determine if you hear any interfering noise. Consult your service provider or the manufacturer of this phone for information on hearing aid compatibility. If you have questions about return or exchange policies, consult your service provider or phone retailer. Avoid Hearing Damage To prevent possible hearing damage, do not listen at high volume levels for long periods. More information about sound and hearing is available online at apple.com/sound and in “Important safety information” in the iPhone User Guide. Medical Device Interference iPhone contains magnets as well as components and/or radios that may interfere with medical devices. See “Important safety information” in the iPhone User Guide. Regulatory Regulatory certification information is available on-device. Go to Settings > General > Legal & Regulatory. Additional regulatory information is in “Safety, handling, and support” in the iPhone User Guide. FCC and ISED Canada Compliance This device complies with part 15 of the FCC Rules and ISED Canada licence-exempt RSS standard(s). Operation is subject to the following two conditions: (1) this device may not cause harmful interference, and (2) this device must accept any interference received, including interference that may cause undesired operation. EU / UK Compliance Apple Inc. hereby declares that this wireless device is in compliance with Directive 2014/53/EU and Radio Equipment Regulation 2017. A copy of the Declaration of Conformity is available at apple.com/euro/compliance. Apple’s EU representative is Apple Distribution International Ltd., Hollyhill Industrial Estate, Cork, Ireland. Apple’s UK representative is Apple UK Ltd., 2 Furzeground Way, Stockley Park, Middlesex, UB11 1BB. Use Restriction This device is restricted to indoor use when operating in the 5150 to 5350 MHz frequency range. This restriction applies in: AT, BE, BG, CH, CY, CZ, DE, DK, EE, EL, ES, FI, FR, HR, HU, IE, IS, IT, LI, LT, LU, LV, MT, NL, NO, PL, PT, RO, SE, SI, SK, TR, UA, UK(NI). Disposal and Recycling Information The symbol above means that according to local laws and regulations your product and/or its battery shall be disposed of separately from household waste. When this product reaches its end of life, take it to a collection point designated by local authorities. The separate collection and recycling of your product and/or its battery at the time of disposal will help conserve natural resources and ensure that it is recycled in a manner that protects human health and the environment. For information about Apple’s recycling program, recycling collection points, restricted substances, and other environmental initiatives, visit apple.com/environment. Class 1 Laser Information This device is classified as a Class 1 Laser product per IEC 60825-1 Ed. 3. This device complies with 21 CFR 1040.10 and 1040.11, except for conformance with IEC 60825-1 Ed. 3., as described in Laser Notice No. 56, dated May 8, 2019. Caution: This device contains one or more lasers. Use other than as described in the user guide, repair, or disassembly may cause damage, which could result in hazardous exposure to infrared laser emissions that are not visible. This equipment should be serviced by Apple or an authorized service provider. CLASS 1 LASER PRODUCT Apple One-Year Limited Warranty Summary Apple warrants the included hardware product and accessories against defects in materials and workmanship for one year from the date of original retail purchase…
Text truncated - open the document above for the full version.
Users Manual
iPhone User Guide Page 1 of 1,118 Everything you need to know about iPhone iPhone User Guide Get started Set up a few basic features before you start using your new iPhone. Setup basics Draft . iPhone User Guide Page 2 of 1,118 Add a personal touch Your iPhone can reflec t your personal style and preferences. Showcase your favorite photos on the Lock Screen, add widgets to the Home Screen, adjust text size, ringtones, and more. Ta ke y o u r b e s t s h o t Use your iPhone to capture the moment, wherever you are. Learn how to take photos and videos on the fly, and use other camera features on your iPhone. Make your iPhone your own Ta k e g r e a t p h o t o s a n d v i d e o s Draft . iPhone User Guide Page 3 of 1,118 Stay connected iPhone makes it easy to reach the people important to you. Add them to your address book so you have their information everywhere you need it—then catch up with text messages, phone calls, or FaceTime. All in the family You and your family members can use Family Sharing to share app purchases, your location, and even health data. You can also set up parental controls to manage how children spend time on their devices. Keep in touch with friends and family Share features with your family Draft . iPhone User Guide Page 4 of 1,118 Simplify your day Learn how to use the apps on your iPhone to direct you to the places you go most often, pay for your morning coffee, remind you of important tasks, and even lock your front door automatically when you leave home. To e x p l o r e t h e i P h o n e U s e r G u i d e , c l i c k Ta b l e o f C o n t e n t s a t t h e t o p o f the page, or enter a word or phrase in the search field. You can also from Apple Books (where available). Use iPhone for your daily routines download the guide Welcome Introduction to iPhone Your iPhone What’s new in iOS 16 Set up and get started Basics Personalize your iPhone Apps Siri iPhone safety features Family Sharing Screen Time Draft . iPhone User Guide Page 5 of 1,118 Accessories Use iPhone with iPad, iPod touch, Mac, and PC CarPlay Accessibility Security and privacy Restart, update, reset, and restore Safety, handling, and support Copyright Draft . iPhone User Guide Page 6 of 1,118 Setup basics Transfer your apps and info onto your new iPhone When you first turn on your iPhone and begin the setup process, you can wirelessly transfer many of your apps, settings, and content from your previous iPhone directly to your new iPhone—just bring the two devices close together, then follow the onscreen instructions. If you have an Android device, tap Move Data from Android on your iPhone during the setup process, then open the Move to iOS app on your Android device. Introduction to iPhone Draft . iPhone User Guide Page 7 of 1,118 Set up cellular service and connect to Wi-Fi Install a physical SIM card or use an eSIM from your carrier to connect to your cellular network. To check if your iPhone is connected to your cellular plan, go to Settings > Cellular. To co n n e c t yo u r i P h o n e t o yo u r h o m e W i - F i n e t wo r k , g o t o S e t t i n g s > Wi-Fi, turn on Wi-Fi, then choose your network. iPhone automatically connects to your Wi-Fi network whenever you’re home. Sign in with your Apple ID Your Apple ID is the account you use to access Apple ser vices such as Apple Music, FaceTime, iCloud, and iMessage. If you don’t have an Apple ID, you can create one. Draft . iPhone User Guide Page 8 of 1,118 To s i g n i n w i t h yo u r A p p l e I D, g o t o S e t t i n g s > Sign in to your iPhone. To verify that you’re signed in, go to Settings > [your name]; your Apple ID appears below your name. Set up Face ID or Touch ID You can use Face ID (face recognition) or Touch ID (your finger print) to securely unlock your iPhone, sign in to many apps, and make purchases. For your security, Face ID and To u c h I D d a t a d o e s n ’ t l e ave yo u r d e v i c e a n d i s n ’ t s ave d a ny w h e re e l s e . Depending on your iPhone model, do one of the following: Set up Face ID: Go to Settings > Face ID & Passcode > tap Set up Face ID, then follow the onscreen instructions. Set up Touch ID: Go to Settings > Touch ID & Passcode > tap Add a Fingerprint, then follow the onscreen instructions. Draft . iPhone User Guide Page 9 of 1,118 Turn on Find My iPhone You can locate your iPhone if it ’s ever lost or stolen. Go to Settings > [your name] > Find My, tap Find My iPhone, then turn on Find My iPhone. You can see the location of your devices in the Find My app . If you lose your iPhone and don’t have access to the Find My app, you can locate your device using Find iPhone on . Draft . iPhone User Guide Page 10 of 1,118 Back up your data with iCloud iCloud helps you keep your important info safe and in sync across your devices. If you replace or lose your iPhone, or it’s damaged or stolen, your photos, videos, and more remain secure in iCloud. To t u r n o n o r c h a n g e t h e fe a t u re s yo u wa n t t o u s e w i t h i C l o u d , g o t o S e t t i n g s > [your name] > iCloud. Want to learn more? Check out , , , , and . Not all features are available for all iPhone models. Turn on and set up iPhoneSet up cellular service Connect iPhone to the internetLocate a device in Find MyUse iCloud on iPhone Draft . iPhone User Guide Page 11 of 1,118 Make your iPhone your own Keep your favorite features handy Some iPhone features—like the flashlight, timer, or calculator—are just a swipe away in Control Center. To quickly open Control Center on an iPhone with Face ID, swipe down from the top-right edge; on an iPhone with a Home button, swipe up from the bottom of the screen. You can add more features—like the alar m or magnifier—to Control Center in Settings > Control Center. Draft . iPhone User Guide Page 12 of 1,118 Personalize your Lock Screen You can showcase a favorite photo, add filters, widgets, and even change the font of the date and time. To g e t s t a r t e d , t o u c h a n d h o l d t h e Lo c…
Text truncated - open the document above for the full version.
Users Manual
8/12/22, 2:01 PMiPhone User Guide Page 172 of 1,118 Move apps and widgets around on your iPhone 1. To u c h a n d h o l d a ny a p p o r w i d g e t o n t h e H o m e S c re e n , t h e n t a p E d i t H o m e S c re e n . The apps begin to jiggle. 2. Drag an app to one of the following locations: Another location on the same page Another Home Screen page Drag the app or widget to the right edge of the screen. You might need to wait a second for the new page to appear. The dots above the Dock show how many pages you have and which one you’re viewing. 3. When you’re finished, press the Home button (on an iPhone with a Home button) or tap Done (on other iPhone models). Draft 8/12/22, 2:01 PMiPhone User Guide Page 173 of 1,118 Reset the Home Screen and apps to their original layout 1. Go to Settings > General > T ransfer or Reset iPhone. 2. Ta p R e s e t , t a p R e s e t H o m e S c r e e n L ayo u t , t h e n t a p R e s e t H o m e S c r e e n . Any folder s you’ve created are removed, and apps you’ve downloaded are arranged alphabetically after apps that came with your iPhone. Remove apps from iPhone You can easily remove apps from your iPhone. If you change your mind, you can download the apps again later. Remove apps Do any of the following: Remove an app from the Home Screen: To u c h a n d h o l d t h e a p p o n t h e H o m e S c re e n , tap Remove App, then tap Remove from Home Screen to keep it in App Library, or tap Delete App to delete it from iPhone. Delete an app from App Library and Home Screen: To u c h a n d h o l d t h e a p p i n A p p Library, tap Delete App, then tap Delete. (See .) If you change your mind, you can you’ve removed. In addition to removing third-party apps from the Home Screen, you can remove the following built-in Apple apps that came with your iPhone: (Contact information remains available through Phone, Messages, Mail, FaceTime, and other apps. To remove a contact, you must restore Contacts.) Find your apps in App Library redownload apps Books Calculator Calendar Compass Contacts FaceTime Draft 8/12/22, 2:01 PMiPhone User Guide Page 174 of 1,118 (Removing this app doesn’t turn off location sharing or Find My for your device or items—it just removes the ability to view locations in the Find My app on that device.) Note: When you remove a built-in app from your Home Screen, you also remove any related user data and configuration files. Removing built-in apps from your Home Screen can affect other system functionality. See the Apple Support article . Files Find My Home iTunes Store Mail Maps Measure Music News Notes Podcasts Reminders Shortcuts Stocks Tips Translate TV Voice Memos Watch Weather Delete built-in Apple apps on your iOS 12, iOS 13, or iPadOS device or Apple Watch Draft 8/12/22, 2:01 PMiPhone User Guide Page 175 of 1,118 Use and customize Control Center on iPhone Control Center on iPhone gives you instant access to useful controls—including airplane mode, Do Not Disturb, a flashlight, volume, screen brightness—and apps. Open Control Center On an iPhone with Face ID: Swipe down from the top-right edge. To close Control Center, swipe up from the bottom. On an iPhone with a Home button: Swipe up from the bottom. To close Control Center, swipe down or press the Home button. Access more controls in Control Center Many controls offer additional options. To see available options, touch and hold a control. For example, you can do the following in Control Center: To u c h a n d h o l d t h e t o p - l e f t g ro u p o f c o n t ro l s , t h e n t a p to open the AirDrop options. To u c h a n d h o l d to take a selfie, take a photo, or record a video. Draft 8/12/22, 2:01 PMiPhone User Guide Page 176 of 1,118 Add and organize controls You can customize Control Center by adding more controls and shor tcuts to many apps, such as Calculator, Notes, Voice Memos, and more. 1 . Go to Settings > Control Center . 2. To a d d o r re m ove c o n t ro l s , t a p or next to a control. 3. To re a r r a n g e c o n t ro l s , t o u c h next to a control, then drag it to a new position. Te m p o r a r i l y d i s c o n n e c t f r o m a W i - F i n e t wo r k In Control Center, tap ; to reconnect, tap it again. To s e e t h e n a m e o f t h e c o n n e c t e d W i - F i n e t wo r k , t o u c h a n d h o l d . Draft 8/12/22, 2:01 PMiPhone User Guide Page 177 of 1,118 Because Wi-Fi isn’t turned off when you disconnect from a network, AirPlay and AirDrop still work, and iPhone joins known networks when you change locations or restart iPhone. To t u r n o f f W i - F i , g o t o S e t t i n g s > Wi-Fi. (To turn on Wi-Fi again in Control Center, tap .) For information about turning Wi-Fi on or off in Control Center while in airplane mode, see . Te m p o r a r i l y d i s c o n n e c t f r o m B l u e t o o t h d e v i c e s In Control Center, tap ; to allow connections, tap the button again. Because Bluetooth isn’t turned off when you disconnect from devices, location accuracy and other services are still enabled. To turn off Bluetooth, go to Settings > Bluetooth, then turn off Bluetooth. To turn on Bluetooth again in Control Center, tap . For information about turning Bluetooth on or off in Control Center while in airplane mode, see . Turn off access to Control Center in apps Go to Settings > Control Center, then turn off Access Within Apps. Change or lock the screen orientation on iPhone Many apps give you a different view when you rotate iPhone. Choose iPhone settings for travel Choose iPhone settings for travel Draft 8/12/22, 2:01 PMiPhone User Guide Page 178 of 1,118 Lock or unlock the screen orientation You can lock the screen orientation so that it doesn’t change when you rotate iPhone. Open Control Center, then tap . When the screen orientation is locked, appears in the status bar (on supported models). Draft 8/12/22, 2:01 PMiPhone User Guide Page 179 of 1,118 Set up Focus, notifications, and Do Not Disturb View and respond to notifications on iPhone Notific…
Text truncated - open the document above for the full version.
Users Manual
8/12/22, 2:02 PMiPhone User Guide Page 463 of 1,118 Maps View maps on iPhone In the Maps app , you can find your location on a map and zoom in and out to see the detail you need. On supported models and in select cities, Maps provides enhanced detail for elevation, roads, trees, buildings, landmarks, and more. (For availability, see Detailed City Experience on the .) WARNING: For important information about navigation and avoiding distractions that could lead to dangerous situations, see . iOS and iPadOS Feature Availability website Important safety information for iPhone Draft 8/12/22, 2:02 PMiPhone User Guide Page 464 of 1,118 Allow Maps to use your precise location To f i n d yo u r l o c a t i o n a n d p rov i d e a c c u r a t e d i re c t i o n s , i P h o n e m u s t b e c o n n e c t e d t o t h e internet, and Precise Location must be on. If Maps displays a message that Location Services is off: Ta p t h e m e s s a g e , t a p Tu r n On in Settings, then turn on Location Services. If Maps displays a message that Precise Location is off: Ta p t h e m e s s a g e , t a p Tu r n O n in Settings, tap Location, then turn on Precise Location. Cellular data rates may apply (see ). Note: To o b t a i n u s e f u l l o c a t i o n - re l a t e d i n fo r m a t i o n i n M a p s , l e ave S i g n i f i c a n t Lo c a t i o n s turned on in Settings > Privacy & Security > Location Services > System Services. Show your current location Ta p . Your position is marked in the middle of the map. The top of the map is nor th. To show your heading instead of north at the top, tap . To re s u m e s h ow i n g n o r t h , t a p or . Choose the right map The button at the top right of a map indicates if the current map is for exploring , driving , riding transit , or viewing from a satellite . To c h o o s e a d i f fe re n t m a p , do the following: 1 . Ta p t h e b u t t o n a t t h e t o p r i g h t . 2. Choose another map type, then tap . View a 3D map On a 2D map, do one of the following: Drag two fingers up. On the Satellite map, tap 3D near the top right. On supported models and in select cities, tap 3D near the top right. (See Detailed City Experience on the .) On a 3D map, you can do the following: Adjust the angle: Drag two fingers up or down. View or change cellular data settings on iPhone iOS and iPadOS Feature Availability website Draft 8/12/22, 2:02 PMiPhone User Guide Page 465 of 1,118 See buildings and other small features in 3D: Zoom in. Return to a 2D map: Tap 2D near the top right. Draft 8/12/22, 2:02 PMiPhone User Guide Page 466 of 1,118 Move, zoom, or rotate a map or 3D globe Move around in a map: Drag the map. Zoom in or out: Double-tap (leaving your finger on the screen after the second tap), then drag up to zoom in or drag down to zoom out. Or, pinch open or closed on the map. On a 2D map, a scale appears in the upper left while you zoom. To change the unit of distance, go to Settings > Maps, then select In Miles or In Kilometers. Rotate the map: Touch and hold the map with two fingers, then rotate your fingers. To s h ow n o r t h a t t h e t o p o f t h e s c re e n a f t e r yo u ro t a t e t h e m a p , t a p . View the earth with an interactive 3D globe: Zoom out until the map changes to a globe. Drag the globe to rotate it, or zoom in or out to explore details for mountain ranges, deserts, oceans, and more (supported models). Draft 8/12/22, 2:02 PMiPhone User Guide Page 467 of 1,118 Add a name to Maps, or report an issue with Maps 1. Ta p yo u r p i c t u r e o r i n i t i a l s n ex t t o t h e s e a r c h f i e l d , t h e n t a p R e p o r t s . If ne ither your picture nor initials appears, tap Cancel next to the search field, or tap the search field, then tap Cancel. 2. Choose one of the options, then provide your information. Apple is committed to keeping personal information about your location safe and private. To l e a r n m o re , g o t o S e t t i n g s > Maps, then tap About Apple Maps and Privacy. Draft 8/12/22, 2:02 PMiPhone User Guide Page 468 of 1,118 Find places Search for places in Maps on iPhone You can use the Maps app to search for addresses, landmarks, services, and more. Search for a place Siri: Say something like: “Show me the Golden Gate Bridge.” . Or you can tap the search field (at the top of the search card), then begin typing. You can search in different ways. For example: Intersection (“8th and Market”) Area (“Greenwich Village”) Learn how to use Siri Draft 8/12/22, 2:02 PMiPhone User Guide Page 469 of 1,118 Landmark (“Guggenheim”) Zip code (“60622”) Business (“movies,” “restaurants San Francisco CA,” “Apple Inc New York”) If you get a list of results, scroll the list to see more. To learn about a place or get directions to it, tap a search result. Display, lengthen, or shorten the search card If you see a different kind of card instead of the search card, tap at the top right of the card. To s h ow m o re o r l e s s i n fo r m a t i o n o n t h e s e a rc h c a rd , d r a g t h e b o t t o m o f t h e s e a rc h c a rd down or up. Quickly find or delete recent searches To g e t a l i s t o f re c e n t s e a rc h re s u l t s , s c ro l l d ow n i n t h e s e a rc h c a rd t o Re c e n t s . To d e l e t e a n i t e m f ro m t h e l i s t , sw i p e t h e i t e m l e f t . O r t a p M o re d i re c t l y a b ove t h e l i s t , then do one of the following: Delete a group: Tap Clear above the group. Delete a single item: Swipe the item left. See , , , and . Find nearby attractions, restaurants, and services in Maps on iPhone You can use the Maps app to find nearby attractions, services, and more. Find a nearby attraction, restaurant, or other service Siri: Say something like: “Find a gas station” or “Find coffee near me.” . Ta p a c a t e g o r y l i ke G r o c e r y S t o r e s o r R e s t a u r a n t s i n t h e F i n d N e a r by s e c t i o n o f t h e search card. Delete recent directions in Maps on iPhoneDelete significant locati…
Text truncated - open the document above for the full version.
Users Manual
8/12/22, 2:02 PMiPhone User Guide Page 702 of 1,118 After content is moved to the Shared Library, it’s no longer in your Personal Library and is visible to all of the Shared Library participants. To move content from the Shared Library back to your Personal Library, follow the steps above, but tap Move to Personal Library instead of Move to Shared Library. Add photos and videos to the Shared Library directly from Camera When you open Camera, a Shared Library button appears at the top of the screen to let you switch between saving the photos and videos you take directly to your Personal Library or to the Shared Library. By default, Camera saves to your Personal Library. To switch, tap to save to the Shared Library; tap to switch back to your Personal Library. Draft 8/12/22, 2:02 PMiPhone User Guide Page 703 of 1,118 To t u r n t h e fe a t u re o n o r o f f a f t e r yo u c o m p l e t e t h e s e t u p p ro c e s s , g o t o S e t t i n g s > Photos > Shared Library > Sharing from Camera, then turn Sharing from Camera on or off (gr een is on). Add photos and videos when Shared Library participants are nearby When you set up or join a Shared Library, you can choose an option to automatically turn on the Shared Library button in Camera when other Shared Library participants are nearby, so you can always add the photos and videos you take together directly to the Shared Library. To d e t e c t w h e n p a r t i c i p a n t s o f yo u r S h a re d L i b r a r y a re n e a r by, e ve r yo n e n e e d s t o b e signed into their device with their Apple ID and have Bluetooth turned on in Settings > Bluetooth. Draft 8/12/22, 2:02 PMiPhone User Guide Page 704 of 1,118 To t u r n t h e fe a t u re o n o r o f f a f t e r yo u c o m p l e t e t h e s e t u p p ro c e s s , g o t o Settings > Photos > Shared Library > Sharing from Camera, then tap Share Automatically or Share Manually. Automatically add photos and videos taken at home When you set up or join a Shared Library, you can choose an option to automatically add photos and videos you take take at home to the Shared Library, go to Settings > Photos > Shared Library > Sharing from Camera, then turn on Share When At Home (green is on). Add photo and videos with sharing suggestions Sharing suggestions recommends photos you might want to add to your Shared Library such as photos you took with participants of the Shared Library, photos you took when participants were nearby, or photos of people you indicated interest in during the setup process. iPhone sends a notification to review sharing suggestions. Or, follow these steps: 1 . Open Photos, then tap For You. 2. Scroll down to For Your Shared Library, then tap See All. 3. Ta p M ove A l l o r t a p S e l e c t t o c h o o s e t h e p h o t o s yo u w a n t t o a d d t o t h e S h a r e d Library. Yo u can add additional people you’re interested in receiving sharing suggestions for the Shared Library. Go to Settings > Photos > Shared Library > Shared Library Suggestions, tap Add Other People, tap a person, then tap Add. The person doesn’t have to be a member of the Shared Library. See . To t u r n o f f s h a r i n g s u g g e s t i o n s , g o t o S e t t i n g s > P h o t o s > S h a re d L i b r a r y S u g g e s t i o n s , then turn off Shared Library Suggestions. For more information about accessing content in a Shared Library, see the Apple Support article, . Find and identify people in Photos on iPhone If you are missing photos after joining an iCloud Shared Photo Library Draft 8/12/22, 2:02 PMiPhone User Guide Page 705 of 1,118 Use iCloud Shared Photo Library on iPhone Use an iCloud Shared Photo Library in the Photos app to share photos and videos with friends and family. You and up to five participants can add photos and videos to the library, and any edits, comments, or favorites made to them is seen by everyone in real time. Content in a Shared Library is also added to everyone’s memories, featured photos, and in the Photos widgets so everyone can experience more complete memories. Photos and videos added to the Shared Library are separate from your Personal Library. You can easily switch between viewing the Shared Librar y, your Personal Librar y, or both in Photos. Switch Library views After you , you can switch between viewing your Personal Library, the Shared Library, or both libraries in the Photos app. 1 . Open Photos, then tap at the top right of the sc reen. 2. Ta p o n e o f t h e fo l l ow i n g v i e w o p t i o n s : View your Photos content and iCloud Shared Photo Library content: Both Libraries . View only your personal Photos content: Personal Library . View only iCloud Shared Photo Library content: Shared Library . 3. The library button in the top-right corner changes depending on which library you’re viewing; tap it w hen you want to switch between Share, Personal, or both libraries. Content that is part of the Shared Library displays a in the top-right corner of the photo or video thumbnail when you select the All Photos option at the bottom of the screen to browse your library. Make edits and changes to content in the Shared Library When you make the following changes to photos and videos in the Shared Library, they are kept up to date for everyone: Edits; see . Favorites, captions, keywords, or date and time adjustments; see . set up an iCloud Shared Photo Library Edit photos and videos on iPhone See photo and video information Draft 8/12/22, 2:02 PMiPhone User Guide Page 706 of 1,118 Deletes; see . Note: You receive notifications if content you added to the Shared Librar y is deleted. To t u r n o f f n o t i f i c a t i o n s , g o t o S e t t i n g s > Photos > Shared Library, then turn off Delete Notifications. If content you added is deleted, you can move it from the Recently Deleted album back to your Personal Library within 30 days. Search for Shared Library content You can find photos and video shared by specific par ticipants of the Shared Librar y. 1. T…
Text truncated - open the document above for the full version.
Contact Information
Applicant
Abhishek Rala(Regulatory Compliance Manager)
Technical Contact
UL Verification Services Inc.Mona Hua
[email protected]510-319-4000
47173 Benicia St · Fremont · United States
Test Firm
UL Verification Services Inc.Jay Kogoma
[email protected]510 319 4135
Technical Specifications
| # | Rule Parts | Frequency Range | Power Output | Emission | Tolerance |
|---|---|---|---|---|---|
| 18 | 25 | 2.49 GHz - 2.49 GHz | 83.00 mW | 8M93D7W | 1 ppm |
Other Applications from Apple Inc.
BCGA3545
Aug 25, 2026Desktop Computer
Equipment Class
NII - Unlicensed National Information Infrastructure TXBCGA3546
Aug 25, 2026Desktop Computer
Equipment Class
JBC - Part 15 Class B Computing Device/Personal ComputerBCGA3535
Aug 25, 2026Desktop Computer
Equipment Class
6VL - 15E 6 GHZ Very Low Power DeviceBCGA3534
Aug 25, 2026Desktop Computer
Equipment Class
JBC - Part 15 Class B Computing Device/Personal ComputerBCGA3577
May 22, 2026Wireless Headphones
Equipment Class
DTS - Digital Transmission System