BCG-E8961ASmartphone
Apple Inc.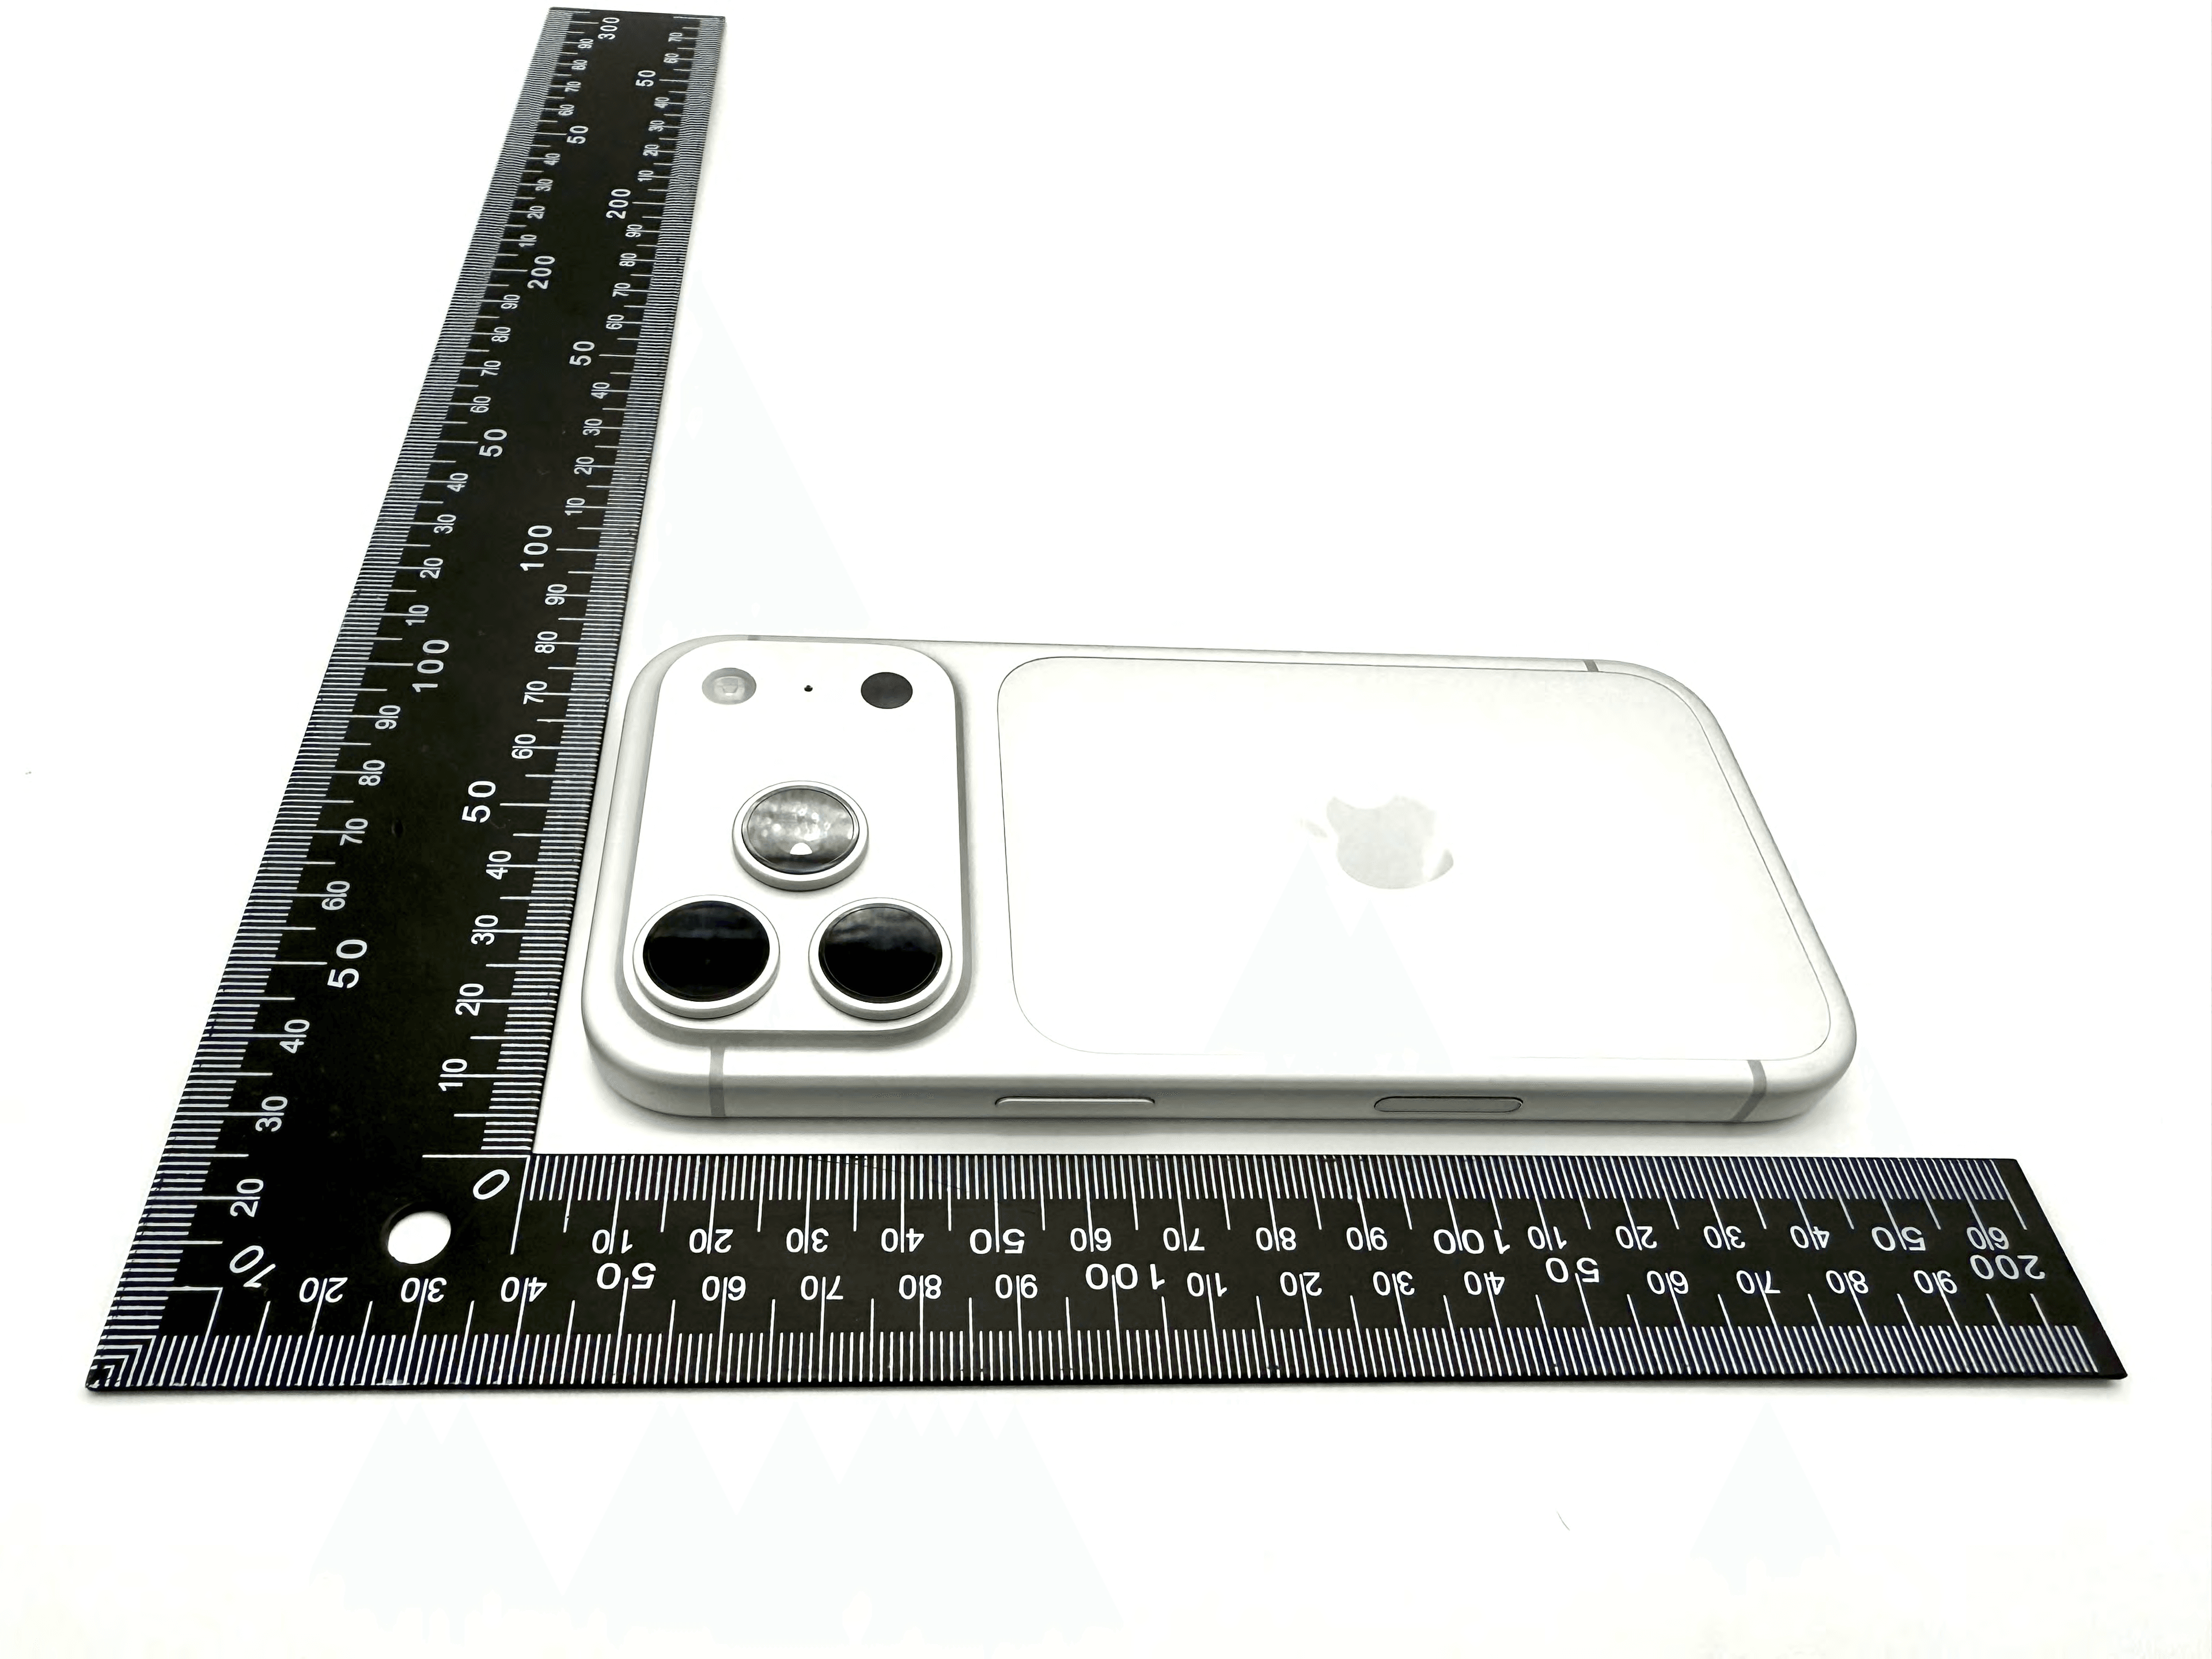
Click to zoom
Application Details
- Equipment Class
- 6VL - 15E 6 GHZ Very Low Power Device
- Date of Grant
- Sep 09, 2025
- Application Purpose
- Original Equipment
- Equipment Note
- Smartphone
- Frequency Range
- 6106.00000000 - 6420.00000000
- Company
- Apple Inc.
- Country
- United States
Documents & Files
Document Text
Text extracted from the exhibit documents filed with the FCC. Open a document above to read the original.
Users Manual
iPhone iPhone RF Exposure Information iPhone has been tested and meets applicable limits for radio frequency (RF) exposure. Specific Absorption Rate (SAR) refers to the rate at which the body absorbs RF energy. The SAR limit is 1.6 watts per kilogram in countries that set the limit averaged over 1 gram of tissue, and 2.0 watts per kilogram in countries that set the limit averaged over 10 grams of tissue. During testing, iPhone radios are set to their highest transmission levels and SAR is evaluated in real time, over time intervals as specified by applicable regulations. iPhone is evaluated in positions that simulate uses against the head, with no separation, and when worn or carried against the torso of the body, with 5mm separation. Apple uses the latest approved regulatory methods adopted in the industry for testing and managing device radios to meet RF exposure limits. These methods track radio usage and RF exposure in real time and manage power to ensure that the iPhone complies with applicable RF exposure limits. To reduce exposure to RF energ y, use a hands-free option, such as the built-in speakerphone, headphones or other similar accessories. Cases with metal parts may change the RF performance of the device, including its compliance with RF exposure guidelines, in a manner that has not been tested or certified. Although this device has been tested to determine RF exposure compliance in each band of operation, not all bands are available in all areas. Bands are dependent on your service providerʼs wireless and roaming networks. Regulatory Information
Users Manual
2. Turn Voice Control on or off. When you turn on Voice Control, appears in the sidebar to indicate that Voice Control is listening for commands. Start using commands To use Voice Control in CarPlay, just say a command. Voice Control: Say, for example, “Open Maps,” “Pan left,” or “Go back.” When you say multiple commands in quick succession, pause about half a second between commands. Pause or resume Voice Control Pause Voice Control when you donʼt want words you say to be interpreted as commands. Resume Voice Control when youʼre ready for it to listen for commands again. Voice Control: Say “Stop listening” or “Start listening.” Commands for navigation and interaction CommandDescription “Open [app]”Open an app. “Go Home”Return to the Home Screen. “Go back”Return to the previous screen (in apps with a Back button). “Tap [item]”Tap an item on the touchscreen. In some apps, if youʼre not sure what to call an unlabeled item, you can refer to it based on its position relative to other items. For example, if you see a row of icons with no text labels, you can try saying “Tap first” or “Tap second” to tap the first or second icon in the row, respectively. “Single tap”Tap the touchscreen. This can be useful in an app like Maps where some items are hidden after a period of inactivity. Tapping the screen causes hidden items to reappear. “Double-tap”Double-tap the touchscreen. This can be used in an app like Maps to zoom in on the map. “Double-tap [item]”Double-tap an item on the touchscreen. “Swipe left” or “Swipe right”Swipe between pages in CarPlay Home or CarPlay Dashboard. “Swipe up” or “Swipe down”Navigate up or down in a list. “Pan left,” “Pan right,” “Pan up,” or “Pan down” In an app like Maps, move around the map. Draft Draft “Open Siri”Activate Siri (instead of pressing the voice command button on the steering wheel). CommandDescription Use Voice Control in Maps If you use Voice Control in the Maps app in CarPlay and donʼt know what to call a button, you can use the button names in the table below. If a button has a text label, use the text shown as the name of the button. For example, to tap a button labeled Go, just say “Tap Go.” ButtonName Zoom In Zoom Out Pan Tracking This button may appear as , , or , depending on the current setting. Overview or Route Overview Expand or Up Collapse or Down Close or Dismiss Report All Guidance or Speaker Alerts Only Draft Draft No Guidance or Mute Siri or Dictation Keyboard ButtonName To learn more about using the Maps app in CarPlay, see Get turn-by-turn directions, Change the map view, and Report traffic incidents. Use Voice Control in Music If you use Voice Control in the Music app in CarPlay and donʼt know what to call a button, you can use the button names in the table below. If a button has a text label, use the text shown as the name of the button. For example, to tap a button labeled Cancel, just say “Tap Cancel.” ButtonName Play Pause Fast Forward Rewind Shuffle Repeat Autoplay Favorite More Go back List Draft Draft Adjust settings for the side or Home button on iPhone You can adjust accessibility settings for the side button (on an iPhone with Face ID) or Home button (on other iPhone models). 1. Go to Settings > Accessibility, then tap Side Button (on an iPhone with Face ID ) or Home Button (on an iPhone with Touch ID). 2. Set any of the following: Click Speed: Choose the speed required to double-click or triple-click the button—Default, Slow, or Slowest. Press and Hold to Speak: Choose whether Siri responds when you press and hold the button. Rest Finger to Open: On an iPhone with Touch ID, you can unlock and open iPhone by resting your finger on Touch ID. Home Button Haptic: On an iPhone with Touch ID, you can choose how it feels when you press it. Tap Home Button Haptic, tap an option, then press the Home button to try it out. Tap Done when the option you like best is selected. On an iPhone with Face ID, you can also use AssistiveTouch or use Switch Control to confirm payments with Face ID instead of double-clicking the side button. Adjust accessibility settings for the Camera Control on iPhone On supported models, you can change the pressure required to lightly press the Camera Control or the speed required to lightly double-press it. You can also change the gesture you use to access controls like Zoom or Depth, disable that gesture, or disable the Camera Control entirely. 1. Go to Settings > Accessibility > Camera Control. 2. Do any of the following: Disable the Camera Control entirely: Turn off Camera Control. Use a light press gesture to access controls: Turn Light-Press on. Turn it off to disable the gesture. Use a swipe gesture to access controls: Turn on Swipe. Turn it off to disable the gesture. Adjust the pressure required to lightly press the Camera Control: Choose a firmness option below Light-Press Force. You can practice the gesture to try out the pressure you set. Adjust the speed required to lightly double-press the Camera Control: Below Double Light-Press Speed, choose how fast you need to press for iPhone to recognize a light double press. You can also customize the Camera Control to open the Magnifier app. See Use the Camera Control to open another app. Draft Draft Use buttons on the Apple TV Remote on iPhone On the Apple TV Remote on iPhone, you can use buttons instead of swipe gestures. Go to Settings > Accessibility > Apple TV Remote, then turn on Directional Buttons. Make the pointer easier to see when using a mouse or trackpad with iPhone If you have difficulty seeing or following the pointer when you use a mouse or trackpad with iPhone, you can change its size and color so itʼs easier to locate on the screen. Go to Settings > Accessibility > Pointer Control, then adjust any of the following: Increase Contrast Automatically Hide Pointer Color Pointer Size Scrolling Speed To customize the buttons of the pointing device, go to Settings > Accessibility > Touch > AssistiveTouch > Devices. Adjust the onscreen and extern…
Text truncated - open the document above for the full version.
Users Manual
3. Tap Hide [name]. Tip: If you prefer, you can feature a person or pet less frequently instead of removing them. See Show a person less frequently or not at all. When you use iCloud Photos, People & Pets is kept up to date on all your devices. Find group photos and videos on iPhone The Photos app recognizes groups of people and pets who often appear together in pictures and videos, and sorts them into group collections. For example, if you have many pictures of your family or a group of friends, Photos creates a collection for each of those groups. Find group photos and videos 1. Go to the Photos app on your iPhone. 2. Tap Collections, then tap People & Pets. 3. Below Groups, swipe to view your groups or tap See All. 4. Select a group to view all the photos and videos in that group. Tip: To add someone to the group, tap <NEW FILTER BUTTON TO COME>, tap View Options, then tap Other People. To share the photos in the group, tap , then tap Share. Create a group collection You can create a group collection with any combination of people and pets from the People & Pets collection. 1. Go to the Photos app on your iPhone. 2. Tap Collections, then tap People & Pets. 3. To the right of Groups, tap . 4. Select the people and pets you want in the group, then tap the checkmark at the top of the screen. 5. Tap the names of the group members (or enter a custom name for the group), then tap Create. Edit or delete a group collection Draft Draft 1. Go to the Photos app on your iPhone. 2. Tap Collections, then tap People & Pets. 3. Below Groups, touch and hold the group you want to edit, then do any of the following: Rename the group: Tap Edit Name and People, enter a new name, then tap Done. Remove someone from the group: Tap Edit Name and People, then tap at the top-left corner of their picture. Add someone to the group: Tap Edit Name and People, then tap Add People & Pets. Select who you want to add, then tap the checkmark at the top of the screen. Edit the group photo: Tap Edit Name and People, then tap the photo icon in the bottom-right corner of the current group photo. Select a new photo, then tap Done. Delete the group: Tap Delete This Group. Change the order of group collections 1. Go to the Photos app on your iPhone. 2. Tap Collections, tap People & Pets, then tap Groups. 3. Touch and hold a group, then drag it to a new position. Browse photos by location on iPhone The Photos app creates collections of your photos and videos based on where they were taken. You can use the Map view to see photos taken in a specific location, look for photos taken nearby, and see collections of photos on a map. Browse photos and videos by location 1. Go to the Photos app on your iPhone. 2. Tap Collections, then tap the Map collection below Pinned. Only pictures and videos that have embedded location information (GPS data) are included. Tip: Pinch the map to zoom in and out, or drag to see more locations. Draft Draft See where a photo or video was taken 1. Go to the Photos app on your iPhone. 2. Open a photo, then swipe up or tap . 3. Tap the map or address link to see more details. Tip: To see more photos from this location, tap Show Nearby Photos. To add or change the location or address where a photo was taken, see Change the date, time, or location of a photo or video. Find recently saved photos on iPhone You can find all the photos youʼve saved from other apps—like Messages, Safari, and Mail—in the Recently Saved collection. Photos and videos that were sent to you using AirDrop also appear here. 1. Go to the Photos app on your iPhone. 2. Do any of the following: Tap Collections, then tap the Recently Saved collection below Pinned. Tip: You can also find the Recently Saved collection below Utilities along with the Recently Viewed and Recently Shared collections. Tap Library, tap <NEW FILTER ICON TO COME>, then tap Sort by Recently Added. Tip: To see photos you saved today, tap Collections, then tap the Saved Today collection below Recent Days. Find your travel photos on iPhone In the Photos app, you can quickly find photos and videos from your trips grouped into collections, based on location data from the photos. 1. Go to the Photos app on your iPhone. 2. Tap Collections, scroll down to Trips, then tap the trip collection you want to view. Draft Draft 3. To find travel photos from an older trip, tap Trips, then choose a year to browse. Find receipts, QR codes, recently edited photos, and more on iPhone In the Photos app, you can find collections of photos and videos organized into different categories in Utilities. For example, you can revisit photos you recently edited, saved, viewed, or shared, or find photos based on their content—like documents, receipts, handwriting, illustrations, and QR codes. Find receipts, QR codes, and more in Utilities 1. Go to the Photos app on your iPhone. 2. Tap Collections, scroll down, then tap Utilities. 3. Tap the collection you want to view. Note: Some Utilities collections, like Hidden and Recently Deleted, are locked by default for your privacy. See Lock and unlock the Recently Deleted and Hidden collections. Reorder the Utilities list You can reorder the Utilities list to help you find the collections you access most often. 1. Go to the Photos app on your iPhone. 2. Tap Collections, scroll down, then tap Utilities. 3. Tap Edit, touch and hold the collection you want to move, then drag it to a new position. To undo your changes, tap Reset. 4. Tap Done. Find recovered items and save or delete them If a photo or video wasnʼt saved properly and couldnʼt be added to your library, you may find a copy of it in Recovered. 1. Go to the Photos app on your iPhone. 2. Tap Collections, scroll down, then tap Utilities. Draft Draft 3. Tap Recovered, then tap the photo or video you want to recover. 4. Tap Permanently Delete or Restore to Library. Important: When you delete a recovered photo or video, itʼs deleted permanently. You canʼt recover photos that you deleted from the Recovered …
Text truncated - open the document above for the full version.
Users Manual
Add diagrams to a Freeform board on iPhone You can add diagrams to a Freeform board. Create a diagram You can easily create a connected diagram, such as a flowchart, by using connectors and the shape picker in Freeform. 1. Go to the Freeform app on your iPhone. 2. Open a board, or tap to start a new one. 3. Tap , tap View Options, then then tap Show Connectors. 4. Begin your diagram by tapping , , or to add an item. 5. Drag a connector arrow to where you want the next part of your diagram. When you let go, a small menu of shapes opens. Tap to select the next shape you want to add. (Tap to browse other shapes.) 6. Tap when youʼre finished diagramming. You donʼt see connector arrows when you select a line or multiple items. Draft Draft Tip: You can quickly add equally spaced, aligned shapes with connectors. Tap to select a shape, then touch and hold a connector arrow. As you hold, a preview of the shape and line appears. When you let go, the shape and line are added to the board. Connect two items with a line After you add two items to a Freeform board, you can add a line between them. 1. Select two items on your board. 2. Do one of the following: Tap in the formatting tools at the bottom, then tap Add Connection Line. Tap , then tap . Change connection points After you add a connection line to a diagram on a Freeform board, you can change how it connects. 1. Tap to select a connection line, then drag one of its endpoints (the blue dots). 2. Attach the endpoint to another item on the board at a new connection point. You can attach a line to an item or (for some object types) near it. A filled circle appears when a connection is possible. Add images, scans, links, and other files to a Freeform board on iPhone You can add any photo or video to a Freeform board, or take a new one with your iPhone camera. You can also add any kind of file to your board by scanning, linking, or inserting it. Add a photo, video, sticker, link, or other file 1. Go to the Freeform app on your iPhone. 2. Open a board, or tap to start a new one. Draft Draft 3. Do one of the following: Copy the item to your Clipboard, tap an empty space, then, when a menu appears, tap Paste. Tap , then tap an option. 4. Tap when youʼre finished. Double-tap any media item—photo, video, or other file—to preview it. Note: You can insert files saved on your iPhone or in iCloud Drive. For most file types, Freeform makes a copy of the inserted file. When you add a link to a collaborative Keynote presentation, Numbers spreadsheet, or Pages document, participants in your Freeform board can tap the card to move to the shared file in iCloud. (If you want others to be able to collaborate on the file, you must save it in iCloud.) Scan and add a document You can scan a paper document and add it to your board as a PDF without leaving Freeform. 1. Go to the Freeform app on your iPhone. 2. Open a board, or tap to start a new one. 3. Tap , then tap Scan Document. 4. Position the document so that it appears on the screen, then tap or press a volume button. 5. Drag the corners to select the area you want in the scanned document, then tap Keep Scan. 6. Scan additional pages, then tap Save when youʼre done. A card with an image of the first page of your scan appears on your board. Tip: To save your scan to iCloud Drive or on your iPhone, select the card, tap , tap , then tap Save to Files. Format a photo or video 1. Go to the Freeform app on your iPhone. 2. Open a board with a photo or video in it. Draft Draft 3. Tap a photo or video to open its formatting tools near the bottom of the screen, then do any of the following: Crop or mask the photo: Tap . Remove the photoʼs background: Tap , then tap Remove Background. If the background of the photo canʼt be made transparent, Remove Background isnʼt available. Tip: You can also paste an image without a background. See Lift a subject from the photo or video background. Add a shadow, round the corners, add a description, and more: Tap , then choose an option. Replace the photo or video: Select the photo or video, tap or , tap Replace, then select a replacement. Preview the photo or video: Tap , or double-tap the photo or video. To preview a movie in full screen, double-tap it. Put an image inside a shape You can use a shape as a mask or frame for an image. For example, you can put your photo inside a circle. 1. Go to the Freeform app on your iPhone. 2. Open a board, or tap to start a new one. 3. Add a photo or other image to the board. 4. Tap , then choose a shape. 5. Position the shape over the image, then select both it and the image. (See Select, align, and group multiple items on a board.) 6. Tap in the formatting tools at the bottom, then tap Mask with Shape. Or drag an image onto a shape to use it as a frame. To remove it from the shape, select the masked image, tap in the formatting tools at the bottom, then tap Reset Mask. Tip: To add a photo, video, file, or link to a Freeform board from supported apps (such as Notes, Photos, Safari, and more), select it and tap in the other app, tap the Freeform app icon, then tap New Board or the name of an existing board. (If you want others to be able to collaborate on a file, you must save it in iCloud.) Apply consistent styles and formatting in Freeform on iPhone When you want the text in your sticky notes, shapes, or text boxes to have a consistent look in Freeform—for example, font, size, and color—you can copy the style from one item and paste it in another. You can also save styles. 1. Go to the Freeform app on your iPhone. 2. Tap an item on a board and make any adjustments to the formatting—so it has the style you want to copy. 3. When you have an item thatʼs formatted in a style you like, tap it to show its formatting tools. Draft Draft 4. Tap in the formatting tools at the bottom, tap Style, then tap Copy Style. 5. Tap to select and show the formatting tools for an item whose style you want to change. 6. Tap , tap Style, then tap Paste Style. Depending on…
Text truncated - open the document above for the full version.
Users Manual
iPhone User Guide Welcome iPhone User Guide Everything you need to know about iPhone Get started Set up a few basic features before you start using your new iPhone. Setup basics Add a personal touch Your iPhone can reflect your personal style and preferences. Showcase your favorite photos on the Lock Screen, add widgets to the Home Screen, adjust text size, ringtones, and more. Make your iPhone your own Draft Draft Take your best shot Use your iPhone to capture the moment, wherever you are. Learn how to take photos and videos on the fly, and use other camera features on your iPhone. Take great photos and videos Stay connected iPhone makes it easy to reach the people important to you. Add them to your contacts so you have their information everywhere you need it—then catch up with text messages, phone calls, or FaceTime. Keep in touch with friends and family Draft Draft All in the family You and your family members can use Family Sharing to share eligible app purchases, your location, and even health data. You can also choose a family member or someone you trust to help you regain access to your iPhone if you forget your passcode. Share features with your family Simplify your day Learn how to use the apps on your iPhone to direct you to the places you go most often, pay for your morning coffee, remind you of important tasks, and even lock your front door automatically when you leave home. Use iPhone for your daily routines Pro tips Check out these tips from Apple Support advisors to keep your iPhone, and the information you keep on it, safe and secure. Expert advice from Apple Support To explore the iPhone User Guide, click Table of Contents at the top of the page, or enter a word or phrase in the search field. Introducing iPhone Draft Draft iPhone models iPhone models compatible with iOS 26 This guide helps you get started using iPhone and discover all the amazing things it can do with iOS 26, which is compatible with the following models: iPhone 11 iPhone 11 Pro iPhone 11 Pro Max iPhone 12 mini iPhone 12 iPhone 12 Pro iPhone 12 Pro Max iPhone 13 mini iPhone 13 iPhone 13 Pro iPhone 13 Pro Max iPhone 14 iPhone 14 Plus iPhone 14 Pro iPhone 14 Pro Max iPhone 15 iPhone 15 Plus iPhone 15 Pro iPhone 15 Pro Max iPhone 16 iPhone 16 Plus iPhone 16 Pro iPhone 16 Pro Max iPhone 16e iPhoneX iPhoneXX iPhoneXXX iPhoneXXXX iPhone SE (2nd generation) iPhone SE (3rd generation) Your features and apps may vary depending on your iPhone model, region, language, and carrier. To find out which features are supported in your region, see the iOS and iPadOS Feature Availability website. Note: Apps and services that send or receive data over a cellular network, or that answer incoming calls, may incur additional fees. Contact your carrier for information about your service plan and fees. Draft Draft Identify your iPhone model and iOS version 1. Go to the Settings app on your iPhone. 2. Tap General, then tap About. See Get information about your iPhone. To determine your iPhone model from the physical details, see the Apple Support article Identify your iPhone model. Get iOS updates To update your iPhone to the latest iOS software compatible with your model, do the following: 1. Go to the Settings app on your iPhone. 2. Tap General, then tap Software Update. See Update iOS. iPhone 11 Learn the location of the cameras, buttons, and other essential hardware features on iPhone 11. Front camera Side button SIM tray Lightning connector Volume buttons Ring/Silent switch Rear cameras Flash Get started with iPhone 11 Turn on and set up iPhone Learn gestures for iPhone models with Face ID Camera basics Qi-certified wireless chargers Whatʼs new in iOS 26 iPhone 11 Pro Learn the location of the cameras, buttons, and other essential hardware features on iPhone 11 Pro. Draft Draft Front camera Side button SIM tray Lightning connector Volume buttons Ring/Silent switch Rear cameras Flash Get started with iPhone 11 Pro Turn on and set up iPhone Learn gestures for iPhone models with Face ID Camera basics Qi-certified wireless chargers Whatʼs new in iOS 26 iPhone 11 Pro Max Learn the location of the cameras, buttons, and other essential hardware features on iPhone 11 Pro Max. Front camera Side button SIM tray Lightning connector Volume buttons Ring/Silent switch Rear cameras Flash Get started with iPhone 11 Pro Max Turn on and set up iPhone Learn gestures for iPhone models with Face ID Camera basics Qi-certified wireless chargers Whatʼs new in iOS 26 iPhone SE (2nd generation) Draft Draft Learn the location of the cameras, buttons, and other essential hardware features on iPhone SE (2nd generation). Front camera Side button SIM tray Home button/Touch ID Lightning connector Volume buttons Ring/Silent switch Rear camera Flash Get started with iPhone SE Turn on and set up iPhone Learn basic gestures Camera basics Qi-certified wireless chargers Whatʼs new in iOS 26 iPhone 12 mini Learn the location of the cameras, buttons, and other essential hardware features on iPhone 12 mini. Front camera Side button Lightning connector SIM tray Volume buttons Ring/Silent switch Rear cameras Flash Get started with iPhone 12 mini Turn on and set up iPhone Learn gestures for iPhone models with Face ID Camera basics MagSafe chargers and battery packs Whatʼs new in iOS 26 Draft Draft iPhone 12 Learn the location of the cameras, buttons, and other essential hardware features on iPhone 12. Front camera Side button Lightning connector SIM tray Volume buttons Ring/Silent switch Rear cameras Flash Get started with iPhone 12 Turn on and set up iPhone Learn gestures for iPhone models with Face ID Camera basics MagSafe chargers and battery packs Whatʼs new in iOS 26 iPhone 12 Pro Learn the location of the cameras, buttons, and other essential hardware features on iPhone 12 Pro. Front camera Side button Lightning connector SIM tray Volume buttons Ring/Silent switch Rear cameras Flash LiDAR Scanner Get started with iPhone 12 Pro Turn on and set up iPhone Learn ge…
Text truncated - open the document above for the full version.
Test Report
REPORT NO: 15496249-E12V2 DATE: 2025-08-19 Page 389 of 615 UL VERIFICATION SERVICES INC. 47173 Benicia Street, Fremont, CA 94538, USA TEL:(510) 319-4000 FAX:(510) 661-0888 This report shall not be reproduced except in full, without the written approval of UL Verification Services Inc. 2TX SDM MODE (FCC + IC) – SU MODE LOW CHANNEL ANT 6 6535 LOW CHANNEL ANT 5 6535 MID CHANNEL ANT 6 6715 MID CHANNEL ANT 5 6715 HIGH CHANNEL ANT 6 6855 HIGH CHANNEL ANT 5 6855 REPORT NO: 15496249-E12V2 DATE: 2025-08-19 Page 390 of 615 UL VERIFICATION SERVICES INC. 47173 Benicia Street, Fremont, CA 94538, USA TEL:(510) 319-4000 FAX:(510) 661-0888 This report shall not be reproduced except in full, without the written approval of UL Verification Services Inc. 9.9.6 802.11be EHT40 MODE IN THE UNII-7 BAND 1TX Antenna 6 MODE (FCC+IC) MOBILE – 26-Tones, RU Index 0 LOW CHANNEL 6565 MID CHANNEL 6685 HIGH CHANNEL 6845 REPORT NO: 15496249-E12V2 DATE: 2025-08-19 Page 391 of 615 UL VERIFICATION SERVICES INC. 47173 Benicia Street, Fremont, CA 94538, USA TEL:(510) 319-4000 FAX:(510) 661-0888 This report shall not be reproduced except in full, without the written approval of UL Verification Services Inc. 1TX Antenna 6 MODE (FCC+IC) MOBILE – 26-Tones, RU Index 9 MID CHANNEL 6685 1TX Antenna 6 MODE (FCC+IC) MOBILE – 26-Tones, RU Index 17 LOW CHANNEL 6565 MID CHANNEL 6685 HIGH CHANNEL 6845 REPORT NO: 15496249-E12V2 DATE: 2025-08-19 Page 392 of 615 UL VERIFICATION SERVICES INC. 47173 Benicia Street, Fremont, CA 94538, USA TEL:(510) 319-4000 FAX:(510) 661-0888 This report shall not be reproduced except in full, without the written approval of UL Verification Services Inc. 1TX Antenna 6 MODE (FCC+IC) MOBILE – SU MODE LOW CHANNEL 6565 MID CHANNEL 6685 HIGH CHANNEL 6845 REPORT NO: 15496249-E12V2 DATE: 2025-08-19 Page 393 of 615 UL VERIFICATION SERVICES INC. 47173 Benicia Street, Fremont, CA 94538, USA TEL:(510) 319-4000 FAX:(510) 661-0888 This report shall not be reproduced except in full, without the written approval of UL Verification Services Inc. 1TX Antenna 5 MODE (FCC+IC) MOBILE – 26-Tones, RU Index 0 LOW CHANNEL 6565 MID CHANNEL 6685 HIGH CHANNEL 6845 REPORT NO: 15496249-E12V2 DATE: 2025-08-19 Page 394 of 615 UL VERIFICATION SERVICES INC. 47173 Benicia Street, Fremont, CA 94538, USA TEL:(510) 319-4000 FAX:(510) 661-0888 This report shall not be reproduced except in full, without the written approval of UL Verification Services Inc. 1TX Antenna 5 MODE (FCC+IC) MOBILE – 26-Tones, RU Index 9 MID CHANNEL 6685 1TX Antenna 5 MODE (FCC+IC) MOBILE – 26-Tones, RU Index 17 LOW CHANNEL 6565 MID CHANNEL 6685 HIGH CHANNEL 6845 REPORT NO: 15496249-E12V2 DATE: 2025-08-19 Page 395 of 615 UL VERIFICATION SERVICES INC. 47173 Benicia Street, Fremont, CA 94538, USA TEL:(510) 319-4000 FAX:(510) 661-0888 This report shall not be reproduced except in full, without the written approval of UL Verification Services Inc. 1TX Antenna 5 MODE (FCC+IC) MOBILE – SU MODE LOW CHANNEL 6565 MID CHANNEL 6685 HIGH CHANNEL 6845 REPORT NO: 15496249-E12V2 DATE: 2025-08-19 Page 396 of 615 UL VERIFICATION SERVICES INC. 47173 Benicia Street, Fremont, CA 94538, USA TEL:(510) 319-4000 FAX:(510) 661-0888 This report shall not be reproduced except in full, without the written approval of UL Verification Services Inc. 2TX CDD MODE (FCC + IC) – 52-Tones, RU Index 37 LOW CHANNEL Ant 6 6565 LOW CHANNEL Ant 5 6565 MID CHANNEL ANT 6 6685 MID CHANNEL ANT 5 6685 HIGH CHANNEL ANT 6 6845 HIGH CHANNEL ANT 5 6845 REPORT NO: 15496249-E12V2 DATE: 2025-08-19 Page 397 of 615 UL VERIFICATION SERVICES INC. 47173 Benicia Street, Fremont, CA 94538, USA TEL:(510) 319-4000 FAX:(510) 661-0888 This report shall not be reproduced except in full, without the written approval of UL Verification Services Inc. 2TX CDD MODE (FCC + IC) – 52-Tones, RU Index 41 MID CHANNEL ANT 6 6685 MID CHANNEL ANT 5 6685 REPORT NO: 15496249-E12V2 DATE: 2025-08-19 Page 398 of 615 UL VERIFICATION SERVICES INC. 47173 Benicia Street, Fremont, CA 94538, USA TEL:(510) 319-4000 FAX:(510) 661-0888 This report shall not be reproduced except in full, without the written approval of UL Verification Services Inc. 2TX CDD MODE (FCC + IC) – 52-Tones, RU Index 44 LOW CHANNEL Ant 6 6565 LOW CHANNEL Ant 5 6565 MID CHANNEL ANT 6 6685 MID CHANNEL ANT 5 6685 HIGH CHANNEL ANT 6 6845 HIGH CHANNEL ANT 5 6845 REPORT NO: 15496249-E12V2 DATE: 2025-08-19 Page 399 of 615 UL VERIFICATION SERVI…
Text truncated - open the document above for the full version.
Contact Information
Applicant
Abhishek Rala(Regulatory Compliance Manager)
[email protected]Fax: 408-996-0275
Test Firm
UL Verification Services Inc.Jay Kogoma
Technical Specifications
| # | Rule Parts | Frequency Range | Power Output |
|---|---|---|---|
| 1 | 15E | 6.12 GHz - 7.12 GHz | 20.00 mW |
| 2 | 15E | 6.11 GHz - 6.42 GHz | 400.00 µW |
| 3 | 15E | 6.11 GHz - 6.42 GHz | 800.00 µW |
| 4 | 15E | 6.11 GHz - 6.42 GHz | 1.60 mW |
Other Applications from Apple Inc.
BCG-E9204A
Sep 09, 2026Smartphone
Equipment Class
6VL - 15E 6 GHZ Very Low Power DeviceBCGA3277
Sep 09, 2026Magnetic Charging Cable
Equipment Class
DCD - Part 15 Low Power Transmitter Below 1705 kHzBCGA3641
Sep 09, 2026Magnetic Charger
Equipment Class
DCD - Part 15 Low Power Transmitter Below 1705 kHzBCGA3669
Sep 09, 2026Magnetic Charger
Equipment Class
DCD - Part 15 Low Power Transmitter Below 1705 kHzBCG-E9193A
Sep 09, 2026Smartphone
Equipment Class
PCE - PCS Licensed Transmitter held to ear