HBW0454X3MyQ - Garage Door Opener
Chamberlain Group LLC, The
Click to zoom
Application Details
- Equipment Class
- DSS - Part 15 Spread Spectrum Transmitter
- Date of Grant
- Jun 06, 2022
- Application Purpose
- Original Equipment
- Date of Application
- Jun 02, 2022
- Equipment Note
- MyQ - Garage Door Opener
- Frequency Range
- 902.25000000 - 926.75000000
- Company
- Chamberlain Group LLC, The
- Country
- United States
Documents & Files
Document Text
Text extracted from the exhibit documents filed with the FCC. Open a document above to read the original.
Users Manual
Wi- Fi®LEDGarageDoorOpener USER'SGUIDE Models84501,84602,84505R,87504- 267,87802 FORRESIDENTIALUSEONLY • Pleasereadthisguideandtheenclosedsafetymaterialscarefully! • ThedoorWILLNOTCLOSEunlesstheProtectorSystem®isconnectedandproperlyaligned. • Periodicchecksofthegaragedooropenerarerequiredtoensuresafeoperation. • ThisgaragedooropenerisONLYcompatiblewithmyQ®andSecurity+2.0®accessories. • DONOTinstallonaone-piecedoorifusingdevicesorfeaturesprovidingunattendedclose. UnattendeddevicesandfeaturesaretobeusedONLYwithsectionaldoors. • Attachwarninglabelstothelocationindicatedonlabel. Downloadt hemyQ®Appt oSet UpanAccount andConnect Openandcloseyourdoor,getalertsandsetschedulesfromanywhere.Connectedsmartgaragedooropenersalsoreceivesoftwareupdatesto ensuretheopenerhasthelatestoperationalfeatures.Seepage6. ToregisteryourgaragedooropenertoreceiveupdatesandoffersfromLiftMaster,visitliftmaster.registria.comorusetheiconbelow: 1.Takeaphotoofthecameraicon includingthepoints(). 2.Senditinbytextingthephototo71403 (US)orvisitwww.liftmaster.photo (Global). Cont ent s UnattendedOperation2 ImportantInstallationInstructions3 Power3 ImportantSafetyInstructions4 ConnectWithYourSmartphone5 TesttheWi-Fi®SignalStrength5 Programming7 RemoteControl7 WirelessKeylessEntry7 HomeLink®7 ToErasetheMemory7 Camera8 SetUptheCamera8 Operation9 ToOpentheDoorManually9 BatteryBackup9 DoorControls10 AutomaticGarageDoorLock10 TheProtectorSystem®(SafetyReversingSensors)11 Adjustment12 Introduction12 Adjustment13 1-ProgramtheTravel13 2-AutomaticForceSetUp13 3-TesttheSafetyReversalSystem14 4-TesttheProtectorSystem®14 Maintenance15 Troubleshooting15 AutomaticGarageDoorOpenerSafety&MaintenanceGuide16 RepairParts20 Warranty20 myQ®SerialNumber Writedownthefollowinginformationforfuturereference: / / myQ ® Serial Number: Product Serial Number: Date of Purchase: myQ ® Serial Number Product Serial Number Safet ySymbolandSignalWord Review Thisgaragedooropenerhasbeendesignedandtestedtooffersafe serviceprovideditisinstalled,operated,maintainedandtestedin strictaccordancewiththeinstructionsandwarningscontainedinthis manual. WhenyouseetheseSafetySymbolsandSignalWordsonthefollowing pages,theywillalertyoutothepossibilityofseriousinjuryordeathif youdonotcomplywiththewarningsthataccompanythem.The hazardmaycomefromsomethingmechanicalorfromelectricshock. Readthewarningscarefully. Mechanical Electrical WhenyouseethisSignalWordonthefollowingpages,itwillalertyou tothepossibilityofdamagetoyourgaragedoorand/orthegarage dooropenerifyoudonotcomplywiththecautionarystatementsthat accompanyit.Readthemcarefully. WARNING:Thisproductcanexposeyoutochemicals includinglead,whichareknowntotheStateofCaliforniato causecancerorbirthdefectsorotherreproductiveharm. Formoreinformationgotowww.P65Warnings.ca.gov Unat t endedOperat ion TheTimer-to-Close(TTC)feature,themyQ®App,andmyQ®Garage DoorandGateMonitorareexamplesofunattendedcloseandaretobe usedONLYwithsectionaldoors.Anydeviceorfeaturethatallowsthe doortoclosewithoutbeinginthelineofsightofthedooris consideredunattendedclose.TheTimer-to-Close(TTC)feature,the myQ®App,andanyothermyQ®devicesaretobeusedONLYwith sectionaldoors. 2 Import ant Inst allat ionInst ruct ions IMPORTANTINSTALLATIONINSTRUCTIONS ToreducetheriskofSEVEREINJURYorDEATH: 1.READANDFOLLOWALLINSTALLATIONWARNINGSAND INSTRUCTIONS. 2.InstallgaragedooropenerONLYonproperlybalancedand lubricatedgaragedoor.AnimproperlybalanceddoormayNOT reversewhenrequiredandcouldresultinSEVEREINJURYor DEATH. 3.ALLrepairstocables,springassembliesandotherhardware MUSTbemadebyatraineddoorsystemstechnicianBEFORE installingopener. 4.DisableALLlocksandremoveALLropesconnectedtogarage doorBEFOREinstallingopenertoavoidentanglement. 5.Wherepossible,installthedooropener7feet(2.13m)ormore abovethefloor. 6.Mounttheemergencyreleasewithinreach,butatleast6feet (1.83m)abovethefloorandavoidingcontactwithvehiclesto avoidaccidentalrelease. 7.NEVERconnectgaragedooropenertopowersourceuntil instructedtodoso. 8.NEVERwearwatches,ringsorlooseclothingwhileinstallingor servicingopener.Theycouldbecaughtingaragedooror openermechanisms. 9.Installwall-mountedgaragedoorcontrol: • withinsightofthegaragedoor. • outofreachofsmallchildrenataminimumheightof5 feet (1.5 m)abovefloors,landings,stepsoranyotheradjacent walkingsurface. • awayfromALLmovingpartsofthedoor. 10.Placeentrapmentwarninglabelonwallnexttogaragedoor control. 11.Placemanualrelease/safetyreversetestlabelinplainviewon insideofgaragedoor. 12.Uponcompletionofinstallation,testsafetyreversalsystem. DoorMUSTreverseoncontactwitha1-1/2"(3.8 cm)highobject (ora2x4laidflat)onthefloor. 13.ToavoidSERIOUSPERSONALINJURYorDEATHfrom electrocution,disconnectALLelectricandbatterypower BEFOREperformingANYserviceormaintenance. 14.DONOTinstallonaone-piecedoorifusingdevicesorfeatures providingunattendedclose.Unattendeddevicesandfeatures aretobeusedONLYwithsectionaldoors. 15. SAVETHESE INSTRUCTIONS. Power TopreventpossibleSERIOUSINJURYorDEATHfromelectrocutionor fire: • BesurepowerisNOTconnectedtotheopener,anddisconnect powertocircuitBEFOREremovingcovertoestablishpermanent wiringconnection. • GaragedoorinstallationandwiringMUSTbeincompliancewith ALLlocalelectricalandbuildingcodes. • NEVERuseanextensioncord,2-wireadapter,orchangeplugin ANYwaytomakeitfitoutlet.Besuretheopenerisgrounded. Toreducetheriskofelectricshock,yourgaragedooropenerhasa groundingtypeplugwithathirdgroundingpin.Thisplugwillonlyfit intoagroundingtypeoutlet.Iftheplugdoesn’tfitintoyouroutlet, contactaqualifiedelectriciantoinstalltheproperoutlet. Opt ionA- TypicalWiring 1.Pluginthegaragedooropenerintoagroundedoutlet. 2.DONOTrungaragedooropeneratthistime. Opt ionB- Permanent Wiring Ifpermanentwiringisrequiredbyyourlocalcode,refertothe followingprocedure.Tomakeapermanentconnectionthroughthe 7/8inchholeinthetopofthemotorunit(accordingtolocalcode): Ground Tab Green Ground Screw Ground Wire White Wire Black Wire Black Wire 1.Removethemotorunitcover screwsandsetthecover aside. 2.Removetheattached3- prongcord. 3.Connecttheblack(…
Text truncated - open the document above for the full version.
Users Manual
Sommaire Fonctionnementsanssurveillance2 Instructionsd’installationimportantes3 Alimentation3 Consignesdesécuritéimportantes4 Connectez-vousavecvotretéléphoneintelligent5 TestezlaforcedusignaltheWi-Fi®5 Programmation7 Télécommande7 Entréesansclésansfil7 HomeLink®7 Poureffacerlamémoire7 Caméra8 Configurationdelacaméra8 Fonctionnement9 Pourouvrirlaportemanuellement9 Batteriedesecours9 Commandesdeporte10 Serrureautomatiquedeportedegarage10 ProtectorSystem®(capteursd’inversiondesécurité)11 Réglage12 Introduction12 Réglage13 1-Programmezledéplacement13 2-Réglagedelaforceautomatique14 3-Testezlesystèmed’inversiondesécurité15 4-TestezleProtectorSystem®15 Maintenance16 Dépannage16 Guidedesécuritéetd’entretiendel’ouvre-portedegarage automatique17 Piècesdétachées21 Garantie21 NumérodesériemyQ® Notezlesrenseignementssuivantspourréférencesfutures : / / Numéro de série myQ ® : Numéro de série du produit : Date d’achat : Numéro de série myQ ® Numéro de série du produit Examendessymbolesdesécuritéet desnotesd’avertissement Cetouvre-portedegarageaétéconçuettestépouroffrirunservice sûràconditionqu’ilsoitinstallé,utilisé,entretenuettestéenstricte conformitéaveclesinstructionsetlesavertissementsdecemanuel. Lorsquevousvoyezcessymbolesdesécuritéetnotesd’avertissement auxpagessuivantes,ilsvousavertissentdurisquedeblessuresgraves voiremortellessivousnerespectezpaslesavertissementsqu’ils accompagnent.Ledangerpeutprovenirdequelquechosede mécaniqueoud’unchocélectrique.Lisezattentivementles avertissements. AVERTISSEMENT Mécanique AVERTISSEMENT Électrique Lorsquevousvoyezcemotd’avertissementauxpagessuivantes,ilvous avertitdurisquequevotreportedegarageet/oul’ouvre-portesoit endommagé(e)sivousnerespectezpaslesmisesengardequi l’accompagnent.Lisez-lesattentivement. ATTENTION AVERTISSEMENT :Ceproduitpeutvousexposeràdes produitschimiques,dontleplomb,quisontreconnuspar l’ÉtatdeCaliforniecommeprovoquantlecancer,des malformationscongénitalesoud’autresproblèmesde reproduction.Pourplusd’information,visitez www.P65Warnings.ca.gov Fonctionnementsanssurveillance Lafonctiondeminuteriedefermeture(TTC),l’applicationmyQ®etle moniteurdeportedegarageetdeportailmyQ®sontdesexemplesde fermeturesanssurveillanceetdoiventêtreutilisésUNIQUEMENTavec desportessectionnelles.Toutdispositifoufonctionpermettantàla portedesefermersansêtredanslechampdevisiondecettedernière estconsidérécommeunefermeturesanssurveillance.Lafonctionde minuteriedefermeture(TTC),l’applicationmyQ®ettoutautreappareil myQ®doiventêtreutilisésUNIQUEMENTavecdesportessectionnelles. 2 Instructionsd’installationimportantes INSTRUCTIONSD’INSTALLATIONIMPORTANTES AVERTISSEMENT PourréduirelerisquedeBLESSURESGRAVESvoire MORTELLES : 1.LISEZETSUIVEZTOUSLESAVERTISSEMENTSETTOUTESLES INSTRUCTIONSD’INSTALLATION. 2.Installezl’ouvre-portedegarageUNIQUEMENTsuruneportede garagecorrectementéquilibréeetlubrifiée.Uneportemal équilibréerisquedenePASs’inverserlorsquecelaest nécessaireetpourraitentraînerdesBLESSURESGRAVESvoir MORTELLES. 3.TOUTESlesréparationsdecâbles,ressortsetautrematériel DOIVENTêtreeffectuéesparuntechnicienensystèmesde portesqualifiéAVANTl’installationdel’ouvre-porte. 4.DésactivezTOUSlesverrousetretirezTOUTESlescordes connectéesàlaportedegarageAVANTd’installerl’ouvre-porte pouréviterqu’elless’enchevêtrent. 5.Danslamesuredupossible,installezl’ouvre-porteàunehauteur minimumde2,13 m(7 pi)dusol. 6.Montezledéclenchementd’urgenceàportéedemain,maisà unehauteurminimumde1,83 m(6 pi)dusoletenévitanttout contactaveclesvéhiculesafind’éviterundéclenchement accidentel. 7.NebranchezJAMAISl’ouvre-portedegarageàunesource d’alimentationavantd’yêtreinvité. 8.NEportezJAMAISdemontres,baguesouvêtementsamplesen installantouentretenantl’ouvre-porte.Ilspourraientêtre happésdanslesmécanismesdeportedegarageoud’ouvre- porte. 9.Installezlacommandedeportedegaragemurale : • envuedelaportedugarage. • horsdeportéedesjeunesenfantsàunehauteurminimalede 1,5 m(5 pi)au-dessusdusol,despaliers,desmarchesoude touteautresurfacedemarcheadjacente. • loindeTOUTESlespiècesmobilesdelaporte. 10.Placezuneétiquetted’avertissementdepiégeagesurlemur,à côtédelacommandedeportedegarage. 11.Placezl’étiquettedetestd’inversiondesécurité/déverrouillage d’urgencebienenvueàl’intérieurdelaportedegarage. 12.Unefoisl’installationterminée,testezlesystèmed’inversionde sécurité.LaporteDOITs’inverseraucontactd’unobjetde 3,8 cm(1-1/2 po)dehaut(ouun2x4poséàplat)surlesol. 13.PouréviterdesBLESSURESPERSONNELLESGRAVESvoire MORTELLESélectrocution,débranchezTOUTEl’alimentation électriqueetlabatterieAVANTd’effectuertoutentretienou TOUTEmaintenance. 14.Nel’installezPASsuruneportemonoblocsivousutilisezdes dispositifsoudesfonctionnalitéspermettantunefermeturesans surveillance.Lesdispositifsetfonctionnalitéssanssurveillance doiventêtreutilisésUNIQUEMENTavecdesportessectionnelles. 15. CONSERVERCES INSTRUCTIONS. Alimentation PouréviterlesrisquesdeBLESSURESGRAVESvoireMORTELLESpar électrocutionouincendie : • Assurez-vousquelecourantn’estPASconnectéàl’ouvre-porte, etdébranchezlecourantducircuitAVANTderetirerlecouvercle pourétabliruneconnexionpermanente. • L’installationetlecâblagedelaportedegarageDOIVENTêtre conformesàTOUSlescodesélectriquesetdeconstruction locaux. • N’utilisezJAMAISderallonge,d’adaptateurà2 filsoune modifiezenAUCUNcaslafichepourl’adapteràlaprise. Assurez-vousquel’ouvre-porteestmisàlaterre. Pourréduirelerisquedechocélectrique,votreouvre-portedegarage estéquipéd’unefichedetypemiseàlaterreavecunetroisième goupilledemiseàlaterre.Cetteficherentreseulementdansune prisedeterre.Silafichenerentrepasdanslaprise,communiquer avecunélectricienqualifiépourfaireinstallerunepriseadéquate. OptionA-Câblagetypique 1.Branchezl’ouvre-portedegaragedansuneprisedecourant miseàlaterre. 2.NefaitesPASfonctionnerl’ouvre-portedegarageàcemoment- là. OptionB-Câblagepermanent Siuncâblagepermanentestrequisparvotrecodelocal,consultezla procéduresuivante.Poureffectueruneconnexionpermanenteà traversletroude7/8 poucesdanslehautdel’unitémoteur(selonle codelocal) : Onglet de terre Vis d…
Text truncated - open the document above for the full version.
Users Manual
1. Take a photo of the camera icon including the points ( ). 2. Send it in by texting the photo to 71403 (US). www.chamberlain.com • Please read this manual and the enclosed safety materials carefully! • Fasten the manual near the garage door after installation. • The door WILL NOT CLOSE unless the Protector System® is connected and properly aligned. • Periodic checks of the garage door opener are required to ensure safe operation. • The model number label is located on the left side panel of your garage door opener. • This garage door opener is compatible with myQ® and Security+ 2.0® accessories. • DO NOT install on a one-piece door if using devices or features providing unattended close. Unatt ended devices and features are to be used ONLY with sectional doors. Installation Manual LED Belt Drive Garage Door Opener Models B4603TC B4643TC B4613TC B6713TC B6753TC FOR RESIDENTIAL USE ONLY PRE-PROGRAMMED REMOTE CONTROL INCLUDED To register your garage door opener to receive updates and offers from Chamberlain, visit chamberlain.r egistria.com or use the icon below: 2 When you see this Signal Word on the following pages, it will alert you to the possibility of damage to your garage door and/or the garage door opener if you do not comply with the cautionary statements that accompany it. Read them carefully. WARNING: This product can expose you to chemicals including lead, which are known to the State of California to cause cancer or birth defects or other reproductive harm. For more information go to www.P65Warnings.ca.gov Unattended Operation The Timer-to-Close (TTC) feature, and the myQ® App are examples of unattended close and are to be used ONLY with sectional doors. Any device or feature that allows the door to close without being in the line of sight of the door is considered unattended close. The Timer-to-Close (TTC) feature, the myQ® App, and any other myQ® devices are to be used ONLY with sectional doors. The images throughout this manual are for reference only and your product may look different. Safety Symbol and Signal Word ReviewContents Preparation ...................................................................................................................................... 3 Assembly.......................................................................................................................................... 7 Installation ....................................................................................................................................12 Install the Door Control ............................................................................................................22 Install the Protector System® ...................................................................................................24 Connect Power ......................................................................................................................... 28 Adjustments ..................................................................................................................................30 Battery Backup .............................................................................................................................33 myQ® App Control .........................................................................................................................34 Connect With Your Smartphone ..............................................................................................34 Camera ...........................................................................................................................................35 Operation .......................................................................................................................................36 Using your Garage Door Opener ..............................................................................................36 Motion Detecting Control Panel ..............................................................................................37 Remote Control and Keyless Entry ...........................................................................................38 HomeLink® ................................................................................................................................38 Erase the Memory .....................................................................................................................39 To Open the Door Manually......................................................................................................39 Maintenance .................................................................................................................................40 Troubleshooting ............................................................................................................................41 Warranty ........................................................................................................................................43 Automatic Garage Door Opener Safety & Maintenance Guide ................................................44 Repair Parts ...................................................................................................................................46 Rail Assembly Parts ..................................................................................................................46 Installation Parts ......................................................................................................................46 Model B4603TC ........................................................................................................................47 Model B4613TC ........................................................................................................................48 Model B4643TC ........................................................................................................................49 Models B6713TC , and B6753TC.............…
Text truncated - open the document above for the full version.
Users Manual
38 1-2 1-2 3 3 OR OR PIN PIN ? ??? LEARN LED LEARN But ton “clic k” “clic k” Operation Remote Control and Keyless Entry PRE-PROGRAMMED REMOTE CONTROL INCLUDED, NO NEED TO PROGRAM THE REMOTE. To add or reprogram a remote control, follow the instructions below. Older Chamberlain remote controls are N OT compatible. PROGRAM MOTION DETECTING CONTROL PANEL 1. Press the LEARN button on the door control to enter programming mode. The command LED will flash once. 2. Press the LEARN button again, the command LED will flash once again. 3. Remote control: Press the button on the remote control that you wish to operate your garage door. Keyless entry: Enter a 4-digit personal identification number (PIN) of your choice on the keyless entry keypad. Then press the ENTER button. The garage door opener lights will flash (or two clicks will be heard) when the code has been programmed. Repeat the steps for programming additional remote controls or keyless entry devices. If programming is unsuccessful, repeat the steps using the LEARN button on the garage door opener. PROGRAM USING THE GARAGE DOOR OPENER LEARN BUTTON 1. L ocate the LEARN Button. 2. Press and immediately release the LEARN button. The LEARN LED will glow steady for 30 seconds. Within 30 seconds... 3. Remote Control: Press and hold the button on the remote control that you wish to use. Keyless Entry: Enter a 4-digit personal identification number (PIN) of your choice on the keyless entry keypad. Then press and hold the ENTER button. Release the button when the garage door opener lights blink or two clicks are heard. HomeLink® If your vehicle is equipped with HomeLink®, a Compatibility Bridge™ (not included) may be necessary for ce rtain vehicles. Visit bridge.chamberlain.com to find out if a Bridge is needed. LEARN Button Adjustment Button Reset Button 39 T o prevent possible SERIOUS INJURY or DEATH from a falling garage door: lIf possible, use emergency release handle to disengage trolley ONLY when garage door is CLOSED. Weak or broken springs or unbalanced door could result in an open door falling rapidly and/or unexpectedly. lNEVER use emergency release handle unless garage doorway is clear of persons and obstructions. lNEVER use handle to pull door open or closed. If rope knot becomes untied, you could fall. Operation Er ase the Memory ERASE ALL REMOTE CONTROLS AND KEYLESS ENTRIES 1. Press and hold the LEARN button on garage door opener until the learn LED goes out (approximately 6 seconds). All remote control and keyless entry codes are now erased. Reprogram any accessory you wish to use. ERASE ALL REMOTE CONTROLS, KEYLESS ENTRIES, AND myQ® DEVICES FROM GARA GE DOOR OPENER 1. Press and hold the LEARN button on garage door opener until the learn LED goes out (approximately 6 seconds). 2. Immediately press and hold the LEARN button again until the learn LED goes out. All codes are now erased. Reprogram any accessory you wish to use. ERASE THE CONNECTION FROM GARAGE DOOR OPENER TO HOME Wi-Fi® NETWORK 1. Press and hold the black adjustment button on the garage door opene r until 3 beeps are heard (Approximately 6 seconds). To Open the Door Manually DIS CONNECT THE TROLLEY 1. The door should be full y closed if possible. 2. Pull down on the emergency release handle so the trolley release arm snaps to the vertical position. The door can now be raised and lowered as often as necessary. TO RE-CONNECT THE TROLLEY 1. Pull t he emergency release handle toward the garage door opener so the trolley release arm snaps to the horizontal position. The trolley will reconnect on the next UP or DOWN operation, either manually or by using the door control or remote control. ERASE THE CAMERA SETTINGS 1. Press and hold the reset button on the side of the camera for 10 s econds. The LED light will turn off, then flash red. You will need to set up your camera again after resetting it. To prevent possible SERIOUS INJURY or DEATH: l NEVER allow small children near batteries. l If battery is swallowed, immediately notify doctor. To reduce risk of fire, explosion or chemical burn: l Replace ONLY with 3V CR2032 coin batteries. l DO NOT recharge, disassemble, heat above 212°F (100°C) or incinerate. 40 NOTICE: This device complies with part 15 of the FCC rules and Innovation, Science and Economic Development Canada license-exempt RSSs. Operation is subject to the following two conditions: (1) this device may not cause harmful interference, and (2) this device must accept any interference received, including interference that may cause undesired operation. Any changes or modifications not expressly approved by the party responsible for compliance could void the user’s authority to operate the equipment. This device must be installed to ensure a minimum 20 cm (8 in.) distance is maintained between users/bystanders and device. This device has been tested and found to comply with the limits for a Class B digital device, pursuant to part 15 of the FCC rules and Industry Canada ICES standard. These limits are designed to provide reasonable protection against harmful interference in a residential installation. This equipment generates, uses and can radiate radio frequency energy and, if not installed and used in accordance with the instructions, may cause harmful interference to radio communications. However, there is no guarantee that interference will not occur in a particular installation. If this equipment does cause harmful interference to radio or television reception, which can be determined by turning the equipment off and on, the user is encouraged to try to correct the interference by one or more of the following measures: lReorient or relocate the receiving antenna. lIncrease the separation between the equipment and receiver. lConnect the equipment into an outlet on a circuit different from that to which the receiver is connected. lConsult the dealer or an experienced radio/TV technician for help. Maintenance Maint enance Schedule EVERY MONTH lManuall y operate door…
Text truncated - open the document above for the full version.
Users Manual
26 1 3 Agra fe MATÉRIEL Agrafe isolée (non illustré) 2 11 mm (7/16 po) BLANC GRIS Canal de fil Installation ÉTAPE 13 Câbl er les capteurs d’inversion de sécurité Si votre garage a un câblage pré-installé pour les capteurs d’inversion de sécurité, voir l’OPTION B : INSTALLATION PRÉ-CÂBLÉE, page 27. OPTION A : INSTALLATION SANS PRÉ-CÂBLAGE 1. Faites passer le fil des deux capteurs à l’ouvre-porte de garage. Fixez avec des agrafes, mais NE per cez PAS le fil. 2. Séparez les fils du capteur et dénudez l’isolant à chaque extrémité. Torsadez les deux fils blancs ensemble. Torsadez ensuite les deux fils blanc/noir ensemble. 3. À l’aide d’un tournevis, enfoncez les languettes des bornes et insérez les fils blancs dans la borne blanche. Insérez les fils blanc/noir dans la borne grise. 27 1 3 4 Fils pr é- installés Fils du capteur d’inversion de sécurité Fils du capteur d’inversion de sécurité Blanc Blanc/noir Fils pré-installés Jaune Violet 11 mm (7/16 po) 5 2 11 mm (7/16 po) Serre-fils (non fournis) Fils pré-installés Jaune (par exemple) Violet (par exemple) Violet Jaune Installation ÉT APE 13 Câbl er les capteurs d’inversion de sécurité (suite) OPTION B : INSTALLATION PRÉCÂBLÉE 1. Coupez les fils du capteur, en vous assurant qu’il y a une longueur suffisante de fil pour atteindre les fils préinstallés du mur. 2. Séparez les fils du capteur et dénudez l’isolant à chaque extrémité. Choisissez deux des fils préinstallés et dénudez l’isolant à chaque extrémité. Choisissez les fils préinstallés de la même couleur pour chaque capteur. 3. Connectez les fils préinstallés aux fils du capteur avec des serre-fils en vous assurant que les couleurs correspondent pour chaque capteur. 4. Au niveau de l’ouvre-porte de garage, dénudez l’extrémité des fils connectés auparavant aux capteurs. Torsadez les fils de même couleur ensemble. 5. À l’aide d’un tournevis, enfoncez les languettes des bornes et insérez la couleur du fil connecté au fil blanc du capteur dans la borne blanche. Insérez l’autre couleur de fil connecté au fil blanc/noir du capteur dans la borne grise. BLANC GRIS AVERTISSEMENT 28 P our é viter les risques de BLESSURES GRAVES voire MORTELLES par électrocution ou incendie : l Assurez-vous que le courant n’est PAS connecté à l’ouvre-porte, et débranchez le courant du circuit AVANT de retirer le couvercle pour établir une connexion permanente. l L’installation et le câblage de la porte de garage DOIVENT être conformes à TOUS les codes électriques et de construction locaux. l N’utilisez JAMAIS de rallonge, d’adaptateur à 2 fils ou ne modifiez en AUCUN cas la fiche pour l’adapter à la prise. Assurez-vous que l’ouvre-porte est mis à la terre. Pour éviter les difficultés d’installation, assurez-vous de ne pas faire fonctionner l’ouvre-porte à ce moment-là. Pour réduire le risque de choc électrique, votre ouvre-porte de garage est équipé d’une fiche de type mise à la terre avec une troisième goupille de mise à la terre. Cette fiche rentre seulement dans une prise de terre. Si la fiche ne rentre pas dans la prise, communiquez avec un électricien qualifié pour faire installer une prise adéquate. Fil blanc F il noir Inst allation ÉTAPE 14 C onnecter l’alimentation IL EXISTE DEUX OPTIONS POUR CONNECTER L’ALIMENTATION : OPTION A - CÂBLAGE TYPIQUE 1. Branchez l’ouvre-porte de garage dans une prise de courant mise à la terre. 2. Ne faites PAS fonctionner l’ouvre-porte de garage à ce moment-là. OPTION B - CÂBLAGE PERMANENT Si un câblage permanent est requis par votre code local, consultez la procédure suivante. Pour effectuer une conne xion permanente à travers le trou de 7/8 pouces dans le haut de l’unité moteur (selon le code local) : 1. Retirez les vis du couvercle de l’unité moteur et mettez le couvercle de côté. 2. Retirez le cordon à trois broches qui y est attaché. 3. Connectez le fil noir (phase) à la vis de la borne en laiton; le fil blanc (neutre) à la vis de la borne argentée; et le fil de terre à la vis de terre verte. L’ouvre-porte doit être mis à la terre. 4. Réinstallez le couvercle. Onglet de terre Vis de t err e verte Fil de terre 29 Zone de protection des faisceaux lumineux Écrou à oreilles 1 2 3 Installation ÉTAPE 15 Alignement des capteurs d’inversion de sécurité IMPORTANT : Les capteurs d’inversion de sécurité DOIVENT être connectés et alignés correctement avant que l’ouvre-porte de garage ne se déplace vers le bas. Lorsque l’ouvre-porte de garage est alimenté en électricité, vérifiez les capteurs d’inversion de sécurité. Si les capteurs sont alignés et câblés correctement, les deux voyants à DEL s’allument en continu. Capteur d’envoi - Voyant DEL ambre Capteur de réception - Voyant DEL vert Le capteur de réception a un autocollant au dos. Pour aligner les capteurs d’inversion de sécurité : 1.Desserrez les écrous à oreilles. 2. Ajustez les capteurs vers le haut ou vers le bas jusqu’à ce que les deux voyants DEL s’allument de manière continue, indiquant l’alignement. 3.Serrez l’écrou à oreilles pour fixer le capteur. DÉPANNAGE DU CAPTEUR DE SÉCURITÉ Si l’un des voyants à DEL du capteur est éteint, le capteur n’est pas alimenté : 1. Vérifiez que l’ouvre-porte de garage est alimenté en électricité. 2. Vérifiez que le fil du capteur n’est pas court-circuité ou cassé. 3. Vérifiez que les capteurs sont correctement câblés; les fils blancs à la borne blanche et les fils blancs/noirs à la borne grise. ROUGE Si le voyant vert du capteur récepteur clignote, les capteurs sont obstrués ou mal alignés : 1. Vérifiez que le faisceau lumineux du capteur n’est pas obstrué. 2. Alignez les capteurs. 3. Si le capteur de réception (DEL vert) fait face à la lumière directe du soleil, interchangez le capteur de réception avec le capteur d’envoi et répétez l’ÉTAPE 12 de l’installation du Protector System®, page 26 pour assurer un fonctionnement adéquat. BLANC GRIS ÉTAPE 16 S’assurer que la commande de porte est correctement câblée Si la commande de porte a été installée et câblée correctement, le voyant de commande d…
Text truncated - open the document above for the full version.
Contact Information
Applicant
Thomas DeSilvia(Director Corporate Compliance)
Technical Contact
The Chamberlain Group, Inc.Adrian Perry
[email protected]6305165327
300 Windsor Drive · Oak Brook · United States
Test Firm
Elite Electronic Engineering Inc.Kevin Halpin
Technical Specifications
| # | Rule Parts | Frequency Range | Power Output |
|---|---|---|---|
| 1 | 15C | 902.25 MHz - 926.75 MHz | 75.70 mW |
Other Applications from Chamberlain Group LLC, The
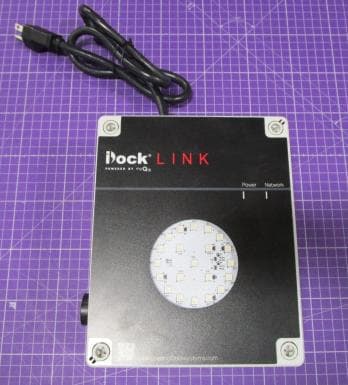
HBW73514
Jul 06, 2026iDock Link 2
Equipment Class
DSS - Part 15 Spread Spectrum TransmitterHBW-VKP2K
Jun 23, 2026SMART GARAGE VIDEO KEYPAD
Equipment Class
DTS - Digital Transmission System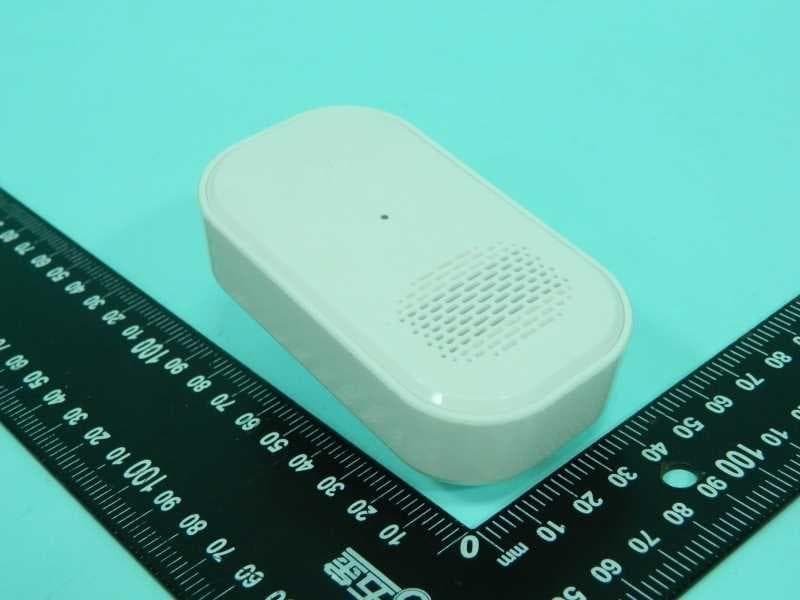
HBWCHM1
Dec 03, 2025Wireless Chime
Equipment Class
DTS - Digital Transmission SystemHBWN519
Oct 10, 2024VEHICULAR GATE OPENER
Equipment Class
DSS - Part 15 Spread Spectrum TransmitterHBWN329
Sep 22, 2024Handheld Remote
Equipment Class
DSC - Part 15 Security/Remote Control Transmitter