HBW0458X1MyQ - Garage Door Opener
Chamberlain Group LLC, The
Click to zoom
Application Details
- Equipment Class
- DTS - Digital Transmission System
- Date of Grant
- Jul 11, 2022
- Application Purpose
- Original Equipment
- Date of Application
- Jul 11, 2022
- Equipment Note
- MyQ - Garage Door Opener
- Frequency Range
- 2402.00000000 - 2480.00000000
- Company
- Chamberlain Group LLC, The
- Country
- United States
Documents & Files
Document Text
Text extracted from the exhibit documents filed with the FCC. Open a document above to read the original.
Users Manual
Easy step-by-step interactive 3D instructions for this product can be found in Download the free myQ ® App Installation Manual Inside Available on most iOS and Android Devices Monitor and control your garage from anywhere and get real-time alerts with peace of mind. Download the free BILT App before assembly www.chamberlain.com Installation Manual Chain Drive Garage Door Opener Models C2212T • C2405 • C2102 • C2202 • D2101 FOR RESIDENTIAL USE ONLY PRE PROGRAMMED REMOTE CONTROL INCLUDED To register your garage door opener to receive updates and offers from Chamberlain, visit chamberlain.registria.com or use the icon below: 1. Take a photo of the camera icon including the points ( ). 2. Send it in by texting the photo to 71403 (US). • Please read this manual and the enclosed safety materials carefully! • Fasten the manual near the garage door after installation. • The door WILL NOT CLOSE unless the Protector System® is connected and properly aligned. • Periodic checks of the garage door opener are required to ensure safe operation. • The model number label is located on the back panel of your garage door opener. • This garage door opener is compatible with myQ® and Security+ 2.0® accessories. • DO NOT install on a one-piece door if using devices or features providing unattended close. Unattended devices and features are to be used ONLY with sectional doors. Available on most iOS and Android Devices Available on most iOS and Android Devices Download the myQ® App Unattended Operation The Timer-to-Close (TTC) feature, the myQ ® App, and myQ ® Garage Door and Gate Monitor are examples of unattended close and are to be used ONLY with sectional doors. Any device or feature that allows the door to close without being in the line of sight of the door is considered unattended close. The Timer-to-Close (TTC) feature, the myQ®App, and any other myQ ® devices are to be used ONLY with sectional doors. The images throughout this manual are for reference only and your product may look different. Contents Preparation � � � � � � � � � � � � � � � � � � � � � � � � � � � � � � � � � � � � � � � � � � � � � � � � � � � � � � � � � � � � � � � � � � � � � � � � � � � � � � � � � � � � � 5 Assembly � � � � � � � � � � � � � � � � � � � � � � � � � � � � � � � � � � � � � � � � � � � � � � � � � � � � � � � � � � � � � � � � � � � � � � � � � � � � � � � � � � � � � � � 9 Installation � � � � � � � � � � � � � � � � � � � � � � � � � � � � � � � � � � � � � � � � � � � � � � � � � � � � � � � � � � � � � � � � � � � � � � � � � � � � � � � � � � � � � 14 Install the Door Control . . . . . . . . . . . . . . . . . . . . . . . . . . . . . . . . . . . . . . . 24 Install the Protector System® . . . . . . . . . . . . . . . . . . . . . . . . . . . . . . . . . . 27 Connect Power . . . . . . . . . . . . . . . . . . . . . . . . . . . . . . . . . . . . . . . . . . . . . 31 Adjustments � � � � � � � � � � � � � � � � � � � � � � � � � � � � � � � � � � � � � � � � � � � � � � � � � � � � � � � � � � � � � � � � � � � � � � � � � � � � � � � � � � � � 33 Battery Backup � � � � � � � � � � � � � � � � � � � � � � � � � � � � � � � � � � � � � � � � � � � � � � � � � � � � � � � � � � � � � � � � � � � � � � � � � � � � � � � � � 36 myQ® App Control � � � � � � � � � � � � � � � � � � � � � � � � � � � � � � � � � � � � � � � � � � � � � � � � � � � � � � � � � � � � � � � � � � � � � � � � � � � � � � � 37 Connect With Your Smartphone . . . . . . . . . . . . . . . . . . . . . . . . . . . . . . . . 37 Operation� � � � � � � � � � � � � � � � � � � � � � � � � � � � � � � � � � � � � � � � � � � � � � � � � � � � � � � � � � � � � � � � � � � � � � � � � � � � � � � � � � � � � � � 38 Using your Garage Door Opener . . . . . . . . . . . . . . . . . . . . . . . . . . . . . . . 38 Using your Door Control . . . . . . . . . . . . . . . . . . . . . . . . . . . . . . . . . . . . . . 39 Remote Control and Keyless Entry . . . . . . . . . . . . . . . . . . . . . . . . . . . . . . 40 Home Link ® . . . . . . . . . . . . . . . . . . . . . . . . . . . . . . . . . . . . . . . . . . . . . . . . 40 Erase the Memory . . . . . . . . . . . . . . . . . . . . . . . . . . . . . . . . . . . . . . . . . . 41 To Open the Door Manually . . . . . . . . . . . . . . . . . . . . . . . . . . . . . . . . . . . 41 Maintenance � � � � � � � � � � � � � � � � � � � � � � � � � � � � � � � � � � � � � � � � � � � � � � � � � � � � � � � � � � � � � � � � � � � � � � � � � � � � � � � � � � � � 42 Troubleshooting � � � � � � � � � � � � � � � � � � � � � � � � � � � � � � � � � � � � � � � � � � � � � � � � � � � � � � � � � � � � � � � � � � � � � � � � � � � � � � � � 43 Warranty � � � � � � � � � � � � � � � � � � � � � � � � � � � � � � � � � � � � � � � � � � � � � � � � � � � � � � � � � � � � � � � � � � � � � � � � � � � � � � � � � � � � � � � 45 Automatic Garage Door Opener Safety & Maintenance Guide � � � � � � � � � � � � � � � � � � � � � � � � � � � � � � � � � � � � � � 46 Repair Parts � � � � � � � � � � � � � � � � � � � � � � � � � � � � � � � � � � � � � � � � � � � � � � � � � � � � � � � � � � � � � � � � � � � � � � � � � � � � � � � � � � � � 48 Rail Assembly Parts . . . . . . . . . . . . . . . . . . . . . . . . . . . . . . . . . . . . . . . . . 48 Installation Parts . . . . . . . . . . . . . . . . . . . . . . . . . . . . . . . . . . . . . . . . . . . . 48 Model C2212T . . . . . . . . . . . . . . . . . . . . . . . . . . . . . . . . . . . . . . . . . . . . . 49 Model C2102 . . . . . . . . . . . . . . . . . . . . . . . . . . . . . . . . . . . . . . . . . . . . . . 50 Model C2405 . . . . . . . . . . . . . . . . . . . . . . . . . . . . . . . . . . . . . . . . . . . . . . 51 Model C2202 . . . . . . . . . . . . . . . . . . . . . . . . . . . . . . . . . . . . . . . . . . . . . . 52 Model D2101 . . . . . . . . . . . . . . . . . . . . . . . . . . . . . . . . . . . . . . . . . . . . . . 53 Safety Symbol and Signal Word Review This garage door opener …
Text truncated - open the document above for the full version.
Users Manual
30 Pre-installed wires Safety reversing sensor wires Safety reversing sensor wires White White/Black Pre-installed wires Yellow Purple 7/16” (11 mm) 7/16” (11 mm) Wire nuts (not provided) Pre-installed wires Yellow (for example) Purple (for example) Purple Wire channel Yellow Installation STEP 14 Wire the Safety Reversing Sensors (continued) OPTION A - PRE-WIRED INSTALLATION 1. Cut the sensor wires, making sure there is enough wire to reach the pre-installed wires from the wall. 2. Separate the sensor wires and strip insulation from each end. Choose two of the pre-installed wires and strip insulation from each end. Choose the same color pre-installed wires for each sensor. 3. Connect the pre-installed wires to the sensor wires with wire nuts making sure the colors correspond for each sensor. 4. At the garage door opener, strip the end of the wires previously connected to the sensors. Twist the like-colored wires together. 5. Using a screwdriver, push in the terminal tabs, and insert the wire color connected to the sensor’s white wire into the white terminal. Insert the other wire color connected to the sensor’s white/black wire into the grey terminal. WHITE GREY WARNING 31 To prevent possible SERIOUS INJURY or DEATH from electrocution or fire: Be sure power is NOT connected to the opener, and disconnect power to circuit BEFORE removing cover to establish permanent wiring connection. Garage door installation and wiring MUST be in compliance with ALL local electrical and building codes. NEVER use an extension cord, 2-wire adapter, or change plug in ANY way to make it fit outlet. Be sure the opener is grounded. To avoid installation difficulties, do not run the opener at this time. To reduce the risk of electric shock, your garage door opener has a grounding type plug with a third grounding pin. This plug will only fit into a grounding type outlet. If the plug doesn’t fit into the outlet you have, contact a qualified electrician to install the proper outlet. Installation STEP 15 Connect Power THERE ARE TWO OPTIONS FOR CONNECTING POWER: OPTION A- TYPICAL WIRING 1. Plug in the garage door opener into a grounded outlet. 2. DO NOT run garage door opener at this time. OPTION B - PERMANENT WIRING If permanent wiring is required by your local code, refer to the following procedure. To make a permanent connection through the 7/8-inch hole in the top of the motor unit (according to local code): 1. Remove the motor unit cover screws and set the cover aside. 2. Remove the attached 3-prong cord. 3. Connect the black (line) wire to the screw on the brass terminal; the white (neutral) wire to the screw on the silver terminal; and the ground wire to the green ground screw. The opener must be grounded. 4. Reinstall the cover. White Wire Black Wire Ground Tab Green Ground Screw Ground Wire 32 Wing nut STEP 16 Align the Safety Reversing Sensors IMPORTANT: The safety reversing sensors MUST be connected and aligned correctly before the garage door opener will move in the down direction. When the garage door opener has power, check the safety reversing sensors. If the sensors are aligned and wired correctly, both LEDs will glow steadily. Light Beam Protection Area Sending sensor - amber LED Receiving sensor - green LED The receiving sensor will have a sticker on the back. To align the safety reversing sensors: 1. Loosen the wing nuts. 2. Adjust the sensors up or down until both LEDs glow steady indicating alignment. 3. Tighten the wing nut to secure the sensor. SAFETY SENSOR TROUBLESHOOTING If either of the sensor LEDs are off, there is no power to the sensor: 1. Check that you have power to the garage door opener. 2. Check the sensor wire is not shorted or broken. 3. Check that the sensors are wired correctly; white wires to white terminal and white/black wires to grey terminal. 1 2 3 RED WHITE GREY If the green receiving sensor LED is blinking, the sensors are obstructed or misaligned: 1. Check for obstructions in the sensor light beam. 2. Align the sensors. 3. If the receiving sensor (green LED) faces direct sunlight, switch the receiving sensor with the sending sensor and repeat STEP 12 Install the Protector System ® page 27 to assure proper operation. STEP 17 Ensure the Door Control is Wired Correctly If the door control has been installed and wired correctly, the command LED on the control panel will blink or the LED behind the push button will blink if installed correctly. Installation WARNING UP (Open) DOWN (Close) PROGRAMMING BUTTONS The programming buttons are located on the left side panel of the garage door opener and are used to program the travel. While programming, the UP and DOWN buttons can be used to move the door as needed. ONE-PIECE DOORS ONLY When setting the UP travel for a one-piece door ensure that the door does not slant backwards when fully open (UP). If the door is slanted backwards this will cause unnecessary bucking and/or jerking when the door is opening or closing. 33 Correct Incorrect PROGRAMMING BUTTONS UP Button DOWN Button Adjustment Button Adjustments Introduction Your garage door opener is designed with electronic controls to make setup and adjustments easy. Without a properly installed safety reversal system, persons (particularly small children) could be SERIOUSLY INJURED or KILLED by a closing garage door. Incorrect adjustment of garage door travel limits will interfere with proper operation of safety reversal system. After ANY adjustments are made, the safety reversal system MUST be tested. Door MUST reverse on contact with 1-1/2” (3.8 cm) high object (or 2x4 laid flat) on floor. To prevent damage to vehicles, be sure fully open door provides adequate clearance. WARNING Without a properly installed safety reversal system, persons (particularly small children) could be SERIOUSLY INJURED or KILLED by a closing garage door. Incorrect adjustment of garage door travel limits will interfere with proper operation of safety reversal system. After ANY adjustments ar…
Text truncated - open the document above for the full version.
Users Manual
Installation Manual Inside Download the free BILT App before assembly Download the free myQ ® App Monitor and control your garage from anywhere and get real-time alerts with peace of mind. Available on most iOS and Android Devices Easy step-by-step interactive 3D instructions for this product can be found in 1. Take a photo of the camera icon including the points ( ). 2. Send it in by texting the photo to 71403 (US). www.chamberlain.com •Please read this manual and the enclosed safety materials carefully! •Fasten the manual near the garage door after installation. •The door WILL NOT CLOSE unless the Protector System® is connected and properly aligned. •Periodic checks of the garage door opener are required to ensure safe operation. •The model number label is located on the left side panel of your garage door opener. •This garage door opener is compatible with myQ® and Security+ 2.0® accessories. • DO NOT install on a one-piece door if using devices or features providing unattended close. Unattended devices and features are to be used ONLY with sectional doors. Installation Manual Belt Drive Garage Door Opener Models B2202 • B2210T • B2211T • B2212T • B2215T • B2401 • B2405 • B353 • B4505T FOR RESIDENTIAL USE ONLY PRE-PROGRAMMED REMOTE CONTROL INCLUDED To register your garage door opener to receive updates and offers from Chamberlain, visit chamberlain.registria.com or use the icon below: Available on most iOS and Android Devices Available on most iOS and Android Devices Download the myQ® App 4 When you see this Signal Word on the following pages, it will alert you to the possibility of damage to your garage door and/or the garage door opener if you do not comply with the cautionary statements that accompany it. Read them carefully. WARNING: This product can expose you to chemicals including lead, which are known to the State of California to cause cancer or birth defects or other reproductive harm. For more information go to www.P65Warnings.ca.gov Unattended Operation The Timer-to-Close (TTC) feature, the myQ® App, and myQ® Garage Door and Gate Monitor are examples of unattended close and are to be used ONLY with sectional doors. Any device or feature that allows the door to close without being in the line of sight of the door is considered unattended close. The Timer-to-Close (TTC) feature, the myQ® App, and any other myQ® devices are to be used ONLY with sectional doors. The images throughout this manual are for reference only and your product may look different. Safety Symbol and Signal Word ReviewContents Preparation ......................................................................................................................................5 Assembly..........................................................................................................................................9 Installation ....................................................................................................................................14 Install the Door Control ............................................................................................................24 Install the Protector System® ...................................................................................................27 Connect Power .........................................................................................................................31 Adjustments ..................................................................................................................................33 Battery Backup .............................................................................................................................36 myQ® App Control .........................................................................................................................37 Connect With Your Smartphone ..............................................................................................37 Operation .......................................................................................................................................38 Using your Garage Door Opener ..............................................................................................38 Using your Door Control ...........................................................................................................39 Remote Control and Keyless Entry ...........................................................................................41 HomeLink® ................................................................................................................................41 Erase the Memory .....................................................................................................................42 To Open the Door Manually......................................................................................................42 Maintenance .................................................................................................................................43 Troubleshooting ............................................................................................................................44 Warranty ........................................................................................................................................46 Automatic Garage Door Opener Safety & Maintenance Guide ................................................47 Repair Parts ...................................................................................................................................49 Rail Assembly Parts ..................................................................................................................49 Installation Parts ......................................................................................................................49 Models B2202, B2401, B2405, and B353 ..............................................................................50 Models B2210…
Text truncated - open the document above for the full version.
Users Manual
8 1 2 4 3 6 7 5 49 4 1 2 7 6 8 9 3 5 10 Repair Parts Rail Assembly Parts Installation Parts Description Part Number 1Curved door arm 041B0035B 2Door bracket with clevis pin and fastener 041A5047-1 3Emergency release rope and handle 041A2828 4Header bracket with clevis pin and fastener 041A5047-2 5Remote control visor clip K029B0137 6Safety sensor bracket 041-0155-000 78Safety sensor kit: receiving and sending sensors with 2-conductor wire 041-0136-000 8Straight door arm 4178B0034B 9White and red/white wire 041B4494-1 103V CR2032 lithium battery K010A0020 Not shown Installation Manual 114-5556-000 Description Part Number 1Belt 041A5250 2Pulley 144C0054M 3Master link 004A1008 4Rail 041A5665 5Trolley assembly: threaded shaft (1), clevis pin (1), and ring (1) 041C5141-2 6“U” bracket 041D0598-1 7D-shape threaded shaft 041A6689 8Spring trolley nut 041B4103 Not shown Wear pads 041A7276 Hardware bag 041A7920-2 Description Part Number 5 4 3 7 1 6 2 14 12 8 9 10 13 4 11 11 5 Repair Parts Garage Door Opener Parts - Models B2202, B2401, B2405, and B353 50 1Sprocket cover 041A4371 2Gear 041A5885-4 3End Panel with Light Cover 041-0037-000 4Light socket 041C0279 5Light Lens K108D0079M 6Capacitor 030B0532-1 7Capacitor Bracket K012A0373 8Travel Module 041D7742-7 9Cover 041-0024-000 10Receiver Logic Board 050ACTB 11Logic Board End Panel 041-0025-000 12Motor with Travel Module 041D7440 13Line Cord 041B4245-1 14Terminal Block 041A3150 Not Shown Wire Harness 041A7946 Description Part Number 3 10 4 2 1 6 7 5 9 8 4 8 3 Repair Parts Garage Door Opener Parts - Models B2210T, B2211T, B2212T, B2215T, and B4505T 51 1Sprocket cover 041B5348-2 2Front End Panel 041A7618 3Light Lens 041-0144 4Light Socket 041C0279 5Cover 041-0229-000 6Motor with Travel Module 041D8006-1 7Travel Module 041D8071-4 8Logic Board End Panel 041D0233-3 9Logic Board 050DCTBMC 1012V Battery G4228 Not Shown Wire Harness 041D9069 Transformer 041D0277-1 Line Cord 041B4245 Terminal Block 041A3150 114-5745-010 © 2022, The Chamberlain Group LLC All Rights Reserved Wi-Fi® is a registered trademark of Wi-Fi Alliance Home Link® is a registered trademark of Gentex Corporation The Chamberlain Group LLC 300 Windsor Drive Oak Brook, IL 60523
Users Manual
Available on most iOS and Android Devices Available on most iOS and Android Devices Download the myQ® App www.chamberlain.com Installation Manual Chain Drive Garage Door Opener Models C2405C • D2405C • C2102C • C2202C • D2101C FOR RESIDENTIAL USE ONLY PRE PROGRAMMED REMOTE CONTROL INCLUDED To register your garage door opener to receive updates and offers from Chamberlain, visit chamberlain.registria.com or use the icon below: 1. Take a photo of the camera icon including the points ( ). 2. Send it in by texting the photo to 71403 (US). • Please read this manual and the enclosed safety materials carefully! • Fasten the manual near the garage door after installation. • The door WILL NOT CLOSE unless the Protector System® is connected and properly aligned. • Periodic checks of the garage door opener are required to ensure safe operation. • The model number label is located on the back panel of your garage door opener. • This garage door opener is compatible with myQ® and Security+ 2.0® accessories. • DO NOT install on a one-piece door if using devices or features providing unattended close. Unattended devices and features are to be used ONLY with sectional doors. Unattended Operation The Timer-to-Close (TTC) feature, the myQ ® App, and myQ ® Garage Door and Gate Monitor are examples of unattended close and are to be used ONLY with sectional doors. Any device or feature that allows the door to close without being in the line of sight of the door is considered unattended close. The Timer-to-Close (TTC) feature, the myQ®App, and any other myQ ® devices are to be used ONLY with sectional doors. The images throughout this manual are for reference only and your product may look different. Contents Preparation � � � � � � � � � � � � � � � � � � � � � � � � � � � � � � � � � � � � � � � � � � � � � � � � � � � � � � � � � � � � � � � � � � � � � � � � � � � � � � � � � � � � � 3 Assembly � � � � � � � � � � � � � � � � � � � � � � � � � � � � � � � � � � � � � � � � � � � � � � � � � � � � � � � � � � � � � � � � � � � � � � � � � � � � � � � � � � � � � � � 7 Installation � � � � � � � � � � � � � � � � � � � � � � � � � � � � � � � � � � � � � � � � � � � � � � � � � � � � � � � � � � � � � � � � � � � � � � � � � � � � � � � � � � � � � 11 Install the Door Control . . . . . . . . . . . . . . . . . . . . . . . . . . . . . . . . . . . . . . . 22 Install the Protector System® . . . . . . . . . . . . . . . . . . . . . . . . . . . . . . . . . . 26 Connect Power . . . . . . . . . . . . . . . . . . . . . . . . . . . . . . . . . . . . . . . . . . . . . 29 Adjustments � � � � � � � � � � � � � � � � � � � � � � � � � � � � � � � � � � � � � � � � � � � � � � � � � � � � � � � � � � � � � � � � � � � � � � � � � � � � � � � � � � � � � � 31 myQ® App Control � � � � � � � � � � � � � � � � � � � � � � � � � � � � � � � � � � � � � � � � � � � � � � � � � � � � � � � � � � � � � � � � � � � � � � � � � � � � � � � 34 Connect With Your Smartphone . . . . . . . . . . . . . . . . . . . . . . . . . . . . . . . 34 Operation� � � � � � � � � � � � � � � � � � � � � � � � � � � � � � � � � � � � � � � � � � � � � � � � � � � � � � � � � � � � � � � � � � � � � � � � � � � � � � � � � � � � � � � 38 Using your Garage Door Opener . . . . . . . . . . . . . . . . . . . . . . . . . . . . . . . 35 Using your Door Control . . . . . . . . . . . . . . . . . . . . . . . . . . . . . . . . . . . . . . 36 Remote Control and Keyless Entry . . . . . . . . . . . . . . . . . . . . . . . . . . . . . . 37 Home Link ® . . . . . . . . . . . . . . . . . . . . . . . . . . . . . . . . . . . . . . . . . . . . . . . . 37 Erase the Memory . . . . . . . . . . . . . . . . . . . . . . . . . . . . . . . . . . . . . . . . . . 38 To Open the Door Manually . . . . . . . . . . . . . . . . . . . . . . . . . . . . . . . . . . . 38 Maintenance � � � � � � � � � � � � � � � � � � � � � � � � � � � � � � � � � � � � � � � � � � � � � � � � � � � � � � � � � � � � � � � � � � � � � � � � � � � � � � � � � � � � 39 Troubleshooting � � � � � � � � � � � � � � � � � � � � � � � � � � � � � � � � � � � � � � � � � � � � � � � � � � � � � � � � � � � � � � � � � � � � � � � � � � � � � � � � 40 Warranty � � � � � � � � � � � � � � � � � � � � � � � � � � � � � � � � � � � � � � � � � � � � � � � � � � � � � � � � � � � � � � � � � � � � � � � � � � � � � � � � � � � � � � � 42 Automatic Garage Door Opener Safety & Maintenance Guide � � � � � � � � � � � � � � � � � � � � � � � � � � � � � � � � � � � � � � 43 Repair Parts � � � � � � � � � � � � � � � � � � � � � � � � � � � � � � � � � � � � � � � � � � � � � � � � � � � � � � � � � � � � � � � � � � � � � � � � � � � � � � � � � � � � 45 Rail Assembly Parts . . . . . . . . . . . . . . . . . . . . . . . . . . . . . . . . . . . . . . . . . 45 Installation Parts . . . . . . . . . . . . . . . . . . . . . . . . . . . . . . . . . . . . . . . . . . . . 45 Model C2102C . . . . . . . . . . . . . . . . . . . . . . . . . . . . . . . . . . . . . . . . . . . . . 46 Model C2405C . . . . . . . . . . . . . . . . . . . . . . . . . . . . . . . . . . . . . . . . . . . . . 47 Model D2405C . . . . . . . . . . . . . . . . . . . . . . . . . . . . . . . . . . . . . . . . . . . . . 47 Model C2202C . . . . . . . . . . . . . . . . . . . . . . . . . . . . . . . . . . . . . . . . . . . . . 48 Model D2101C . . . . . . . . . . . . . . . . . . . . . . . . . . . . . . . . . . . . . . . . . . . . . 49 Safety Symbol and Signal Word Review This garage door opener has been designed and tested to offer safe service provided it is installed, operated, maintained and tested in strict accordance with the instructions and warnings contained in this manual. Mechanical Electrical When you see these Safety Symbols and Signal Words on the following pages, they will alert you to the possibility of serious injury or death if you do not comply with the warnings that accompany them. The hazard may come from something mechanical or from electric shock. Read…
Text truncated - open the document above for the full version.
Users Manual
WARNING 31 UP (Open) DOWN (Close) PROGRAMMING BUTTONS The programming buttons are located on the left side panel of the garage door opener and are used to program the travel. While programming, the UP and DOWN buttons can be used to move the door as needed. ONE-PIECE DOORS ONLY When setting the UP travel for a one-piece door ensure that the door does not slant backwards when fully open (UP). If the door is slanted backwards this will cause unnecessary bucking and/or jerking when the door is opening or closing. Correct Incorrect PROGRAMMING BUTTONS UP Button DOWN Button Adjustment Button Adjustments Introduction Your garage door opener is designed with electronic controls to make setup and adjustments easy. Without a properly installed safety reversal system, persons (particularly small children) could be SERIOUSLY INJURED or KILLED by a closing garage door. Incorrect adjustment of garage door travel limits will interfere with proper operation of safety reversal system. After ANY adjustments are made, the safety reversal system MUST be tested. Door MUST reverse on contact with 1-1/2” (3.8 cm) high object (or 2x4 laid flat) on floor. To prevent damage to vehicles, be sure fully open door provides adequate clearance. WARNING 32 Without a properly installed safety reversal system, persons (particularly small children) could be SERIOUSLY INJURED or KILLED by a closing garage door. Incorrect adjustment of garage door travel limits will interfere with proper operation of safety reversal system. After ANY adjustments are made, the safety reversal system MUST be tested. Door MUST reverse on contact with 1-1/2” (3.8 cm) high object (or 2x4 laid flat) on floor. Note: While programming, the UP and DOWN buttons can be used to move the door as needed. Adjustments 1 Program the Travel 1 Press and hold the Adjustment Button until the UP Button begins to flash and/or a beep is heard. The Safety Reversing Sensors will be disconnected during the Program the Travel process. 2 Press and hold the UP Button until the door is in the desired UP position. 3 Once the door is in the desired UP position press and release the Adjustment Button. The garage door opener lights will flash twice and the DOWN Button will begin to flash. 4 Press and hold the DOWN Button until the door is in the desired DOWN position. 5 Once the door is in the desired DOWN position press and release the Adjustment Button. The garage door opener lights will flash twice. Program the Travel is now complete. If the garage door opener lights flash 5 times, then programming has timed out and the Travel Limits have not been set. Please restart the Program the Travel process. 2 Automatic Force Set Up Once both the up and down positions have been manually set, the Safety Reversing Sensors will reconnect and become operational. Then, the opener will enter a force-sensing operation by automatically moving the door to open and close. The garage door opener will sound an audible and visual alert before automatically opening and closing the door. The garage door opener will beep three times, confirming that the Automatic Force Setup completed successfully. Adjustment is complete. If you hear one long beep after the door attempts to move, then the Automatic Force Set Up has not completed successfully. Please start over at step 1 of Program the Travel. WARNINGWARNING 33 Without a properly installed safety reversal system, persons (particularly small children) could be SERIOUSLY INJURED or KILLED by a closing garage door. Safety reversal system MUST be tested every month. After ANY adjustments are made, the safety reversal system MUST be tested. Door MUST reverse on contact with 1-1/2” (3.8 cm) high object (or 2x4 laid flat) on the floor. Without a properly installed safety rever…
Text truncated - open the document above for the full version.
Contact Information
Applicant
Thomas DeSilvia(Director Corporate Compliance)
Technical Contact
The Chamberlain Group, Inc.Adrian Perry
[email protected]6305165327
300 Windsor Drive · Oak Brook, Illinois · United States
Test Firm
Elite Electronic Engineering Inc.Kevin Halpin
Technical Specifications
| # | Rule Parts | Frequency Range | Power Output |
|---|---|---|---|
| 2 | 15C | 2.40 GHz - 2.48 GHz | 1.40 mW |
Other Applications from Chamberlain Group LLC, The
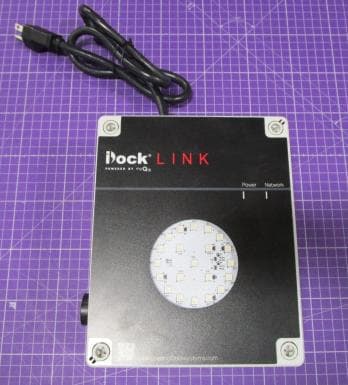
HBW73514
Jul 06, 2026iDock Link 2
Equipment Class
DSS - Part 15 Spread Spectrum TransmitterHBW-VKP2K
Jun 23, 2026SMART GARAGE VIDEO KEYPAD
Equipment Class
DTS - Digital Transmission System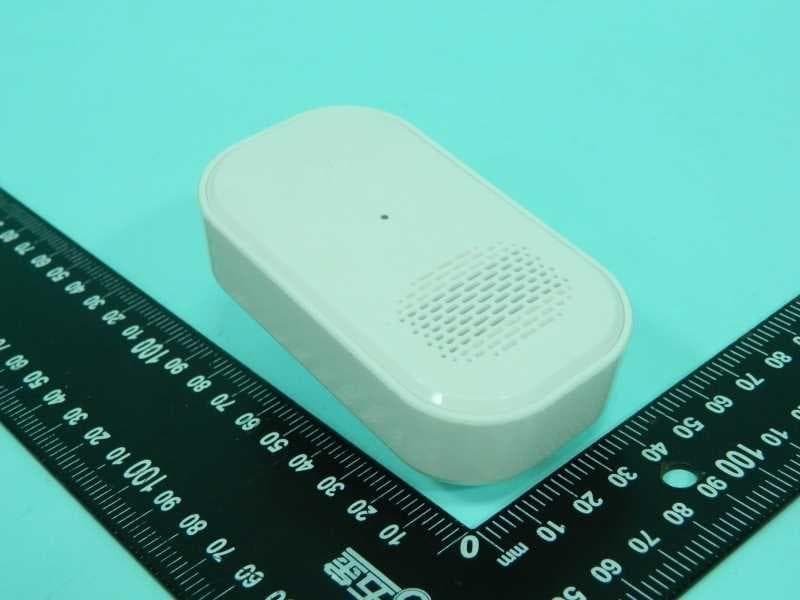
HBWCHM1
Dec 03, 2025Wireless Chime
Equipment Class
DTS - Digital Transmission SystemHBWN519
Oct 10, 2024VEHICULAR GATE OPENER
Equipment Class
DSS - Part 15 Spread Spectrum TransmitterHBWN329
Sep 22, 2024Handheld Remote
Equipment Class
DSC - Part 15 Security/Remote Control Transmitter