HBW1337Touch Pad Transmitter
Chamberlain Group LLC, The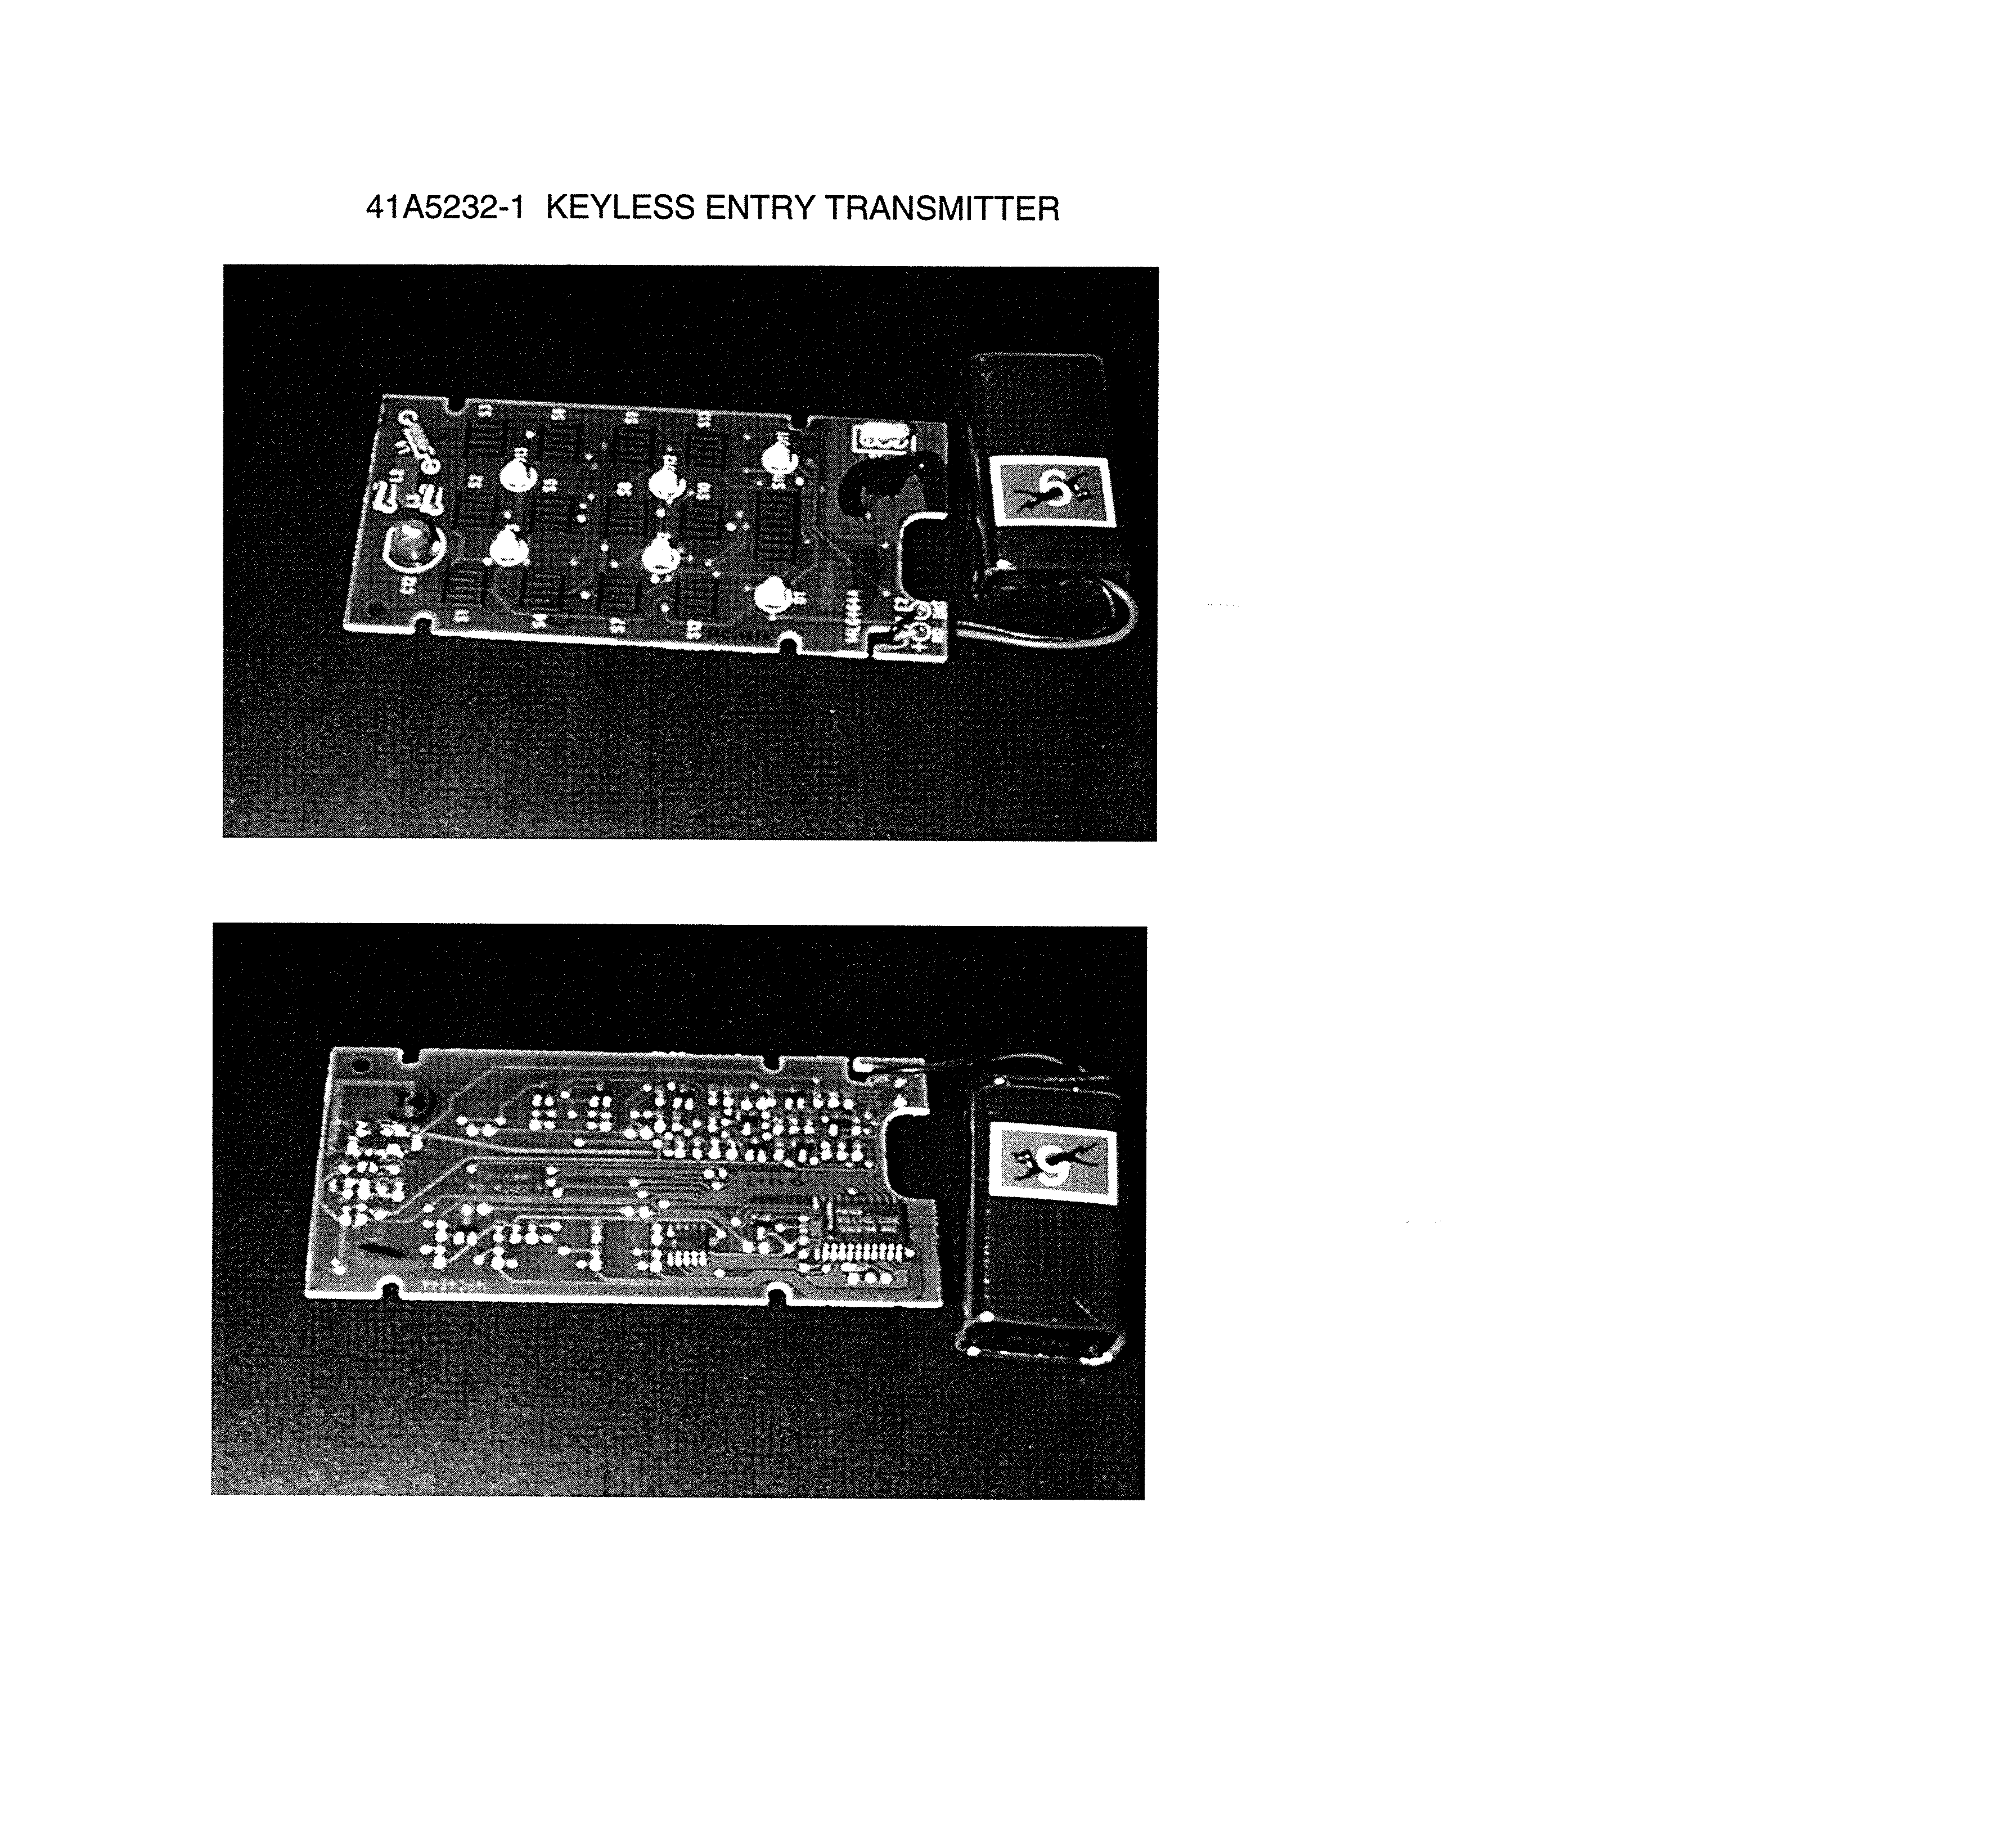
Click to zoom
Application Details
- Equipment Class
- DSC - Part 15 Security/Remote Control Transmitter
- Date of Grant
- Sep 30, 1998
- Application Purpose
- Original Equipment
- Date of Application
- Aug 20, 1998
- Equipment Note
- Touch Pad Transmitter
- Frequency Range
- 433.00000000 - 433.00000000
- Company
- Chamberlain Group LLC, The
- Country
- United States
Documents & Files
Document Text
Text extracted from the exhibit documents filed with the FCC. Open a document above to read the original.
Users Manual
To comply with FCC/IC rules, adjustment or modification of receiver and/or transmitter is prohibited, except for changing the code setting and replacing the transmitter battery. THERE ARE NO OTHER USER SERVICEABLE PARTS. Installation Choose a convenient location for installation. It should be at eye level, reachable by the shortest person who will use it, and within sight of the door. For a one-piece door, use the optional location shown in the illustration (on the edge of the door jamb) to avoid injury as the door swings up and out. Test the reception of the Keyless Entry by operating your opener from the selected location. Change the location if necessary. Remove the battery compartment cover to access the bottom mounting hole: • Insert a small phillips screw driver into the small hole at the bottom of the cover and gently pull outward to loosen. • Slide the cover down to remove. Center the keypad at eye level against the selected location. Mark 4-1/4" up the centerline from the bottom and drill a 1/8" pilot hole. Install top mounting screw, allowing 1/8" to protrude above surface. Position keypad on screw head and adjust for snug fit. With cover open so bottom mounting hole is visible, use a punch to mark hole. Remove keypad and drill 1/8" pilot hole. Replace keypad and complete installation with bottom screw, using care to avoid cracking plastic housing. Do not overtighten. To replace the battery cover, insert the lip at the top and snap in place. Side two contains instructions for changing the personal entry password and setting a temporary password. Door Jamb Edge (Optional Location for 1-Piece Door) Keypad Door Jamb Face SECTIONAL DOOR ONLY KEYPAD MUST BE INSTALLED WITHIN SIGHT OF THE DOOR Exterior Front Wall 1-Piece or Sectional Door Typical Sectional Door Installation Setting the Personal Entry Password We recommend that you program your personal password now, before you install the Keyless Entry. Then you can test the reception at the mounting location before you proceed further. 1. Choose a 4-digit personal entry password using the numbers from 0 to 9 (a number can be used more than once, for example, 4,0, 4,1). 2. Press the four buttons for the password, then press and hold the Enter button. The indicator light on the door opener panel will blink. 3. Press and release the “Smart” (learn) button on the door opener panel. After the opener lights blink, release the Enter button. Test by pressing the the password, then press Enter. The door should begin to move. You may also program the Keyless Entry from a multifunction door control, as follows: 1. With the door closed,enter the four digit password desired, then press and hold Enter. 2. Press and hold the light button on the door control. 3. Press and hold the door control push bar. 4. After the opener lights blink, release all buttons. SECURITY: Garage Door Opener "Smart" (learn) Button Indicator Light KG KG 1 3 9 7 5 1 3 9 7 5 1 2 3 Children operating or playing with a garage door opener can injure themselves or others. The garage door could close and cause serious injury or death.Do not allow children to operate the wall push button(s) or remote control(s). A moving garage door could injure or kill someone under it. Activate the opener only when you can see the door clearly, it is free of obstructions, and is properly adjusted. WARNING 433MHz Wireless Keyless Entry 1 Features For use with any SECURITY: compatible garage door opener receiver. Personalized Password: Up to 10,000 possible combinations. Password can be easily changed if desired. Temporary password:Can be added for visitors or service persons. This temporary password can be limited to a programmable number of hours or a programmable number of entries. Rolling Code:While your password remains constant until you change it, the code between the Keyless Entry and the receiver changes with each use, randomly accessing over 100 billion new codes. Operation: Opener activates when 4-digit password and Enter button is pressed. If wrong numbers are accidentally pressed, correction can be made immediately. The Enter button will transmit only the last four digits. The Keypad will blink for 15 seconds after the password is transmitted. During that time the Enter button can be used to stop or reverse the door travel. Battery Bottom mounting hole Battery Cover ©1998 The Chamberlain Group, Inc. 114A2315All Rights ReservedPrinted in Mexico Changing the Personal Entry Password Press the four buttons for the present password, then press and hold the # button. The opener light will blink twice. Release the # button. Press the new 4-digit password you have chosen, then press Enter. The opener light will blink once when the password has been learned. Test by pressing the new password, then press Enter. The door should move. Setting a Temporary Password In addition to the personal entry password which works at all times, a 4-digit temporary password can be added for the convenience of visitors or service persons. This allows authorized persons a way to gain temporary access. After a programmed number of hours or number of accesses, this temporary entry password expires and will no longer open the door. The temporary password can be used to close the door even after it has expired. To set a temporary entry password: 1.Press the four buttons for your personal entry password (not the last temporary password), then press and hold the ]button. The opener light will blink three times. Release the button. 2. Press the temporary 4-digit entry password you have chosen, then press Enter. The opener light will blink four times. 3.To set the number of hours this temporary password will work, press the number of hours (up to 255), then press ]. OR 3.To set the number of times this temporary password will work, press the number of times (up to 255), then press #. The opener light will blink once when the temporary password has been learned. Test by pressing the four buttons for the temporary password…
Text truncated - open the document above for the full version.
Users Manual
To comply with FCC/IC rules, adjustment or modification of receiver and/or transmitter is prohibited, except for changing the code setting and replacing the transmitter battery. THERE ARE NO OTHER USER SERVICEABLE PARTS. Installation Choose a convenient location for installation. It should be at eye level, reachable by the shortest person who will use it, and within sight of the door. For a one-piece door, use the optional location shown in the illustration (on the edge of the door jamb) to avoid injury as the door swings up and out. Test the reception of the Keyless Entry by operating your opener from the selected location. Change the location if necessary. Remove the battery compartment cover to access the bottom mounting hole: • Insert a small phillips screw driver into the small hole at the bottom of the cover and gently pull outward to loosen. • Slide the cover down to remove. Center the keypad at eye level against the selected location. Mark 4-1/4" up the centerline from the bottom and drill a 1/8" pilot hole. Install top mounting screw, allowing 1/8" to protrude above surface. Position keypad on screw head and adjust for snug fit. With cover open so bottom mounting hole is visible, use a punch to mark hole. Remove keypad and drill 1/8" pilot hole. Replace keypad and complete installation with bottom screw, using care to avoid cracking plastic housing. Do not overtighten. To replace the battery cover, insert the lip at the top and snap in place. Side two contains instructions for changing the personal entry password and setting a temporary password. Door Jamb Edge (Optional Location for 1-Piece Door) Keypad Door Jamb Face SECTIONAL DOOR ONLY KEYPAD MUST BE INSTALLED WITHIN SIGHT OF THE DOOR Exterior Front Wall 1-Piece or Sectional Door Typical Sectional Door Installation Setting the Personal Entry Password We recommend that you program your personal password now, before you install the Keyless Entry. Then you can test the reception at the mounting location before you proceed further. 1. Choose a 4-digit personal entry password using the numbers from 0 to 9 (a number can be used more than once, for example, 4,0, 4,1). 2. Press the four buttons for the password, then press and hold the Enter button. The indicator light on the door opener panel will blink. 3. Press and release the “Smart” (learn) button on the door opener panel. After the opener lights blink, release the Enter button. Test by pressing the the password, then press Enter. The door should begin to move. You may also program the Keyless Entry from a multifunction door control, as follows: 1. With the door closed,enter the four digit password desired, then press and hold Enter. 2. Press and hold the light button on the door control. 3. Press and hold the door control push bar. 4. After the opener lights blink, release all buttons. SECURITY: Garage Door Opener "Smart" (learn) Button Indicator Light KG KG 1 3 9 7 5 1 3 9 7 5 1 2 3 Children operating or playing with a garage door opener can injure themselves or others. The garage door could close and cause serious injury or death.Do not allow children to operate the wall push button(s) or remote control(s). A moving garage door could injure or kill someone under it. Activate the opener only when you can see the door clearly, it is free of obstructions, and is properly adjusted. WARNING 433MHz Wireless Keyless Entry 1 Features For use with any SECURITY: compatible garage door opener receiver. Personalized Password: Up to 10,000 possible combinations. Password can be easily changed if desired. Temporary password:Can be added for visitors or service persons. This temporary password can be limited to a programmable number of hours or a programmable number of entries. Rolling Code:While your password remains constant until you change it, the code between the Keyless Entry and the receiver changes with each use, randomly accessing over 100 billion new codes. Operation: Opener activates when 4-digit password and Enter button is pressed. If wrong numbers are accidentally pressed, correction can be made immediately. The Enter button will transmit only the last four digits. The Keypad will blink for 15 seconds after the password is transmitted. During that time the Enter button can be used to stop or reverse the door travel. Battery Bottom mounting hole Battery Cover ©1998 The Chamberlain Group, Inc. 114A2315All Rights ReservedPrinted in Mexico Changing the Personal Entry Password Press the four buttons for the present password, then press and hold the # button. The opener light will blink twice. Release the # button. Press the new 4-digit password you have chosen, then press Enter. The opener light will blink once when the password has been learned. Test by pressing the new password, then press Enter. The door should move. Setting a Temporary Password In addition to the personal entry password which works at all times, a 4-digit temporary password can be added for the convenience of visitors or service persons. This allows authorized persons a way to gain temporary access. After a programmed number of hours or number of accesses, this temporary entry password expires and will no longer open the door. The temporary password can be used to close the door even after it has expired. To set a temporary entry password: 1.Press the four buttons for your personal entry password (not the last temporary password), then press and hold the ]button. The opener light will blink three times. Release the button. 2. Press the temporary 4-digit entry password you have chosen, then press Enter. The opener light will blink four times. 3.To set the number of hours this temporary password will work, press the number of hours (up to 255), then press ]. OR 3.To set the number of times this temporary password will work, press the number of times (up to 255), then press #. The opener light will blink once when the temporary password has been learned. Test by pressing the four buttons for the temporary password…
Text truncated - open the document above for the full version.
Block Diagram
195d1337b 195d1337bFriday, July 31, 1998Page 1 QTYREFDESPART NUMBERDESCRIPTIONVALUE 2C1,C930D71020100CAPACITOR, SMD0805100PF 1C230D72203030CAPACITOR, SMD08052.2PF 1C330D71500000CAPACITOR, SMD08051.5PF 2C4, C1130D74000000CAPACITOR, SMD08054PF 4C5,C6,C7,C830D710422R0CAPACITOR, SMD08050.01 1C1030D710522R0CAPACITOR, SMD08050.1 1C1230B0444CAPACITOR, VARIABLE BOT ADJ2-5PF 6D1,D2,D3,52B0074DIODE, LED T1 D11,D12,D13 1D552B0107DIODE, SMD ZENER5.6V 1D652B0065DIODE, SMD SIGNAL 3D7,D8,D952B0070DIODE, SMD DUAL COMMON CATHODE 2E1/E223B0099BATTERY CLIP 2L2,L340A0059INDUCTOR, AIRWOUND30NH 1L440B0039-451INDUCTOR, RF CHOKE1UH 1Q1207C0074TRANSISTOR, SMD NPN RF 3Q2,Q3,Q6207C0073TRANSISTOR, SMD NPN SWITCH 2Q4,Q5207C0069TRANSISTOR, SMD PNP SWITCH 3R1,R14,R31311C1025RESISTOR, SMD0805 5%1K 8R2,R12,R13,311C1035RESISTOR, SMD0805 5%10K R21,R22,R23, R24,R25 3R3,R10,R11311C2035RESISTOR, SMD0805 5%20K 2R4,R32311C4715RESISTOR, SMD0805 5%470 3R5,R7,R8311C1535RESISTOR, SMD0805 5%15K 3R6,R9,R15311C1045RESISTOR, SMD0805 5%100K 7R16,R17,R26,311C4735RESISTOR, SMD0805 5%47K R27,R28,R29, R30 3R18,R19,R20311C4725RESISTOR, SMD0805 5%4.7K 1R33311C1055RESISTOR, SMD0805 5%1M 1U1125C0156SOIC, ROLLCODE KEYLESS ENTRY 1U2125C0148SOIC, ELECT. ERASABLE PROM 3V 1X133B0044RESONATOR, CERAMIC4MHZ 1114D0464BOARD, P.C. NOTES: 1. ALL LEADED COMPONENTS TO BE INSERTED TO WITHIN .020" OF BODY OR PREFORM LIMITS. 2. REFERENCE DOCUMENTS: TEST SPEC: 190A0514 B.O.M. : 001A5232 3. PRECAUTIONS MUST BE TAKEN TO PREVENT FINGER OILS OR OTHER FILMS FROM BEING DEPOSITED ON THE CARBON ELECTRODES DURING HANDLING AND ASSEMBLY. 4. ROUTE WIRES OF BATTERY CLIP E1/E2 THROUGH SLOT IN PCB AFTER WAVESOLDER. REVECN #DATEDESCRIPTIONBY AM-11012-Jun-98RELEASEJPJ BM-14931-Jul-98 C2 was 30d72003030; C4 was 30d76800000; REA C11 was 30d75000000; R3 was 311c1535. Page 1
Block Diagram
195d1337b 195d1337bFriday, July 31, 1998Page 1 QTYREFDESPART NUMBERDESCRIPTIONVALUE 2C1,C930D71020100CAPACITOR, SMD0805100PF 1C230D72203030CAPACITOR, SMD08052.2PF 1C330D71500000CAPACITOR, SMD08051.5PF 2C4, C1130D74000000CAPACITOR, SMD08054PF 4C5,C6,C7,C830D710422R0CAPACITOR, SMD08050.01 1C1030D710522R0CAPACITOR, SMD08050.1 1C1230B0444CAPACITOR, VARIABLE BOT ADJ2-5PF 6D1,D2,D3,52B0074DIODE, LED T1 D11,D12,D13 1D552B0107DIODE, SMD ZENER5.6V 1D652B0065DIODE, SMD SIGNAL 3D7,D8,D952B0070DIODE, SMD DUAL COMMON CATHODE 2E1/E223B0099BATTERY CLIP 2L2,L340A0059INDUCTOR, AIRWOUND30NH 1L440B0039-451INDUCTOR, RF CHOKE1UH 1Q1207C0074TRANSISTOR, SMD NPN RF 3Q2,Q3,Q6207C0073TRANSISTOR, SMD NPN SWITCH 2Q4,Q5207C0069TRANSISTOR, SMD PNP SWITCH 3R1,R14,R31311C1025RESISTOR, SMD0805 5%1K 8R2,R12,R13,311C1035RESISTOR, SMD0805 5%10K R21,R22,R23, R24,R25 3R3,R10,R11311C2035RESISTOR, SMD0805 5%20K 2R4,R32311C4715RESISTOR, SMD0805 5%470 3R5,R7,R8311C1535RESISTOR, SMD0805 5%15K 3R6,R9,R15311C1045RESISTOR, SMD0805 5%100K 7R16,R17,R26,311C4735RESISTOR, SMD0805 5%47K R27,R28,R29, R30 3R18,R19,R20311C4725RESISTOR, SMD0805 5%4.7K 1R33311C1055RESISTOR, SMD0805 5%1M 1U1125C0156SOIC, ROLLCODE KEYLESS ENTRY 1U2125C0148SOIC, ELECT. ERASABLE PROM 3V 1X133B0044RESONATOR, CERAMIC4MHZ 1114D0464BOARD, P.C. NOTES: 1. ALL LEADED COMPONENTS TO BE INSERTED TO WITHIN .020" OF BODY OR PREFORM LIMITS. 2. REFERENCE DOCUMENTS: TEST SPEC: 190A0514 B.O.M. : 001A5232 3. PRECAUTIONS MUST BE TAKEN TO PREVENT FINGER OILS OR OTHER FILMS FROM BEING DEPOSITED ON THE CARBON ELECTRODES DURING HANDLING AND ASSEMBLY. 4. ROUTE WIRES OF BATTERY CLIP E1/E2 THROUGH SLOT IN PCB AFTER WAVESOLDER. REVECN #DATEDESCRIPTIONBY AM-11012-Jun-98RELEASEJPJ BM-14931-Jul-98 C2 was 30d72003030; C4 was 30d76800000; REA C11 was 30d75000000; R3 was 311c1535. Page 1
Cover Letter(s)
845 Larch Ave. Elmhurst, IL 60126 phone 630.993.6306 fax 630.530.6140 email: [email protected] August 20, 1998 Federal Communications Commission EQUIPMENT APPROVAL SERVICES PO Box 358315 Pittsburgh, PA 15251-5315 Re: Request for Certification Enclosed is an application, fee in the amount of $895, and exhibits for Certification of a Remote Control Transmitter, Model 1A5232-1. The final instruction sheet is not available at this time, so I have included a typical instruction sheet indicating the FCC statement and important information. The FCC ID of this model, upon certification, will be HBW1337. We would appreciate your prompt attention to the submittal. Sincerely, THE CHAMBERLAIN GROUP, INC. Barbara P. Kelkhoff Manager, Product Safety LIST OF EXHIBITS 3 FUNCTION, REMOTE CONTROL TRANSMITTER MODEL 41A5232-1 1. Expository Statement 2. Theory of Operation 3. Schematic 4. Photographs 5. FCC Label Drawing 6. Operating Instructions 7. Test Report EXPOSITORY STATEMENT REMOTE TOUCHCODE TRANSMITTER MODEL 41A5232-1 1. Since the final instruction sheet is not available at this time, a marked-up typical version has been included. The instructions include statements required to assure compliance with the Commission's Rules; Part 15. 2. Labeling is in accordance with the Commission's labeling requirements, Parts 2 and 15, Section 15.19. 3. This transmitter is intended for use with the certified receivers of our manufacture only. 4. The transmitter is equipped with an automatically releasing push-button switch. Transmission is terminated upon release of the push-button. 5. The 41A5232-1 is factory set to 433 ± 0.1% MHz. It is not intended to be readjusted in the field, and specific instruction prohibiting tampering are provided to the user. 6. Test data for the Model 41A5232-1 is part of this submission. No emissions were detected in the forbidden bands below 1.0 GHz. Certified by: Barbara P. Kelkhoff Manager, Product Safety THEORY OF OPERATION AND CIRCUIT DESCRIPTION MODEL 41A5232-1 REMOTE TOUCHCODE TRANSMITTER (Please refer to enclosed schematic drawing: 195D1337A) The model 41A5232-1 transmitter uses a 4 digit number entered on a numeric keypad to determine the code that will be transmitted. The sequence of operation is to press 4 digits on the keypad, then press and hold the “ENTER” button (within 10 seconds of entering the last digit of the code) to operate the desired receiving device (usually a garage door opener). RF transmission begins when the “ENTER” button is pressed and continues until the button is released or 52 seconds elapses, whichever comes first. The transmitter consists of a low power RF oscillator (Q1 and related parts), a digital encoder (U1 and related parts), a voltage regulator (Q3 and related parts), and a keypad having buttons labeled “0” through “9” and “ENTER”. Operation is initiated by pressing any one of the buttons on the keypad. This turns on transistor Q4 through diodes D7, D8 or D9, which supplies current to zener diode D5. The voltage developed across D5 provides bias to the voltage regulator circuitry of Q3. The regulator applies 5V to the VCC input of U1 which causes the microprocessor to begin operation by truning on Q6 which acts to keep the voltage regulator on when the button is released. After 4 numeric buttons have been pressed, activation of the “ENTER” button will cause a digital PWM signal to appear at pin 17 of U1. This signal drives and modulates the RF oscillator. The RF oscillator is of the grounded base type. C1, C2, C11 and C12 and foil inductor, L1, set the oscillator’s center frequency to 433 MHz. R1-R3 establish DC bias conditions. L2 and L3 reduce harmonic output. In order to preserve battery life, U1 turns Q6 off when operation has ended. Turn-off occurs 20 seconds after the last RF transmission. LEDs, D1-D3 and D11-D13, provide back illumination to the keypad. 1. EXPOSITORY STATEMENT 2. THEORY OF OPERATION 3. SCHEMATIC 4. PHOTOGRAPHS 5. FCC LABEL DRAWING 6. OPERATING INSTRUCTIONS 7. TEST REPORT
Cover Letter(s)
845 Larch Ave. Elmhurst, IL 60126 phone 630.993.6306 fax 630.530.6140 email: [email protected] August 20, 1998 Federal Communications Commission EQUIPMENT APPROVAL SERVICES PO Box 358315 Pittsburgh, PA 15251-5315 Re: Request for Certification Enclosed is an application, fee in the amount of $895, and exhibits for Certification of a Remote Control Transmitter, Model 1A5232-1. The final instruction sheet is not available at this time, so I have included a typical instruction sheet indicating the FCC statement and important information. The FCC ID of this model, upon certification, will be HBW1337. We would appreciate your prompt attention to the submittal. Sincerely, THE CHAMBERLAIN GROUP, INC. Barbara P. Kelkhoff Manager, Product Safety LIST OF EXHIBITS 3 FUNCTION, REMOTE CONTROL TRANSMITTER MODEL 41A5232-1 1. Expository Statement 2. Theory of Operation 3. Schematic 4. Photographs 5. FCC Label Drawing 6. Operating Instructions 7. Test Report EXPOSITORY STATEMENT REMOTE TOUCHCODE TRANSMITTER MODEL 41A5232-1 1. Since the final instruction sheet is not available at this time, a marked-up typical version has been included. The instructions include statements required to assure compliance with the Commission's Rules; Part 15. 2. Labeling is in accordance with the Commission's labeling requirements, Parts 2 and 15, Section 15.19. 3. This transmitter is intended for use with the certified receivers of our manufacture only. 4. The transmitter is equipped with an automatically releasing push-button switch. Transmission is terminated upon release of the push-button. 5. The 41A5232-1 is factory set to 433 ± 0.1% MHz. It is not intended to be readjusted in the field, and specific instruction prohibiting tampering are provided to the user. 6. Test data for the Model 41A5232-1 is part of this submission. No emissions were detected in the forbidden bands below 1.0 GHz. Certified by: Barbara P. Kelkhoff Manager, Product Safety THEORY OF OPERATION AND CIRCUIT DESCRIPTION MODEL 41A5232-1 REMOTE TOUCHCODE TRANSMITTER (Please refer to enclosed schematic drawing: 195D1337A) The model 41A5232-1 transmitter uses a 4 digit number entered on a numeric keypad to determine the code that will be transmitted. The sequence of operation is to press 4 digits on the keypad, then press and hold the “ENTER” button (within 10 seconds of entering the last digit of the code) to operate the desired receiving device (usually a garage door opener). RF transmission begins when the “ENTER” button is pressed and continues until the button is released or 52 seconds elapses, whichever comes first. The transmitter consists of a low power RF oscillator (Q1 and related parts), a digital encoder (U1 and related parts), a voltage regulator (Q3 and related parts), and a keypad having buttons labeled “0” through “9” and “ENTER”. Operation is initiated by pressing any one of the buttons on the keypad. This turns on transistor Q4 through diodes D7, D8 or D9, which supplies current to zener diode D5. The voltage developed across D5 provides bias to the voltage regulator circuitry of Q3. The regulator applies 5V to the VCC input of U1 which causes the microprocessor to begin operation by truning on Q6 which acts to keep the voltage regulator on when the button is released. After 4 numeric buttons have been pressed, activation of the “ENTER” button will cause a digital PWM signal to appear at pin 17 of U1. This signal drives and modulates the RF oscillator. The RF oscillator is of the grounded base type. C1, C2, C11 and C12 and foil inductor, L1, set the oscillator’s center frequency to 433 MHz. R1-R3 establish DC bias conditions. L2 and L3 reduce harmonic output. In order to preserve battery life, U1 turns Q6 off when operation has ended. Turn-off occurs 20 seconds after the last RF transmission. LEDs, D1-D3 and D11-D13, provide back illumination to the keypad. 1. EXPOSITORY STATEMENT 2. THEORY OF OPERATION 3. SCHEMATIC 4. PHOTOGRAPHS 5. FCC LABEL DRAWING 6. OPERATING INSTRUCTIONS 7. TEST REPORT
External Photos
41A5232-1 KEYLESS ENTRY TRANSMITTER
ID Label/Location Info
Model/Modèle 41A5232-1 Sears Roebuck & Co. U.S.A. FCC ID: HBW1337 Sears Canada, Inc. Toronto, Ontario M5B 2B8 CANADA: RSVD PAT.#RE29,525; 4,037,201; 4,750,118; 4,806,930 Assembled in Mexico 132B2154-4 132LA2154-40-A ECN: Shown at 100% THIS DEVICE COMPLIES WITH PART 15 OF THE FCCRULES. Operation is subject to the following two conditions:(1) this device may not cause harmful interference, and (2) thisdevice must accept any interference received, includinginterference that may cause undesired operation. Sears TX
ID Label/Location Info
Model/Modèle 41A5232-1 Sears Roebuck & Co. U.S.A. FCC ID: HBW1337 Sears Canada, Inc. Toronto, Ontario M5B 2B8 CANADA: RSVD PAT.#RE29,525; 4,037,201; 4,750,118; 4,806,930 Assembled in Mexico 132B2154-4 132LA2154-40-A ECN: Shown at 100% THIS DEVICE COMPLIES WITH PART 15 OF THE FCCRULES. Operation is subject to the following two conditions:(1) this device may not cause harmful interference, and (2) thisdevice must accept any interference received, includinginterference that may cause undesired operation. Sears TX
ID Label/Location Info
41A5232-1 KEYLESS ENTRY TRANSMITTER
Internal Photos
41A5232-1 KEYLESS ENTRY TRANSMITTER
Internal Photos
41A5232-1 KEYLESS ENTRY TRANSMITTER
Operational Description
845 Larch Ave. Elmhurst, IL 60126 phone 630.993.6306 fax 630.530.6140 email: [email protected] August 20, 1998 Federal Communications Commission EQUIPMENT APPROVAL SERVICES PO Box 358315 Pittsburgh, PA 15251-5315 Re: Request for Certification Enclosed is an application, fee in the amount of $895, and exhibits for Certification of a Remote Control Transmitter, Model 1A5232-1. The final instruction sheet is not available at this time, so I have included a typical instruction sheet indicating the FCC statement and important information. The FCC ID of this model, upon certification, will be HBW1337. We would appreciate your prompt attention to the submittal. Sincerely, THE CHAMBERLAIN GROUP, INC. Barbara P. Kelkhoff Manager, Product Safety LIST OF EXHIBITS 3 FUNCTION, REMOTE CONTROL TRANSMITTER MODEL 41A5232-1 1. Expository Statement 2. Theory of Operation 3. Schematic 4. Photographs 5. FCC Label Drawing 6. Operating Instructions 7. Test Report EXPOSITORY STATEMENT REMOTE TOUCHCODE TRANSMITTER MODEL 41A5232-1 1. Since the final instruction sheet is not available at this time, a marked-up typical version has been included. The instructions include statements required to assure compliance with the Commission's Rules; Part 15. 2. Labeling is in accordance with the Commission's labeling requirements, Parts 2 and 15, Section 15.19. 3. This transmitter is intended for use with the certified receivers of our manufacture only. 4. The transmitter is equipped with an automatically releasing push-button switch. Transmission is terminated upon release of the push-button. 5. The 41A5232-1 is factory set to 433 ± 0.1% MHz. It is not intended to be readjusted in the field, and specific instruction prohibiting tampering are provided to the user. 6. Test data for the Model 41A5232-1 is part of this submission. No emissions were detected in the forbidden bands below 1.0 GHz. Certified by: Barbara P. Kelkhoff Manager, Product Safety THEORY OF OPERATION AND CIRCUIT DESCRIPTION MODEL 41A5232-1 REMOTE TOUCHCODE TRANSMITTER (Please refer to enclosed schematic drawing: 195D1337A) The model 41A5232-1 transmitter uses a 4 digit number entered on a numeric keypad to determine the code that will be transmitted. The sequence of operation is to press 4 digits on the keypad, then press and hold the “ENTER” button (within 10 seconds of entering the last digit of the code) to operate the desired receiving device (usually a garage door opener). RF transmission begins when the “ENTER” button is pressed and continues until the button is released or 52 seconds elapses, whichever comes first. The transmitter consists of a low power RF oscillator (Q1 and related parts), a digital encoder (U1 and related parts), a voltage regulator (Q3 and related parts), and a keypad having buttons labeled “0” through “9” and “ENTER”. Operation is initiated by pressing any one of the buttons on the keypad. This turns on transistor Q4 through diodes D7, D8 or D9, which supplies current to zener diode D5. The voltage developed across D5 provides bias to the voltage regulator circuitry of Q3. The regulator applies 5V to the VCC input of U1 which causes the microprocessor to begin operation by truning on Q6 which acts to keep the voltage regulator on when the button is released. After 4 numeric buttons have been pressed, activation of the “ENTER” button will cause a digital PWM signal to appear at pin 17 of U1. This signal drives and modulates the RF oscillator. The RF oscillator is of the grounded base type. C1, C2, C11 and C12 and foil inductor, L1, set the oscillator’s center frequency to 433 MHz. R1-R3 establish DC bias conditions. L2 and L3 reduce harmonic output. In order to preserve battery life, U1 turns Q6 off when operation has ended. Turn-off occurs 20 seconds after the last RF transmission. LEDs, D1-D3 and D11-D13, provide back illumination to the keypad. 1. EXPOSITORY STATEMENT 2. THEORY OF OPERATION 3. SCHEMATIC 4. PHOTOGRAPHS 5. FCC LABEL DRAWING 6. OPERATING INSTRUCTIONS 7. TEST REPORT
Operational Description
845 Larch Ave. Elmhurst, IL 60126 phone 630.993.6306 fax 630.530.6140 email: [email protected] August 20, 1998 Federal Communications Commission EQUIPMENT APPROVAL SERVICES PO Box 358315 Pittsburgh, PA 15251-5315 Re: Request for Certification Enclosed is an application, fee in the amount of $895, and exhibits for Certification of a Remote Control Transmitter, Model 1A5232-1. The final instruction sheet is not available at this time, so I have included a typical instruction sheet indicating the FCC statement and important information. The FCC ID of this model, upon certification, will be HBW1337. We would appreciate your prompt attention to the submittal. Sincerely, THE CHAMBERLAIN GROUP, INC. Barbara P. Kelkhoff Manager, Product Safety LIST OF EXHIBITS 3 FUNCTION, REMOTE CONTROL TRANSMITTER MODEL 41A5232-1 1. Expository Statement 2. Theory of Operation 3. Schematic 4. Photographs 5. FCC Label Drawing 6. Operating Instructions 7. Test Report EXPOSITORY STATEMENT REMOTE TOUCHCODE TRANSMITTER MODEL 41A5232-1 1. Since the final instruction sheet is not available at this time, a m…
Text truncated - open the document above for the full version.
Contact Information
Applicant
Thomas DeSilvia(Director Corporate Compliance)
Test Firm
Elite Electronic Engineering Co.Dan Crowder
Technical Specifications
| # | Rule Parts | Frequency Range | Power Output | Tolerance |
|---|---|---|---|---|
| 1 | 15C | 433 MHz - 433 MHz | - | % |
Other Applications from Chamberlain Group LLC, The
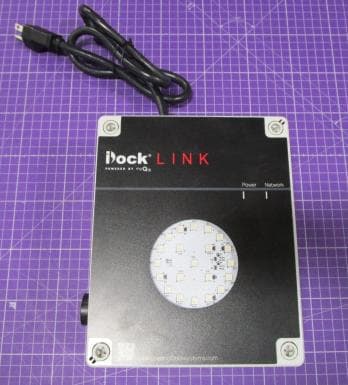
HBW73514
Jul 06, 2026iDock Link 2
Equipment Class
DSS - Part 15 Spread Spectrum TransmitterHBW-VKP2K
Jun 23, 2026SMART GARAGE VIDEO KEYPAD
Equipment Class
DTS - Digital Transmission System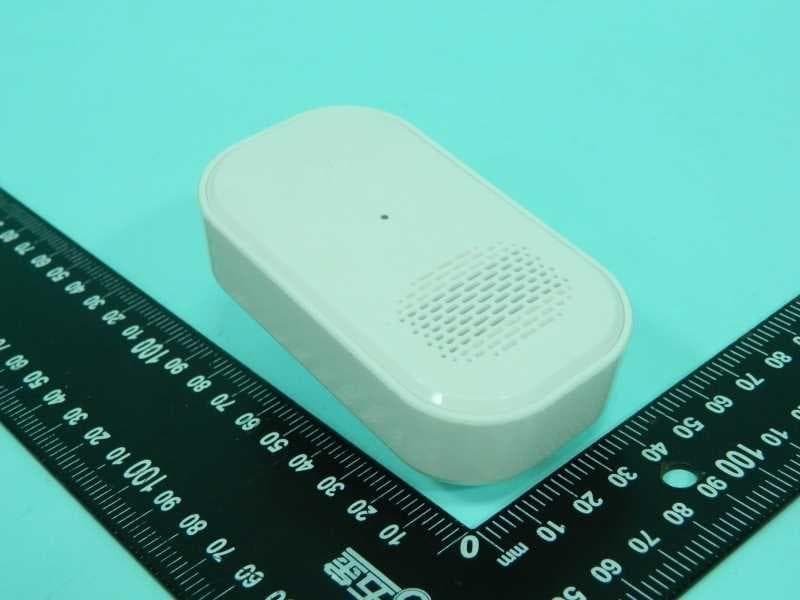
HBWCHM1
Dec 03, 2025Wireless Chime
Equipment Class
DTS - Digital Transmission SystemHBWN519
Oct 10, 2024VEHICULAR GATE OPENER
Equipment Class
DSS - Part 15 Spread Spectrum TransmitterHBWN329
Sep 22, 2024Handheld Remote
Equipment Class
DSC - Part 15 Security/Remote Control Transmitter