HBW9525Main control/transceiver for use in HD Operators
Chamberlain Group LLC, The
Click to zoom
Application Details
- Equipment Class
- DSS - Part 15 Spread Spectrum Transmitter
- Date of Grant
- Feb 18, 2020
- Application Purpose
- Original Equipment
- Date of Application
- Feb 18, 2020
- Equipment Note
- Main control/transceiver for use in HD Operators
- Frequency Range
- 902.25000000 - 926.75000000
- Company
- Chamberlain Group LLC, The
- Country
- United States
Documents & Files
Document Text
Text extracted from the exhibit documents filed with the FCC. Open a document above to read the original.
Users Manual
COMMERCIAL DC VEHICULAR SLIDE GATE OPERATOR INSTALLATION MANUAL • THIS PRODUCT MUST BE INSTALLED AND SERVICED IN ACCORDANCE WITH THIS MANUAL BY A TRAINED GATE SYSTEMS TECHNICIAN ONLY. • This operator is for use on vehicular passage gates ONLY and not intended for use on pedestrian passage gates. • HDSL24UL is intended for use in Class I, II, III, and IV vehicular slide gate applications. • HDFSL24UL is intended for use in Class III and IV vehicular slide gate applications ONLY. • Visit LiftMaster.com to locate a professional installing dealer in your area. • This gate operator is compatible with MyQ ® and Security+ 2.0 ® accessories. LiftMaster 300 Windsor Drive Oak Brook, IL 60523 Access installation and technical support guides or register this product Send it in by texting the photo to 71403. Take a photo of the camera icon including the points ( ). 1. 2. HDFSL24ULTECH HDSL24ULTECH Models HDSL24UL • HDFSL24UL 2 SAFETY 2 Safety Symbol and Signal Word Review ................................................ 2 Usage Class ........................................................................................... 3 UL325 Entrapment Protection Requirements ........................................ 3 Safety Installation Information ............................................................... 4 Gate Construction Information ............................................................... 5 INTRODUCTION 6 Carton Inventory .................................................................................... 6 Operator Specifications .......................................................................... 7 Site Preparation ..................................................................................... 8 INSTALLATION 9 Types of Installations ............................................................................. 9 Step 1 Determine Location for Operator .............................................. 10 Step 2 Install the Operator ................................................................... 11 Step 3 Attach the Chain ....................................................................... 12 Step 4 Install Entrapment Protection ................................................... 14 Step 5 Earth Ground Rod ..................................................................... 16 Step 6 Power Wiring ............................................................................ 16 Step 7 Connect Batteries ..................................................................... 18 Step 8 Dual Gate Setup ........................................................................ 20 Step 9 Install the Cover ....................................................................... 22 Step 10 Install Warning Signs ............................................................. 22 ADJUSTMENT 23 Limit, Speed, and Force Adjustment .................................................... 23 Obstruction Test .................................................................................. 24 PROGRAMMING 26 Remote Controls (Not Provided) ......................................................... 26 LiftMaster Internet Gateway (not provided) ......................................... 27 CAPXL Connected Access Portal ......................................................... 27 Erase All Codes .................................................................................... 28 Erase Limits ......................................................................................... 28 Constant Pressure Override (CPO) ...................................................... 28 Gate Hold Open Feature ....................................................................... 28 To Remove and Erase Monitored Entrapment Protection Devices ....... 28 OPERATION 29 Gate Operator Setup Examples ............................................................ 29 Control Board Overview ....................................................................... 30 Manual Disconnect .............................................................................. 31 Reset Switch ........................................................................................ 31 Relay Board and Terminal Block Access .............................................. 31 Operator Alarm .................................................................................... 32 Remote Control .................................................................................... 32 ACCESSORY WIRING 33 External Control Devices ...................................................................... 33 Locks ................................................................................................... 34 Miscellaneous Wiring ........................................................................... 34 EXPANSION AND RELAY BOARDS 35 Expansion and Relay Boards Overview ................................................ 35 Auxiliary Relays ................................................................................... 36 Wiring Accessories to the Expansion Board ........................................ 37 MAINTENANCE 38 Important Safety Instructions .............................................................. 38 Maintenance Chart ............................................................................... 39 Batteries ............................................................................................... 39 Drive Train ........................................................................................... 39 TROUBLESHOOTING 40 Diagnostic Codes ................................................................................. 40 Control Board LEDs ............................................................................. 41 Troubleshooting Chart ......................................................................... 42 SOLAR PANELS 45 Step 6 Solar Panel(s) ........................................................................... 45 REPAIR PARTS…
Text truncated - open the document above for the full version.
Users Manual
51 Miscellaneous Post-mountingplate Forpost-mountingmodelsCSL24UL,CSW24UL, CSW200UL,SL3000UL,HDSL24UL, HDFSL24UL,andHDSW24ULcommercialgate operators.Postsnotincluded. ModelMPEL Remoteantennaextensionkit Theremoteantennaextensionkitallowsthe antennatoberemotelyinstalled. Model86LM Plug-inloopdetector Lowpower.Convenientlyplugsintoexisting controlboard.Nottobeusedasentrapment protection. ModelLOOPDETLM LoopDetector Lowpowerloopdetectorsmountedandwired separatelyinsidecontrolbox.LiftMasterlow poweraccessory.Nottobeusedasentrapment protection. ModelLD7LP Vehiclesensingprobe Thevehiclesensingprobeisburiedintheground andcandetectacarasitapproachesandwill thenopenthegate. ModelCP3 Solarpanelkit Thiskitistoreplaceoraddasolarpaneltothe operatorapplication.60Wmaximumfor24Vdc operatorsand30Wmaximumfor12Vdc operators.Requiresa33AHbatteryharness. ModelsSP10W12V(10Watt,12V)and SP20W12V(20Watt,12V) Magneticgatelock Outdoormagneticlock,transformer,junction box,mountingplateandhardware.Notforuse withSolarApplications.Mustbepowered separately. ModelMG1300 Heater Theheaterkeepsthegearboxandbatteriesata suitabletemperaturewhentheoutside temperatureisbelow-4°F(-20°C).The thermostatMUSTbesetbetween45°Fand60°F (7°Cand15.5°C)toensurepropergate operation.Theheatercanbepoweredby110to 250Vac. ModelHTR LongrangeRFIDreader ModelLMSC1000 LiftMaster ® InternetGateway Internetenabledaccessorywhichconnectsyourgate operatortoyourWiFinetworkandallowsyoutomonitor andcontrolgateoperatorsandlightingaccessories enabledbymyQ ® technology. Model828LM myQ ® Business™connectedaccessprotocol-high capacity ModelCAPXL 40-39235-1 Warningsign Model40-39235 Transformerkit Changesinputvoltage(208/240/480/575Vac)toanoutput voltageof120Vac.Rated208/240/480/575Vac, 4.8/4.2/2.1/1.7A,60Hz,1PH Model3PHCONV TransformerkitisNOTcompatiblewith33AHbatteries. Solenoidlockharnesskit ModelK77-37972 Batteries Gateaccesssystembatteriesreplaceorupgradethegateoperatorbatteries.Two identical12Vdcbatteriesarerequiredforeachgateoperator.Donotmix7AHand 33AHbatterieswithinagateoperator. 7AHbatteries Standard7AMP-HourBattery,12Vdc,toreplaceoriginal batteriesprovidedwithoperator.Reuseexisting harnesses. Models29-NP712(1)andK74-30762(2) 33AHbatteries Upgrade33AMP-HourBattery,12Vdc.Idealforsolar applicationsandextendedbatterybackup.Tworequired. ModelA12330SGLPK 33AHbatteriesareNOTcompatibleiftransformerkit model3PHCONVisinstalled. Harnesskit For33AHbatteryapplications. ModelK42-0102-000 ACCESSORIES 52 LiftMaster7yearresidential/5yearcommercialLimitedWarranty LiftMaster(“Seller”)warrantstothefirstpurchaserofthisproduct,forthestructureinwhichthisproductisoriginallyinstalled,thatitisfreefromdefectin materialsand/orworkmanshipforaperiodof7yearresidentialinstallation/5yearcommercialinstallationfromthedateofpurchase[andthatthe HDSL24ULisfreefromdefectinmaterialsand/orworkmanshipforaperiodof7yearresidentialinstallation/5yearcommercialinstallationfromthedate ofpurchase].Theproperoperationofthisproductisdependentonyourcompliancewiththeinstructionsregardinginstallation,operation,maintenance andtesting.Failuretocomplystrictlywiththoseinstructionswillvoidthislimitedwarrantyinitsentirety. If,duringthelimitedwarrantyperiod,thisproductappearstocontainadefectcoveredbythislimitedwarranty,call1-800-528-2806,tollfree,before dismantlingthisproduct.Thensendthisproduct,pre-paidandinsured,toourservicecenterforwarrantyrepair.Youwillbeadvisedofshipping instructionswhenyoucall.Pleaseincludeabriefdescriptionoftheproblemandadatedproof-of-purchasereceiptwithanyproductreturnedforwarranty repair.ProductsreturnedtoSellerforwarrantyrepair,whichuponreceiptbySellerareconfirmedtobedefectiveandcoveredbythislimitedwarranty,will berepairedorreplaced(atSeller’ssoleoption)atnocosttoyouandreturnedpre-paid.Partswillberepairedorreplacedwithneworfactory-rebuiltparts atSeller’ssoleoption. ALLIMPLIEDWARRANTIESFORTHEPRODUCT,INCLUDINGBUTNOTLIMITEDTOANYIMPLIEDWARRANTIESOFMERCHANTABILITYANDFITNESS FORAPARTICULARPURPOSE,ARELIMITEDINDURATIONTOTHE7YEARRESIDENTIAL/5YEARCOMMERCIALLIMITEDWARRANTYPERIODSET FORTHABOVE[EXCEPTTHEIMPLIEDWARRANTIESWITHRESPECTTOTHEHDSL24UL,WHICHARELIMITEDINDURATIONTOTHE7YEAR RESIDENTIAL/5YEARCOMMERCIALLIMITEDWARRANTYPERIODFORTHEHDSL24UL,ANDNOIMPLIEDWARRANTIESWILLEXISTORAPPLY AFTERSUCHPERIOD.Somestatesdonotallowlimitationsonhowlonganimpliedwarrantylasts,sotheabovelimitationmaynotapplytoyou.THIS LIMITEDWARRANTYDOESNOTCOVERDAMAGECAUSEDBYIMPROPERINSTALLATION,OPERATIONORCARE(INCLUDING,BUTNOTLIMITEDTO ABUSE,MISUSE,FAILURETOPROVIDEREASONABLEANDNECESSARYMAINTENANCE,UNAUTHORIZEDREPAIRSORANYALTERATIONSTOTHIS PRODUCT),LABORCHARGESFORREINSTALLINGAREPAIREDORREPLACEDUNIT,ORREPLACEMENTOFBATTERIES. THISLIMITEDWARRANTYDOESNOTCOVERANYPROBLEMSWITH,ORRELATINGTO,THEGATEORGATEHARDWARE,INCLUDINGBUTNOT LIMITEDTOTHEGATESPRINGS,GATEROLLERS,GATEALIGNMENTORHINGES.THISLIMITEDWARRANTYALSODOESNOTCOVERANY PROBLEMSCAUSEDBYINTERFERENCE.ANYSERVICECALLTHATDETERMINESTHEPROBLEMHASBEENCAUSEDBYANYOFTHESEITEMS COULDRESULTINAFEETOYOU. UNDERNOCIRCUMSTANCESSHALLSELLERBELIABLEFORCONSEQUENTIAL,INCIDENTALORSPECIALDAMAGESARISINGINCONNECTIONWITH USE,ORINABILITYTOUSE,THISPRODUCT.INNOEVENTSHALLSELLER’SLIABILITYFORBREACHOFWARRANTY,BREACHOFCONTRACT, NEGLIGENCEORSTRICTLIABILITYEXCEEDTHECOSTOFTHEPRODUCTCOVEREDHEREBY.NOPERSONISAUTHORIZEDTOASSUMEFORUSANY OTHERLIABILITYINCONNECTIONWITHTHESALEOFTHISPRODUCT. Somestatesdonotallowtheexclusionorlimitationofconsequential,incidentalorspecialdamages,sotheabovelimitationorexclusionmaynotapplyto you.Thislimitedwarrantygivesyouspecificlegalrights,andyoumayalsohaveotherrightswhichvaryfromstatetostate. WARRANTY 53 SAMSWiringwithRelaysNotEnergized SAMSOperation Tokeepvehiclesfromrushingthegate,thebarrierarmstaysinclosedpositionuntilthegatereachesfullyopenpositionthenthebarrierarmisreleasedto openandallowvehiclestopass. AUX Relay 1 DualGateSettings NOTE:Werecommendthatallaccessoriesandboardconfigurationsaresetontheprimaryoperator. Maincontrolboard FEATUREPRIMARYOPERATORSECONDARYOPERATOR Timer-to- Close SettheTTCdi…
Text truncated - open the document above for the full version.
Users Manual
14 TopreventSERIOUSINJURYorDEATHfromamovinggate: lALLgateoperatorsystemsREQUIREtwoindependententrapment protectionsystemsforeachentrapmentzone. lEntrapmentprotectiondevicesMUSTbeinstalledtoprotectanyone whomaycomenearamovinggate. lEntrapmentprotectiondevicesMUSTbelocatedtoprotectinBOTH theopenandclosegatecycles. lLocateentrapmentprotectiondevicestoprotectbetweenmovinggate andRIGIDobjects,suchasposts,walls,pillars,columns,oroperator itself. Step4InstallEntrapmentProtection InstallentrapmentprotectiondevicesaccordingtotheUL325 EntrapmentProtectionRequirementssection,seepage3.UsetheSite PlanningSafetyChecklistintheappendix,toidentifyentrapmentzones thatwillresultfromtheinstallation. 1.InstallentrapmentprotectiondevicesforALLentrapmentzones.This operatorhasaninherententrapmentprotectiondevicebuilt-in.The installerMUSTprovideoneadditionalentrapmentprotectiondevice foreachentrapmentzone. 2. TheoperatorwillNOTrununlessaminimumoftwoexternaldevices areconnected;oneintheopendirectionandoneintheclosed direction. 3.TestALLentrapmentprotectiondevicesAFTERinstallingthe operator,refertothemanualprovidedwithyourentrapment protectiondevice. Definitions ENTRAPMENT:Theconditionwhenapersoniscaughtorheldina positionthatincreasestheriskofinjury. SLIDEGATEENTRAPMENTZONE:Anentrapmentzoneexistsifatany pointduringtravel,thegapbetweenthegateandanyopposingfixededge orsurfacesuchasposts,walls,pillars,columnsoroperatoritself,isless than16"(406mm)inalocationupto6ft.(1.8m)abovegrade. SeeAccessoriesforapprovedentrapmentprotectiondevices. Illustrationisforexampleonly;yoursitemayhaveadditionalentrapment zoneswhichMUSTbeprotected. Secure Side Public Side Gap between vertical bars MUST be less than 2-1/4" (57 mm) Interior posts, non-pinch rollers (2x) Place warning signs on both sides of the gate in clear view Take a photograph of the complete installation site for your records Any gap larger than 2-1/4" (57 mm) between gate and fixed objects MUST be protected. Install edge sensors where gap between post and gate creates an entrapment zone. Pedestrian gate located near the slide gate. Make sure a separate pedestrian entrance is available and the path is clearly designated. 6' (1.8 m) minimum Photoelectric sensor (close direction) Photoelectric sensor (close direction) Photoelectric sensor (open direction) Photoelectric sensor (open direction) Left hand gate opening Edge sensor Edge sensor Edge sensor Earth ground IllustrationsprovidedbyDASMAGateSystemsSafetyGuide INSTALLATION 15 WireEntrapmentProtectionDevices Therearethreeoptionsforwiringexternalentrapmentprotectiondevicesdependingonthespecificdeviceandhowthedevicewillfunction.Refertothe manualincludedwithyourentrapmentprotectiondeviceformoreinformation.Theseentrapmentprotectiondeviceinputsareformonitoreddevices,which includepulsedphotoelectricsensors,resistiveedgesensors,andpulsededgesensors.Onlyonemonitoredentrapmentprotectiondevicemaybewired toeachinput.Additionalmonitoredentrapmentprotectiondevicesmaybewiredtotheexpansionboard. NOTE:Boardinputsforentrapmentprotectiondevicesareyellow. ControlBoard CLOSESEYES/INTERRUPT (2Terminals)TheCLOSEEYES/INTERRUPTinputisforphotoelectric sensorentrapmentprotectionfortheclosedirection.Whenan obstructionissensedduringgateclosingthegatewillopentothefull openpositionandresetstheTimer-to-Close.Thisinputwillbe disregardedduringgateopening. CLOSEEDGE (2Terminals)TheCLOSEEDGEinputisforedgesensorentrapment protectionfortheclosedirection.Whenanobstructionissensedduring gateclosingthegatewillreversetothefullopenposition,disengaging theTimer-to-Close.Thisinputwillbedisregardedduringgateopening. OPENEYES/EDGE (2Terminals)TheOPENEYES/EDGEinputisforphotoelectricsensoror edgesensorentrapmentprotectionfortheopendirection.Whenan obstructionissensedduringgateopeningthegatewillreversefor4 secondsthenstop.Thisinputwillbedisregardedduringgateclosing. Close Photoelectric Sensors Open Photoelectric Sensors OR Open Edge Close Edge ExpansionBoard EYEONLYandCOM OpenorCloseDirectionPhotoelectricSensors,thefunctionalityisbased ontheswitchsettings(locatednexttotheterminals) SwitchsettoCLOSE:gatereversesfullywhenanobstructionissensed SwitchsettoOPEN:gatereverses4secondswhenanobstructionis sensed EYE/EDGEandCOM OpenorCloseDirectionPhotoelectricSensorsorEdgeSensor,the functionalityisbasedontheswitchsettings(locatednexttothe terminals) SwitchsettoCLOSE:gatereversesfullywhenanobstructionissensed SwitchsettoOPEN:gatereverses4secondswhenanobstructionis sensed Photoelectric Sensors Photoelectric Sensors OR Edge Sensor INSTALLATION 16 Step5EarthGroundRod Usetheproperearthgroundrodforyourlocalarea.Thegroundwire mustbeasingle,wholepieceofwire.Neversplicetwowiresforthe groundwire.Ifyoushouldcutthegroundwiretooshort,breakit,or destroyitsintegrity,replaceitwithasinglewirelength. 1.Installtheearthgroundrodwithin3feet(.9m)oftheoperator. 2.Runwirefromtheearthgroundrodtotheoperator. NOTE:Iftheoperatorisnotgroundedproperlytherangeoftheremote controlswillbereducedandtheoperatorwillbemoresusceptibleto lightningandsurgedamage. To operator Check national and local codes for proper depth Step6PowerWiring ToreducetheriskofSEVEREINJURYorDEATH: lANYmaintenancetotheoperatororintheareaneartheoperator MUSTNOTbeperformeduntildisconnectingtheelectricalpower(AC orsolarandbattery)andlocking-outthepowerviatheoperatorpower switch.UponcompletionofmaintenancetheareaMUSTbecleared andsecured,atthattimetheunitmaybereturnedtoservice. lDisconnectpoweratthefuseboxBEFOREproceeding.Operator MUSTbeproperlygroundedandconnectedinaccordancewith nationalandlocalelectricalcodes.NOTE:Theoperatorshouldbeona separatefusedlineofadequatecapacity. lALLelectricalconnectionsMUSTbemadebyaqualifiedindividual. lDONOTinstallANYwiringorattempttoruntheoperatorwithout consultingthewiringdiagram. lALLpowerwiringshouldbeonadedicatedcircuitandwellprotected. Thelocationofthepowerdisconnectshouldbevisibleandclearly labeled. lALLpowerandcontrolwiringMUSTberuninseparateconduit. Theoperatorcanbewiredforeither120Vacor240Vacorasolarpanel…
Text truncated - open the document above for the full version.
Users Manual
21 Wiredsetup Beforedigging,contactlocalundergroundutilitylocatingcompanies.Use PVCconduittopreventdamagetocables. 1.DisconnectALLpowertotheoperatorandturnOFFthebattery switch. 2.Trenchacrossdrivewaytoburytheshieldedtwistedpaircable. 3.ConnectthewiresfromtheshieldedtwistedpaircabletotheComLink terminalsontheprimarygateoperatorcontrolboard.NOTE:We recommendthatallaccessoriesandboardconfigurationsareseton theprimaryoperator. 4.Routetheshieldedtwistedpaircabletothesecondarygateoperator's controlboard. 5.ConnectthewiresfromtheshieldedtwistedpaircabletotheComLink terminalsonthesecondarycontrolboard(ComLinkAtoComLinkA andComLinkBtoComLinkB).Groundtheshieldofthecabletothe chassisgroundofoneoperator. 6.ConnectALLpowertotheoperatorandturnONthebatteryswitch. DUALGATEWIRETYPE(SHIELDEDTWISTEDPAIRCABLE) 22AWGupto200 feet(61 m)18AWG-200-1000 feet(61-305 m) Wiremustberatedat30Voltminimum Com Link Data A Com Link Data B Com Link Data A Com Link Data B Bipartdelay/synchronizedclose TheLOCK/BIPARTDELAYswitchisusedonlywithdualgateapplicationsandservestwofunctions: l BIPARTDELAY Notapplicableforslidegateapplications. l SYNCHRONIZEDCLOSE Tosynchronizetheclosingofthegates,settheLOCK/BIPARTDELAYswitchtoONforbothoperators. INSTALLATION 22 Step9Installthecover Beforeinstallingthecover,followtheinstructionsintheAdjustment sectiontoadjustthelimits,speed,andforce. 1.Slidethecoverovertheoperator. 2.Aligntheholesinthecoverwiththethreadedholesintheoperator's chassisandsecurethecoverwiththeprovidedscrews. Screw Screw Step10InstallWarningSigns InstallersMUSTinstalltheULrequiredwarningsigns.ThesignsMUST beinstalledinplainviewonbothsidesofeachgateinstalled.Usethe fasteningholesineachcornertopermanentlysecurethesign. Place warning signs on both sides of the gate in clear view Thebasicinstallationiscomplete. INSTALLATION 23 Limit,Speed,andForceAdjustment ToreducetheriskofSEVEREINJURYorDEATH: lWithoutaproperlyinstalledsafetyreversalsystem,persons (particularlysmallchildren)couldbeSERIOUSLYINJUREDor KILLEDbyamovinggate. lToomuchforceongatewillinterferewithproperoperationofsafety reversalsystem. lNEVERincreaseforcebeyondminimumamountrequiredtomove gate. lNEVERuseforceadjustmentstocompensateforabindingorsticking gate. lIfonecontrol(force,speedortravellimits)isadjusted,theother controlsmayalsoneedadjustment. lAfterANYadjustmentsaremade,thesafetyreversalsystemMUSTbe tested.GateMUSTreverseoncontactwithanobject. lFastergatespeedincreasesrisktopedestrians.Useminimumspeed necessarytomovegate. Introduction Youroperatorisdesignedwithelectroniccontrolstomaketravellimit andforceadjustmentseasy.Theadjustmentsallowyoutoprogram wherethegatewillstopintheopenandcloseposition.Theelectronic controlssensetheamountofforcerequiredtoopenandclosethegate. Theforceisadjustedautomaticallywhenyouprogramthelimitsbut shouldbefinetunedusingtheREVERSALFORCEdialonthecontrol board(refertoFineTunetheForcesection)tocompensatefor environmentalchanges.ThelimitsetupLEDs(locatednexttotheSET OPENandSETCLOSEbuttons)indicatethestatusofthelimits,referto thetabletotheright. Thelimitscanbesetusingthecontrolboard(below)oraremotecontrol (refertoLimitSetupwithaRemoteControlintheAppendix).Settingthe limitswitharemotecontrolrequiresa3-buttonremotecontrol programmedtoOPEN,CLOSE,andSTOP. NOTE:TheTESTbuttonsonthecontrolboardwillnotworkuntilthe limitshavebeensetandtherequiredentrapmentprotectiondevicesare installed. LIMITSETUPLEDS SET OPEN LED SET CLOSE LED OPERATOR MODE EXPLANATION OFFOFFNORMALMODELimitsareset BLINKINGBLINKINGLIMITSETTING MODE Limitsarenotset BLINKINGONLIMITSETTING MODE Openlimitisnotset ONBLINKINGLIMITSETTING MODE Closelimitisnotset ONONLIMITSETTING MODE Limitsareset SettheInitialLimits,Speed,andForce Fordualgateapplicationsthelimitswillhavetobesetforeach operator.ThegateMUSTbeattachedtotheoperatorbeforesetting thelimitsandforce. ForslidegateapplicationstheopenlimitandclosedlimitMUSTbeset atleastfourfeetapart. 1.PressandreleasetheSETOPENandSETCLOSEbuttons simultaneouslytoenterlimitsettingmode. 2.PressandholdoneoftheMOVEGATEbuttonstomovethegateto theopenorcloselimit. 3.PressandreleasetheSETCLOSEorSETOPENbuttondepending onwhichlimitisbeingset. 4.PressandholdoneoftheMOVEGATEbuttontomovethegateto theotherlimit. 5.PressandreleasetheSETCLOSEorSETOPENbuttondepending onwhichlimitisbeingset. 6.Setthespeeddialtothedesiredsetting,seepage24. HDSL24UL:0.5ft/sec.min-1ft./sec.max. HDFSL24UL:1ft/sec.min-2ft./sec.max. 7.Cyclethegateopenandclose.Thisautomaticallysetstheforce. Whenlimitsaresetproperlytheoperatorwillautomaticallyexitlimit settingmode. 5 2 6 3 4 1 7 ADJUSTMENT 24 SpeedControl TheSPEEDCONTROLdialcontrolsthespeedoftheoperator.Thedialis presettominimumfromthefactory.Setthespeedaslowaspossiblefor theintendedapplication. GateoperatingspeedforHDSL24UL0.5ft./sec.-1ft./sec. GateoperatingspeedforHDFSL24UL1ft./sec.-2ft./sec. Fordualgatesetup,settheSPEEDCONTROLdialoneachoperatortothe samesettingormakesurethegatethattravelsfurtherissetfasterthan theotheroperatorforthesmoothestoperation. Afteranyspeedadjustment: 1.Cyclethegateopenandclosetoautomaticallyrelearntheforces. 2.PerformtheObstructionTest,seepage25. FineTunetheForce Oncetheinitiallimitshavebeenset,theREVERSALFORCEDIALonthecontrolboardisusedforfinetuningtheforcewherewindorenvironmental changesmayaffectthegatetravel.TheREVERSALFORCEDIALissettominimumatthefactory. Basedonthelengthandweightofthegateitmaybenecessarytomakeadditionalforceadjustments.Theforcesettingshouldbehighenoughthatthegate willnotreversebyitselfnorcausenuisanceinterruptions,butlowenoughtopreventseriousinjurytoaperson.Theforcesettingisthesameforboththe openandclosegatedirections. 1.OpenandclosethegatewiththeTESTBUTTONS. 2.Ifthegatestopsorreversesbeforereachingthefullyopenorclosedposition,increasetheforcebyturningtheforcecontrolslightlyclockwise. 3.Performthe“ObstructionTest”aftereverylimit,speed,andforcesettingadjustmentseepage25. Settings1-3:Fixedforcesettings(gatewillnotadjustduetogatewear ortemperaturechanges). Settings4-10:Automaticallyincreasetheforce…
Text truncated - open the document above for the full version.
Users Manual
32 OperatorAlarm Whentheinherentforceoftheoperatordetectsthefollowingtwice consecutively,thealarmwillsoundupto5minutesandtheoperatorwill needtobereset. A.Thegateishittinganobstruction. B.Thegatedoesnotmeetspecifications. C.Debrisisonthegate'stracksuchasmud,rocks,dirt,etc. D.Thegatehasoneormorebrokenaxlesorwheels. E.Thegatewheelisoffthegaterail. Theoperatoralarmwillbeep3timeswithacommandifthebatteryis low. Removeanyobstructionsorrepairgatesystem.Toggletheresetswitch toRESETthenbacktoNORMALOPERATIONtoshutoffthealarmand resettheoperator.Aftertheoperatorisreset,normalfunctionswill resume. E D B C A Remotecontrol Thereare3differentoptionsforprogrammingtheremotecontroldependingonhowyouwouldliketheremotecontroltofunction,seepage26. SingleButtonOpenOnly Whengateisintheclosedposition,activationoftheremotecontrolbuttonwillopenthegate.TheTimer-to-Closecanbesettoclosethegate. SingleButtonControl(SBC)Functionality Programoneremotecontrolbuttonasanopen,close,andstop Whengateisintheclosedposition,activationoftheremotecontrolbuttonwillopenthegate.Duringtheopencycleanotheractivationoftheremote controlwillstopthegateandthenextactivationoftheremotecontrolwillclosethegate. Whenthegateisintheopenposition,activationoftheremotecontrolbuttonwillclosethegate.Iftheremotecontrolisactivatedwhilethegateisclosing, thegatewillstopandthenextactivationwillopenthegate. ThreeButtonRemoteControl Programeachremotecontrolbuttonasanopen,close,andstop. OPERATION 33 AllcontrolwiringusedtoconnectexternaldevicestoClass2circuitsoftheoperatormustbe(QPTZ)Power-LimitedCircuitCables,TypeCL2,CL2P, CL2R,orCL2Xorothercablewithequivalentorbetterelectrical,mechanical,andflammabilityratings. ExternalControlDevices NOTTOBEUSEDASENTRAPMENTPROTECTION EXIT(2Terminals) Thisinputisasoftopencommand(maintainedswitchdoesnotoverride externalsafetiesanddoesnotresetalarmcondition).Usedforexitprobe, telephoneentry,externalexitloopdetector,oranydevicethatwould commandthegatetoopen. lOpensaclosedorclosinggateandholdsopenanopengate,if maintained,pausesTimer-to-CloseatOPENlimit. SHADOW(2Terminals) Thisinputisusedforexternalshadowloopdetectorwhenloopis positionedundertheswingofthegate. lHoldsopengateatopenlimit lOnlyactivewhenthegateisattheOPENlimit,disregardedatall othertimes lPausesTimer-to-CloseatOPENlimit INTERRUPT(2Terminals) Thisinputisusedforanexternalinterruptloopdetectorwhenloopison theoutsideofthegate. lHoldsopengateatopenlimit lStopsandreversesaclosinggatetoopenlimit lPausesTimer-to-CloseatOPENlimit,activatesquickcloseandanti- tailgatefeatureswhenenabledontheexpansionboard Accesscontroldevicewiring Access Control Device Exit Com Control board Loopwiring Interrupt Loop Control board Exit Com Shadow Com Interrupt Com Exit Loop ACCESSORYWIRING 34 Locks Maglock(2Terminals,N.C.andCOM) Relaycontactoutput,Normally-closed(N.C.)outputformaglocks. Relayactivatespriortomotoractivationandduringmotorrun.Relayis offwhenmotorisoff. CONTROL BOARDMAGLOCK NOT PROVIDED MiscellaneousWiring Threebuttoncontrolstation(4Terminals) lOPENandCOM:Opensaclosedgate.Hardopen(maintainedswitch overridesexternalsafetiesandresetsalarmcondition).Ifmaintained,pauses Timer-to-CloseatOPENlimit.Opensaclosinggateandholdsopenanopen gate(withinline-of-sight). lCLOSEandCOM:Closesanopengate.Hardclose(maintainedswitch overridesexternalsafetiesandresetsalarmconditionwithinline-of-sight) lSTOPandCOM:Stopsamovinggate.Hardstop(maintainedswitch overridesOpenandClosecommandsandresetsalarmcondition).If maintained,pausesTimer-to-CloseatOPENlimit.OverridesOpenandClose commands(withinline-of-sight). Firedepartmentopeninput(2Terminals) Actsashardopen. Maintainedinputoverrides(ignores)externalsafeties(photoelectricsensorand edge),pausesTimer-to-Closemomentaryinputlogicassinglebuttoncontrol andsafetiesremainactive,re-enablesTimer-to-Close. Accessorypower24VDC,MAX1Amp(4Terminals) lSWITCHED:SwitchedONwithgatemotionandattheopenlimitwhen Timer-to-Closeisactive.Turnsoff5secondsaftermotion. lUNSWITCHED:24Vdcvoltageouttopoweraccessories,alwaysON. MAIN CONTROL BOARD Three Button Control Station Open Close N.C. Stop Com Fire Dept Com Fire Department MAIN CONTROL BOARD Accessory Power Switched Com (-) Acc power +24 Vdc Com (-) Acc power +24 Vdc Accessory Power Unswitched TerminalBlock Theterminalblockprovidesadditionalspaceforaccessorywiring. Terminal Block ACCESSORYWIRING 35 lToAVOIDdamagingthecircuitboard,relaysoraccessories,DONOTconnectmorethan42Vdc(32Vac)totheAUXrelaycontactterminalblocks. ExpansionandRelayBoardsOverview 1.QUICKCLOSEswitch: OFF:Nochangetothegate'snormaloperation. ON:WhenCLOSEEYES/Interruptloopisdeactivateditcausesan openingorastoppedgatetoclose(ignorestheTimer-to-Close). 2.ACFAILswitch: OPEN:LossofACpowerwillcausethegatetoopenapproximately15 secondsafterACpowerfailandremainOPENuntilACpoweris restored(enablingtheTimer-to-Close). BATT:WithlossofACpower,gatewillremaininpresentpositionand operatorispoweredfrombatteries. 3.EXITFAILswitch: WhensettoOPEN,iftheEXITplug-inloopdetector(Model LOOPDETLM)detectsafault,thenthegatewillopenandremainopen untilfaultiscleared.WhensettoCLOSE,thenplug-inEXITloop detectorfaultsareignored(EXITloopisfaultedandinoperative). 4.ANTI-TAILswitch: OFF:WhenCLOSEEYES/Interruptloopisactivateditcausesaclosing gatetostopandreverse. ON:WhenCLOSEEYES/Interruptloopisactivateditcausesaclosing gatetopause.Oncethevehicleisclearthegatewillcontinuetoclose. 5.AUXRELAYswitches: SettheAUXRELAYswitchesasneededtoobtainthedesiredfunction asshownonthefollowingpage. 6.EYE/EDGEswitches: SettheEYE/EDGEswitchesasneededtoobtainthedesiredOPENor CLOSEfunctionality. 7.1,2,and3LEDs: LEDsindicatingthestatusoftheEYE/EDGEinputs.Alsousedtocheck thefirmwareversionoftheexpansionboard: 1.Locatethe1,2,and3LEDsontheexpansionboard. 2.DisconnectAC/DCpowertothemaincontrolboardfor15 seconds. 3.Connectpower.The1,2,and3LEDswillflashinsequenceuntil themaincontrolboardfirmwarerevisionisdisplayed.Whenthe greenPOWERLEDglowssolidtheLED1willflashtheversion number,thenstop,thentheLED2willflashtherevisionnumber (forexample:F…
Text truncated - open the document above for the full version.
Contact Information
Applicant
Thomas DeSilvia(Director Corporate Compliance)
Technical Contact
The Chamberlain Group, Inc.Condy Schaaf
[email protected]6305166711
300 Windsor Drive · Oak Brook, Illinois · United States
Test Firm
Elite Electronic Engineering Inc.Kevin Halpin
Technical Specifications
| # | Rule Parts | Frequency Range | Power Output |
|---|---|---|---|
| 1 | 15C | 902.25 MHz - 926.75 MHz | 7.50 mW |
Other Applications from Chamberlain Group LLC, The
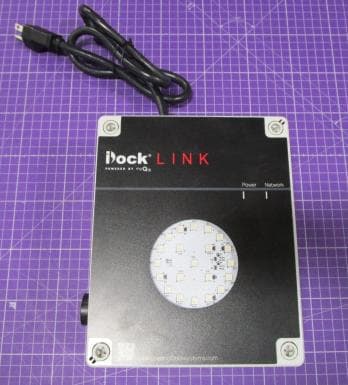
HBW73514
Jul 06, 2026iDock Link 2
Equipment Class
DSS - Part 15 Spread Spectrum TransmitterHBW-VKP2K
Jun 23, 2026SMART GARAGE VIDEO KEYPAD
Equipment Class
DTS - Digital Transmission System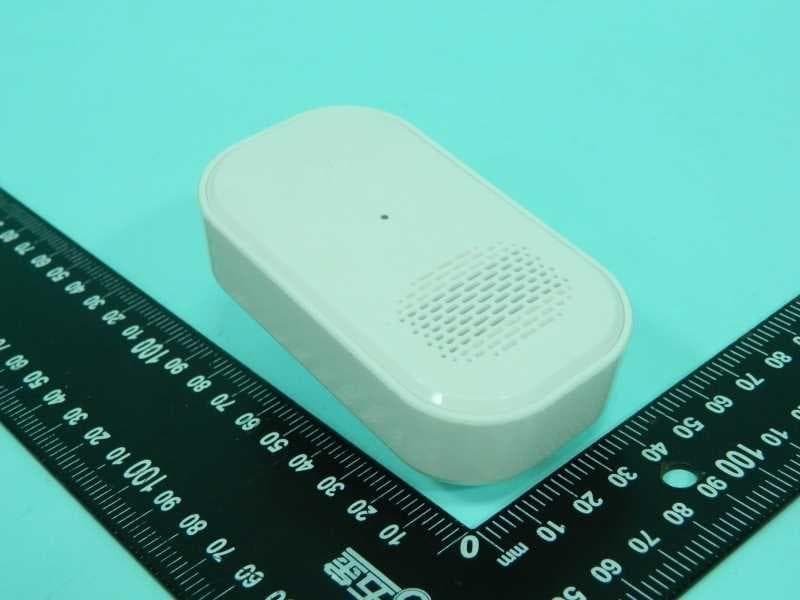
HBWCHM1
Dec 03, 2025Wireless Chime
Equipment Class
DTS - Digital Transmission SystemHBWN519
Oct 10, 2024VEHICULAR GATE OPENER
Equipment Class
DSS - Part 15 Spread Spectrum TransmitterHBWN329
Sep 22, 2024Handheld Remote
Equipment Class
DSC - Part 15 Security/Remote Control Transmitter