HED3CRWE41196OfficeConnect 11Mbps Wireless Access Point
Accton Technology Corp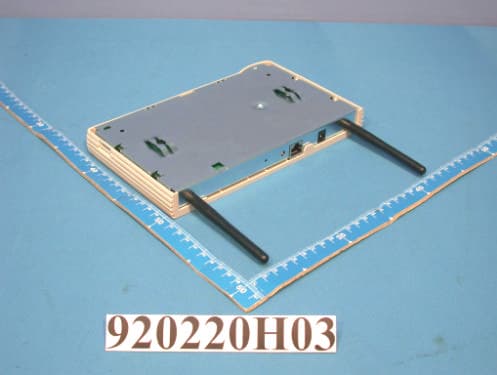
Click to zoom
Application Details
- Equipment Class
- DTS - Digital Transmission System
- Date of Grant
- May 08, 2003
- Application Purpose
- Original Equipment
- Date of Application
- May 08, 2003
- Equipment Note
- OfficeConnect 11Mbps Wireless Access Point
- Frequency Range
- 2412.00000000 - 2462.00000000
- Company
- Accton Technology Corp
- Country
- Taiwan
Documents & Files
Document Text
Text extracted from the exhibit documents filed with the FCC. Open a document above to read the original.
Users Manual
http://www.3com.com/ Part No. DUA4119-6AAA01 Published March 2003 OfficeConnect ® 11Mbps Wireless Access Point User Guide 3CRWE41196 3Com Corporation 5500 Great America Parkway Santa Clara, California 95052-8145 Copyright © 2003, 3Com Corporation. All rights reserved. No part of this documentation may be reproduced in any form or by any means or used to make any derivative work (such as translation, transformation, or adaptation) without written permission from 3Com Corporation. 3Com Technologies reserves the right to revise this documentation and to make changes in content from time to time without obligation on the part of 3Com Technologies to provide notification of such revision or change. 3Com Corporation provides this documentation without warranty, term, or condition of any kind, either implied or expressed, including, but not limited to, the implied warranties, terms or conditions of merchantability, satisfactory quality, and fitness for a particular purpose. 3Com may make improvements or changes in the product(s) and/or the program(s) described in this documentation at any time. If there is any software on removable media described in this documentation, it is furnished under a license agreement included with the product as a separate document, in the hard copy documentation, or on the removable media in a directory file named LICENSE.TXT or !LICENSE.TXT. If you are unable to locate a copy, please contact 3Com and a copy will be provided to you. UNITED STATES GOVERNMENT LEGEND If you are a United States government agency, then this documentation and the software described herein are provided to you subject to the following: All technical data and computer software are commercial in nature and developed solely at private expense. Software is delivered as “Commercial Computer Software” as defined in DFARS 252.227-7014 (June 1995) or as a “commercial item” as defined in FAR 2.101(a) and as such is provided with only such rights as are provided in 3Com’s standard commercial license for the Software. Technical data is provided with limited rights only as provided in DFAR 252.227-7015 (Nov 1995) or FAR 52.227-14 (June 1987), whichever is applicable. You agree not to remove or deface any portion of any legend provided on any licensed program or documentation contained in, or delivered to you in conjunction with, this User Guide. Unless otherwise indicated, 3Com registered trademarks are registered in the United States and may or may not be registered in other countries. 3Com, OfficeConnect and the 3Com logo are registered trademarks of 3Com Corporation. Intel and Pentium are registered trademarks of Intel Corporation. Microsoft, MS-DOS, Windows, and Windows NT are registered trademarks of Microsoft Corporation. Novell and NetWare are registered trademarks of Novell, Inc. UNIX is a registered trademark in the United States and other countries, licensed exclusively through X/Open Company, Ltd. Netscape Navigator is a registered trademark of Netscape Communications. JavaScript is a trademark of Sun Microsystems WiFi and the WiFi logo are trademarks of WECA (Wireless Ethernet Compatibility Alliance) IEEE and 802 are trademarks of the Institute of Electrical and Electronics Engineers, Inc. All other company and product names may be trademarks of the respective companies with which they are associated. ENVIRONMENTAL STATEMENT It is the policy of 3Com Corporation to be environmentally-friendly in all operations. To uphold our policy, we are committed to: Establishing environmental performance standards that comply with national legislation and regulations. Conserving energy, materials and natural resources in all operations. Reducing the waste generated by all operations. Ensuring that all waste conforms to recognized environmental standards. Maximizing the recyclable and reusable content of all products. Ensuring that all products can be recycled, reused and disposed of safely. Ensuring that all products are labelled according to recognized environmental standards. Improving our environmental record on a continual basis. End of Life Statement 3Com processes allow for the recovery, reclamation and safe disposal of all end-of-life electronic components. Regulated Materials Statement 3Com products do not contain any hazardous or ozone-depleting material. Environmental Statement about the Documentation The documentation for this product is printed on paper that comes from sustainable, managed forests; it is fully biodegradable and recyclable, and is completely chlorine-free. The varnish is environmentally-friendly, and the inks are vegetable-based with a low heavy-metal content. CONTENTS A BOUT T HIS G UIDE Naming Convention7 Conventions8 Feedback about this User Guide8 Related Documentation9 Product Registration9 1 I NTRODUCING THE A CCESS P OINT OfficeConnect 11Mbps Wireless Access Point12 Access Point Advantages13 Package Contents13 Minimum System and Component Requirements14 Front Panel14 Rear Panel16 2 H ARDWARE I NSTALLATION Introduction17 Safety Information17 Positioning the Access Point17 Using the Rubber Feet18 Wall Mounting18 Powering Up the Access Point19 Connecting the Access Point19 3 R UNNING THE S ETUP W IZARD Accessing the Wizard21 Password26 LAN Settings26 Wireless Settings29 Summary30 4 A CCESS P OINT C ONFIGURATION Navigating Through the Access Point Configuration Pages31 Main Menu31 Option Tabs31 Welcome Screen32 Notice Board32 Password33 Wizard33 LAN Settings34 Unit Configuration34 DHCP Clients List36 Wireless Settings37 Configuration38 Encryption40 Connection Control42 Client List45 Profile46 System Tools48 Restart48 Configuration48 Upgrade49 Status and Logs51 Status52 Logs52 Support52 5 T ROUBLESHOOTING Basic Connection Checks53 Browsing to the Access Point Configuration Screens53 Forgotten Password and Reset to Factory Defaults54 Wireless Networking54 Alert LED56 Recovering from Corrupted Software56 Frequently Asked Questions57 A U SING D ISCOVERY Running the Discovery Ap…
Text truncated - open the document above for the full version.
Users Manual
3 R UNNING THE S ETUP W IZARD Accessing the Wizard 3Com recommends that you perform the initial Access Point configuration from a computer that is directly connected to one of the LAN ports and not from a wireless connection. However, you may configure the Access Point from a wireless admin computer but, note that you may lose contact with the Access Point if you change the wireless configuration. To communicate with the Access Point, your wireless NIC should be set as follows: ■ WEP encryption - none ■ Service Area Name/SSID - 3Com The Access Point setup program is Web-based, which means that it is accessed through your Web browser (Netscape Navigator or Internet Explorer). To use the Setup Wizard: 1Ensure that you have at least one computer connected to the Access Point. Refer to Chapter 2 for details on how to do this. 2Insert the Access Point CD-ROM in the CD-ROM drive on your computer. A menu will appear; select Gateway Discovery. Discovery will find the Access Point even if it is unconfigured or misconfigured. 22C HAPTER 3: R UNNING THE S ETUP W IZARD Figure 5 Discovery Welcome Screen 3When the Welcome screen is displayed, select the NIC from which the Access Point will be discovered. Then click on Next and wait until the application discovers the Access Points connected to your LAN. Figure 6 Discovered Access Point Screen 4Figure 6 shows an example Discovered Devices screen. Highlight the 11Mbps Wireless Access Point by clicking on it, and press Next. Accessing the Wizard23 Figure 7 Discovery Finish Screen 5Click on Finish to launch a web browser and display the login page for the Access Point as shown in Figure 8 . 6To log in, enter the password (the default setting is admin ) in the System Password field and click Log in (Figure 8 ). Be sure to bookmark this screen for easy reference if you should want to change the Access Point settings. Figure 8 Access Point Login Screen 24C HAPTER 3: R UNNING THE S ETUP W IZARD 7If the password is correct, the Country Selection screen appears. Select the country you wish to configure the Access Point for, then click Apply. (Figure 9 ). This screen is only displayed on initial configuration of the Access Point. Figure 9 Country Selection Screen 8When you have logged in and selected a country either: ■ The Welcome screen will appear (Figure 10). Select the Wizard tab and click Wizard. or ■ If your Access Point has not been configured before, the Wizard will launch automatically (refer to Figure 11 ). 9Click Next. 10You will be guided step by step through a basic setup procedure. Accessing the Wizard25 Figure 10 Welcome Screen Figure 11 Wizard Screen 26C HAPTER 3: R UNNING THE S ETUP W IZARD Password Figure 12 Change Administration Password Screen When the Change Administration Password screen (Figure 12) appears, type the Old Password, then a new password in both the New Password and Confirm Password boxes. 3Com recommends entering a new password when setting up the Access Point for the first time. The Access Point is shipped from the factory with a default password, admin . 1. Password is case sensitive. 2. Write the new password down and keep it in a safe place, so that you can change your settings in the future. Click Next. LAN Settings Figure 13 LAN Settings Screen Accessing the Wizard27 This screen determines how the Access Point obtains its IP address. There are three options. Obtain IP Address automatically - The Access Point will obtain an IP address from a DHCP server already operating on your network. Specify an IP address manually - Select this option to manually configure the IP address of the Access Point. The screen shown in Figure 14 is displayed. This screen displays a suggested LAN IP address and subnet mask of the Access Point. It also allows you to change the IP address and subnet mask. 3Com recommends that you manually assign your Access Point a static IP address. Figure 14 LAN IP Address Screen Specify an IP address manually and enable DHCP server - The Access Point contains a Dynamic Host Configuration (DHCP) server that can automatically configure the TCP/IP settings of every computer on your network. To activate the DHCP Server option, select Specify an IP Address manually and Enable DHCP server. The screen shown in Figure 15 opens. 28C HAPTER 3: R UNNING THE S ETUP W IZARD Figure 15 DHCP Server Setup Screen This screen displays a suggested LAN IP address and subnet mask of the Access Point. It also allows you to change the IP address and subnet mask. Two further fields are available for you to enter the Start address of an address pool and an End address. The largest available continuous IP pool will be automatically entered; if this is not appropriate, make your required changes. Before enabling the DHCP Server, ensure that there are no other DHCP servers running on your network. Accessing the Wizard29 Wireless Settings Figure 16 Wireless Configuration Screen This screen displays the current Channel and Service Area Name. It also allows you to change these settings. There are a maximum of 13 channels, the number available to you is dependent on the country you reside in. The Service Area Name default for 3Com products is "3Com". Up to 32 (case sensitive) characters can be entered for the Service Area Name. 3Com strongly recommends that you change the SSID to something other than the default. For information on improving your Wireless network security see “ Wireless Settings” on page 37. If you are configuring the Access Point from a wireless computer any changes you make to the wireless configuration will result in communication between the Access Point and your computer being lost. This is why 3Com strongly recommends that you configure the Access Point from a wired computer. It is very important that you set up your wireless clients to use the same Service Area Name or SSID as the one you use on this screen. If your clients use a different Service Area Name then they will not be able to communicate with the Access Po…
Text truncated - open the document above for the full version.
Users Manual
44C HAPTER 4: A CCESS P OINT C ONFIGURATION To create a list of Wireless computers that can access the Access Point: 1Press New. The screen shown in Figure 30 opens. 2Select one or more MAC addresses of the Wireless PCs that you want to allow to connect to the Access Point. 3Click Add. The list on the Connection Control window contains the MAC addresses of all Wireless PCs that are in range, currently operating, and have the same Service Area Name/SSID, channel and encryption settings as the Access Point. You will find this screen easier to use if you set up and make a note of all of your wireless PC's on your network first. You may also add the entries manually if you know the MAC address. To add a MAC address that is not in the list, enter the MAC address in the appropriate fields. A MAC address consists of 12 characters. Valid characters are '0-9', and 'A-F'. Click Close to discard all changes. Modifying a MAC Address 1Click on the MAC address to be modified in the table (Figure 31 ) 2Modify the MAC address. The MAC address can only be edited manually. 3Press Apply to accept the changes. Figure 31 MAC Address Table Click Close to discard all changes. Deleting a MAC Address The connection rights for a Wireless PC listed in the table can be removed by pressing Delete for that entry in the table. Wireless Settings45 Once an entry has been deleted it cannot be undone. Please wait 30 seconds for changes to take effect. Client List Figure 32 Client List Screen The Wireless Client List provides details on the devices that are connected to the Wireless LAN. The list is only created when Wireless Networking is enabled. For each device that is connected to the Wireless LAN, the MAC address and Connection Speed of that device is displayed. As you connect more devices to the Wireless LAN, the client list will grow to a maximum of 128 (the maximum number of wireless devices that the Access Point can support). 46C HAPTER 4: A CCESS P OINT C ONFIGURATION Profile Figure 33 Profile Screen Some 3Com Wireless Network Adapters allow you to import Wireless configurations via a ‘profile’. The Access Point can generate a profile so that you do not need to configure your Wireless PCs manually. The profile contains three items as follows: ■ Service Area Name/SSID of the Access Point This is configured on the Configuration tab under the Wireless Settings option. ■ Encryption settings from the Access Point This is configured on the Encryption tab under the Wireless Settings option. ■ Profile Name This is used to identify the profile once it has been imported into the Wireless Network Adapter configuration software. Wireless Settings47 Saving a Profile To set up a profile (once the Service Area Name/SSID and Encryption settings have been configured in the Access Point): 1Enter a Profile Name (up to 25 alphanumeric characters) and then click Save Profile. 2Your browser will then prompt you to enter a file name and folder location in which to save the profile. Once the profile has been saved it can be copied on to another PC and imported into the 3Com Wireless Network Adapter. For instructions on how to import a profile, refer to the User Guide that accompanies your 3Com Wireless Network Adapter(s). If, once the profile is imported, the Wireless Network Adapter cannot connect to the Access Point, check that: ■ the adapter is within range of the Access Point if Connection Control has been enabled in the Access Point, the MAC address of the Wireless Network Adapter must be included in the list of authorised Wireless PCs. Importing a Profile You can import a profile that has already been saved. 1Click Browse and navigate to the folder where you have saved the profile on your admin computer. 2Select the Profile you want to import and click Load Profile. Only the Service Area Name and WEP settings will be imported from the profile. 48C HAPTER 4: A CCESS P OINT C ONFIGURATION System Tools The main frame of the System Tools screen includes three administration items: Restart, Configuration, and Upgrade (Figure 34 ). Restart Figure 34 Restart Screen If your Access Point is not operating correctly, you can choose to restart the Access Point by selecting Restart the Access Point, simulating the effect of power cycling the unit. No configuration information will be lost but the log files will be erased. Any network users who are currently connected to the Access Point will have their access interrupted whilst the restart takes place, and they may need to reboot their computers when the restart has completed and the Access Point is operational again. Configuration Figure 35 Configuration Screen System Tools49 Select the Configuration tab to display the Configuration screen (Figure 35 ). Backup Configuration Click BACKUP to save the current Access Point configuration. You will be prompted to download and save a file to disk. Restore Configuration Data If you want to reinstate the configuration settings previously saved to a file, press Browse to locate the backup file on your computer, and then click RESTORE to copy the data into the Access Point's memory. The password will remain unchanged. Reset to Factory Default If you want to reset the settings on your Access Point to those that were loaded at the factory, click RESET. You will lose all your configuration changes. The Access Point reverts to a DHCP client and will therefore restart requiring a new IP address. To communicate with the Access Point you may need to rerun the DISCOVERY software to find out the IP address of the Access Point. See Appendix A for more information. You may need to reconfigure and restart your computer to re-establish communication with the Access Point. Upgrade Figure 36 Upgrade Screen The Upgrade facility allows you to install on the Access Point any new releases of system software that 3Com may make available. To install new software, you first need to download the software from the 3Com 50C HAPTER 4: A CCESS P OINT C ONFIGURATION support web si…
Text truncated - open the document above for the full version.
External Photos
Page 1 CONSTRUCTION PHOTOS OF EUT Page 2
ID Label/Location Info
(Fig. 1) FCC ID: HED3CRWE41196 FCC LABEL LOCATION The label will be permanently affixed at a conspicuous location on the device. Label
ID Label/Location Info
100.0 8 0 . 0
Internal Photos
Page 1 CONSTRUCTION PHOTOS OF EUT Page 2 Page 3 Page 4 Page 5 Page 6 Page 7 Page 8
Operational Description
FCC ID: HED3CRWE41196 Report No.: 920220H03A ADT No.: 920225H05 Operational Description The transmitter of the EUT (OfficeConnect Wireless Cable/DSL Gateway) is powered by Power Adapter. The antenna used in this product is External Dipole Antenna without connector. Under normal use condition, the user has to keep at least 20cm separation distance between radiator and the body of the user. The other instruction, please have a look at the users manual. DSSS Information This device is Direct Sequence Spread Spectrum, the data is mixed by pseudorandom code which is an orthogonal code. The mixed data is digital modulated by DBPSK and DQPSK technique depends on the data rates. The CCK coding is applied for increasing the data rate, and also the processing gain will be increased. The bit rates are 1,2,5.5,11Mbps.
RF Exposure Info
FCC ID: HED3CRWE41196 Report No.: 920220H03A ADT No.: 920225H05 RF EXPOSURE REPORT REPORT NO.: RF920220H03A MODEL NO.: 3CRWE41196 ACCORDING: FCC Guidelines for Human Exposure IEEE C95.1 APPLICANT: Accton Technology Corporation ADDRESS: No.1, Creation Rd. III, Science-based Industrial Park, Hsinchu, Taiwan, R.O.C ISSUED BY: Advance Data Technology Corporation LAB LOCATION: No. 81-1, Lu Liao Keng, 9 Ling, Wu Lung Tsuen, Chiung Lin Hsiang, Hsin Chu Hsien, Taiwan, R.O.C. Lab Code: 200376-0 FCC ID: HED3CRWE41196 Report No.: 920220H03A ADT No.: 920225H05 RF Exposure Measurement 1. Introduction In this document, we try to prove the safety of radiation harmfulness to the human body for our product. The limit for Maximum Permissible Exposure (MPE) specified in FCC 1.1310 is followed. The Gain of the antenna used in this product is measured in a Fully Anechoic Chamber (FAC) calibrated for antenna measurement in ADT, and also the maximum total power input to the antenna is measured. Through the Friis transmission formula and the maximum gain of the antenna, we can calculate the distance, away from the product, where the limit of MPE is reached. Although the Friis transmission formula is a far field assumption, the calculated result of that is an over-prediction for near field power density. We will take that as the worst case to specify the safety range. 2. RF Exposure Limit According to FCC 1.1310: The criteria listed in the following table shall be used to evaluate the environmental impact of human exposure to radio-frequency (RF) radiation as specified in 1.1307(b) LIMITS FOR MAXIMUM PERMISSIBLE EXPOSURE (MPE) Frequency Range (MHz) Electric Field Strength (V/m) Magnetic Field Strength (A/m) Power Density (mW/cm 2 ) Average Time (minutes) (A)Limits For Occupational / Control Exposures 300-1500......F/3006 1500-100,000......56 (B)Limits For General Population / Uncontrolled Exposure 300-1500......F/15006 1500-100,000......1.030 F = Frequency in MHz FCC ID: HED3CRWE41196 Report No.: 920220H03A ADT No.: 920225H05 3. Friis Formula Friis transmission formula : Pd = (Pout*G) / (4*pi*r 2 ) where Pd = power density in mW/cm 2 Pout = output power to antenna in mW G = gain of antenna in linear scale Pi = 3.1416 R = distance between observation point and center of the radiator in cm Pd is the limit of MPE, 1 mW/cm 2 . If we know the maximum Gain of the antenna and the total power input to the antenna, through the calculation, we will know the MPE value at distance 20cm. Ref. : David K. Cheng, Field and Wave Electromagnetics, Second Edition, Page 640, Eq. (11-133). 4 EUT Operating condition The software provided by Manufacturer enabled the EUT to transmit and receive data at lowest, middle and highest channel individually. 5 Climate Condition The temperature and related humidity: 20 deg. C and 63 % RH 6. Classification This device is not fixed inside the host equipment, it is connected with host through wire. So it is easy to be re-located in the place where at least 20 cm far away from the body of the user. Warning statement to the user for keeping at least 20cm or more separation distance with the antenna should be included in users manual. So, this device is classified as Mobile Device. FCC ID: HED3CRWE41196 Report No.: 920220H03A ADT No.: 920225H05 7 Test Results 7.1 Antenna Gain The maximum Gain measured in Fully Anechoic Chamber are 1.5dBi or 1.4 (numeric). 7.2 Output Power Into Antenna & RF Exposure value at distance 20cm: Channel Channel Frequency (MHz) Output Power to Antenna (mW) Power Density (mW/cm 2 ) Limit of Power Density (mW/cm 2 ) 1241260.530.0171.0 6243765.920.0181.0 11246263.100.0181.0
Test Report
FCC ID: HED3CRWE41196 Report No.: RF920220H03A1Issued: Apr. 14, 2003 ADT No. 920225H05 FCC TEST REPORT REPORT NO.: RF920220H03A MODEL NO.: 3CRWE41196 RECEIVED: Feb. 20, 2003 TESTED: Feb. 20 to Apr. 10, 2003 APPLICANT: Accton Technology Corporation ADDRESS: No.1, Creation Rd. III, Science-based Industrial Park, Hsinchu, Taiwan, R.O.C ISSUED BY: Advance Data Technology Corporation LAB LOCATION: No. 81-1, Lu Liao Keng, 9 Ling, Wu Lung Tsuen, Chiung Lin Hsiang, Hsin Chu Hsien, Taiwan, R.O.C. This test report consists of 57 pages in total. It may be duplicated completely for legal use with the approval of the applicant. It should not be reproduced except in full, without the written approval of our laboratory. The client should not use it to claim product endorsement by CNLA, NVLAP or any government agencies. The test results in the report only apply to the tested sample. Lab Code: 200376-0 FCC ID: HED3CRWE41196 Report No.: RF920220H03A2Issued: Apr. 14, 2003 ADT No. 920225H05 Table of Contents 1CERTIFICATION......................................................................................................4 2SUMMARY OF TEST RESULTS...........................................................................5 3GENERAL INFORMATION....................................................................................6 3.1GENERAL DESCRIPTION OF EUT.....................................................................6 3.2DESCRIPTION OF TEST MODES.......................................................................7 3.3GENERAL DESCRIPTION OF APPLIED STANDARDS..................................7 3.4DESCRIPTION OF SUPPORT UNITS.................................................................8 4TEST TYPES AND RESULTS.............................................................................10 4.1CONDUCTED EMISSION MEASUREMENT....................................................10 4.1.1TEST INSTRUMENTS.............................................................................................10 4.1.2TEST PROCEDURES..............................................................................................11 4.1.3DEVIATION FROM TEST STANDARD....................................................................11 4.1.4TEST SETUP...........................................................................................................12 4.1.5EUT OPERATING CONDITIONS............................................................................13 4.1.6TEST RESULTS.......................................................................................................14 4.2RADIATED EMISSION MEASUREMENT.........................................................20 4.2.1LIMITS OF RADIATED EMISSION MEASUREMENT............................................26 4.2.2TEST INSTRUMENTS.............................................................................................27 4.2.3TEST PROCEDURES.............................................................................................28 4.2.4DEVIATION FROM TEST STANDARD...................................................................28 4.2.5TEST SETUP...........................................................................................................29 4.2.6EUT OPERATING CONDITIONS............................................................................29 4.2.7TEST RESULTS.......................................................................................................30 4.36dB BANDWIDTH MEASUREMENT.................................................................35 4.3.1LIMITS OF 6dB BANDWIDTH MEASUREMENT....................................................35 4.3.2TEST INSTRUMENTS.............................................................................................35 4.3.3TEST PROCEDURE................................................................................................36 4.3.4DEVIATION FROM TEST STANDARD...................................................................36 4.3.5TEST SETUP...........................................................................................................36 4.3.6EUT OPERATING CONDITIONS............................................................................36 4.3.7TEST RESULTS.......................................................................................................37 4.4MAXIMUM PEAK OUTPUT POWER.................................................................41 4.4.1LIMITS OF MAXIMUM PEAK OUTPUT POWER MEASUREMENT......................41 4.4.2INSTRUMENTS........................................................................................................41 4.4.3TEST PROCEDURES.............................................................................................42 4.4.4DEVIATION FROM TEST STANDARD...................................................................42 4.4.5TEST SETUP...........................................................................................................42 FCC ID: HED3CRWE41196 Report No.: RF920220H03A3Issued: Apr. 14, 2003 ADT No. 920225H05 4.4.6EUT OPERATING CONDITIONS............................................................................42 4.4.7TEST RESULTS.......................................................................................................43 4.4.8LIMITS OF POWER SPECTRAL DENSITY MEASUREMENT...............................44 4.4.9TEST INSTRUMENTS.............................................................................................44 4.4.10TEST PROCEDURE................................................................................................45 4.4.11DEVIATION FROM TEST STANDARD...................................................................45 4.4.12TEST SETUP...........................................................................................................45 4.4.13EUT OPERATING CONDITION...............................................................................45 4.4.14TEST RESULTS............…
Text truncated - open the document above for the full version.
Test Report
Report No.920220H03A ADT No.920225H05 The Measurement of Conducted Spurious Emissions CONDUCTED SPURIOUS EMISSIONS MEASUREMENT 1. LIMITS OF CONDUCTED SPURIOUS EMISSIONS EASUREMENT Below 20dB of the highest emission level of operating band (in 100KHz Resolution Bandwidth, see Section 15.247(c)). Emissions which fall in the restricted bands, as defined in Section 15.205(a), must also comply with the limits specified in Section 15.209(a) (see Section 15.205(c)). 2. TEST INSTRUMENTS Description & ManufacturerModel No.Serial No.Calibrated Until R&S SPECTRUM ANALYZERFSP1093.4495.30Dec. 19, 2003 NOTE: 1.The measurement uncertainty is less than +/- 2.6dB, which is calculated as per the NAMAS document NIS81. 2.The calibration interval of the above test instruments is 12 months and the calibrations are traceable to NML/ROC and NIST/USA. 3. TEST PROCEDURE The transmitter output was connected to the spectrum analyzer via a low lose cable. Set both RBW and VBW of spectrum analyzer to 100 kHz with suitable frequency span including 100 kHz bandwidth from band edge. The band edges was measured and recorded. Report No.920220H03A ADT No.920225H05 4. TEST SETUP 5. EUT OPERATING CONDITIONS The software provided by client to enable the EUT under transmission condit…
Text truncated - open the document above for the full version.
Contact Information
Applicant
Abby Wei(Manager)
Technical Contact
Advance Data Technology CorporationEric Lin
[email protected]+886 3 593 5343
81-1 Luliaoken, 9th Lin, Wulung Tsuen Chiunglin · Hsinchu · Taiwan
Test Firm
Bureau Veritas CPS (H.K.) Ltd. Taoyuan BranchRichard Chen
Technical Specifications
| # | Rule Parts | Frequency Range | Power Output |
|---|---|---|---|
| 1 | 15C | 2.41 GHz - 2.46 GHz | 65.90 mW |
Other Applications from Accton Technology Corp
HEDEAP115
Jan 27, 2026Wi-Fi 7 AP
Equipment Class
NII - Unlicensed National Information Infrastructure TX
HEDEAP112
Oct 13, 2024Wi-Fi 6 IoT Gateway
Equipment Class
DTS - Digital Transmission System
HEDEAP111
Mar 17, 2024Wi-Fi 6 Access Point
Equipment Class
DTS - Digital Transmission System
HEDOAP101E
Oct 24, 2023Outdoor Access Point
Equipment Class
DTS - Digital Transmission System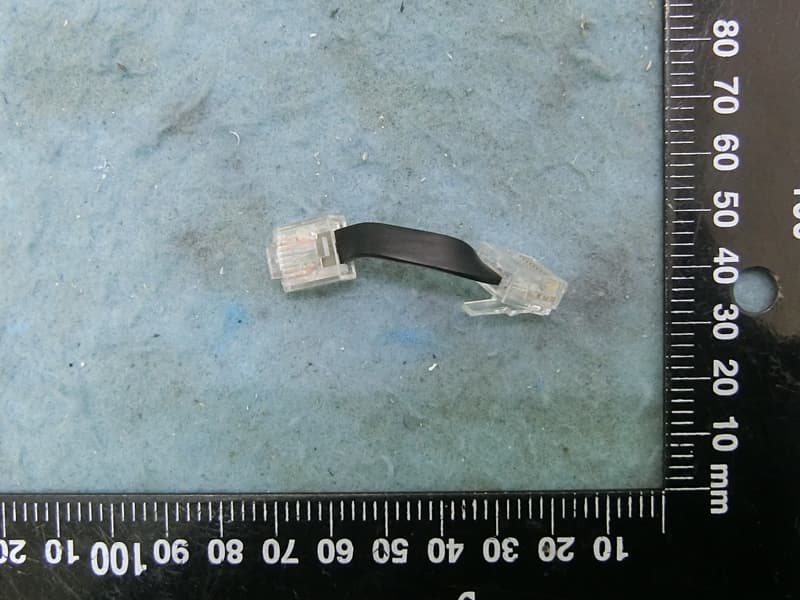
HEDEAP104
Dec 14, 2022Indoor Wall Plate WiFi 6 Access Point
Equipment Class
DTS - Digital Transmission System