HV4-HSTNN-W02PHP Active Pen
Wacom Co Ltd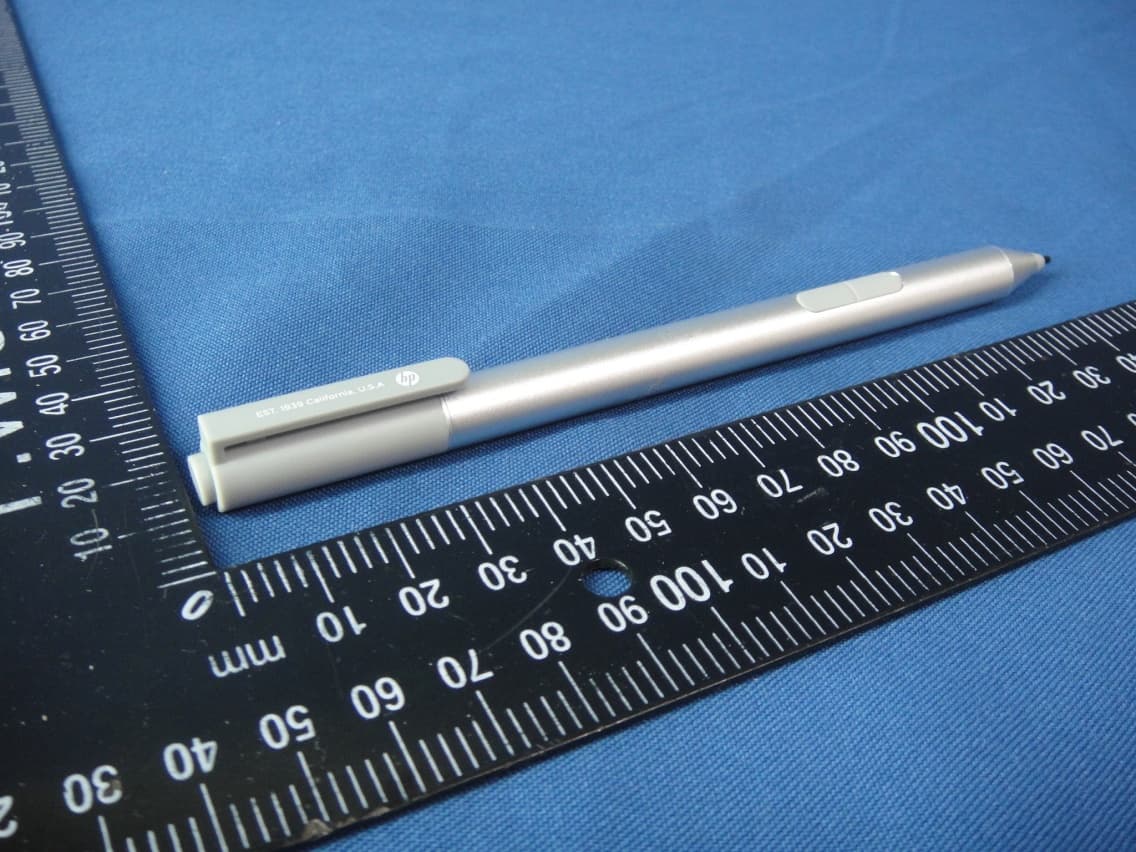
Click to zoom
Application Details
- Equipment Class
- DTS - Digital Transmission System
- Date of Grant
- Nov 01, 2015
- Application Purpose
- Original Equipment
- Date of Application
- Nov 01, 2015
- Equipment Note
- HP Active Pen
- Frequency Range
- 2402.00000000 - 2480.00000000
- Company
- Wacom Co Ltd
- Country
- Japan
Documents & Files
Document Text
Text extracted from the exhibit documents filed with the FCC. Open a document above to read the original.
Users Manual
1 Turn on your device. 2 Install the pen battery. 3 Insert the Bluetooth batteries. 4 Turn on the pen by tapping the tip to any surface. 5 Pair the pen with your device using Bluetooth. See your device documentation for instructions on creating a Bluetooth connection. The function of the A button varies, depending on the software. Press the B button to launch an app. The Bluetooth light C is on when the pen is connected to a device. For regulatory and safety notices, refer to the Product Notices included with your product. 1 Turn on your device. 2 Install the pen battery. 3 Insert the Bluetooth batteries. 4 Turn on the pen by tapping the tip to any surface. 5 Pair the pen with your device using Bluetooth. See your device documentation for instructions on creating a Bluetooth connection. The function of the A button varies, depending on the software. Press the B button to launch an app. The Bluetooth light C is on when the pen is connected to a device. For regulatory and safety notices, refer to the Product Notices included with your product. 1 Turn on your device. 2 Install the pen battery. 3 Insert the Bluetooth batteries. 4 Turn on the pen by tapping the tip to any surface. 5 Pair the pen with your device using Bluetooth. See your device documentation for instructions on creating a Bluetooth connection. The function of the A button varies, depending on the software. Press the B button to launch an app. The Bluetooth light C is on when the pen is connected to a device. For regulatory and safety notices, refer to the Product Notices included with your product. 1 Turn on your device. 2 Install the pen battery. 3 Insert the Bluetooth batteries. 4 Turn on the pen by tapping the tip to any surface. 5 Pair the pen with your device using Bluetooth. See your device documentation for instructions on creating a Bluetooth connection. The function of the A button varies, depending on the software. Press the B button to launch an app. The Bluetooth light C is on when the pen is connected to a device. For regulatory and safety notices, refer to the Product Notices included with your product. 1 Turn on your device. 2 Install the pen battery. 3 Insert the Bluetooth batteries. 4 Turn on the pen by tapping the tip to any surface. 5 Pair the pen with your device using Bluetooth. See your device documentation for instructions on creating a Bluetooth connection. The function of the A button varies, depending on the software. Press the B button to launch an app. The Bluetooth light C is on when the pen is connected to a device. For regulatory and safety notices, refer to the Product Notices included with your product. 1 Turn on your device. 2 Install the pen battery. 3 Insert the Bluetooth batteries. 4 Turn on the pen by tapping the tip to any surface. 5 Pair the pen with your device using Bluetooth. See your device documentation for instructions on creating a Bluetooth connection. The function of the A button varies, depending on the software. Press the B button to launch an app. The Bluetooth light C is on when the pen is connected to a device. For regulatory and safety notices, refer to the Product Notices included with your product. 1 Turn on your device. 2 Install the pen battery. 3 Insert the Bluetooth batteries. 4 Turn on the pen by tapping the tip to any surface. 5 Pair the pen with your device using Bluetooth. See your device documentation for instructions on creating a Bluetooth connection. The function of the A button varies, depending on the software. Press the B button to launch an app. The Bluetooth light C is on when the pen is connected to a device. For regulatory and safety notices, refer to the Product Notices included with your product. 1 Turn on your device. 2 Install the pen battery. 3 Insert the Bluetooth batteries. 4 Turn on the pen by tapping the tip to any surface. 5 Pair the pen with your device using Bluetooth. See your device documentation for instructions on creating a Bluetooth connection. The function of the A button varies, depending on the software. Press the B button to launch an app. The Bluetooth light C is on when the pen is connected to a device. For regulatory and safety notices, refer to the Product Notices included with your product. 1 Turn on your device. 2 Install the pen battery. 3 Insert the Bluetooth batteries. 4 Turn on the pen by tapping the tip to any surface. 5 Pair the pen with your device using Bluetooth. See your device documentation for instructions on creating a Bluetooth connection. The function of the A button varies, depending on the software. Press the B button to launch an app. The Bluetooth light C is on when the pen is connected to a device. For regulatory and safety notices, refer to the Product Notices included with your product. 1 Turn on your device. 2 Install the pen battery. 3 Insert the Bluetooth batteries. 4 Turn on the pen by tapping the tip to any surface. 5 Pair the pen with your device using Bluetooth. See your device documentation for instructions on creating a Bluetooth connection. The function of the A button varies, depending on the software. Press the B button to launch an app. The Bluetooth light C is on when the pen is connected to a device. For regulatory and safety notices, refer to the Product Notices included with your product. 1 Turn on your device. 2 Install the pen battery. 3 Insert the Bluetooth batteries. 4 Turn on the pen by tapping the tip to any surface. 5 Pair the pen with your device using Bluetooth. See your device documentation for instructions on creating a Bluetooth connection. The function of the A button varies, depending on the software. Press the B button to launch an app. The Bluetooth light C is on when the pen is connected to a device. For regulatory and safety notices, refer to the Product Notices included with your product. 1 Turn on your device. 2 Install the pen battery. 3 Insert the Bluetooth batteries. 4 Turn on the pen by tapping the tip to any surface. 5 Pair the pen with your device using Blueto…
Text truncated - open the document above for the full version.
Cover Letter(s)
Hewlett-Packard Company 1501 Page Mill Road Mail Stop 040802 Palo Alto, CA 94304 www.hp.com Walter Overcash Product Regulatory Engineer 832.502.8790 Tel [email protected] October 28, 2015 Dear Sirs: We authorize Wacom Taiwan Information Co., Ltd to use our company trademark “hp” for the purposes of applying for regulatory approvals for the following product: REGULATORY MODEL NO. DESCRIPTION HSTNN-W02P HP Active Pen (Where “X” can be up to 21 alphanumeric characters, symbols or blanks for marketing purpose.) If you have any comments or questions, please feel free to contact me. Sincerely, Walter Overcash
External Photos
Report No.: 151007E09 Page No. 1 / 4 CONSTRUCTION PHOTOS OF EUT
ID Label/Location Info
FCC ID: HV4-HSTNN-W02P IC : 6888A-HSTNN-W02P LABEL LOCATION Brad name : hp Model name : HSTNN-W02P Front view Back view Meritage 5 16 2-R1 2 Adhesive 2 3.5 4.8 4-R3 37.7 47.28 CCA00000000000 000-000000 R30000 MSIP: RRM-HV4-HSTNN-W02P HP Active Pen RMN: HSTNN-W02P FCC ID: HV4-HSTNN-W02P IC: 6888A-HSTNN-W02P Rating: 1.5V 0.65mA SPS: 846410-001 0000-00-0000
Internal Photos
Report No.: 151007E09 Page No. 2 / 4 Report No.: 151007E09 Page No. 3 / 4 Report No.: 151007E09 Page No. 4 / 4
RF Exposure Info
Report No.: SA151007E09 Page No. 1 / 6 Report Format Version: 6.1.1 RF Exposure Report Report No.: SA151007E09 FCC ID: HV4-HSTNN-W02P Test Model: HSTNN-W02P Received Date: Oct. 07, 2015 Test Date: Oct. 20, 2015 Issued Date: Oct. 29, 2015 Applicant: WACOM CO., LTD. Address: 2-510-1, Toyondai, Kazo-Shi Saitama 349-1148 Japan Issued By: Bureau Veritas Consumer Products Services (H.K.) Ltd., Taoyuan Branch Hsin Chu Laboratory Lab Address: No. 81-1, Lu Liao Keng, 9th Ling,Wu Lung Tsuen, Chiung Lin Hsiang, Hsin Chu Hsien 307, Taiwan R.O.C. Test Location (1): No. 81-1, Lu Liao Keng, 9th Ling,Wu Lung Tsuen, Chiung Lin Hsiang, Hsin Chu Hsien 307, Taiwan R.O.C. Test Location (2): No. 49, Ln. 206, Wende Rd., Shangshan Tsuen, Chiung Lin Hsiang, Hsin Chu Hsien 307, Taiwan R.O.C. Test Location (3): E-2, No.1, Li Hsin 1st Road, Hsinchu Science Park, Hsinchu City 300, Taiwan R.O.C. This report is for your exclusive use. Any copying or replication of this report to or for any other person or entity, or use of our name or trademark, is permitted only with our prior written permission. This report sets forth our findings solely with respect to the test samples identified herein. The results set forth in this report are not indicative or representative of the quality or characteristics of the lot from which a test sample was taken or any similar or identical product unless specifically and expressly noted. Our report includes all of the tests requested by you and the results thereof based upon the information that you provided to us. You have 60 days from date of issuance of this report to notify us of any material error or omission caused by our negligence, provided, however, that such notice shall be in writing and shall specifically address the issue you wish to raise. A failure to raise such issue within the prescribed time shall constitute your unqualified acceptance of the completeness of this report, the tests conducted and the correctness of the report contents. Unless specific mention, the uncertainty of measurement has been explicitly taken into account to declare the compliance or non-compliance to the specification. The report must not be used by the client to claim product certification, approval, or endorsement by any government agencies. Report No.: SA151007E09 Page No. 2 / 6 Report Format Version: 6.1.1 Table of Contents Release Control Record .................................................................................................................................. 3 1 Certificate of Conformity ...................................................................................................................... 4 2 Evaluation Result .................................................................................................................................. 5 3 SAR Test Exclusion Thresholds .......................................................................................................... 6 4 Conclusion ............................................................................................................................................ 6 Report No.: SA151007E09 Page No. 3 / 6 Report Format Version: 6.1.1 Release Control Record Issue No. Description Date Issued SA151007E09 Original release. Oct. 29, 2015 Report No.: SA151007E09 Page No. 5 / 6 Report Format Version: 6.1.1 2 Evaluation Result Following FCC KDB 447498 D01 “General SAR test exclusion guidance” The corresponding SAR Exclusion Threshold condition, listed below: 1) The 1-g and 10-g SAR test exclusion thresholds for 100 MHz to 6 GHz at test separation distances ≤ 50 mm are determined by: [(max. power of channel, including tune-up tolerance, mW)/(min. test separation distance, mm)] ·[√f(GHz)] ≤ 3.0 for 1-g SAR and ≤ 7.5 for 10-g extremity SAR, where f(GHz) is the RF channel transmit frequency in GHz . Power and distance are rounded to the nearest mW and mm before calculation . The result is rounded to one decimal place for comparison The test exclusions are applicable only when the minimum test separation distance is ≤ 50 mm and for transmission frequencies between 100 MHz and 6 GHz. When the minimum test separation distance is < 5 mm, a distance of 5 mm is applied to determine SAR test exclusion. 2) At 100 MHz to 6 GHz and for test separation distances > 50 mm, the SAR test exclusion threshold is determined according to the following: a) [Threshold at 50 mm in step 1) + (test separation distance - 50mm)·( f(MHz)/150)] mW, at 100MHz to 1500 MHz b) [Threshold at 50 mm in step 1) + (test separation distance - 50 mm)·10] mW at > 1500 MHz and ≤ 6 GHz 3) At frequencies below 100 MHz, the following may be considered for SAR test exclusion. a) The threshold at the corresponding test separation distance at 100 MHz in step 2) is multiplied by [1 + log(100/f(MHz))] for test separation distances > 50 mm and < 200 mm. b) The threshold determined by the equation in a) for 50 mm and 100 MHz is multiplied by ½ for test separation distances ≤ 50 mm. c) SAR measurement procedures are not established below 100 MHz. When SAR test exclusion cannot be applied, a KDB inquiry is required to determine SAR evaluation requirements for any test results to be acceptable. Report No.: SA151007E09 Page No. 6 / 6 Report Format Version: 6.1.1 3 SAR Test Exclusion Thresholds Maximum measured transmitter power: Frequency (GHz) Max. Power (mW) Min. test separation distance (mm) SAR test exclusion calculation value (NOTE 2) 10-g extremity SAR test exclusion thresholds Result 2.402 ~ 2.480 1.941 5 0.60164738 7.5 Pass NOTE: 1. The antenna type is Chip antenna with 2.93dBi gain. 2. Calculate SAR test exclusion thresholds from condition “1” formulas. 4 Conclusion Since Source-base time average power is below SAR test exclusion power thresholds, the SAR evaluation is not required. --- END ---
Test Report
Report No.: RF151007E09 Page No. 1 / 30 Report Format Version: 6.1.1 FCC Test Report Report No.: RF151007E09 FCC ID: HV4-HSTNN-W02P Test Model: HSTNN-W02P Received Date: Oct. 07, 2015 Test Date: Oct. 14 to 20, 2015 Issued Date: Oct. 29, 2015 Applicant: WACOM CO., LTD. Address: 2-510-1, Toyondai, Kazo-Shi Saitama 349-1148 Japan Issued By: Bureau Veritas Consumer Products Services (H.K.) Ltd., Taoyuan Branch Hsin Chu Laboratory Lab Address: No. 81-1, Lu Liao Keng, 9th Ling,Wu Lung Tsuen, Chiung Lin Hsiang, Hsin Chu Hsien 307, Taiwan R.O.C. Test Location (1): No. 81-1, Lu Liao Keng, 9th Ling,Wu Lung Tsuen, Chiung Lin Hsiang, Hsin Chu Hsien 307, Taiwan R.O.C. Test Location (2): No. 49, Ln. 206, Wende Rd., Shangshan Tsuen, Chiung Lin Hsiang, Hsin Chu Hsien 307, Taiwan R.O.C. Test Location (3): E-2, No.1, Li Hsin 1st Road, Hsinchu Science Park, Hsinchu City 300, Taiwan R.O.C. This report is for your exclusive use. Any copying or replication of this report to or for any other person or entity, or use of our name or trademark, is permitted only with our prior written permission. This report sets forth our findings solely with respect to the test samples identified herein. The results set forth in this report are not indicative or representative of the quality or characteristics of the lot from which a test sample was taken or any similar or identical product unless specifically and expressly noted. Our report includes all of the tests requested by you and the results thereof based upon the information that you provided to us. You have 60 days from date of issuance of this report to notify us of any material error or omission caused by our negligence, provided, however, that such notice shall be in writing and shall specifically address the issue you wish to raise. A failure to raise such issue within the prescribed time shall constitute your unqualified acceptance of the completeness of this report, the tests conducted and the correctness of the report contents. Unless specific mention, the uncertainty of measurement has been explicitly taken into account to declare the compliance or non-compliance to the specification. The report must not be used by the client to claim product certification, approval, or endorsement by TAF or any government agencies. Report No.: RF151007E09 Page No. 2 / 30 Report Format Version: 6.1.1 Table of Contents Release Control Record .................................................................................................................................. 4 1 Certificate of Conformity ...................................................................................................................... 5 2 Summary of Test Results ..................................................................................................................... 6 2.1 Measurement Uncertainty ................................................................................................................... 6 2.2 Modification Record ............................................................................................................................ 6 3 General Information .............................................................................................................................. 7 3.1 General Description of EUT ................................................................................................................ 7 3.2 Description of Test Modes ................................................................................................................... 8 3.2.1 Test Mode Applicability and Tested Channel Detail ............................................................................. 9 3.3 Description of Support Units ............................................................................................................. 10 3.3.1 Configuration of System under Test .................................................................................................. 10 3.4 Duty Cycle of Test Signal ................................................................................................................... 11 3.5 General Description of Applied Standards ........................................................................................ 12 4 Test Types and Results ...................................................................................................................... 13 4.1 Radiated Emission and Bandedge Measurement ............................................................................. 13 4.1.1 Limits of Radiated Emission and Bandedge Measurement .............................................................. 13 4.1.2 Test Instruments ................................................................................................................................ 14 4.1.3 Test Procedures ................................................................................................................................. 15 4.1.4 Deviation from Test Standard ............................................................................................................ 15 4.1.5 Test Setup .......................................................................................................................................... 16 4.1.6 EUT Operating Conditions ................................................................................................................. 16 4.1.7 Test Results ....................................................................................................................................... 17 4.2 6dB Bandwidth Measurement ........................................................................................................... 21 4.2.1 Limits of 6dB Bandwidth Measurement ............................................................................................. 21 4.2.2 Test Setup ..........................................................................................................…
Text truncated - open the document above for the full version.
Test Setup Photos
Report No.: 150807E06 1 of 3 Reference No.: PHOTOGRAPHS OF THE TEST CONFIGURATION RADIATED EMISSION TEST (Below 1GHz) Report No.: 150807E06 2 of 3 Reference No.: RADIATED EMISSION TEST (Above 1GHz) Report No.: 150807E06 3 of 3 Reference No.:
Contact Information
Applicant
Koichi Yokoyama(Senior Director, Quality Assurance)
Test Firm
Bureau Veritas CPS (H.K.) Ltd., Taoyuan BranchRichard Chen
Technical Specifications
| # | Rule Parts | Frequency Range | Power Output |
|---|---|---|---|
| 1 | 15C | 2.40 GHz - 2.48 GHz | 2.00 mW |
Other Applications from Wacom Co Ltd
HV4CTK6120
Aug 19, 2026Pen Tablet
Equipment Class
DCD - Part 15 Low Power Transmitter Below 1705 kHzHV4STU540A
May 12, 2026LCD SIGNATURE PAD
Equipment Class
DCD - Part 15 Low Power Transmitter Below 1705 kHzHV4DTHA140
Sep 16, 2025Portable Pad
Equipment Class
DTS - Digital Transmission SystemHV4PTK470
Oct 10, 2024Creative Pen Tablet
Equipment Class
DTS - Digital Transmission SystemHV4PTK870
Oct 10, 2024Creative Pen Tablet
Equipment Class
DCD - Part 15 Low Power Transmitter Below 1705 kHz